Tait TPCB1A Handheld Portable Transceiver User Manual TP8100 user s guide
Tait Limited Handheld Portable Transceiver TP8100 user s guide
UserManual.wiki
>
Tait
>
TPCB1A User Manual
Exhibit D Users Manual per 2 1033 c3
Navigation menu
Upload a User Manual
Namespaces
Wiki Guide
HTML
PDF
Info
Views
User Manual
Discussion / Help
Navigation

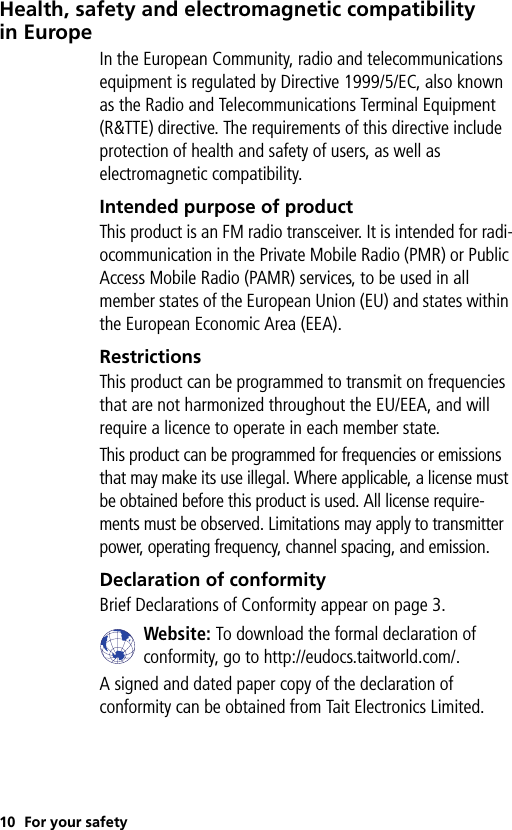
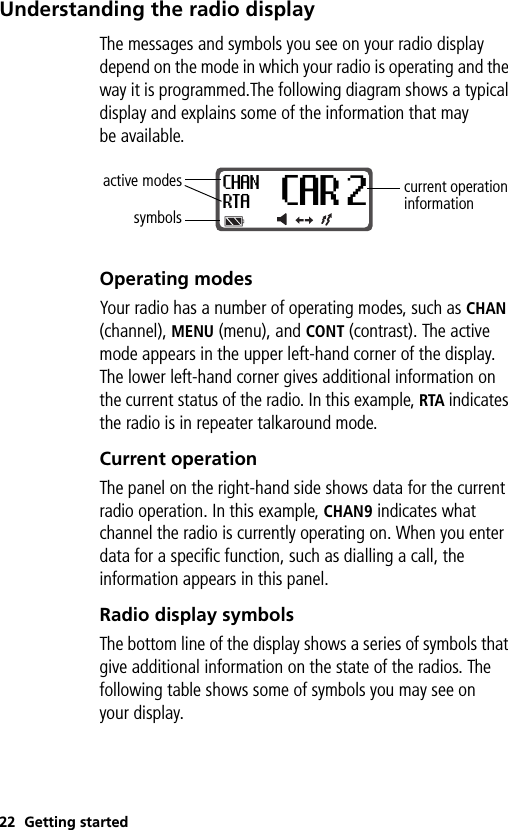
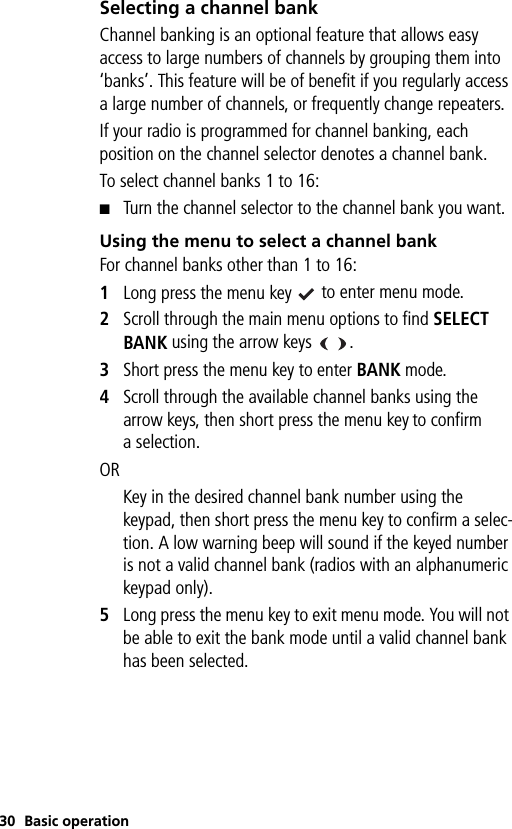
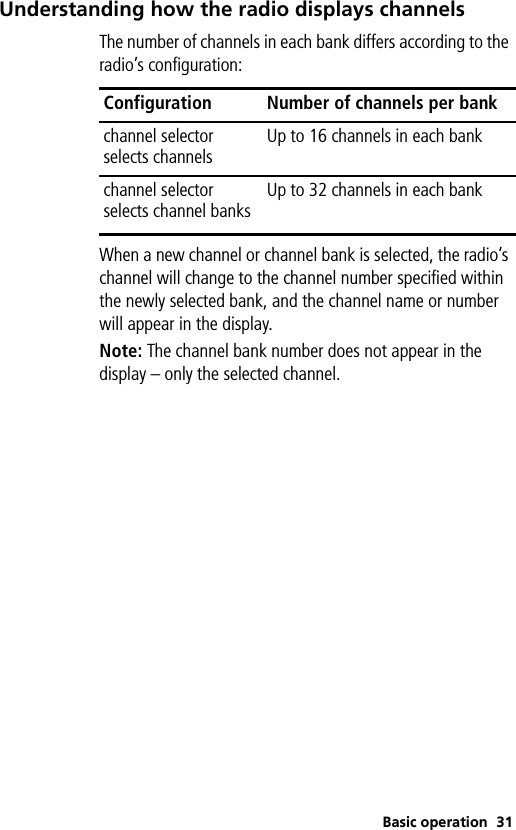
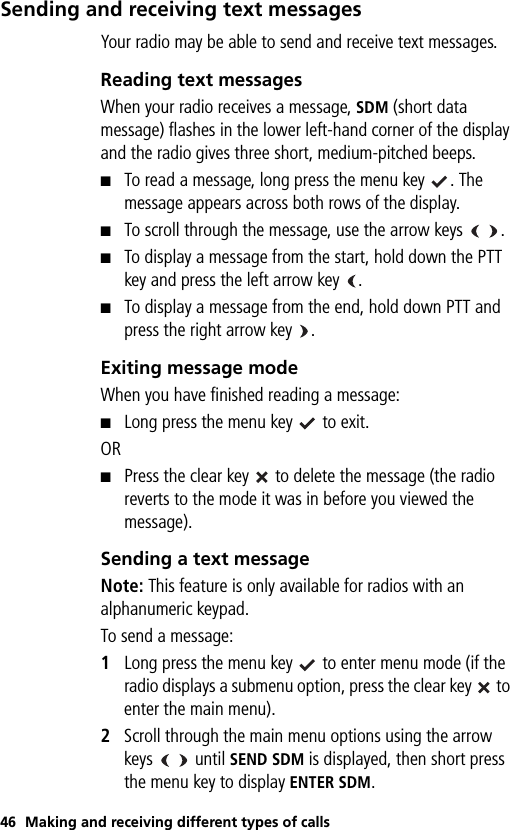
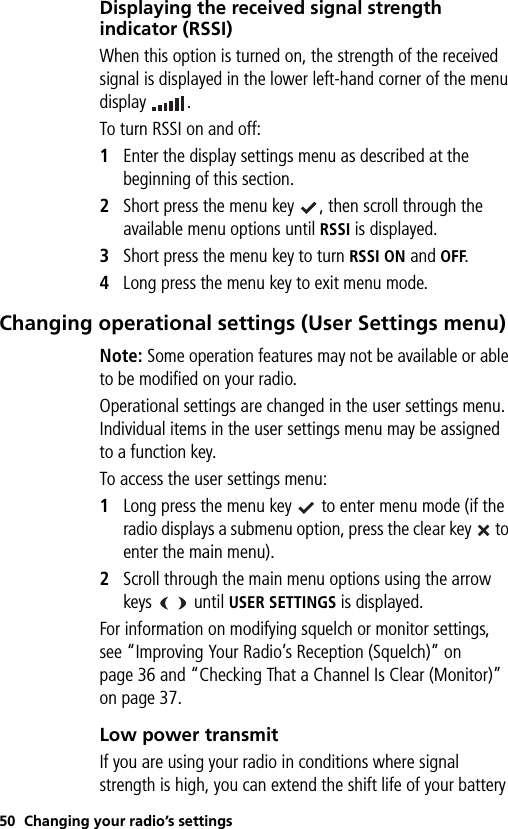
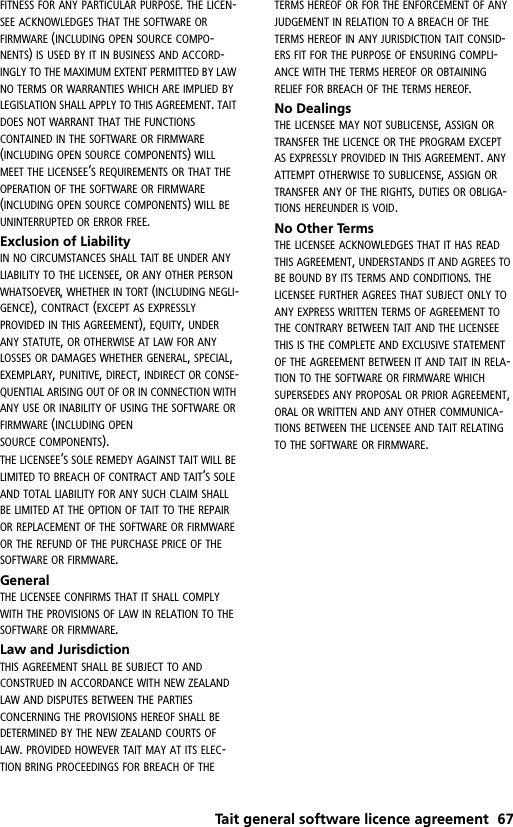
![Navigating your radio’s menusThe menu text on your radio display may differ from that shown here. Menu text can be customized when the radio is programmed.Menu mapQueued CallsSelect ChannelSelect BankSend SelcallDial Selcall (TP8120 only)Select StatusSend DTMFAlpha SymbolsSend SDM [Short Data Message]User SettingsLow PwrHandsetKeylockDTMFEconomySquelchMonitorSq Ovrd [Squelch Override]Alert SettingsLevelTonesKeytoneDisplay SettingsRSSINightAdjust ContrastAdvanced SettingsProgram SignalProgram FS-Group [Flexiscan]HW VerFW VerMain DBVersion InfoCal DBProgram GroupMain Menu](https://usermanual.wiki/Tait/TPCB1A/User-Guide-861175-Page-13.png)