Technicolor Connected Home USA TCA300 Integrated Device User Manual
Technicolor Connected Home USA LLC Integrated Device Users Manual
UserManual.wiki
>
Technicolor Connected Home USA
>
TCA300 User Manual
>
Users Manual
Contents
1.
Users Manual
2.
Users Manual.pdf
Users Manual
Navigation menu
Upload a User Manual
Namespaces
Wiki Guide
HTML
PDF
Info
Views
User Manual
Discussion / Help
Navigation
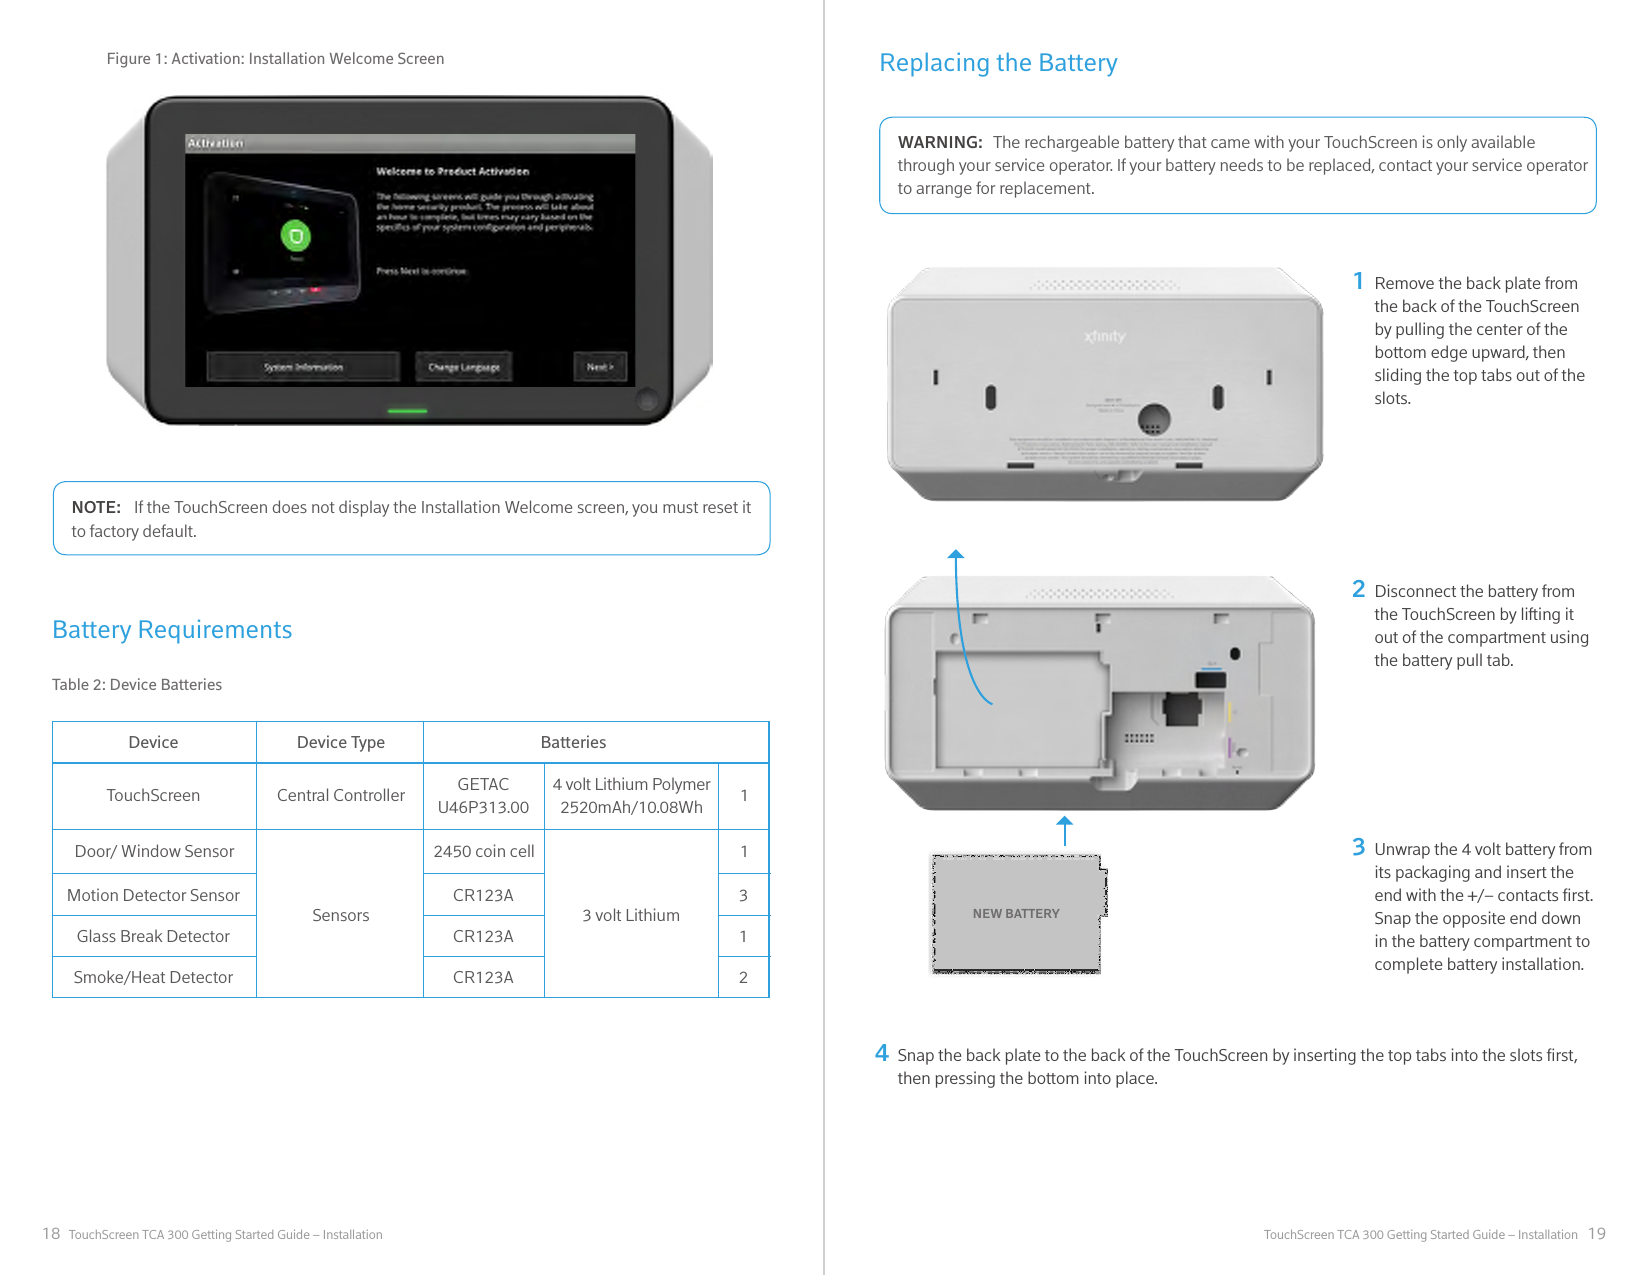
![16 17TouchScreen TCA 300 Getting Started Guide – Installation TouchScreen TCA 300 Getting Started Guide – InstallationFeed the AC power cable through the circular hole on the back plate and connect to the power port on the back of the TouchScreen.456978Snap the back plate to the back of the TouchScreen by inserting the top tabs into the slots rst, then pressing the bottom into place. Ensure all slack from the AC power cable is pulled through the back plate.Connect the stand to the back of the TouchScreen.Plug the TouchScreen’s AC adapter into the wall outlet, and replace the center screw through the bracket hole.Position the TouchScreen near an un-switched wall outlet (not controlled by a light switch).(Optional) – If encountering networking issues, connect an Ethernet cable to the TouchScreen and the iControl-dedicated router.10 After a few seconds, the Installation Welcome screen is displayed on the TouchScreen.RatingVoltageCurrentFrequencyValue12V DC1.5A60 HzTable 1: AC Power Supply Ratings HOME HUB DESIGN INTENT V001 08.14.15 10 of 11 [COMCAST CONFIDENTIAL]Home Hub Power SupplyPower supply should follows similar look and feel to the Home Hub. See CAD “150630_HH PSU.STP”The minimum distance for the sensors to communicate with the IMPORTANT NOTE:TouchScreen is beyond most practical limits. However, the distance can be limited occasionally by the materials for the walls, electrical interference, and other conditions.](https://usermanual.wiki/Technicolor-Connected-Home-USA/TCA300.Users-Manual/User-Guide-3005950-Page-9.png)