Technicolor Delivery Technologies Belgium 589VACV2HP Technicolor xDSL Gateway User Manual TG589vac v2 QIG indd
Technicolor Delivery Technologies Belgium Technicolor xDSL Gateway TG589vac v2 QIG indd
Contents
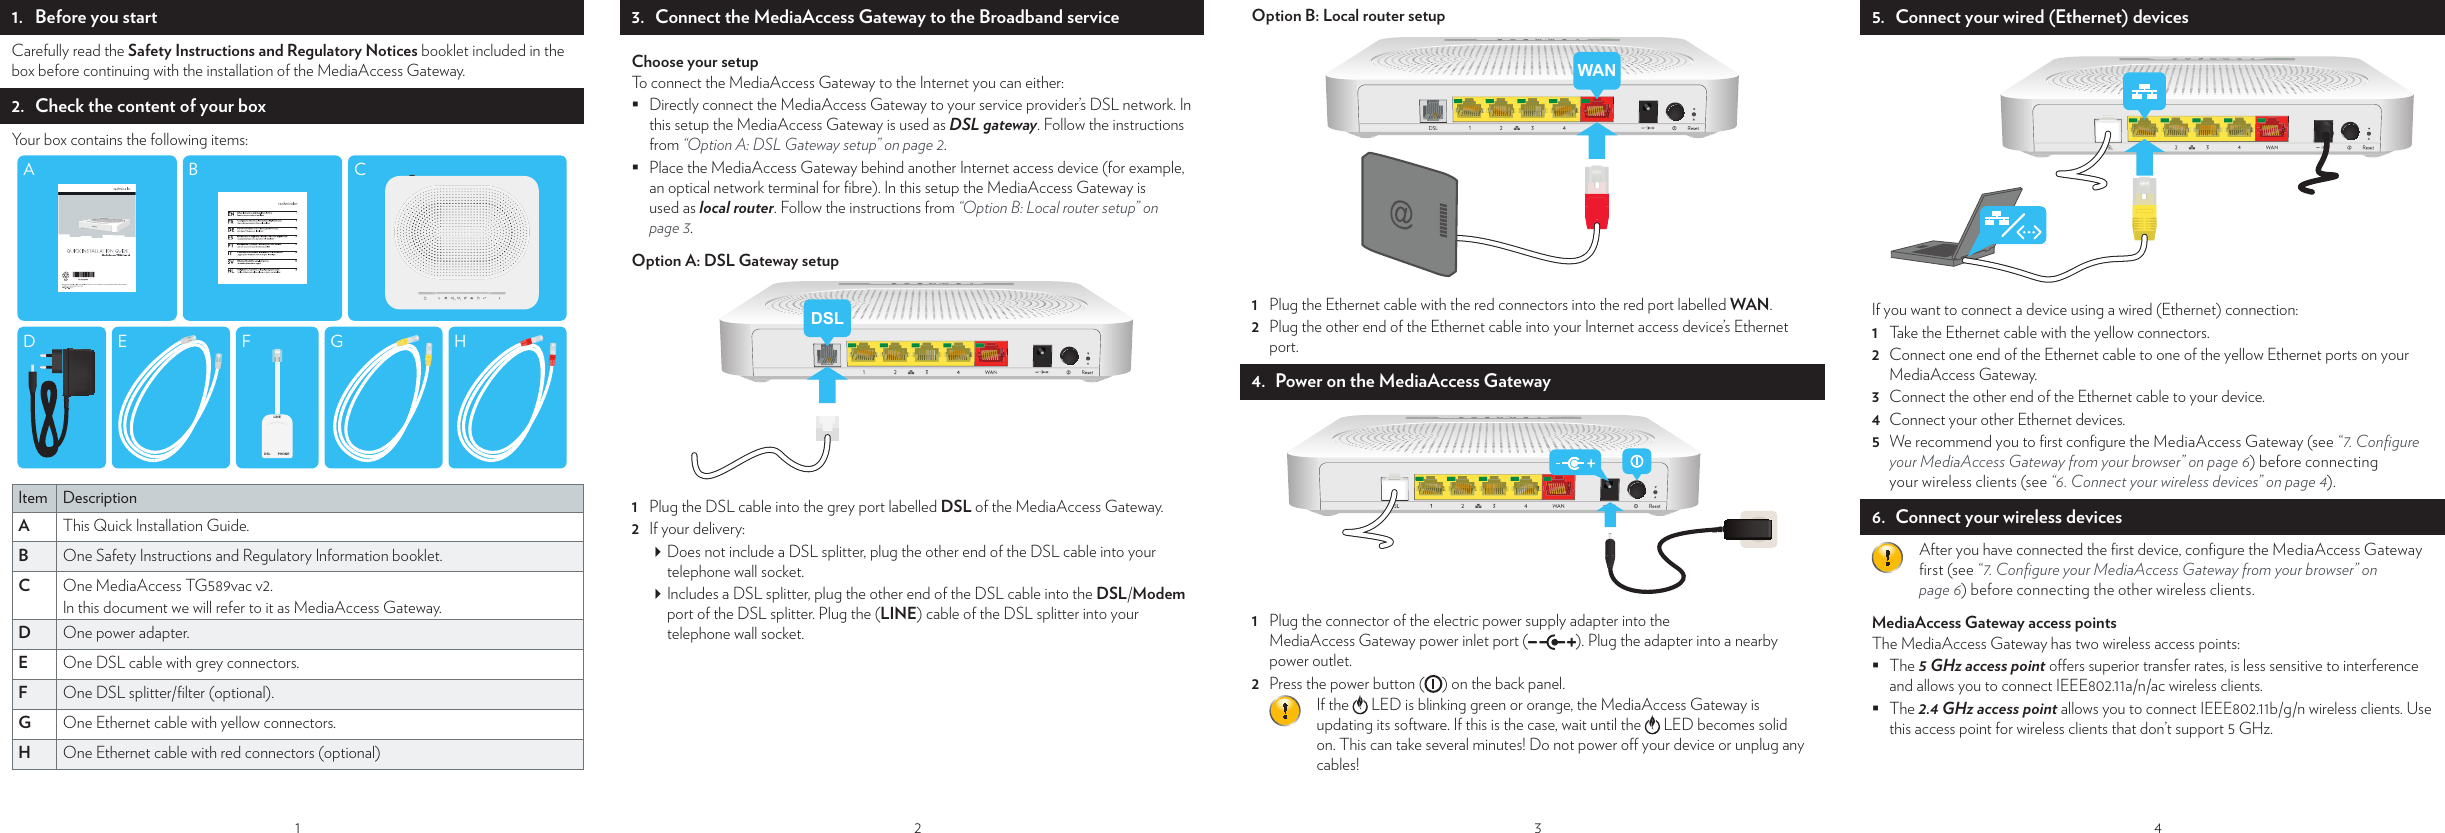
- 1. User Manual
- 2. User Manual Statement
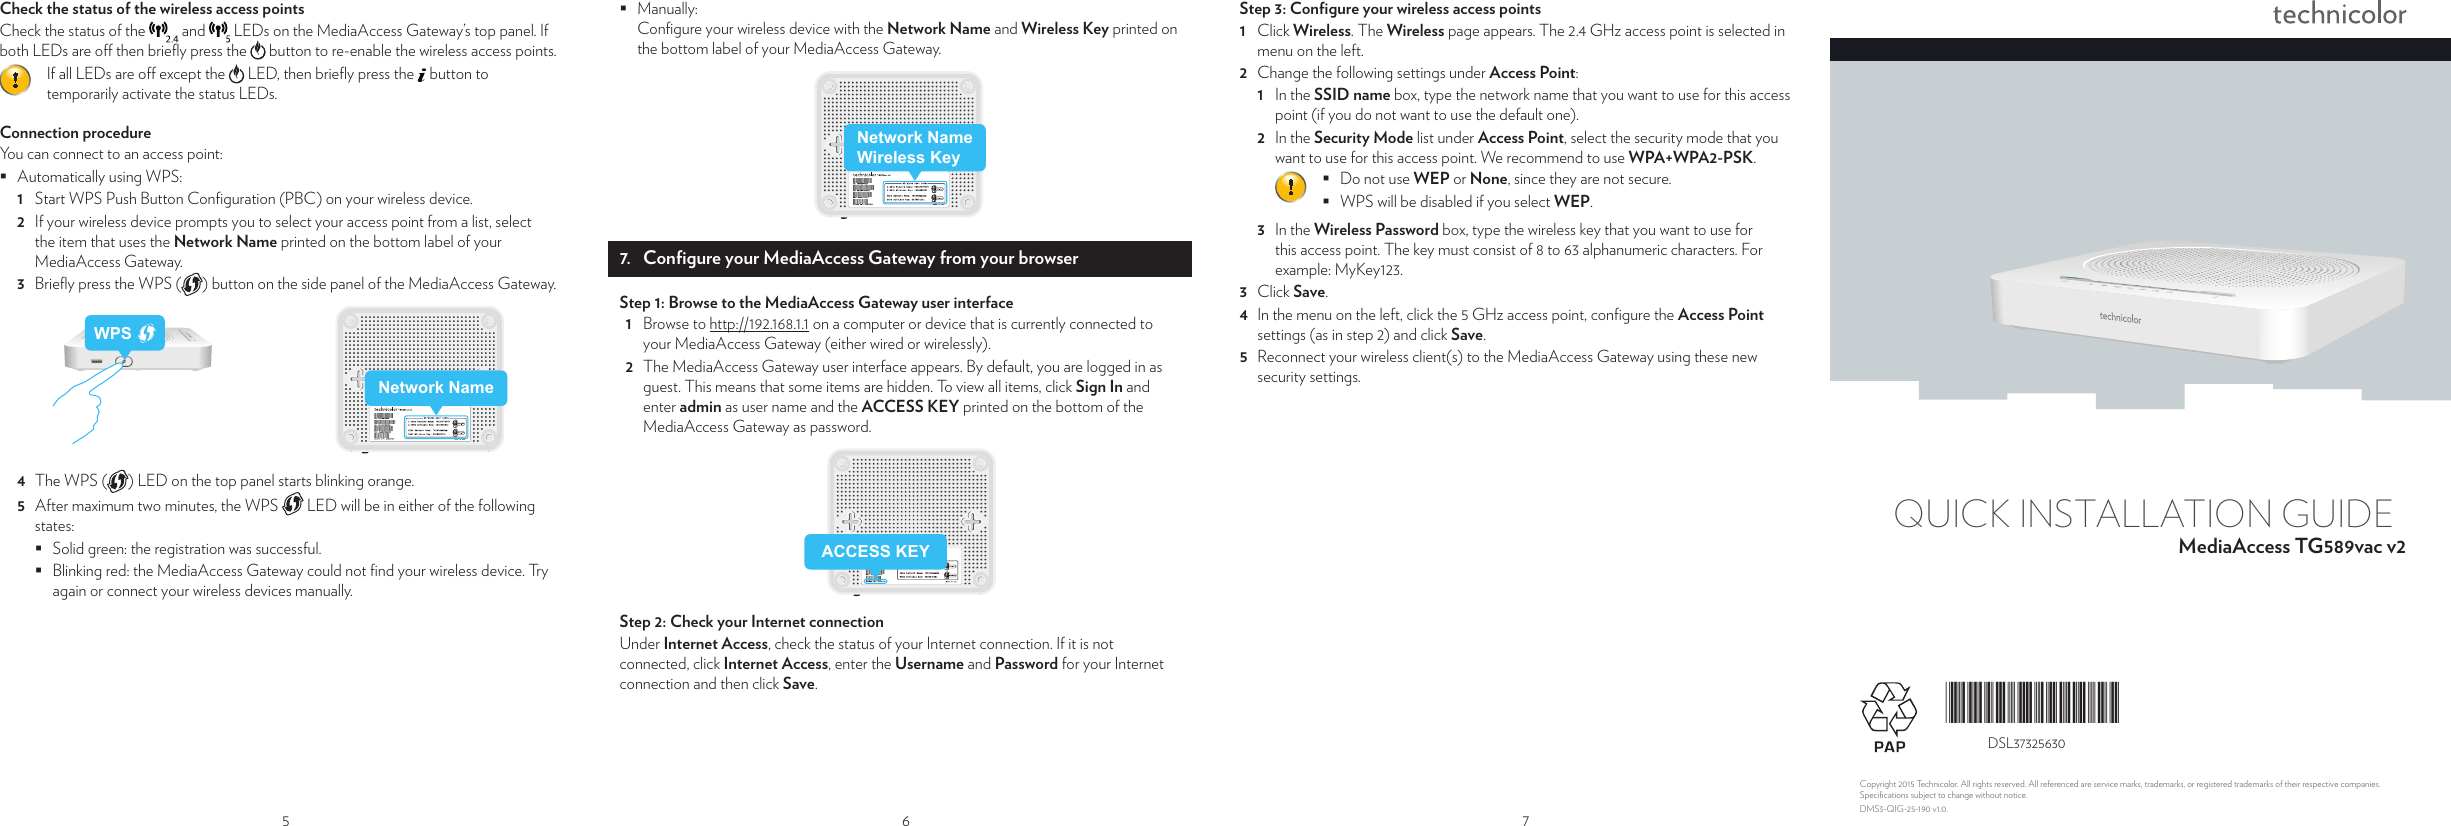
User Manual