Techtronic Cordless GP EL2200 AM/FM RECEIVER WITH BLUETOOTH User Manual
One World Technologies, Inc. AM/FM RECEIVER WITH BLUETOOTH
UserManual.wiki
>
Techtronic Cordless GP
>
EL2200 User Manual
User Manual
Navigation menu
Upload a User Manual
Namespaces
Wiki Guide
HTML
PDF
Info
Views
User Manual
Discussion / Help
Navigation
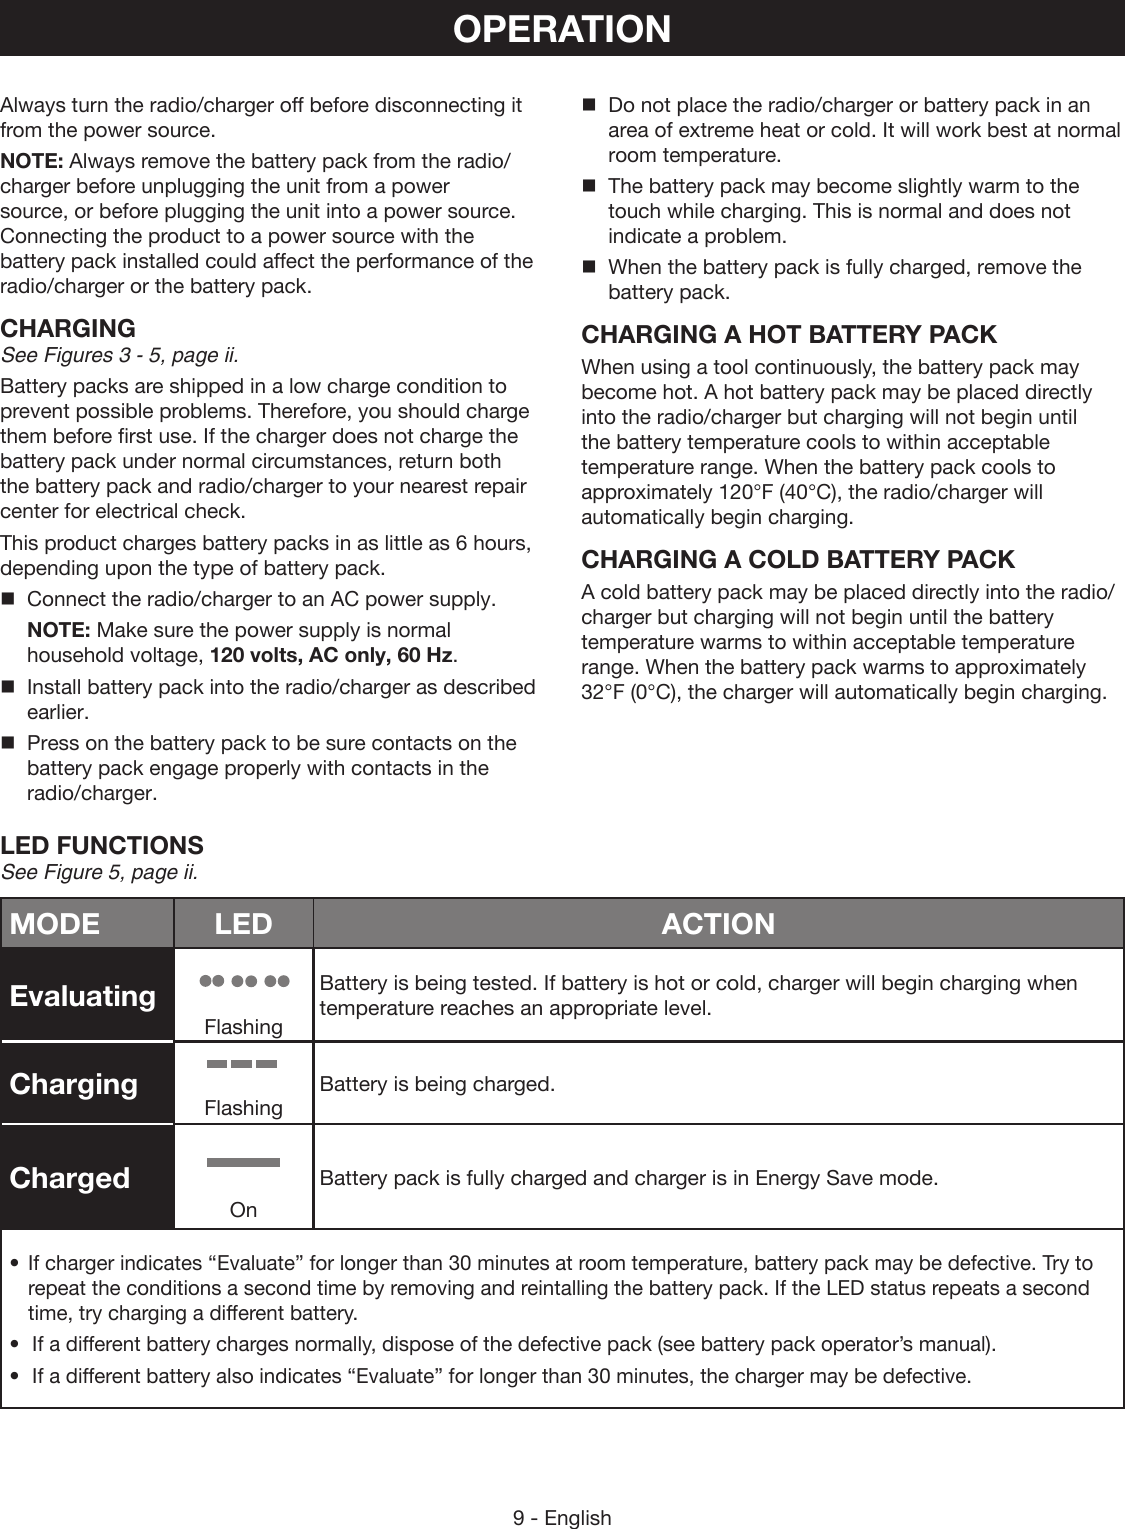
![10 - EnglishOPERATIONLCD DISPLAYSee Figures 6 - 7, pages ii and iii.When the radio/charger is connected to a power supply and in the ON position, the LCD display will show the time, frequency, mode, and settings. NOTE: The illustrations of the LCD display shown in this manual are only examples of the frequencies you may see on your radio/charger and are not the exact frequencies that you may choose to listen to.MENU NAVIGATION BUTTONSSee Figures 6 - 7, pages ii and iii.Use the menu navigation buttons to turn the radio/charger on and off, control the volume, change frequencies, toggle between modes and set the time.TURNING THE RADIO/CHARGER ON AND OFF:Press the ON/OFF button to turn the radio/charger ON and OFF. When the radio/charger is on and a battery pack is connected as the power supply, the [ ] symbol will be shown in the LCD display. If the battery charge is low, a flashing low battery indicator will be displayed [ ]. If the radio is connected to an AC power supply, the battery indicator will disappear.ADJUSTING THE VOLUME:When the radio/charger is turned ON, the unit will return to the last volume setting used.To increase the volume, press the VOL + button. To decrease the volume, press the VOL - button.SWITCHING MODES:To switch modes, press the MODE button. The selected mode will be displayed above the frequency. Press the MODE button until the desired mode is selected. There are four modes:FM modeAM modeAUX modeBLUETOOTH® modeAM/FM TUNING:Use the SCAN and SCAN buttons to manually tune to the desired radio frequency. The selected frequency is displayed on the LCD.Press the SCAN button to tune to a lower frequency and press the SCAN button to tune to a higher frequency.NOTE: Briefly press either button (not press and hold) to tune one frequency step at a time. Press and hold either button to quickly find the next frequency with clear reception.To decrease interference or electrical noise, adjust the position of the antenna or move the radio/charger to a higher elevation. The antenna folds into the handle and out of the way when not in use.STORING A PRESET IN MEMORY:The memory feature saves up to 20 frequencies as presets in the radio’s memory. You can save up to ten (10) frequencies each for FM and AM modes.Tune to the desired AM or FM frequency.Press and hold the PRESET button until the word “MEMORY” and the preset position number flash on the screen.Press the SCAN or SCAN button to choose a preset position number. NOTE: There are ten (10) preset positions for FM and ten (10) for AM. Only one station can be saved in each preset position.Press the PRESET button again to store the frequency.To tune to presets (FM or AM mode):Press and release the PRESET button to cycle through each preset position number and its associated frequency.SETTING THE CLOCK:The time appears on the LCD display when the radio/charger is on.Press and hold the CLK/DSPY button until the “hour” display blinks. Press the VOL + or VOL - button to select the hour. NOTE: Time is displayed in 12-hour format only. To select an hour that is after noon and before midnight, cycle the hours until “PM” appears in the display.Press and release the CLK/DSPY button to lock in the hour setting. “Minutes” will begin to blink.Press the VOL + or VOL - button to select the desired number. Press and release the CLK/DSPY button again to confirm the time. USING A PHONE/MP3 PLAYER (NOT INCLUDED) WITH THE RADIO/CHARGERSee Figure 8, page iii.Press the MODE button until AUX mode is highlighted.Connect one end of a 3.5 mm audio patch cord (maximum 8 in. long) to the device.Connect the other end of the 3.5 mm patch cord to the auxiliary input jack.The phone/MP3 player must be on and in play mode for sound to be heard through the speakers.](https://usermanual.wiki/Techtronic-Cordless-GP/EL2200/User-Guide-2369860-Page-10.png)