Operational Description

Preliminary Feature Operation
for
Casio 2-Line Cordless Phone with Caller ID
(MHS-2), And
Casio 1-Line Cordless Phone with Caller ID
(MHS-5)
Revision: 0.3
Date: Mar. 31, 2000
Author: Frank Yang-Hsin LIN
Reviewed:
Approved:
Copy To:
TECOM CO., LTD
23, R&D Road 2
Science-Based Industrial Park
Hsin-Chu Taiwan R.O.C.
TECOM SOHO Department Preliminary Feature Operation for Casio 1&2-Line Cordless Phone
Issued by: Frank Yang-Hsin LIN Date: Mar. 31, 2000
Revision: 0.3 Page:1/73
Version and Amendment Records
Version # Description Date
0.01 1. Preliminary Operation Manual Jan. 27, 2000
0.02 1. Modify the mistakes and add the MHS-2 function Feb. 24, 2000
0.3 1. Modify the programming item Mar. 31, 2000

TECOM SOHO Department Preliminary Feature Operation for Casio 1&2-Line Cordless Phone
Issued by: Frank Yang-Hsin LIN Date: Mar. 31, 2000
Revision: 0.3 Page:2/73
TABLES OF CONTENT
I. INTRODUCTION...........................................................................................................................7
1. Becoming Familiar with Your Wireless System .............................................................................................................. 7
2. The Features ....................................................................................................................................................................... 7
II. INDICATIONS................................................................................................................................8
1. Lamp Cadence.................................................................................................................................................................... 8
2. Indicator on the Base unit (For MHS-5 Base) ................................................................................................................. 8
3. Indicators on the Base unit (For MHS-2 Base)................................................................................................................ 8
4. Icons on the Handset unit.................................................................................................................................................. 9
4.1 CO Line Status............................................................................................................................................................... 9
4.2 Other Status ................................................................................................................................................................... 9
III. PROGRAMMING ( HANDSET UNIT ONLY).....................................................................10
1. Summary of the Programming and Function Codes..................................................................................................... 10
1.1 Programming Codes .................................................................................................................................................... 10
1.2 Function Codes............................................................................................................................................................ 10
2. Programming the System Security Code on the Handset............................................................................................. 11
3. Handset ID Setting........................................................................................................................................................... 11
4. CO Line Ring Programming........................................................................................................................................... 11
5. Ringer Type Programming.............................................................................................................................................. 12
6. FLASH Time Programming............................................................................................................................................ 12
7. Tone/Pulse Mode Programming ..................................................................................................................................... 13
8. Hold Reminder Time Programming............................................................................................................................... 13
9. LIU (Line In Use) Enable/Disable Programming .......................................................................................................... 14
10. Line Select Enable/Disable Programming.................................................................................................................... 14
11. Privacy Enable/Disable Programming ......................................................................................................................... 15
12. First Line Select Programming ..................................................................................................................................... 15
13. Ringer Level Programming........................................................................................................................................... 16
14. Handset Reset programming......................................................................................................................................... 16
IV. PROGRAMMING ( MHS-2 BASE UNIT ONLY) ................................................................18
1. Summary of the Programming........................................................................................................................................ 18
2. Programming the System Security Code on the Base ................................................................................................... 18
3. CO Line Ring Programming........................................................................................................................................... 18
4. Tone/Pulse Mode Programming ..................................................................................................................................... 19
5. LIU (Line In Use) Enable/Disable Programming .......................................................................................................... 19
6. Line Select Enable/Disable Programming...................................................................................................................... 20
7. Privacy Enable/Disable Programming ........................................................................................................................... 20
8. First Line Select Programming ....................................................................................................................................... 21
9. Date/Time Programming ................................................................................................................................................. 21

TECOM SOHO Department Preliminary Feature Operation for Casio 1&2-Line Cordless Phone
Issued by: Frank Yang-Hsin LIN Date: Mar. 31, 2000
Revision: 0.3 Page:3/73
10. Hold Reminder Time Programming............................................................................................................................. 22
11. FLASH Time Programming.......................................................................................................................................... 23
12. Ringer Type Programming............................................................................................................................................ 23
13. Ringer Level Programming........................................................................................................................................... 23
14. Base Reset programming............................................................................................................................................... 24
V. INSTALLATION ( MHS-5 ONLY )............................................................................................25
1. Configuration ................................................................................................................................................................... 25
2. System Security Code Programming.............................................................................................................................. 25
VI. BASIC OPERATION ( HANDSET UNIT ONLY )...............................................................26
1. Standby Mode................................................................................................................................................................... 26
1.1 Handset Link with the "Idle" Base Unit....................................................................................................................... 26
1.2 Handset Link with the "Busy" Base Unit..................................................................................................................... 26
1.3 Handset Can Not Link with the Base Unit................................................................................................................... 26
2. Making Outside Line Call ............................................................................................................................................... 26
2.1 Making An Outgoing Call by Manual Dialing............................................................................................................. 27
2.2 End An Outgoing Call ................................................................................................................................................. 27
3. Answering Call ................................................................................................................................................................. 27
4. Last Number Redial (LNR)............................................................................................................................................. 28
4.1 Making An Outgoing Call by LNR.............................................................................................................................. 28
4.2 Making An Outgoing Call by LNR with Pre-Dialing .................................................................................................. 28
5. Placing an Outside Call on Hold..................................................................................................................................... 29
5.1 Placing an Outside Call on Hold ................................................................................................................................. 29
5.2 Hold Reminder ............................................................................................................................................................ 29
5.3 Hold Recall Ring ......................................................................................................................................................... 29
6. Retrieve a Line on Hold................................................................................................................................................... 29
7. Making an Intercom Call................................................................................................................................................. 30
7.1 If the Called Party is Idle and Access-able .................................................................................................................. 30
7.2 If the Called Party is Busy and Access-able ................................................................................................................ 30
7.3 If the Called Party is in DND (Ringer Off) Mode and Access-able............................................................................. 31
7.4 If the Called Party is UN-Accessible by Intercom Path Busy...................................................................................... 31
7.5 If the Called Party is an Illegal Number ...................................................................................................................... 31
7.6 Page All Handsets........................................................................................................................................................ 31
8. Answering an Incoming Intercom Call........................................................................................................................... 32
9. Conference Call................................................................................................................................................................ 32
9.1 Two CO Lines Conference Call................................................................................................................................... 32
10. Transferring CO Call..................................................................................................................................................... 33
10.1 Transferring a Call..................................................................................................................................................... 33
10.2 Transferring Recall :.................................................................................................................................................. 33
11. FLASH Function............................................................................................................................................................ 34
12. PAUSE Function ............................................................................................................................................................ 34
13. TONE Function.............................................................................................................................................................. 35
14. DND Function................................................................................................................................................................. 36

TECOM SOHO Department Preliminary Feature Operation for Casio 1&2-Line Cordless Phone
Issued by: Frank Yang-Hsin LIN Date: Mar. 31, 2000
Revision: 0.3 Page:4/73
14.1 Setting DND Mode.................................................................................................................................................... 36
14.2 Canceling the DND Mode. ........................................................................................................................................ 36
15. MUTE Function ............................................................................................................................................................. 36
16. Out Of Range Warning ................................................................................................................................................. 37
16.1 Handset Walks Back to the Base Unit....................................................................................................................... 37
16.2 Handset Keeps Walking Out From the Base Unit ..................................................................................................... 37
17. Battery Low Warning.................................................................................................................................................... 38
18. Complete with Headset.................................................................................................................................................. 38
19. Volume Control .............................................................................................................................................................. 38
VII. BASIC OPERATION (MHS-2 BASE UNIT ONLY) ............................................................39
1. Standby Mode................................................................................................................................................................... 39
2. Making Outside Line Call ............................................................................................................................................... 39
2.1 Making An Outgoing Call ........................................................................................................................................... 39
3. Answering Call ................................................................................................................................................................. 39
4. End An Outgoing Call...................................................................................................................................................... 40
5. Last Number Redial (LNR)............................................................................................................................................. 40
5.1 Making An Outgoing Call by LNR.............................................................................................................................. 40
5.2 Making An Outgoing Call by LNR with Pre-Dialing .................................................................................................. 40
6. Placing an Outside Call on Hold..................................................................................................................................... 40
6.1 Placing an Outside Call on Hold ................................................................................................................................. 40
6.2 Hold Reminder ............................................................................................................................................................ 41
6.3 Hold Recall Ring ......................................................................................................................................................... 41
7. Retrieve a Line on Hold................................................................................................................................................... 41
8. Page All Handsets............................................................................................................................................................. 41
9. Making an Intercom Call................................................................................................................................................. 41
9.1 If the Called Party is Idle and Access-able .................................................................................................................. 41
9.2 If the Called Party is Busy and Access-able ................................................................................................................ 42
9.3 If the Called Party is in DND (Ringer Off) Mode and Access-able............................................................................. 42
9.4 If the Called Party is UN-Accessible by Intercom Path Busy...................................................................................... 42
9.5 If the Called Party is an Illegal Number ...................................................................................................................... 42
10. Answering an Incoming Intercom Call......................................................................................................................... 43
11. Conference Call.............................................................................................................................................................. 43
11.1 Two CO Lines Conference Call................................................................................................................................. 43
12. Transferring CO Call..................................................................................................................................................... 44
12.1 Transferring a Call..................................................................................................................................................... 44
12.2 Transferring Recall :.................................................................................................................................................. 44
13. FLASH Function............................................................................................................................................................ 44
14. PAUSE Function ............................................................................................................................................................ 45
15. TONE Function.............................................................................................................................................................. 45
16. MUTE Function ............................................................................................................................................................. 45
17. Volume Control .............................................................................................................................................................. 45
VIII. DIRECTORY OPERATION ( HANDSET UNIT ONLY )...................................................46

TECOM SOHO Department Preliminary Feature Operation for Casio 1&2-Line Cordless Phone
Issued by: Frank Yang-Hsin LIN Date: Mar. 31, 2000
Revision: 0.3 Page:5/73
1. Storing the Information into Directory.......................................................................................................................... 46
2. Reviewing the Information from Directory ................................................................................................................... 47
3. Dialing Information from Directory............................................................................................................................... 47
4. Editing Information from Directory............................................................................................................................... 48
5. Removing All Information From Directory................................................................................................................... 48
6. Removing one Information From Directory.................................................................................................................. 49
IX. DIRECTORY OPERATION ( MHS-2 BASE UNIT ONLY )..............................................50
1. Storing the Information into Directory.......................................................................................................................... 50
2. Reviewing the Information from Directory ................................................................................................................... 50
3. Dialing Information from Directory............................................................................................................................... 51
4. Editing Information from Directory............................................................................................................................... 51
5. Removing All Information From Directory................................................................................................................... 52
6. Removing one Information From Directory.................................................................................................................. 52
X. ONE-TOUCH SPEED DIAL OPERATION ( MHS-2 BASE UNIT ONLY ).........................54
1. Storing the Information into One-Touch Speed Dial.................................................................................................... 54
2. Reviewing the Information from One-Touch Speed Dial ............................................................................................. 54
3. Dialing Information from One-Touch Speed Dial......................................................................................................... 55
4. Editing Information from One-Touch Speed Dial......................................................................................................... 55
5. Removing one Information From One-Touch Speed Dial ............................................................................................ 56
XI. CALLER ID OPERATION ( HANDSET UNIT ONLY ).....................................................58
1. Caller ID Call Back Dialing method............................................................................................................................... 58
1.1 Programming the Dialing Method ............................................................................................................................... 58
1.2 Programming the Area Code ....................................................................................................................................... 58
1.3 Erasing the Area Code................................................................................................................................................. 59
2. Ringing Line Caller ID Function .................................................................................................................................... 59
2.1 View the Caller ID Information Between Ringing Calls ............................................................................................. 60
3. Caller ID Data Base Function ......................................................................................................................................... 61
3.1 Enter the CID Data Base Retrieve Mode..................................................................................................................... 61
3.2 Delete All Callers from the Caller Data Base.............................................................................................................. 61
3.3 Scroll the Calls in the CID Data Base.......................................................................................................................... 62
3.4 View the Completed Caller Information...................................................................................................................... 62
3.5 Dial Back for the Caller on the Display....................................................................................................................... 63
3.6 Delete a Caller from the Caller Data Base................................................................................................................... 64
3.7 Store a Caller Number into the Directory Memory ..................................................................................................... 64
3.8 Leave the CID Data Base Retrieve Mode.................................................................................................................... 65
4. Caller ID on Call Waiting ( Type II Call ID )................................................................................................................ 65
XII. CALLER ID OPERATION ( MHS-2 BASE UNIT ONLY ) ................................................67
1. Caller ID Call Back Dialing method............................................................................................................................... 67
1.1 Programming the Dialing Method ............................................................................................................................... 67
1.2 Programming the Area Code ....................................................................................................................................... 67
1.3 Erasing the Area Code................................................................................................................................................. 68

TECOM SOHO Department Preliminary Feature Operation for Casio 1&2-Line Cordless Phone
Issued by: Frank Yang-Hsin LIN Date: Mar. 31, 2000
Revision: 0.3 Page:6/73
2. LCD Icon for Caller ID Function ................................................................................................................................... 68
3. Ringing Line Caller ID Function .................................................................................................................................... 68
3.1 View the Caller ID Information Between Ringing Calls ............................................................................................. 69
4. Caller ID Data Base Function ......................................................................................................................................... 69
4.1 Enter the CID Data Base Retrieve Mode..................................................................................................................... 69
4.2 Delete All Callers from the Caller Data Base.............................................................................................................. 69
4.3 Scroll the Calls in the CID Data Base.......................................................................................................................... 70
4.4 Dial Back for the Caller on the Display....................................................................................................................... 70
4.5 Delete a Caller from the Caller Data Base................................................................................................................... 71
4.6 Store a Caller Number into the Directory Memory ..................................................................................................... 71
4.7 Store a Caller Number into the One-Touch Speed Dial............................................................................................... 72
5. Caller ID on Call Waiting ( Type II Call ID )................................................................................................................ 72

TECOM SOHO Department Preliminary Feature Operation for Casio 1&2-Line Cordless Phone
Issued by: Frank Yang-Hsin LIN Date: Mar. 31, 2000
Revision: 0.3 Page:7/73
I. INTRODUCTION
1. Becoming Familiar with Your Wireless System
The system consists of one base unit and up to sixty wireless handsets. The base unit provides four voice (RF) channels for Intercom
or outside calling by any wireless handset.
2. The Features
The system provides many features such as:
2 CO line Capacity. (MHS-5 only with 1 CO line capacity)
15 * 2 LCD with icons (MHS-2 Base Unit Only)
12 * 2 LCD with icons
Tone/Pulse Dialing.
Directory. (80 Numbers and name)
Speed Dialing (12 Numbers and name, MHS-2 Base Unit Only)
Last Number Redial (LNR).
Intercom calling.
Conference.
Call Transfer.
Hold.
Flash.
Pause.
Do Not Disturb (DND).
Ringer On/Off control.
Ringer Level Control.
Volume Level Control.
Headset Compatibility.
Caller ID. (50 Caller ID)
PS: The second line features described in this manual may not apply to MHS-5 model.
TECOM SOHO Department Preliminary Feature Operation for Casio 1&2-Line Cordless Phone
Issued by: Frank Yang-Hsin LIN Date: Mar. 31, 2000
Revision: 0.3 Page:8/73
II. INDICATIONS
1. Lamp Cadence
Dark solid dark
Lit solid lit
Slowest 1sec off, 1sec on repeatedly.
Slow 0.5sec off, 0.5sec on repeatedly.
Fast 0.125sec off, 0.125sec on, repeatedly.
Flick1 0.125sec off, 1.875sec on, repeatedly.
Flick2 0.125sec off, 0.125sec on, 0.125sec off, 1.625sec on, repeatedly.
Flick3 0.125sec off, 0.125sec on, 0.125sec off, 0.125sec on, 0.125sec off, 1.125sec on, repeatedly.
2. Indicator on the Base unit (For MHS-5 Base)
-- POWER: indicates the AC power and the Base unit status.
Dark: The AC power lost.
Slow: 0.5sec on, 0.5sec off, repeatedly.
Within power on 15 seconds, waiting to receive the new S.S.C. period,
Base unit in S.S.C. Programming mode.
Fast: 0.125sec on, 0.125sec off, repeatedly.
The S.S.C. is empty in the Base unit.
Lit: Base unit is in idle mode.
Flick1: Base unit is in normal operation.
Flick2: Base unit is in charge mode.
Flick3: Base unit is in busy mode.
3. Indicators on the Base unit (For MHS-2 Base)
The LED on the Faceplate Top
Lit: Normal operation.
Slow: CO Ring, Transfer Ring, Recall Ring, Intercom Ring.
Page LED
Dark: Intercom Idle.
Slow: Base receives an intercom ring.

TECOM SOHO Department Preliminary Feature Operation for Casio 1&2-Line Cordless Phone
Issued by: Frank Yang-Hsin LIN Date: Mar. 31, 2000
Revision: 0.3 Page:9/73
Flick1: Base unit is in use the intercom trunk.
Lit: Handset units are in use the intercom trunk.
Speaker LED
Dark: Idle mode.
Lit: Speakerphone mode.
Headset LED
Dark: Idle mode.
Lit: Headset mode.
Line1/Line2 Red LEDs
Dark: CO line is idle.
Slow: CO line is ringing.
Fast: Handset unit user holds the CO line.
Lit: Handset unit user uses the CO line.
Line1/Line2 Green LEDs
Dark: CO line is idle.
Slow: Base receives a transfer call, or a CO line “hold recall ring”.
Fast: Base unit holds the CO.
Lit: Base unit user uses the CO line.
4. Icons on the Handset unit
The LCD of the handset is 2*15 dot matrix with some icons. There are 2 CO line icons to show the CO line status on the LCD.
They have many different combinations to show the line status, including Idle, Ring, Talk, Hold, Transfer Ring, … etc. And
battery power status.
4.1 CO Line Status
For all 2 CO Lines status. There are 3 different icons on each CO line. They are “Handset”, “Ring”, and “Ring Off” icons
Ring Off Icon: (I) For the CO line is programmed to the “Ring Off” mode.
Handset Icon: (I) Off: CO Line is idle.
(II) On: CO Line is in use.
(III) Flash: CO Line is held.
Ring Icon: (I) Off: CO Line doesn’t ring.
(II) Flash: CO Line is ringing.
Handset and Ring Icons: (I) Both Flash: Transfer Ring or Recall Ring
4.2 Other Status
The other icon is for battery low status.
Battery Icon: For the battery power status.

TECOM SOHO Department Preliminary Feature Operation for Casio 1&2-Line Cordless Phone
Issued by: Frank Yang-Hsin LIN Date: Mar. 31, 2000
Revision: 0.3 Page:10/73
III. PROGRAMMING ( HANDSET UNIT ONLY)
1. Summary of the Programming and Function Codes
1.1 Programming Codes
There are some programming parameters on the handset, and here are the operation and the list.
. Standby, the LCD displays:
Ring:Mid
ID:1 1
<icons>
Note: 1. "Ring": Ringer volume that may be Low, Mid, Hi or DND.
2. "ID": Identification Number of the handset.
3. <icons>: Icons for the status of CO lines, and battery.
. Press [PRG] and then enter the programming items, you may press the [ s ]/[ t ] to select the item you want to change
1. System Security Code (S.S.C.)
2. Register Programming
3. Handset ID Programming.
4. CO Line Ring Programming.
5. Handset Ring Type Programming.
6. Hold-Reminder Time Programming.
7. FLASH Time Programming.
8. Tone/Pulse Mode Programming.
9. Caller ID Area Code Dialing Method Programming (Refer to the Caller ID Operation)
10. LIU (Line In Use) Enable/Disable Programming
11. Line Select Enable/Disable Programming
12. Privacy Enable/Disable Programming
13. First Line Select Programming
14. Ringer Level Programming
15. Handset RESET Programming.
1.2 Function Codes
There are some function access codes on the handset, here is the summary.
For more details, please refer to the following paragraphs.
Each time you press the [ FCN ] will form a function access key by followed function access code [ 1/4/7/* ].
. Standby, press [FCN]
Ring:Mid
ID:1 1
<icons>
The symbol "" indicates [FCN] key prompt
[FCN] [1] DELETE code, to delete the SPEED/CID list memory, or CID area Code
[FCN] [4] DND code, to activate Do Not Disturb feature
[FCN] [7] PAUSE code, to insert a delay during digits
[FCN] [*] CONFERENCE code, to bridge 3-way conference call
TECOM SOHO Department Preliminary Feature Operation for Casio 1&2-Line Cordless Phone
Issued by: Frank Yang-Hsin LIN Date: Mar. 31, 2000
Revision: 0.3 Page:11/73
2. Programming the System Security Code on the Handset
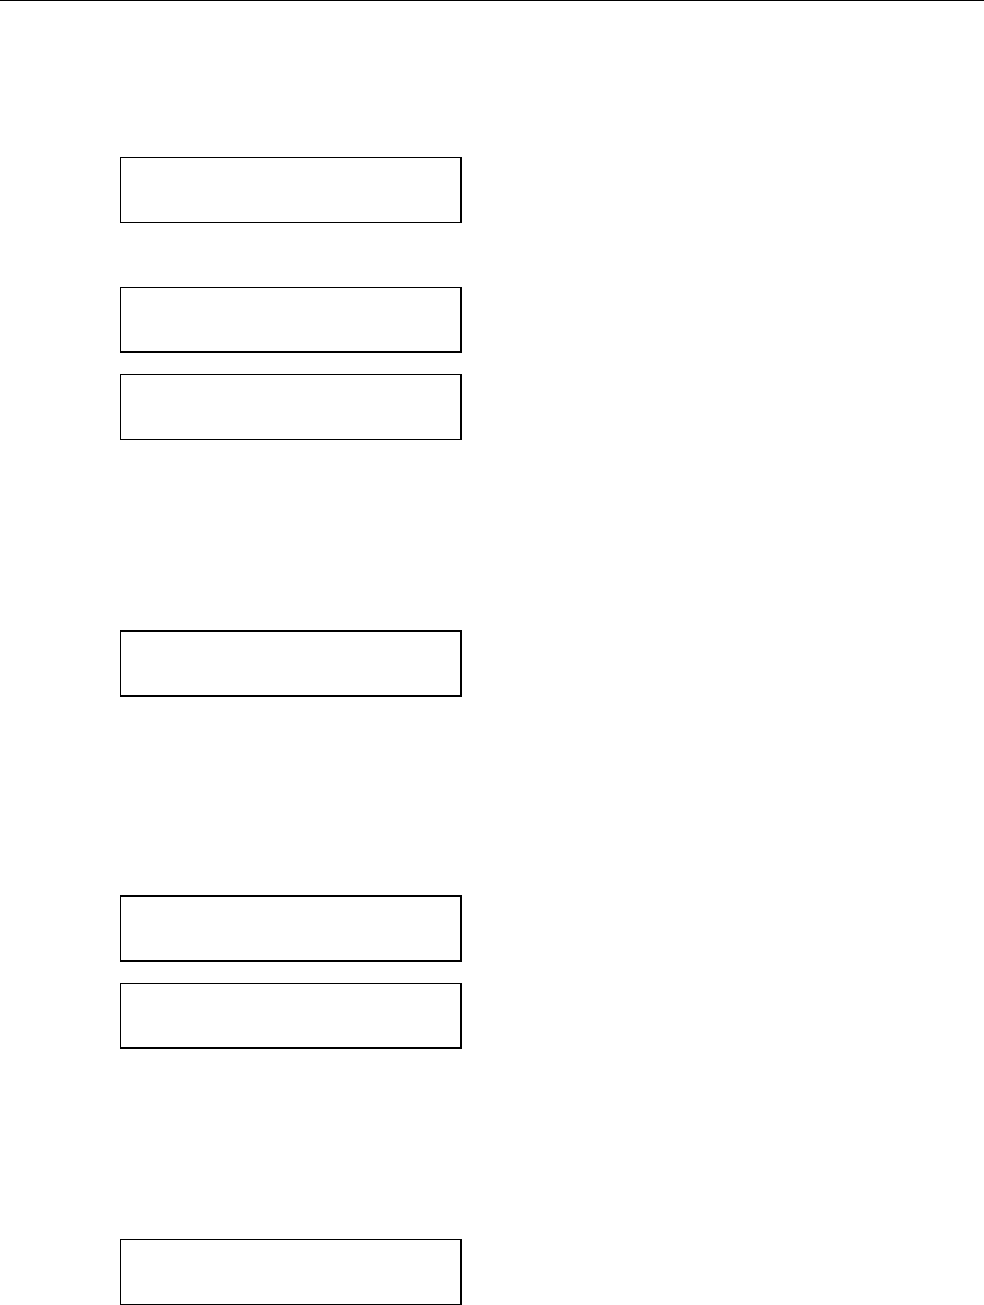
. Standby, press [PRG] and the LCD displays:
MEM
<icons>
. Press [s]/[t] to select the item to set the system security code
S e c.Code
(Empty)
<icons>
Or
Se c .Code
123456
<icons>
1. MEM : Programming start prompt
2. Sec.Code : Sec.Code programming mode prompt
3. (Empty) : Sec.Code is not programmed
4. 123456 : The Sec.C code already exists.
. Enter [ # ] to enter the changing mode, and then,
. Enter [ 1/2/3/4/5/6/7/8/9/0/*/#/PAUSE/FLASH ] 6 digits for new S.S.Code, say 775141. The LCD will display:
Se c .Code
775141
<icons>
. Press [OFF], or [PRG], or [s]/[t] to confirm and quit the new setting or change to the other programming.
3. Handset ID Setting
. Standby, press [PRG]
. Press [s]/[t] to select the item to enter the handset ID programming and the LCD will display:
Han d setID
1 1 <icons>
Or
Han d setID
1 5 <icons>
1. Handset ID : Programming handheld ID mode
2. ID:11 : The default handset ID number
3. ID:15 : The original handset ID number
. Enter [ # ] to enter the changing mode, and then,
. Enter [ 11 - 70 ] 2 digits intercom station number. Default '11'.
For example: we enter the new [ 1 ] [ 2 ] handset ID number
Han d setID
1 2 <icons>
. Press [OFF], or [PRG], or [s]/[t] to confirm and quit the new setting or change to the other programming.
4. CO Line Ring Programming
TECOM SOHO Department Preliminary Feature Operation for Casio 1&2-Line Cordless Phone
Issued by: Frank Yang-Hsin LIN Date: Mar. 31, 2000
Revision: 0.3 Page:12/73
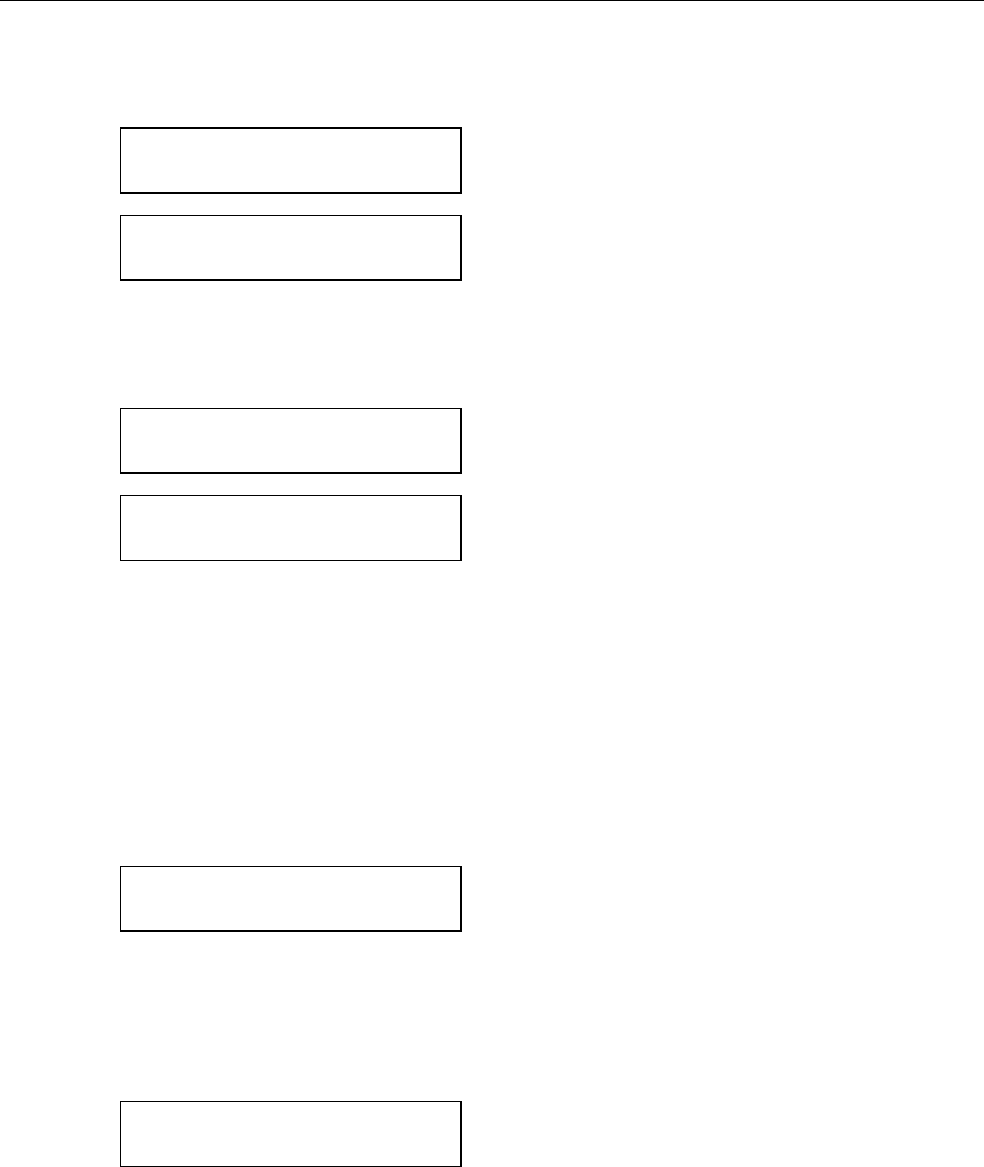
You may program each the CO line incoming call will ring or not on your handset. Default all the 2 CO lines will ring.
. Standby, press [PRG].
. Press [s]/[t] to select the item to select the line you want to program, say CO1
L1Ring
On(#:chg)
<icons>
or
L1Ring
Of f ( #:chg)
<icons>
1. L1 Ring : You are programming CO line#1 ring On/Off.
2. On/Off : The current setting is On/Off.
. Press [#] to toggle the CO line ringing On/Off status. The LCD will display:
L1Ring
Of f ( #:chg)
<icons>
or
L1Ring
On(#:chg)
<icons>
1. L1 Ring : You are programming CO line#1 ring On/Off.
2. Off/On : Disable/Enable CO1 ring.
. Press [OFF], or [PRG], or [s]/[t] to confirm and quit the new setting or change to the other programming.
5. Ringer Type Programming
You may select one of the four types ringer sound on your handset. Default is the type 1.
. Standby, press [PRG].
. Press [ s ]/[ t ] to select the ringer type programming mode. The LCD will display:
RingType
1(#:chg)
<icons>
1. Ring Type : Ringer type.
2. 1 : The old programmed type
. Press [#] to select the new ringer type you prefer.
Each time you change, there is a new ringer type sounds for your reference.
For example, if we select [2], the LCD will display:
RingType
2(#:chg)
<icons>
1. Ring Type : Ringer type.
2. 2 : Type 2
. Press [OFF], or [PRG], or [s]/[t] to confirm and quit the new setting or change to the other programming.
6. FLASH Time Programming
You may program the FLASH time duration as your service need.
. Standby, press [PRG]
TECOM SOHO Department Preliminary Feature Operation for Casio 1&2-Line Cordless Phone
Issued by: Frank Yang-Hsin LIN Date: Mar. 31, 2000
Revision: 0.3 Page:13/73
. Press [s]/[t] to select the FLASH Time programming mode. The LCD will display:
FlashTime
600ms(#:chg)
<icons>
1. Flash Time : Flash time programming mode
2. 0.6 Sec. : Programmed FLASH time
. Press [#] to select the new FLASH time selection: 600/375/275/100ms
FlashTime
275ms(#:chg)
<icons>
. Press [OFF], or [PRG], or [s]/[t] to confirm and quit the new setting or change to the other programming.
Note: When any handset changes its Flash Time, the other handsets are automatically changed to the same universal
Flash time setting.
7. Tone/Pulse Mode Programming
You may program your phone to be a Tone or Pulse dialing phone.
. Standby, press [PRG].
. Press [s]/[t] to select the Tone/Pulse programming mode.
Tone/Pulse
Tone(#:chg)
<icons>
or
Tone/Pulse
Pulse(#:chg)
<icons>
1. Tone/Pulse : You are programming Tone/Pulse.
2. Tone or Pulse: The current setting is Tone/Pulse.
. Press [#] to toggle between the Tone and Pulse modes. The LCD will display:
Tone/Pulse
Pulse(#:chg)
<icons>
or
Tone/Pulse
Tone(#:chg)
<icons>
1. Tone/Pulse : You are programming Tone/Pulse mode.
2. Pulse or Tone: Changed to Pulse/Tone Mode.
. Press [OFF], or [PRG], or [s]/[t] to confirm and quit the new setting or change to the other programming.
8. Hold Reminder Time Programming
Default: 30 seconds.
. Standby, press [PRG].
. Press [s]/[t] to select the Hold Reminder Time programming mode. The LCD will display:
HoldRemin d
3 0 Se c (#:chg)
<icons>
TECOM SOHO Department Preliminary Feature Operation for Casio 1&2-Line Cordless Phone
Issued by: Frank Yang-Hsin LIN Date: Mar. 31, 2000
Revision: 0.3 Page:14/73
1. Hold Remind : Hold Reminder Time programming mode
2. 30 Sec. : Programmed Reminder Time.
. Press [#] to select the Hold Reminder Time setting.
For example, disable the function of Hold Reminder. The LCD will display:
HoldRemin d
Of f ( #:chg)
<icons>
. Press [OFF], or [PRG], or [s]/[t] to confirm and quit the new setting or change to the other programming.
9. LIU (Line In Use) Enable/Disable Programming
You may program the LIU detection function enable or disable. Default the LIU function is enable.
. Standby, press [PRG], press [s]/[t] to select this item.
LIU D ete c t
On(#:chg)
<icons>
or
LIU D ete c t
Of f ( #:chg)
<icons>
1. LIU Detect : You are programming the LIU function On/Off.
2. On/Off : The current setting is On/Off.
. Press [#] to toggle the LIU function On/Off status. The LCD will display:
LIU D ete c t
Of f ( #:chg)
<icons>
or
LIU D ete c t
On(#:chg)
<icons>
1. LIU Detect : You are programming the LIU function On/Off.
2. Off/On : Disable/Enable LIU function.
. Press [OFF], or [PRG], or [s]/[t] to confirm and quit the new setting or change to the other programming.
10. Line Select Enable/Disable Programming
You may program the Auto Line Select function enable or disable. Default the function is disable.
The user off-hooks the handset, the ringing CO line will be picked up when the function is on.
. Standby, press [PRG], press [s]/[t] to select this item.
LineSele c t
On(#:chg)
<icons>
or
LineSele c t
Of f ( #:chg)
<icons>
1. Line Select: You are programming the Auto Line Select function On/Off.
2. On/Off : The current setting is On/Off.
. Press [#] to toggle the selection. The LCD will display:
TECOM SOHO Department Preliminary Feature Operation for Casio 1&2-Line Cordless Phone
Issued by: Frank Yang-Hsin LIN Date: Mar. 31, 2000
Revision: 0.3 Page:15/73
LineSele c t
Of f ( #:chg)
<icons>
or
LineSele c t
On(#:chg)
<icons>
1. Line Select: You are programming the Auto Line Select function On/Off.
2. Off/On : Disable/Enable Auto answer.
. Press [OFF], or [PRG], or [s]/[t] to confirm and quit the new setting or change to the other programming.
11. Privacy Enable/Disable Programming
You may program the Privacy function enable or disable. Default the function is disable.
The other user can join the conversation easily when you are talking the CO line and this function is off.
. Standby, press [PRG], press [s]/[t] to select this item.
Priv a cy
On(#:chg)
<icons>
or
Priv a cy
Of f ( #:chg)
<icons>
1. Privacy : You are programming the Privacy function On/Off.
2. On/Off : The current setting is On/Off.
. Press [#] to toggle the selection. The LCD will display:
Priv a cy
Of f ( #:chg)
<icons>
or
Priv a cy
On(#:chg)
<icons>
1. Privacy : You are programming the Privacy function On/Off.
2. Off/On : Disable/Enable Privacy function.
. Press [OFF], or [PRG], or [s]/[t] to confirm and quit the new setting or change to the other programming.
12. First Line Select Programming
You may program the First Line Select function. Default the function is L1.
. Standby, press [PRG], press [s]/[t] to select this item.
FirstLine
L1(#:chg)
<icons>
or
FirstLine
L2(#:chg)
<icons>
1. First Line : You are programming the First Line function.
2. L1/L2 : The current setting is L1/L2.
TECOM SOHO Department Preliminary Feature Operation for Casio 1&2-Line Cordless Phone
Issued by: Frank Yang-Hsin LIN Date: Mar. 31, 2000
Revision: 0.3 Page:16/73
. Press [#] to toggle the Selection. The LCD will display:
FirstLine
L2(#:chg)
<icons>
or
FirstLine
L1(#:chg)
<icons>
1. First Line : You are programming the First Line function.
2. Off/On : Disable/Enable CO1 ring.
. Press [OFF], or [PRG], or [s]/[t] to confirm and quit the new setting or change to the other programming.
13. Ringer Level Programming
You may select one of the three ringer level sound on your handset. Default is the middle.
. Standby, press [PRG].
. Press [ s ]/[ t ] to select the ringer level programming mode. The LCD will display:
RingLevel
Mid(#:chg)
<icons>
1. Ring Level : Ringer level.
2. Mid : The old programmed level
. Press [#] to change the ringer level to Low/Mid/Hi. Each time you change, there is a new ringer level sounds for
your reference. For example, if we change to Hi level, the LCD will display:
RingLevel
Hi(#:chg)
<icons>
1. Ring Level : Ringer Level.
2. Hi : Ringer level is Hi
. Press [OFF], or [PRG], or [s]/[t] to confirm and quit the new setting or change to the other programming.
14. Handset Reset programming
You may RESET the handset and clear all the programmed data, all the parameters will back to the default values.
- S.S.Code: Empty
- Ringer Volume: Middle level
- Handset ID: 11
- CO Ring Assign: Both 2 lines will ring
- Ring Type: Type 1
- Hold-Reminder Time: 30 seconds
. Standby, press [PRG]
. Press the [s]/[t] to select the RESET programming mode. The LCD will display:
Reset?
PRG:r e set
<icons>
--- "Reset ?" : Handset RESET prompt.
. Press [PRG] again, and a confirmation signal to indicate the successful programming. The LCD will display:

TECOM SOHO Department Preliminary Feature Operation for Casio 1&2-Line Cordless Phone
Issued by: Frank Yang-Hsin LIN Date: Mar. 31, 2000
Revision: 0.3 Page:17/73
MEMOK!
Reset
<icons>
1. MEM OK! : Programming end & OK prompt.
2. Reset: Reset programming mode prompt.
. After 15 seconds, the handset will back to standby mode automatically, and the display shows:
Ring:Mid
ID:1 1
<icons>
TECOM SOHO Department Preliminary Feature Operation for Casio 1&2-Line Cordless Phone
Issued by: Frank Yang-Hsin LIN Date: Mar. 31, 2000
Revision: 0.3 Page:18/73
IV. PROGRAMMING ( MHS-2 BASE UNIT ONLY)
1. Summary of the Programming
There are some programming parameters on the base unit, and here are the operation and the list.
. Press [PROGRAM] and then enter the programming items.
Rotate the Data Dial to select the item you want to change
1. System Security Code (S.S.C.)
2. CO Line Ring Programming.
3. Tone/Pulse Mode Programming.
4. LIU (Line In Use) Enable/Disable Programming
5. Line Select Enable/Disable Programming
6. Privacy Enable/Disable Programming
7. First Line Select Programming
8. Date/Time Programming
9. Caller ID Area Code Dialing Method Programming (Refer to the Caller ID Operation)
10. Date/Time Programming
11. Hold-Reminder Time Programming.
12. FLASH Time Programming.
13. Ring Type Programming.
14. Ringer Level Programming
15. Base RESET Programming.
2. Programming the System Security Code on the Base
. Standby, press [PROGRAM] and the LCD displays:
Program
. Rotate the Data Dial to select the item to set the system security code
S e curityCode
(Empty)
Or
S e curityCode
1 2 3 4 5 6
1. Program : Programming start prompt
2. Security Code : Security Code programming mode prompt
3. (Empty) : Security Code is not programmed
4. 123456 : The Security Code already exists.
. Press the center of the Data Dial to select this item,
. Enter [ 1/2/3/4/5/6/7/8/9/0/*/#/PAUSE/FLASH ] 6 digits for new S.S.Code, say 775141. The LCD will display:
S e curityCode
7 7 5 1 4 1
. Press the center of Data Dial to accept the new security code.
3. CO Line Ring Programming
You may program each the CO line incoming call will ring or not on your handset. Default all the 2 CO lines will ring.
. Standby, press [PROGRAM]
TECOM SOHO Department Preliminary Feature Operation for Casio 1&2-Line Cordless Phone
Issued by: Frank Yang-Hsin LIN Date: Mar. 31, 2000
Revision: 0.3 Page:19/73
. Rotate the Data Dial to select the item to set the system security code
L1Ring
On
or
L1Ring
Of f
1. L1 Ring : You are programming CO line#1 ring On/Off.
2. On/Off : The current setting is On/Off.
. Press the center of the Data Dial to select this option
. Rotate the dial to select either ON or Off. The LCD will display:
L1Ring
<Of f >
or
L1Ring
<On>
1. L1 Ring : You are programming CO line#1 ring On/Off.
2. Off/On : Disable/Enable CO1 ring.
. Press the center of the Data Dial to accept.
4. Tone/Pulse Mode Programming
You may program your phone to be a Tone or Pulse dialing phone.
. Standby, press [PROGRAM]
. Rotate the Data Dial to select the Tone/Pulse programming mode.
Tone/Pulse
Tone
or
Tone/Pulse
Pulse
1. Tone/Pulse : You are programming Tone/Pulse.
2. Tone or Pulse: The current setting is Tone/Pulse.
. Press the center of the Data Dial to select this option
. Rotate the dial to select from the Tone and Pulse modes. The LCD will display:
Tone/Pulse
<Pulse>
or
Tone/Pulse
<Tone>
. Press the center of the Data Dial to accept.
5. LIU (Line In Use) Enable/Disable Programming
You may program the LIU detection function enable or disable. Default the LIU function is enable.
. Standby, press [PROGRAM]
. Rotate the Data Dial to select this item.
LIU D ete c t
On
or
TECOM SOHO Department Preliminary Feature Operation for Casio 1&2-Line Cordless Phone
Issued by: Frank Yang-Hsin LIN Date: Mar. 31, 2000
Revision: 0.3 Page:20/73
LIU D ete c t
Of f
1. LIU Detect : You are programming the LIU function On/Off.
2. On/Off : The current setting is On/Off.
. Press the center of the Data Dial to select this option
. Rotate the dial to select from the LIU function On/Off status. The LCD will display:
LIU D ete c t
<Of f >
or
LIU D ete c t
<On>
1. LIU Detect : You are programming the LIU function On/Off.
2. Off/On : Disable/Enable LIU function.
. Press the center of the Data Dial to accept.
6. Line Select Enable/Disable Programming
You may program the Auto Line Select function enable or disable. Default the function is disable.
The user off-hooks the handset, the ringing CO line or an idle CO line will be picked up when the function is on.
. Standby, press [PROGRAM]
. Rotate the Data Dial to select this item.
LineSele c t
On
or
LineSele c t
Of f
1. Line Select : You are programming the Auto Lien Select function On/Off.
2. On/Off : The current setting is On/Off.
. Press the center of the Data Dial to select this option
. Rotate the dial to change the selection. The LCD will display:
LineSele c t
<Of f >
or
LineSele c t
<On>
1. Line Select : You are programming the Auto Lien Select function On/Off.
2. Off/On : Disable/Enable Auto answer.
. Press the center of the Data Dial to accept.
7. Privacy Enable/Disable Programming
You may program the Privacy function enable or disable. Default the function is disable.
The other user can join the conversation easily when you are talking the CO line and this function is off.
. Standby, press [PROGRAM]
. Rotate the Data Dial to select this item.
Priv a cy
On
or
Priv a cy
TECOM SOHO Department Preliminary Feature Operation for Casio 1&2-Line Cordless Phone
Issued by: Frank Yang-Hsin LIN Date: Mar. 31, 2000
Revision: 0.3 Page:21/73
Of f
1. Privacy : You are programming the Privacy function On/Off.
2. On/Off : The current setting is On/Off.
. Press the center of the Data Dial to select this option
. Rotate the dial to change the selection. The LCD will display:
Priv a cy
<Of f >
or
Priv a cy
<On>
1. Privacy : You are programming the Privacy function On/Off.
2. Off/On : Disable/Enable Privacy function.
. Press the center of the Data Dial to accept.
8. First Line Select Programming
You may program the First Line Select function. Default the function is L1.
. Standby, press [PROGRAM]
. Rotate the Data Dial to select this item.
FirstLine
L1
or
FirstLine
L2
1. First Line : You are programming the First Line function.
2. L1/L2 : The current setting is L1/L2.
. Press the center of the Data Dial to select this option
. Rotate the dial to change the selection. The LCD will display:
FirstLine
<L2>
or
FirstLine
<L1>
1. First Line : You are programming the First Line function.
2. Off/On : Disable/Enable CO1 ring.
. Press the center of the Data Dial to accept.
9. Date/Time Programming
You may set the calendar by your base unit. Default is: 00:00AM Jan. 01, 2000
. Standby, press [PROGRAM]
. Rotate the Data Dial to select this item.
Year&Date
2 0 0 0 0 1 /0 1
. Press the center of the Data Dial to select this option.
. Rotate the dial to change the year. The LCD will display:
Year&Date
TECOM SOHO Department Preliminary Feature Operation for Casio 1&2-Line Cordless Phone
Issued by: Frank Yang-Hsin LIN Date: Mar. 31, 2000
Revision: 0.3 Page:22/73
<2 0 0 1 >0 1 /0 1
. Press the center of the Data Dial to select the year.
. And rotate the dial to select the month option.
. Press the center of the Data Dial to select this option.
. Rotate the dial to change the month. The LCD will display:
Year&Date
2 0 0 1 <1 2 >/0 1
. Press the center of the Data Dial to select the month.
. And rotate the dial to select the date option.
. Press the center of the Data Dial to select this option.
. Rotate the dial to change the date. The LCD will display:
Year&Date
2 0 0 1 1 0 /<2 5 >
. Press the center of the Data Dial to accept.
Then, rotate the Data Dial to select the time setting.
Time
0 0 :0 0 AM
. Press the center of the Data Dial to select this option.
. Rotate the dial to change the hour. The LCD will display:
Time
<0 3 >:0 0 PM
. Press the center of the Data Dial to select the hour. The AM/PM will be changed automatically.
. And rotate the dial to select the minute option.
. Press the center of the Data Dial to select this option.
. Rotate the dial to change the minute. The LCD will display:
Time
0 3 :<4 5 >PM
. Press the center of the Data Dial to select the minute.
10. Hold Reminder Time Programming
Default: 30 seconds.
. Standby, press [PROGRAM]
. Rotate the Data Dial to select the Hold Reminder Time programming mode. The LCD will display:
HoldRemin d
3 0 Se c .
1. Hold Remind : Hold Reminder Time programming mode
2. 30 Sec. : Programmed Reminder Time.
. Press the center of the Data Dial to select this option
. Rotate the dial to select from the Tone and Pulse modes. The LCD will display:
HoldRemin d
<Of f >
. Press the center of the Data Dial to accept.
TECOM SOHO Department Preliminary Feature Operation for Casio 1&2-Line Cordless Phone
Issued by: Frank Yang-Hsin LIN Date: Mar. 31, 2000
Revision: 0.3 Page:23/73
11. FLASH Time Programming
You may program the FLASH time duration as your service need.
. Standby, press [PROGRAM]
. Rotate the Data Dial to select the FLASH Time programming mode. The LCD will display:
FlashTime
6 0 0 ms
1. Flash Time : Flash time programming mode
2. 0.6 ms. : Programmed FLASH time
. Press the center of the Data Dial to select this option
. Rotate the dial to select from the FLASH time: 600/375/275/100ms
FlashTime
<2 7 5 >ms
. Press the center of the Data Dial to accept.
Note: When the base unit changes its Flash Time, the other handsets are automatically changed to the same universal
Flash time setting.
12. Ringer Type Programming
You may select one of the four ringer types sound on your base. Default is the type 1.
. Standby, press [PROGRAM]
. Rotate the Data Dial to select the item to set the ring type
RingType
1
1. Ring Type : You are programming the ring type.
2. 1 : The ring type is 1.
. Press the center of the Data Dial to select this option
. Rotate the dial to select from 4 ring types
RingType
<3>
. Press the center of the Data Dial to accept.
13. Ringer Level Programming
You may select one of the three ringer level sound on your base. Default is the middle.
. Standby, press [PROGRAM] and rotate the Data Dial to select this item.
RingLevel
Mid
1. Ring Level : Ringer level.
2. Mid : The old programmed level
. Press the center of the Data Dial to select this option
. Rotate the dial to change the selection. For example, if we change to Hi level, the LCD will display:
RingLevel
<Hi>
TECOM SOHO Department Preliminary Feature Operation for Casio 1&2-Line Cordless Phone
Issued by: Frank Yang-Hsin LIN Date: Mar. 31, 2000
Revision: 0.3 Page:24/73
1. Ring Level : Ringer Level.
2. Hi : Ringer level is Hi
. Press the center of the Data Dial to accept.
14. Base Reset programming
You may RESET the handset and clear all the programmed data, all the parameters will back to the default values.
- System Security Code: Empty
- CO Ring Assign: Both 2 lines will ring
- Ring Type: Type 1
- Hold-Reminder Time: 30 seconds
- FLASH Time: 600ms
- Tone/Pulse Mode: Tone
- Caller ID Dialing Method: Smart Dialing
- Caller ID Area Code: Empty
- LIU (Line In Use): On
- Line Select: Off
- Line Privacy: Off
- First Line: L1
- Year/Date/Time: 00:00AM Jan. 01, 2000
- Handset Volume: Level 1
- Headset Volume: Level 2
- Speakerphone Volume: Level 3
- Ringer Volume: Middle level
. Standby, press [PROGRAM]
. Rotate the Data Dial to select this item.
Reset?
NoYes
--- "Reset ?" : Handset RESET prompt.
. Press Softkey [Yes] , and a confirmation signal to indicate the successful programming. The LCD will display:
Reset !
. After 15 seconds, the base will re-power on automatically.
TECOM SOHO Department Preliminary Feature Operation for Casio 1&2-Line Cordless Phone
Issued by: Frank Yang-Hsin LIN Date: Mar. 31, 2000
Revision: 0.3 Page:25/73
V. INSTALLATION ( MHS-5 ONLY )
1. Configuration
The system consists of a base unit and wireless handsets.
The base unit provides 4 voice (RF) channels for Intercom or outside calls.
2. System Security Code Programming
The S.S.C. (System Security Code) prevents your cordless system from being used by other cordless telephone users.
. Press and HOLD the [PAGE] key over 3seconds on the Base unit.
OR,
. Power-up the base unit, and be sure the S.S.C. has been programmed in the handset.
. Standby, and move the handset close to the base unit
. Press [PRG]
. Press [ s ]/[ t ] to select the SSC transmission programming mode.
. Press and HOLD the [#] key, and the LCD displays
MEM
S S CToBase
<icons>
1. MEM :Programming start prompt
2. SSC : S.S.Code programming mode prompt
3. To Base : Air link programming prompt
. Keep holding [#] until a confirmation beep is heard to indicated the S.S.C. is accepted correctly in base unit.
The LCD will display :
MEMOK!
S S CToBase
<icons>
1. MEM OK! : Programming end and OK prompt
2. SSC : S.S.Code programming mode prompt
3. To Base : Air link programming prompt
. After the about 15 seconds, if you still do not get the confirmation, then it means that the programming failed.
When you release the [*] key, the handset will show 'ERR' on LCD. You may try to program again.
The LCD will display:
MEMER R !
S S CToBase
<icons>
1. MEM ERR! : Programming end and fail prompt
2. SSC : S.S.Code programming mode prompt
3. To Base : Air link programming prompt
Once you want to change the security code, run the above all steps again.
TECOM SOHO Department Preliminary Feature Operation for Casio 1&2-Line Cordless Phone
Issued by: Frank Yang-Hsin LIN Date: Mar. 31, 2000
Revision: 0.3 Page:26/73
VI. BASIC OPERATION ( HANDSET UNIT ONLY )
1. Standby Mode
The handset will automatically be in the battery saver mode, when the handset in standby mode.
1.1 Handset Link with the "Idle" Base Unit
Ring:Low
ID:1 2
<icons>
1."Ring": Ringer volume that may be Low, Mid, Hi or DND.
2."ID": Identification Number of the handset.
3.<icons>: Icons for the status of CO lines, and battery.
1.2 Handset Link with the "Busy" Base Unit
Ring:Low
ID:1 2 Busy
<icons>
1."Ring": Ringer volume that may be Low, Mid, Hi or DND.
2."ID" : Identification Number of the handset.
3. Busy : The voice channels of the Base Unit are busy.
4. <icons>: Icons for the status of CO lines, and battery.
1.3 Handset Can Not Link with the Base Unit
Ring:Low
ID:1 2 NoSvc
<icons>
1."Ring": Ringer volume that may be Low, Mid, Hi or DND.
2."ID" : Identification Number of the handset.
3. NoSvc : Handset fails to link with the base unit.
4. <icons>: Icons for the status of CO lines, and battery.
Note: 1. In this case, the handset maybe have the wrong S.S.C., or if the local power is OFF at the Base Unit,
or the handset is out of the system service areas.
2. If trying to request a service from the 'Busy' base unit which all the paths are in use,
you will get a audible warning tone.
2. Making Outside Line Call
If trying to request a service from the 'busy' base unit which all the paths are in use,
you will get an audible warning tone and LCD will show as follows:
Ring:Low
ID:1 2 Busy
<icons>
1."Ring": Ringer volume that may be Low, Mid, Hi or DND.
TECOM SOHO Department Preliminary Feature Operation for Casio 1&2-Line Cordless Phone
Issued by: Frank Yang-Hsin LIN Date: Mar. 31, 2000
Revision: 0.3 Page:27/73
2."ID" : Identification Number of the handset.
3. Busy : The voice channels of the Base Unit are busy.
4. <icons>: Icons for the status of CO lines, and battery.
2.1 Making An Outgoing Call by Manual Dialing
. Standby
. Press an available [ Lx ], where x = 1/2. For example, press [L2]. The LCD displays:
L2m m :s s
<Icons>
1. L2 : The CO line number you are using.
1. mm:ss : Talk time, count by second
2. <icons> : Icons for the status of CO lines, and battery.
. Enter the telephone number, for example: "035775141, [PAUSE] "
L2m m :s s
035775141Pnn
<Icons>
1. 035775141Pnn : Dialed digits, n - cursor for next digit
2. L2 : The CO line number you are using.
3. mm:ss : Talk time, count by second
4. <icons> : Icons for the status of CO lines, and battery.
Then, enter "2581" and some leading digits will be shifted away. The LCD displays:
L2m m :s s
5 1 4 1 P2 5 8 1 nn
<Icons>
--- The symbol "" means that some leading digits are shifted away.
2.2 End An Outgoing Call
. On line, and the conversation is over, the LCD will display: (outgoing call)
L2m m :s s
5 1 4 1 P2 5 8 1 nn
<icons>
. Press [OFF] to release the call, or put the handset to the charger to release the call automatically.
Ring:Low
ID:1 2
<icons>
1."Ring": Ringer volume that may be Low, Mid, Hi or DND.
2."ID" : Identification Number of the handset.
3. <icons>: Icons for the status of CO lines, and battery.
3. Answering Call
You may press any one of the digit keys [1/2/3/4/5/6/7/8/9/0/*/#] to pick up the ringing call, and the answer priority is
Ringing Intercom Call, Transfer Calls, Hold Recall Calls, Ringing CO Line Calls.
But, you may override the priority, by press the [Lx] or [INT] directly.
. Handset in the standby mode when the handset rings,
. Press [ any one of the digit ] key, or you may press the ringing [ Lx ]
TECOM SOHO Department Preliminary Feature Operation for Casio 1&2-Line Cordless Phone
Issued by: Frank Yang-Hsin LIN Date: Mar. 31, 2000
Revision: 0.3 Page:28/73
to pick up the CO ringing line, the LCD will display
(For example, if you pick up Line 2)
L2m m :s s
<icons>
. If you want to release the call, press [OFF]. The LCD will return to the idle status.:
Ring:Low
ID:1 2
<icons>
4. Last Number Redial (LNR)
4.1 Making An Outgoing Call by LNR
.Standby :
. Press an available [ Lx ], where x = 1/2.
For example, if you press [L2], the LCD will display:
L2m m :s s
<icons>
. Press [RDL] to redial the last dialed number. The LCD will display:
L2m m :s s
035775141n
<icons>
1. 035775141 : Last dialed digits, n - cursor for next digit
2. L2 : The CO line number you are using.
3. mm:ss : Talk time, count by second
4. <icons> : Icons for the status of CO lines, and battery.
4.2 Making An Outgoing Call by LNR with Pre-Dialing
. Standby
. Press [RDL] and the LCD displays:
LN R
035775141
<icons>
1. LNR : LNR review mode prompt.
2. 035775141 : Last Number Redial digits.
3. <icons>: Icons for the status of CO lines, and battery.
After Last dialing number reviewed, and you want to dial the number
. Press an available [ Lx ], where x = 1/2, handset will automatically pick up an idle CO line and dial out the number
as display on the LCD :
L1m m :s s
035775141
<icons>
1. L1 : The CO line number you are using.
2. mm:ss : Talk time, count by second
3. 035775141 : Last Number Redial digits.
4. <icons>: Icons for the status of CO lines, and battery.
TECOM SOHO Department Preliminary Feature Operation for Casio 1&2-Line Cordless Phone
Issued by: Frank Yang-Hsin LIN Date: Mar. 31, 2000
Revision: 0.3 Page:29/73
5. Placing an Outside Call on Hold
5.1 Placing an Outside Call on Hold
. On line
L1m m :s s
035775141nn
<icons>
or
L1m m :s s
<icons>
(incoming call)
1. L1 : The CO line number you are using.
2. mm:ss : Talk time, count by second
3.035775141 : Dialed digits, n - cursor for next digit.
4. <icons>: Icons for the status of CO lines, and battery.
. Press [HLD], and the LCD will display:
TR N FTo
ID:1 2
<icons>
1. TRNF To : Transfer call prompt
2. (blank) : Waiting the station number
3."ID" : Identification Number of the handset.
4. <icons>: Icons for the status of CO lines, and battery.
. After the 10 seconds time-out, the display will revert to the final idle display if nothing is dialed.
Ring:Low
ID:1 2
<icons>
1."Ring": Ringer volume that may be Low, Mid, Hi or DND.
2."ID" : Identification Number of the handset.
3. <icons>: Icons for the status of CO lines, and battery.
5.2 Hold Reminder
. If the Hold Reminder Time is not disabled, when you held a CO line over a programmed period of time,
a triple beep will be heard to remind you that the line is still held. The related icons will be changed.
5.3 Hold Recall Ring
. If the held CO line is not picked up for 3 minutes, all handset units will start to ring (i.e., Recall Ring)
to remind all of the users. The related icons will be changed.
. Press [ any one of the digit ] key, or you may press the ringing [ Lx ] to pick up the CO hold recall ringing line
6. Retrieve a Line on Hold
. A CO line being held
. Press the [ Lx ] held line key, where x = 1/2, the LCD will display
L2m m :s s
TECOM SOHO Department Preliminary Feature Operation for Casio 1&2-Line Cordless Phone
Issued by: Frank Yang-Hsin LIN Date: Mar. 31, 2000
Revision: 0.3 Page:30/73
<icons>
1. L2 : The CO line number you are using.
2. mm:ss : Talk time, count by second
3. <icons> : Icons for the status of CO lines, and battery.
Note: In this wireless system, the held CO line will be released when the held line isn’t picked up within 5 minutes.
7. Making an Intercom Call
. Standby
. Press the [ INT ] key. The LCD will display
ICMTo
ID:1 2
<icons>
1. ICM To : Intercom call prompt, and wait for user to enter the called party ID number
2."ID" : Identification Number of the handset.
3. <icons>: Icons for the status of CO lines, and battery.
. Dial desired intercom number, say station 12 calls station 15, the LCD will display
ICMTo1 5
ID:1 2
<icons>
1. ICM To 15: Intercom call station 15
2."ID" : Identification Number of the handset.
3. <icons>: Icons for the status of CO lines, and battery.
7.1 If the Called Party is Idle and Access-able
Note: Access-able means the called party is idle and linked with the base unit.
The calling party station 12 will display :
ICMTo1 5
ID:1 2 Ring
<icons>
1. ICM To 15: Intercom call station 15
2."ID" : Identification Number of the handset.
3. Ring : Intercom ringing prompt
4. <icons>: Icons for the status of CO lines, and battery.
The called party station 15 will get an intercom ring and display :
ICMBy 1 2
ID:1 5 Ring
<icons>
1. ICM By 12: Intercom call from station 12
2."ID" : Identification Number of the handset.
3. Ring : Intercom ringing prompt
4. <icons>: Icons for the status of CO lines, and battery.
7.2 If the Called Party is Busy and Access-able
The calling party station 12 will display :
TECOM SOHO Department Preliminary Feature Operation for Casio 1&2-Line Cordless Phone
Issued by: Frank Yang-Hsin LIN Date: Mar. 31, 2000
Revision: 0.3 Page:31/73
ICMTo1 5
ID:1 2 Busy
<icons>
1. ICM To 15: Intercom call station 15
2."ID" : Identification Number of the handset.
3. Busy : Called party busy prompt
4. <icons>: Icons for the status of CO lines, and battery.
Note: The called party station 15 will remain UN-changed. and WON'T hear a call waiting triple beep for intercom call.
7.3 If the Called Party is in DND (Ringer Off) Mode and Access-able
The calling party station 12 will display :
ICMTo1 5
ID:1 2 D N D
<icons>
1. ICM To 15: Intercom call station 15
2."ID" : Identification Number of the handset.
3. DND : Called party DND prompt
4. <icons>: Icons for the status of CO lines, and battery.
The called party station 15 will remain UN-changed.
7.4 If the Called Party is UN-Accessible by Intercom Path Busy
The calling party station 12 will display :
ICMTo1 5
ID:1 2 Busy
<icons>
1. ICM To 15: Intercom call station 15.
2."ID" : Identification Number of the handset.
3. Busy : Called party busy prompt.
4. <icons>: Icons for the status of CO lines, and battery.
The called party station 15 will remain UN-changed.
7.5 If the Called Party is an Illegal Number
Note: Illegal means the called party is non-existing or loses the link with this system.
The calling party station 12 will display :
ICMTo1 5
ID:1 2 NoFn d
<icons>
1. ICM To 15: Intercom call station 15.
2."ID" : Identification Number of the handset.
3. NoFnd : UN-reachable called party prompt
4. <icons>: Icons for the status of CO lines, and battery.
7.6 Page All Handsets
When the user can’t find the handset unit, the user can press the [PAGE] key on the base unit.
All handsets will ring 15 seconds to indicate the handset where it is.
TECOM SOHO Department Preliminary Feature Operation for Casio 1&2-Line Cordless Phone
Issued by: Frank Yang-Hsin LIN Date: Mar. 31, 2000
Revision: 0.3 Page:32/73
8. Answering an Incoming Intercom Call
. Handset is ringing.
ICMBy 1 2
ID:1 5 Ring
<icons>
1. ICM By 12: Intercom call from station 12
2."ID" : Identification Number of the handset.
3. Ring : Intercom ringing prompt
4. <icons>: Icons for the status of CO lines, and battery.
. Press [ any one of the digit ] key, or you may press the [ INT ] to pick up the ringing intercom call,
the LCD will display:
ICMBy 1 2
ID:1 5 Talk
<icons>
1. ICM By 12: Intercom call from station 12
2."ID" : Identification Number of the handset.
3. Talk : Intercom talk mode prompt
4. <icons>: Icons for the status of CO lines, and battery.
. And the calling party station 12 shows
ICMTo1 5
ID:1 2 Talk
<icons>
1. ICM To 15 Intercom called party ID=15
2."ID" : Identification Number of the handset.
3. Talk : Intercom talk mode prompt
4. <icons>: Icons for the status of CO lines, and battery.
When conversation is over. Press [OFF] to release the call
9. Conference Call
You may make a three-way conference call.
9.1 Two CO Lines Conference Call
. On CO line
L2m m :s s
035775141nn
<icons>
1. 035775141nn : Dialed digits, n - cursor for next digit
2. L2 : The CO line number you are using.
3. mm:ss : Talk time, count by second
4. <icons> : Icons for the status of CO lines, and battery.
. Press [HLD] and make the second CO line call
L1m m :s s
035765432nn
<icons>
TECOM SOHO Department Preliminary Feature Operation for Casio 1&2-Line Cordless Phone
Issued by: Frank Yang-Hsin LIN Date: Mar. 31, 2000
Revision: 0.3 Page:33/73
1. 035765432nn : Dialed digits, n - cursor for next digit
2. L1 : Another CO line number you are using.
3. mm:ss : Talk time, count by second
4. <icons> : Icons for the status of CO lines, and battery.
. Press [FCN] and press [CONF] (same as [*] ) to bridge the two CO lines
L1,L2m m :s s
035765432nn
<icons>
1. 035765432nn : Dialed digits, n - cursor for next digit
2. L1,L2 : You are using both CO lines.
3. mm:ss : Talk time, count by second
10. Transferring CO Call
10.1 Transferring a Call
. On line
L1m m :s s
035775141nn
<icons>
or
L1m m :s s
<icons>
(incoming call)
1. L1 : The CO line number you are using.
2. mm:ss : Talk time, count by second
3.035775141 : Dialed digits, n - cursor for next digit.
4. <icons>: Icons for the status of CO lines, and battery.
. Press [HLD], and the LCD will display:
TR N FTo
ID:1 2
<icons>
1. TRNF To : Transfer call prompt
2. (blank) : Waiting the station number
3."ID" : Identification Number of the handset.
. After the 10 seconds time-out, the display will revert to the final idle display if nothing is dialed. If you enter the transfer
station number in time, say station 12 transfer a call to station 15.
TR N FTo1 5
ID:1 2
<icons>
1. TRNF To : Transfer call prompt
2. 15 : The transfer station number
3."ID" : Identification Number of the handset.
4. <icons>: Icons for the status of CO lines, and battery.
. A transfer ring will be heard at station 15. The icon below the LCD will indicate the transferred line.
Note: You will hear a call waiting triple beep when you are on the other line and receive a transfer ring.
10.2 Transferring Recall :
TECOM SOHO Department Preliminary Feature Operation for Casio 1&2-Line Cordless Phone
Issued by: Frank Yang-Hsin LIN Date: Mar. 31, 2000
Revision: 0.3 Page:34/73
. If the transferred call didn't answer over 3 minute, the system will recall to all the handsets to remind there is
a line has been unanswered and in holding state for too long. The icon below the LCD will indicate the transferred line.
. Press [ any one of the digit ] key, or you may press the recalling [ Lx ] to pick up the CO ringing line.
The LCD will display:
L1m m :s s
<icons>
1. L1 : The CO line number you are using.
2. mm:ss : Talk time, count by second
3. <icons>: Icons for the status of CO lines, and battery.
11. FLASH Function
You may press the FLASH function key instead of pressing the hook switch to activate services such as
call waiting, 3-way calling, etc.
. On line
L1m m :s s
035775141n
<icons>
1. L1 : The CO line number you are using.
2. 035775141n : Dialed digits, n - cursor for next digit
3. mm:ss : Talk time, count by second
4. <icons>: Icons for the status of CO lines, and battery.
. Press [FLS] to make a hook switch to the line. The LCD will display:
L1m m :s s
<icons>
1. L1 : The CO line number you are using.
2. (Blank) : Blank the digit field, wait the new digits
3. mm:ss : Talk time, count by second
4. <icons>: Icons for the status of CO lines, and battery.
. Enter new phone number, or service code
L1m m :s s
035765432n
<icons>
1. L1 : The CO line number you are using.
2. 035765432n : Dialed digits, n - cursor for next digit
3. mm:ss : Talk time, count by second
4. <icons>: Icons for the status of CO lines, and battery.
12. PAUSE Function
You may use the PAUSE function to make a dialing delay between digits during a call, or program
the PAUSE in the speed dialing numbers for certain banking and long distance service.
Each time you press PAUSE key, about a 2 seconds delay occurs in the dialing sequence.
You may press more than one PAUSE to get a longer delay for you need.
. On line, and dialed some digits
L1m m :s s
775141n
TECOM SOHO Department Preliminary Feature Operation for Casio 1&2-Line Cordless Phone
Issued by: Frank Yang-Hsin LIN Date: Mar. 31, 2000
Revision: 0.3 Page:35/73
<icons>
1. L1 : The CO line number you are using.
2. 775141n : Dialed digits, n - cursor for next digit
3. mm:ss : Talk time, count by second
. Press [FCN]. The LCD will display
L1m m :s s
775141n
<icons>
1. L1 : The CO line number you are using.
2. 775141n : Dialed digits, n - cursor for next digit
3. mm:ss : Talk time, count by second
4. <icons>: Icons for the status of CO lines, and battery.
5. "" : FCN key prompt
. Press [PAUSE] ( same as [7] ) to insert time delay between digits. The LCD will display:
L1m m :s s
775141Pn
<icons>
1. L1 : The CO line number you are using.
2. 775141Pn:Dialed digits, n - cursor for next digit
3. "P" : Pause key
4. mm:ss : Talk time, count by second
5. <icons>: Icons for the status of CO lines, and battery.
. Enter the rest digits. The LCD will display:
L1m m :s s
775141P2 5 n
<icons>
1. L1 : The CO line number you are using.
2. 775141Pn25: Dialed digits, n - cursor for next digit
3. "P" : Pause key
4. mm:ss : Talk time, count by second
13. TONE Function
If you have pulse service and wish to access a computer or calling service that use tone.
On line, and dialed digits in pulse. The LCD will display
L1m m :s s
775141n
<icons>
1. L1 : The CO line number you are using.
2. 775141n : Dialed digits, n - cursor for next digit
3. mm:ss : Talk time, count by second
4. <icons>: Icons for the status of CO lines, and battery.
. Press [TONE] (same as [*]) to change the dialing mode to TONE mode.
And then enter the rest digits will be dialed as TONE signal.
L1m m :s s
775141*25n
<icons>
1. L1 : The CO line number you are using.
2. 775141*25n : Dialed digits, n - cursor for next digit
TECOM SOHO Department Preliminary Feature Operation for Casio 1&2-Line Cordless Phone
Issued by: Frank Yang-Hsin LIN Date: Mar. 31, 2000
Revision: 0.3 Page:36/73
3. mm:ss : Talk time, count by second
. When you release the line, the dial mode will change to the pulse mode again automatically.
14. DND Function
The Do Not Disturb feature is useful to temporarily prevent interruptions during meetings or telephone conversations.
When you activate the DND feature, you will not hear incoming call rings.
14.1 Setting DND Mode
. Standby.
. Press [FCN]. and then press [DND] (same as [4]) to activate DND
Ring:D N D
ID:1 2
<icons>
1."Ring": Ringer volume that may be Low, Mid, Hi or DND.
2."ID" : Identification Number of the handset.
14.2 Canceling the DND Mode.
. Press [FCN] and then press [DND] ( same as [4] ) again to disable DND mode.
Ring:Low
ID:1 2
<icons>
1."Ring": Ringer volume that may be Low, Mid, Hi or DND.
2."ID" : Identification Number of the handset.
3. <icons>: Icons for the status of CO lines, and battery.
15. MUTE Function
The Mute feature turns off the microphone so the person at the other phone cannot hear you.
The Mute feature automatically cancels when you hang up, change lines.
. On line
. Press and HOLD the [MUTE] key for privacy, the LCD will display
Mutem m :s s
775141*25n
<icons>
1. Mute : Mute function activate
2. 775141*25n : Dialed digits, n - cursor for next digit
3. <icons>: Icons for the status of CO lines, and battery.
. To resume your conversation, release the [MUTE] key.
L1m m :s s
775141*25n
<icons>
1. L1 : The CO line number you are using.
2. 775141*25n : Dialed digits, n - cursor for next digit
3. mm:ss : Talk time, count by second
4. <icons>: Icons for the status of CO lines, and battery.
TECOM SOHO Department Preliminary Feature Operation for Casio 1&2-Line Cordless Phone
Issued by: Frank Yang-Hsin LIN Date: Mar. 31, 2000
Revision: 0.3 Page:37/73
16. Out Of Range Warning
The LCD will display the “Out Of Range” and a double beep warning when the handset is too far from the base unit.
You have to move closer to the base unit for clear conversation.
. On line
L1m m :s s
775141*25n
<icons>
1. L1 : The CO line number you are using.
2. 775141*25n : Dialed digits, n - cursor for next digit
3. mm:ss : Talk time, count by second
. Walking out from base unit service area
OutOfRange
775141*25
<icons>
1. Out Of Range --- Out Of Range warning prompt
16.1 Handset Walks Back to the Base Unit
If the user walks back to the base unit after the he/she receive the Out Of Range warning, the
handset will stop the O.O.R. warning.
L1m m :s s
775141*25n
<icons>
1. L1 : The CO line number you are using.
2. 775141*25n : Dialed digits, n - cursor for next digit
3. mm:ss : Talk time, count by second
16.2 Handset Keeps Walking Out From the Base Unit
If the user keeps walking away from the base unit service area, once the system lose the signal for a period of time,
say 10 seconds, then the base will hold the call.
. Either the handset links with the base unit,
L1m m :s s
<icons>
1. L1 : The CO line number you are using.
2. (Blank) : Blank the digit field, wait the new digits
3. mm:ss : Talk time, count by second
4. <icons>: Icons for the status of CO lines, and battery.
. Or the handset loses the link with the system.
Ring:Low
ID:1 2 NoSvc
<icons>
1."Ring": Ringer volume that may be Low, Mid, Hi or DND.
2."ID" : Identification Number of the handset.
3. NoSvc : Handset fails to link with any base unit
4. <icons>: Icons for the status of CO lines, and battery.

TECOM SOHO Department Preliminary Feature Operation for Casio 1&2-Line Cordless Phone
Issued by: Frank Yang-Hsin LIN Date: Mar. 31, 2000
Revision: 0.3 Page:38/73
17. Battery Low Warning
The warning indicator appears when the battery of the handset becomes weak. If you are on a call when battery low, you will
hear the double beep, end the conversation as soon as possible. Otherwise, you may lose the call.
The icon will warning you about the battery low status.
18. Complete with Headset
The Headset unit frees your hands so you can keep working.
Plug the headset into the headset jack. The voice will be switched to the headset unit automatically.
Plug out the headset when you want to talk by handset. The voice will be switched to the handset automatically.
19. Volume Control
There are 5 receiver volume levels (Level 1,2,3,4,5) on the cordless handset.
The default level for handset volume is level 1.
The default level for headset volume is level 2.
. Talk mode
. Press [s]/[t] to select a desired volume level.
A warning beep will be heard when the volume is set at the maximum (Level 5) and minimum level (Level 1)
TECOM SOHO Department Preliminary Feature Operation for Casio 1&2-Line Cordless Phone
Issued by: Frank Yang-Hsin LIN Date: Mar. 31, 2000
Revision: 0.3 Page:39/73
VII. BASIC OPERATION (MHS-2 BASE UNIT ONLY)
1. Standby Mode
Normally, the base unit will automatically be in the standby mode. The user can use the base unit to make a call.
Or programming the database, or accessing the directory,… etc.
Sometimes, all the 4 RF channels are occupied by the handset, the base unit will display “System Busy” for the users.
SystemBusy
2. Making Outside Line Call
If trying to request a service from the 'busy' base unit which all the paths are in use,
you will get an audible warning tone and LCD will show as follows:
SystemBusy
2.1 Making An Outgoing Call
. Standby,
. Press an available [ Lx ], where x = 1/2. For example, press [L2].
OR
. Press the [Headset] or [SPEAKER].
OR
. Lift the handset to pick up the CO line. The LCD displays:
Speake r m m :s s
OR
Headsetm m :s s
OR
Han d setm m :s s
. Enter the telephone number, for example: "035775141 "
035775141
Speake r m m :s s
3. Answering Call
You may press [SPEAKER] or [HEADSET] or lift the handset to pick up the ringing call, and the answer priority is
Ringing Intercom Call, Transfer Calls, Hold Recall Calls, Ringing CO Line Calls. (In this case, the AUTO ANSWER is ON)
But, you may override the priority, by press the [Lx] or [INT] directly.
The LCD displays:
Speake r m m :s s
OR
TECOM SOHO Department Preliminary Feature Operation for Casio 1&2-Line Cordless Phone
Issued by: Frank Yang-Hsin LIN Date: Mar. 31, 2000
Revision: 0.3 Page:40/73
Headsetm m :s s
OR
Han d setm m :s s
4. End An Outgoing Call
. On line, and the conversation is over,
. Just hang up the handset or press [SPEAKER] or [HEADSET] to release the call.
5. Last Number Redial (LNR)
5.1 Making An Outgoing Call by LNR
. Pick up a CO line
. Press [REDIAL] to redial the last dialed number. The LCD will display:
035775141
Speake r m m :s s
5.2 Making An Outgoing Call by LNR with Pre-Dialing
. Press [REDIAL] and the LCD displays:
LN R
035775141
After Last dialing number reviewed, and you want to dial the number
. Press an available [ Lx ], where x = 1/2, handset will automatically pick up an idle CO line and dial out the number
as display on the LCD :
035775141
Speake r m m :s s
6. Placing an Outside Call on Hold
6.1 Placing an Outside Call on Hold
. On line
035775141
Speake r m m :s s
. Press [HOLD], and the LCD will display:
TR N FTo
1. TRNF To : Transfer call prompt
2. (blank) : Waiting the station number
. After the 10 seconds time-out, the display will revert to the final idle display if nothing is dialed.
TECOM SOHO Department Preliminary Feature Operation for Casio 1&2-Line Cordless Phone
Issued by: Frank Yang-Hsin LIN Date: Mar. 31, 2000
Revision: 0.3 Page:41/73
6.2 Hold Reminder
. If the Hold Reminder Time is not disabled, when you held a CO line over a programmed period of time,
a triple beep will be heard to remind you that the line is still held. The related icons will be changed.
6.3 Hold Recall Ring
. If the held CO line is not picked up for 3 minutes, all handset units will start to ring (i.e., Recall Ring)
to remind all of the users. The related icons will be changed.
. Press the ringing [ Lx ] to pick up the CO hold recall ringing line
7. Retrieve a Line on Hold
. A CO line being held
. Press the [ Lx ] held line key, where x = 1/2, the LCD will display
Speake r m m :s s
Note: In this wireless system, the held CO line will be released when the held line isn’t picked up within 5 minutes.
8. Page All Handsets
. Press the [PAGE] key. The LCD will display
PageAl l ICM
. Press the Softkey [PageAll] to ring all handsets. All handset will ring 15 seconds.
9. Making an Intercom Call
. Press the [PAGE] key. The LCD will display
PageAl l ICM
. Press the Softkey [ICM], the LCD will display
ICMTo
1. ICM To : Intercom call prompt, and wait for user to enter the called party ID number
. Dial desired intercom number, say station 12 calls station 15, the LCD will display
ICMTo1 5
9.1 If the Called Party is Idle and Access-able
Note: Access-able means the called party is idle and linked with the base unit.
The calling party station 12 will display :
TECOM SOHO Department Preliminary Feature Operation for Casio 1&2-Line Cordless Phone
Issued by: Frank Yang-Hsin LIN Date: Mar. 31, 2000
Revision: 0.3 Page:42/73
ICMTo1 5 Ring
1. ICM To 15: Intercom call station 15
2. Ring : Intercom ringing prompt
The called party station 15 will get an intercom ring and display :
ICMBy 1 2 Ring
1. ICM By 12: Intercom call from station 12
2. Ring : Intercom ringing prompt
9.2 If the Called Party is Busy and Access-able
The calling party station 12 will display :
ICMTo1 5 Busy
1. ICM To 15: Intercom call station 15
2. Busy : Called party busy prompt
Note: The called party station 15 will remain UN-changed. and WON'T hear a call waiting triple beep for intercom call.
9.3 If the Called Party is in DND (Ringer Off) Mode and Access-able
The calling party station 12 will display :
ICMTo1 5 DND
1. ICM To 15: Intercom call station 15
2. DND : Called party DND prompt
The called party station 15 will remain UN-changed.
9.4 If the Called Party is UN-Accessible by Intercom Path Busy
The calling party station 12 will display :
ICMTo1 5 Busy
1. ICM To 15: Intercom call station 15.
2. Busy : Called party busy prompt.
The called party station 15 will remain UN-changed.
9.5 If the Called Party is an Illegal Number
Note: Illegal means the called party is non-existing or loses the link with this system.
The calling party station 12 will display :
ICMTo1 5 NoFn d
1. ICM To 15: Intercom call station 15.
TECOM SOHO Department Preliminary Feature Operation for Casio 1&2-Line Cordless Phone
Issued by: Frank Yang-Hsin LIN Date: Mar. 31, 2000
Revision: 0.3 Page:43/73
2. NoFnd : UN-reachable called party prompt
10. Answering an Incoming Intercom Call
. Handset is ringing.
ICMBy 1 2 Ring
1. ICM By 12: Intercom call from station 12
2. Ring : Intercom ringing prompt
. Press [PAGE/INTERCOM] to pick up the ringing intercom call,
the LCD will display:
ICMBy 1 2 Talk
1. ICM By 12: Intercom call from station 12
2. Talk : Intercom talk mode prompt
. And the calling party station 12 shows
ICMTo1 5 Talk
1. ICM To 15 Intercom called party ID=15
2. Talk : Intercom talk mode prompt
Note: The row 2 of the LCD will display the talk mode, for example: Handset, Headset or Speakerphone.
The LCD will show:
ICMTo1 5 Talk
Speake r
11. Conference Call
You may make a three-way conference call.
11.1 Two CO Lines Conference Call
. On CO line
Speake r m m :s s
. Press [HLD] and make the second CO line call
Speake r m m :s s
. Press [CONF] to bridge the two CO lines
Speake r m m :s s
. Both two CO line LEDs will flash the same cadence with the “I-USE” indication.
TECOM SOHO Department Preliminary Feature Operation for Casio 1&2-Line Cordless Phone
Issued by: Frank Yang-Hsin LIN Date: Mar. 31, 2000
Revision: 0.3 Page:44/73
12. Transferring CO Call
12.1 Transferring a Call
. On line
035775142
Speake r m m :s s
. Press [HOLD], and the LCD will display:
TR N FTo
1. TRNF To : Transfer call prompt
2. (blank) : Waiting the station number
3."ID" : Identification Number of the handset.
. After the 10 seconds time-out, the display will revert to the final idle display if nothing is dialed. If you enter the transfer
station number in time, say station 12 transfer a call to station 15.
TR N FTo1 5
1. TRNF To : Transfer call prompt
2. 15 : The transfer station number
3."ID" : Identification Number of the handset.
. A transfer ring will be heard at station 15. The icon below the LCD will indicate the transferred line.
Note: You will hear a call waiting triple beep when you are on the other line and receive a transfer ring.
12.2 Transferring Recall :
. If the transferred call didn't answer over 3 minute, the system will recall to all the handsets to remind there is
a line has been unanswered and in holding state for too long. The icon below the LCD will indicate the transferred line.
. Press [ Lx ] to pick up the CO ringing line. The LCD will display:
Speake r m m :s s
13. FLASH Function
You may press the FLASH function key instead of pressing the hook switch to activate services such as
call waiting, 3-way calling, etc.
. On line
035775141
Speake r m m :s s
. Press [FLS] to make a hook switch to the line. The LCD will display:
Speake r m m :s s
. Enter new phone number, or service code
TECOM SOHO Department Preliminary Feature Operation for Casio 1&2-Line Cordless Phone
Issued by: Frank Yang-Hsin LIN Date: Mar. 31, 2000
Revision: 0.3 Page:45/73
035765432
Speake r :1m m :s s
14. PAUSE Function
You may use the PAUSE function to make a dialing delay between digits during programming mode.
The PAUSE in the speed dialing numbers for certain banking and long distance service.
Each time you press PAUSE key, about a 2 seconds delay occurs in the dialing sequence.
You may press more than one PAUSE to get a longer delay for you need.
15. TONE Function
If you have pulse service and wish to access a computer or calling service that use tone.
On line, and dialed digits in pulse.
. Press [TONE] (same as [*]) to change the dialing mode to TONE mode.
And then enter the rest digits will be dialed as TONE signal.
775141*25
Speake r m m :s s
. When you release the line, the dial mode will change to the pulse mode again automatically.
16. MUTE Function
The Mute feature turns off the microphone so the person at the other phone cannot hear you.
The Mute feature automatically cancels when you hang up, change lines.
. On line
. Press [MUTE] key for privacy, the LCD will display
775141*25n
Mutem m :s s
1. Mute : Mute function activate
2. 775141*25n : Dialed digits, n - cursor for next digit
. To resume your conversation, press the [MUTE] key again.
17. Volume Control
There are 7 receiver volume levels (Level 1,2,3,4,5,6,7) on the speakerphone mode. The default level is middle (Level 3).
There are 3 receiver volume levels (Level 1,2,3,) on the handset/headset mode. The default level is middle (Level 1).
. Talk mode, press [s]/[t] to select a desired volume level.
A warning beep will be heard when the volume is set at the maximum and minimum level.
Normally, the LCD will display:
035765432
Speake r MINm m :s s
Or
035765432
Speake r 2m m :s s
Or
035765432
Speake r MAXm m :s s
TECOM SOHO Department Preliminary Feature Operation for Casio 1&2-Line Cordless Phone
Issued by: Frank Yang-Hsin LIN Date: Mar. 31, 2000
Revision: 0.3 Page:46/73
VIII. DIRECTORY OPERATION ( HANDSET UNIT ONLY )
The Directory function stores 80 names and phone numbers.
Name: maximum 16 characters.
Number: maximum 30 digits.
1. Storing the Information into Directory
. Press [DIR]. The LCD displays
Dir e c tory
<icons>
. If the directory is empty, it will display
Dir e c tory
(Empty)
<icons>
. If the directory is full, it will display
Dir e c tory
(Ful l )
<icons>
. Press [PRG] to start to enter the name
(Name?)
<icons>
. Use the dial pad to enter the phone name which you want to save. For example: John Smith
Joh n Smith
(Name?)
<icons>
. Press [PRG] to save the name and then to enter the number
(Numbe r ?)
<icons>
. Use the dial pad to enter the phone number which you want to save. For example: 5775141
5775141
(Numbe r ?)
<icons>
. Press [PRG] again to store the name and number into directory, a confirmation beep will be heard.
The LCD will display:
Dir e c tory
OK!
<icons>
1. Directory OK! : Directory programming OK
. User can press the [UP/DOWN] key for the Backward/Forward the cursor.
TECOM SOHO Department Preliminary Feature Operation for Casio 1&2-Line Cordless Phone
Issued by: Frank Yang-Hsin LIN Date: Mar. 31, 2000
Revision: 0.3 Page:47/73
. User can use the [FNC]+[DEL] to delete one character or one digit.
. Repeatedly press the dial pad key that letter or symbols, until the display shows the letter or symbol that
you want to save.
1 for , - ' & . ( ) 1 2 for A, B, C, a, b, c, 2 3 for D, E, F, d, e, f, 3
4 for G, H, I, g, h, i, 4 5 for J, K, L, j, k, l, 5 6 for M, N, O, m, n, o, 6
7 for P, Q, R, S, p, q, r, s, 7 8 for T, U, V, t, u, v, 8 9 for W, X, Y, Z, w, x, y, z, 9
* for * 0 for 0, “SPACE” # for #
2. Reviewing the Information from Directory
. Press [DIR]. The LCD displays
Dir e c tory
<icons>
. Press digit key to find out the leading-letter what you want to find. For instance: “John Smith”
J
(#:Sear c h)
<icons>
. Press the [#] to search the “John Smith” The LCD will display
Joh n Smith
5775141
<icons>
. If no any entry is for leading-letter “J”, the LCD will display the nearest entry
TonySmith
5771234
<icons>
. Or, Directly press [s]/[t] to find the item to review.
Joh n Smith
5775141
<icons>
3. Dialing Information from Directory
. Press [DIR].
. Press digit key to find out the leading-letter what you want to find. For instance: “John Smith”
J
(#:Sear c h)
<icons>
. Press the [#] to search the “John Smith” The LCD will display
Joh n Smith
5775141
<icons>
. Or, Directly press [s]/[t] to find the item to review.
Joh n Smith
5775141
TECOM SOHO Department Preliminary Feature Operation for Casio 1&2-Line Cordless Phone
Issued by: Frank Yang-Hsin LIN Date: Mar. 31, 2000
Revision: 0.3 Page:48/73
<icons>
. Press an available [ Lx ], where x = 1/2, handset will automatically pick up an idle CO line and dial out the number
L1m m :s s
775141*25n
<icons>
1. L1 : The CO line number you are using.
2. 775141*25n : Dialed digits, n - cursor for next digit
3. mm:ss : Talk time, count by second
4. <icons>: Icons for the status of CO lines, and battery.
4. Editing Information from Directory
First, find out the directory message which you want to modify.
. Press [DIR]
. Press digit key to find out the leading-letter what you want to find. For instance: “John Smith”
. Or, Directly press [s]/[t] to find the item to edit.
Joh n Smith
5775141
<icons>
. Press [PRG] to start to edit the name
. Use the [UP/DOWN] to backward/forward the cursor, and
. Use the dial pad to enter the new phone name which you want to save. For example: Tony Smith
TonySmith
(Name?)
<icons>
. Press [PRG] to save the name and then to edit the number
. Use the [UP/DOWN] to backward/forward the cursor, and
. Use the dial pad to enter the new phone number which you want to save. For example: 5775342
5775342
(Numbe r ?)
<icons>
. Press [PRG] again to store the name and number into directory, a confirmation beep will be heard.
The LCD will display:
Dir e c tory
OK!
<icOns>
5. Removing All Information From Directory
. Press [DIR]. The LCD displays
Dir e c tory
<icons>
. Press [DEL] ([FCN] + [1]) to delete all the directory
Dir e c tory
DeleteAl l ?
<icons>
. Press [PRG] to confirm and delete all directory messages
TECOM SOHO Department Preliminary Feature Operation for Casio 1&2-Line Cordless Phone
Issued by: Frank Yang-Hsin LIN Date: Mar. 31, 2000
Revision: 0.3 Page:49/73
Dir e c tory
(Empty)
<icons>
6. Removing one Information From Directory
. Press [DIR]. The LCD displays
Dir e c tory
<icons>
. Press digit key to find out the leading-letter what you want to find. For instance: “John Smith”
J
(#:Sear c h)
<icons>
. Press the [#] to search the “John Smith” The LCD will display
Joh n Smith
5775141
<icons>
. Or, Directly press [s]/[t] to find the item to review.
Joh n Smith
5775141
<icons>
. Press [DEL] ([FCN] + [1]) to delete this item
Joh n Smith
Delete?
<icons>
. Press [PRG] to confirm and delete this message
1Item
Deleted
<icons>
TECOM SOHO Department Preliminary Feature Operation for Casio 1&2-Line Cordless Phone
Issued by: Frank Yang-Hsin LIN Date: Mar. 31, 2000
Revision: 0.3 Page:50/73
IX. DIRECTORY OPERATION ( MHS-2 BASE UNIT ONLY )
The Directory function stores 80 names and phone numbers.
Name: maximum 16 characters.
Number: maximum 30 digits.
1. Storing the Information into Directory
. Press [DIR]. The LCD displays
Dir e c tory
. If the directory is empty, it will display
Dir e c tory
(Empty)
. If the directory is full, it will display
Dir e c tory
(Ful l )
. Press [PROGRAM] to start to enter the name
(Name?)
. Use the dial pad to enter the phone name which you want to save.
OR
. Turn the [data Dial] to advance the character through the alphabet, and [<], [>] to move the cursor.
Joh n Smith
(Name?)
. Press [PROGRAM] to save the name and then to enter the number
(Numbe r ?)
. Use the dial pad to enter the phone number which you want to save. For example: 5775141
5775141
(Numbe r ?)
. Press [PROGRAM] again to store the name and number into directory, a confirmation beep will be heard.
The LCD will display:
Dir e c tory
OK!
1. Directory OK! : Directory programming OK
. User can use the [DELETE] to delete one character or one digit.
2. Reviewing the Information from Directory
. Press [DIR]. The LCD displays
TECOM SOHO Department Preliminary Feature Operation for Casio 1&2-Line Cordless Phone
Issued by: Frank Yang-Hsin LIN Date: Mar. 31, 2000
Revision: 0.3 Page:51/73
Dir e c tory
. Press digit key to find out the leading-letter what you want to find. For instance: “John Smith”
JSeac c h
. Press the Softkey [Search] to search the “John Smith” The LCD will display
Joh n Smith
5775141
OR
. Rotate the [Data Dial] to search the directory information.
Joh n Smith
5775141
. If no any entry is for leading-letter “J”, the LCD will display the nearest entry
Nei l Smith
5721155
. Rotate the [Data Dial] to find the other item to review.
TonySmith
5775141251
3. Dialing Information from Directory
. Press [DIR]. The LCD displays
Dir e c tory
. Press digit key to find out the leading-letter what you want to find. For instance: “John Smith”
JSeac c h
. Press the Softkey [Search] to search the “John Smith” The LCD will display
Joh n Smith
5775141
OR
. Rotate the [Data Dial] to search the directory information.
Joh n Smith
5775141
. Press an available [ Lx ], where x = 1/2, handset will automatically pick up an idle CO line and dial out the number
. Or press the [Center of the Data Dial] to auto pick up the idle line and dial out the number
5775141
Speake r m m :s s
4. Editing Information from Directory
First, find out the directory message which you want to modify.
. Press [DIR]
TECOM SOHO Department Preliminary Feature Operation for Casio 1&2-Line Cordless Phone
Issued by: Frank Yang-Hsin LIN Date: Mar. 31, 2000
Revision: 0.3 Page:52/73
. Press digit key to find out the leading-letter what you want to find. For instance: “John Smith”
. Or, Directly press [s]/[t] to find the item to edit.
Joh n Smith
5775141
. Press [EDIT] to start to edit the new name
. Turn the [data Dial] to advance the character through the alphabet, and [<], [>] to move the cursor.
TonySmith
(Name?)
. Press [PROGRAM] to save the name and then to enter the number
. Use the dial pad to enter the new phone number which you want to save. For example: 5775342
5775342
(Numbe r ?)
. Press [PROGRAM] again to store the name and number into directory, a confirmation beep will be heard.
The LCD will display:
Dir e c tory
OK!
1. Directory OK! : Directory programming OK
. User can use the [DELETE] to delete one character or one digit.
5. Removing All Information From Directory
. Press [DIR]. The LCD displays
Dir e c tory
. Press [DELETE] to delete all the directory
DeleteAl l ?
NoYes
. Press Softkey [Yes] to confirm and delete all directory messages
Dir e c tory
(Empty)
6. Removing one Information From Directory
. Press [DIR]. The LCD displays
Dir e c tory
. Press digit key to find out the leading-letter what you want to find. For instance: “John Smith”
JSeac c h
. Press the Softkey [Search] to search the “John Smith” The LCD will display
Joh n Smith
5775141
OR
. Rotate the [Data Dial] to search the directory information.

TECOM SOHO Department Preliminary Feature Operation for Casio 1&2-Line Cordless Phone
Issued by: Frank Yang-Hsin LIN Date: Mar. 31, 2000
Revision: 0.3 Page:53/73
Joh n Smith
5775141
. Press [DELETE] to delete this item
Delete?
NoYes
. Press Softkey [Yes] to confirm and delete this messages
1Item
Deleted
TECOM SOHO Department Preliminary Feature Operation for Casio 1&2-Line Cordless Phone
Issued by: Frank Yang-Hsin LIN Date: Mar. 31, 2000
Revision: 0.3 Page:54/73
X. ONE-TOUCH SPEED DIAL OPERATION ( MHS-2 BASE UNIT ONLY )
The One-Touch Speed Dial function stores 12 names and phone numbers.
Name: maximum 16 characters.
Number: maximum 30 digits.
1. Storing the Information into One-Touch Speed Dial
. Press [PROGRAM].
. Rotate the Data Dial to select One Touch Dial
OneTouchDial
. Press the center of the Data Dial to select
0 1 : ( Empty)
. Rotate the Data Dial to select One-Touch which you want store
0 6 : ( Empty)
Or
. Press [PROGRAM], and press the One-Touch button directly.
0 6 : ( Empty)
. Press [PROGRAM] to start to store the message into the One-touch button
. Use the dial pad to enter the phone name which you want to save.
OR
. Turn the [data Dial] to advance the character through the alphabet, and [<], [>] to move the cursor.
Joh n Smith
(Name?)
. Press [PROGRAM] to save the name and then to enter the number
(Numbe r ?)
. Use the dial pad to enter the phone number which you want to save. For example: 5775141
5775141
(Numbe r ?)
. Press [PROGRAM] again to store the name and number into directory, a confirmation beep will be heard.
The LCD will display:
Joh n Smith
0 6 :OK!
2. Reviewing the Information from One-Touch Speed Dial
TECOM SOHO Department Preliminary Feature Operation for Casio 1&2-Line Cordless Phone
Issued by: Frank Yang-Hsin LIN Date: Mar. 31, 2000
Revision: 0.3 Page:55/73
. Press [PROGRAM].
. Rotate the Data Dial to select One Touch Dial
OneTouchDial
. Press the center of the Data Dial to select
0 1 : ( Empty)
. Rotate the Data Dial to select One-Touch which you want store
Joh n Smith
0 6 :5775141
Or
. Press the One-Touch button directly.
Joh n Smith
0 6 :5775141
3. Dialing Information from One-Touch Speed Dial
. Press [PROGRAM].
. Rotate the Data Dial to select One Touch Dial
OneTouchDial
. Press the center of the Data Dial to select
0 1 : ( Empty)
. Rotate the Data Dial to select One-Touch which you want store
Joh n Smith
0 6 :5775141
Or
. Press the One-Touch button directly.
Joh n Smith
0 6 :5775141
. Press an available [ Lx ], where x = 1/2, handset will automatically pick up an idle CO line and dial out the number
. Or press the [Center of the Data Dial] to auto pick up the idle line and dial out the number
5775141
Speake r m m :sS
The other method is:
. Press an available [ Lx ], where x = 1/2,
. And then, press the One-Touch button which you want to dial. The number will be dialed out automatically.
4. Editing Information from One-Touch Speed Dial
. Press [PROGRAM].
. Rotate the Data Dial to select One Touch Dial
TECOM SOHO Department Preliminary Feature Operation for Casio 1&2-Line Cordless Phone
Issued by: Frank Yang-Hsin LIN Date: Mar. 31, 2000
Revision: 0.3 Page:56/73
OneTouchDial
. Press the center of the Data Dial to select
0 1 : ( Empty)
. Rotate the Data Dial to select One-Touch which you want store
Joh n Smith
0 6 :5775141
Or
. Press the One-Touch button directly.
Joh n Smith
0 6 :5775141
. Press [EDIT] to start to edit the new name
. Turn the [data Dial] to advance the character through the alphabet, and [<], [>] to move the cursor.
TonySmith
(Name?)
. Press [PROGRAM] to save the name and then to enter the number
. Use the dial pad to enter the new phone number which you want to save. For example: 5775342
5775342
(Numbe r ?)
. Press [PROGRAM] again to store the name and number into directory, a confirmation beep will be heard.
The LCD will display:
TonySmith
0 6 :OK!
5. Removing one Information From One-Touch Speed Dial
. Press [PROGRAM].
. Rotate the Data Dial to select One Touch Dial
OneTouchDial
. Press the center of the Data Dial to select this item
0 1 : ( Empty)
. Rotate the Data Dial to select One-Touch which you want to store
Joh n Smith
0 6 :5775141
Or
. Press the One-Touch button directly.
Joh n Smith
0 6 :5775141
. Press [DELETE] to delete this item
Delete?

TECOM SOHO Department Preliminary Feature Operation for Casio 1&2-Line Cordless Phone
Issued by: Frank Yang-Hsin LIN Date: Mar. 31, 2000
Revision: 0.3 Page:57/73
NoYes
. Press Softkey [Yes] to confirm and delete this messages
0 6 :Deleted
TECOM SOHO Department Preliminary Feature Operation for Casio 1&2-Line Cordless Phone
Issued by: Frank Yang-Hsin LIN Date: Mar. 31, 2000
Revision: 0.3 Page:58/73
XI. CALLER ID OPERATION ( HANDSET UNIT ONLY )
1. Caller ID Call Back Dialing method
The system provides 4 different call back operations. There are 7-10-11, Always 11, Smart Dial, and Exact
in this system. If Smart Dial option is chosen, the user must program their local area code.
If one of the other 3 options is chosen, the area code programming, will not appear as an option,
and the area code will not be changed, either.
The 4 dialing methods operate as follow:
1. 7-10-11: When user tries to dial from a CID record, three choices appear on the LCD: 7, 10, 11.
The user chooses one option and the unit dials immediately, using the correct number of digits. (default value)
2. Always 11: When this option is selected, the unit will always dial a “1” followed by the area code and phone number
(totally 11 digits)
3. Smart Dial: Only this option requires input of local area code. If the area code of the CID record matched
the local area code, the unit dials 7 digits. Otherwise it dials 11 digits
4. Exact Dial: Always dials the exact digits that are in CID record.
1.1 Programming the Dialing Method
. Standby, press [PRG].
. Press [s]/[t] to select the item to select the Dialing method
Dial i ngMode
7-1 0 -1 1
<icons>
or
Dial i ngMode
SmartDial
<icons>
1. Dialing mode : You are programming Dialing method.
2. 7-10-11: The dialing mode “7-10-11”.
3. <icons>: Icons for the status of CO lines, and battery.
. Enter [#] to change the dialing mode, the LCD will display
Dial i ngMode
SmartDial
<icons>
1. Dialing mode : You are programming Dialing method.
2. Smart Dial : The dialing mode “Smart Dial”.
3. <icons>: Icons for the status of CO lines, and battery.
. Press [OFF], or [PRG], or [s]/[t] to confirm and quit the new setting or confirm and change to the other
programming.
1.2 Programming the Area Code
If Smart Dial option is chosen, the user must program their local area code.
. Standby, press [PRG].
. Press [s]/[t] to select the item to select the Area Code Group you want to program
Ar e aCode
TECOM SOHO Department Preliminary Feature Operation for Casio 1&2-Line Cordless Phone
Issued by: Frank Yang-Hsin LIN Date: Mar. 31, 2000
Revision: 0.3 Page:59/73
(Empty)
<icons>
or
Ar e aCode
035
<icons>
1. Area Code : You are programming Area Code.
2. (empty) : The current setting is "empty".
3. 035 : The current setting is "035".
4. <icons>: Icons for the status of CO lines, and battery.
. Enter [ # ] to enter the changing mode, and then,
. Enter [ 1/2/3/4/5/6/7/8/9/0 ] 3 digit for new Area Code, say 027, the LCD will display
Ar e aCode
027
<icons>
1. Area Code : You are programming Area Code.
3. 027 : The new setting is "027".
4. <icons>: Icons for the status of CO lines, and battery.
. Press [OFF], or [PRG], or [s]/[t] to confirm and quit the new setting or confirm and change to
the other programming.
1.3 Erasing the Area Code
. Standby, press [PRG].
. Press [s]/[t] to select the item to select the Area Code Group you want to program
Ar e aCode
027
<iCons>
1. Area Code : You are programming Area Code.
2. 027 : The current setting is "027".
. Press [FCN] and then press [DEL] ( same as [1] ) to erase the CID Area code. The LCD will display:
Ar e aCode
Delete?
<icons>
1. Area Code : You are programming Area Code.
2. Deleted : Prompt to confirmation
. Press [PRG] to confirm and delete the area code
MEMOK!
(Empty)
<icons>
2. Ringing Line Caller ID Function
If the Caller ID service is available from your telephone company, and your have requested this feature,
the LCD will show the telephone name and number of the incoming calls, and the date and time the call is received.
By press [MUTE], you can change the view between Number and Name displays or change to the other
CO line caller ID.
When you receive a call, the caller's Name is displayed as : (This is the 1st Page for the caller's ID.)
TECOM SOHO Department Preliminary Feature Operation for Casio 1&2-Line Cordless Phone
Issued by: Frank Yang-Hsin LIN Date: Mar. 31, 2000
Revision: 0.3 Page:60/73
TOM M YT E COM
0357751234L1
<icons>
or
NoName
NoNumbe r L1
<icons>
Or
Priv a teL1
<icons>
or
OutOfAr e a
L1
<icons>
1. L1 : The Caller's ID is for Line#1.
2. TOMMY TECOM : Incoming caller’s name.
3. "No Name" : The Name is not sent from your telephone company.
4. "No Number" : The Number is not sent from your telephone company.
5. "Private" : Incoming caller’s Name Private indicator.
6. "Out Of Area" : Incoming caller’s Name Out-Of-Area. indicator.
If the name length is over 12 or the number length is over 10, the other message will be display on the page 2.
The user can press [MUTE] to see the rest part of caller ID. (This is the 2nd Page for the caller's ID.)
Smith
8 9 0 L1
<icons>
2.1 View the Caller ID Information Between Ringing Calls
If you get more than one line ringing at the same time, you can check the caller from these different lines to
decide which line should be answered with higher priority.
. Handset in standby mode, line 1 and line 2 ringing, the LCD shows line 1 caller information
TOM M YT E COM
0357757890L1
<icons>
1. L1 : The Caller's ID is for Line#1.
2. TOMMY TECOM : Incoming caller’s name.
3. 0357757890: Incoming caller’s number.
. Press [MUTE] to see the rest part of Phone Name & Number. (OR, Skip this page)
ECOMCO.
8 9 0 L1
<icons>
. Press [MUTE] again to check the Line 2 caller information.
SHERRY SO H O
0357793196L2
<icons>
1. L2 : The Caller's ID is for Line#2.
2. SHERRY SOHO : Incoming caller’s name.
3. 0357793196: Incoming caller’s number.
. Press [MUTE] again, back to the LCD normal mode
Ring:Low
TECOM SOHO Department Preliminary Feature Operation for Casio 1&2-Line Cordless Phone
Issued by: Frank Yang-Hsin LIN Date: Mar. 31, 2000
Revision: 0.3 Page:61/73
ID:1 2
<icons>
1."Ring": Ringer volume that may be Low, Mid, Hi or DND.
2."ID" : Identification Number of the handset.
3. <icons>: Icons for the status of CO lines, and battery.
. Press [MUTE] again, back to the line 1 caller information. And so on...
TOM M YT E COM
0357757890L1
<icons>
1. L1 : The Caller's ID is for Line#1.
2. TOMMY TECOM : Incoming caller’s name.
3. 0357757890: Incoming caller’s number.
3. Caller ID Data Base Function
Up to 50 caller's information can be stored in the Database of the base unit on a numbered list.
This list can be reviewed at any time. If more than 50 calls are received, the earliest received numbers are
deleted to maintain a total of 50 calls.
Because of the system limitation, only one of the handsets can operate the Database at a time.
3.1 Enter the CID Data Base Retrieve Mode
You may enter the CID Database which stored the latest 50 calls and you may use some very useful features
during the view of the data base.
Because of the system limitation, only one of the handsets can operate the Database at a time.
. Standby, press [CID] to enter CID database retrieve mode. The LCD will display:
Al l CID:X X
<icons>
1. “All CID:XX” : The all CID number XX.
3.2 Delete All Callers from the Caller Data Base
You may delete all caller information easily from the caller database after you have returned the call
or you have reviewed the caller list.
. LCD shows the all caller information, and you want to delete it from the caller list.
Al l CID:X X
<icons>
1. “All CID:XX” : The all CID number XX.
. Press [FCN] and then press [DEL] (same as [1]) to delete the all caller data. The LCD displays:
Al l CID:0 0
<icons>
1. “All CID:00” : The all CID are deleted.
TECOM SOHO Department Preliminary Feature Operation for Casio 1&2-Line Cordless Phone
Issued by: Frank Yang-Hsin LIN Date: Mar. 31, 2000
Revision: 0.3 Page:62/73
3.3 Scroll the Calls in the CID Data Base
. In CID database retrieve mode, current caller index number is 11
TOM M YT E COM
0357757890
<icons>
1. TOMMY TECOM : Incoming caller’s name.
2. 0357757890: Incoming caller’s number.
. Press [s]/[t] to scroll the CID data base between calls. For example,
-- Or if pressing [t] (FORWARD) instead, you will see the caller#10
SHERRY SO H O
0357793196
<icons>
-- If pressing [s] (BACKWARD), you will see the caller#12 :
SA N D ERSXYZ
0352123456
<icons>
3.4 View the Completed Caller Information
When receiving the caller ID information. The LCD will display:
TOM M YT E COM
0357757890
<icons>
1. TOMMY TECOM : Incoming caller’s name.
2. 0357757890: Incoming caller’s number.
If the name length is over 12 or the number length is over 10, the rest message will be display on the page 2.
The user can press [MUTE] to see the rest part of caller ID. (OR, Skip this page)
ECOMCO.
8 9 0
<icons>
. Press [MUTE] to change the LCD to shows the caller 3rd (or 2nd ) page for the phone index, repeated counter and
date/time information.
#11 *03
A U G2 7 2 0 :1 0
<icons>
. Press [MUTE] again, and you can change the CID pages back and forth for the completed caller information.
TOM M YT E COM
0357757890
<icons>
1. TOMMY TECOM : Incoming caller’s name.
2. 0357757890: Incoming caller’s number.
TECOM SOHO Department Preliminary Feature Operation for Casio 1&2-Line Cordless Phone
Issued by: Frank Yang-Hsin LIN Date: Mar. 31, 2000
Revision: 0.3 Page:63/73
3.5 Dial Back for the Caller on the Display
You may answer the call easily while you are reviewing the caller ID database.
3.5.1 Dial Back the Phone Number with 7-10-11
. LCD shows the caller information, and you want to return the call
TOM M YT E COM
0357751412
<icons>
1. TOMMY TECOM : Incoming caller’s name.
2. 0357751412: Incoming caller’s number.
. Press an available [ Lx ] (where x = 1/2) to pick up the CO line
The LCD will show:
Dial1:7Digi
2:1 0 3 :1 1
<icons>
1. Dial 1:7Digi 2:10 3: 11. :Dial 1 or 2 or 3 to select the all dial out number digits
1: dial out 7 digits, 2: dial out 10 digit, 11: dial out 11 digits
2. <icons>: Icons for the status of CO lines, and battery.
. Press [1] or [2] or [3] to select the dial out the number, and then the unit will dial out the number automatically.
For example: press [2] to select 10-digit dialing mode, the LCD will display:
L1m m :s s
0357751412
<icons>
1. L1 : The CO line number you are using.
2. 0357751412n : Dialed digits, n - cursor for next digit
3. mm:ss : Talk time, count by second
4. <icons>: Icons for the status of CO lines, and battery.
3.5.2 Dial Back the Phone Number with Other Options
. LCD shows the caller information, and you want to return the call
TOM M YT E COM
0357751412
<icons>
1. TOMMY TECOM : Incoming caller’s name.
2. 0357751412: Incoming caller’s number.
. Press an available [ Lx ] (where x = 1/2) to pick up the CO line, and then the unit will dial out the number
automatically.
The dialed out number will be always 11, or exact dial or smart dial. It will depend on the user setting.
For example: exact dial, the LCD will display:
L1m m :s s
0357751412
<icons>
1. L1 : The CO line number you are using.
2. 0357751412n : Dialed digits, n - cursor for next digit
3. mm:ss : Talk time, count by second
4. <icons>: Icons for the status of CO lines, and battery.
TECOM SOHO Department Preliminary Feature Operation for Casio 1&2-Line Cordless Phone
Issued by: Frank Yang-Hsin LIN Date: Mar. 31, 2000
Revision: 0.3 Page:64/73
3.6 Delete a Caller from the Caller Data Base
You may delete a caller information easily from the caller database after you have returned the call or
you have reviewed the caller list.
. LCD shows the caller information, and you want to delete it from the caller list.
TOM M YT E COM
0357757890
<icons>
OR
ECOMCO.
8 9 0
<icons>
OR
#11 *03
A U G2 7 2 0 :1 0
<icons>
. Press [FCN] and then press [DEL] (same as [1]) to delete the caller data. The LCD displays:
#11:Deleted
<iCons>
1. Deleted : The prompt for confirmation.
2. #11 : The CID list index number.
3.7 Store a Caller Number into the Directory Memory
You may store a caller phone number from the caller list, into your directory memory.
. The LCD shows the caller information, and you want to store it
TOM M YT E COM
0357757890
<icons>
OR
ECOMCO.
8 9 0
<icons>
OR
#11 *03
A U G2 7 2 0 :1 0
<icons>
. Press [DIR] and [PRG]. The LCD will display:
(Name?)
<icons>
1. Enter Name : Directory is waiting the name input.
2. 123 : Programmed memory content.
. Press [CID]. The LCD will display
TOM M YT E COM
(Name?)
<icons>
. Press [PRG] to confirm the name and continue to save the number
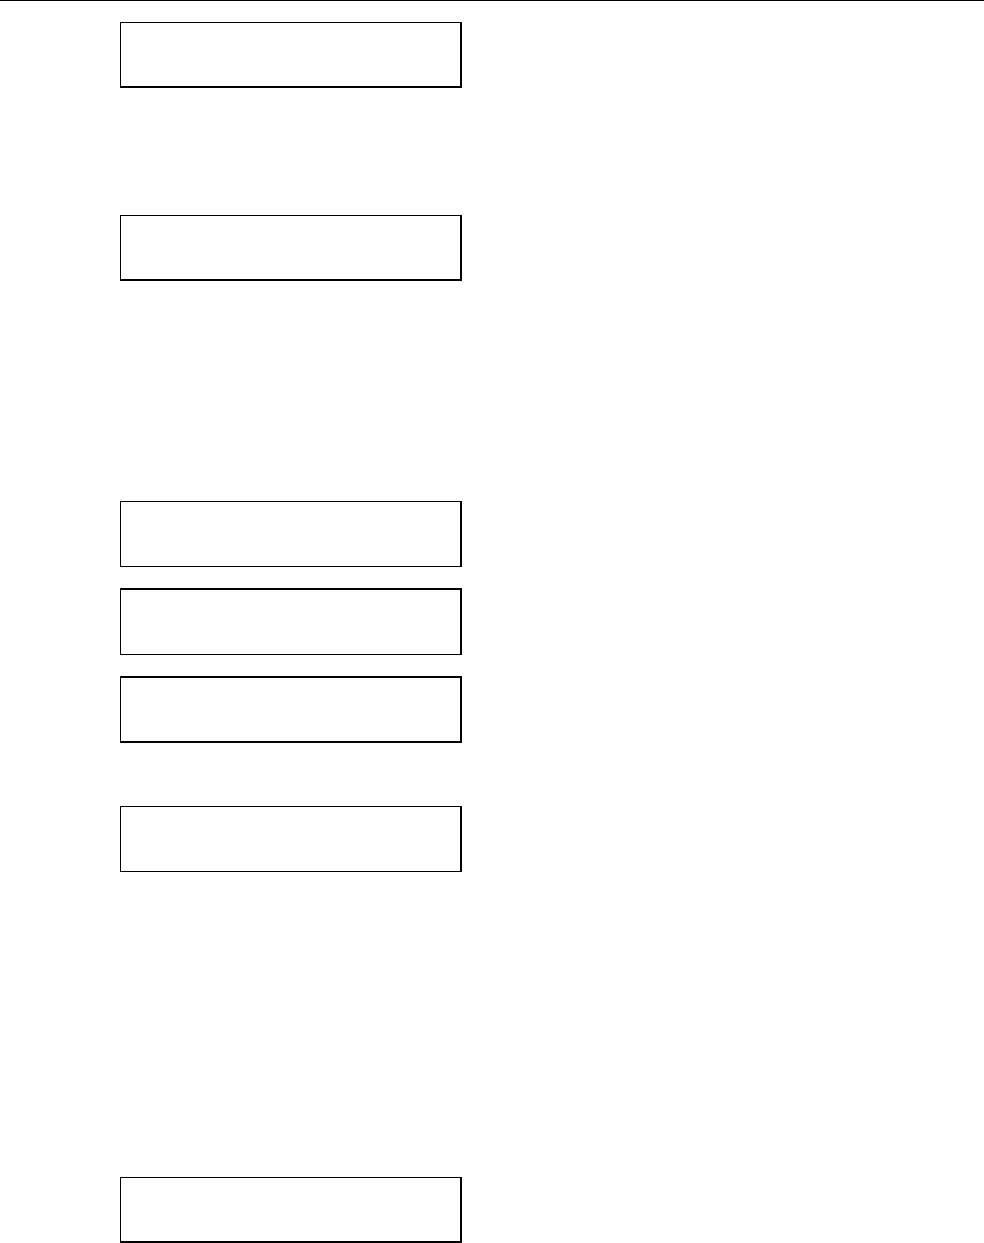
TECOM SOHO Department Preliminary Feature Operation for Casio 1&2-Line Cordless Phone
Issued by: Frank Yang-Hsin LIN Date: Mar. 31, 2000
Revision: 0.3 Page:65/73
0357757890
(Numbe r ?)
<icons>
1. 0357757890 : The CID caller ID number.
. Press [PRG] again to store the name and number into directory, a confirmation beep will be heard.
The LCD will display:
Dir e c tory
OK!
<icOns>
1. Directory OK! : Memory location & programming OK
3.8 Leave the CID Data Base Retrieve Mode
You may leave the CID data base whenever you are in any CID data base access features, and back to
the standby mode.
. The LCD shows the caller information, and you want to leave
TOM M YT E COM
0357757890
<icons>
OR
ECOMCO.
8 9 0
<icons>
OR
#11 *03
A U G2 7 2 0 :1 0
<icons>
. Press [OFF] to leave the caller data base and the LCD goes back to the normal standby mode.
Ring:Low
ID:1 2
<icons>
1."Ring": Ringer volume that may be Low, Mid, Hi or DND.
2."ID" : Identification Number of the handset.
3. <icons>: Icons for the status of CO lines, and battery.
4. Caller ID on Call Waiting ( Type II Call ID )
This is a telephone service which identifies a waiting caller without interrupting your current call.
This feature gives you the informed choice of whether or not to take the incoming call.
The operation is the same as the normal operation. Please see the example below:
. Suppose that you are talking on Line#1. The LCD displays:
L1m m :s s
775141n
<icons>
1. L1 : The CO line number you are using.
2. 775141n : Dialed digits, n - cursor for next digit
3. mm:ss : Talk time, count by second
4. <icons>: Icons for the status of CO lines, and battery.
. After hearing a short CPE Alert Signal (CAS), the LCD will display the new incoming Caller ID automatically.
If you want to view the new incoming Call ID of this line when you are doing something else,
press [MUTE] and see the Caller ID of the waiting caller:

TECOM SOHO Department Preliminary Feature Operation for Casio 1&2-Line Cordless Phone
Issued by: Frank Yang-Hsin LIN Date: Mar. 31, 2000
Revision: 0.3 Page:66/73
TOM M YT E COM
0357751412L1
<icons>
1. TOMMY TECOM : Incoming caller’s name.
2. 0357751412 : Incoming caller’s number.
. Press [MUTE] again to return the original line#1 talking mode
L1m m :s s
775141n
<icons>
1. L1 : The CO line number you are using.
2. 775141n : Dialed digits, n - cursor for next digit
3. mm:ss : Talk time, count by second
4. <icons>: Icons for the status of CO lines, and battery.
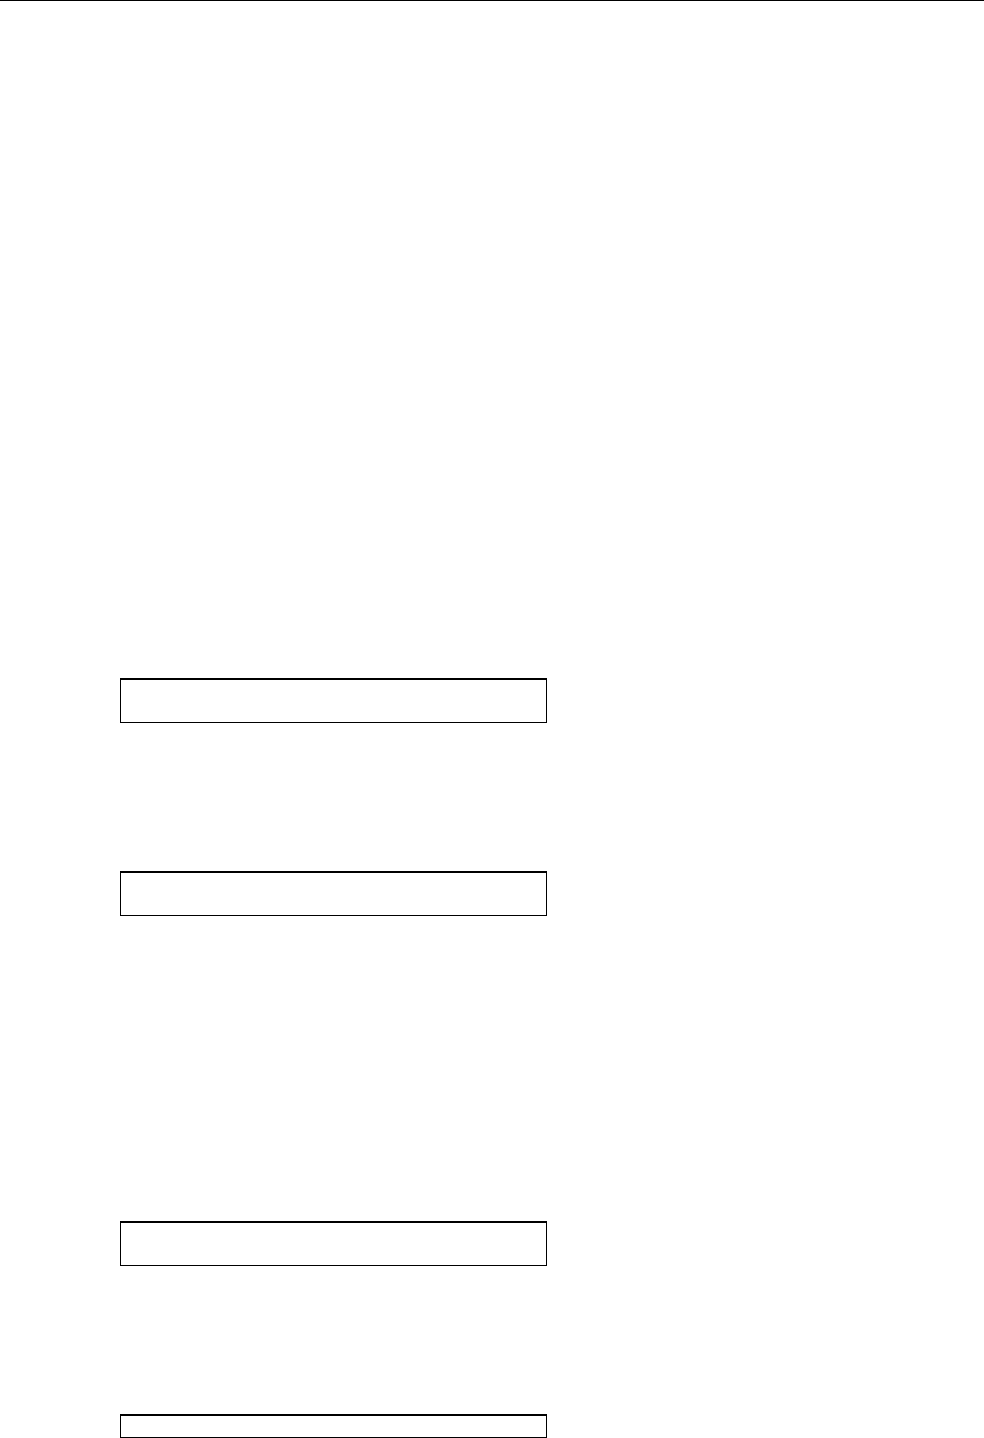
TECOM SOHO Department Preliminary Feature Operation for Casio 1&2-Line Cordless Phone
Issued by: Frank Yang-Hsin LIN Date: Mar. 31, 2000
Revision: 0.3 Page:67/73
XII. CALLER ID OPERATION ( MHS-2 BASE UNIT ONLY )
1. Caller ID Call Back Dialing method
The system provides 4 different call back operations. There are 7-10-11, Always 11, Smart Dial, and Exact
in this system. If Smart Dial option is chosen, the user must program their local area code.
If one of the other 3 options is chosen, the area code programming, will not appear as an option,
and the area code will not be changed, either.
The 4 dialing methods operate as follow:
5. 7-10-11: When user tries to dial from a CID record, three choices appear on the LCD: 7, 10, 11.
The user chooses one option and the unit dials immediately, using the correct number of digits. (default value)
6. Always 11: When this option is selected, the unit will always dial a “1” followed by the area code and phone number
(totally 11 digits)
7. Smart Dial: Only this option requires input of local area code. If the area code of the CID record matched
the local area code, the unit dials 7 digits. Otherwise it dials 11 digits
8. Exact Dial: Always dials the exact digits that are in CID record.
1.1 Programming the Dialing Method
. Standby, press [PROGRAM].
. Rotate the [Data Dial] to select the Dialing method
Dial i ngMode
7-1 0 -1 1
1. Dialing mode : You are programming Dialing method.
2. 7-10-11: The dialing mode “7-10-11”.
. Press the [Center of the Data Dial] to select this option
. An then, rotate the [Data Dial] to select the new selection
Dial i ngMode
<SmartDial>
1. Dialing mode : You are programming Dialing method.
2. Smart Dial : The dialing mode “Smart Dial”.
. Press the [Center of the Data Dial] to confirm the selection
1.2 Programming the Area Code
If Smart Dial option is chosen, the user must program their local area code.
. Standby, press [PROGRAM].
. Rotate the [Data Dial] to select this item
Ar e aCode
2 3 4
1. Area Code : You are programming Area Code method.
2. 2 3 4: The dialing mode “234”.
. Press the [Center of the Data Dial] to select this option
. An then, rotate the [Data Dial] to select the new selection
Ar e aCode
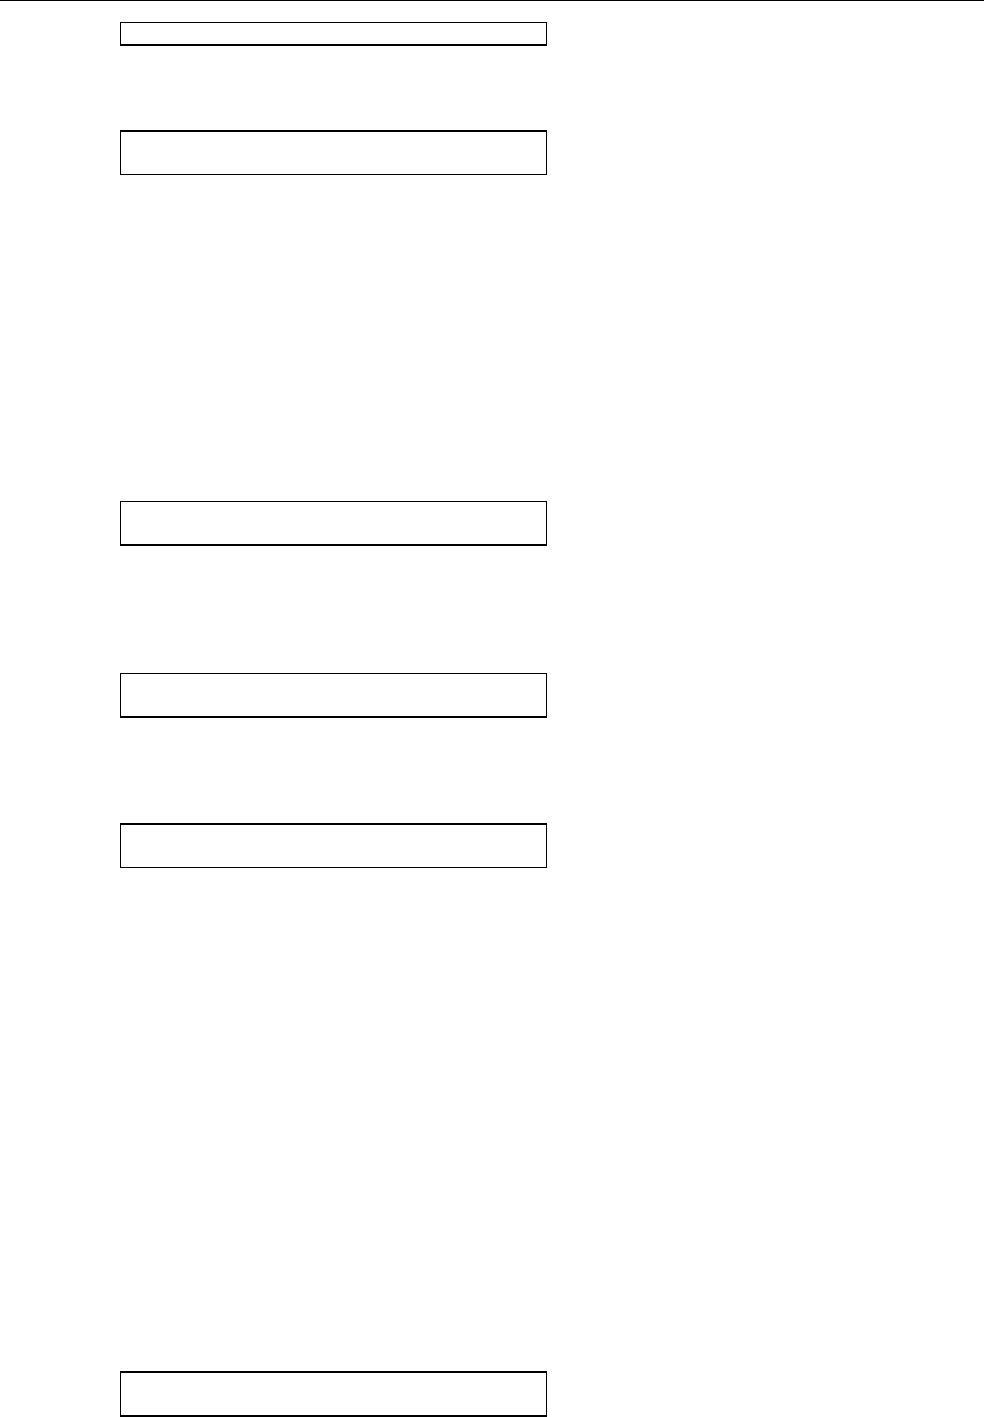
TECOM SOHO Department Preliminary Feature Operation for Casio 1&2-Line Cordless Phone
Issued by: Frank Yang-Hsin LIN Date: Mar. 31, 2000
Revision: 0.3 Page:68/73
<3>3 4
. Press the [Center of the Data Dial] to confirm the selection
. And then repeat the operation to select the other digits
Ar e aCode
3 4 5
1. Area Code : You are programming Area Code method.
2. 3 4 5: The dialing mode “3 4 5”.
. Press the [Center of the Data Dial] to confirm the selection
. Press [PROGRAM], or rotate the [Data Dial] to confirm and quit the new setting
or confirm and change to the other programming.
1.3 Erasing the Area Code
. Standby, press [PROGRAM].
. Rotate the [Data Dial] to select this item
Ar e aCode
2 3 4
1. Area Code : You are programming Area Code method.
2. 2 3 4: The dialing mode “234”.
. Press [DELETE] to erase the CID Area code. The LCD will display:
Delete?
NoYes
1. Delete ? : Prompt for user re-confirmation
. Press softkey [Yes] to confirm and delete the area code
Ar e aCode
(Empty)
1. Area Code : You are programming Area Code.
2. (Empty) : Prompt to confirmation
2. LCD Icon for Caller ID Function
There are some icons on the LCD. These icons display for caller ID message.
Icon1 – “Global mark”: for the call is from long distance.
Icon2 – “CALL WAITING” for call waiting caller ID
Icon3 – “REPEAT” for the repeat times from the same caller
Icon4 – “NEW” There are some new caller ID in the database.
Icon5 – “CALLS” Total caller ID counter in the database.
Icon6 – “Date & Time” Show the current time or Caller ID calling time.
3. Ringing Line Caller ID Function
If the Caller ID service is available from your telephone company, and your have requested this feature,
the LCD will show the telephone name and number of the incoming calls.
JO H NSMITH
L1:8621234567
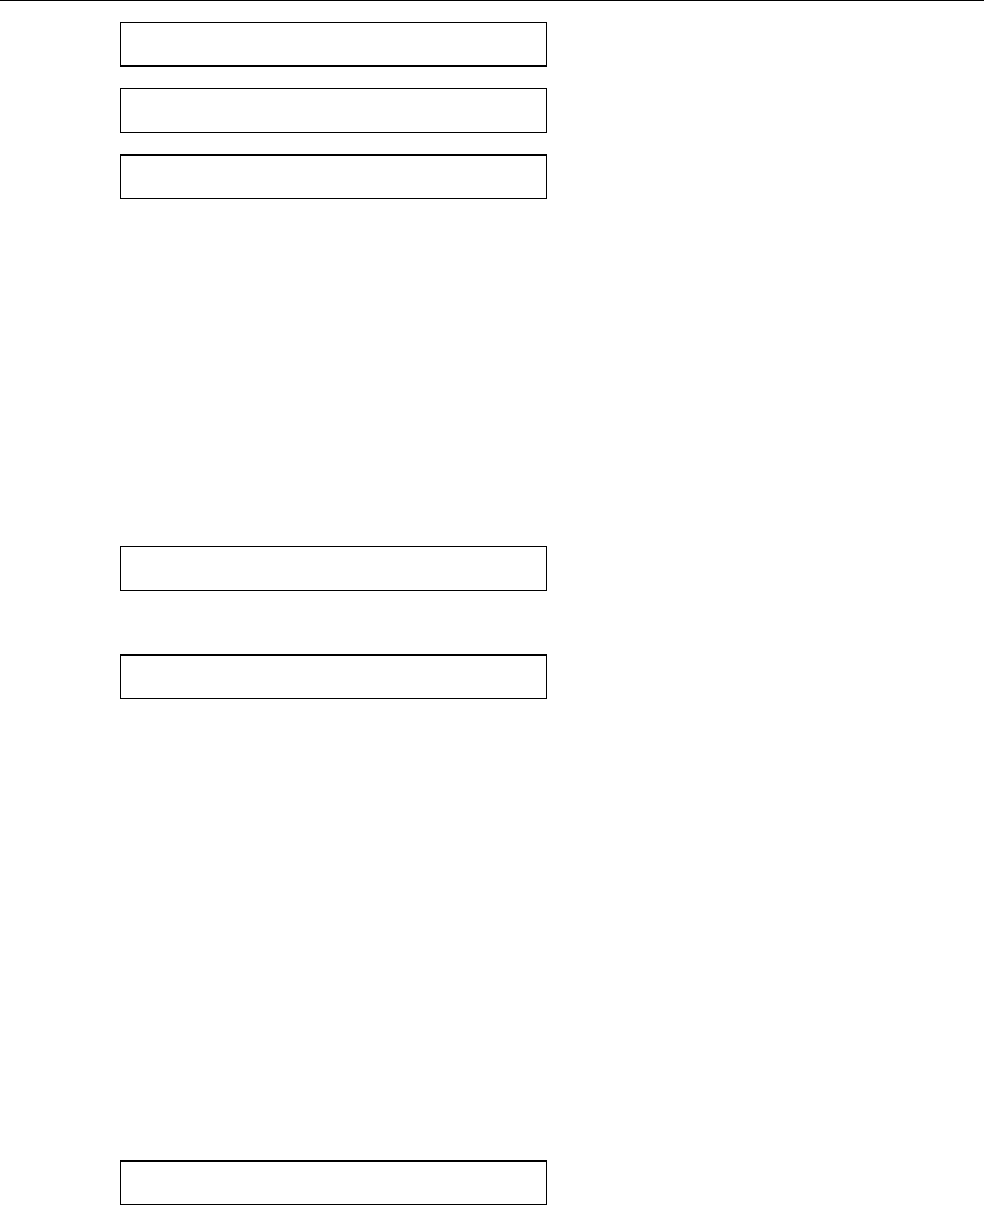
TECOM SOHO Department Preliminary Feature Operation for Casio 1&2-Line Cordless Phone
Issued by: Frank Yang-Hsin LIN Date: Mar. 31, 2000
Revision: 0.3 Page:69/73
NoName
L1:NoNumbe r
Or
Priv a te
L1
or
OutOfAr e a
L1
1. L1 : The Caller's ID is for Line#1.
2. TOMMY TECOM : Incoming caller’s name.
3. "No Name" : The Name is not sent from your telephone company.
4. "No Number" : The Number is not sent from your telephone company.
5. "Private" : Incoming caller’s Name Private indicator.
6. "Out Of Area" : Incoming caller’s Name Out-Of-Area. indicator.
3.1 View the Caller ID Information Between Ringing Calls
If you get more than one line ringing at the same time, you can check the caller from these different lines to
decide which line should be answered with higher priority.
. Handset in standby mode, line 1 and line 2 ringing, the LCD shows line 1 caller information
JO H NSMITH
L1:8621234567
. Press [>] again to check the Line 2 caller information.
SHERRY SO H O
L2:5265551217
. Press [>] again, back to the LCD normal mode
4. Caller ID Data Base Function
Up to 50 caller's information can be stored in the Database of the base unit on a numbered list.
This list can be reviewed at any time. If more than 50 calls are received, the earliest received numbers are
deleted to maintain a total of 50 calls.
Because of the system limitation, only one of the handsets can operate the Database at a time.
4.1 Enter the CID Data Base Retrieve Mode
You may enter the CID Database which stored the latest 50 calls and you may use some very useful features
during the view of the data base.
Because of the system limitation, either only one of the handsets or base unit can operate the Database at a time.
. Standby, press [CID] to enter CID database retrieve mode. The LCD will display:
Al l CID:4 5
4.2 Delete All Callers from the Caller Data Base
You may delete all caller information easily from the caller database after you have returned the call
or you have reviewed the caller list.
. LCD shows the all caller information, and you want to delete it from the caller list.
. Press [DELETE] (same as [1]) to delete the all caller data. The LCD displays:
TECOM SOHO Department Preliminary Feature Operation for Casio 1&2-Line Cordless Phone
Issued by: Frank Yang-Hsin LIN Date: Mar. 31, 2000
Revision: 0.3 Page:70/73
Delete?
NoYes
1. Delete ? : Prompt for user re-confirmation
. Press softkey [Yes] to confirm and delete all the CID database
Al l CID:0 0
1. All CID: 00 : All CID data are deleted.
4.3 Scroll the Calls in the CID Data Base
. In CID database retrieve mode,
. An then, rotate the [Data Dial] to select the caller ID information
JO H NSMITH
1 8 :8621234567
. Note: If the caller is from long distance, the Icon – “Global Mark” will be turned on
If the caller ID isn’t yet retrieved, the Icon – “New” will be turned on.
If the caller has called many times, the Icon – “REPEAT” will be turned on and show repeat times (max.:19)
. An then, rotate the [Data Dial] to select the other caller ID information
SHERRY SO H O
2 5 :5685554567
4.4 Dial Back for the Caller on the Display
You may answer the call easily while you are reviewing the caller ID database.
4.4.1 Dial Back the Phone Number with 7-10-11
. LCD shows the caller information, and you want to return the call
JO H NSMITH
1 8 :8621234567
. Press an available [ Lx ] (where x = 1/2),
OR
. Press the [Center of the Data Dial]
The LCD will show:
Dial i ngDigits
7 1 0 1 1
. Press the softkey to select the dial out the number, and then the unit will dial out the number automatically.
For example: press [10] to select 10-digit dialing mode, the LCD will display:
8621234567
Speake r m m :s s
4.4.2 Dial Back the Phone Number with Other Options
. LCD shows the caller information, and you want to return the call
JO H NSMITH
1 8 :8621234567
. Press an available [ Lx ] (where x = 1/2),
TECOM SOHO Department Preliminary Feature Operation for Casio 1&2-Line Cordless Phone
Issued by: Frank Yang-Hsin LIN Date: Mar. 31, 2000
Revision: 0.3 Page:71/73
OR
. Press the [Center of the Data Dial]
And then the unit will dial out the number automatically.
The dialed out number will be always 11, or exact dial or smart dial. It will depend on the user setting.
For example: exact dial, the LCD will display:
The LCD will show:
8621234567
Speake r m m :s s
4.5 Delete a Caller from the Caller Data Base
You may delete a caller information easily from the caller database after you have returned the call or
you have reviewed the caller list.
. LCD shows the caller information, and you want to delete it from the caller list.
JO H NSMITH
1 8 :8621234567
. Press [DELETE] to delete the caller data. The LCD displays:
Delete?
NoYes
1. Delete ? : Prompt for user re-confirmation
. Press softkey [Yes] to confirm and delete the area code
1 8 :Deleted
4.6 Store a Caller Number into the Directory Memory
You may store a caller phone number from the caller list, into your directory memory.
. Press [DIR], and then press [PROGRAM] key
. The LCD shows the caller information, and you want to store it
(Name?)
. Press [CID]. The LCD will display
TOM M YT E COM
(Name?)
. Press [PROGRAM] to confirm the name and continue to save the number
035775141
(Numbe r ?)
. Press [PROGRAM] again to store the name and number into directory, a confirmation beep will be heard.
The LCD will display:
Dir e c tory
OK!
1. Directory OK! : Memory location & programming OK
Note: The user can use the [<] or [>] to backspace and forward the cursor position.
TECOM SOHO Department Preliminary Feature Operation for Casio 1&2-Line Cordless Phone
Issued by: Frank Yang-Hsin LIN Date: Mar. 31, 2000
Revision: 0.3 Page:72/73
4.7 Store a Caller Number into the One-Touch Speed Dial
You may store a caller phone number from the caller list, into your one-touch speed dial memory.
. Press [PROGRAM].
. Rotate the Data Dial to select One Touch Dial
OneTouchDial
. Press the center of the Data Dial to select
0 1 : ( Empty)
. Rotate the Data Dial to select One-Touch which you want store
0 6 : ( Empty)
Or
. Press [PROGRAM], and press the One-Touch button directly.
0 6 : ( Empty)
. Press [PROGRAM] to start to store the message into the One-touch button
. Press [CID]. The LCD will display
TOM M YT E COM
(Name?)
. Press [PROGRAM] to confirm the name and continue to save the number
035775141
(Numbe r ?)
. Press [PROGRAM] again to store the name and number into directory, a confirmation beep will be heard.
The LCD will display:
TOM M YT E COM
0 6 :OK!
Note: The user can use the [<] or [>] to backspace and forward the cursor position.
5. Caller ID on Call Waiting ( Type II Call ID )
This is a telephone service which identifies a waiting caller without interrupting your current call.
This feature gives you the informed choice of whether or not to take the incoming call.
The operation is the same as the normal operation. Please see the example below:
. Suppose that you are talking on Line#1. The LCD displays:
JO H NSMITH
L1:8621234567
. After hearing a short CPE Alert Signal (CAS), the LCD will display the new incoming Caller ID automatically.
If you want to view the new incoming Call ID of this line when you are doing something else,
press [>] and see the Caller ID of the waiting caller:
SHERRY SO H O

TECOM SOHO Department Preliminary Feature Operation for Casio 1&2-Line Cordless Phone
Issued by: Frank Yang-Hsin LIN Date: Mar. 31, 2000
Revision: 0.3 Page:73/73
L1:5685554567
And, the LCD icon will display “CALL WAITING”
Press [>] again, the LCD will back to the normal display.
8621234567
Speake r m m :s s
----- END -----