Tecom Co WL502X 802.11b Wireless LAN Card-Bus Card User Manual
Tecom Co Ltd 802.11b Wireless LAN Card-Bus Card
Tecom Co >
User Manual

WL5020i
WLAN Cardbus Adapter
User’s Manual
Version 1.0
TECOM CO., LTD.
March 2003
©2003 by TECOM CO., LTD. All rights reserved.
Printed in Taiwan
2
Table of Contents
Package Contents and Trademark(s)--------------------- 3
Software Installation ---------------------------------------- 3
TECOM WLAN Utility Tool -------------------------------4
1. General -------------------------------------------------- 4
2. Advanced ------------------------------------------------ 5
3. Statistics ------------------------------------------------- 6
4. Site Survey ---------------------------------------------- 7
5. Encryption ---------------------------------------------- 8
Troubleshooting ---------------------------------------------- 9
Specifications ------------------------------------------------- 10
Technical Support ------------------------------------------- 10
3
Package Contents
The package you have received should contain the following items:
Wireless LAN PC Card
CD ROM containing Driver, Utility Software and User’s Manual
Quick Installation Guide
Trademark(s)TM and Registered Trademark(s)®
TECOM and the TECOM logo are trademarks of TECOM CO., LTD.
Microsoft, Windows are registered trademarks of Microsoft Corporation.
Other brand and product names may be registered trademarks or
trademarks of their respective holders.
Software Installation
1. Insert the original CD (packed with the product) into CD-ROM reader, wait for
automatic pop-up window and then double-click “setup” to proceed with the
installation.
2. After the installation process is complete, re-start your notebook PC. Insert TECOM
WLAN PC card into Cardbus slot. A new hardware wizard will pop up and guide you
to install drivers in your system.
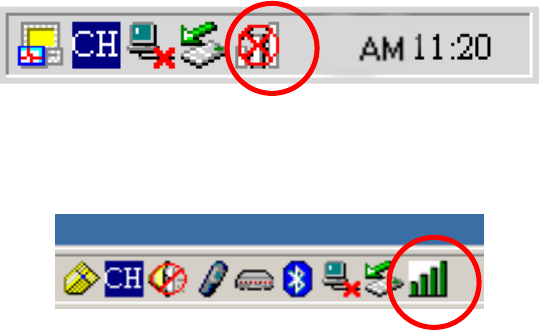
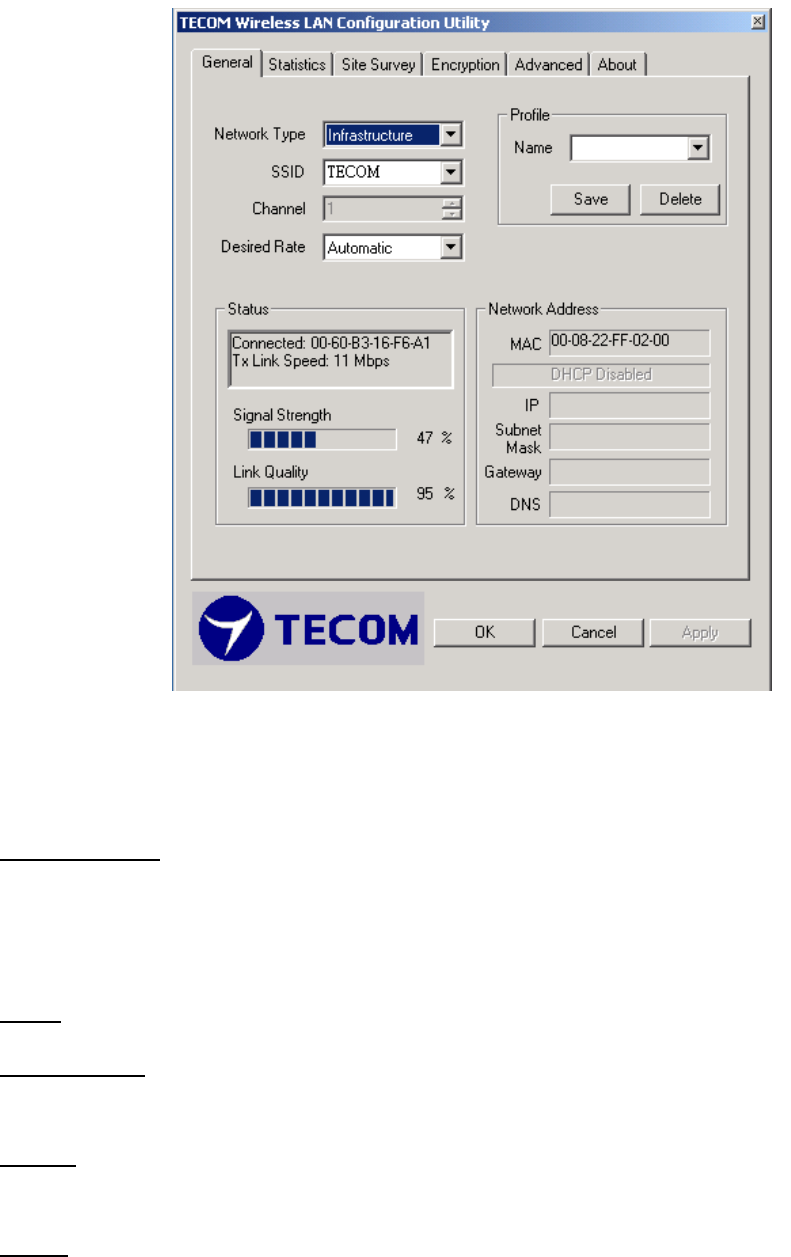
3. A tray icon shown as below should be seen at this time.
4. The icon of WL5020i should be in green when the PC card is connecting to a 802.11b
Access Point. Double click the icon first from right to bring up TECOM WLAN Utility
Tool.
4
TECOM WLAN Utility Tool
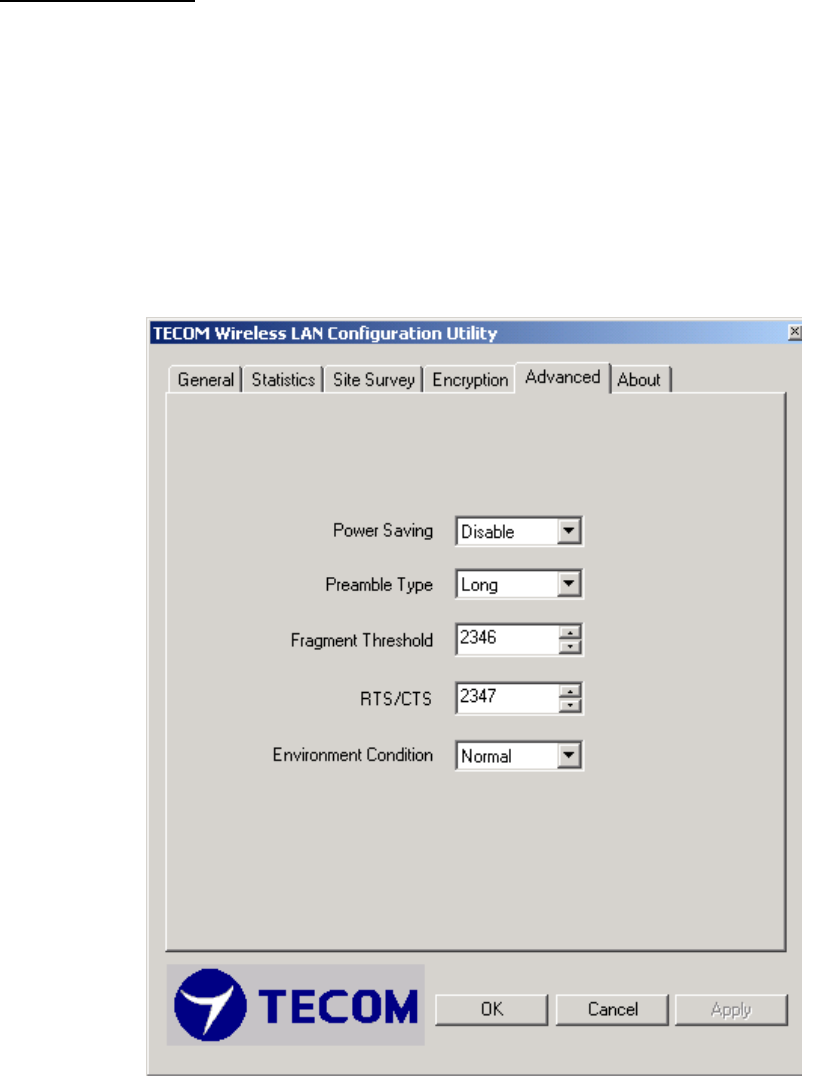
After clicking the icon second from left on the above icon-tray, TECOM WLAN Utility
Tool window will be shown as following,
Please click on the tabs on the top of the screen to configure.
1. General Tab
Network Type: There are two types of Network you can set
Infrastructure (Access Point) – this will work only with an existing AP
Ad-hoc (Peer-to-Peer) – this is an 802.11 compatible ad-hoc mode. All stations with
the same SSID are connected peer-to-peer. No AP is needed.
SSID: Stations which link together should be set to the same SSID
Desired Rate: Unless you definitely know the rate you can get, always select
“Automatic Rate”.
Profile: To save the above setting into a profile, change the profile name and click
“Save” button. Or press “Delete" button to delete a profile.
Status: This section shows the current link information of Network, Signal Strength and
5
Link Quality
Network Address: This section shows the current Network status such as MAC address
(Wireless Card), DHCP (Enable or not), IP address, Subnet Mask address, Gateway
Address and DNS server address.
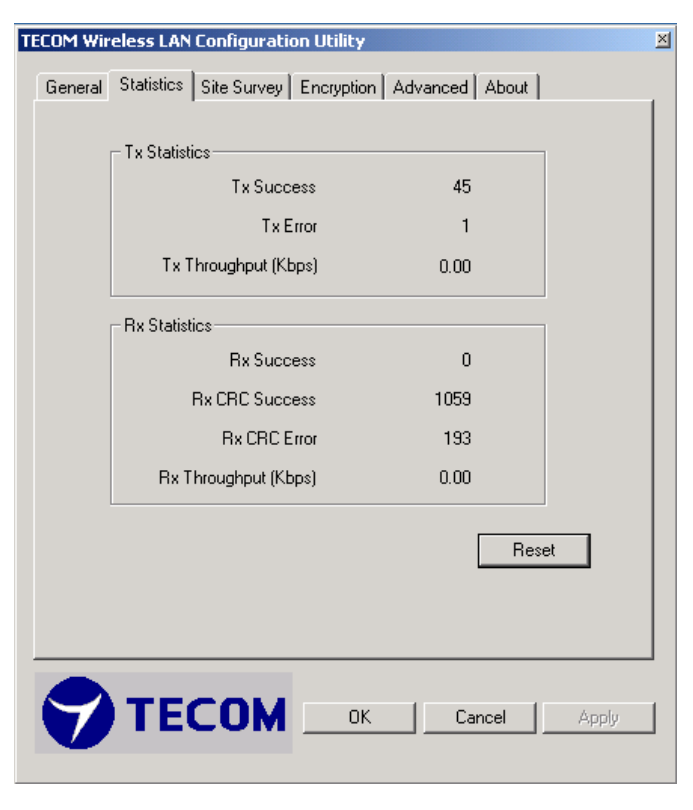
2. Advanced Tab: Choosing the Advanced option, you can change advanced
configuration settings, such as the Power Saving mode, Preamble Type,
Fragmentation Threshold, and RTS/CTS Threshold. The following figure shows
the recommended configuration for the advanced settings.
6
3. Statistics Tab: This option enables you to view the available statistic information (Total
Packet Number, Error Packet Number, FER-Frame Error Rate, Throughput). In order
to reset or update this statistics list, press the “Reset” button.
7
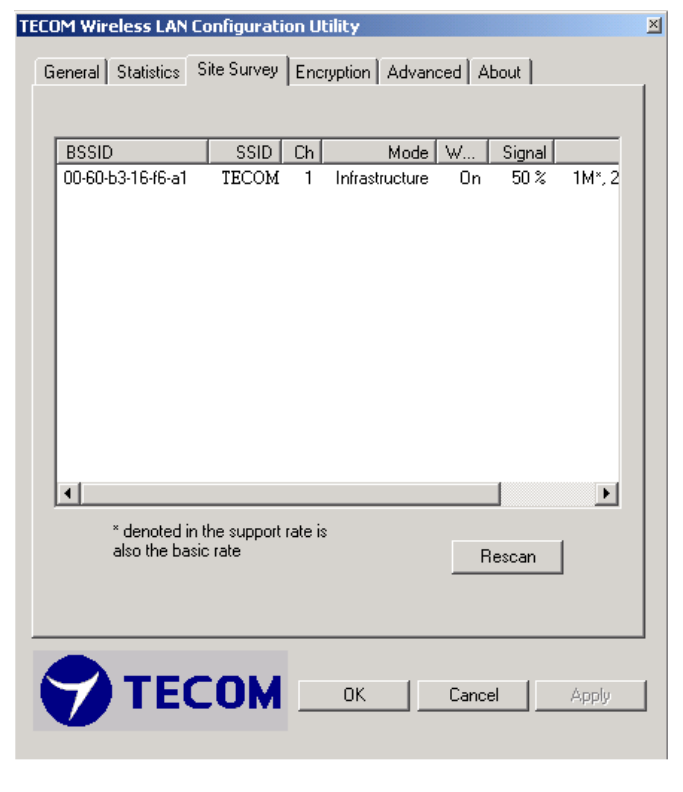
4. Site Survey Tab: By choosing the Site Survey option, you can scan all channels to find
all access points within the range of your card. In order to update this list, press the
“Rescan” button. If you want to link to an AP in this list, Double-click on it. The
application will jump over to General screen and show all the parameters of the
connection newly established.
8
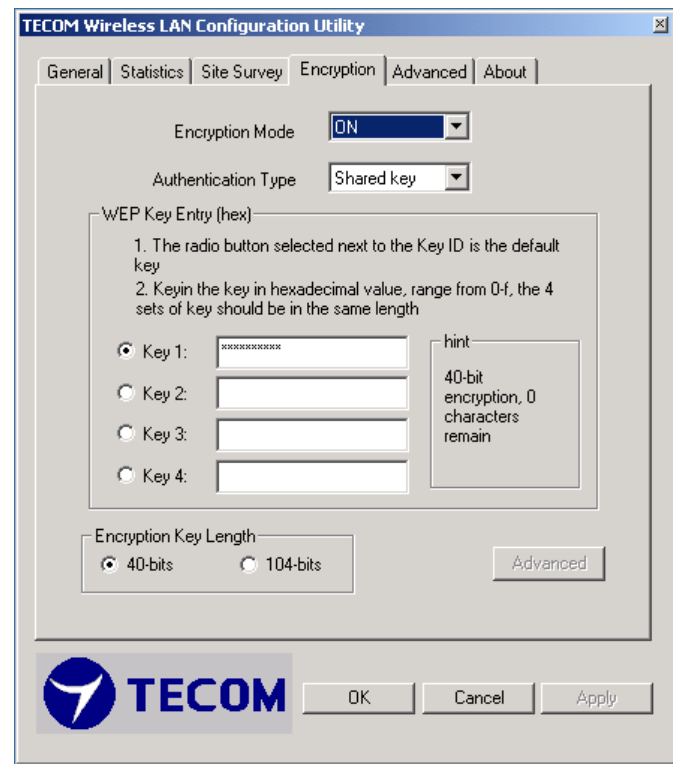
5. Encryptions Tab: This section let you set specify one WEP key to use. If you decide to
use encryption, choose one of the available 4 WEP keys and the “Encryption Key
Length”. You also have the option to select the “Authentication Type (Open
system/Shared key)”. To activate the change, press “Apply” button at the bottom of
the screen.
9
Troubleshooting
1. Adapter Installation Problems
If your computer cannot find the TECOM Wireless Cardbus Adapter or the network driver
is not installed correctly, check the followings,
Make sure the adapter is securely inserted in the Cardbus slot. when you insert the
wireless adapter into the notebook’s slot, a click should be heard if the adapter is
properly inserted. Check for any hardware problems, such as physical damage to the
card connector.
Try the card in another CardBus slot. If this also fails, test your computer with another
TECOM wireless LAN cardbus that is known to operate correctly.
2. Diagnostics utility
Make sure your computer is using the latest BIOS.
If there are other network adapters in the computer, they may be causing conflict,
remove all other adapters from the computer and test the wireless adapter separately.
Check for a defective computer Cardbus slot. Try the adapter in another computer
Cardbus slot that is known to operate correctly.

10
Specifications
Data Rate 11, 5.5, 2 and 1 Mbps,
Auto Fallback
Standard IEEE 802.11b
Operating Range Up to 100m indoors
Up to 350m outdoors
Radio Signal Type CCK – 11, 5.5 Mbps
DQPSK – 2Mbps
DBPSK – 1Mbps
Input Voltage 3.3 V
Antenna Built-in side-stem antenna
LED Indicator Connection
Host Interface 68-pin connector to Cardbus slot
Operating Temperature 0-50 C (32 – 140 F)
Storage Temperature 0-70 C (32 – 158 F)
Humility 5 to 80% (non-condensing)
Technical Support
If you are still experiencing problems after reading Product User’s Guide and the
Troubleshooting section, you may either contact our technical support at:
support@tecom.com.tw.
OR, simply click our URL address www.tecomproduct.com to go to our company website
and check the latest version and other information about the product and/or software.
IMPORTANT NOTE: To comply with the FCC RF exposure compliance requirements,
no change to the antenna or the device is permitted. Any change to the antenna or
the device could result in the device exceeding the RF exposure requirements and
void user’s authority to operate the device. This device and its antenna must not be
co-located or operating in conjunction with any other antenna or transmitter.