Tekcom TP-323 Family Radio Transceiver User Manual User Instructions
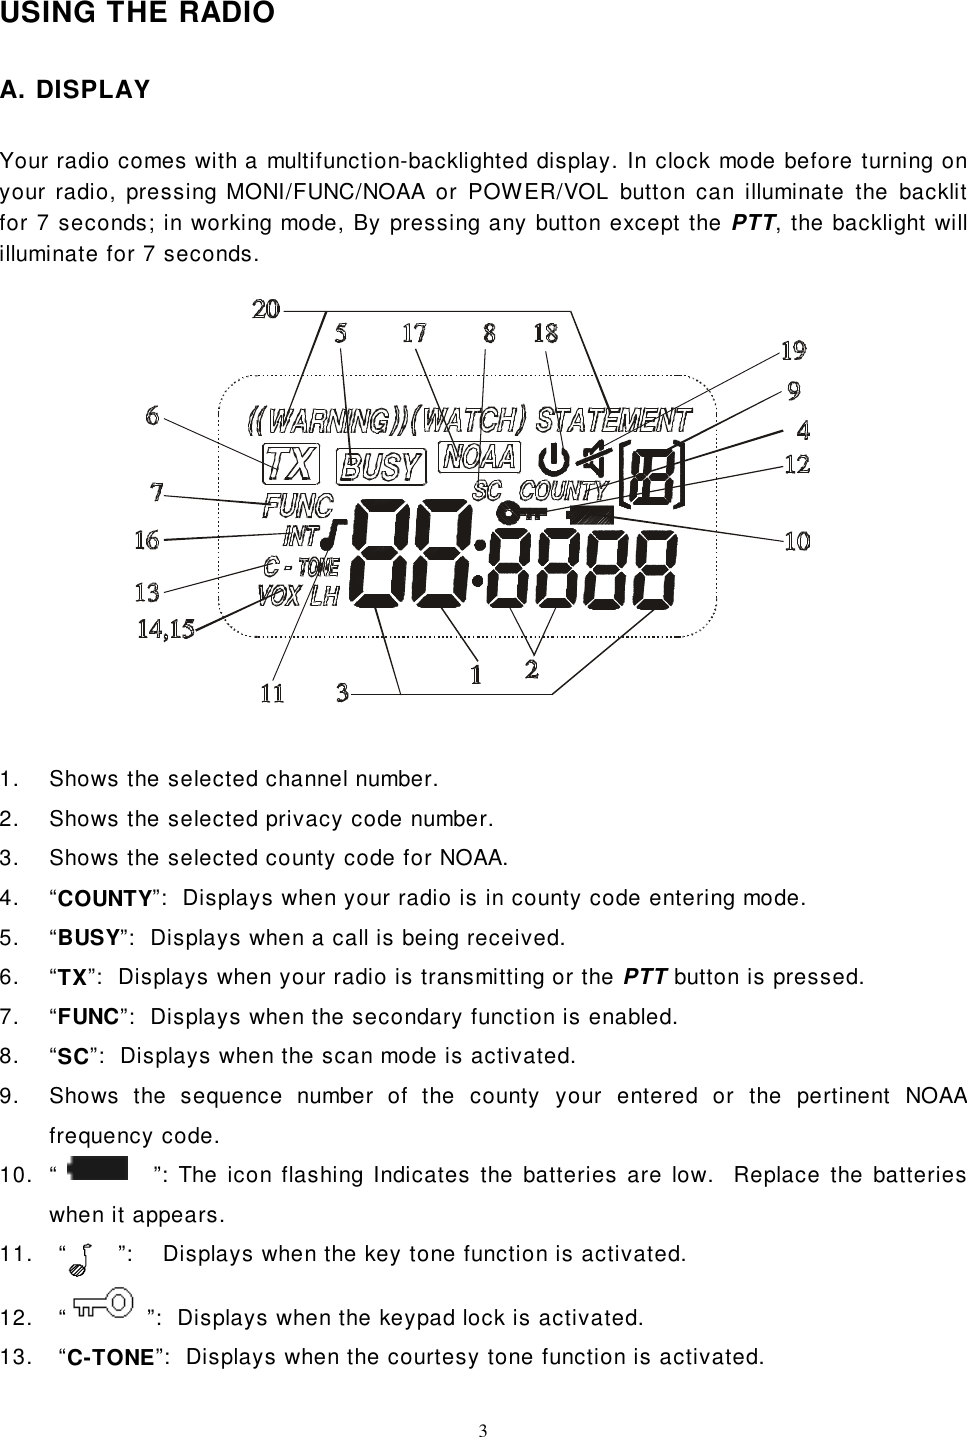
Tekcom Industries Limited Family Radio Transceiver User Instructions
UserManual.wiki
>
Tekcom
>
TP 323 User Manual
User Instructions
Navigation menu
Upload a User Manual
Namespaces
Wiki Guide
HTML
PDF
Info
Views
User Manual
Discussion / Help
Navigation
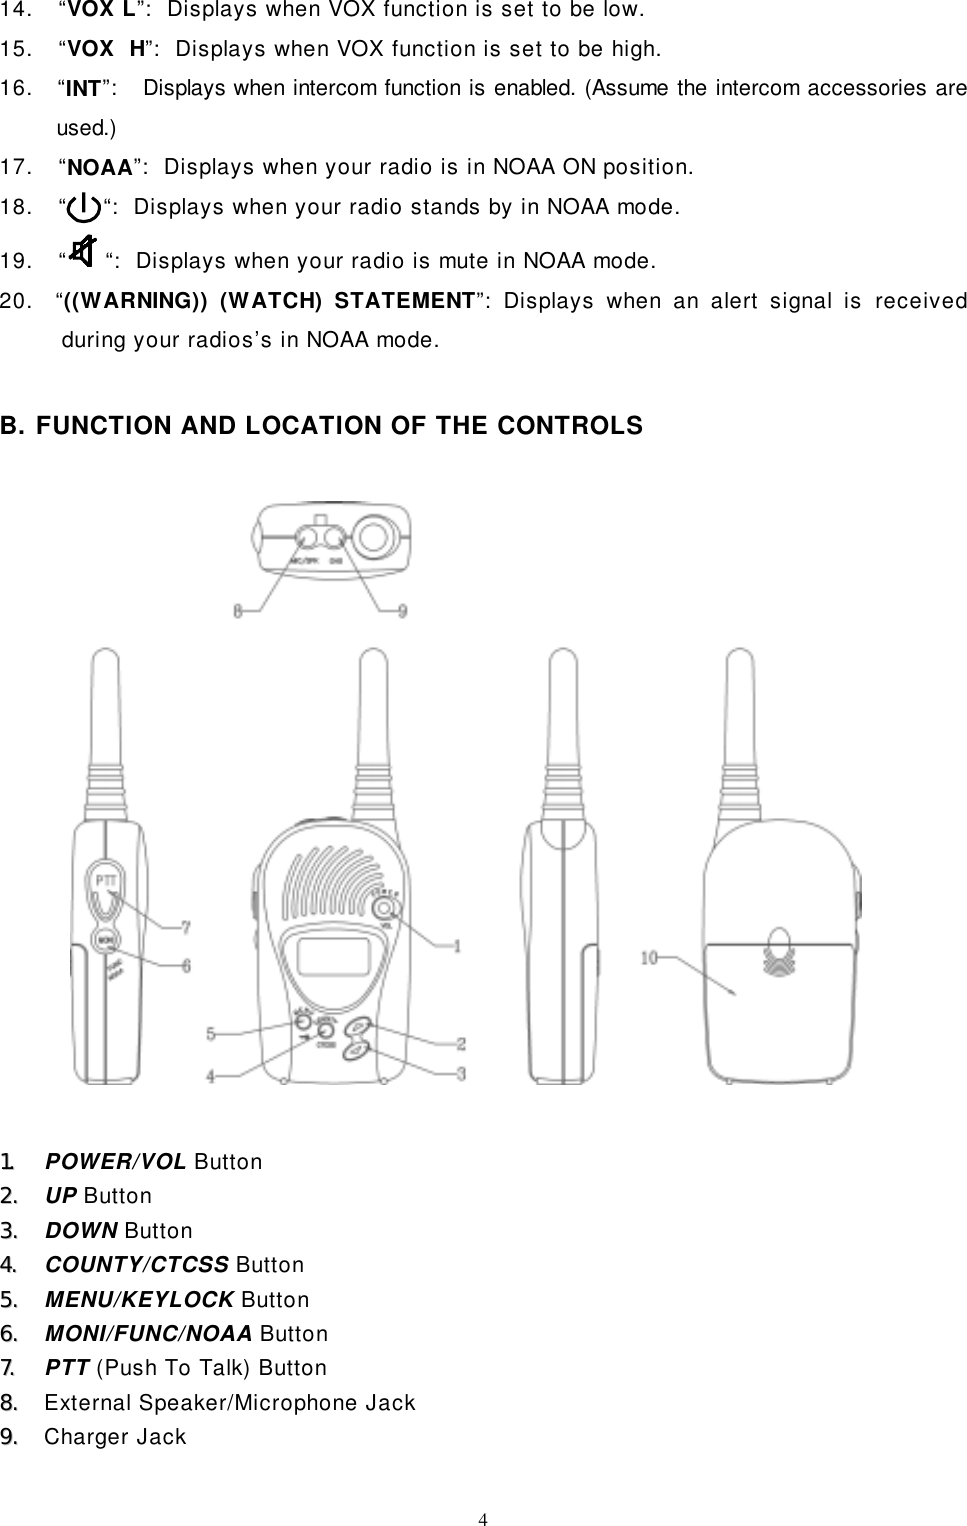
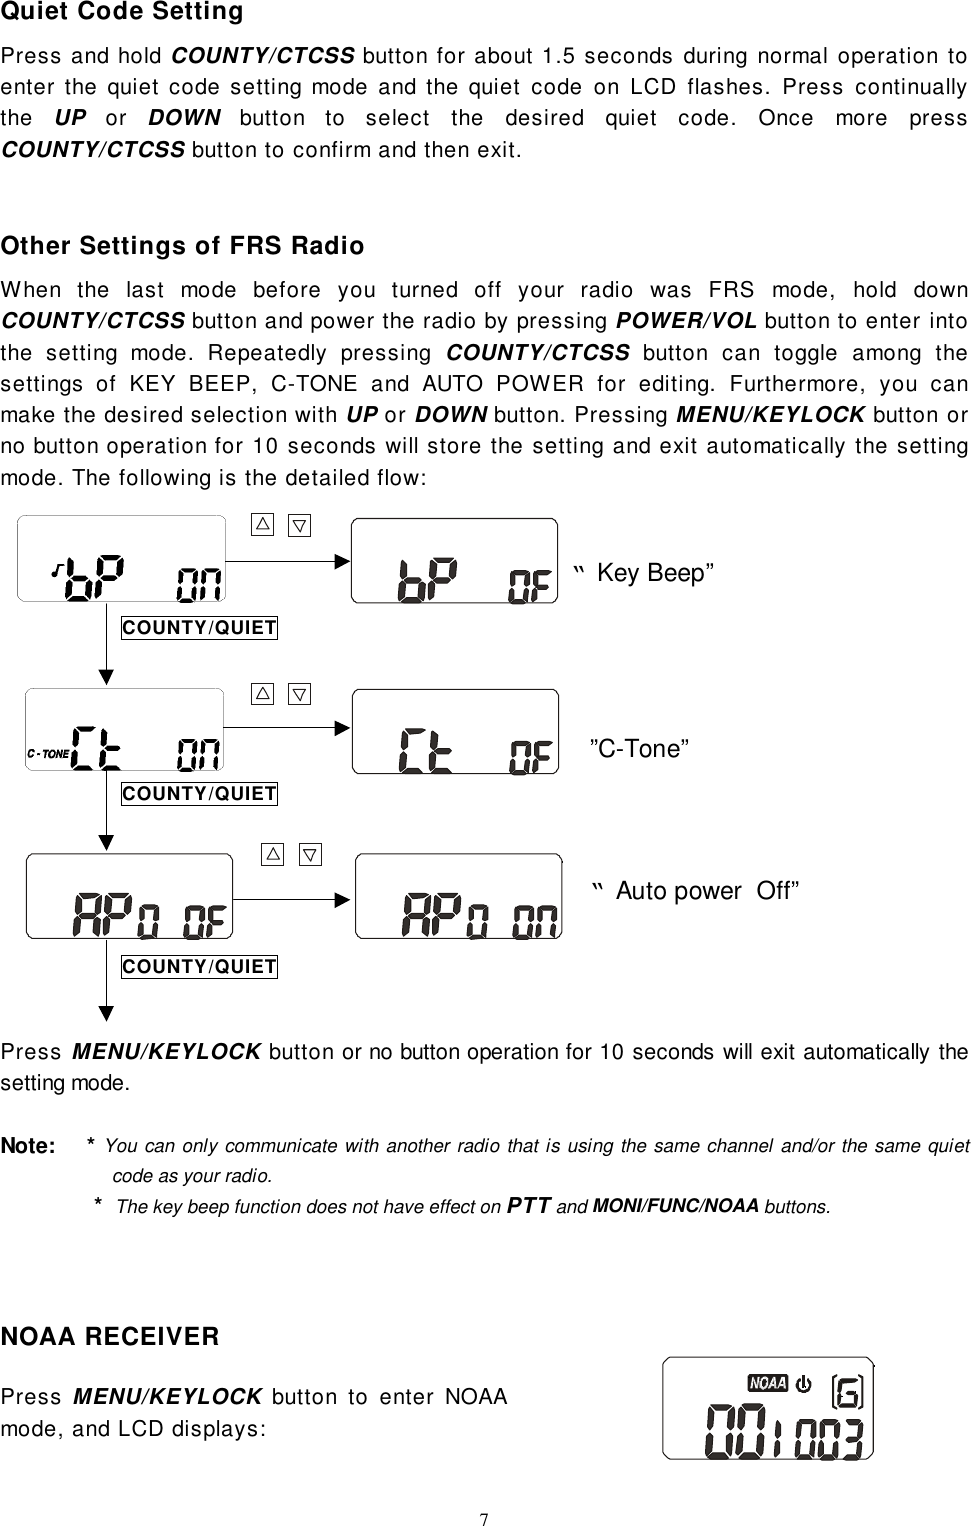
![8If COUNTY/CTCSS button is pressed, yourradio will enter county code that represents thelocation from where you select to receivewarning and LCD displays:You have altogether ten* locations to select, all county warnings [ALL] or warning fromnine specified local locations [------], which can be selected in sequence by momentarypress of COUNTY/CTCSS key.The programmed county code can be deactivated and re-activated by UP or DOWN key(county 0 has a special selection of all warnings [ALL] that was set originally. LCDdisplays: orNOTE: If one of 1 to 9* [------] (specific local locations) is selected, its local county code needs to beprogrammed into your unit.You can toggle different location selections by press COUNTY/CTCSS button showed asfollowing.Once you get your desired selection, you can enter the county code setting mode of thisselection by press and hold COUNTY/CTCSS button for 2 seconds. The extreme leftcounty-code digit will flash.Use UP or DOWN button to select the desired digit and press COUNTY/CTCSS button toconfirm and then advance to the following digit.REMEMBER: Some counties has more than one transmission station and are subdivided into severalCOUNTY/CTCSSCOUNTY/CTCSSCOUNTY/CTCSSCOUNTY/CTCSS Entering Appropriate CountyCd](https://usermanual.wiki/Tekcom/TP-323/User-Guide-161489-Page-8.png)
![9smaller localized sections. The extreme left digit represents the smaller localized section. If the countyhas not been subdivided into smaller sections, select zero(0) in it.To enter the remaining five digits, follow the same precedure. Press COUNTY/CTCSSbutton followed by UP or DOWN key.When finished, press MENU/KEYLOCK button or wait for 10 seconds to store and return,and COUNTY/CTCSS button to advance to the next county selection.! Radio on [ NOAA ]The NOAA Receiver is on and broadcast voice message can be continuously heard.! Radio standby [ ]The radio is in standby and will changed to the on position to hear voice messagewhen an alert signal is received.! Radio mute [ ]The radio is in standby and the LCD will display “WARN”, “WATCH” or “STATEMENT”that the unit has received an alert signal. Voice message can not be heard until theradio is switched to the ON position.Press MONI/FUNC/NOAA button to toggle the NOAA receiver status between NOAA-ON,NOAA-standby, NOAA-mute.Resetting the unitPowering the unit while holding down the MENU button can reset the your radio. As theresult, the channel will be reset to CH1, quiet code to be number 12, CTCSS privacy modeoperation is deactivated, the automatic shut off timer continues, keypad lock disabled,courtesy tone is off, key beep function is on, backlight switched off and the NOAA channelto be A with reset county code of “oooooo” for county1~9 and “ALL” for county 0.CLOCK SettingIn clock mode:Hold down MONI/FUNC/NOAA button and press UP button to adjust the hour of the clock.Hold down MONI/FUNC/NOAA button and press DOWN button to adjust the minute of theclock.Note: You can only communicate with another radio that is using the same channel and/or the samequiet code as your radio. Toggle between various NOAA receivertt NOAA Receiver Status](https://usermanual.wiki/Tekcom/TP-323/User-Guide-161489-Page-9.png)