Tekk XM-700 Two Way Radio User Manual XM 700 170626
Tekk International Inc. Two Way Radio XM 700 170626
Tekk >
User Manual
Brief Introduction
Thank you for buying handheld two-way radio XM-700. The XM-700 provides cost-effective
communications totally unlicensed for a variety of business and personal communication solutions.
The XM-700 operates on 5 special FCC designated frequencies free for you to use all across the
USA.
Please read this manual carefully in order to know how to properly operate the radio before
use.
Content
Unpacking and Checking Equipment--------------------------------------------------------------1
Parts List ----------------------------------------------------------------------------------------------- 2
Preparation----------------------------------------------------------------------------------------------2
Basic operations----------------------------------------------------------------------------------------3
LCD Icons Instructions-------------------------------------------------------------------------------4
Channel Information ---------------------------------------------------------------------------------5
Optional Items------------------------------------------------------------------------------------------5
VOX ---------------------------------------------------------------------------------------------------7
Battery ----------------------------------------------------------------------------------------------------7
Emergency Call -------------------------------------------------------------------------------------8
First /Quick Channel -------------------------------------------------------------------------------9
Information Input--------------------------------------------------------------------------------------9
Power On Setting --------------------------------------------------------------------------------------9
Troubleshooting ----------------------------------------------------------------------------------------11
Specification --------------------------------------------------------------------------------------------11
Appendix II CTCSS (Hz) ----------------------------------------------------------------------------11
Appendix III DCS-------------------------------------------------------------------------------------12
Unpacking and Checking Equipment
Welcome to use TEKK radios, before using we suggest you:
·Please check the packing box of this product and see if there are signs of damage.
·Please open the packing box carefully. We recommend that you identify the items listed in the
following packing list. if you find that our product and its accessories in handling are lost or
damaged during the shipment. Please immediately contact TEKK dealers.
Parts List

Item Quantity
Rubber Antenna 1
Li-ion Battery Pack 1
Desktop Charger 1
Power Adapter 1
Belt Clip 1
User’s Manual 1
Preparation
Charging the Battery
1) Using the battery
The battery is not completely charged at the factory, please charge it before using.
To extend the battery life time, please power off the battery when you don't use two way
radio, and save battery in a cool (temperature less than 25 )and dry place.℃
2 Precautions of Charging Equipment
1. Do not expose the charger to rain or snow.
2. Do not operate the charger if it has received a sharp blow, or has been dropped or damaged
in any way.
3. Do not disassemble the charger if it has received a sharp blow, or has been dropped or
damaged in any way.
4. Never alter the AC cord or plug provided with the unit. If the plug will not fit the outlet,
have the proper outlet installed by a qualified electrician. An improper condition can result
in a risk of electric shock.
5. To reduce the risk of damage to the cord or plug, pull the plug rather than the cord when
disconnecting the charger from the AC receptacle.
6. To reduce the risk of electric shock, unplug the charger from the outlet before attempting
any maintenance or cleaning.
7. Use of an attachment not recommended or sold by TEKK may result in a risk of fire,
electric shock, or personal injury.
8. Make sure the cord is located so it will not be stepped on, tripped over, or subjected to
damage or stress.
9. An extension cord should not be used unless absolutely necessary. Use of an improper
extension cord could result in a risk of fire and/or electric shock. If an extension cord must
be used, make sure that:
•The pins on the plug of the extension cord are the same number, size, and shape as those
on the plug of the charger.
•The extension cord is properly wired and in good electrical condition.
•The cord size is 18 AWG for lengths up to 100 feet, and 16 AWG for lengths up to

150feet.
10. Do not replace charger's power cord. If the power cord damages, you must stop using
charger immediately.
3. Charging the Battery
Please use the battery charger designated by TEKK to charge battery. After purchase or
extended storage (more than two months), the first time to charge battery cannot make
battery reach its normal operating capacity. After repeating charge /discharge it two or
three times, the operating capacity will increase to its normal capacity.
4. Please Charge the Radio According to Operation Steps as Follows:
1. Insert power adapter into power supply socket.
2. Insert output terminal of power adapter into DC jack behind the charging kit, now the
charging orange indicator lights about 2 seconds then goes out.
3. Insert the battery or radio equipped with battery into the charging kit.
4. Confirm the battery and charging kit terminal contact reliably, when charging indicator
light turns into red and charging starts.
5. After completion of charge (charging time about 5 hours), light turns to be green.
5. Indicators Display As Following:
Status Indicator
Power Connected Orange light is on about 2 seconds then goes out
No battery(temperature end judges) All go out
Charge normally Red light is on
The battery is fully charged Green light is on
Fault (over temperature, battery short
circuit or over discharge state)
Red light flashes
Note: Before charging, please turn off radio power equipped with battery. When
charging, using radio will interfere with normal charge of battery and transceiver
effect.
Basic operations
1) Power On/Off
Turn the power switch knob clockwise to turn on radio power; to turn it off ,turn
the power switch knob counter-clockwise.
2) Volume Control
Turn the volume switch knob clockwise to increase volume; to decrease the

volume, rotate the volume switch knob counter-clockwise.
3) TX
1. According to different settings of monitor ,please monitor the radio for some while .Ensure
there is no radio transmitting at the chosen channel .
2. Press PTT and face to microphone talking .
1) Please make the distance between your lip and microphone at 2.5-5 cm ,and talk as usual
to get the best voice quality .
2) Press and hold PTT, LED red light is on .
3) Release PTT to receive information .
3. When using earphone with VOX function ,users can hands-free talking .
4. Also users can active the IVOX function which no need to use earphone .
4) RX
When radio receiving information ,green LED lights .
1) Only same signaling and CTCSS setting can receive information .
2) May not receive any calling if radio is at lower signal and set high level SQL.
3) Local dealer maybe program your radio with CTCSS/DCS . Users can receive the same
signaling information if chosen channel with CTCSS/DCS . Or it can not get any calling .
Radio with CTCSS/DCS will help you to ignore ineffective calling. Although there seems
special channel for CTCSS/DCS ,radio also can communicate with other radio which
programmed the same CTCSS /DCS .
LCD Icons Instruction
ICON ILLUSTRATION
1 Key lock
2 CTCSS
3 DCS
4 Battery Gauge Indicator
5 Narrow band
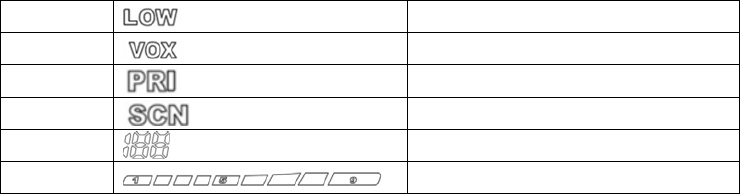
6 Lower power
7 VOX
8 First Scan
9 Scan
10 Channel No. Menu NO.
11 Signal Level for TX and RX
Program Settings
Channel Information
Radio Basic Information
1) Channels
Please choose desired channel number as working channel.
2) Turn On SP
Turn on speaker, you can hear sound from radio when it receives correct signaling .
Function 1
Optional Items
TOT
This function can prevent users occupied the present channel for long time and limit TX time,
meanwhile prevent radio from damage by long time transmitting .
Alarm before TOT
You can set an alert tone sounds from the speaker before TOT is cut.
Voice Report
Your radio can choose different languages voice report : English ,Chinese ,Off .
Beeper of Power On
Choose desired beeper to sound when turn on the radio .
SQL
The purpose of the squelch is to mute the speaker when no signals are present. With the squelch
level ( 0-9) correctly set , you will hear sound only while actually receiving signal. The higher
the selected squelch level, the stronger the signals must be when receive. The appropriate
squelch level depends on ambient RF noise conditions.
Key Lock

1.By manual :long press the key with lock icon .
2.Auto-lock: Set time to active auto-lock .It will be invalid when re-turn on radio .
3.Auto-lock + memory : Set time to active auto-lock .It will be valid when turn on radio
again.
Tail Elimination
You can eliminate tail by reversed CTCSS Signal or phases state after ending transmitting with
CTCSS signaling .
Item Description
FRE Tail elimination by frequency
120FRE Tail elimination by 120 degree phasing+ Frequency
180FRE Tail elimination by 180 degree phasing + Frequency
240FRE Tail elimination by 240 degree phasing + Frequency
OFF NO tail elimination
120 Tail elimination by 120 degree phasing
180 Tail elimination by 180 degree phasing
240 Tail elimination by 240 degree phasing
Back Light
1.Off: Turn off the LCD back light.
2.ON :Turn on LCD back light and keep lighting at certain time.
Duration : choose desired duration for keeping lighting duration .The number after AUTO icon
is duration.( Unit: second)
Channel Name Display
Tick √: Display
Not tick √ : No Display
Beeper
Turn beeper on/off . If turn off beeper ,key tone and power on tone will not be available .
End-of-Transmission Tone
Turn End-of-Transmission tone on/off . If enabled ,your two way radio will transmit a tone when
you finish transmitting .
Monitor End-of- Transmission Tone
If enabled this monitor function ,you can hear the indicating sound when finish transmitting.
Decode tail elimination by frequency without CTCSS/DCS decode
Tail elimination by frequency at channel without CTCSS/DCS decode .
Encode tail elimination by frequency without CTCSS/DCS encode
Tail elimination by frequency at channel without CTCSS/DCS encode .
Key Lock
Enable the key lock function.
UP/DOWN Lock
Enable UP/DOWN lock function .
VOX
VOX level
Choose your desired VOX level.
VOX Level Comparing Value
You can choose 0-180 branch setting in every VOX level for your radio.
VOX Delay Time
This function helps you to make fluent communication by avoiding quickly back to TX mode
without transmitting the last sentence .
No VOX During RX
When radio is receiving , VOX/IVOX are not available .
Battery
Battery Save
The battery saver function decreases the amount of power used when a signal is not being
received and no operations are being performed ( no keys are being and no switches are being
turned ). But when your radio receives information first time ,the delay time will be longer .
Low Battery Beeper Type
You can choose the desired beeper for low battery alert.
Low Battery Alert
Set the interval by every low battery alert .
APO
Radio will automatically turn off power if there is no operation within 5 minutes and alarm at
interval time before APO .Under APO mode, user can active radio by operating it again.
Off : Turn off APO function
APO Time : Turn on this function and set the time to auto power off as requested .
.
Low Battery Voice Report
Radio will report low battery status if active this function.
Low Battery Orange Indicator
Orange indicator lights when TX at low power.
TX Available at Lower Battery
Set the certain voltage value to enable radio TX at lower battery (if battery lower than certain
value ,radio turns off power automatically )
APO at High Voltage
Radio automatically power off if the voltage higher than pre-set voltage value.
APO at Low Voltage
Radio automatically power off if the voltage lower than pre-set voltage value.
Function 2
Emergency Call
1) Emergency Call Types
Local Emergency : Alert from radio .
Local Emergency + Remote Emergency: Alert from radio ,same as other radios with same
frequency and same signaling .
2) Emergency Duration
Continuous : Keep alerting
Duration : Choose desired duration
3) Remote Emergency TX Duration
Continuous : Keep alerting
Duration: Choose desired duration
4) Remote Emergency RX Duration
Continuous : Keep alerting
Duration :Choose desired duration
5)Emergency Call Circle Duration
Choose desired circle duration to make emergency call.
6) Channel Select

Assigned Channel : Suppose assigned at Channel 3 ,no matter what the present channel is ,alarm
always goes from Channel 3.
Present Channel: Suppose present channel is No.5 ,alarm from Channel 5.
Present channel is No.6 ,alarm goes from Channel 6.
7) Emergency Channel NO.
You can select desired channel to make emergency call.
First /Quick Channel
1) First Channel
Your radio can choose desired channel as first channel.
2) Quick Channel
Your radio can choose desired channel as quick channel.
3) First Channel Back Duration
Your radio can choose desired duration to return to first channel.
Information Input
This function allow radio input and store at most 16 letters or numbers , Chinese words. It also can
be used to store SN-code, identification for Program ID ,ID and so on .
Power On Settings
1) Display Method
Off: display all functions’ icons.
Voltage :only display voltage value.
Display Information : edited by users .
2) Power on Message
Please edit the desired information by program software .
3) Pass word to Power on
Your radio is default to be no password ,Users can freely set.
4) Password to Reset All Settings
Enable this function ,radio will back to pre-set status.
4) Scanning
Press this key to start scanning memorial channels .Press any keys except to quit

scanning.
5) VOX
You can turn on/off VOX function.
6) Monitor
Your radio can disable/enable monitor CTCSS /DCTCSS, simultaneously will active SQ once
receives carrier frequency.
7) Emergency Call
You can make an emergency call by programmed key.
9)First Channel
You can exchange to first channel by pressing programmed key.
10)Quick Channel
You can exchange to quick channel by pressing programmed key.
11) SQ Cancel Function
You can active SQ and keep at SQ status when receiving carrier frequency by shortly pressing
programmed key .
13) Instant SQ Cancel
Active this SQ and keep at SQ status when receive carrier frequency by holding this programmed
key.
14)1750Hz
Press and hold 1750hz key to transmit, release to receive.
15) Back Light
You can turn on back light by pressing programmed key.
Troubleshooting
Symptom Try This
No power
z Battery power may have run out, please
update battery or recharge it.
z Battery may not be properly installed,
please take it off and re-install.
Battery lasts a short time after charge z The battery life is over, please replace new
battery.

Can not talk to other members of your
group.
z Verify transmitting is within effective
operating range.
z Verify channel, frequency and code
settings are correct.
Hearing other conversation on a
channel (not group members’)
z Please change code settings, including all
two way radio settings of your group.
Appendix II CTCSS (Hz, Supported Non-Standard)
1-67.0 14-103.5 27-159.8 40-199.5
2-69.3 15-107.5 28-162.2 41-203.5
3-71.9 16-110.9 29-165.5 42-206.5
4-74.4 17-114.8 30-167.9 43-210.7
5-77.0 18-118.8 31-171.3 44-218.1
6-79.7 19-123.0 32-173.8 45-225.7
7-82.5 20-127.3 33-177.3 46-229.1
8-85.4 21-131.8 34-179.9 47-233.6
9-88.5 22-136.5 35-183.5 48-241.8
10-91.5 23-141.3 36-186.2 49-250.3
11-94.8 24-146.2 37-189.9 50-254.1
12-97.4 25-151.4 38-192.8
13-100.0 26-156.7 39-196.6
Appendix III DCS (Supported Non-Standard)
023 071 143 225 266 356 452 532 664
025 072 145 226 271 364 454 546 703
026 073 152 243 274 365 455 565 712
031 074 155 244 306 371 462 606 723
032 114 156 246 311 411 464 612 731
036 115 162 245 315 412 465 624 732
043 116 165 251 325 413 466 627 734
047 122 172 252 331 423 503 631 743
051 125 174 255 332 431 506 632 754
053 131 205 261 343 432 516 645
054 132 212 263 346 445 523 654
065 134 223 265 351 443 526 662

Keys
Status Key Method Function
1 F1 Short Press No
2 Long Press FM Radio on/off
3 F2 Short Press No
4 Long Press Reverse frequency on /off
5 F3 Short Press No
6 Long Press Key Lock on /off
7 SK1 Short Press Instant SQ Cancel
8 SK2 Short Press Back Light On
Specifications
General Specification
Device Number(D/N) XM-700
Frequency Range 151.820/151.880/151.940/154.570/154.600MHz
Output Power ≤2w
Channel 5 channels
Channel Spacing 11.25KHz /20KHz
CTCSS/DCS 50 CTCSS / 105 DCS
Antenna Impedance 50 Ohm
Working Temperature –20 to ℃+50℃
Working Voltage DC7.4V
Battery Type Li-ion battery
Dimension(antenna excluding) 112.5( H )×59( W ) ×37(D)mm
Weight (include antenna, battery) About 230 grams
FCC Statement:
This equipment has been tested and found to comply with the limits for a Class B digital device,
pursuant to part 15 of the FCC Rules. These limits are designed to provide reasonable
protection against harmful interference in a residential installation. This equipment generates,
uses and can radiate radio frequency energy and, if not installed and used in accordance with
the instructions, may cause harmful interference to radio communications. However, there is
no guarantee that interference will not occur in a particular installation. If this equipment does
cause harmful interference to radio or television reception, which can be determined by
turning the equipment off and on, the user is encouraged to try to correct the interference by
one or more of the following measures:
—Reorient or relocate the receiving antenna.
—Increase the separation between the equipment and receiver.
—Connect the equipment into an outlet on a circuit different from that to which the receiver is
connected.
—Consult the dealer or an experienced radio/TV technician for help.
Operation is subject to the following two conditions: 1. This device may not cause harmful
interference, and 2. This device must accept any interference received, including
interference that may cause undesired operation.
Note:” Changes or modifications to this unit not expressly approved by the party
responsible for compliance could void the user’s authority to operate the equipment.”
Compliance with RF Exposure Standards
XM-700 complies with the following RF energy exposure standards and guidelines:
• United States Federal Communications Commission, Code of Federal Regulations; 47 CFR
§§ 1.1307, 1.1310, 2.1091 and 2.1093
• American National Standards Institute (ANSI) / Institute of Electrical and Electronic
Engineers (IEEE) C95. 1-1992
• Institute of Electrical and Electronic Engineers (IEEE) C95.1-1999 Edition
FCC Radiation Exposure Statement:
This equipment complies with FCC radiation exposure limits set forth for an
uncontrolled environment .This equipment should be installed and operated with
minimum distance 2.5cm between the radiator & your body.This transmitter must not
be co-located or operating in conjunction with any other antenna or transmitter
Your Tekk International Inc. 2-way radio is designed and tested to comply with a
number of national and international standards and guidelines (listed below) for human
exposure to radio frequency electromagnetic energy. This radio complies with the IEEE
and ICNIRP exposure limits for general/uncontrolled RF exposure environment at
operating duty factors of up to 50% transmitting and is authorized by the FCC for
occupational use only. In terms of measuring RF energy for compliance with the FCC
exposure guidelines, your radio radiates measurable RF energy only while it is
transmitting (during talking), not when it is receiving (listening) or in standby mode.
Note: The approved batteries supplied with this radio are rated for a 5-5-90 duty factor (5%
talk-5% listen - 90% standby), even though this radio complies with the FCC occupational
RF exposure limits and may operate at duty factors of up to 50% talk.
Operating Instructions:
• Transmit no more than the rated duty factor of 50% of the time. To transmit (talk), push
the Push-To-Talk (PTT) button. To receive calls, release the PTT button. Transmitting 50%
of the time, or less, is important because this radio generates measurable RF energy
exposure only when transmitting (in terms of measuring for standards compliance).
• Hold the radio in a vertical position in front of face with the microphone (and the other
parts of the radio, including the antenna) at least one inch (2.5 cm) away from the nose.
Keeping the radio at the proper distance is important because RF exposures decrease
with distance from the antenna. Antenna should be kept away from eyes.
• When worn on the body, always place the radio in a Tekk International Inc. approved
clip, holder, holster, case, or body harness for this product. Using approved body-worn
accessories is important because the use of Tekk International Inc. or other
manufacturer’s non-approved accessories may result in exposure levels, which exceed
the FCC’s general/uncontrolled environment RF exposure limits.
• If you are not using a body-worn accessory and are not using the radio in the intended
use position in front of the face, then ensure the antenna and the radio are kept at least
2.5 cm (one inch) from the body when transmitting. Keeping the radio at the proper
distance is important because RF exposures decrease with increasing distance from the
antenna.
• Use only Tekk International Inc. approved supplied or replacement antennas, batteries,
and accessories. Use of non-manufacturer-name approved antennas, batteries, and
accessories may exceed the FCC RF exposure guidelines.