TeleEpoch M570 CDMA Mobile Phone User Manual User Maunal
TeleEpoch Limited CDMA Mobile Phone User Maunal
UserManual.wiki
>
TeleEpoch
>
M570 User Manual
>
User Maunal
Contents
1.
User Maunal
2.
User Manual
User Maunal
Navigation menu
Upload a User Manual
Namespaces
Wiki Guide
HTML
PDF
Info
Views
User Manual
Discussion / Help
Navigation


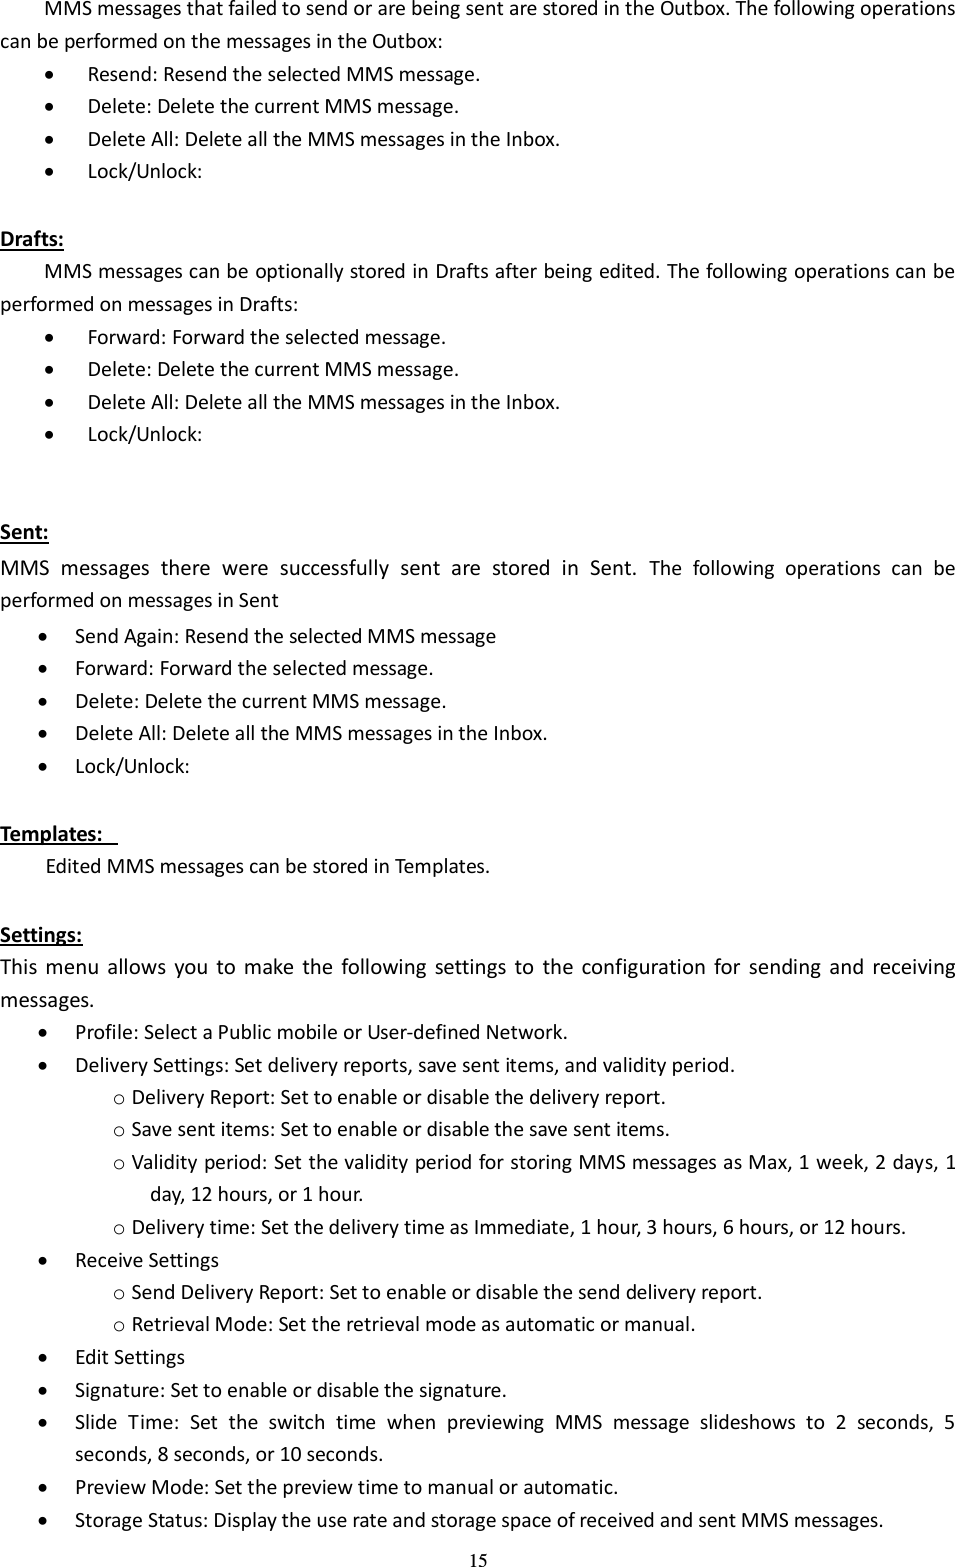
![7 Signal strength received by the antenna Alarm clock There are unread messages Battery level indicator (This icon indicates full battery). Vibrate mode Ring mode Silent Keypad locked Missed call Bluetooth Alert modes There are multiple user-selectable tones available for text message and call notifications. Please follow the paths below for selecting the modes and the specific tones for each type. Text message alerts: For text message alerts, follow the path [Profiles], then choose one alert mode from the list (General, Silent, Meeting, Outdoor, Headset, In Car, Airplane) [Personalize] [Message Alert Tone], select, OK and exit. Call alerts and ringtones: Follow the [Profiles], then choose one alert mode from the list (General, Silent, Meeting, Outdoor, Headset, In Car, Airplane) [Personalize] [Caller Ring Tone]-and select tone, OK and exit. Find contacts This handset provides a way to search for phone number by first letter of a name. Highlight and select ‘Contacts’ under main, input the first letter of the contact’s name and the screen will display all applicable records. 5.Getting Started Charging your battery A new baery must be fully charged before it is used for the rst me. To keep the baery funconing opmally, it is recommended that you occasionally discharge the baery fully by consuming the power unl the phone is switched o automacally. During the course of charging, it is normal for the phone and the battery to heat up slightly.](https://usermanual.wiki/TeleEpoch/M570.User-Maunal/User-Guide-1431202-Page-7.png)


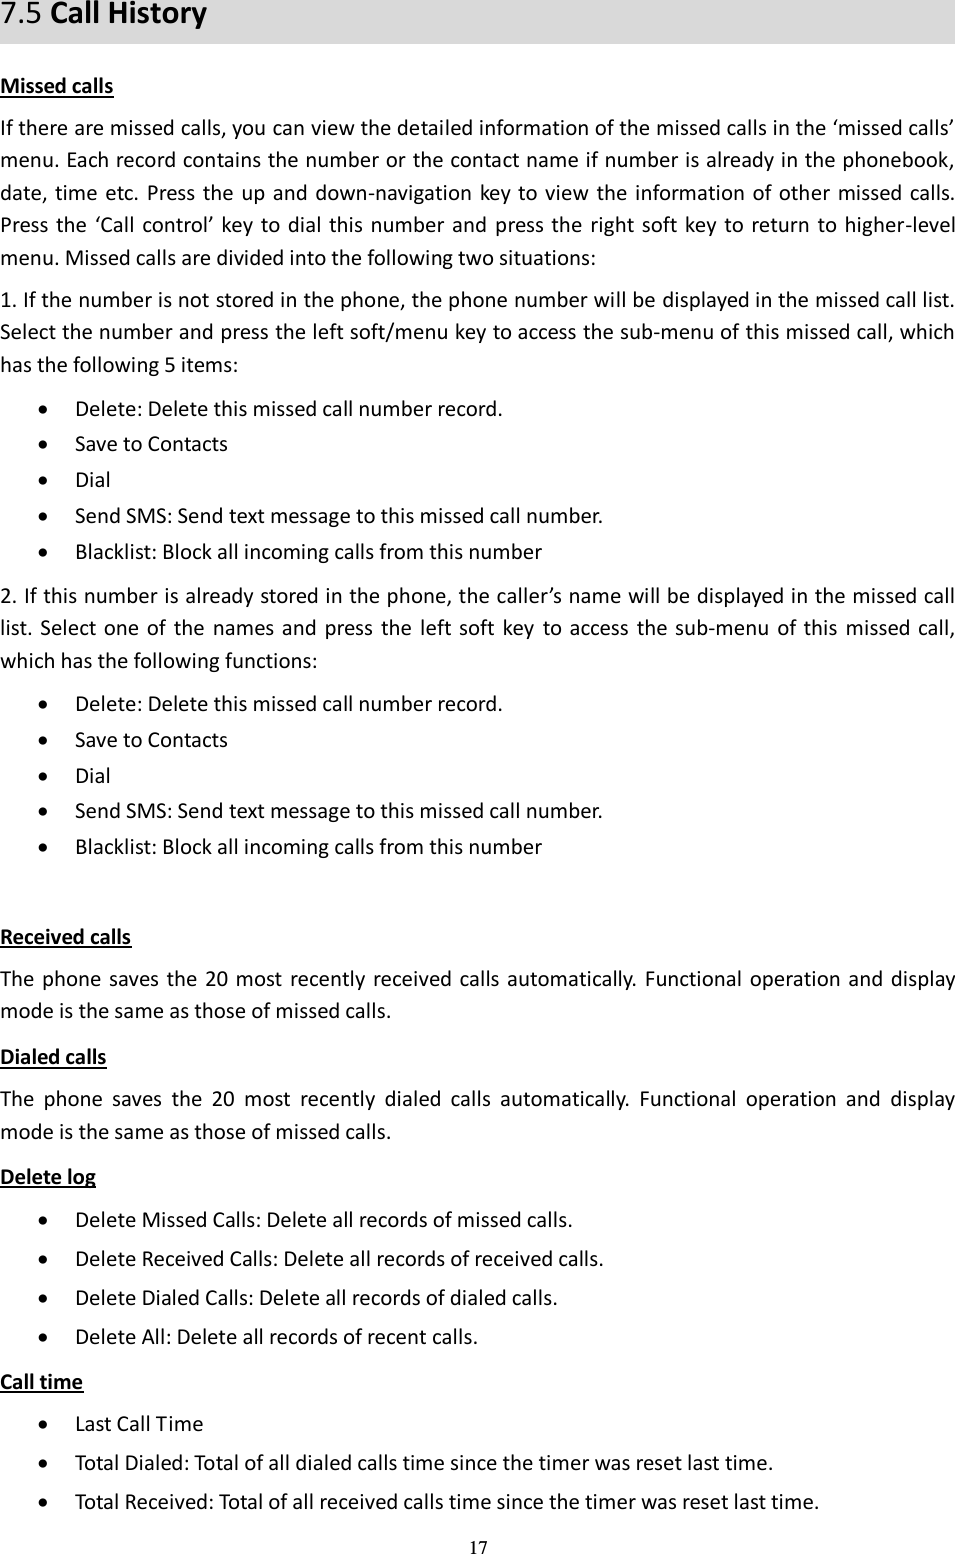


![23 Play List: After selected a play list, the music player interface will display the items in the list. They can be play in order or songs can be selected from the list. Repeat: Repeat the song. Bluetooth Playback: After connecting a Bluetooth device, the music can be heard through Bluetooth earphones. Delete: Delete the currently selected song. Delete All: Clear the play list. 8.3 Blue Tooth Device Search: When a Bluetooth device is enabled, all Bluetooth hands free devices and Bluetooth devices will be searched for. Bluetooth devices are then added and paired. After detecting a Bluetooth hands free device, a Bluetooth password must be entered to perform the pairing. Once pairing completes, it will connect with the device. (Bluetooth passwords are set by other Bluetooth devices.) Discoverable On 3 minutes: Enable this function to make it discoverable within three minutes. Found Devices: Display detected devices. Manage: List the devices connect to the cell phone. Bluetooth hands free devices and Bluetooth devices can be deleted and configured. o Pair: Pair with the device selected. o Remove: Remove the selected device from the list. o Browse Files: When browsing files, the selected device must be successfully paired. o Setup Bluetooth: Enable and disable Bluetooth, rename, and device status. 8.4.Text Input Method This handset supports full English and French. You can set the language under the path [Settings] > [Phone Setup] > [Language]. Multiple text entry modes are available in the SMS text input screen. By selecting, ‘More” and then ‘Text Entry,’ the mode can be changed. The icon in the upper left of the SMS screen changes to show the modes. Abc –first letter capitalized abc –all letters lower case ABC –all letters upper case En –predictive text in English Fr –predictive text in French 123-numeric In the predictive text modes, after the first two letters are input, suggestions to the word are noted at](https://usermanual.wiki/TeleEpoch/M570.User-Maunal/User-Guide-1431202-Page-23.png)