Telian FCS8010 PCS CDMA Phone User Manual FCS8010
Telian Corporation PCS CDMA Phone FCS8010
Telian >
Users Manual
(Back cover)
All other product or service names are the property of their respective owners.
The information contained in this user’s guides is believed to be correct at the time of
printing. We reserve the right to change or modify any information or specifications
without notice. The contents of this user’s guides are provided “as is.” Except as required
by applicable law, no warranties of any kind, either express or implied, including, but not
limited to, the implied warranties of merchantability and fitness for a particular purpose, are
made in relation to the accuracy, reliability, or contents of this guide.
© Copyright 2005, BRIGHTSTAR Corp., All rights reserved.
1
FCS 8010
(AVVIO 8100)
REV. 1
(12/02/2005)
2
(This page is left blank intentionally)
3
WELCOME
Congratulations on your purchase of an Avvio 8100 product!
Please retain your original dated sales receipt for your records.
For warranty service of your Avvio product you will need to provide a copy of your dated
sales receipt to confirm warranty status.
Please read important safety instructions on page 7 before use.
Read and understand all instructions before use.
Please retain this guide for future reference.

4
CONTENTS
1. SAFETY INFORMATION
2. PREPARE YOUR PHONE FOR USE
2.1 Install the battery
2.2 Charge the battery
2.2.1 Base
2.2.2 Handy
3. FEATURE HIGHLIGHTS
4. ABOUT THE PHONE
4.1 Name and function
4.2 Key functions
4.3 Display indicators
4.3.1 Idle screen
4.3.2 Scroll Bar
4.4 Icons
5. BASIC OPERATIONS
5.1 Power ON and OFF
5.2. Make a call
5.3 Answer a call
5.4 Adjust the volume
5.5 Redial the recent call number
5.6 Caller ID
5.7 Out of Range display and warning tone
5.8 Paging
5.9 Handy and Base ID settings
5.10 SMS and Voice mail
5
6. USE PHONE MENUS
6.1 Navigate menus
6.1.1 Scroll through menus
6.1.2 Use a shortcut
6.1.3 Exit menu levels
6.2 List of Menus
7. ENTER LETTERS AND NUMBERS
7.1 Enter Letters
7.1.1 Edit name
7.1.2 Change case of letters and numbers
8. USE THE PHONE BOOK
8.1 About the phone book
8.2 Add a new phone book Entry
8.3 Edit Entry
8.4 Search Entry
8.5 Search Name
8.6 Erase
8.7 My Phone Number
9. USE CALL LOGS
9.1 Check Missed / Received / Dialed Calls
9.2 Erase Logs
9.3 Call Duration
10. USE SMS (SHORT MESSAGE SERVICE)
10.1 Send a Text Message
10.2 View Inbox / Outbox
10.3
Erase a message
10.4 Message Settings
6
10.5 Use Voice mail
11. SOUND MENU
11.1 Set Ring Type
11.2 Set Ring Tone
11.3 Set Ring Volume
11.4 Set Key Tone
11.5 Set Sound Setting
11.6 Set Alarm
12. USER SETTINGS
12.1 Set Auto Redial
12.2 Set Lift Answer
12.3 Set One Touch
12.4 Set Voice Privacy
12.5 Set Back-Light
12.6 Set LCD Contrast
12.7 Set Language
12.8 Set Data Service
13. SECURITY
13.1 Set Auto Lock
13.2 Set Change Code
13.3 Set Restrict
13.4 Set Reset
14. REFERENCE INFORMATION
14.1 Emergency Calls
14.1.1 Make an emergency call
14.2 Troubleshooting
14.2.1 No Service
14.2.2 What if the call does not go through?

7
15. TECHNICAL INFORMATION
1
SAFETY INFORMATION
SAFETY INFORMATION FOR FIXED PHONES
IMPORTANT INFORMATION ON SAFE AND EFFICIENT OPERATION.
READ THIS INFORMATION BEFORE USING YOUR PHONE.
EXPOSURE TO RADIO FREQUENCY (RF) ENERGY
Your phone contains a transmitter and a receiver. When it is ON, it receives and also
sends out radio frequency (RF) signals. When you communicate with your phone, the
system handling your call controls the power level at which your phone transmits.
Your AVVIO phone is designed to comply with local regulatory requirements in your
country concerning exposure of human beings to RF energy.
OPERATIONAL PRECAUTIONS
To assure optimal phone performance and make sure human exposure to RF energy is
within the guidelines set forth in the relevant standards; always adhere to the following
procedures.
EXTERNAL ANTENNA CARE
Use only the supplied BRIGHSTAR approved antenna. Unauthorized antennas,
modifications, or attachments could damage the phone.
Do NOT hold the antenna when the phone is IN USE. Holding the antenna affects call
quality and may cause the phone to operate at a higher power level than needed. In addition,
use of unauthorized antennas may result in non-compliance with the local regulatory
requirements in your country.
PHONE OPERATION
When placing or receiving a phone call, hold your phone as you would a wireline telephone.
8
DATA OPERATION
When using any data feature of the phone, with or without an accessory cable, position the
phone and its antenna at least 1 inch (2.5 centimeters) from your body.
APPROVED ACCESSORIES
Use of accessories not approved by BRIGHTSTAR, including but not limited to batteries
and antennas, may cause your phone to exceed RF energy exposure guidelines.
RF ENERGY INTERFERENCE / COMPATIBILITIES
Note: Nearly every electronic device is susceptible to RF energy interference from external
sources if in adequately shielded, designed, or otherwise configured for RF energy
compatibility. In some circumstances your phone may cause interference.
Facilities
Turn off your phone in any facility where posted notices instruct you to do so. These
facilities may include hospitals or health care facilities that may be using equipment that is
sensitive to external RF energy.
MEDICAL DEVICE
Pacemakers
Pacemaker manufacturers recommend that a minimum separation of 6 inches
(15centimeters) be maintained between a handheld wireless phone and a pacemaker.
Persons with pacemakers should:
• Always keep the phone more than 6 inches (15 centimeters) from your pacemaker when
the phone is turned ON.
• Not carry the phone in the breast pocket
• Use the ear opposite the pacemaker to minimize the potential for interference.
• Turn OFF the phone immediately if you have any reason to suspect that interference is
taking place.
9
Hearing Aids
Some digital wireless phones may interfere with some hearing aids. In the event of such
interference, you may want to consult your hearing aid manufacturer to discuss alternatives.
Other Medical Devices
If you use any other personal medical device, consult the manufacturer of your device to
determine if it is adequately shielded from RF energy. Your physician may be able to assist
you in obtaining this information.
BATTERIES
Batteries can cause property damage and / or bodily injury such as burns if a conductive
material such as jewelry, keys, or beaded chains touches exposed terminals. The conductive
material may complete an electrical circuit (short circuit) and become quite hot. Exercise
care in handling any charged battery, particularly when placing it inside a pocket, purse or
other container with metal objects. Use only original batteries and chargers.
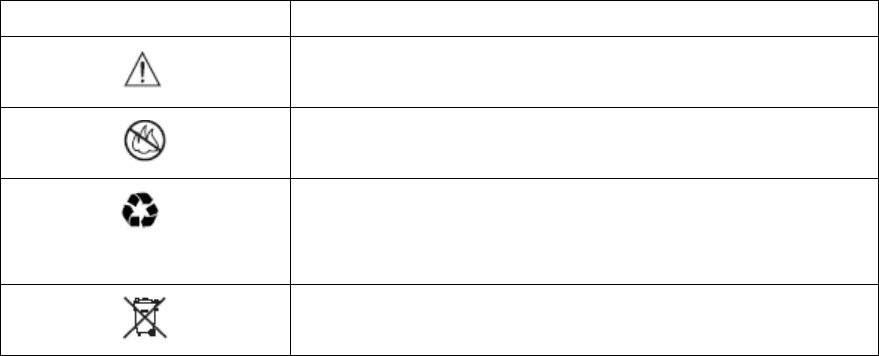
Your battery or phone may contain symbols, defined as follows.
Symbol Definition
Important safety information will follow
Your battery or phone should not be disposed of in a fire
Your battery or phone may require recycling in accordance
with local laws. Contact your local regulatory authorities for
more information.
Your battery or phone should not be thrown in the trash
10
Seizures / Blackouts
Some people may be susceptible to epileptic seizures or blackouts when exposed to
flashing lights, such as when watching television or playing video games. These seizures or
blackouts may occur even if a person never had a previous seizure or blackout.
If you experienced seizures or blackouts, or if you have a family history of such
occurrences, please consult with your doctor.
11
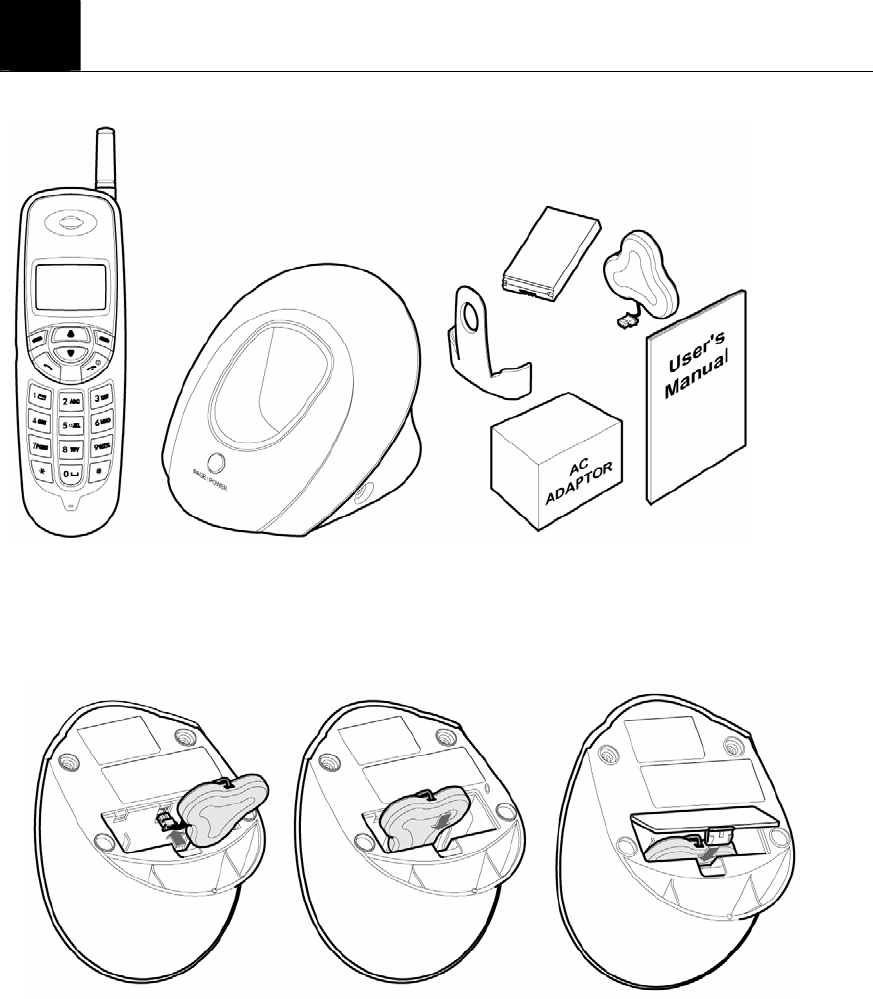
2
PREPARE YOUR PHONE FOR USE
2.1 Install Battery
-. Base
12
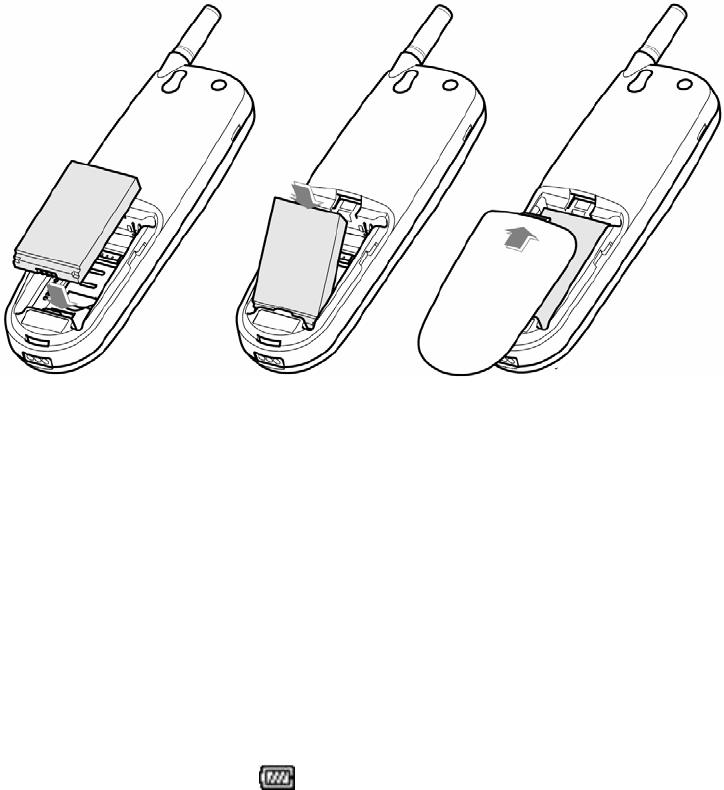
-Handy
Note: To use when sudden power failure, the base battery shall be installed at all times.
Charges after you insert the battery to the handset.
Caution: To prevent injury or burns, do not allow metal objects to contact the battery
terminals. Do not disassemble. Use only the original batteries. Batteries must be disposed
of property.
2.2 Charge the battery
Caution: For initial charge, phone should be charged at least 6 hours. After the phone is
fully charged, battery icon stops scrolling.
2.2.1 Base
① Connect the lead from the charger to the side of the Base.
② Connect the charger to an AC wall outlet.
Note: When you turn on the power, red LED is on. If the handy is on the base, blue LED is
on, which shows charging status. If the battery of the handy is completely discharged, it
may take a while to see blue LED turned on.

13
2.2.2 Handy
① Put the handy on the base and check if charging indication appears on the
display.
② If the battery is discharged, it may take a few minutes before the charging
indication appears on the display.
③ After the phone is fully charged, battery icon stops scrolling. Charging
time depends on a charger and battery used.

14
3
FEATURE HIGHLIGHTS
z Dial tone generation
z Auto Dialing
z Voice mail
z Short Message Service (160 characters x 22ea)
z Emergency call
z Call logs
z Call restriction
z Caller ID
z Clock with alarm
z Cordless function (Out of range display and warning tone)
z Blue back light for LCD and keypad
z Multiple ring tones
z Page button
z Graphic display
z Multi language (English, Spanish, Portuguese)
z 200 phone book memories
z Antenna bar
z Battery bar
z Ear phone / microphone jack
z PC FAX
z Data communication through Mini USB
z Phone Lock
z Call Forwarding
z Call Waiting
z 3 – Way Call
z Key Guard
15
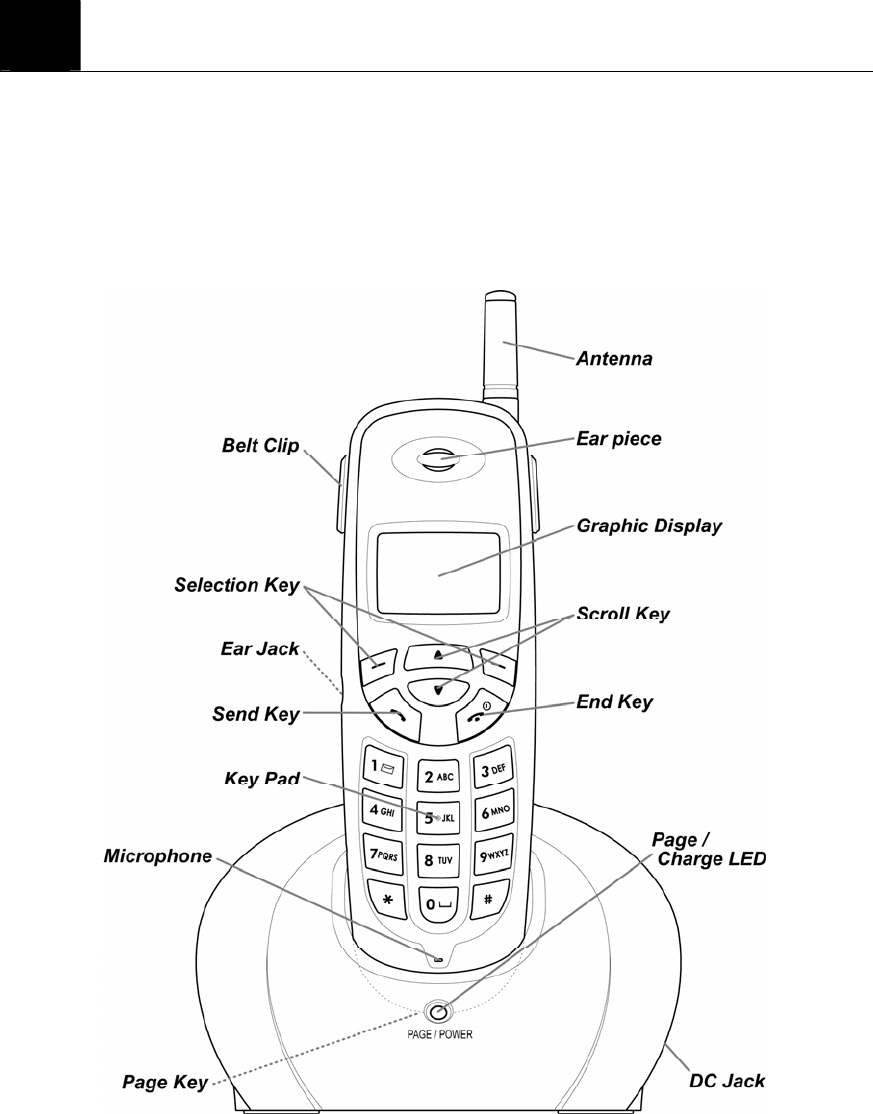
4
ABOUT THE PHONE
This phone is operated in digital mode within 800MHz frequency band.
4.1 Name and function
16
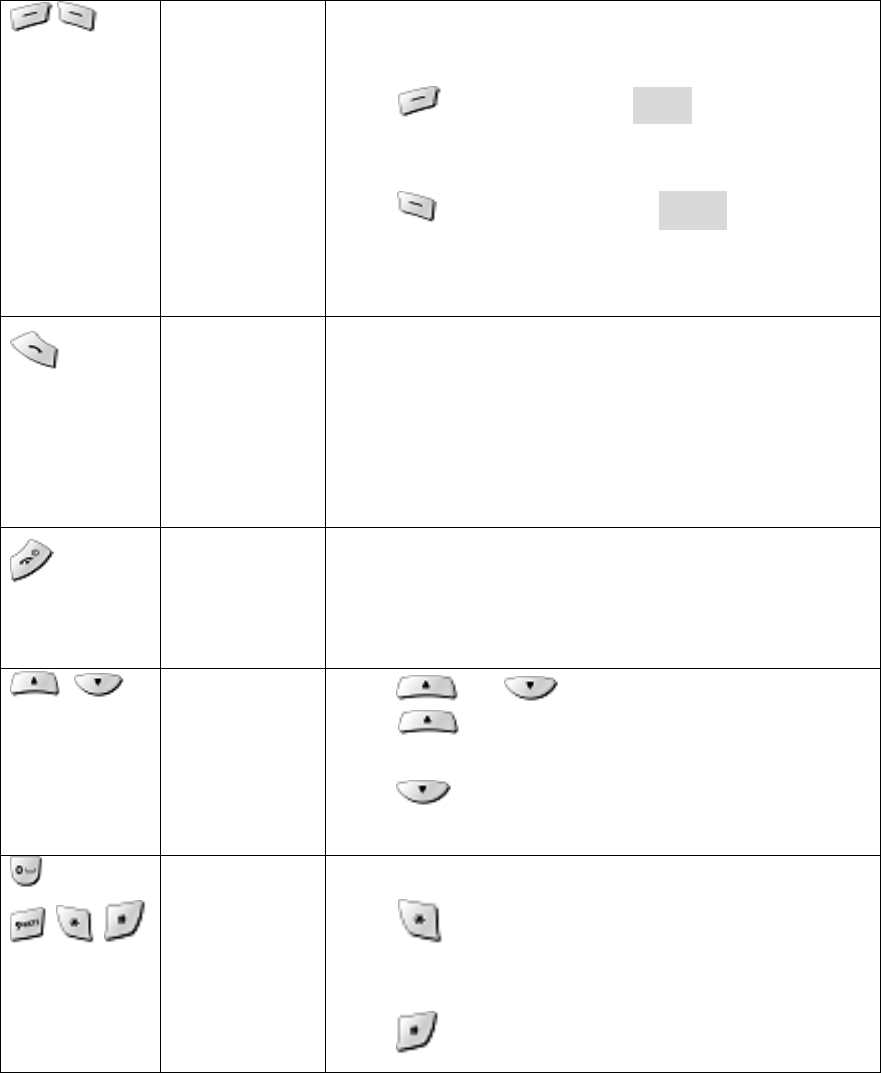
4.2 Key functions
Menu /
Selection Key
The functions of the selection keys depend on the
guiding texts shown above the keys.
Press to directly go to Menu indicated on the
screen above the key.
Press to directly access to Search to search the
phone book.
Send key Press to make a call to name / number shown on the
screen.
Press to answer a call.
Press and hold for 1 second to enter the list of missed,
received and dialed call numbers.
End key Press to end a call.
Press once to exit a function and to return to the idle
screen.
Scroll keys Press or to scroll the menu.
Press to go to Message Menu from standby
status.
Press to go to Sound Menu from standby status.
, ,
Numeric/Text
key, Toggle
key
Used for entering numbers and letters.
Press to toggle between upper case and lower
case in text mode.
Press to cycle among numeric mode and special
17
character mode and text mode.
4.3 Display indicators
4.3.1 Standby screen
The standby screen displays when the phone is turned on. Several features can be used only
when the phone is at the idle screen.
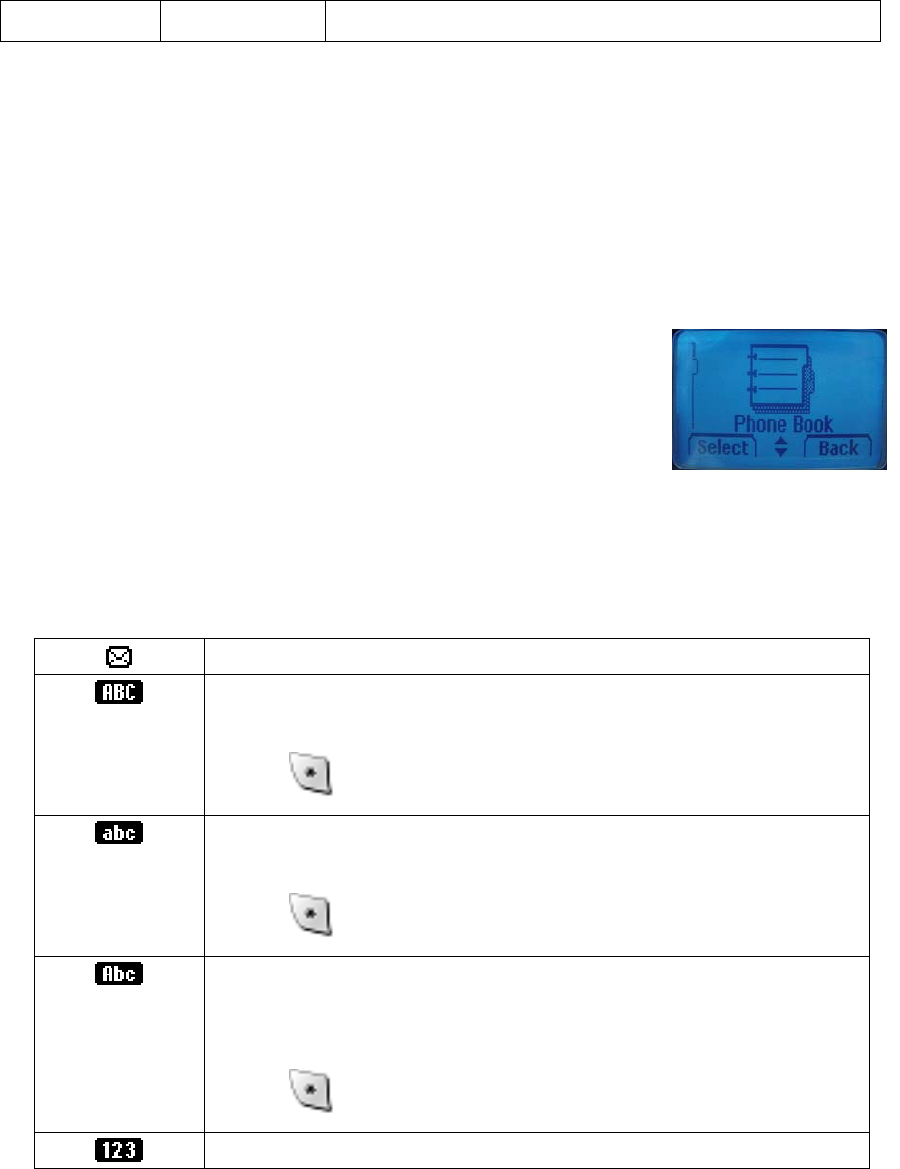
4.3.2 Scroll bar
When you access the phone’s menu, there is a scroll bar
at the far left or right of the screen. This bar indicates
user’s location in the menu: each “tab” on the bar represents
a different menu item.
4.4 Icons
Icons are graphical representations of a specific item or situation.
The list below shows what each icon means.
You have one or more new text or voice messages waiting.
Text mode icon.
This indicates that the characters you enter will be uppercase.
Press to switch to lowercase or first-uppercase.
Text mode icon.
This indicates that the characters you enter will be lowercase.
Press to switch to numeric mode or first-uppercase.
Text mode icon.
This indicates that the first character you enter will be uppercase
and the next characters will be lowercase.
Press to switch to lowercase or uppercase.
Numeric mode icon.
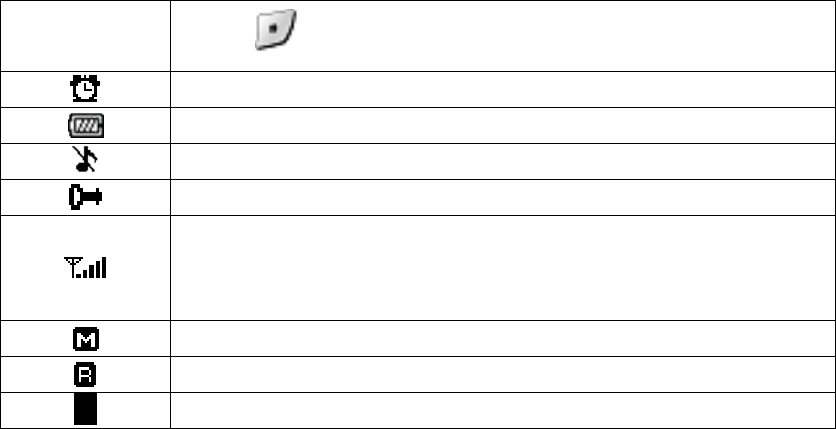
18
Press to switch to numeric mode or text mode.
The alarm clock is set.
Battery indicator
Silent
Phone lock
Signal strength indicator.
This indicator shows the signal strength of the wireless network a
t
your current location. The higher the bar, the stronger signal.
Mute
Roaming Status
1x 1x Indicator

19
5
BASIC OPERATIONS
5.1 Power ON and OFF
Case 1:
① To turn the phone on, press .
Or, handy is automatically powered on when you place the handy on the base.
② To turn the phone off, press and hold .
5.2 Make a call
Case 1:
① Enter the phone number including the area code and press
② Press to end the call or to cancel the call attempt. If handy is placed in a base,
call is automatically terminated.
Note: The phone may generate heat during longer calls.
Case 2:
① Press to hear dial tone
② Enter the phone number including the area code and press .
③ Press to end the call or to cancel the call attempt. If handy is placed in a base,
call is automatically terminated.
Note: If you dial a phone number after the handy generates the dial tone, the call is
automatically made 6 seconds later.
5.3 Answer a call
Case 1:

20
① When the handy is resting in its base, and the phone rings, lift the handy.
② If Lift Answer is set to ON, the ringing will stop and get into talk mode appearing
talk time in the display.
③ Press if Lift Answer is set to off.
Case 2:
① When the handy is out of its base, and the phone rings, press to answer a
call.
5.4 Call Forwarding
Call forwarding is a feature on your phone that lets you forward your incoming calls to
another phone number, even if your phone is turned off. Also, you can receive calls while
Call Forwarding is activated. (Three kind of option – unconditional, no answer, occupied)
Contact your service provider to activate Call Forwarding
5.5 Call Waiting
Call Waiting alerts you to a second incoming call while you are on the phone. To respond
to a call waiting, press (Send). Press Send again to return to the original call.
Contact your service provider to activate Call Waiting.
5.6 Three-Way Calling
Three-Way Calling is a feature on your phone that lets you set up a three-way conversation
with two other persons. (SEND) is used with Three-Way Calling.
During a call with a person, press (Send) and dial to call the second caller. When the
second caller responds, press (Send) again to establish 3 - Way Call.
Contact your service provider to activate 3-Way Calling.
5.7 Menu During the call
During the call, Menu appears in the display as below, you can press Menu to use one of
the options you want.
9 Messages Send or check the message you received or sent.
9 Send Phone # Send your own phone # to the call receiver.

21
9 Mute Press Mute to keep silence and press Unmute to disable
Mute.
9 Voice Privacy Select Privacy mode you prefer between Standard Mode
or Enhanced mode.
9 Tone Length Select Long DTMF or Short DTMF.
5.8 Adjust the Volume
You can adjust the earpiece volume during a call by pressing the scroll keys on the phone.
① Press to increase the volume.
② Press to decrease the volume.
5.9 Redial the recent call number
You can redial the recent call number. The maximum numbers recently missed, dialed or
received numbers that can be stored is 30. Stored numbers may be up to 32 digits long.
① Press for a second, dial tone is generated and recent call numbers appear in
the display.
② Press or to scroll to the number you wish to dial.
③ Press once.
Note: If no recently dialed or received call numbers are stored, you are not able to use
this function.
5.10 Caller ID
Caller ID is a network service that identifies incoming calls. Contact your service provider
to find out how to get this feature.
When Caller ID is active, your phone shows the caller’s phone number during an incoming
call, as long as this number is a part of your service provider’s wireless network.
The wireless network lets you know if it does not recognize the caller’s phone number. The
wireless network will also let you know if the calling party has blocked the Caller ID
feature.
If you have stored the name and number of the calling party in your phone book and that
number is supported by the wireless network, the caller’s name can also appear.
22
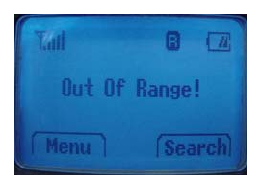
5.11 Out of Range display and warning tone
If handy is out of range from the base, display shows “Out Of Range”. In this state, you are
not able to make or receive a call, and also SMS and Voice mail function does not work.
① Standby
If handy is far away from the base, the handy displays “Out Of Range” on the screen, and
generates “Out of Range” warning beep sound every 2 minutes. This tone lasts for 4
minutes until you get close to the base. If you try to make a call during this state, handy
generates error beep sound and display “Out Of Range”.
When handy is close to the base, “Out Of Range” disappears.
② During a call
During a call, if handy is far away from the base,
the handy displays “Out Of Range” on the screen
and generates “Out Of Range” warning beep sound
every 3 second. You can continue the call if the handy
closes to the base within 30 seconds after beep
sound started. If not, call is automatically dropped.
Note: Exceptionally, you can make an emergency call although the handy is “Out Of
Range” from the base.
5.12 Paging
Press the page button to find handy, and then handy beeps.
After you find it, press any key on the handy to stop the beep sound. You can stop the
beep by pressing page key one more time.
5.13 Handy and Base ID Settings
Once battery in the handy or in the base is replaced, you must configure ID settings as
follows.
23
① Place handy on the base when a charger is connected to the base.
② When handy beeps and display “Charging” and blue LED is on, ID setting is
completed.
Caution: If ID setting is not properly completed, handy displays “Out Of Range”. Retry 5.9
Procedure to properly configure ID settings.
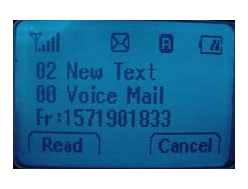
5.14 SMS and Voice Mail
A new SMS or Voice mail arrives, the back light of the handy
is on and the handy displays “XX New Text” or “XX Voice Mail”
and call back number on the screen.
24
6
USE PHONE MENUS
6.1 Navigate menus
A menu is a list of choices you can make. Your phone has 6 main menus. Each main menu
contains numerous submenus that allow you to use the phone book, change the ringing tone,
and so on. You can use menus and submenus in two ways: by scrolling or by using
shortcuts.
6.1.1 Scroll through menus
From the idle screen, press Menu, and then scroll through the menu using the and
.
6.1.2 Use a shortcut
You can use a shortcut to get to options directly without scrolling through lists.
For example, press Menu, 4 and 1 to access ring type setting menu directly.
6.1.3 Exit menu levels
① To return the previous menu level, press Back or No.
② To return to the idle screen, press . No menu setting changes are saved.
6.2 List of Menus
Your phone consists of the menus as below.
1. Phone Book
1. Add New
2. Search Entry
3. Search Name
4. Erase
5. My Phone #
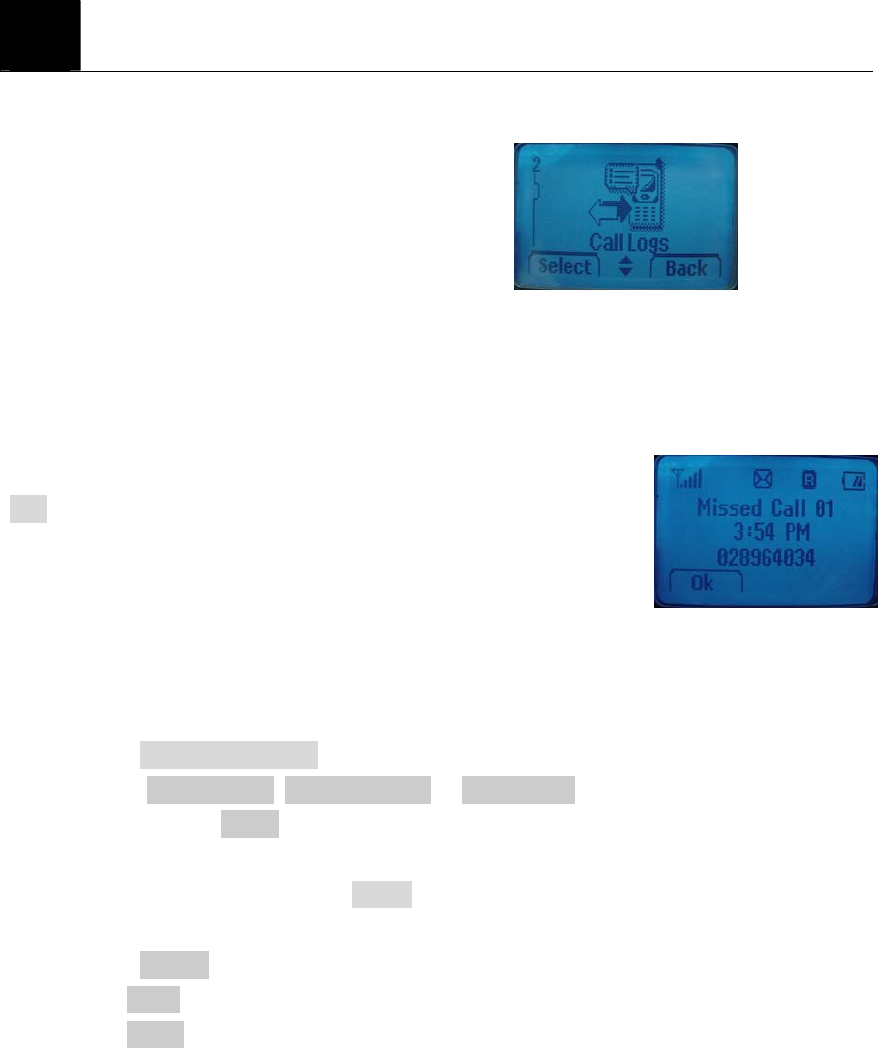
2. Call Logs
1. Missed Calls
2. Received Calls
25
3. Dialed Calls
4. Erase Logs
1. Missed Calls
2. Received Calls
3. Dialed Calls
4. All Logs
5. Call Duration
1. Last Call
2. All Calls
3. Received Calls
4. Dialed Calls
3. Message
1. Write Message
2. Inbox
3. Outbox
4. Erase Message
1. Inbox
2. Outbox
3. Voice Mail
4. Erase All
5. Settings
1. Save Sent SMS
2. Default Call Back #
3. Message Alert
1. Bell & remind
2. Silent
3. Bell
4. Delivery Ask
5. Auto Erase
1. Inbox
2. Outbox
6. Voice Mail
26
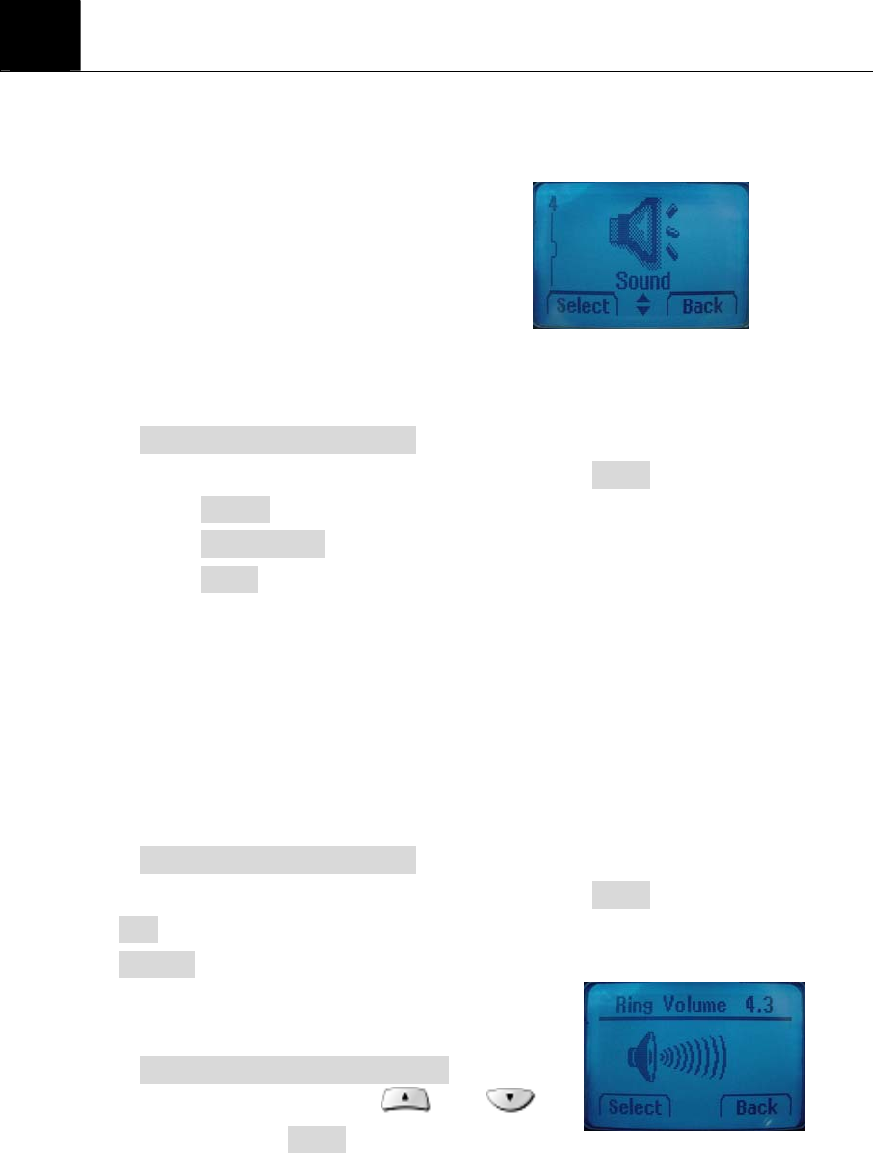
4. Sound
1. Ring Type
1. Ringer
2. Slide Ringer
3. Silent
2. Ring Tone
1. Bell
2. Melody
3. Ring Volume
4. Key Tone
1. Tone Length
1. Long DTMF
2. Short DTMF
2. Tone Volume
5. Sound Settings
1. Minute Alert
2. Connect Alert
3. Release Alert
4. Charge Alert
5. Error Alert
6. Alarm
1. Alarm #1
2. Alarm #2
3. Alarm #3
5. Settings
1. Auto Redial
1. Retry Time
2. Repeat
2. Lift Answer
3. One Touch
4. Voice Privacy
1. Standard Mode
2. Enhanced Mode
27
5. Back-Light
6. LCD Contrast
7. Language
1. English
2. Español
3. Portuguêse
8. Data Service
1. Receive Mode
1. Voice
2. Data
3. Fax
2. Baud Rate
1. 230400bps
2. 115200bps
3. 19200bps
6. Security
1. Auto Lock
2. Change Code
3. Restrict
1. Receiving
2. Dialing
3. International
4. Reset
28
7
ENTER LETTERS AND NUMBERS
You can enter letters or numbers with the phone key pad to save the information into your
phone. To enter letters, press the key associated with the letter you wish to enter until it
appears on the screen (numbers also appear).
7.1 Enter Letters
When you want to add new names or when you search names in the phone book, your
phone automatically switches to the text mode and displays the Abc icon.
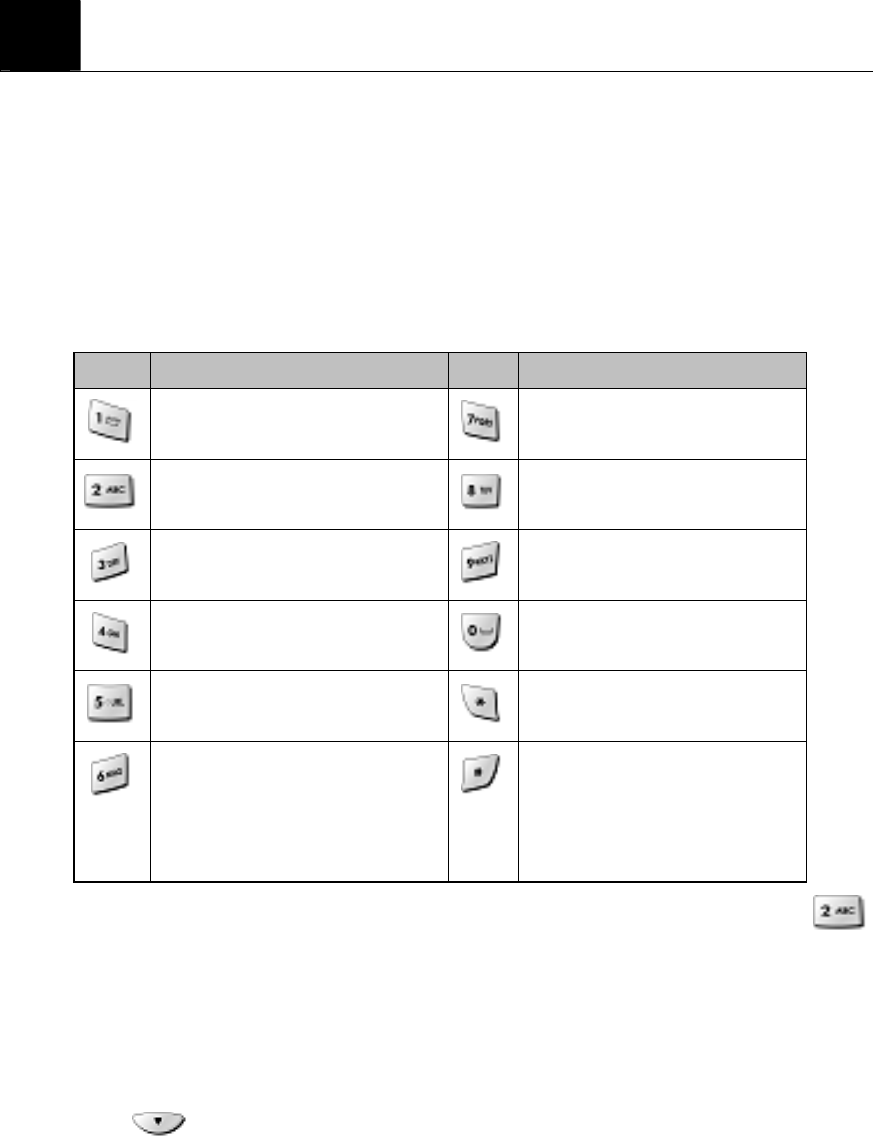
Key Characters Key Characters
1 . @ - ' , / : ? ( P Q R S 7
A B C 2 T U V 8
D E F 3 W X Y Z 9
G H I 4 Enter an empty space
J K L 5 Changes "Abc", "ABC",
"abc"
M N O 6 Changes "Abc", "123",
Special character as below
! @ # % & * < > - ; \ ? . ,
{ } $ [ ] ^_+ = : " ' ( ) / ~
Press a key once or several times to enter the letter(s) you want. For example, press
three times to enter the letter C.
7.1.1 Edit name
To edit a name in the phone book:
① Use to scroll the cursor to the left.

29
② Use to scroll the cursor to the right.
③ Press Clear to correct any mistakes.
7.1.2 Change case of letters and numbers
You can switch the mode among uppercase and lowercase letters by and lowercase
letters and numbers by pressing .
30
8
USE THE PHONE BOOK
8.1 About the phone book
You can store up to 200 entries in the phone.
Entries stored in phone allow numbers of up to 32 digits,
and names of up to 33 characters.
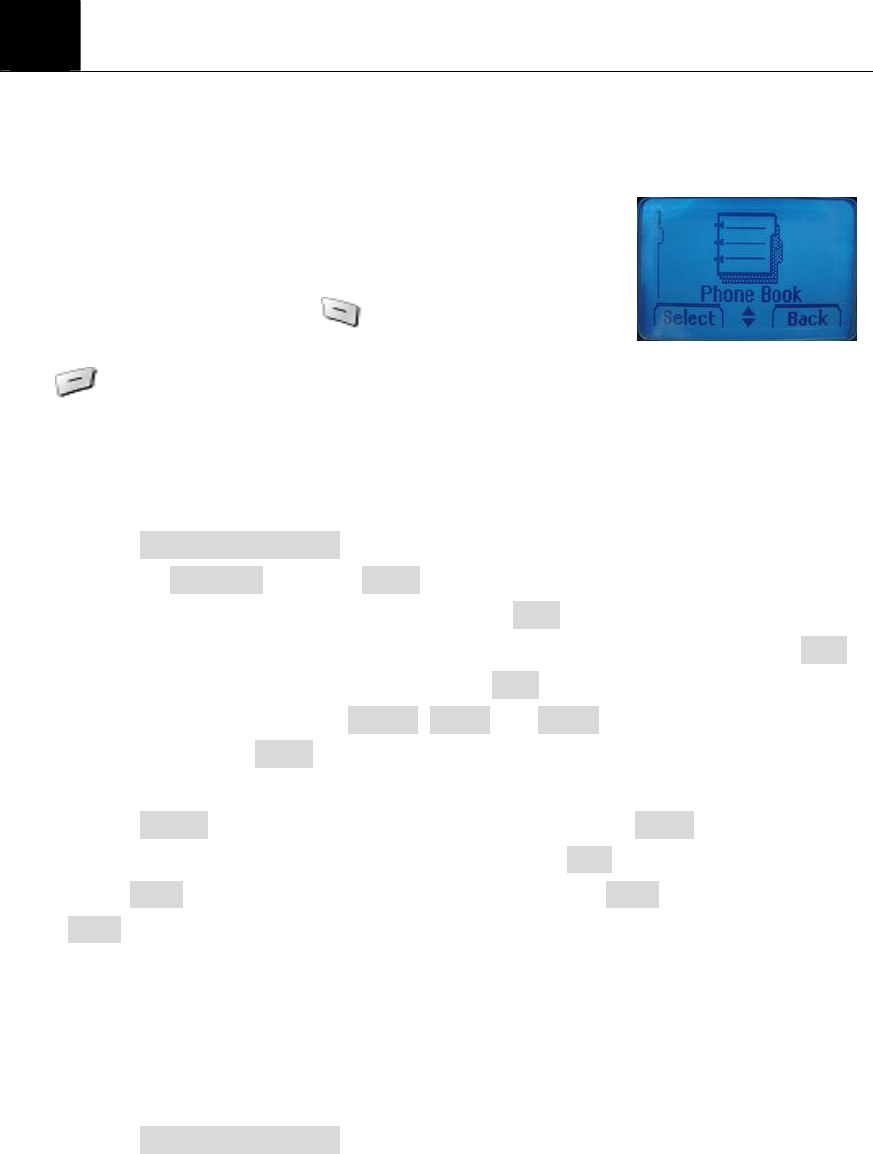
In the idle screen, you can press (Search) on the right
and (Search) on the left to enter to the Phone Book List.
8.2 Add a new phone book Entry
To create a phone book entry:
① Press Menu > Phone book.
② Scroll to Add New and press Select.
③ Enter the number you want to store and press Save.
④ Check entry number shown in the display or change entry number and press Next.
⑤ Enter the name you want to store and press Save.
⑥ Select one of labels among Mobile, Home and Office where you want to store the
number and press Select to complete.
⑦ To store the number into other storing option :
⑧ Press Search and enter the name you want to find or press Select to find all list.
Note : During the call, if you press the phone number, Save appears in the left of the
display and Clear appears in the right of the display. Press Save to add phonebook or
press Clear to edit phone number. And then, follow the above procedure to finish adding
phone book entry.
8.3 Edit Entry
To edit a phone book entry:
① Press Menu > Phone book.

31
② Scroll to Search Name or Search Entry to find the number you want to edit.
③ Select the entry to edit.
④ Press Edit and change the name or the number.
⑤ Press Save to complete the change.
To add the number into other storing option:
① Press Menu > Phone book.
② Scroll to Search Name or Search Entry to find the number you want to add.
③ Select the entry to edit.
④ Scroll to one of the options (Mobile, Home, Office) you want to add and press Edit.
⑤ Enter the number and press Save to complete the change.
8.4 Search Entry
To search a phone book list by Entry:
① Press Menu > Phone book.
② Scroll to Search Entry and press Select.
③ Entry?____ appears in the display and enter the number you want to find, or press
Search to list all entries stored in the phone book.
Note: If One touch is set to ON in the setting menu, you can make a call by pressing long
the last digit of Entry number stored in the phone book from idle screen
8.5 Search Name
To search a phone book list by name:
① Press Menu > Phone book.
② Scroll to Search Name and press Select.
③ Enter one or two characters to match the phone book
stored and press Search.
④ The character you entered is included in the name stored
and entries appear in the display.
⑤ If you press Search without entering a character, all entries are listed.
⑥ Scroll to the number you want to call and press .

32
Note: You also can go directly to this function by pressing Search from the idle screen
8.6 Erase
To delete phone book entries:
① Press Menu > Phonebook.
② Scroll to Erase and press Select.
③ Scroll to One by One to delete one phonebook.
④ Or, press Erase All to decide the way you want to delete phone book entries and
press Select.
⑤ Select Yes (or Erase) if you want to delete, or select No (or Back) to go back to
previous menu.
Caution: Note that this action cannot be undone once you perform this function..
8.7 My Phone #
To store your own phone number in the phone:
① Press Menu > Phonebook.
② Press My Phone # to display your number.
33
9
USE CALL LOGS
The Call History keeps track of:
z Missed Calls
z Received Calls
z Dialed Calls
z Erase Logs
z Call Duration
Note: Your phone can store up to 30 call numbers including missed, received and dialed
calls.
When you miss a call(s), the message of missed call number,
time and call back number appears on the screen. You can press
OK after checking the screen and go back to Standby. The records
will be stored in Call Logs.
You are notified of missed calls only when your phone is turned
on in the service area.
9.1 Check Missed / Received / Dialed Calls
① Press Menu > Call Logs.
② Select Missed Calls, Received Calls or Dialed Call
and press Select.
③ From the list of records, select the number listed
in the display and press Detail to see the detail call log
like date and time.
④ Press Option for the following options.
z Store Save the number to the phone book.
z Erase Delete the chosen number.
9.2 Erase Logs
You can choose to delete Missed Calls, Received Calls and Dialed Calls or delete All.

34
① Press Menu > Call Logs.
② Select Erase Logs and press Select.
③ Scroll to Missed Calls, Received Calls, Dialed Calls or All Calls and press Select.
④ Press Yes to delete or press No to quit.
Caution: Note that this action cannot be undone once you perform this function.
9.3 Call Duration
You can check the call time in below:
z Last Calls Check the call duration of the last call.
z All Calls Check the total call times and call duration of all calls.
z Received Calls Check the total times and call duration of all received calls.
z Dialed Calls Check the total times and call duration of all dialed calls.
① Press Menu > Call Logs> Call Duration.
② Scroll to Last Calls, All Calls, Received Calls or Dialed Calls and press Select.
35
10
USE SMS (SHORT MESSEAGE SERVICE)
Your phone can send or receive text message. It supports 22 messages with 160 characters
each message and you can use Template (already installed in your phone) to shorten the
editing time.
After completion of a message, you can choose to send it out right away, or to save it into
the outbox.
z Write Message
z Inbox [00/00]
z Outbox [00]
z Erase Message
z Settings
z Voice Mail [00]
10.1 Send a Text Message
You can send a text message to one recipient. You can manually enter the phone number,
or you can select the number from the phone book.
Note: The maximum length of a text message differs depending on the capabilities of the
network from which it originated. Also, text messages may be delayed according to network
service condition because messages can be originated in networks.
Contact your service provider for more information.
① Press Menu > Message.
② Scroll to Write Message and press Select.
③ You can enter text, numbers and special characters to create a message. A
maximum 160 characters is supported to send a message.
④ Or, press Temp to use template stored in the phone and select one of the template
messages below.
- Where are you?
- Hello, How are you?
36
- Tell me, urgently.
- I will call you later.
- Contact me when available.
- I will be late.
- Received message. Will reply later.
- What are you doing?
- When can I see you?
- What time is the meeting?
⑤ Press Next to complete the message.
⑥ Press Search to find the number stored in the phone book.
⑦ Scroll to the name you want and press Detail.
⑧ Select Mobil, Home or Office and press Input.
⑨ If the number appears in the display, press Next to save the number.
Or, you can manually enter the number and press Next right after completing
the message.
⑩ Choose one of the following options and press Select.
9 Send Send message to only one number.
9 Edit Message Edit the message
9 Edit Number Edit the phone number you entered.
9 Save Message Save message to the Outbox.
9 Priority Set a priority between Urgent and Normal.
9 Call Back Enter a call back number.
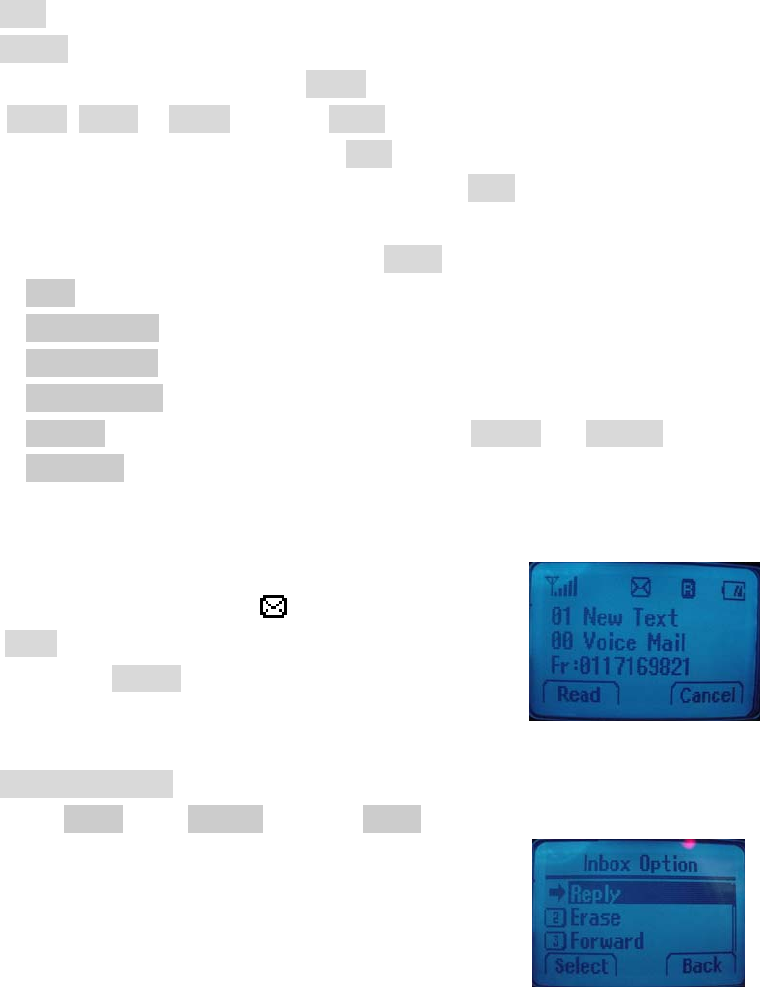
10.2 View Inbox / Outbox
When you receive a message, a call back number is displayed with
a message alert, and a new message icon appears as picture.
You can press Read to read it right away, or ignore it and check it
later in Inbox by pressing Cancel.
Outbox stores messages sent and saved.
① Press Menu > Message.
② Scroll to the Inbox or the Outbox and press Select.
③ From the list, select the message you received or sent

37
and press Select.
④ When you press Option, you can scroll to one of
the following message options:
9 Reply (Inbox) Reply the chosen message.
9 Resend (Outbox ) Send the chosen message.
9 Edit Number(Outbox) Modify the phone number of the chosen message.
9 Erase Delete the chosen message.
9 Forward(Inbox/Outbox) Forward the chosen message.
10.3 Erase a message
To delete messages stored in Inbox, Outbox and Voice mail:
① Press Menu > Message.
② Scroll to Erase Message and press Select.
③ Scroll to Inbox, Outbox or Voice Mail you want to delete and press Select, One
by One. Or, select Erase All to delete all in the message box and press Erase
(Yes) to delete or press Back (No) to quit.
Caution: Note that this action cannot be undone once you perform this function.
10.4 Message Settings
To configure the message settings:
① Press Menu > Message.
② Scroll to Settings and press Select.
③ From the list, select one option you need and press Select.
9 SMS You can save the sent message
9 Default CB # Enter the default call back number.
9 Message Alert Select Bell, Silent or Bell & Remind.
9 Delivery Ack Press Yes to check message delivery or press
No to quit.
9 Auto Erase Set to erase Inbox or Outbox automatically.
10.5 Use Voicemail (Network Service)
You can access to your voice messages by calling your network voice mail phone number.

38
Voice messages are stored to the network voice mail box, not to your phone. Please
contact your service provider for more information.
There are three ways to listen to Voice Mail you received.
① Press Menu > Message.
② Scroll to the Voice mail and press Select.
③ If there is no voice mail received, “Voice Mail Empty!” displays.
④ If there is one or more voice mails received, press to listen to the voice mail.
Or, Dial voice mail box number assigned by local service provider and press .
Note: If you set One Touch dial to On in Settings of the main menu, entry number [001] in
the phone book is set to local voice mail box number. You can press and hold in
standby mode to listen to the voice mail unless you change the number in entry number
[001] to the other phone number.
39
11
SET SOUND
You can set your own preference on the following functions.
z Ring Type
z Ring Tone
z Ring Volume
z Key Tone
z Sound Settings
z Alarm
11.1 Set Ring Type
① Press Menu > Sound > Ring Type.
② Scroll to one of the below options you want and press Select.
9 Ringer
9 Slide Ringer
9 Silent
Caution: Your phone is set to Slide Ringer as a default value. If you set ring type to Ringer,
you must not have the handy close to your ear when it is standby mode or when it is
generating ring sound. If the handy is on the base, even though Slide Ringer is set to
default, the handy generates same volume as if Ringer is set. For your safety, please keep
default setting to Slide Ringer.
11.2 Set Ring Tone
① Press Menu > Sound > Ring Tone.
② Scroll to one of the below options you want and press Select.
9 Bell
9 Melody
11.3 Set Ring Volume
① Press Menu > Sound > Ring Volume.
② Adjust the volume by pressing and
scroll keys and press Select.
40
11.4 Set Key Tone
① Press Menu > Sound > Key Tone.
② Scroll to one of the below options you need and press Select.
9 Tone Length Select Long DTMF or Short DTMF
9 Tone Volume Adjust the volume by pressing or scroll keys.
11.5 Set Sound Setting
① Press Menu > Sound > Sound Settings
② Scroll to one of the below options you need and press Select.
9 Minute Alert
9 Connect Alert
9 Release Alert
9 Charge Alert
9 Error Alert
11.6 Set Alarm
When Alarm is set, the icon appears on the idle screen. You can set up to three
Alarms.
① Press Menu > Sound > Alarm.
② Scroll to Alarm # you want to set and press Select.
③ Select Off, Once or Daily and press Next.
④ Set Time and press Next.
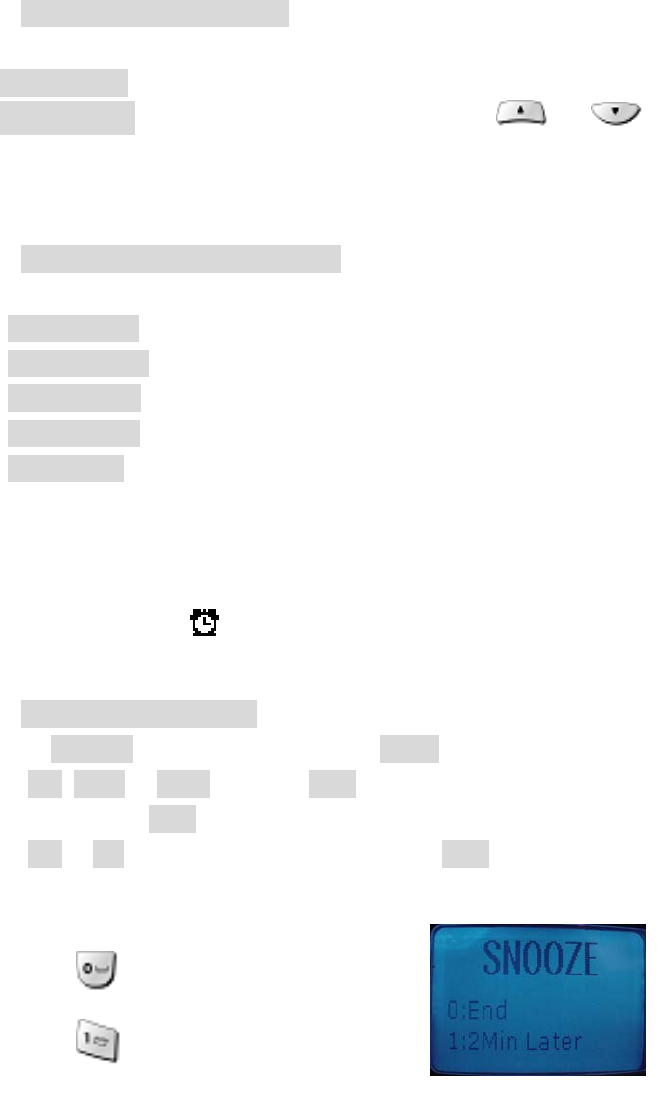
⑤ Select Off or On to use Snooze function and press Next to save the change.
⑥ When the phone alarms at the time you set, press any key to stop the alarm.
⑦ If you set Snooze function,
9 Select : end
9 Select : Snooze

41
12
USE SETTINGS
Setting menu includes:
z Auto Redial
z Lift Answer
z One Touch
z Voice Privacy
z Back-Light
z LCD Contrast
z Language
z Data Service
12. 1 Set Auto Redial
You can set Auto Redial to enable the phone to keep trying dialing if the called party is not
available.
① Press Menu > Settings > Auto Redial
② Scroll to Retry time and press Select.
③ You can choose one of the options you need and press Select.
9 Off
9 3 Seconds
9 5 Seconds
9 7 Seconds
9 10 Seconds
Or, you can scroll to Repeat and press Select.
9 1 time
9 3 times
9 5 times
12. 2 Set Lift Answer
This allows you to set answer mode.
① Press Menu > Settings > Lift Answer.

42
② Select On to answer a call by lifting the handy from the base or Off to answer by
pressing .
12.3 Set One Touch
① Press Menu > Settings > One Touch.
② Select On to dial by pressing and holding the last digit of Entry.
12.4 Set Voice Privacy
① Press Menu > Settings > Voice Privacy.
② Press Select to choose Voice Privacy mode you prefer between Standard Mode or
Enhanced mode.
12.5 Set Back-Light
① Press Menu > Settings > Back-Light
② Scroll to one of the below options you want and press Select.
9 10 Seconds
9 20 Seconds
9 30 Seconds
9 Off
12.6 Set LCD Contrast
There are 7 levels for LCD Contrast.
① Press Menu > Settings > LCD Contrast.
② Adjust contrast using pressing and key.
③ Press Select to save or Back to quit.
12.7 Set Language
You can select the language you need. The phone currently supports three languages
(English, Spanish, and Portuguese).
① Press Menu > Settings > Language.
② Select the language you need and press Select to complete.

43
12.8 Set Data Service
You can use your phone to receive data or fax. In order to use this feature, the handy
should be connected to PC with USB cable.
① Press Menu > Settings > Data Service.
② Scroll to Receive Mode and press Select.
③ Select one of the below options as you want.
9 Voice Set to Voice to make or receive a call.
9 Data Set to Data to receive data from PC.
9 Fax Set to Fax to receive fax from PC.
Also, this menu enables the subscriber terminal to set the data band.
④ Scroll to Band Rate and press Select.
⑤ Select one of the below options as you want.
9 230400 bps
9 115200 bps
9 19200 bps
12.9 PC Connectivity for Email and Internet
For more information, please refer to the quick guide and install PC Application software in
your PC from provided CD.
44
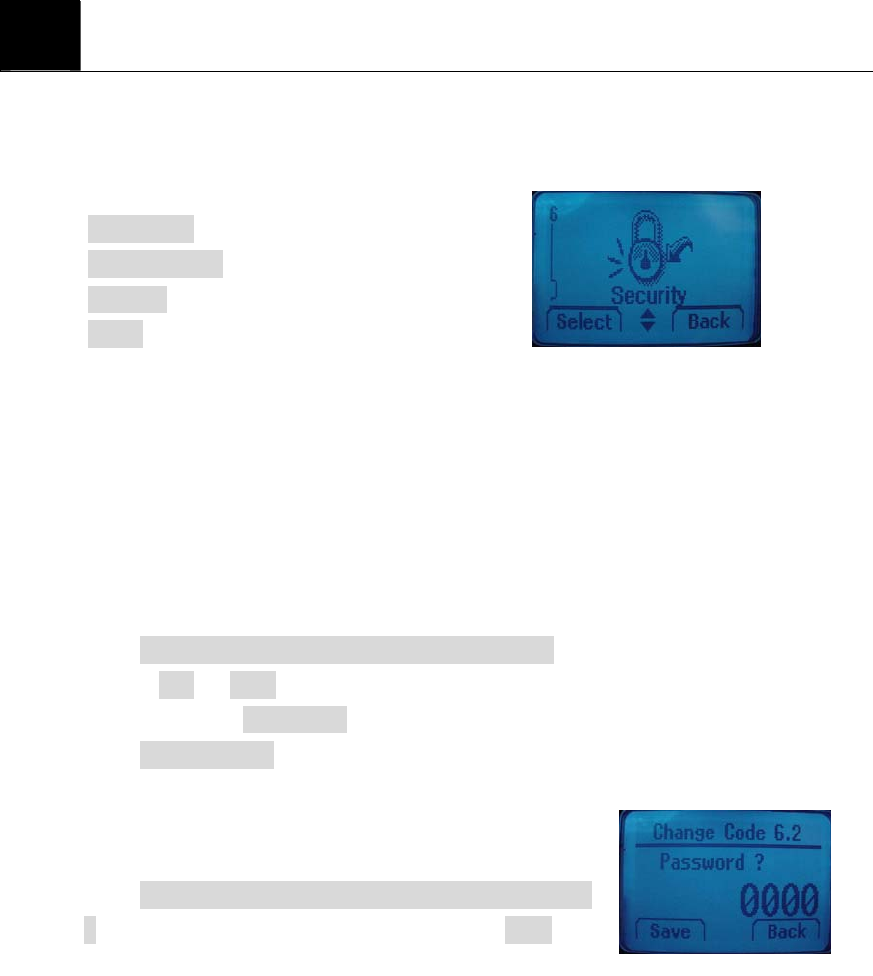
13
SECURITY
Your phone is equipped with a versatile security system that prevents the unauthorized
change of the below phone settings.
9 Auto Lock
9 Change Code
9 Restrict
9 Reset
You must press default security code “0000” to enter into this menu and you can change
security code as you want.
13.1 Set Auto Lock
You can lock the phone to prevent unauthorized use of phone. Even though your phone is
locked, you still can make a call to the emergency number programmed into your phone,
such as 911 or any other official emergency number.
① Press Menu > Security > Password > Auto lock.
② Toggle ON or OFF to lock or unlock phone. If you want to lock the phone after
power on, select Power ON .
③ Press Security code to disenable the lock.
13.2 Set Change Code
You can change security code in four digits.
① Press Menu > Security > Password > Change Code.
② Enter the number you want to set and press Save.
Caution: Contact your service provider if you forget the security code.
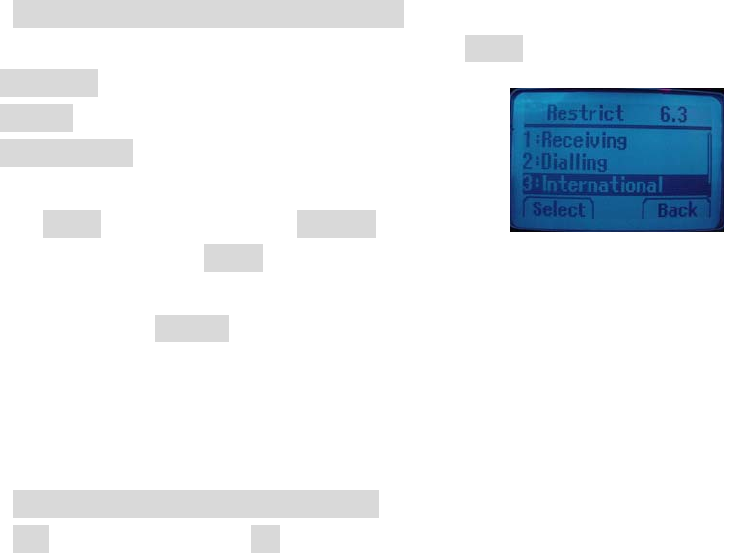
13.3 Set Restrict
45
You can restrict incoming and outgoing calls.
① Press Menu > Security > Password > Restrict.
② Scroll to one of the below options you want and press Select.
9 Receiving
9 Dialing
9 International
③ Scroll to Allow to allow the calls or Restrict to
restrict the calls and press Select to complete.
Note: Exceptionally, you can make an emergency call even when receiving or Dialling or
International calls are set to Restrict.
13.4 Set Reset
This feature resets the current settings to factory default values. All messages stored in the
phone are erased and cannot be undone once performed.
① Press Menu > Security > Password > Reset
② Press Yes to reset the phone or No to quit.
13.5 Set Key Guard
You can set to enable or disable key guard by pressing # and hold. Key guard icon appears
in the display when key guard is enabled.

46
14
REFERENCE INFORMATION
14.1 Emergency Calls
IMPORTANT!
This phone, like any wireless phone, operates using radio signals, wireless and landline
networks, and user-programmed functions. Because of this, connections in all conditions
cannot be guaranteed. Therefore, you should never rely solely on any wireless phone for
essential communications (e.g. medical emergencies).
Remember, to make or receive any calls, the phone must be switched on and be used in a
service area that has adequate signal strength. Emergency calls might not be possible on all
wireless phone networks or when certain network services and/or phone features are in use.
Check with local service providers.
14.1.1 Make an emergency call
① Enter the emergency number for your present location (for example, 911 or any
other official emergency number emergency numbers vary by location).
② Press .
If certain features like restrict calls are in use, you might first need to turn those features off
before you can make an emergency call. Consult this guide and your local cellular service
provider.
When making an emergency call, remember to give all of the necessary information as
accurately as possible. Remember that your wireless phone might be the only means of
communication at the scene of an accident do not terminate the call until given permission
to do so.
14.2 Troubleshooting
14.2.1 No service
If you are outside the wireless service area, “No service” will display on your phone, so no
calls can be made or received.

47
14.2.2 What if the call does not go through?
Your phone can make and receive calls only when it is switched on and in the wireless
network service area.
No service means that you are probably outside the wireless service area. No calls can be
made or received.
48
15
TECHNICAL INFORMATION
Weight Handy : 168.0grams(0.37 lbs)
Base : 153.5 grams(0.33 lbs)
Size (H x W x D)
Handy :
160.3mm(H) x 50.0mm(W) x 34.8(T)
(Antenna adds 27.0mm to the height)
5.31”(H) x 1.96”(W) x 1.37”(T)
(Antenna adds 1.06” to the height)
Base :
83.2mm(H) x 125.0mm(W) x 133.7mm(T)
3.27”(H) x 4.92”(W) x 5.26”(T)
Wireless Networks CDMA 1 x 1900
Frequency Range 1900Mhz
Base Back up Battery 3.6V 280mAh rechargeable battery

49
18
WARRANTY
Limited Warranty for Personal Communication Products, Accessories and Software.
What Does this Warranty Cover? Subject to the exclusions contained below,
BRIGTHSTAR warrants the Avvio branded 8000 that it manufactures (“Products”), to be
free from defects in materials and workmanship under normal consumer usage for the
period(s) outlined below. This limited warranty is a consumer’s exclusive remedy, and
applies as follows to new Avvio branded Products manufactured by BRIGHTSTAR, and
purchased by consumers around the world which are accompanied by this written warranty:
PRODUCTS COVERED
A. Products as defined above.
1. The Fixed Wireless Telephone.
2. The accessories included with the Fixed Wireless Telephone.
LENGTH OF COVERAGE
A. One (1) year from the date of purchase by the first consumer purchaser of the product.
EXCLUSIONS
Normal Wear and Tear. Periodic maintenance, repair and replacement of parts due to
normal wear and tear are excluded from coverage.

50
Batteries. Only batteries whose fully charged capacity falls below 80% of their rated
capacity and batteries that leak are covered by this limited warranty.
Abuse & Misuse. Defects or damage that result from: (a) improper operation, storage,
misuse or abuse, accident or neglect, such as physical damage (cracks, scratches, etc.) to
the surface of the product resulting from misuse; (b) contact with liquid, water, rain,
extreme humidity or heavy perspiration, sand, dirt or the like, extreme heat, or food; (c) use
of the Products for commercial purposes or subjecting the Product to abnormal usage or
conditions; or (d) other acts which are not the fault of BRIGHTSTAR, are excluded from
coverage.
Use of Non-Pulsare branded Products and Accessories. Defects or damage that result
from the use of Non-Avvio branded or certified Products, Accessories, Software or other
peripheral equipment are excluded from coverage.
Unauthorized Service or Modification. Defects or damages resulting from service, testing,
adjustment, installation, maintenance, alteration, or modification in any way by someone
other than BRIGHTSTAR or its authorized service centers are excluded from coverage.
Altered Products. Products or Accessories with (a) serial numbers or date tags that have
been removed, altered or obliterated; (b) broken seals or that show evidence of tampering;
(c) mismatched board serial numbers; or (d) nonconforming or non-AVVIO branded
housings, or parts, are excluded from coverage.
Communication Services. Defects, damages, or the failure of products, due to any
communication service or signal you may subscribe to or use with the Products is excluded
from coverage.
Who is covered? This warranty extends only to the first consumer purchaser, and is not
transferable.
What will BRIGHTSTAR Do? BRIGHTSTAR, at its option, will at no charge repair,
51
replace or refund the purchase price of any Products that does not conform to this warranty.
We may use functionally equivalent reconditioned/refurbished/pre-owned or new Products,
Accessories or parts. No data, software or applications added to your Product, Accessory
or Software, including but not limited to personal contacts, games and ringer tones, will be
reinstalled. To avoid losing such data, software and applications please create a back up
prior to requesting service.
How to Obtain Warranty Service or Other Information?
For information on how to obtain service, contact the place where the product was
purchased or an BRIGHTSTAR Service Center in your country.
In order for this Warranty to take effect, take your unit, along with this policy, to the place
of purchase or to a BRIGHTSTAR Authorized Service Center.
You will receive instructions on how to ship the Products, at your expense, to a
BRIGHTSTAR Authorized Repair Center. To obtain service, you must include: (a) a copy
of your receipt, bill of sale or other comparable proof of purchase; (b) a written description
of the problem; (c) the name of your service provider, if applicable; (d) the name and
location of the installation facility (if applicable) and, most importantly; (e) your address
and telephone number.
What Other Limitations Are There? ANY IMPLIED WARRANTIES, INCLUDING
WITHOUT LIMITATION THE IMPLIED WARRANTIES OF MERCHANTABILITY
AND FITNESS FOR A PARTICULAR PURPOSE, SHALL BE LIMITED TO THE
DURATION OF THIS LIMITED WARRANTY, OTHERWISE THE REPAIR,
REPLACEMENT, OR REFUND AS PROVIDED UNDER THIS EXPRESS LIMITED
WARRANTY IS THE EXCLUSIVE REMEDY OF THE CONSUMER, AND IS
PROVIDED IN LIEU OF ALL OTHER WARRANTIES, EXPRESS OF IMPLIED. IN NO
EVENT SHALL BRIGHTSTAR BE LIABLE, WHETHER IN CONTRACT OR TORT
(INCLUDING NEGLIGENCE) FOR DAMAGES IN EXCESS OF THE PURCHASE
PRICE OF THE PRODUCT, OR FOR ANY INDIRECT, INCIDENTAL, SPECIAL OR
CONSEQUENTIAL DAMAGES OF ANY KIND, OR LOSS OF REVENUE OR
PROFITS, LOSS OF BUSINESS, LOSS OF INFORMATION OR DATA OR OTHER
52
FINANCIAL LOSS ARISING OUT OF OR IN CONNECTION WITH THE ABILITY OR
INABILITY TO USE THE PRODUCTS, TO THE FULL EXTENT THESE DAMAGES
MAY BE DISCLAIMED BY LAW.
Some states and jurisdictions do not allow the limitation or exclusion of
incidental or consequential damages, or limitation on the length of an implied
warranty, so the above limitations or exclusions may not apply to you. This
warranty gives you specific legal rights, and you may also have other rights
that vary from state to state or from one jurisdiction to another.
53
REGULATORY INFORMATION
Cautions
Modifications not expressly approved by the party responsible for compliance could void
the user’s authority to operate the equipment.
FCC compliance Information
This device complies with part 15 of FCC Rules.
Operation is subject to the following two conditions:
1. This device may not cause harmful interference, and
2. This device must accept any interference received.
Including interference that may cause undesired operation.
Information to User
This equipment has been tested and found to comply with the limits for a Class B digital
device, Pursuant to part 15 of the FCC Rules. These limits are designed to provide
reasonable protection against harmful interference in a residential installation.
This equipment generates, uses and can radiate radio Frequency energy and, if not installed
and used in accordance with the instructions, may cause harmful interference to radio
communications.
However, there is no guarantee that interference will not occur in a particular installation. If
this equipment does cause harmful interference to radio or television reception, which can
be determined by turning the equipment off and on, the user is encouraged to try to correct
the interference by one or more of the following measures:
▪ Reorient or relocate the receiving antenna.
▪ Increase the separation between the equipment and receiver
▪ Connect the equipment into an outlet on a circuit different from that to which the receiver
is connected.
Consult the dealer or an experienced radio/TV technician for help.
54
FCC RF EXPOSURE INFORMATION
Read this information before using your phone
In August 1996 the Federal Communications Commission (FCC) of the United States with
its action in Report and Order FCC 96-326 adopted an updated safety standard for human
exposure to radio frequency (RF) electromagnetic energy emitted by FCC regulated
transmitters. Those guidelines are consistent with the safety standard previously set by both
U.S. and international standards bodies. The design of this phone complies with the FCC
guidelines and these international standards.
Use only the supplied or an approved antenna. Unauthorized antennas, modifications, or
attachments could impair call quality, damaged the phone, or result in violation of FCC
regulations.
Do not use the phone with a damaged antenna. If a damaged antenna comes into contact
with the skin, a minor burn may result. Please contact your local dealer for replacement
antenna.
Body-worn Operation
This device has been tested for body-worn operation and meets FCC RF exposure
guidelines.
Body-worn operation is restricted to accessories that maintain a minimum of 1.5cm
separation to the body and do not contain metallic components.
Use of any other body-worn accessories may not compliance with FCC RF exposure
guidelines.
For more information about RF exposure, please visit the FCC website : www.fcc.gov
Specific Absorption Rate (SAR) for Wireless Phones
The SAR is a value that corresponds to the relative amount of RF energy absorbed in the
head of a user for a wireless handset. The SAR value of a phone is the result of an extensive
testing, measuring and calculation process. It does not represent how much RF the phone
emits. All phone models are tested at their highest value in strict laboratory settings. But

55
when in operation, the SAR of a phone can be substantially less that the level reported to
the FCC. This is because of a variety of factors including its proximity to a base station
antenna, phone design and other factors. What is important to remember is that each phone
meets strict federal guidelines. Variations in SARs do not represent a variation in safety. All
phones must meet the federal standard, which incorporates a substantial margin of safety.
As stated above, variations in SAR values between different model phones do not mean
variations in safety. SAR values at or below the federal standard of 1.6W/kg are considered
safe for use by the public.
The highest reported SAR values of FCS-8010 are:
PCS mode (Part 24) – Head: 1.450 W/kg; Body-worn: 0.561 W/kg
FCC Radio Frequency Emission
This phone meets the FCC Radio Frequency Emission Guidelines. FCC ID number: NPQFCS8010 .
More information on the phone’s SAR can be found from the following FCC website:
http://www.fcc.gov/oet/fccid