Telit Mobile Terminals S p A GM825 Licensed Portable User Manual gm825 en
Telit Mobile Terminals S.p.A. Licensed Portable gm825 en
Exhibit 8 User Manual
1
GM 825 USER'S MANUAL
INTRODUCTION
We thank you for your custom. Please read this user's manual carefully
so you can fully appreciate the advanced features of your phone.
This dual-band GSM phone operates entirely automatically on the dual
frequency band (GSM 900-1800 MHz, as long as the network provider
offers this service), thereby ensuring high quality conversation and
better coverage for the radio signal. It can be used in all European Union
member countries, in other countries that have implemented GSM
networks and wherever (e.g. United States) a GSM-compatible 1900 MHz
network has been implemented.
In addition, the phone has a WAP Browser to access Internet web sites
with a data call, besides an advanced messaging system (E M S) that
revolutionizes the conventional SMS message.
The GM825 user interface is designed to be friendly and easy to use; just
reading the first few pages of this manual will however allow you to use
the phone's basic functions immediately.
CE CONFORMITY MARK
The phone conforms to European Union standards
EN 60950
ETS 300342
And it has been manufactured in compliance with the following European
directives:
99/5/EC
89/336/EEC
73/23/EEC
In order to make continual improvements, the specifications, design and
other information given in this manual may change without notice.
© 2001 Telit Mobile Terminals S.p.A. All rights reserved.
English
English
2
INTRODUCTION 1
INSTALLING THE SIM CARD 8
Installing the SIM card 8
RECHARGING THE BATTERY 11
Low battery indicator 12
Recharging trouble 12
PRESENTING THE PHONE 13
KeysDescription 13
Indicators on the display 14
MAIN FUNCTIONS 17
Switching On 17
Switching Off 17
Emergency Calls 17
How to send a call 18
Correcting typing errors 18
International calls 18
Automatic repetition 18
Quickly send a call to a number in the phonebook
18
Answering a call 19
Automatic answer ^ 19
Answer calls by pressing any key 19
Quickly turning off the ringer 19
Information on missed calls 19
Adjusting the volume 20
Turning the microphone on and off during a con-
versation 20
3
Noting down a number during a call 20
Keypad protection _ 20
Passwords 20
Security code (6 digits) 20
Autoblock 21
PIN and PIN2 codes (from 4 to 8 digits) 21
PUK and PUK2 codes (8 digits) 21
MENU - GUIDE TO THE USER INTERFACE 22
Dialogue method 22
Number method 22
MENU LAYOUT 23
main menu (overall view) 23
USING THE CALL LOG 29
Last missed calls (Menu 3-2) 29
Last calls sent 30
USING THE PHONEBOOK 31
Saving a phone number with the associated name
31
Retrieving a phone number from the phonebook 32
Using the data in the phonebook 32
Phonebook Menu 32
MANAGING CALLS 34
Options during a call 34
Turning off the ringer when the phone rings and re-
jecting a call 35
Sending DTMF tones 35
The EMS standard 37
4
Default animations: list and meanings 39
MESSAGES – MENU LAYOUT 40
SMS messages (Menu 2-1) 42
New (Menu 2-1-1) 42
Entering text with the conventional method t 43
Entering text with method s 44
T9 / EMS menu 45
Ins. object 45
Phonebook 46
Language 47
T9 help 47
Sending the message 47
Received (Menu 2-1-2) 48
Receiving and reading an EMS containing sounds
or images 48
50
Class 0 SMS messages 50
Written (Menu 2-1-3) 50
Parameters (Menu 2-1-4-X) 50
Name (2-1-4-X-1) 50
SMS Centre Number (2-1-4-X-2) 50
Validity (2-1-4-X-3) 51
Destination (2-1-4-X-4) 51
Protocol (2-1-4-X-5) 51
Set default (2-1-4-X-6) 51
Automatic deletion (Menu 2-1-5) 51
Reply path (Menu 2-1-6) 51
5
Confirm (Menu 2-1-7) 51
Information (Menu 2-1-8) 52
Cell Broadcast (Menu 2-2) 52
Activation (Menu 2-2-1) 52
Subject (Menu 2-2-2) 52
Call mailbox (Menu 2-3) 53
INTERNET WITH WAP 54
Interned access (Menu 12-1) 54
Internet configuration (Menu 12-2) 56
Browser menu 58
Preferred (menu 12-3) 62
ALL THE MENUS AND FUNCTIONS,
DEFINITIONS AND USE 63
Network services (Menu 0) 63
Phonebook (Menu 1) 63
Messages (Menu 2) 63
Calls (Menu 3) 63
Audio (Menu 4) 64
Settings (Menu 5) 66
Display (Menu 5-1) 66
Language (Menu 5-2) 67
Call waiting (Menu 5-3) 68
Keys lock (Menu 5-4) 68
Answer mode (Menu 5-5) 68
Internet (Menu 5-6) 68
Call control (Menu 6) 68
Beep every 60 seconds (Menu 6-1) 68
6
Call length (Menu 6-2) 68
Costs (Menu 6-3) 68
Send number (Menu 6-4) 69
Clock (Menu 7) 69
Adjustment (7-1) 69
Alarm (Menu 7-2) 69
Date format (Menu 7-3) 69
Information on the phone (Menu 8) 69
Personal number (Menu 8-1) 69
IMEI (Menu 8-2) 69
Software (Menu 8-3) 70
Information on the SIM card (Menu 8-4) 70
Total life (Menu 8-5) 70
Security (Menu 9) 70
PIN (Menu 9-1) 70
Phone (Menu 9-2) 70
Call block (Menu 9-3) 70
Fixed dialling numbers (Menu 9 4) 71
Call divert (Menu 10) 71
Always divert (Menu 10-1) 71
Missed calls (Menu 10-2) 71
Cancel (Menu 10-3) 71
GSM networks (Menu 11) 71
Network search (Menu 11-1) 71
Selection (Menu 11-2) 72
Network list (Menu 11-3) 72
Own network (Menu 11-4) 72
7
Select Band (Menu 11-5) 72
Internet (Menu 12) 72
ACCESSORIES 73
TROUBLESHOOTING 74
IMPORTANT NOTICES 77
QUICK HELP 79
How to make your first call 79
How to answer a call 79
How to save a number to the phonebook 79
How to retrieve a position from the phonebook 80
How to send an EMS message 80
How to reach the first SMS message 81
7
IMEI ______________________________________
Security code ___________________________
Autoblock code _________________________
Phone no. ____________________________
Phone no. ____________________________
Personal notes
Note: The above data are needed to use the phone. Keep this manual in a
safe place.
8
INSTALLING THE SIM CARD
Installing the SIM card
To be able to use the phone it is necessary to have a valid “plug-in” (small)
SIM card. This SIM card is supplied by the network operator or service
provider.
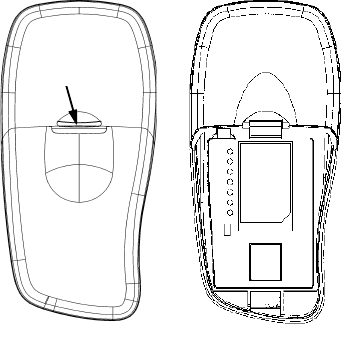
1 Switch off the phone and take off the battery cover on the back, pulling the
release towards the bottom of the phone.
2 Take the battery out, paying attention not to pull on the cable connecting it
to the phone.
Free the sim-card holder flap by moving the metal clip towards the top of
the phone and take it out.
3Insert the SIM card into the flap so that the contacts face into the phone, put
the sim-card holder flamp back into its seat and lock it with the metal clip.
SGANCIO
RELEASE
9
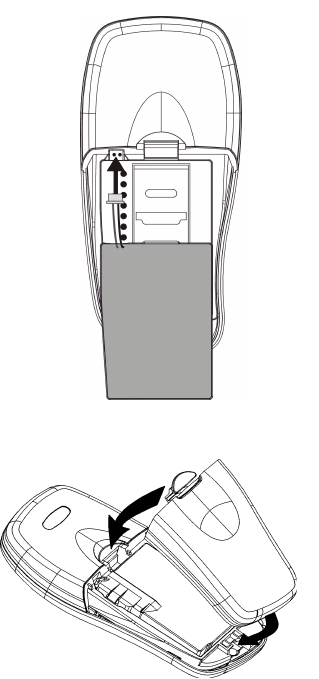
4Insert the battery so that the connecting cable does not obstruct the battery
cover catch, as shown in the figure.
5Place the battery cover with its bottom on the case of the phone, then gen-
tly press in the slot near the catch for it to click home.
1
2

10
To insert the SIM card,
unlock the SIM holder
flap by sliding the metal
clip in the direction
shown by the OPEN
arrow.
Then lift the flap and
insert the SIM card with
its contacts facing
downwards, as shown
here alongside.
After fully inserting the
SIM card, close the flap
and lock it with the clip
in the direction shown
by the LOCK arrow.
11
RECHARGING THE BATTERY
This phone is powered with Ni-MH (nickel-metal hydrate) rechargeable
batteries.
Ni-MH batteries have the so-called “memory effect”: a progressive loss of
power efficiency if not correctly recharged. To get the best performance over
time it is advisable to recharge it only when it has fully discharged.
To recharge the Ni-MH battery, proceed as follows:
1 Switch off the phone by holding down key .
2 Insert the battery charger connector fully into the socket on the top of the
phone, then connect the battery charger to the electric power socket (with
the right voltage, as stated on the label of the battery charger).
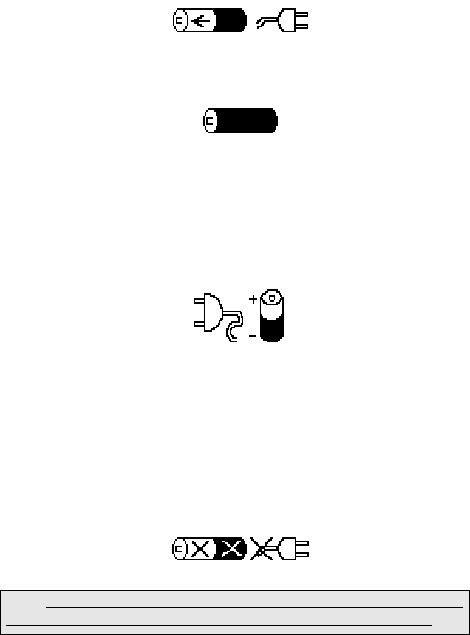
3 Holding down any key (except for ) will display the following symbol:
to show the battery is discharging.
Note: Use genuine batteries and battery chargers only.
IMPORTANT NOTICES
• Connect the battery charger solely with the battery installed.
• Although the connectors are different, do not get the battery
recharge socket on the top side of the appliance mixed up with
the handsfree jack on the left-hand side.
• It is perfectly normal for the recharge connector, when inserted in the
appliance, to protrude out of the case slightly.
12
4 After fully discharging the battery, the phone will automatically start
recharging and the previous symbol will be replaced by the following one:
5 After recharging, this symbol will appear:
The battery has charged - disconnect the battery charger from the power
socket and from the phone.
Low battery indicator
When the battery has discharged completely, the phone beeps and the
following symbol is displayed for a few seconds:
It is necessary to recharge the battery.
Note: Recharging requires the ambient temperature (which is not the one
shown on the display) to be between 0º and +45º.
Recharging trouble
Any trouble (temperature too high, battery damaged, etc.) will be displayed in
this way:
Note: It is advisable to put a new battery through two complete discharge
and recharge cycles to increase its life and performance significantly.

13
PRESENTING THE PHONE
Keys Description
to switch the phone on and off; to enable/disable the “Mute” function
during conversation
Soft Keys: to perform the menu functions described by the
symbols above the keys on the display (e.g., for
)
to send a call, confirm a selection; quickly see the call log; disable
autoblock (see page 21)
to access the menus, move on to the next item, access other options;
pressed for 1 second to enable/disable the fast ringer silencing function
to end or refuse a call, reject a selection, quit a menu without changing
the setting, pressed for 1 second to turn autoblock back on; if held
down, to quit the menu completely, irrespective of the current level
to delete a character (or all of them if held down), figure, call, EMS,
content of a phonebook position or calls lost shown on the display; to
quit a menu level and go back to the higher menu level
- to enter the phone numbers or characters available on each key
besides entering , to scroll down through menu selections,
phonebook positions and EMS messages; to decrease a value; to
increase the pauses (P) and waits (W) in the sequence of DTMF
tones, after entering at least 1 number on stand-by
besides entering #, to scroll up through menu selections, phonebook
positions and EMS messages; to increase a value; to retrieve the
corresponding phonebook position when preceded by a number; on
stand-by to lock or unlock the keypad
Note: During WAP Internet sessions and when using the T9, some keys
have special functions. Refer to the relevant sections for this.
Note: The GM825 supports a new transmission standard for short text
messages (conventional SMS) that in this manual is referred to as EMS
(Enhanced Messaging Service).
14
Indicators on the display
The display can show symbols and messages providing information on the
operating conditions of the phone.
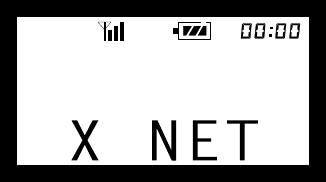
Xindicates the nationality of the GSM network
NET
NETNET
NET indicates the name of the GSM network on which the phone is
registered (when switching on, while waiting for network registration,
the factory welcome message is displayed, which can be
personalized in the relevant menu)
Date
DateDate
Date depending on the menu settings, indicates the day of the week and
the date or a personal message written in the relevant menu, or
alternately:
SUBJECTS
SUBJECTSSUBJECTS
SUBJECTS of the Cell Broadcast messages (e.g., city name), depending on the
ones activated and the service offered (when the Cell Broadcast
message display is enabled, the information and other messages are
hidden: press c to display them.
£indicates the remaining credit (the function and symbol depend on
the SIM card)
Athe alarm has been activated
Han earphone or handsfree device is connected (optional extra)
Xindicates the strength of the network signal (at most 3 bars); only
emergency calls are possible if there is no antenna and GSM
network name, but there are bars
Bindicates there are inroad EMS messages; when blinking it indicates
the SMS message memory of the SIM card is full; delete one or more
EMS messages to receive others
f
B
A H
D A T E / S U B J E c T S / £
15
Pindicates the battery charge: from 3 steady segments (full) to blinking
(discharged). During recharging, the segments in the battery come on
progressively; they stay on steady when the charge is complete
12.00 displays the current time. To adjust the clock, see page 69
fthe ringer is on
Uthe ringer is off
Z]indicates the phone is connected to the battery charger and is
recharging the battery; blinking shows the phone is connected to the
battery charger but the charge is complete
Sindicates a diverted call or alternately:
Rindicates a block on incoming calls or alternately:
Qthe block on outgoing calls has been activated
bthe keypad is locked. To unlock it, hold down , then
Xindicates a block on some functions: outgoing calls, access to SMS
message functions, phonebook, etc.
aautomatic reply has been turned on
Proaming is active (the phone is connected on a different GSM network
to the one that issued the SIM card and therefore calls pass through it
with possibly higher costs)
gindicates the phone is registered on a GSM network that cannot be
used via roaming – only emergency calls are therefore possible
Twhen on it indicates the home zone status (refer to your network
operator or service provider for further information) or your own
network after searching for the network from the menu.
Fthere is a message in the answering service (function depends on the
SIM card)
During a call, one of the following symbols appears on the display:
Nindicates an active outgoing call
Oindicates an active incoming call
Vindicates an outgoing call on stand-by (hold)
Windicates an incoming call on stand-by (hold)
16
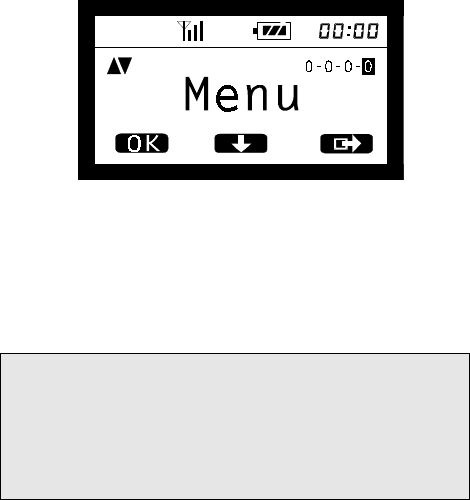
Using
to access the menu, the display takes on this appearance:
ST indicates there are additional fields (upwards and downwards)
at the same menu level.
0-0-0-0indicates the current menu level
Menu indicates the name of the menu
"$indicate the functions activated with the corresponding bottom
Soft Keys .
Caution: This manual often specifies the key to press to perform a certain
operation.
A black symbol on a white background – for instance
- indicates the
key to press.
A white symbol on a black background, which sometimes appears
alongside (for instance, ), is the symbol shown on the display
corresponding to that key and NOT another key to press.
17
MAIN FUNCTIONS
Switching On
Carefully read the instructions and information supplied by the network
operator or service provider with the SIM card.
1 Insert a valid SIM card into the phone when it is switched off.
2 Insert the battery.
3 Charge the battery by connecting the phone to the battery charger.
4 Hold down to switch on the phone. If the phone displays the message
requesting the
PINX
key in the code (provided with the SIM card) displayed as asterisks, then
confirm with or .
Depending on the information contained in the SIM card used, the phone
automatically sets the display language (if it is in the phone memory). If the
language is not in the memory, the phone will automatically use a per-set
language. If necessary, change the display text language by pressing H,
scroll with to go onto the required language and confirm the selection
with .
5 If the PIN code has been entered correctly the display will show:
and the phone will register with the GSM network while the display stays on
stand-by.
Switching Off
Hold down until it switches off.
Emergency Calls
It is possible to make an emergency call at any time: press for 1 second,
dial 112 and press . Without a SIM card, press L and confirm with
.
Note: You must not misuse this service. Read the documentation of the network
operator or service provider on emergency calls, especially if in an area covered
by a foreign operator.
The phone can make and receive calls only if it is switched on, a SIM card
is inserted (activated with the PIN, when applicable) and it is in an area
covered by a GSM network.

18
How to send a call
Dial the phone number with the code and press .
The display will show the number dialled, the word “Call” and the outgoing call
symbol:
N
Once connected, information on the call status will be displayed and, when the
call ends, on its length and possibly cost.
Note: Displaying the cost depends on the network and type of contract.
Correcting typing errors
Delete the last character shown on the display by pressing .
To delete the number completely, hold down .
International calls
Hold down until + is displayed. Dial the international code of the required
country, the dialling code and phone number and press .
For instance, if you want to call the phone number 123456 in Rome: +39 06
123456; or Helsinki: +358 9 123456.
Automatic repetition
When the number dialled cannot be reached because it is engaged or there is
no answer, after the “Recall ?” message, it is possible, by pressing , to
enable the phone to make another 10 attempts at making the call (with
progressive delays: 5 sec., 1 min., etc.). An audible warning signals when the
connection is made.
Press to disable the function, straight after or while attempting to
make the call.
Quickly send a call to a number in the phonebook
During stand-by, for a couple of seconds press the numerical key
corresponding to the position in the phonebook (from 1 to 9) where the
number you want to call has been saved (the call is sent automatically), or:
Briefly press the corresponding number and then .
To be able to correct the number before sending it, key in the number of the
position in the phonebook following it with , make the correction and then
press .

19
Note: to be able to take full advantage of this function, put the numbers you
use most in the first 9 positions of the phonebook (see page 31).
Answering a call
When you receive a call, the display blinks >>CALL<< and the phone starts to
ring (if the ringer is on). If the caller can be identified, the display shows their
phone number (or name, if this has been saved in the phonebook).
To answer, press ; To turn off the ringer without rejecting the call
G or K to reject the call.
Press K to end the conversation.
Automatic answer a
If this function has been activated (Menu 5-5-2), it is possible to answer
incoming calls after approximately 6 seconds without pressing any keys.
Answer calls by pressing any key
If this function has been activated (Menu 5-5-3), it is possible to answer
incoming calls by pressing any key (except for , and ).
Quickly turning off the ringer
Holding down turns off the phone's ringer (the display will show U
UU
U): Only
the messages on the display and possibly a blinking light (when not disabled
in menu 5-1-2-1) warn of an incoming call. Hold down this key to turn the
ringer back on.
Note: This selection is not saved when switching off. If you want the ringer
never to ring, you need to set the ringer volume onto “Off” in the specific menu
(4-1-2-1).
Information on missed calls
The message on the display in stand-by “N. X missed” (where X is the
number of calls missed) indicates that the phone memory contains information
on unanswered calls.
Press to access the information on missed calls: number of calls in
memory and, when available, the phone number (or name if recorded in the
phonebook), date and time of the call.
Pressing again automatically calls the indicated phone number
(if available).
20
Adjusting the volume
Solely during a conversation the volume of the phone's speaker and/or
earphone can be adjusted by pressing (to increase the volume) or
(to decrease it).
Turning the microphone on and off during a conversation
The microphone can be turned off (and then turned on in the same way) by
pressing for 1 second.
Noting down a number during a call
During a conversation, it is possible to enter a phone number to call or save at
the end of the conversation: just key it in and, after the call, this number will
appear on the display.
Keypad protection b
bb
b
Key protection makes it possible to prevent accidentally and unwittingly
pressing keys, including key .
To lock the keypad with the display on stand-by, hold down key . The
display shows b and on pressing any key, a message appears signalling
protection.
To unlock the keypad, press for 1 second followed by . Whereas, if
the automatic key lock function is activated (Menu 5-4), the keypad will be
locked after 30 seconds of it not being used.
Note: When keypad protection has been turned on, only emergency calls can
be made.
Passwords
The phone and SIM card use different passwords, making it possible to
prevent unauthorized use. When the request message is displayed (PIN, PUK,
Code), key in the code (displayed as a set of asterisks) and press .
The numbers keyed in can be deleted singly by pressing a number of
times.
Security code (6 digits)
The security code, programmed by the manufacturer as 000000, permits
accessing the “Security” submenu (Menu 9) of the phone.

21
Autoblock
If this function has been activated (Menu 9-2-4), you need to enter a code
(manufacturer's default code is 1 2 3) to be able to access some important
services (outgoing calls, access to phonebook and SMS menu besides
various other menu functions). After entering the right code, the function is
turned off: to turn it back on, press for 1 second. If the function has been
turned on, X
XX
X is displayed.
PIN and PIN2 codes (from 4 to 8 digits)
The PIN (Personal Identity Number) is provided with the SIM card by the
network operator or service provider and is used to prevent unauthorized use
of the phone.
When you are asked to enter the PIN, key it in and press or .
If you enter the wrong PIN three times consecutively, the SIM card is disabled
and can no longer be used. Use the PUK code to set a new PIN and unlock
the SIM card.
The PIN2 code, provided by the network operator or service provider, is
needed to access certain protected services and functions (FDN, meters, etc.)
that have to be supported by the SIM card and the subscription.
PUK and PUK2 codes (8 digits)
The PUK (Personal Unblocking Key) code is provided with the SIM card and is
needed to access a locked SIM card and to change a blocked PIN.
The PUK2 code is only provided for some SIM cards. This code is needed to
change or unblock the PIN2 code. For further information, contact your
network operator or service provider.
22
MENU - GUIDE TO THE USER INTERFACE
With the menu settings it is possible to modify the phone's operation according
to your needs.
These functions are divided into a main menu (first level) and several
submenus (lower levels) that are accessed by pressing and using the
Soft Keys () to follow the instructions shown on the display (see
under PRESENTING THE PHONE).
In each menu and submenu it is possible to check and change the settings of
the various functions.
The menus and submenus are accessible both with the Dialogue method
and the Number method.
Dialogue method
1Press to access the menu function.
2Press to scroll through the menu
OR
press to scroll downwards or to scroll upwards.
3On finding the required item, press to access the corresponding
submenu or to confirm the selection
OR
briefly press to quit and return to the previous menu level without
changing the setting; Hold down to quit the menu function com-
pletely and go back to the display on stand-by.
Note: In some cases, after selecting an option, one of the following requests is
displayed: “Security code”, “Enter PIN”, “Enter PIN2”. In these cases, simply
key in the required code and press .
Number method
The menus, submenus and settings are marked by a number shown at the top
right of the display. For example, 5-1-5 = “Contrast”.
To access a menu function via the corresponding number, press followed
by the corresponding numbers of the menu and submenus.

23
MENU LAYOUT
The following pages show the layout of the phone's software menu that is
accessed by pressing m.
There are the various submenu levels within the items of the main menu:
to activate the selected item, press on the item; to move between
items at the same menu level, press (downwards only) or and
(downwards and upwards respectively).
Starting from the main menu, the three Soft keys - - perform
additional functions depending on the symbol shown over them on the display:
more selections are available.
H questions the network to find out the status of an option.
passes on to the next time within the same menu.
passes on to the next menu item.
sends the call to the number shown.
zooms in and scrolls through the information shown on the display.
quits the current menu level.
J plays a tune.
The position of the current item in the menu layout is shown by the number
(or set of numbers) at the top right of the display.
MAIN MENU (overall view)
0 Network services
1 Phonebook
2 Messages
3 Calls
4 Audio
5 Settings
6 Call control
7 Clock
8 Information
9 Security
10 Call divert
11 GSM networks
12 Internet
Caption
= can change
1= 1st menu level
1 = 2nd menu level
= 3rd menu level
1 = 4th menu level
1 = 5th menu level
24
0 Network services (shown only with some SIM cards)
1 Phonebook
2 Messages
1 SMS
New
Received
Written
Parameters
Del. Autom.
Reply Path
Confirm
Information
2 Broadcast
Activation
1 Off
2 On
Subject
x Definable
3 Call Mailbox
Mailbox No.
1 Call ?
3 Calls
1 All
2 Unanswered
3 Received
4 Outgoing
4 Audio
1 Ringer
Tone
1 Standard, Standard 2, Beep, Pos. empty...
Definable.
Volume
1 Off
2 Low
3 Medium
4 High
5 Progressive
2 Key volume
Off
Low
High
25
3 Warnings
On
Off
4 Network tone
On
Only NoServ
Off
5 DTMF
On
Off
5 Settings
c Display
Brightness
Brightness time (light)
1 Off (light always off)
2 Short
3 Long
Text
1 Personal
2 Date
q Welcome
Contrast
Font selection
1 Classic
2 Young
Images
Animations
Screen saver
1 Status
1 On
2 Off
2 List
3 Wait time
2 Language
Automatic
English
Italiano
Deutsch
Español
Français
3 Call waiting
On
Off
Status
26
4 Keys lock
On
Off
5 Answer
One key
Automatic
Any key
6 Call control
1 Beep every 60 seconds
On
Off
2 Call duration
Last
Received
Outgoing
Total time
Reset
3 Costs
Last
All
Cost management
Reset
Enter PIN 2
Credit
Disabled
- Units
4 Send number
Send
Do not send
Automatic
7 Clock
1 Adjustment
Time
Date
<Sunday><Monday><Tuesday><Wednesday>
<Thursday><Friday><Saturday>
2 Alarm
Time
On
Off
3 Date format
dd/mm/yy
mm/dd/yy
8 Information
27
1 Own number
2 IMEI
3 Software
4 SIM info
5 Total life
9 Security
1 PIN
Change PIN1
Enter PIN:
New PIN
Change PIN2
Enter PIN2:
New PIN2
Use PIN
1 Enabled
2 Disabled
2 Phone
(Security code)
Type
1 On
2 Off
3 SIM list
Del. List
Sure?
Change Code
New Code
Autoblock
1 On
2 Off
3 Change code
Use default
Reset?
3 Block calls
Outgoing
Incoming
Delete
New Code
4 Fixed dial
On
Off
10 Call divert
1 Always
Divert to:
1 Phonebook
28
2 All
3 Voice
4 Fax
5 Asynchronous data
2 Missed calls
Divert to:
1 If engaged
2 If cut off
3 No answer
4 All missed
3 Delete
All
Missed calls
If engaged
If cut off
No answer
11 GSM networks
1 Network search
2 Selection
Automatic
Manual
3 Network list
4 Own network
5 Select Band
GSM900/1800
GSM900/1900
12 Internet
1 Home
2 Settings
Profile 1
Profile 2
Profile 3
Name
Homepage
Proxy
1 IP address
2 IP port
Access
1 Conn. number
2 Call type
1 ISDN
2 Analogue
3 Login name
4 Password
5 Linger time
Set default
3 Preferred
29
USING THE CALL LOG
The phone can save the information on the last calls received and the missed
calls. The information on the last calls sent is saved on the SIM card.
Note: When the SIM card is changed, these data are deleted from the call log.
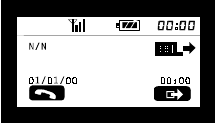
On pressing the display shows the following information on the calls
sent (E¨):
N/N indicates the number over the total calls in the call log.
In the middle of the display there is the alternative phone number (if available)
and the recipient's name, if included in the phonebook.
It is possible to save the number in the call log in the phonebook by pressing
and writing the associated name. Whereas, on briefly pressing
it is possible to copy the number on the display to change it before sending the
call or saving it.
Last missed calls (Menu 3-2)
The phone can save the last 20 missed calls: unanswered calls (
).
To access the list, from stand-by, press to reach the “Calls” menu, confirm
with and then select “Unanswered”.
These numbers are also displayed by pressing when there is the
message “N. X missed” (X = number of missed calls) and scrolling through
the phone numbers with and . To send a call to the number
displayed, press ; To enter the number in the phonebook, press
and enter the associated name (see following section on using the
phonebook).

30
Last calls sent
The phone saves the last 20 phone numbers of the sent calls (E¨).
On stand-by, press , then scroll with and to go onto the
required number among the ones saved and press to send the call.
Press twice from stand-by to send the call to the last number dialled.
To see the information on the 20 outgoing calls, 20 answered and missed
incoming calls, refer to the section on Menu 03 “Calls” (page 63).

31
USING THE PHONEBOOK
With the phonebook function it is possible to save phone numbers and their
associated names to the SIM card.
This phone has phonebook positions available on the SIM card. The number
of positions available in the phonebook therefore varies depending on the type
of SIM card used.
Saving a phone number with the associated name
1 Key in the phone number with the relevant dialling codes, if any.
2 Press to reach “Phonebook” and then confirm with .
3 Enter the name to associate with the number; press once to enter the first
letter shown on the key, twice for the second one, and so on. To enter a
lowercase letter, hold down the key until the character changes case (the
display will show abc): all the following letters will appear in lowercase until
a key is held down again.
4 Select the other letters following the same procedure. To shift the cursor to
the left, press ; to the right, press . To enter a letter, shift the cursor
onto the letter following the one to enter. The characters are listed below
(available in lowercase too):
5 Press to confirm the name or to exit the menu.
6 Press to accept (“Save to”) the suggested phonebook position
number or to exit the menu, or press to change the sug-
gested phonebook position number, key in the required position and con-
firm with .
space 1 , . : ; ! ? ( ) + - * / = @ # ' $ % & < > \ “ _ § £ ¤ ¥ ¡ ¿
A B C 2 Ä ß Ç Å Æ
D E F 3 Є É ∆ ф
G H I 4 Γ { | } ~
J K L 5 Λ
M N O 6 Ñ Ö Ø Ω
P Q R S 7 Л Σ
T U V 8 Ü
W X Y Z 9 Ψ Ξ θ
0 +
Note: The phone indicates supplementary network services with (SS) at
the start of the name in the phonebook. These characters (SS) do not
however affect name searches.
32
Retrieving a phone number from the phonebook
To retrieve a phone number from the phonebook with the initial of the saved
name:
1 Press and confirm with under “Phonebook”.
2 Key in the initial letter of the saved name.
OR
Scroll through the phonebook names listed on the SIM card with and
.
3 Press to send the call.
Note: On the position saved in the phonebook, press to move onto
the position number and then onto the phone number: Briefly press to
change the digit. Make the changes, then press . When asked to
“Change” confirm with to update the phonebook.
Using the data in the phonebook
It is possible to utilize the data in the phonebook for the other services too; this
function is particularly helpful when, for instance, there is a request to enter
the phone number or when you want to divert incoming calls or send an EMS
message to a number saved in the phonebook.
When asked to enter the number, go to the phonebook as in point 1
11
1 above,
select the required position with and , then press .
Phonebook Menu
This menu is accessed by pressing for one second within the phonebook.
The phonebook menu options are:
“Delete number”: to delete the content of a phonebook position, after another
request for confirmation (“Delete?”).
“New”: to save a new position in the phonebook.
“Fixed dial”: displays and makes it possible to change (after entering the
PIN2 code) the status (on or off) of the fixed dialling numbers:
FDN (Fixed Dialling Numbers) - see relevant section – “Security” menu.

33
“Service num.”: Access this function to use some special numbers of the
single network operator, such as for instance the call mailbox number
activating call waiting, which can be saved on the SIM card.
This function clearly depends on the type of SIM card and the settings defined
by the network operator.
“SIM information”: provides information on the SIM card, such as the SIM
phase, number of ADN (Abbreviated Dialling Numbers) number memories and
MAX to indicate the maximum number of characters available to enter the
name or phone number.
“Extract no.”: provides the number to change it before a call without then
saving the change to the phonebook.
“Groups”: This function makes it possible to associate each of the names in
the phonebook with one of the 15 groups available (5 saved as default and 10
available for the user) and then associate a ringer and an image to each one
of these.
On receiving an incoming call from a number in the phonebook, the ringer
associated with the group chosen, if any, will sound and the image will appear
on the display, alternating with the classic screen giving the number and name
of the caller.
The images that can be used are the same ones available for the EMS (see
page 66 for the list), including those received from other users.
“Set”: makes it possible to associate the current name of the phonebook with
one of the available groups. Scroll through the various items with the keys
and , and confirm the selection made with .
“Modify”: makes it possible to change the three typical features of each group,
via the associated menu items “Name”, “Melody”, “Image”.
Scroll through the various items with the keys and , then confirm with
.
Select “Empty” to associate no sound or image to the current group.
The five default groups (“Family”, “VIP”, “Friends”, “Work”, “Other”) can be
changed completely.

34
MANAGING CALLS
Options during a call
The phone has call management functions that can be used during a call.
During a conversation, press m for a list of commands available to manage
calls.
If a new call arrives while a conversation is in progress, the display shows
“Call waiting” accompanied by an audible warning. Pressing m brings up a
menu with three options:
“Swap”: to accept the new incoming call, suspending the one in progress.
Press m again to return to the previous call, putting the one in progress on
hold.
“Answer”: to accept the new incoming call, ending the one in progress.
“Reject”: to reject the new incoming call, continuing with the one in progress.
Additional options available during a call in progress may be:
Close X End call no. X (that may be multiparty)
Reject Refuse the waiting call
Swap Swap with the waiting call
Reply Reply to the waiting call, ending the one in progress
Retr. Multi. Retrieve the multiparty call
Swap to multi. Swap with the multiparty call
Swap to X Swap with call no. X
Return to X Return to call no. X
Hold Hold the current call
Hold multi. Suspend the current multiparty call
Join multi Joint the (current or held) call to the multiparty call
Send DTMF To write numbers to send in DTMF
Separate X To communicate privately with participant number X of the
multiparty call
MENUSTANDARD To access the standard menu
35
Turning off the ringer when the phone rings and rejecting a call
When a call arrives, it is possible to turn off the ringer by pressing G
without rejecting the communication.
In addition, it is possible to reject the call by pressing K thereby sending
the busy signal to the caller:
• When the divert if busy function has not been turned on, the caller will
hear the busy tone.
• When the divert for missed calls function has been turned on (menu 10-2)
the call is transferred to the number specified in the relevant menu.
Note: Activating the voice mailbox (service offered by network operator or
service provider) may include a divert if busy service.
Sending DTMF tones
DTMF multi-frequency signals make it possible to communicate with
mailboxes, computerized telephone systems, etc. Including pauses and waits
in the selection of DTMF tones is therefore useful to access certain services.
The DTMF tones are active (unless disabled in menu 4-5-2) and can therefore
be sent by simply pressing the corresponding key. In the case of invalid
sequences, the display will show “Wrong input”. While sending a call
containing pauses and/or waits, during these it is possible to press or
to stop transmitting DTMF tones immediately.
If the DTMF tones have been turned off, during a call press , scroll with
, confirm “Send DTMF” with , enter the required DTMF
sequence and press .
After entering at least one number, to add pause and wait tones, press in
quick succession: the display will first show “P” (pause) and then “W” (wait).
It is possible to enter a sequence of DTMF tones before sending a call: enter
the phone number, then “P” followed by the DTMF sequence.
It is possible to dial a phone number followed by a sequence of DTMF tones to
save in the phonebook or send a call.
Note: Entering “W” breaks off transmission of the DTMF sequence for a
manual entry or for additional entries that are ended by pressing .
This function is especially helpful to enter personal passwords or phone
numbers.

36
Note: It is extremely helpful, especially when you need to send a set of
DMTF tones, to save them as a number in the phonebook.
These tone sequences are often longer than the available characters for
each item in the phonebook; in this case, it suffices to split the sequence
into two portions, saving them as separate items in the phonebook.
It will then be sufficient, in the phonebook item containing the first portion
of the sequence, to add the command onto the end of the sequence for
number linking, marked with bold type in the following example:
E.g., phonebook position no.102: 123456789162534+103.
Where “+103” is the command linking the current item (102 in this case)
with the contents of item 103, which will then be read consecutively so as
to form the complete sequence.
37
The EMS standard
Enhanced Messaging Service
The GM825 has a new function making it possible to enrich and make
conventional SMS text messages more interesting and appealing.
EMS technology makes it possible to include sounds, images and
animations in the messages, which will then be reproduced by the
recipient's mobile phone (if enabled for this standard).
Default images and animations, already stored in the phone,
are immediately available for sending to other terminals.
Some of them are transmitted as true information packs (so they take up a
certain number of characters available for the message) and are reproduced
by the recipient's phone exactly as the send sees them (except, obviously, for
any differences between the displays of different phones).
Images and animations of this kind, received via EMS, can be saved in the
phone's memory and afterwards sent with other messages.
Whereas, for some animations, only the code representing them gets
transmitted (e.g., moods such as joy, anger, happiness, love), which activates
the display of the corresponding image on the recipient's phone; therefore,
each model of mobile phone will display them differently, depending on how
the manufacturer has interpreted the spirit of the message.
In this way, the message is not weighed down by transmitting a true animation,
since it remains in the phone and is displayed at the command of the EMS
received.
Note: EMS technology is a development of the conventional SMS, of
which it keeps all the features. This manual therefore uses the term EMS
to explain the meaning, even though the phone keeps the conventional
term of SMS.

38
10 default tunes, similarly, are already included in the phone's permanent
memory.
These, too, have been coded in a standard with which all EMS enabled
terminals are compatible; of these, too, therefore only an identification code is
transmitted that activates playback on the recipient's phone.
Besides these, 10 memory spaces are available for tunes that the user can
compose – or receive via EMS – and save for future use.
Tunes, images and animations received via EMS can thereby be saved
(except for ones that are NOT actually sent, such as full-screen animations)
and reused as a ringer for the phone or included in another EMS to send.
The GM825 is equipped with
technology making it easier and faster to add text when writing
messages.
T9 is a registered trademark of Tegic Communications, Inc. and is a
patented technology in Europe, the United Kingdom and other nations.
Note: The EMS standard is very recent. Phones made in the past might
wrongly interpret messages containing sounds/graphics and display
indecipherable characters together with normal text.
39
Default animations: list and meanings
Animations of large dimensions stored in the phone are coded according to a
standard that permits sending the recipient the command to activate the
animation on their phone without sending the entire image composed of dots
(which could take up a considerable amount of memory).
The EMS standard has a set of coded animations whose meaning, in the order
in which they appear on the phone, is:
• Irony, winking
• Happiness
• Doubt, disbelief
• Sadness
• Enthusiasm
•Crying
•Wink
• Laughter
• Indifference
• Love – kiss
• Confusion – indecision
• Tiredness
• Anger
• Putting on glasses
• The devil
Each model of mobile phone (enabled to use EMS technology) will show
different animations, but with the same meaning as the one sent by the
sender.
To display the listed animations, see “Animations” menu
(5-1-8) and relevant description on page 67.
40
MESSAGES – MENU LAYOUT
You access the EMS (Enhanced Message Service) functions menu (2-1) by
pressing to reach “Messages” and confirming twice with .
With this menu it is possible to send EMS messages and read the ones
received, as well as define the parameters governing the transmission of
messages.
To be able to send EMS messages, it is necessary to enter the SMS Service
Centre number provided by the network operator or service provider.
Note: EMS and Cell Broadcast messages are services that might not be
supported by your network.
2 EMS messages
1 New
Send to: (Number) - (Message)
Send (Message sent)
Save
Send and save
Parameters
2 Received
3 Written
4 Parameters
Definable (the parameters are taken from the SIM)
Definable
Definable
Definable
Definable
Phone parameters
1 Name
2 Service Centre Number
3 Validity
4 Destination
5 Protocol
6 Set default
5 Automatic deletion
On
Off
6 Reply path
On
Off
7 Confirm
On
Off
8 Information
41
2 Cell Broadcast
1 Activation
Off
On
2 Subject
3 Call mailbox
1 Mailbox number
In this menu the Soft Keys - - perform additional functions
depending on the symbol shown above them on the display:
pressed briefly to change the method of entering text (
,
,
); held
down to access the “T9” submenu and to add animations/sounds/phone
numbers taken from the phonebook.
to reply to a message received or to update one saved
to read a message and scroll through the display
to move on to the next item at the same menu level
to quit the menu
T9 / EMS menu
1 Add object
1Sounds
2 Melodies
3 Images
4 Animations
2 Preview
3 Phonebook
4 Language
1 English
2 Italiano
3 Deutsch
4 Español
5 Português
6 Français
7 Ελληνικά
8 Türkçe
5 T9 help
Note: To access the T9 / EMS menu,
whose diagram is shown here, hold
down the key in the text editor
when composing a new message.

42
SMS messages (Menu 2-1)
New (Menu 2-1-1)
This function makes it possible to compose and send a new message.
Enter the recipient's number, confirming it with , or press to
take the number from the phonebook.
You then pass on to the text editor, which appears as shown in the figure:
The band of symbols above the text area contains several elements
corresponding to different functions.
In detail, from left to right:
indicates the start of the EMS message; if there is any hidden text,
appears in its place on the left. To display the hidden text, press several
times to scroll left.
specifies the set language to enter text in “T9” mode.
To change the language used, see the T9 menu on page 45.
indicates the ‘Shift‘ function (uppercase first letter, lowercase the other
letters of the word); on pressing
is displayed to indicate the ‘Caps lock’
function (uppercase for the whole message); on pressing again, no
symbols appear, indicating the text will be lowercase.
indicates the function of the method of entering the message. By pressing
it is possible to change the method to
(conventional message
typing) and to
(entering numbers).
: is the meter indicating the number of characters still available when
composing an EMS message.
Area del
testo
Cursore
Tex t
area
Cursor

43
On the far right
indicates there is space available for writing or, if
appears there is hidden text to the right of the display (press to see the
text to scroll the text to the right) or if
appears there is no more space
available for writing.
By repeatedly pressing e it is possible to scroll through the text of the
message to the left and right respectively.
Entering text with the conventional method
Each key corresponds to more than one letter. Briefly press the key once for
the first letter, twice consecutively for the second, 3 consecutive times for the
third, etc. (see page 31).
For instance, to write the word BUS - press twice consecutively to key in
the letter “b”, wait for the cursor to move on, press 2 consecutive times to
key in the letter “u”, wait for the cursor to move on, and briefly press 4 times
to key in “s”. Then press to create a space to continue with the message.
Linked messages
With the Gm825 you can compose messages longer than 160 characters as
it splits them up automatically, optimizing the division of the contents, into
several single messages that will get sent to the same recipient.
The remaining character count in the text editor at top right is accompanied
by a number from 1 to 5 (maximum length) indicating the number of single
messages of 160 characters used to contain the current text.
Linked messages are joined automatically when they are received and the
text is presented as a single unit.

44
Entering text with method
To write a word, press the keys containing the letters of the required word just
once and consecutively, irrespective of their sequence on the key, as on a
typewriter. The phone will automatically form the word by offering a list of
alternative words taken from a database (dictionary) of words. This is easier if
you do not look at the display until you have finished keying in all the letters of
the word.
For instance, to write BUS with T9 – press keys , and
consecutively. Then press to create a space in order to continue with the
message.
If the word composed automatically is not the required one, it is possible to
choose a different word from the database with . After finding it, press
to move on with the message. Whereas, if the word is not in the list, delete it with
and briefly press to change the method of entering text into
: then
key in the new word with the conventional method and afterwards confirm with
. Pressing twice more takes you back to the
method. The new
word formed will automatically be added to the phone's database with
(in the future it will no longer be necessary to key it in from scratch).
NUMBERS: briefly press and select
, then key in the number. Press this
key twice more to go back to
mode.
PUNCTUATION: To add punctuation press : T9 is able to guess the
punctuation needed according to the set language. If the punctuation is not as
required, press to enter other symbols.
45
T9 / EMS menu
By holding down while composing a message in the text editor, it is
possible to access the 5 menus to manage the T9 system and to enter images
and tunes in the text messages:
1 – “Ins. object” to add images and sound to the current message
2 – “Preview” to display the message as the recipient will see it – with graphics
and sound – to check it is correct before sending it
3 – “Phonebook” to enter a number taken from the phonebook in the message
4 - “Language” to set the language to use in T9 mode
5 – “T9 Help” T9 system help
Ins. object
With this function it is possible to add to the message the images or sounds
available in the 5 available submenus:
1 – Sounds
10 pre-coded sounds in each GSM model enabled for the EMS standard; they
can neither be changed nor deleted.
2 – Melodies
The phone is supplied with 10 initially empty spaces the user can use to
compose personalized tunes (see page 64) to then send via EMS or to save
those received from other terminals.
3 – Images
There are 25 available images of different sizes that are transmitted and
displayed by the recipient exactly as the sender sees them on his or her
display (adding these objects to an EMS therefore takes up more space).
Besides these, it is possible to save up to 10 images received from other
terminals via EMS.

46
4 – Animations
15 animations of large dimensions representing moods or situations of daily
life (e.g., enthusiasm, laughter, indifference, sadness, crying) and of which,
instead of the entire image, only a standard code is transmitted that, on the
recipient's phone, activates the corresponding image (therefore a different
interpretation of the same feeling) as interpreted by the manufacturer. The
image will therefore only be identical between two of the same models.
Besides these, there are 5 small-sized and 10 larger animations; they are
transmitted and displayed exactly and not re-interpreted by the recipient.
After selecting the object to add to the message (sound or graphics), confirm
the selection with ; you automatically go back to the text editor, which
will display a symbol (a musical note or an empty box) showing that the
object (sound or image) has been included.
EMS objects take up part of the space normally reserved for text; this
consumption is indicated by a decrease in the remaining space shown by the
meter at top right.
An attempt at adding an object whose size exceeds the remaining space is
signalled by “No space left” and you are taken back to the text editor.
5 – Preview
This function makes it possible to display the EMS message – not to change it
– in order to check the text and objects included are correct.
Animations and images appear as in reality and not represented by a symbol
as in the text editor and, at the same time, the tunes included in the message
are played.
Phonebook
Select this item if you want to add a phone number saved in the phonebook to
the text in the message; scroll through the various items of the phonebook with
, and copy the required number, confirming with (you are
automatically taken back to the text editor).
47
Language
To use a different language with T9 composition (even within the same
message), go onto option 1 - “Language”, confirm with and scroll to
select the required language. The available languages are:
LISH,
LIANO,
TSCH,
NÇAIS,
AÑOL e
TUGUÊS.
T9 help
The T9 help is text that automatically scrolls on the display with essential
information for using the T9 composition technology.
Sending the message
To send the message, press and choose one of the following options:
“Send”, “Save”, “Send and save” described below.
Send (1)
To send the message.
If the message has been sent, the display will show “Message sent” or
“Message not sent” (with the reason for not sending it) for a few seconds.
If the message has been sent, the display will again show “Send to:” with the
same phone number.
It is then possible to send this EMS message to the same number or to a
different number - by pressing and entering the new number, or exit the
menu by pressing .
Save (2)
To save the message without sending it (you can send the message later).
When B
BB
B blinks on the display, the message memory is full: to receive or
save others, delete some of them.
Send and save (3)
To send and save the message.
Parameters (4)
To assign the set of “Parameters” (Menu 1-4) while entering the SMS
message, see the relevant paragraphs on page 50.
48
Received (Menu 2-1-2)
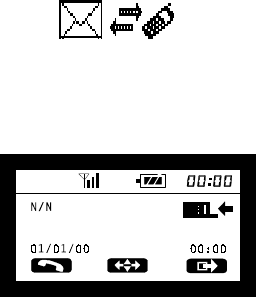
When you receive an SMS/EMS message, the display shows the following
image with an audible warning:
When the image disappears, the display continues to show B until the SMS
message is read.
To receive the message received press to reach the Messages menu
and confirm with ; the following message heading will appear:
It will show: the current number over the total number of SMS messages
(N/N), the sender's phone number (and name, if saved in the phonebook), the
date and time when the message was received.
To scroll through the list of messages use keys and .
To read and scroll through the content of an SMS message, press .
To go back to the message heading, press .
Receiving and reading an EMS containing sounds or images
An EMS message is presented and received as any other SMS.
The images and animations appear together with the text, just as the sender
composed the message.
To scroll through the message, use and ; if there is more than one
object, shift the selection from one to another with # If there is more
than one object on the same row, shifts the selection from one to
another without scrolling through the message; on selecting the last object, the
symbol of the key turns into
and the text starts scrolling.
49
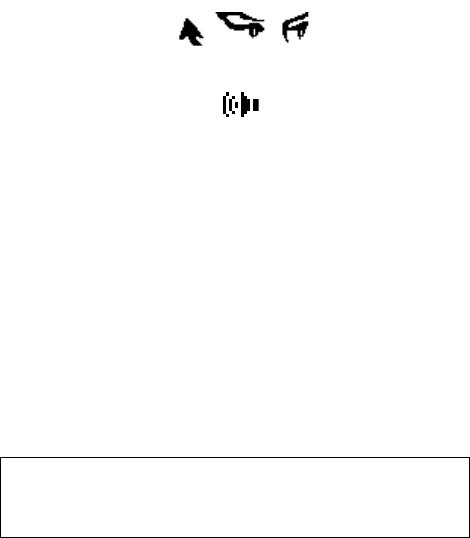
A selected object is framed with a dotted line
When a “Melody” object is selected as in the figure,
the sound is played back.
To save an object received via EMS, select it and press .
If there is sufficient space available in the phone memory, the phone will ask
for confirmation (“Save?”) - confirm with or cancel the operation with
.
If the object to save is a melody, you are asked for a name to associate with it,
which will then appear in the list of available ringers (menu 4-1-1).
The images and animations saved will instead appear in the list activated by
the menu Settings-Display-Images/Animations (menus 5-1-7 and 5-1-8).
To delete a message press for 1 second and then confirm the request to
“Delete?” with key .
To reply to a message, simply press and write the test; after
confirming with , press again when asked to send or scroll
through the options with .
While the test of a message is displayed, press to go back to display
the heading.
Note: Only pictures and animations actually received via EMS (obviously
not ones where only the identification code is transmitted) can be saved
and afterwards deleted from the phone memory, likewise tunes composed
by the user or received via EMS.

50
Written (Menu 2-1-3)
To read messages previously written and saved. The display is similar to that
of messages received. By pressing
on the heading of a message it is
possible to update its test and the number of the recipient, to then send it.
Parameters (Menu 2-1-4-X)
Before sending your first SMS message, in the following submenus it will be
necessary to set all the data needed to activate the SMS message function or
at least the SMS Service Centre Number provided by the network operator or
service provider. If they are not changed, these parameters will hold good for
the following SMS messages too.
It is possible to save several parameters on the SIM card in the “Definable”
positions (scrolling with ). The number of parameters that can be
saved depends on the SIM card. The “Phone Parameters” option (2-1-4-6) on
the other hand saves the parameters to the phone memory and not the SIM
card.
Name (2-1-4-X-1)
This function makes it possible to assign a name to the profile (for instance,
that of the network operator to which the profile refers). This option turns out to
be helpful when you use different network operators for each one of which
there will be a specific profile, setting the parameters of the 4 submenus
(Service Centre Number, Validity, Destination and Protocol).
SMS Centre Number (2-1-4-X-2)
Enter the Service Centre number provided by the network operator or service
provider.
Note: Do not get this number mixed up with that of the message recipient.
Class 0 SMS messages
Some network operators and service providers send a special type of SMS
message. These class 0 SMS messages are automatically shown on the
display, but they are not saved to the SIM card (and so are automatically
deleted when the phone is switched off).
51
Validity (2-1-4-X-3)
This network service makes it possible to set a length of time (Minutes, Hours,
Days and Weeks) during which the SMS messages will be stored by the
Service Centre while it tries to send them. To move between items, press
; to change the units of time, use and .
Note: If the maximum time entered exceeds the time laid down by the Service
Centre, the message is automatically reduced to their specifications.
Destination (2-1-4-X-4)
This function makes it possible to save the phone number of the recipient of
new EMS messages. The number appears automatically under “Send to”
when you send a new EMS message, barring the opportunity of changing the
number by pressing . This function is particularly helpful if you often send
EMS messages to the same recipient.
Protocol (2-1-4-X-5)
This network service makes it possible to convert the EMS message into
different formats, such as: ISDN and PSTN services, Pager, E-mail, Fax, etc.
Note: Change the set value “0_ Text” only after calling the network operator to
check whether other formats are supported.
Set default (2-1-4-X-6)
This function sets the parameters set in the previous menus as automatic.
If there is more than one profile saved, it permits choosing and applying the
most suitable one (until another one is set as default) according, for instance,
to the EMS Centre used, the recipient's phone number and the protocol to be
used.
Automatic deletion (Menu 2-1-5)
This function makes it possible to turn SMS message automatic deletion on or
off after they have been read.
Reply path (Menu 2-1-6)
This network service permits the EMS message recipient to send a reply using
the same EMS Centre as the sender.
Confirm (Menu 2-1-7)
This network service lets the sender obtain confirmation from the SMS Centre
that the message has been received.
52
Information (Menu 2-1-8)
This function provides information on the EMS messages on the SIM card.
In detail: the first row shows the EMS messages present and the maximum
permissible number of messages; the following two rows show, respectively,
the number of messages received and the ones written and saved.
Note: Since all the EMS messages (written, saved and received) are saved on
the SIM, they take space from its memory and it is therefore advisable to
delete them when you no longer need them.
Cell Broadcast (Menu 2-2)
With the Cell Broadcast service, the network operator or service provider
sends messages to all the subscribers in a certain area.
Note: The number and language of the Cell Broadcast subjects strictly
depend on the SIM card used and change according to the type of service
implemented by the network operator or service provider.
Activation (Menu 2-2-1)
This function, if activated with , displays the options “On” (2-2-1-2) and
“Off” (2-2-1-1) for Cell Broadcast messages.
If the function is on, the display will automatically show the messages when on
stand-by.
If necessary, the rows of the message will be displayed in succession.
To remove Cell Broadcast from the display temporarily, press .
Subject (Menu 2-2-2)
It is possible to select different Cell Broadcast message subjects.
Choose the subject by scrolling through the list with or and ,
or define a new subject with a 3-digit number, confirm with or quit the
function. If the first option is “All” then all subjects will be received; whereas, if
it is another item, press to delete the selection and confirm with .
53
Call mailbox (Menu 2-3)
This function makes it possible to listen to voice messages saved in your call
mailbox or on an answering service.
To access the call mailbox service, enter the number provided by the network
operator or service provider, or enter a private number to access your
answering service.
Enter the “Mailbox number”, confirm with and select whether to call
the saved call mailbox number when asked “Call?” with or press
to change the mailbox number.
To make full use of the functions for sending DMTF tones, often used for the
call mailbox, see the relevant section on page 35 and the note on page 36.
54
INTERNET WITH WAP
Interned access (Menu 12-1)
Accessing and surfing the Interned with WAP is better in optimum conditions
of reception of the radio signal – and these conditions need to be maintained
throughout the Internet session ( X Y ).
If the Call waiting service has been activated with the network operator and a
call arrives during an Internet session, the display will show the warning: press
and choose whether to “Reply” by pressing to accept the call and
close the Internet connection (after finishing the call the phone will
automatically return to the Internet session) or whether to “Reject” by pressing
and keep on browsing. If Call waiting is not active the Internet session will
not be interrupted.
It is possible to access Internet WAP sites as follows:
Press to access the main menu, scroll through the various menu items
with , or to reach “Internet”.
Confirm the request to connect to the Web by confirming with under
“Home”. At the first attempt to access the Internet, the display shows:
After a few seconds, this image disappears and is replaced by the following
screens in sequence, indicating the WAP connection has been started and
information is being exchanged:
The first time you access a WAP session, there may be a request to enable
security; confirm with .
Connecting Sending XXXXX Receiving WWWW
55
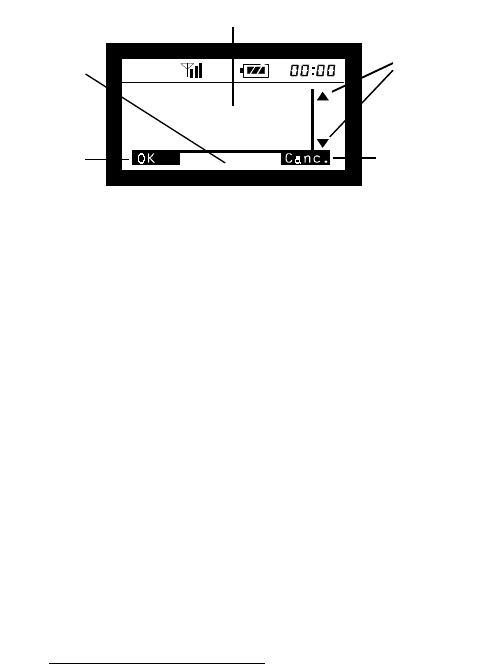
The following image shows a typical WAP page by way of example
(specifically, a portion of the browser menu).
The following symbols may be displayed in the WAP icon area:
indicates the secure connection function (only certain sites)
indicates there is mail not yet sent
an attempt at connection is in progress
the phone is connected to the Internet
the Internet ‘alert’ icon (warnings sent from the Internet)
When browsing the Internet some keys take on special functions:
to scroll down (or to the right) on the WAP page
to scroll up (or to the left) on the WAP page
held down to access the Browser Menu;
pressed briefly to scroll down through WAP pages
pressed briefly to move ‘back‘;
In text editors, it works as delete and when held down it deletes all the
text; in this case, to use as ‘back’ it is first necessary to go back to
the start of the text with , then press ; held down to go back to
the homepage
as a Soft Key function (option at top left of the display)
as a Soft Key function (option at top right of the display);
held down to end the WAP session
Soft Key DX
Soft Key SX
WAP
Icon Area
WAP page text area
Page
scroll bar
5 Bookmarks
6 Incoming mail
56
Internet configuration (Menu 12-2)
The configuration menu is in the main menu 12 “Internet” and it has the
following layout:
2 Internet
Profile 1,2,3
Name
Homepage
Proxy
1 IP address
2 IP port
Access
1 Conn. number
2 Call type
1 ISDN
2 Analogue
3 Login name
4 Password
5 Linger time
Set default
The phone might already have been configured to access the Internet.
If the phone is configured, the Internet access data are already set in this
menu: repeatedly press to quit the menu and return to the display on
stand-by, then access menu 12 “Internet”.
If the phone is not configured (the fields are empty or contain incorrect data),
refer to the subscription documentation or contact the network operator to get
the data to set.
The phone can have at most three “Profiles” depending on the factory
settings.
To enter the configuration data, select one parameter at a time and confirm
with , enter the figure and confirm with and then pass on to
the next figure. Press to go back by one menu level (without
confirming the changes). $ is used to scroll through the options; to
delete a figure. The arrow 4 to the left of the menu item indicates the function
is active.
After entering all the data, select “Set default” (5-6-X-5) to activate and apply
the current Profile.
57
Name (12-2-X-1): This is the name associated with each one of the three
available profiles that appears at the higher menu level when the phone offers
the selection of the profile whose parameters are to be displayed/changed.
Homepage (12-2-X-2): enter the URL address of the opening page (if other
than the Proxy WAP it might not be accepted). It usually starts with “http://
wap…”
Proxy (12-2-X-3): This menu item opens up two submenus where you can
define the Proxy to connect to:
IP address (12-2-X-3-1): Enter the IP address (of the Proxy) using & to
shift the cursor between the digits of the parameter (when a field is full the
cursor automatically moves onto the next field).
IP port (12-2-X-3-2): Enter the required figure (usually 9201 or 9203).
Access (12-2-X-4): This menu takes you to the following 5 submenus:
Conn. number (12-2-X-4-1): is the number to connect to for the WAP
connection (as with a normal modem connection).
Call type (12-2-X-4-2): the call to make the connection may be ISDN or
Analogue.
Login name (12-2-X-4-3): enter the user name if required.
Password (12-2-X-4-4): enter the password if required.
Linger-Time (12-2-X-4-5): the connection time in seconds after which if there
is no data exchange the call is ended.
Set default (12-2-X-5): to set the current Profile as the default.
Note: “X” indicates the current Profile (1, 2 or 3).
After entering all the data, repeatedly press to quit this menu and
access menu 12-1 “Home” to start the connection.
58
Browser menu
During a WAP Internet session hold down to access the Browser menu
(the menu layout is shown below) that provides a set of extremely useful
functions to surf the Internet with the WAP.
Note: The WAP Browser uses the phone languages as regards the functions,
Soft Keys and error messages even if during the Internet sessions different
languages could be used.
The layout and meaning of the various Browser menu items are shown below:
1 Back
2 Home
3 Exit
4 Bookmark site
5 Bookmarks
6 Mail in
7 Refresh
8 Settings
1 Homepage
2 Circuit prompt
3 Circuit wait
4 Key pressure timeout
5 Protection
Connection prompt
Protection prompt
Current certificate
CA certificates
Authentication
Coding
1 Check password
2 New password
6 Advanced
Go to URL
Show URL
Restart Browser
Off-line services
Mail out
59
9 SMS
? Information on…
1 Openwave
2 Security
Schlumberger
RSA
1 – Back
To go back to the previous page.
2 - Home
To go to the opening page.
3 – Exit
To shut down the WAP session and go back to the normal phone stand-by
status.
4 - Bookmark site
This function makes it possible to add the current site to your list of
bookmarks.
5 - Bookmarks (favourite WAP sites)
Shows the list of your favourite WAP Internet sites.
6 – Mail in
The main in box is displayed together with a notice if there are any new
messages.
7 - Reload
To reload the current WAP page.
8 - Settings
8-1 Homepage
If enabled by the Proxy it shows the full address of the homepage
and offers the possibility of changing it (the setting of this function
contained in the Proxy has priority over the one contained in the user
profile).
8-2 Circuit prompt
This makes it possible to enable or disable the message displayed
whenever the system does not have a data circuit and needs a data
call to re-establish the connection.
The text of the message displayed is
“The circuit is not operative. Start a data call?”.
60
8-3 Circuit wait
This makes it possible to define the length of the maximum wait
before disconnecting from a data circuit. The value set by the user is
stored in the phone, but some providers define a minimum limit that
has priority over this value. The maximum value is 9999 seconds.
8-4 Key pressure timeout
In general, every key can be used to obtain different characters,
pressing it several times in succession. Timeout is the length of time
after which the last character displayed becomes final and the cursor
passes on to the next position.
This function makes it possible to change the speed with which the
cursor passes on to the next position, choosing it from Fast, Medium
Slow (respectively 1 – 1.5 – 2 seconds).
8-5 Protection
This opens the following 6 submenus:
8-5-1 Connection prompt
To enable or disable the “Protected connection stability”
warning.
8-5-2 Protection prompt
To enable or disable the message, “You are about to enter
an unprotected area. OK?” that appears before you leave a
protected area.
8-5-3 Current certificate
The phone utilizes digital certificates (called “CA”) issued by
trusted third parties to authenticate some web sites.
On accessing this function, the phone shows the available
information for the certificate being used for the current
session.
8-5-4 CA certificates
This function displays the list of CA certificates stored in the
phone, to display the main data and enable or disable them.
61
8-5-5 Authentication
The phone can save the user name and password entered
by the user in a local memory when you access web sites
so as to then re-enter them automatically when you access
them again. With this function it is possible to enable or
disable this possibility. Disabling also deletes the entire
memory of user names and passwords.
8-5-6 Coding
This shows the Browser coding control code
(8-5-6-1 – Check password) or forces calculation of a new
code (8-5-6-2 – New password).
8-6 Advanced
Confirming access with takes you to the following 5 submenus:
8-6-1 Go to URL
To enter the address of a web site to go to. Pressing produces a
list of special characters (punctuation, etc.) that can be entered by
pressing the key corresponding to the number associated with each
one of them.
8-6-2 Show URL
Shows the URL of the current site.
8-6-3 Restart browser
Deletes the temporary internal memory (cache) of the browser and
starts a new session with the proxy.
8-6-4 Off-line services
Shows a list of applications already loaded in the phone that can be
used without accessing the GSM network.
8-6-5 Mail out
Shows the mail items in the out box.
62
9 SMS
Confirming this selection takes you to the SMS menu (see page 40) without
ending the WAP connection.
? Information on…
The browser provides the main information (release, copyright) on
Openwave (WAP management software) and the available security
systems (Schlumberger and RSA).
Preferred (menu 12-3)
The link to some sites, variable depending on the software release and on the
possibilities offered by the network operators, has been saved in the phone for
faster use.
To access the Internet with the WAP it is necessary to use a SIM card enabled
for data calls and subscribe to the service of the network operator or service
provider. Contact them to obtain more detailed information on the WAP
services they offer.
The WAP Internet pages displayed on the phone are formatted differently to
the Internet pages on a computer. Obviously, not all the graphics normally
shown on the monitor of a PC can be faithfully reproduced on the display of a
mobile phone, but the GM825 makes it possible to display graphic objects that
till now were excluded from WAP sessions.
Note: It is possible to access the browser menu even without a web
connection by pressing the key for longer than one second after
selecting and confirming “Internet” (menu 12).
Note: The GM825 supports the Download for fun function. It is possible
to download tunes from some sites (iMelody standard) and save them in
the phone to be used as ringers, as well as Screensavers (see page 66)
provided the format is compatible
(WBMP – 97x32 pixels).
63
ALL THE MENUS AND FUNCTIONS,
DEFINITIONS AND USE
Network services (Menu 0)
The presence, description and configuration, number and type of services
offered in this menu depend on the SIM card used.
Contact your network operator or service provider to obtain more detailed
information on the services they offer.
Phonebook (Menu 1)
Confirming this menu item with takes you straight to the phonebook.
See the relevant section, “USING THE PHONEBOOK” on page 31.
Messages (Menu 2)
The “Messages” menu, via the functions described on page 40, makes it
possible to send or read EMS messages, define their working parameters,
manage the call mailbox and Broadcast messages (sent by the network
operator).
Calls (Menu 3)
This function makes it possible to display the last 20 outgoing calls (E¨)
and the last 20 answered (E§) or unanswered () incoming calls.
Refer to the section, “USING THE CALL LOG”.
The available options are: “All” (3-1) to display all the calls in the memory;
“Unanswered” (3-2) to display the unanswered incoming calls; “Received” (3-
3) to display the answered incoming calls and “Outgoing” (3-4) to display the
sent calls.
To scroll through the sequence of phone calls in each option, press and
or .
To send a call to the number displayed, press .
To associate the displayed number with a name and save it in the phonebook,
press , enter the name and confirm.
To delete a call, display it and press ; the display will show “Delete this?”:
confirm with or press - (“Delete all?”) and confirm to delete
ALL the calls from memory.
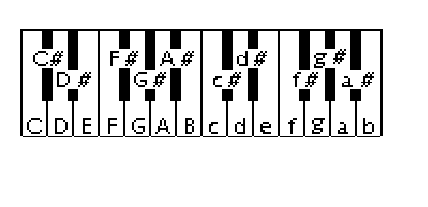
64
Audio (Menu 4)
This menu contains 5 submenus:
Ringer, Key volume, Warning tones, Network tone and DTMF.
In the “Ringer” menu (4-1) with “To ne” (4-1-1) you can set the type of warning
tone when a call arrives and its “Volu me” (4-1-2): “Off”, “Low”, “Medium”,
“High” and “Progressive”.
By selecting “Tone” (4-1-1) (and scrolling with keys and ) it is
possible to define the phone's ringer, choosing it from:
19 default tunes (“Standard 1, 2, 3...Beeps 1, 2, 3...Melodies 1, 2, 3...”);
10 originally empty positions (“Empty” positions) where it is possible to
create and save short tunes to send also via EMS;
the “Definable” option (4-1-1-00), with which it is possible to personalize your
ringer (longer than the previous personalized ones, but they cannot be
transmitted).
To compose personalized tunes there are two octaves, and each of the
notes is represented by a letter.
The notes of the lower octave are represented by uppercase letters
C-D-E-F-G-A-B
while the second (higher) octave is represented by the same lowercase
letters:
c-d-e-f-g-a-b.
The correspondence between the keys to press and the corresponding notes
is highlighted in the following drawing:
|ZPREMERE 2 VOLTE
PRESS TWICE

65
The letters representing the notes are entered with keys from
to
. Simply pressing one of these keys produces the uppercase letter (note
of the lower octave). To obtain the corresponding note of the higher octave,
press the same key TWICE in succession
To obtain the semitones (notes with a sharp, e.g., C#) the # character should be
added straight after the letter representing the note by pressing key .
Immediately afterwards it is necessary to enter a character to define its length.
Notes can have 4 different lengths; pressing key from one to four times in
succession and obtaining the symbols YFRI.
Note: the character for the length is fundamental .
Between notes (therefore between the character for the length of one note and
the letter of the next one) it is possib
from one to four times and obtaining the characters `H - .
le to add a pause by pressing key
Movements within the composition are made with and . Any errors or
an excessively long string are signalled by a warning tone and the cursor will
automatically go onto the first wrong note. J plays back the composition
that has just been written.
EXAMPLES:
C#
of the 1st octave
Press
-
-
(from one to four times depending on the length)
f of the 2nd octave plus pause:
Press
twice to enter “f”, then
(from one to four times depending on
the length) followed by
(from one to four times to select the pause before
the following note.
The composition therefore has the following syntax:
NOTE – [SHARP] - NOTE LENGTH – [PAUSE]
The parameters in brackets are optional
After writing the tune, confirm with
If you are composing one of the personalized melodies that can be transmitted
via EMS ( “Empty” item in the list of tunes), you are asked for a name to give
the composition. This name will then replace “Empty” in the list.
66
In the other menu options it is possible to set the “Key Volume” (4-2)
(“Off”, “Low” and “High”), the tones of the “Warning tones” (4-3) informing
you of the connection, switching the phone on and off, connecting and
disconnecting the battery charger, as well as the low battery charge.
With “Network tone” (4-4) it is moreover possible to activate warning tones
informing you if there is or is no GSM network coverage, or only if there is no
coverage.
The “Active” option in “DTMF” (4-5) is moreover used to immediately send the
tone corresponding to the key pressed in multifrequency transmissions.
Settings (Menu 5)
Display (Menu 5-1)
This function makes it possible to change the “Brightness” (5-1-1) of the
display, with and , and the “Light time” (5-1-2) since last pressing a
key. In addition, it is possible to set the “Te xt” (5-1-3) shown on the display on
stand-by, choosing from “Date” and “Personal” text. The personal text, at
most 40 characters long, is written with the conventional method.
The “Welcome” option (5-1-4) makes it possible to write the welcome
message that appears for a few seconds when switching on the phone on the
display instead of the network operator's name.
Note: If the personal text exceeds 16 characters, the text will scroll on the
display. The maximum length is anyhow 40 characters.
With “Contrast” (5-1-5) it is possible to adjust the light/dark of the display and
with “Select Font” (5-1-6) to set the font of the messages on the display.
“Images” (5-1-7) makes it possible to use to scroll through the images
stored in the phone, starting from the default ones and then passing on to the
ones received via EMS, which can be deleted by briefly pressing .
67
“Animations” (5-1-8): similar to the situation for images, it is possible to
display all the animations and delete the ones saved by the user by pressing
.
“Screen saver” (5-1-9): the GM825 has a screen saver that (if activated in the
relevant menu) appears in the graphic area of the display after a certain length
of time has passed without any keys being pressed. Besides the screen saver
installed on the phone, it is possible to save others downloaded via WAP with
the Download for fun function.
The menus dedicated to managing the screen savers are, in sequence:
“Status” (5-1-9-1): to turn the Screen saver function on and off
“List” (5-1-9-2): to display the saved screen savers directly (the first one is
the one resident in the phone. To scroll through the available images, press
. The saved Screen savers (except for the first one, which is stored
permanently in the phone) can be deleted by pressing and confirming
with when asked to “Delete ?”.
To select an image as a Screen saver, display it and confirm with ; for
a few seconds the display will show “Screen saver selected” confirming the
choice made.
To quit the display without making any selection, press .
“Wait time” (5-1-9-3): in this menu it is possible to define the time in seconds
after which the screen saver comes on: enter the time, then confirm with
.
Language (Menu 5-2)
This function makes it possible to choose the language in which all the
messages on the display are shown. By selecting “Automatic” the phone
automatically recognizes the nationality of the SIM card and displays the
messages in the language associated with it (if the language is stored in the
phone).
68
Call waiting (Menu 5-3)
This network service, if turned on, makes it possible to be informed during a
conversation of the arrival of another call with an audible warning. The
submenu makes it possible to: turn on and off and check the service status.
Keys lock (Menu 5-4)
This function makes it possible to lock the keypad automatically approximately
30 seconds after last pressing a key. It is unlocked as for manual locking:
press for 1 second and then .
Answer mode (Menu 5-5)
This function makes it possible to set the method of answering a call: pressing
, automatic (after 6 seconds without pressing any key), or pressing any
key (except for , o ).
Internet (Menu 5-6)
If the phone has already been configured for Internet access via WAP this
menu contains the connection data in profiles (and it is not necessary to set
anything); otherwise, it is necessary to enter the data (provided by the network
operator or service provider) for the configuration in the submenus.
For more details on this subject, please read the section INTERNET WITH
WAP.
Call control (Menu 6)
Beep every 60 seconds (Menu 6-1)
This function turns on an audible warning on each minute of conversation.
Call length (Menu 6-2)
This function indicates the length of the last call (6-2-1), of all the calls
received and the outgoing ones, as well as the total conversation time. This
last option, if confirmed with , makes it possible to “Reset” (6-2-5) the
meters.
Costs (Menu 6-3)
This network service makes it possible to know the amount charged for the
“Last” (6-3-1) and for “All” (6-3-2) the calls. In addition, with the “Cost
management” option (6-3-3) it is possible, after keying in the PIN 2 code, to
enter the unit value and currency. With “Reset” (6-3-4) and entering the PIN 2
code you reset all the calculations, while “Credit”
(6-3-5) makes it possible to limit the units to a fixed number, after which the
call is cut off.
Note: This function depends on the SIM card and on the network operator.

69
Send number (Menu 6-4)
This network service makes it possible, for all outgoing calls, to choose
whether to
“Send” (6-4-1), “Not send” (6-4-2) your phone number or, with “Automatic”
(6-4-3), to leave the network setting unaltered.
On the contrary to calls, EMS/SMS messages ALWAYS contain the sender's
number.
Clock (Menu 7)
Adjustment (7-1)
This function sets in sequence: the time (always displayed at top right of the
display) and, after confirming, the date and day of the week.
To pass from one value to another, press ; change the values with
and ; confirm with .
Alarm (Menu 7-2)
Use this menu to set the time for the alarm, then to turn it on or off. Increase
and decrease the hours and minutes with and .
When the alarm rings, press any key; when asked “Switch on?” press
to turn on the phone, or to leave it off.
Note: The alarm clearly stays in operation even with the phone switched off
(you should remember this when travelling by airplane and the alarm might
ring).
Date format (Menu 7-3)
This function sets the format of the date to the European system (days-months-
year: menu 7-3-1) or American system (months-day-year: menu 7-3-2).
Information on the phone (Menu 8)
Personal number (Menu 8-1)
This function makes it possible to display your own phone number stored on
the SIM card. If the number fails to appear or has to be changed, enter the
number (or edit with ) and confirm.
IMEI (Menu 8-2)
Displays the phone's serial number. If your phone gets stolen, communicate
this number (printed on a label on the sales package – which should therefore
be kept) to the network operator or service provider to block use of the phone
on the GSM networks that provide this service.
70
Software (Menu 8-3)
Displays the phone's software release.
Information on the SIM card (Menu 8-4)
Displays, in succession, the phase (1 or 2) of the SIM followed by the country's
code (MCC) and the GSM network code (MNC) on which the issuing operator
operates.
Total life (Menu 8-5)
Displays the total time of the calls sent and received by the phone. This figure
cannot be reset.
Security (Menu 9)
PIN (Menu 9-1)
This function makes it possible, by changing PIN1 and PIN2, to personalize
the PIN with 4-8 digits. If the SIM allows it, there is also the “Use PIN” option
(9-1-3) to enable or disable the request for the PIN when switching on.
Phone (Menu 9-2)
Access to this submenu depends on correctly entering the security code set by
the manufacturer as 000000.
On entering the security code number (shown as asterisks), confirmed with
, there are the following options: “Type” (9-2-1) to turn on and off the
request for the security code when switching on or to have the phone work
with just one of the last 10 SIM cards inserted; “Delete List” (9-2-2) to delete
the list of the last 10 SIM cards inserted; “New Code” (9-2-3) to change the
code to access this menu; “Autoblock” (9-2-4) to turn automatic block on and
off, changing the relevant code (factory setting 1 2 3). With the “Use default”
option (9-2-5) all the factory settings are restored.
Call block (Menu 9-3)
This network service makes it possible to block “Outgoing calls” (in detail: all
“Outgoing calls”, calls “Abroad” and “Only domestic” calls) and “Incoming
calls” (in detail: “Incoming calls” and calls “Abroad”).
With the “Delete” option (9-3-3) it is possible to cancel the various types of call
block set beforehand, after entering the security code and then pressing
.
All attempts at activating call blocking depend on entering a 4-digit code,
residing in the SIM card memory and therefore provided by the network
operator.
With ”New Code” (9-3-4) it is possible to enter a new code to access call
blocking.
71
Fixed dialling numbers (Menu 9 4)
This function requires PIN2 and, after activation (9-4-1), it permits sending
calls solely to the phone numbers contained in the fixed dialling number (FDN)
memories. In addition, it permits calling phone numbers solely from these fixed
dialling number memories.
Note: The FDN function numbers are stored solely on the SIM card and can
only be changed with the PIN2 code.
Call divert (Menu 10)
Always divert (Menu 10-1)
This network service makes it possible to transfer incoming calls to another
phone number. Before turning on call divert, it is necessary to enter the
number on which to transfer calls. With it is possible to divert calls
according to the type of service: “All”, “Voice”, “Fax” and “Data”.
Missed calls (Menu 10-2)
This network service makes it possible to transfer calls to which you cannot
reply (if busy, cut off, no answer and all missed calls) according to the type of
setting. Before turning on this function, it is necessary to enter the number on
which to divert the calls: pressing H sends the network the request to
display the service status.
Note: the “No answer” option has to contain the time after which transfer is
turned on.
Cancel (Menu 10-3)
Cancels all diversions activated or the different types of diversion activated
(“Always”, “If busy”, “If cut off”, “No answer”).
GSM networks (Menu 11)
Network search (Menu 11-1)
This function starts a search for GSM networks that can be received in the
area, listing the ones found. This list also gives the status of each network
marked by a symbol (T own network, P roaming or g prohibited network).
Go onto the chosen network and confirm with to start registering the
phone.
72
Selection (Menu 11-2)
This function turns on “Automatic” or “Manual” GSM network selection.
Network list (Menu 11-3)
This function makes it possible to add GSM networks to the SIM card to create
a priority list the phone will follow in searching for a GSM network when there
is not the one that issued the SIM card.
Press to scroll through the list of priorities in searching for a network.
Use to go onto “Empty” and press to display the set
networks that can be added to the priority list.
By holding down it is possible to delete a network from the priority list.
Own network (Menu 11-4)
This function displays the name of the network operator that issued the SIM
card.
Select Band (Menu 11-5)
This function makes it possible to select the frequency band - 900/1800MHz
or 900/1900 MHz, so that the phone can operate in the European Union
countries and in other countries that have implemented a GSM-compatible
1900 MHz network.
To select the band, enter the function, select the option and confirm with
.
Internet (Menu 12)
Confirming this selection takes you to the WAP connection and the parameters
for optimum management of this function. To use the associated functions in the
best way, read the section, “Accessing the Internet”, on page 54.
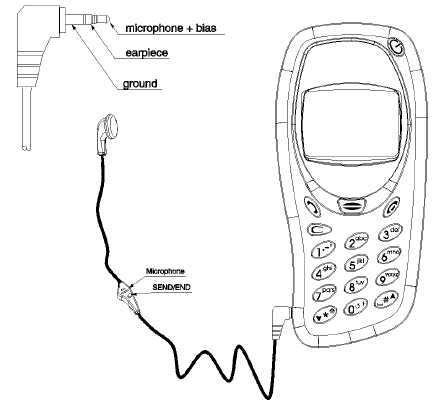
73
ACCESSORIES
Connect the jack of the cable of the earphone (optional extra) into the socket
on the side of the phone so it is fully inserted.
To answer a call with the earphone connected, press (or briefly press
the earphone key, if there is one); at the end of the call, press .
To disconnect the earphone from the phone, extract the jack from the socket
74
TROUBLESHOOTING
Problem Possible cause and solution
It is not possible to switch
on the phone.
Low battery charge. Recharge the battery.
(Page 11) The battery is not connected
correctly (page 9)
You hear an audible
warning and this image
appears:
Low battery charge. The battery charger is
not properly connected. Recharge the
battery. (Page 10-11)
A blinking P symbol is
displayed.
A problem has occurred during battery
recharge. Check the battery and the charger
plug are connected to the phone correctly.
(Page 10-11)
While the phone is
recharging the display
shows this symbol
A fault has occurred in the battery: charging
temperature too high (take out the battery
and leave it to cool for half an hour),
damage (change the battery). Change the
battery.
This message is displayed:
“Insert SIM”
No card has been inserted in the phone or
the card has not been inserted correctly.
Insert the SIM card. (Page 8)
This message is displayed:
“SIM faulty”
The SIM card is defective or has not been
inserted correctly. Check that the SIM card
has been inserted correctly and is clean.
(Page 7-9)
This message is displayed:
“PUK X
XX
X - - - - - -”
The wrong PIN has been keyed in 3
consecutive times. Unlock the SIM card with
the 8-digit PUK code (Page 21).
The name of the network
operator or service provider
is not shown on the display
in stand-by mode.
You are outside the area of coverage of the
GSM signal. Change position.

75
Problem Possible cause and solution
The symbol g
gg
g is displayed
and it is not possible to make
calls.
The network operator or service
provider that issued the SIM card you
are using has no roaming
arrangements with the GSM network
to which your phone is now
connected. Only emergency calls are
possible. (Page 17)
You hear a three-tone warning
during a call.
The GSM network is overloaded.
Wait a moment and try again.
A blinking B symbol is
displayed and no SMS
messages are received.
The SMS memory is full: delete one
or more SMS messages. (Page 49)
Weak signal (X
XX
X). You are in an area with a weak GSM
signal (e.g., in a building or a tunnel).
Change position.
A few seconds after accessing
menu 9 - Internet, an error
message is displayed and
there is no Internet connection.
Try connecting to the Internet later
and with better radio signal reception
conditions. If you still fail to connect
to the Internet, check the Profile set-
up in the “Internet” - “Settings” menu
(12-2).
Instead of the network
operator's normal logo, the
display shows “X NET YY”
The phone is connected to a network
that the SIM fails to recognize (for
instance, a network set up after the
SIM had been issued).
76
IMPORTANT
Read this information before using your wireless handheld phone
SAFETY INFORMATION
Exposure To Radio Frequency Signals
Your wireless handheld portable telephone is a low power radio transmitter
and receiver. When it is ON, it receives and also sends out radio frequency
(RF) signals. In August 1996, the Federal Communications Commission
(FCC) adopted RF exposure guidelines with safety levels for handheld
wireless phones. Those guidelines are consistent with safety standards
previously set by both U.S. and international standards bodies:
• American National Standards Institute (ANSI) IEEE C95.1-1992
• National Council on Radiation Protection and Measurement (NCRP) - Report
86
• International Commission on Non-Ionizing Radiation Protection (ICNIRP)
1996
• Department of Health and Welfare Canada, Safety Code 6
Those standards were based on comprehensive and periodic evaluations of
the relevant scientific literature. For example, over 120 scientists, engineers,
and physicians from universities, government health agencies, and industry
reviewed the available body of research to develop the ANSI Standard
(C95.1). The design of your phone complies with the FCC guidelines (and
those standards).
If you wear a handset on your body, to maintain compliance with FCC RF
exposure guidelines, use only approved carrying case, holster, or other body-
worn accessory. If you do not use a body-worn accessory, ensure the antenna
is at least one inch (2.5 centimeters) from your body when transmitting. Use of
non-approved accessories may violate FCC RF exposure guidelines.
Antenna Care
Use only the supplied or an approved replacement antenna.
Unauthorized antennas, modifications, or attachments could damage the
phone and may violate FCC regulations.
77
Phone Operation
Normal Operation
For the most efficient and comfortable use the phone as you would any other
telephone, with the antenna pointed up and over your shoulder.
Tips on Efficient Operation
For your phone to operate most efficiently:
• Extend your antenna fully (if applicable).
• Do not touch the antenna unnecessarily when the phone is in use. Contact
with the antenna affects call quality and may cause the phone to operate at a
higher power level than otherwise needed.
Batteries
All batteries can cause property damage, injury or burns if a conductive
material such as jewelry, keys or beaded chains touches exposed terminals.
Exercise care in handling any charged battery, particularly when placing it
inside your pocket, purse or other container with metal objects. When the
battery is detached from the phone, your batteries are packed with a protective
battery cover; please use this cover for storing your batteries when not in use.
Never throw a battery into a fire because it may explode. Since a leaking
battery may corrode the telephone you need to replace it immediately with the
same or equivalent type battery recommended by the manufacturer;
otherwise, you risk damaging the phone, the charger or battery.
Driving
Check the laws and regulations on the use of wireless telephones in the areas
where you drive and always obey them. Also, if using your phone while
driving, please:
• give full attention to driving - driving safely is your first responsibility
• use hands-free operation, if available
• pull off the road and park before making or answering a call if driving
conditions so require
Electronic Devices
Most modern electronic equipment is shielded from RF signals. However,
certain electronic equipment may not be shielded against the RF signals from
78
your wireless phone.
Pacemakers
The Health Industry Manufacturers Association recommends that a minimum
separation of six (6”) inches (20 cm) be maintained between a handheld
wireless phone and a pacemaker to avoid potential interference with the
pacemaker. These recommendations are consistent with the independent
research by and recommendations of Wireless Technology Research.
Persons with pacemakers:
• Should always keep the phone more than six inches from their pacemaker
when the phone is turned ON.
• Should not carry the phone in a breast pocket.
• Should use the ear opposite the pacemaker to minimize the potential for
interference.
• Should turn the phone off immediately if they have any reason to suspect that
interference is taking place.
Hearing Aids
Some digital wireless phones may interfere with some hearing aids. In the
event of such interference you may want to consult your hearing aid
manufacturer or call the customer service line to discuss alternatives.
Other Medical Devices
If you use any other personal medical device, consult the manufacturer of your
device to determine if they are adequately shielded from external RF energy.
Your physician may be able to assist you in obtaining this information.
Turn your phone OFF in health care facilities when any regulations posted in
these areas instruct you to do so. Hospitals or health care facilities may be
using equipment that could be sensitive to external RF energy.
Posted facilities
Turn your phone OFF in any facility where posted notices so require.
Aircraft
FCC regulations prohibit using your phone while in the air. Switch OFF your
phone before boarding an aircraft.
79
Blasting areas
To avoid interfering with blasting operations, turn your phone OFF when in a
“blasting area” or in areas posted: “Turn off two way radio”. Obey all signs and
instructions.
Potentially explosive atmospheres
Turn your phone OFF and do not remove the battery when in any area with a
potentially explosive atmosphere and obey all signs and instructions. Sparks
in such areas could cause an explosion or fire resulting in bodily injury or even
death. Areas with a potentially explosive atmosphere are often, but not
always, clearly marked. They include fueling areas such as gasoline stations;
below deck on boats; vehicles using liquefied petroleum gas; fuel or chemical
transfer or storage facilities; areas where fuel odors are present; areas where
the air contains chemicals or particles, such as grain, dust, or metal powders;
any other area where you would normally be advised to turn off your vehicle
engine.
Vehicles
RF signals may affect improperly installed or inadequately shielded electronic
systems in motor vehicles that may include electronic fuel injection systems,
electronic anti-skid (anti-lock) braking systems, electronic speed control
systems, or air bag systems.
Check with the manufacturer or its representative regarding your vehicle. You
should also consult the manufacturer of any equipment that has been added to
your vehicle.
Vehicles equipped with an air bag
For vehicles equipped with an air bag, remember that an air bag inflates with
great force. Do not place objects, including both installed or portable wireless
equipment, in the area over the air bag or in the air bag deployment area. If in-
vehicle wireless equipment is improperly installed and the air bag inflates, serious injury could result.
81
82
IMPORTANT NOTICES
• Service stations: It is recommended to switch off the phone when fuelling; the
same precaution has to be taken when near petro-chemical plants or where
explosives are used.
• Keep the phone out of the reach of children.
• Use the phone while driving solely with a handsfree device. Do not stop on the
hard shoulder of a motorway or dual carriageway to make or receive a phone
call, unless it is an emergency. Breaching these regulations is cause for a fine
under the highway code and may even be a crime.
• Switch the phone off on board an airplane: it may interfere with the aircraft's
instrumentation. The user is obliged to ask a crew member for permission to
use the phone while the plane is on the ground. Failure to observe this regula-
tion is a crime in several countries.
• It is recommended not to use the phone in hospitals. Failure to observe this pre-
caution may lead to severe liability, even of a penal nature. It is recommended to
pay the utmost attention when using the phone in the field of interaction with
devices such as pace-makers, hearing aids and electro-medical equipment in
general. Cardiacs are advised not to keep a mobile phone near their heart to
prevent any interaction between the electromagnetic waves and their heartbeat.
• There are no definite data on the possible harmfulness of electromagnetic
waves generated by a mobile phone. In any case, exposure to electromagnetic
waves can be drastically reduced by using a portable handsfree device or ear-
phone.
• Use genuine parts and accessories only. using other components could dam-
age the phone and forfeit warranty.
• Never attempt to dismantle the phone or battery: there are no parts the user can
repair inside it.
• Prevent the phone coming into contact with any liquid: however, should this
occur, disconnect the phone from the electricity supply (if being recharged) and
call a technical service centre in compliance with the terms of the warranty cer-
tificate.
• Avoid using the phone outside the permissible temperature range: -10°C and
+ 55°C. Never leave the phone in direct sunlight or where there are high levels of
humidity or dust.
• The phone can be cleaned by using a soft cloth moistened with water.
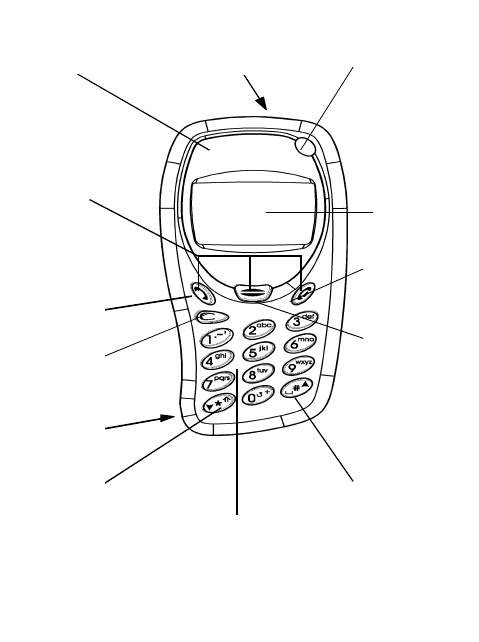
83
Soft Keys
Tasto di
scorrimento
GIÚ
Tasto
ca nc e lla
Tasto di
accensione/
spegnimento
Tasto di
accesso
menù
Chiusura
chiamata
Ino ltro
chiamata
Auricolare
Display
Tasto di
sc orrimento
SÚ
Ta stiera a lfa numerica
c o mpo sizio ne numeri/
inserimento nom i
Presa
auricolare
(sul fianco)
Presa per
carica batterie
(sul fianco) On/off key
Earpiece
Battery charger
socket (on side)
Send call
Delete key
Earphone
socket
(on side)
DOWN scroll key
Alphanumeric keypad
to dial numbers/
enter names
UP scroll key
Menu
access key
End call
Display
Soft Keys

84
QUICK HELP
How to make your first call
Carefully read the instructions and information supplied by the network
operator or service provider with the SIM card.
1 Insert a valid SIM card into the phone when it is switched off.
2 Insert the battery.
3 If necessary, charge the battery with the specific battery charger.
Note: The phone can be used while recharging, but this lengthens the
recharge time.
4 Switch on the phone by holding down . If the display shows
PINX
XX
X
key in the PIN provided together with the SIM card and press .
When the PIN is requested, press H to display the available lan-
guages; press L to send an emergency call (not available in all
countries-contact the network operators for information).
(You should not misuse this service).
5 When the name of the network operator or service provider who supplied
the SIM card appears, the display is on stand-by and the phone is con-
nected to the network.
6 Key in the dialling code, then the phone number and press .
How to answer a call
1 With the phone on and in an area covered by the GSM network, an incom-
ing call is signalled by the ringer and the display shows:
<<CALL>>
Note: to switch off the ringer without rejecting the incoming call, press
G.
2 Press to answer and then to end a call.
How to save a number to the phonebook
1 With the display on stand-by, enter the phone number preceded by the
local area code and the international code (with + instead of 00).
Note: the + symbol is displayed by holding down .
2 Press to reach the “Phonebook” menu and confirm with
.
3 Enter the name and press
.
Pressing the first time enters the first letter, the second time the next one and
so on. To delete the last letter keyed in, briefly press .

85
4 Press
and
again to confirm the position in the phonebook.
5 Send the call to the number or delete the number by pressing .
How to retrieve a position from the phonebook
1 With the display on stand-by press till “Phonebook” is displayed and
confirm with
.
2 Scroll through the phonebook positions with and .
3 Press on the required phonebook position to send the call.
How to send an EMS message
With the display on stand-by, press to reach “Messages” and confirm
twice with .
Press 3 times to go onto “Parameters” and confirm twice with
.
Press and go onto “SMS Centre Number”: enter the SMS Centre
number supplied by the network operator or service provider) and press
.
Hold down to return to the display on stand-by.
5 Press to go onto “Messages”, confirm with and confirm again on
“New”.
6 With the request “Send to:” enter the recipient's phone number (or access
the phonebook by pressing , choose a number with or
and copy it to the EMS ), then confirm with .
7 Compose the message and press .
8 Press with the request “Send”: the SMS text message has been
sent.
Note: The steps described in points are used solely to send the
first SMS message.
86
How to reach the first SMS message
1 The phone emits an audible warning and for a few seconds the display
shows:
2 Until the SMS message is read, the display on stand-by shows B: press
, to the ”Messages” menu; the message received and never read will
open automatically; scroll through it with $.
To read a message another time, go to the “Messages” menu with and
, go onto “Received” with $and confirm with .
3 Press and or to scroll through the message.
4 Press once to go back to the start of the message or twice to quit.
Note: Messages are recorded on the SIM card; so as not to use up its memory
pointlessly, it is a good idea to delete SMS messages after reading them to
leave room for fresh incoming SMS messages.