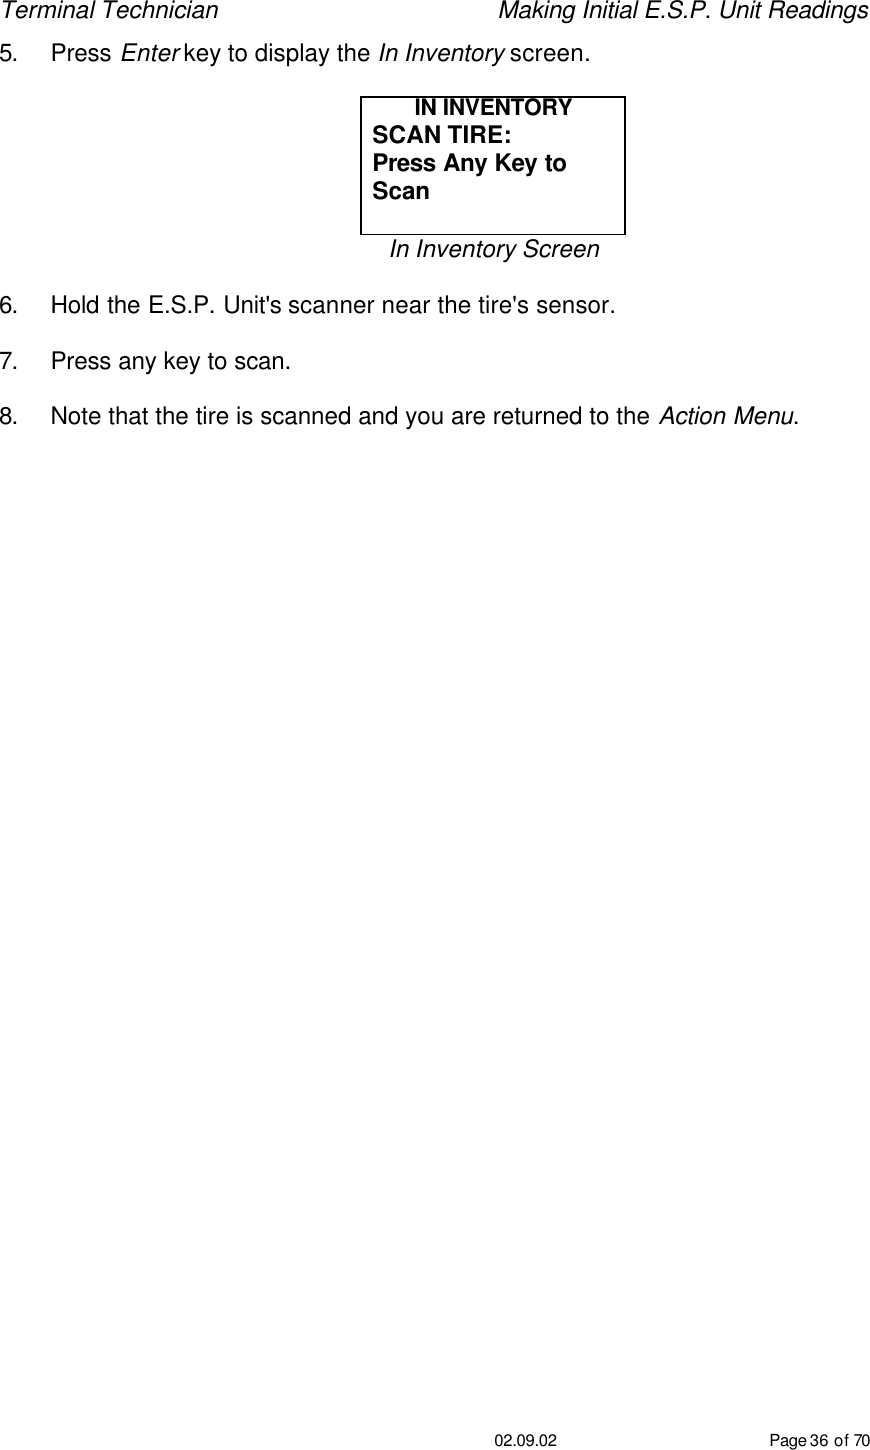
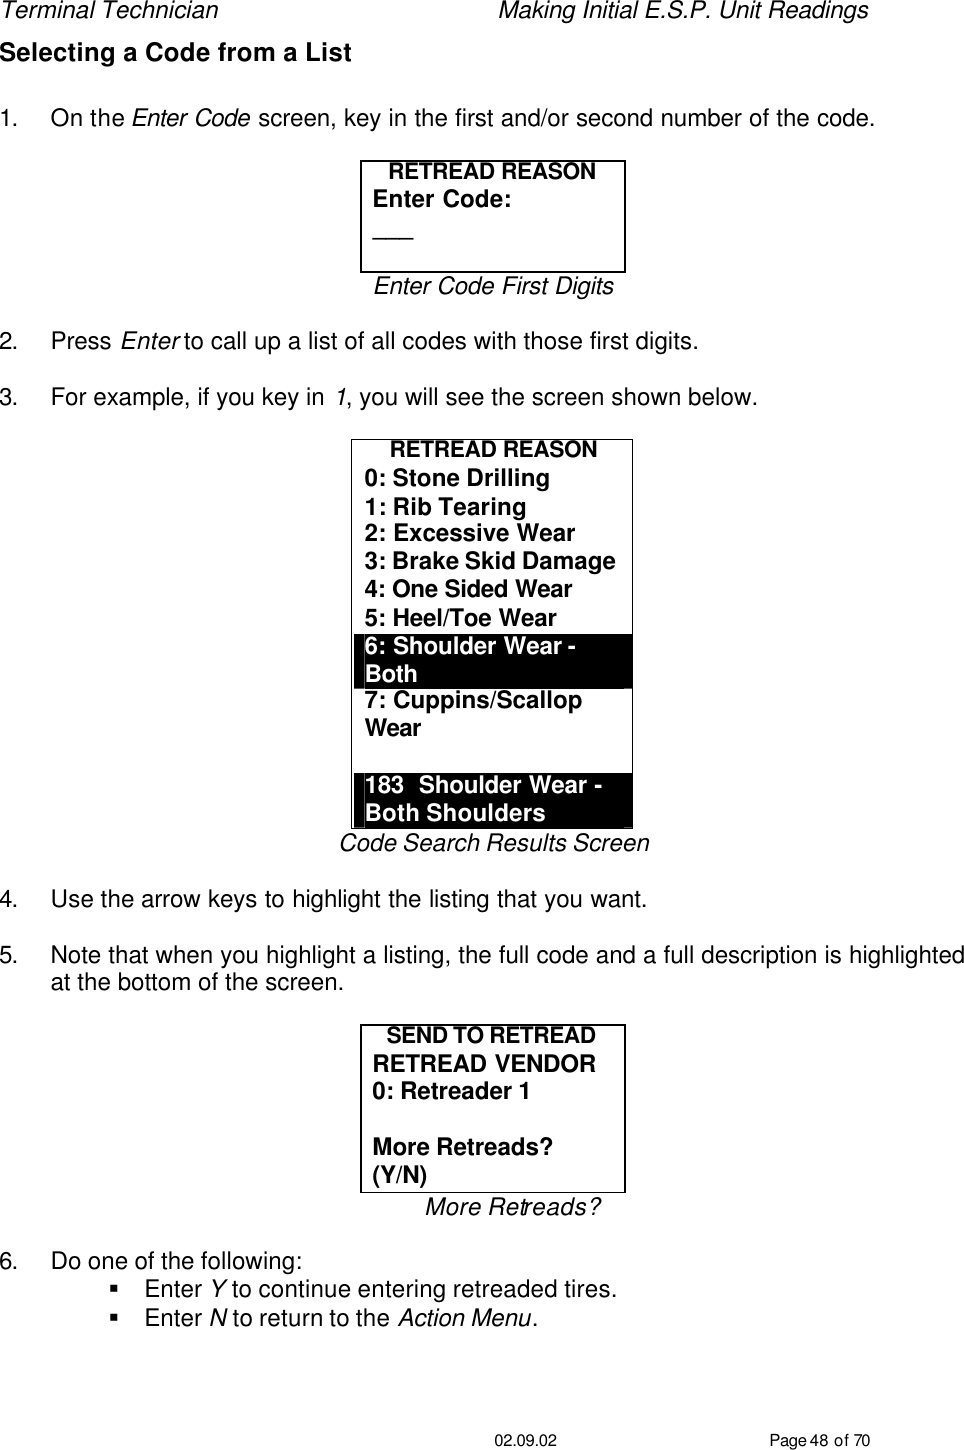
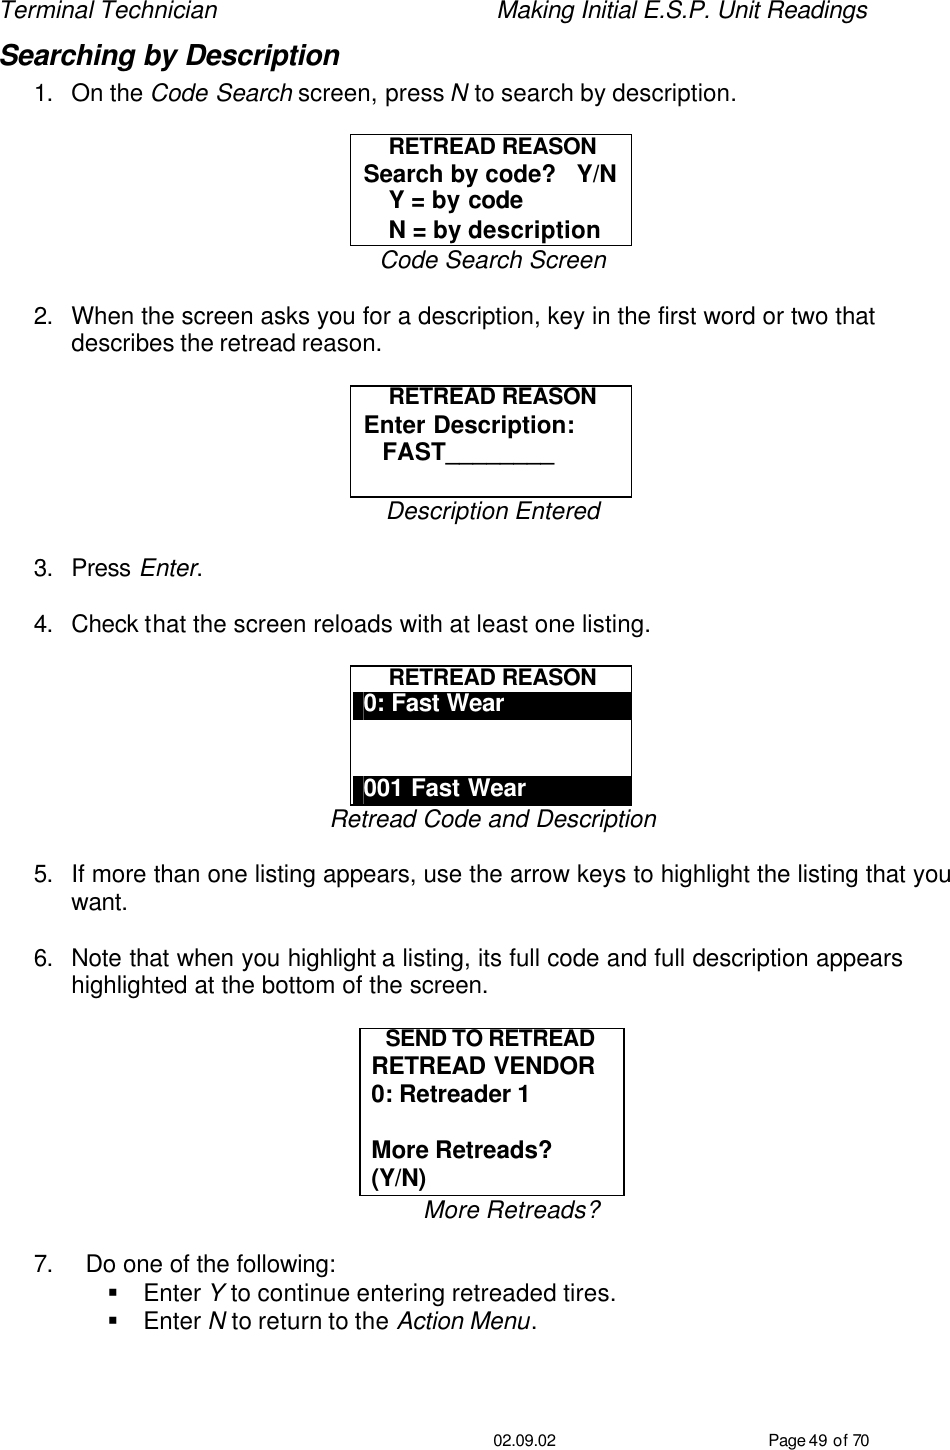
Texas Instruments 76519 Radio Frequency Identification (RFID) User Manual BIB TRACK ESP Unit User Guide3
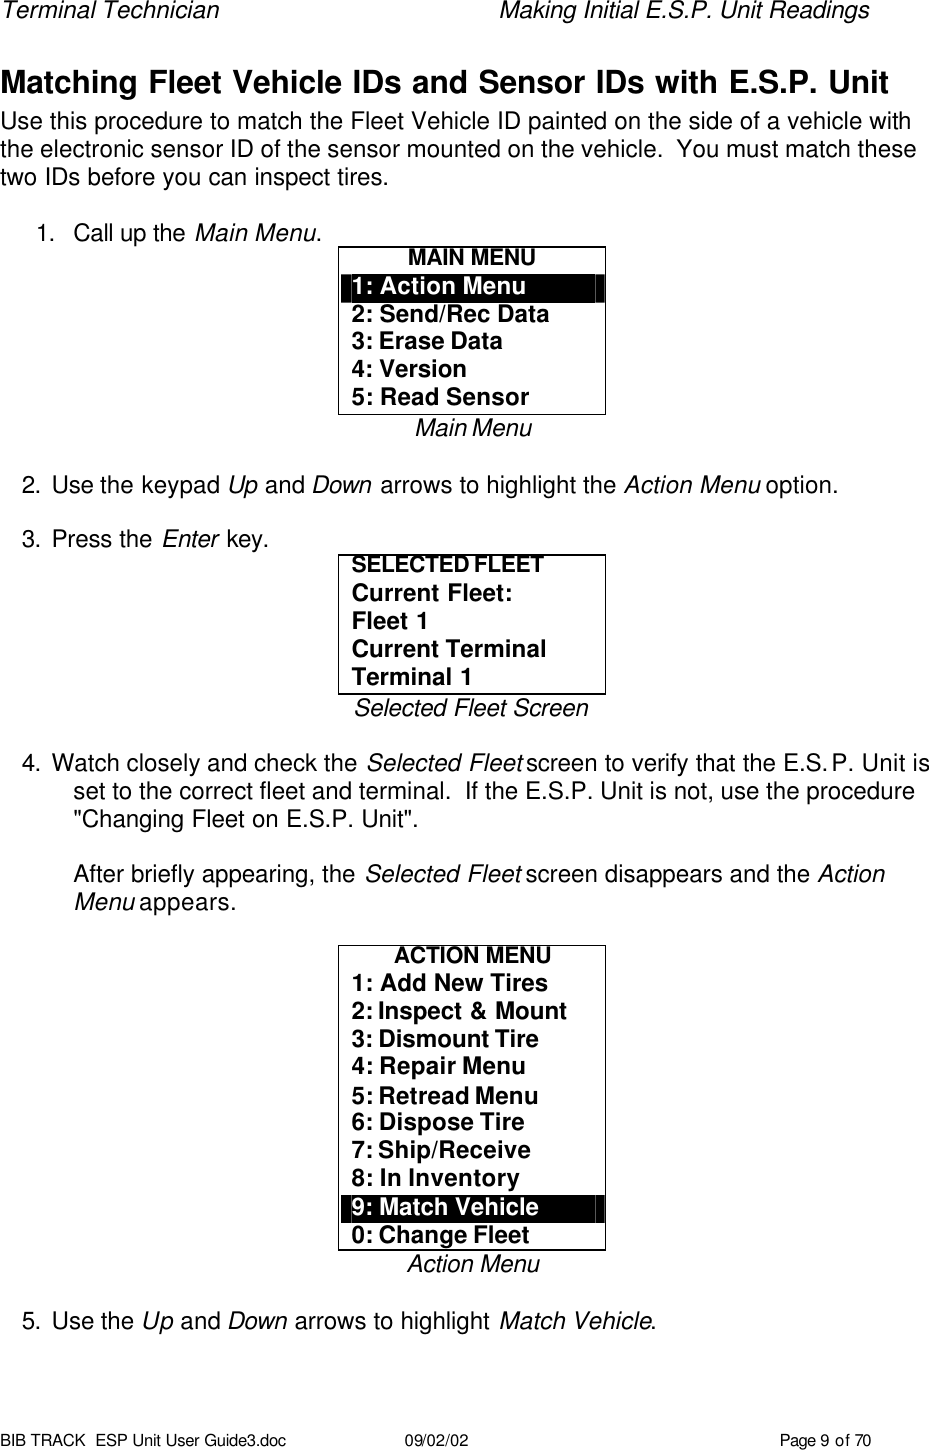
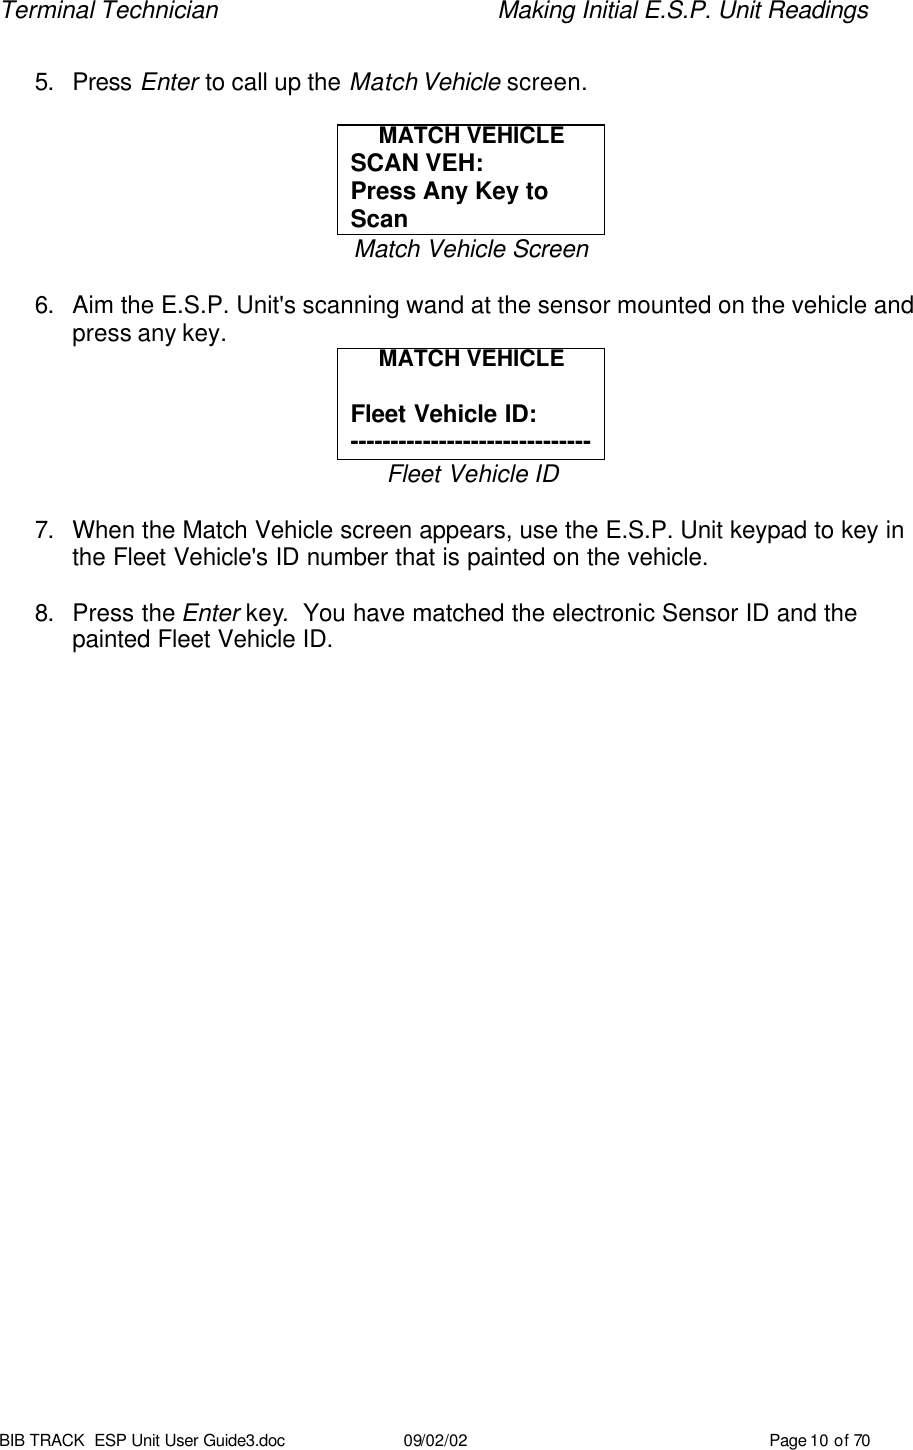
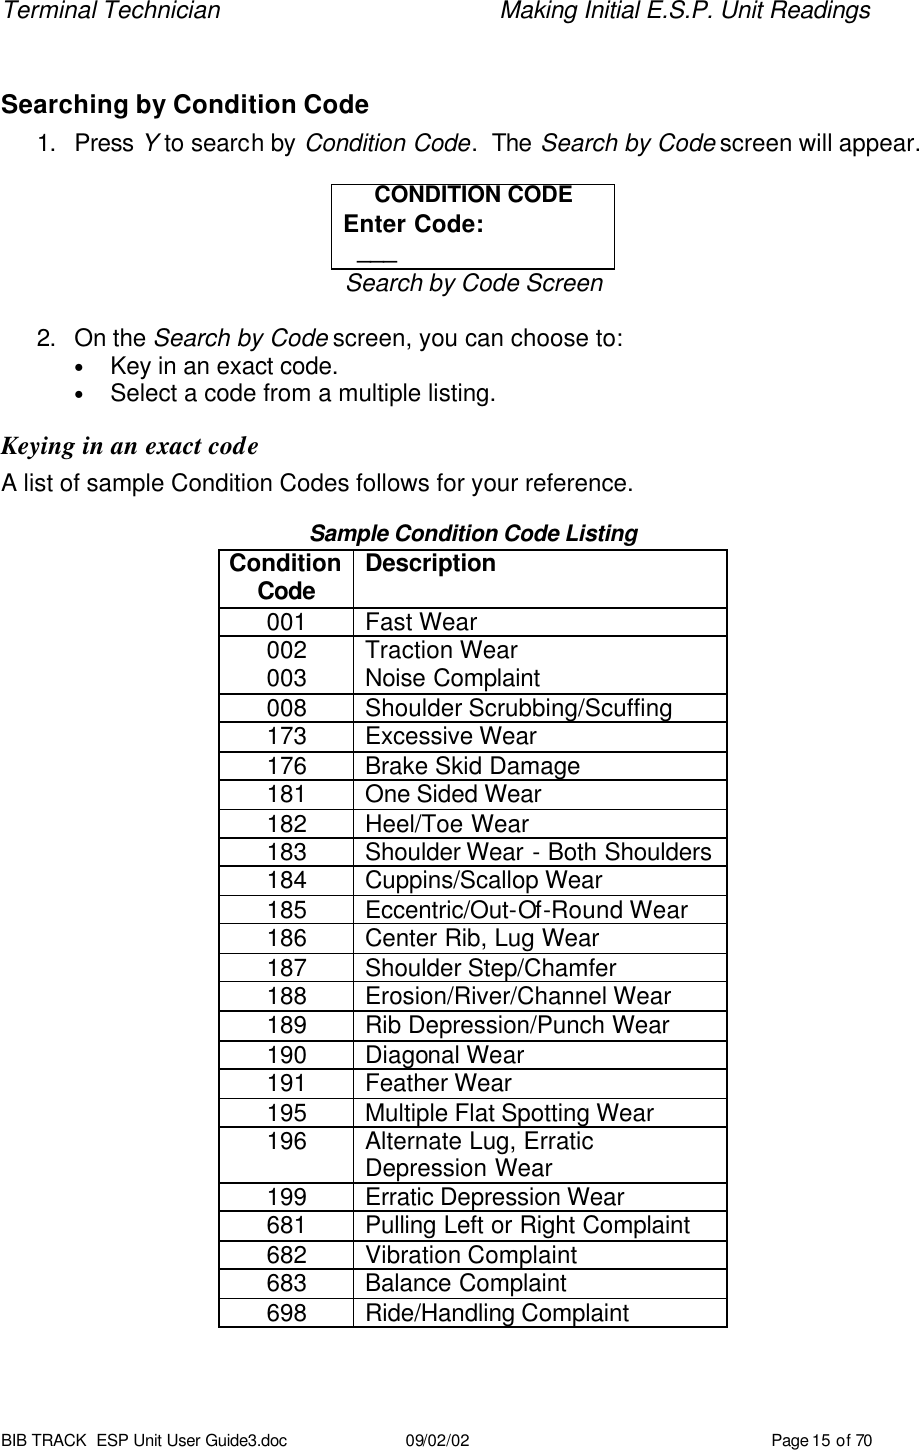
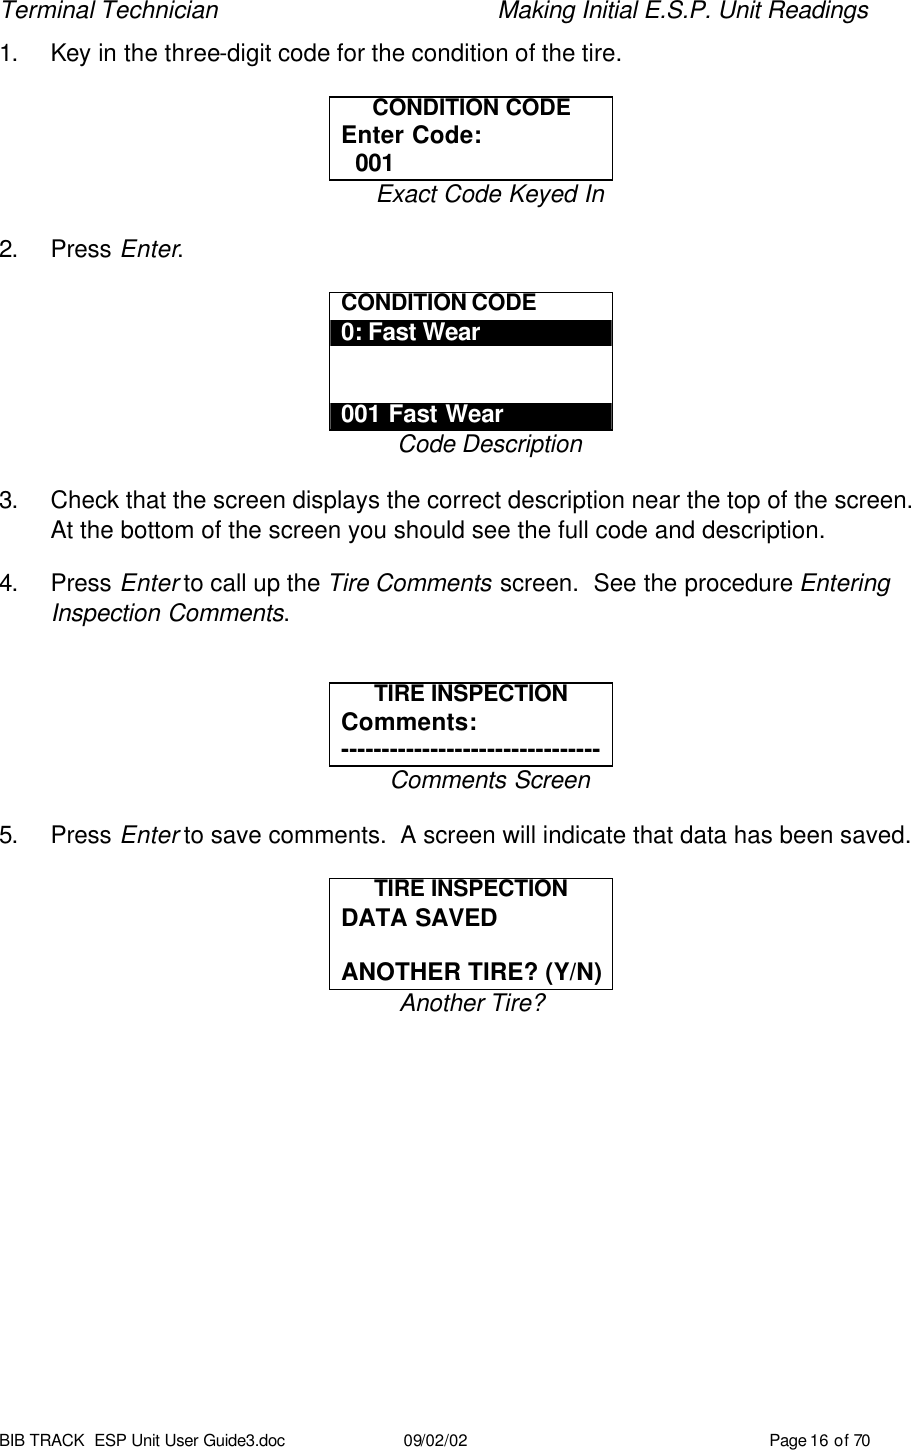
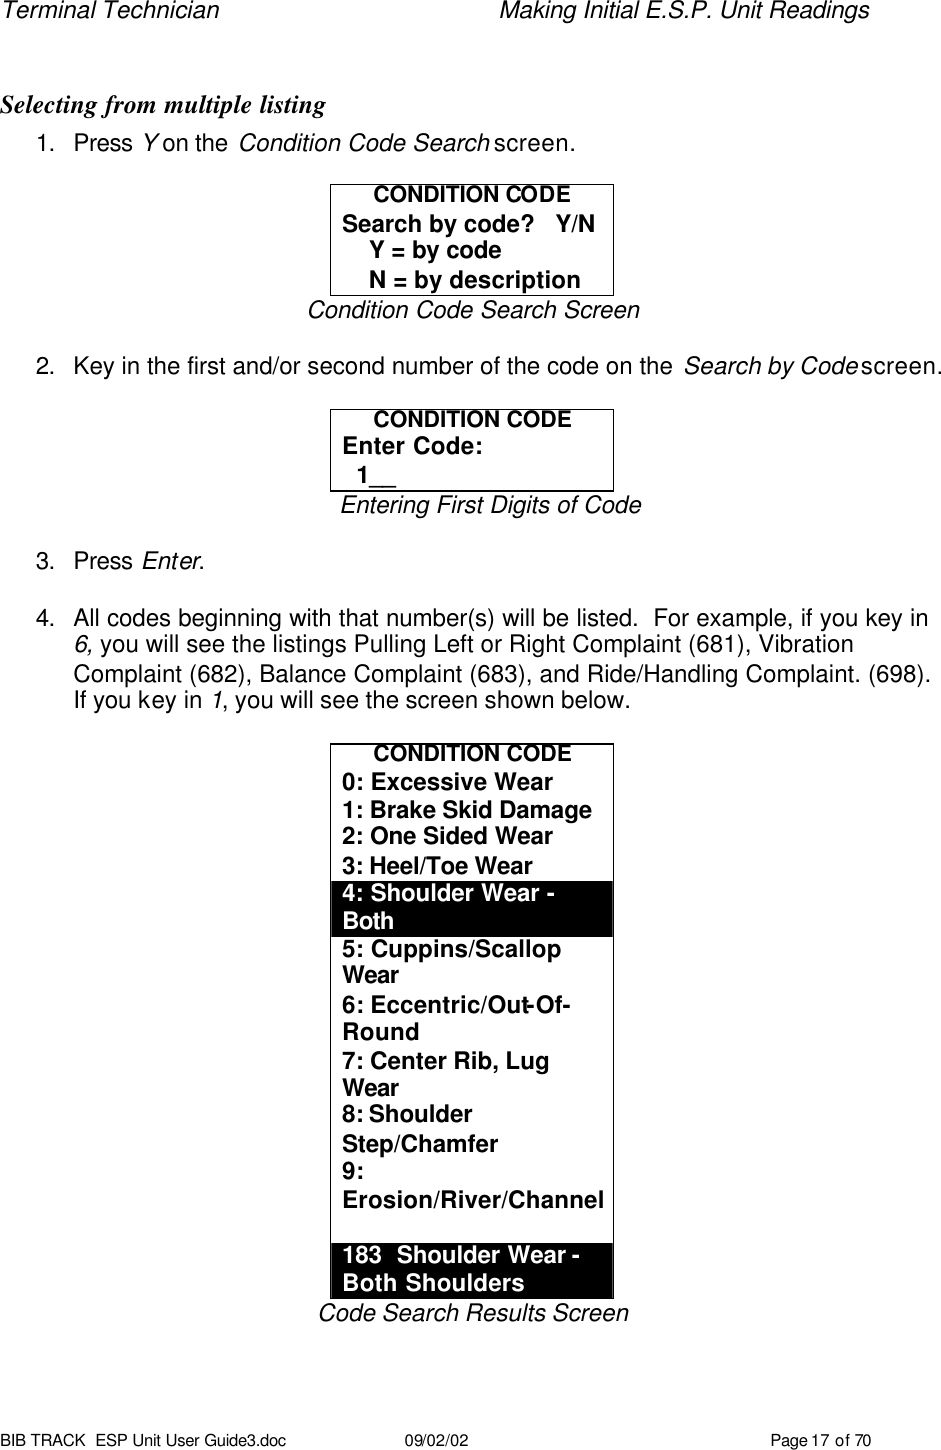
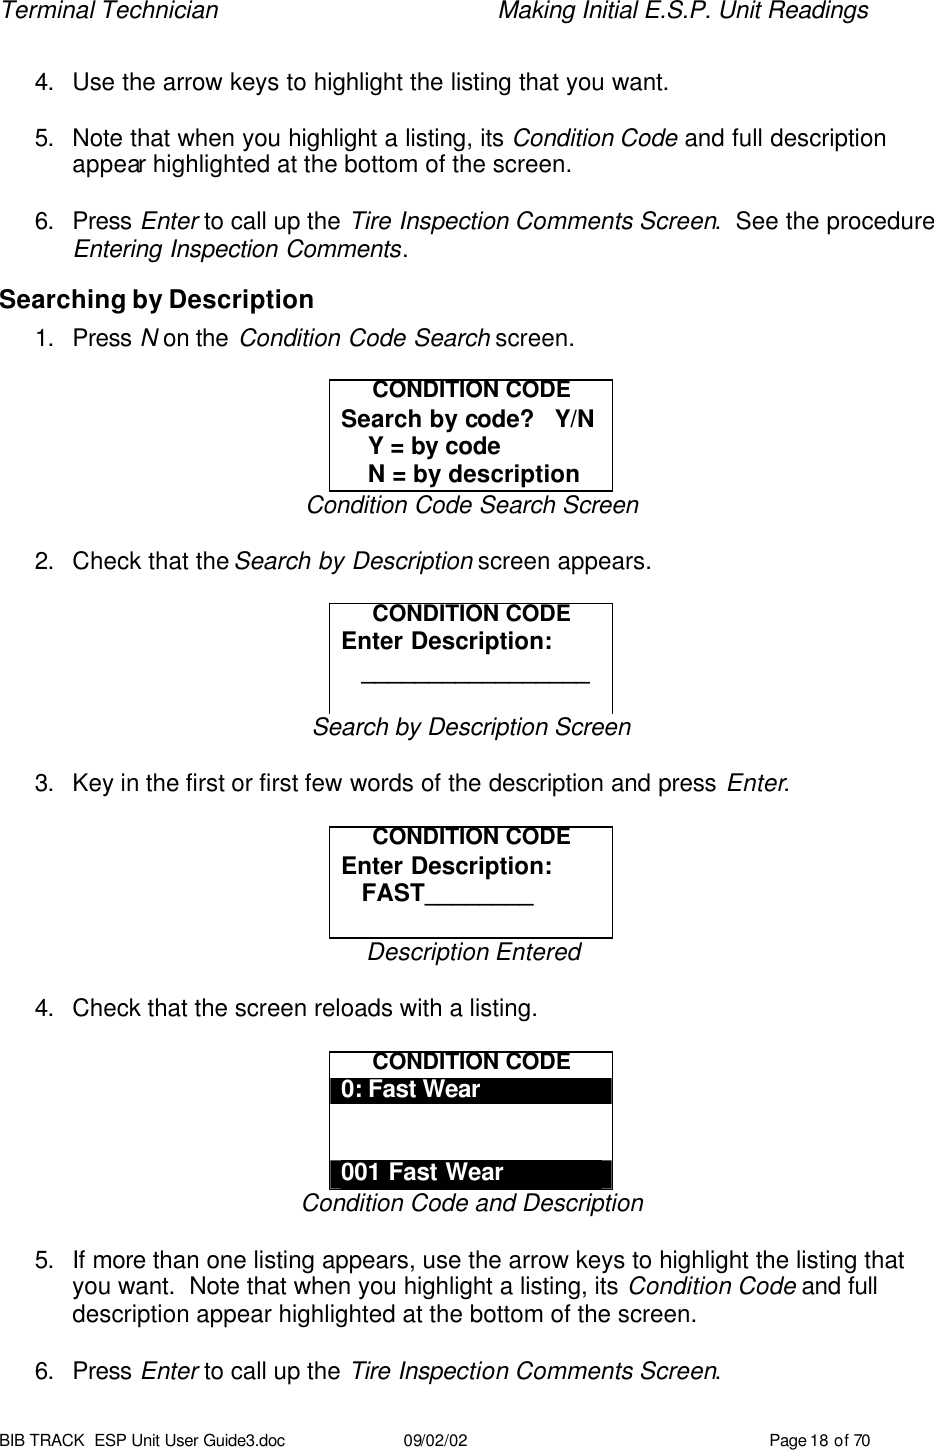
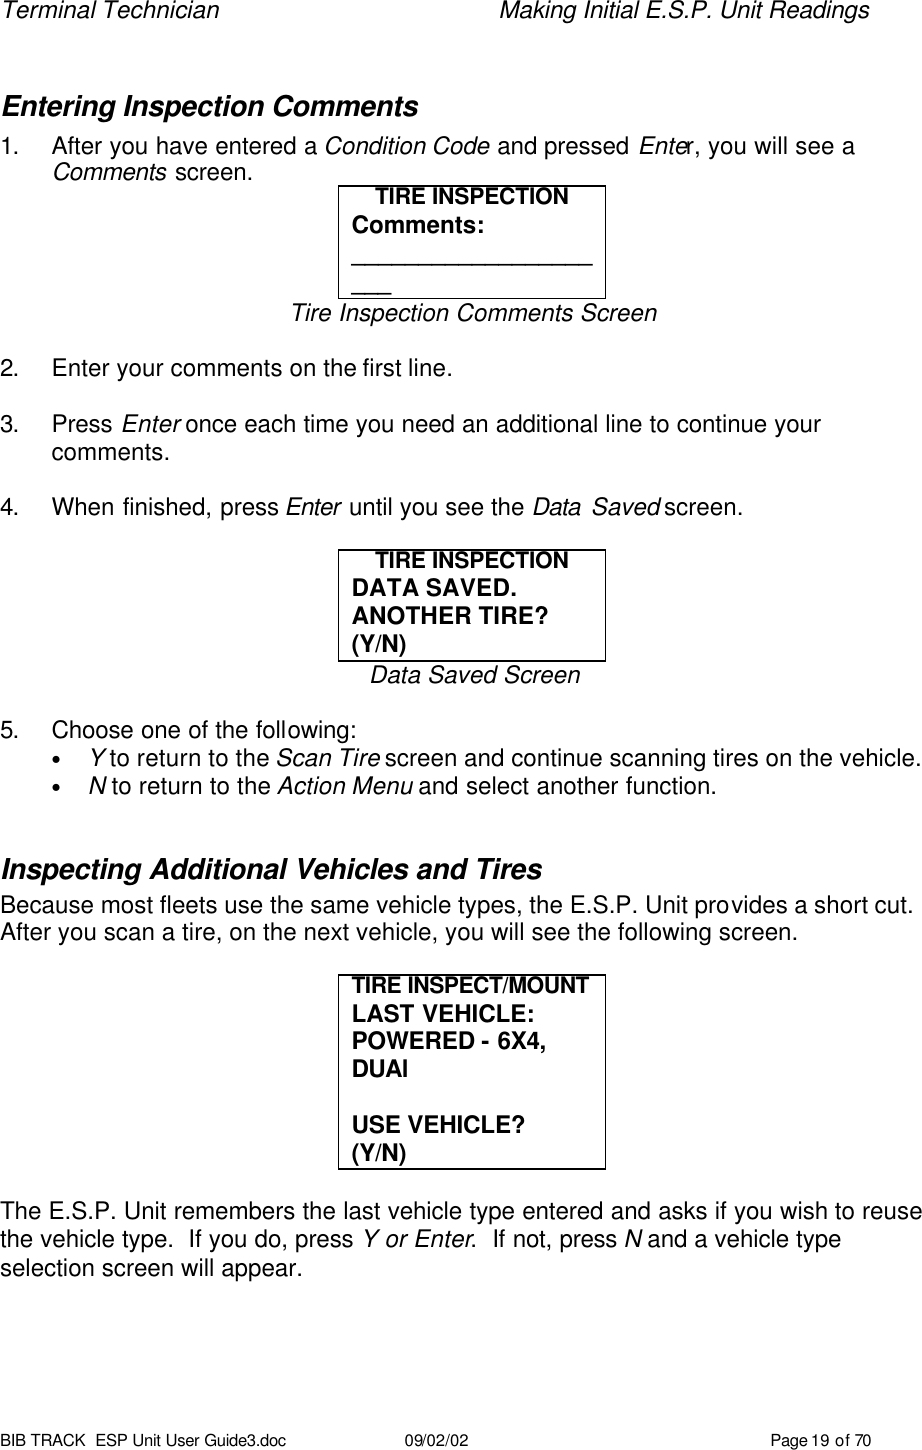
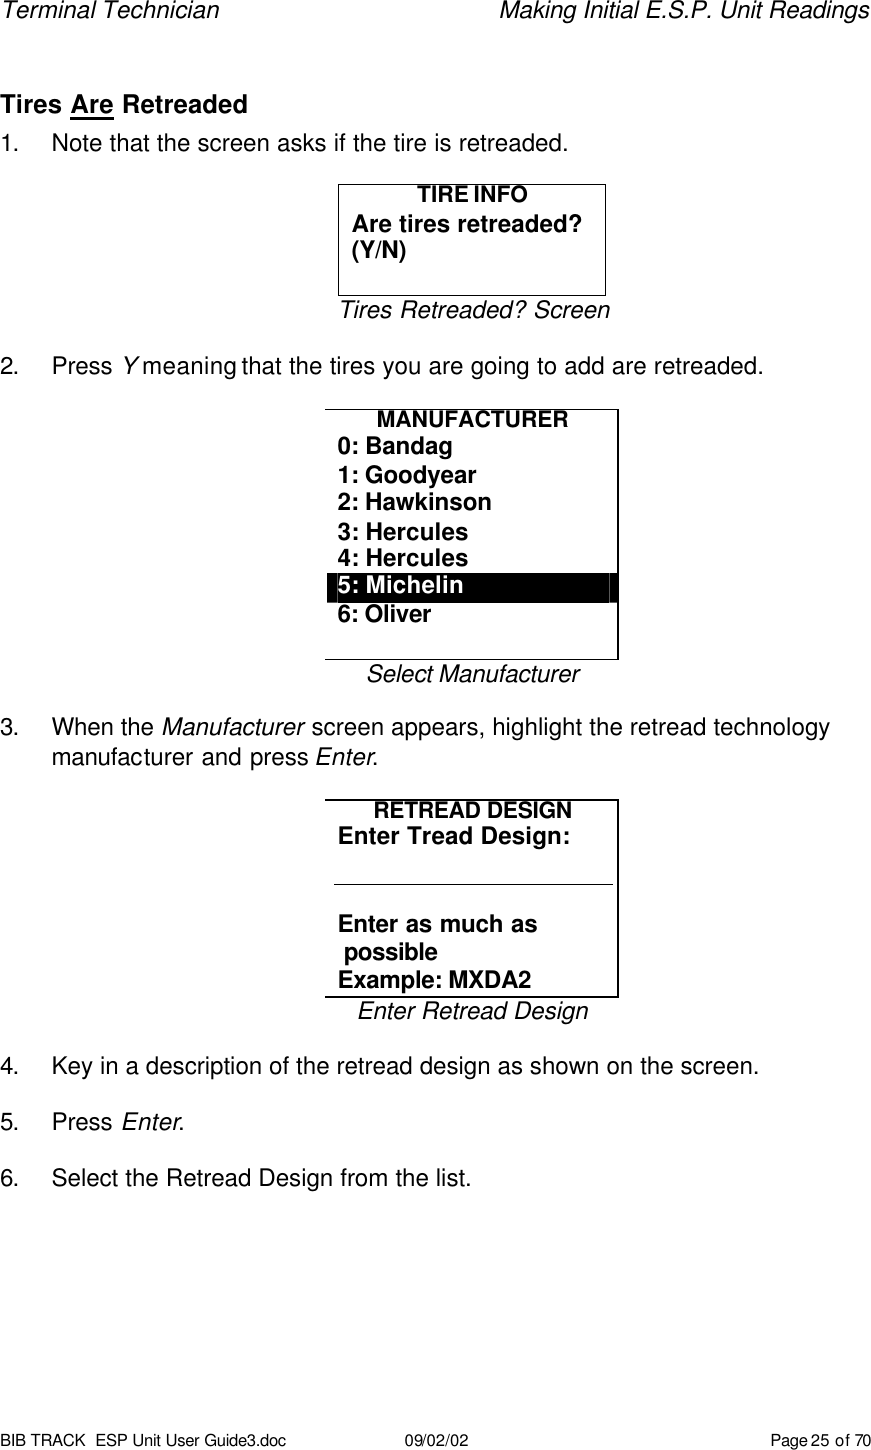
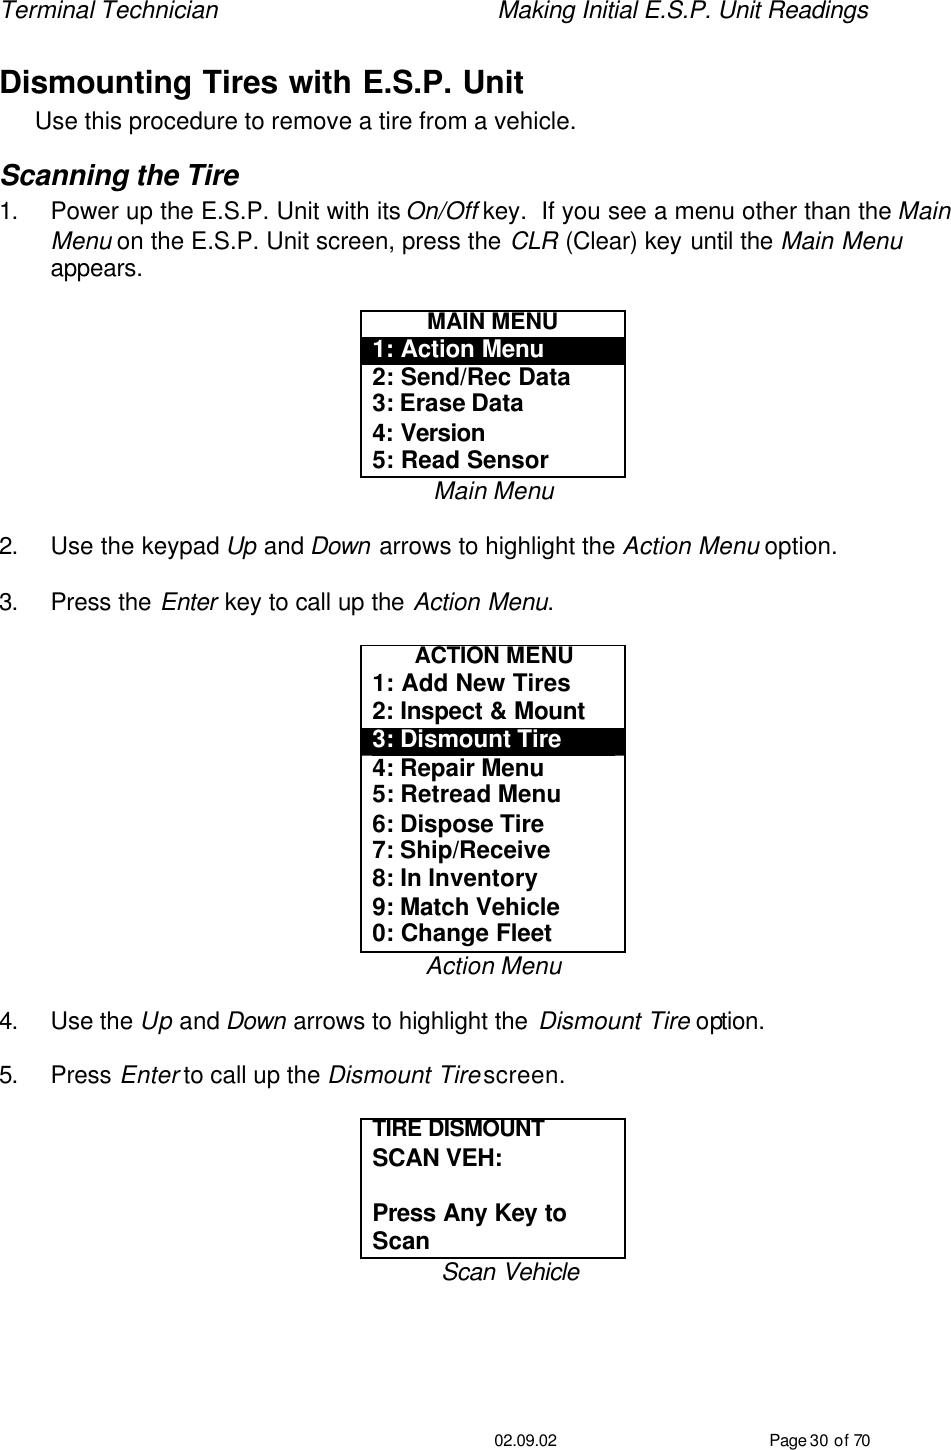
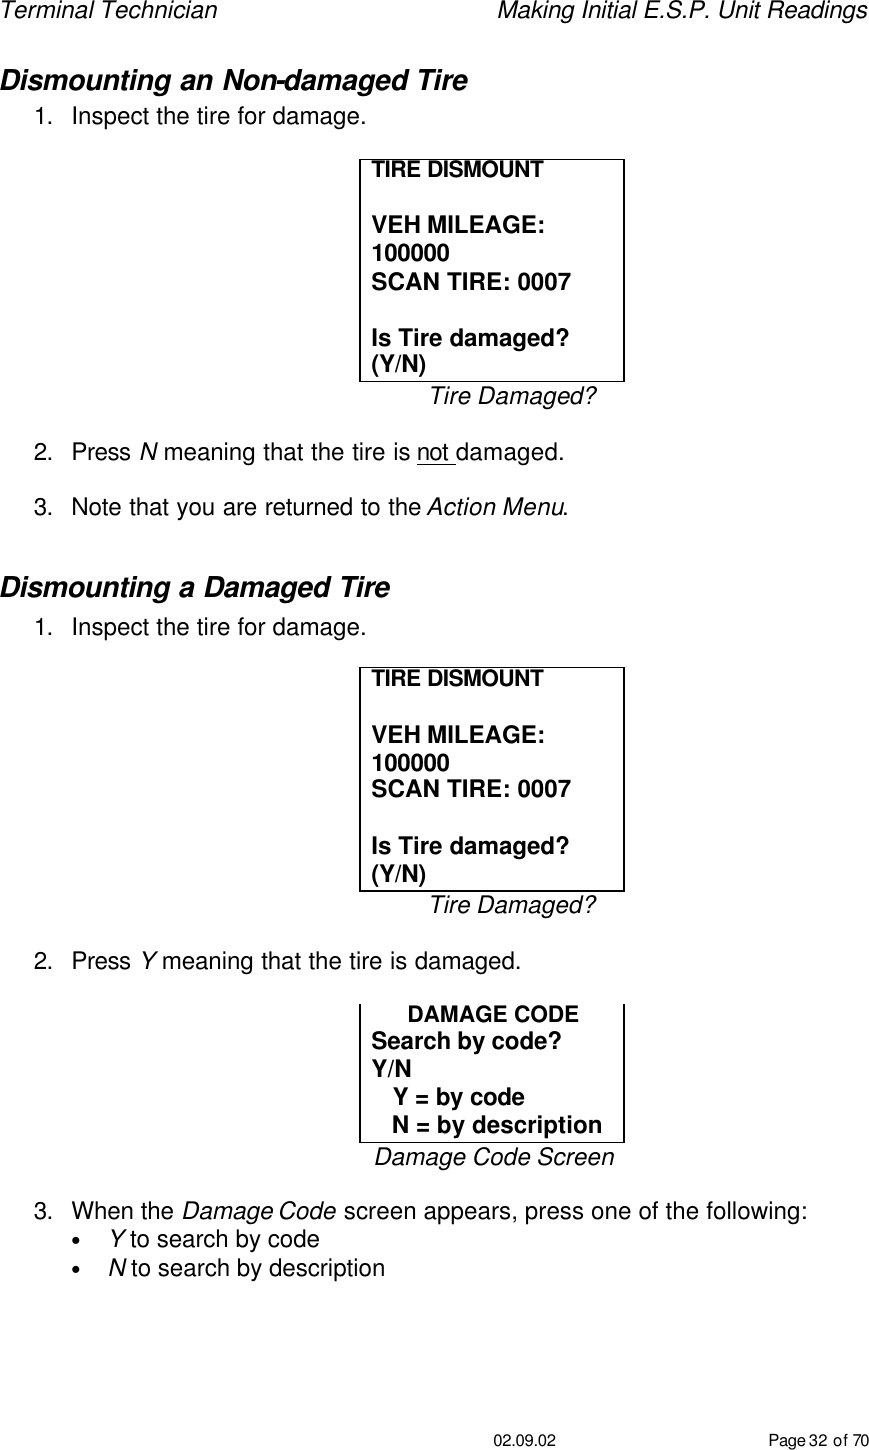
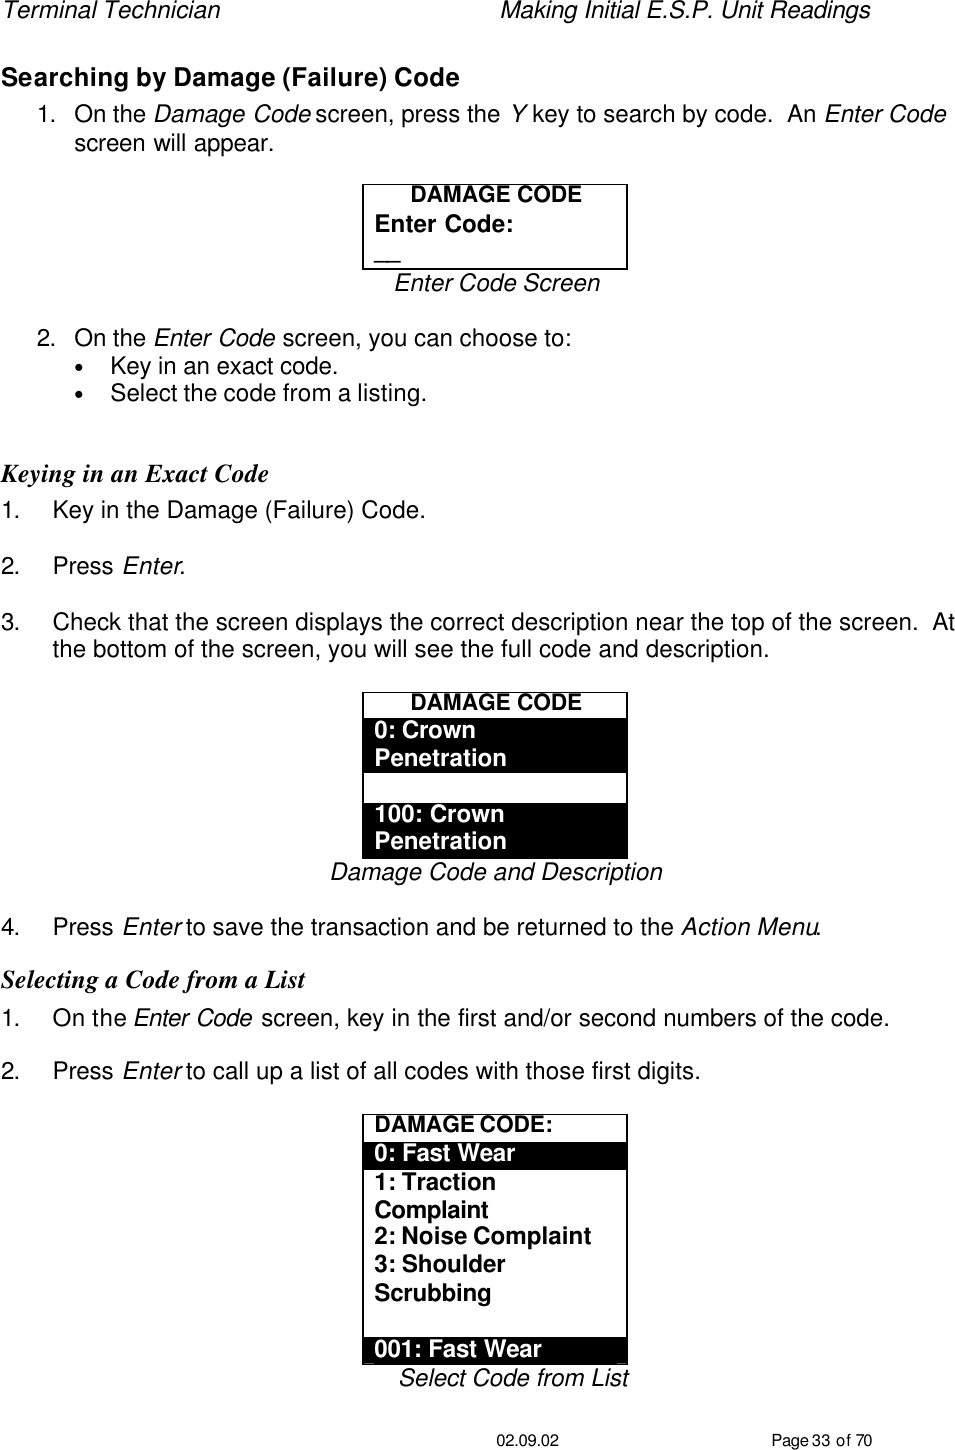
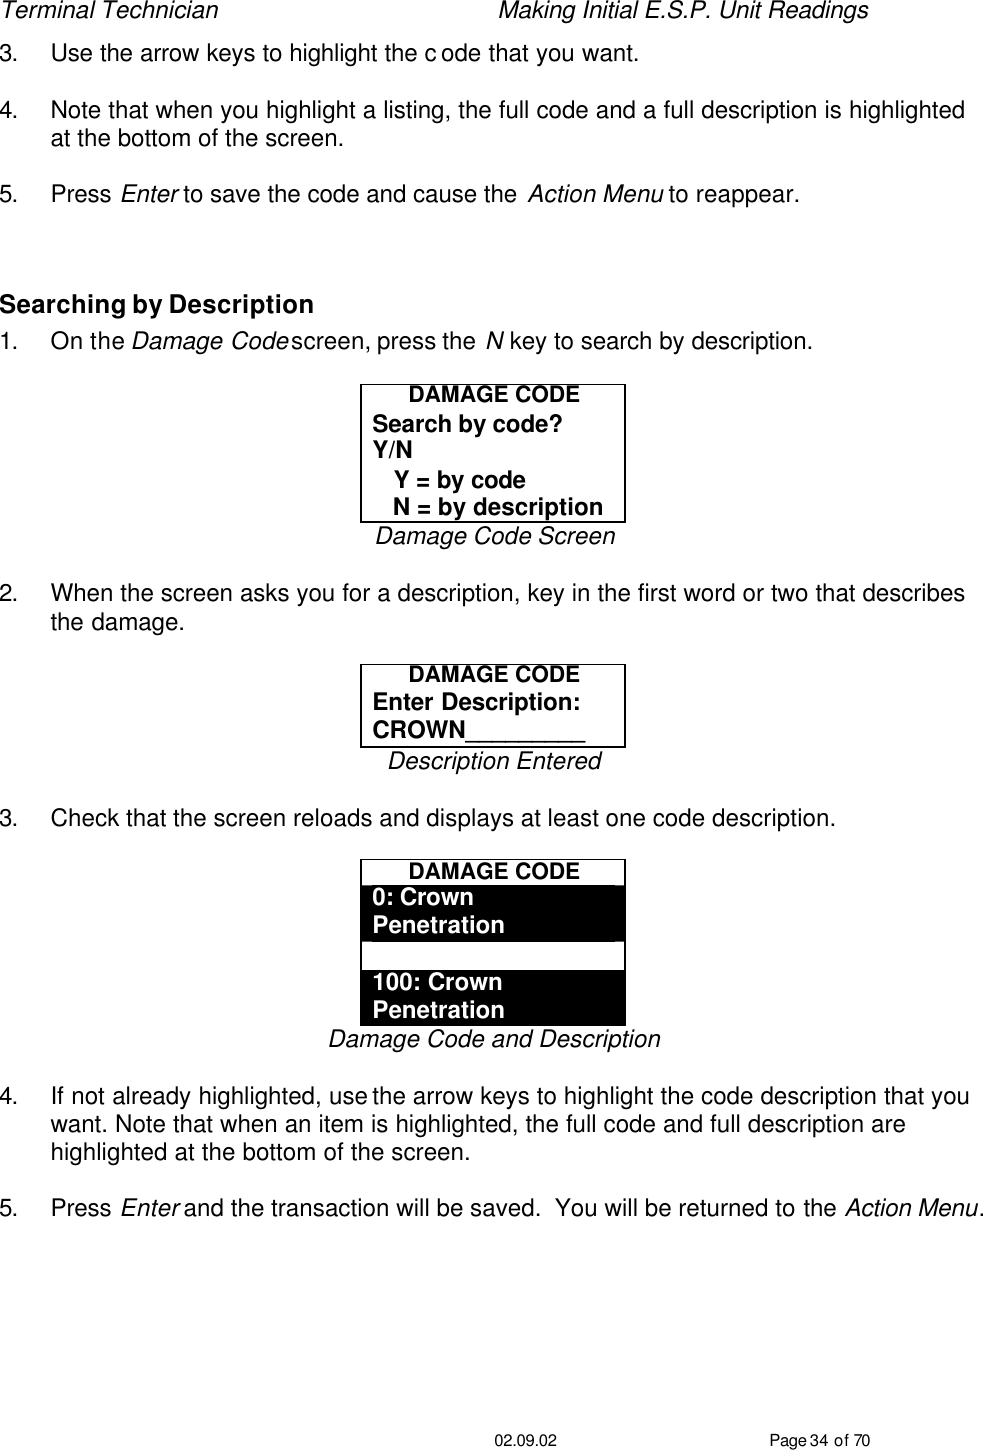
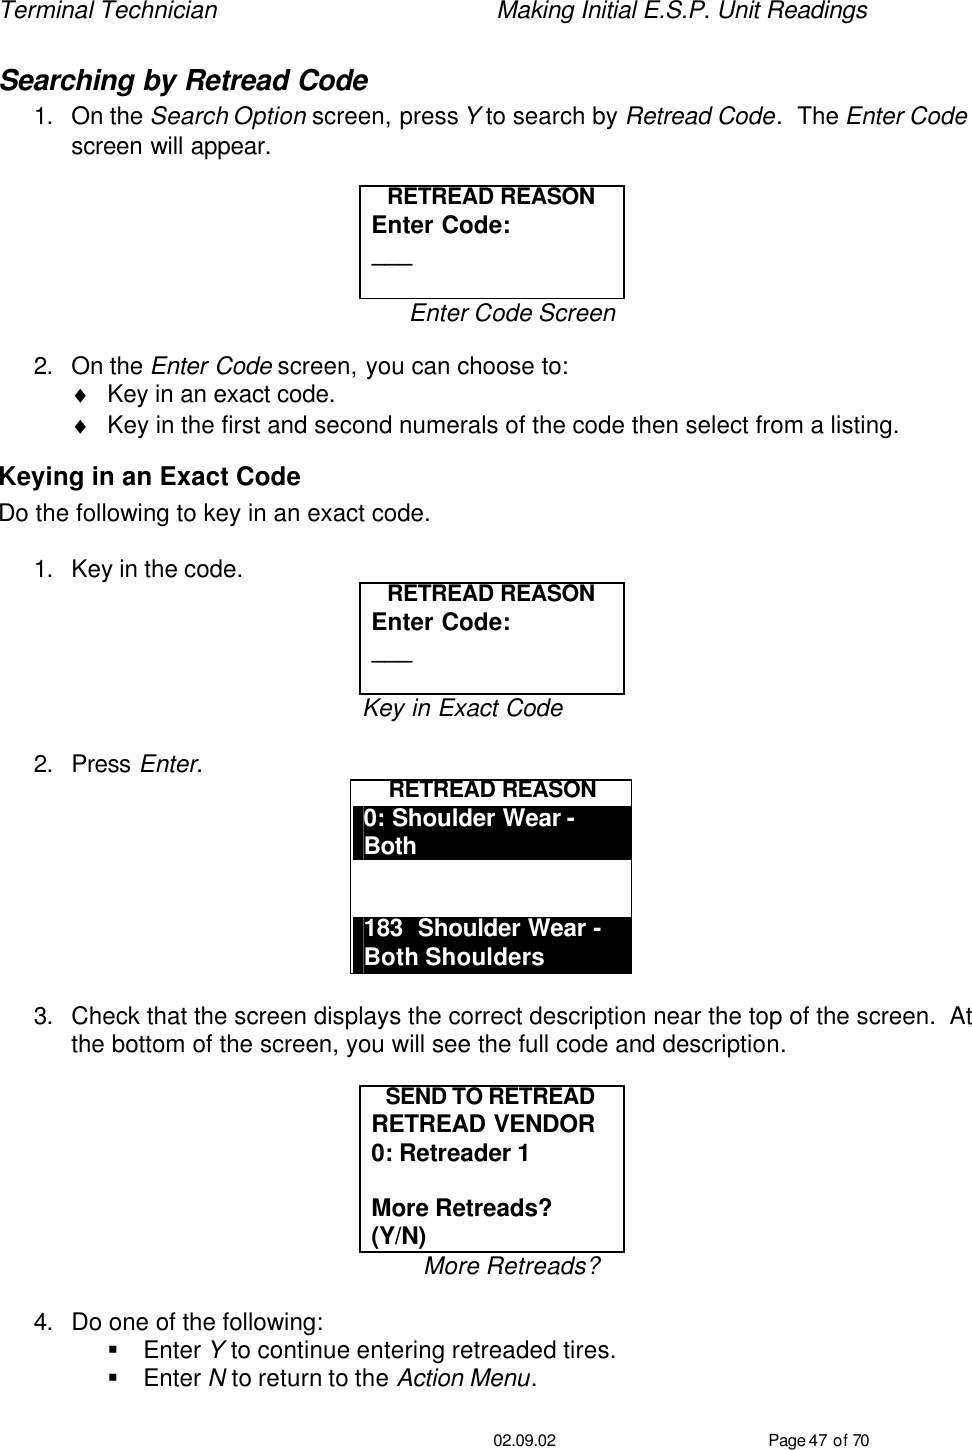
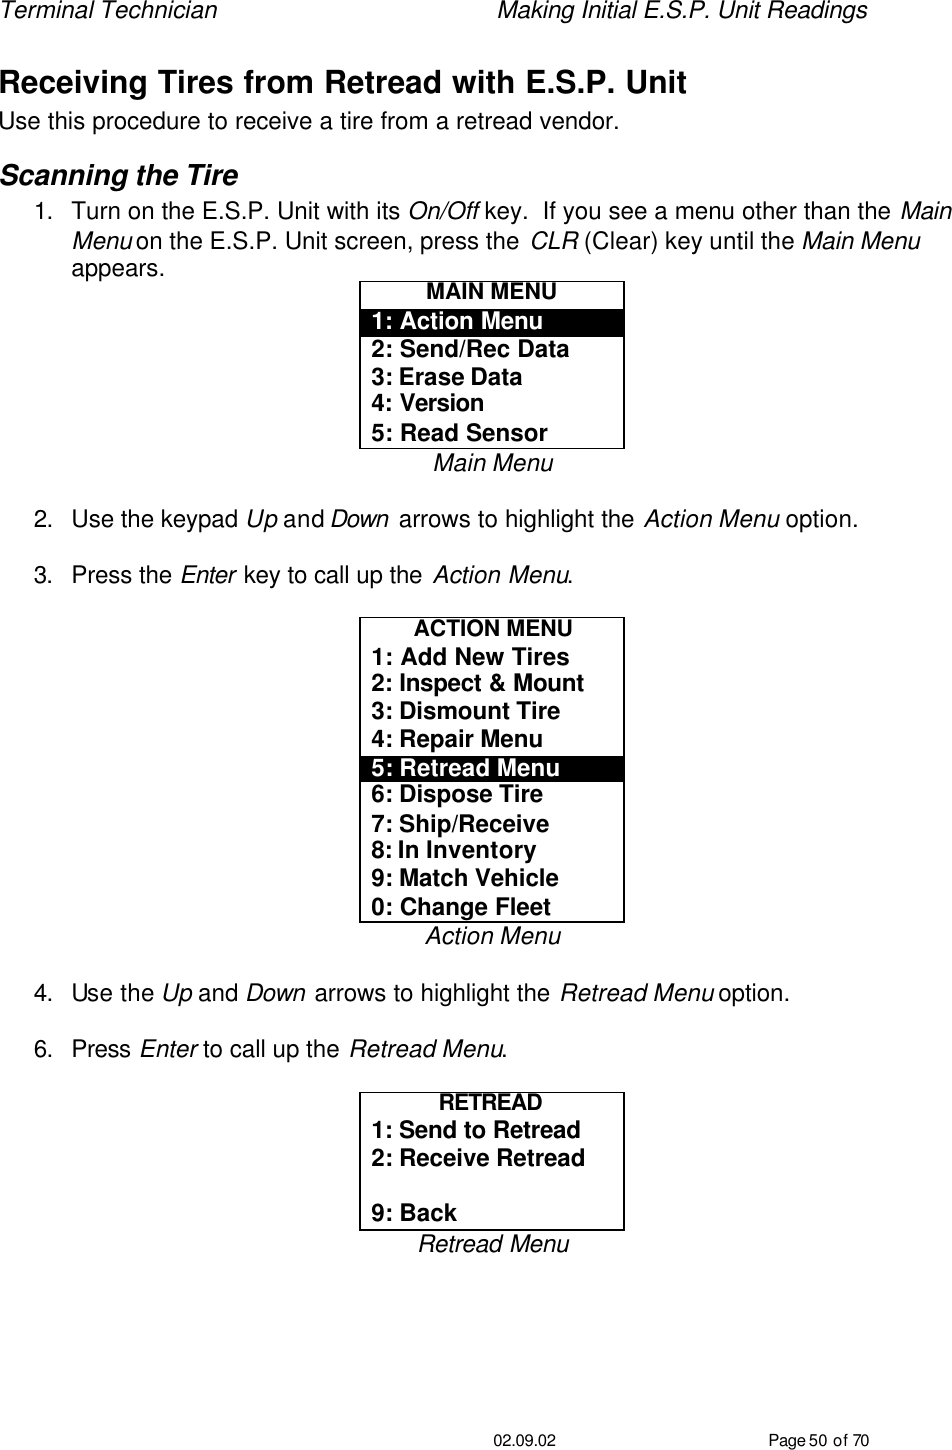
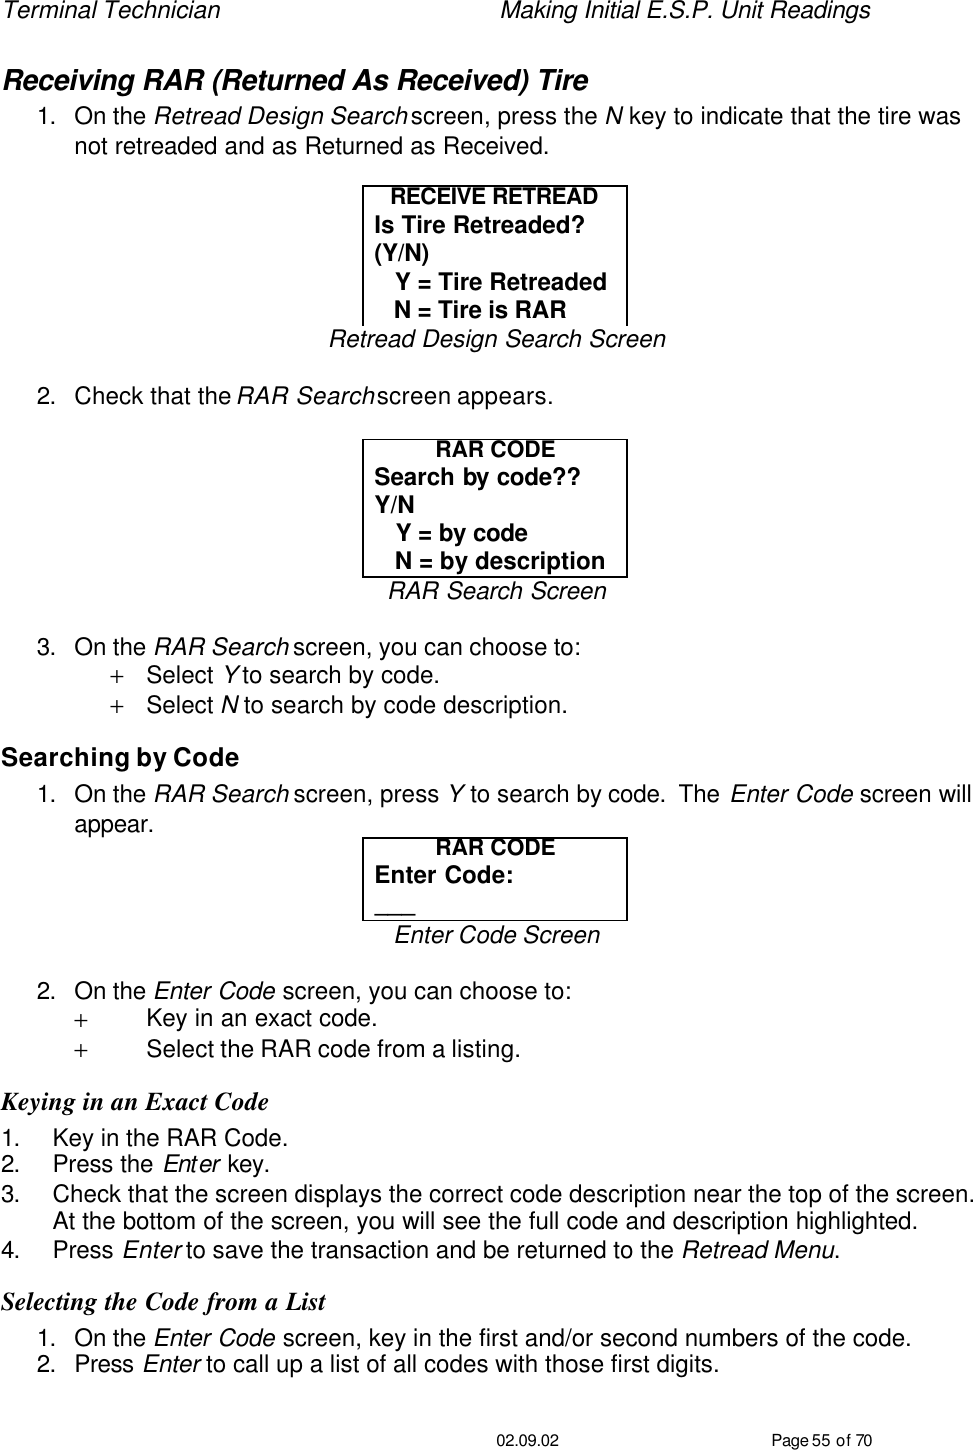
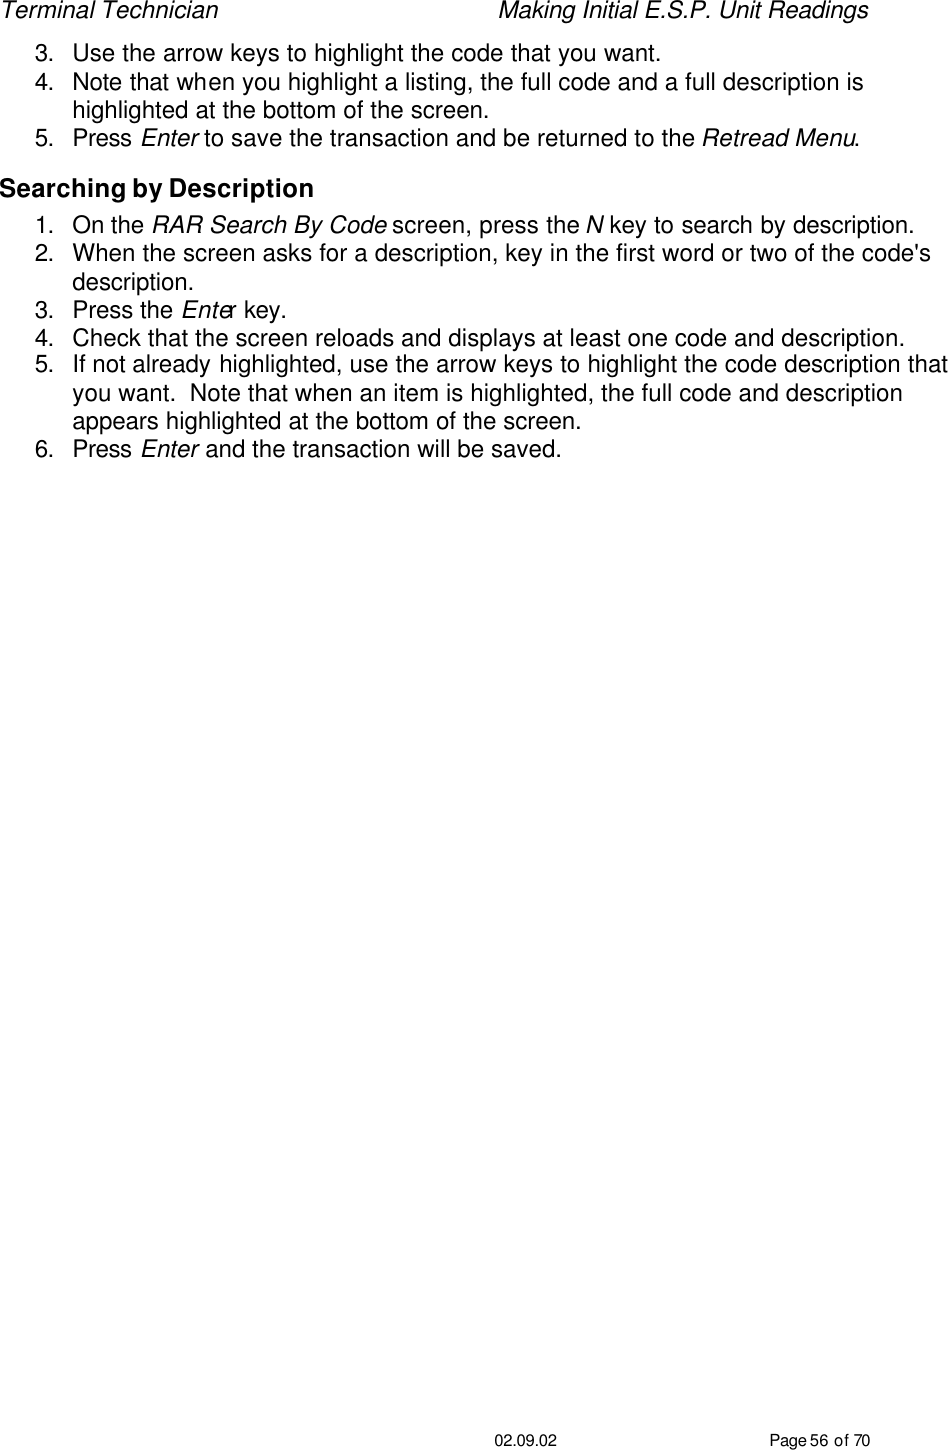
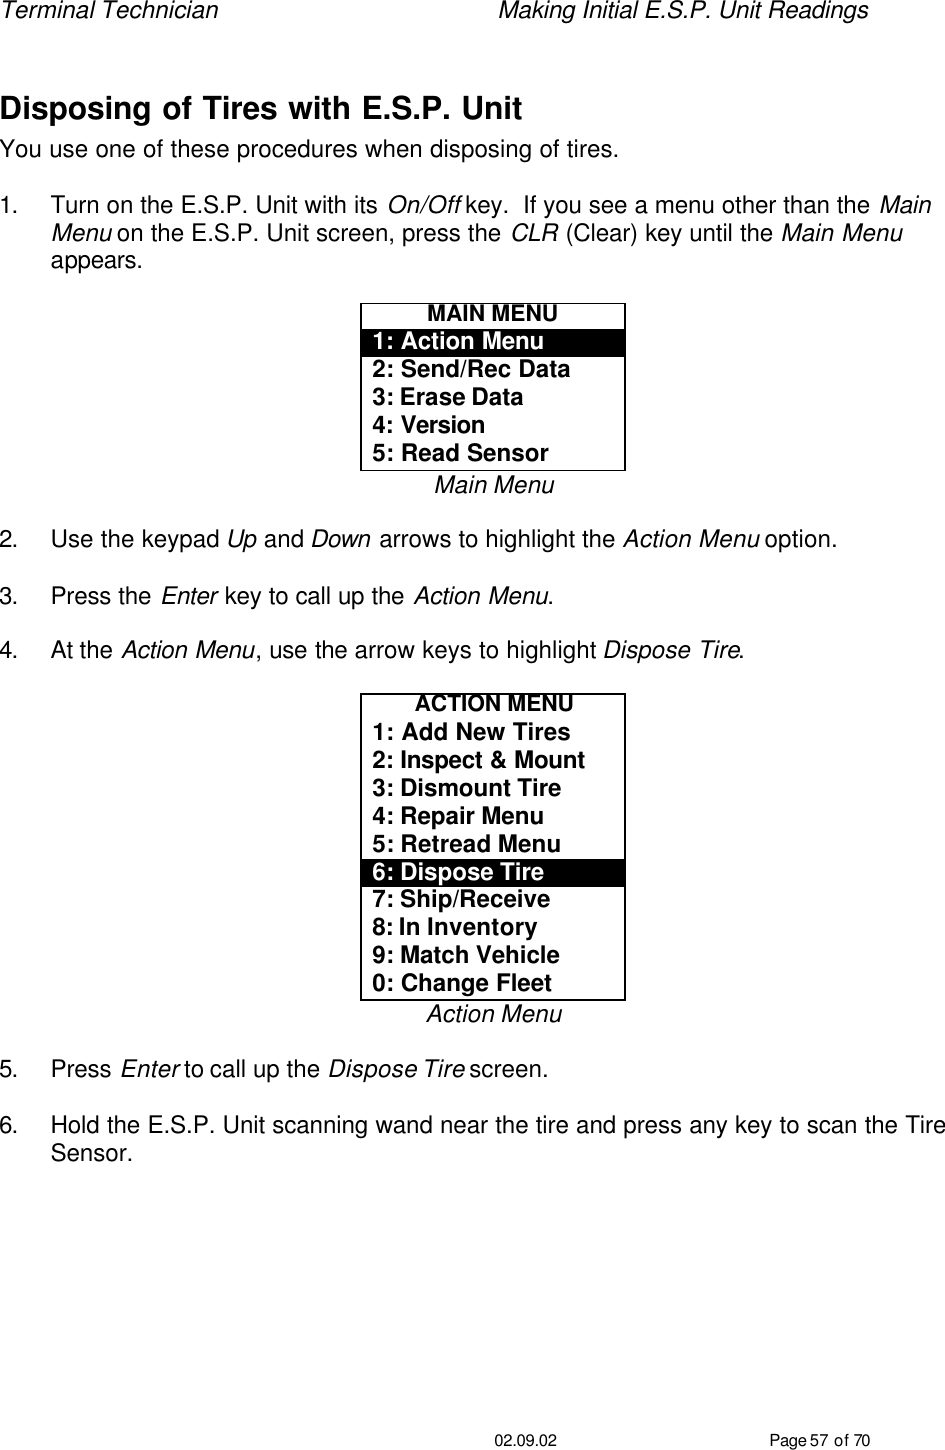
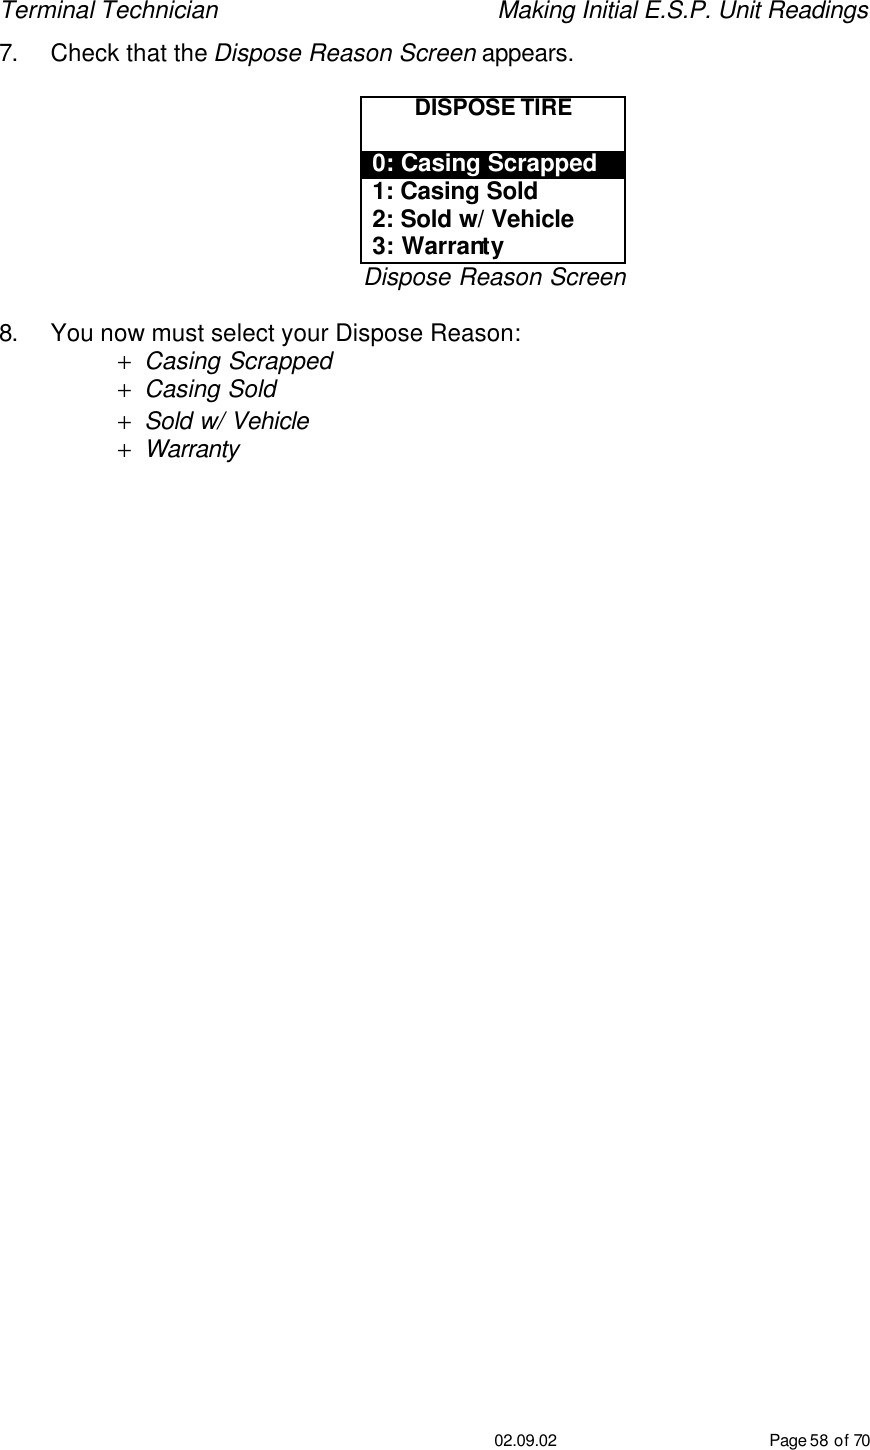
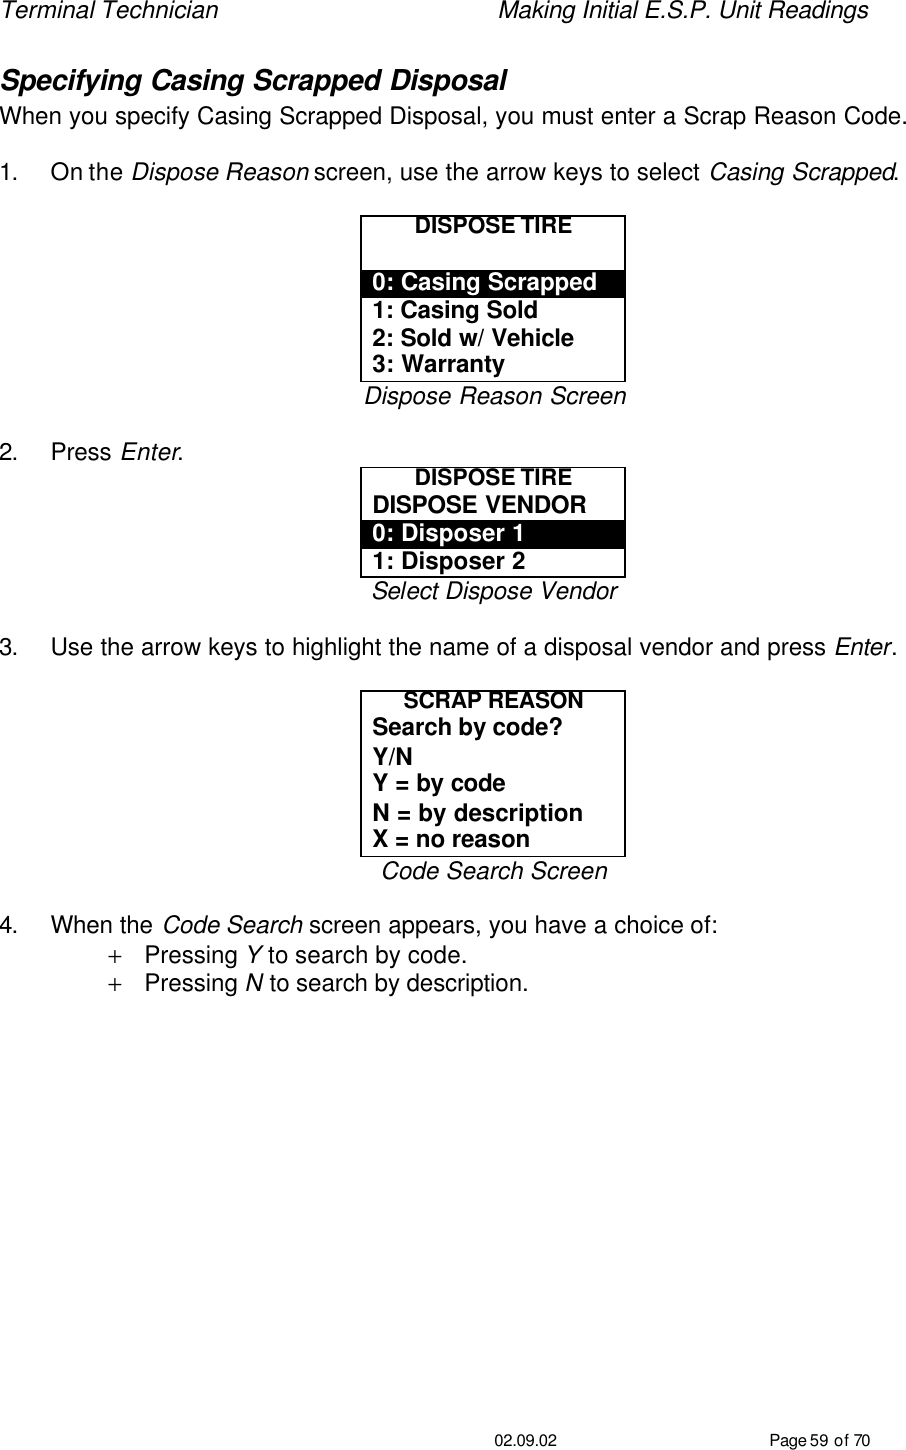
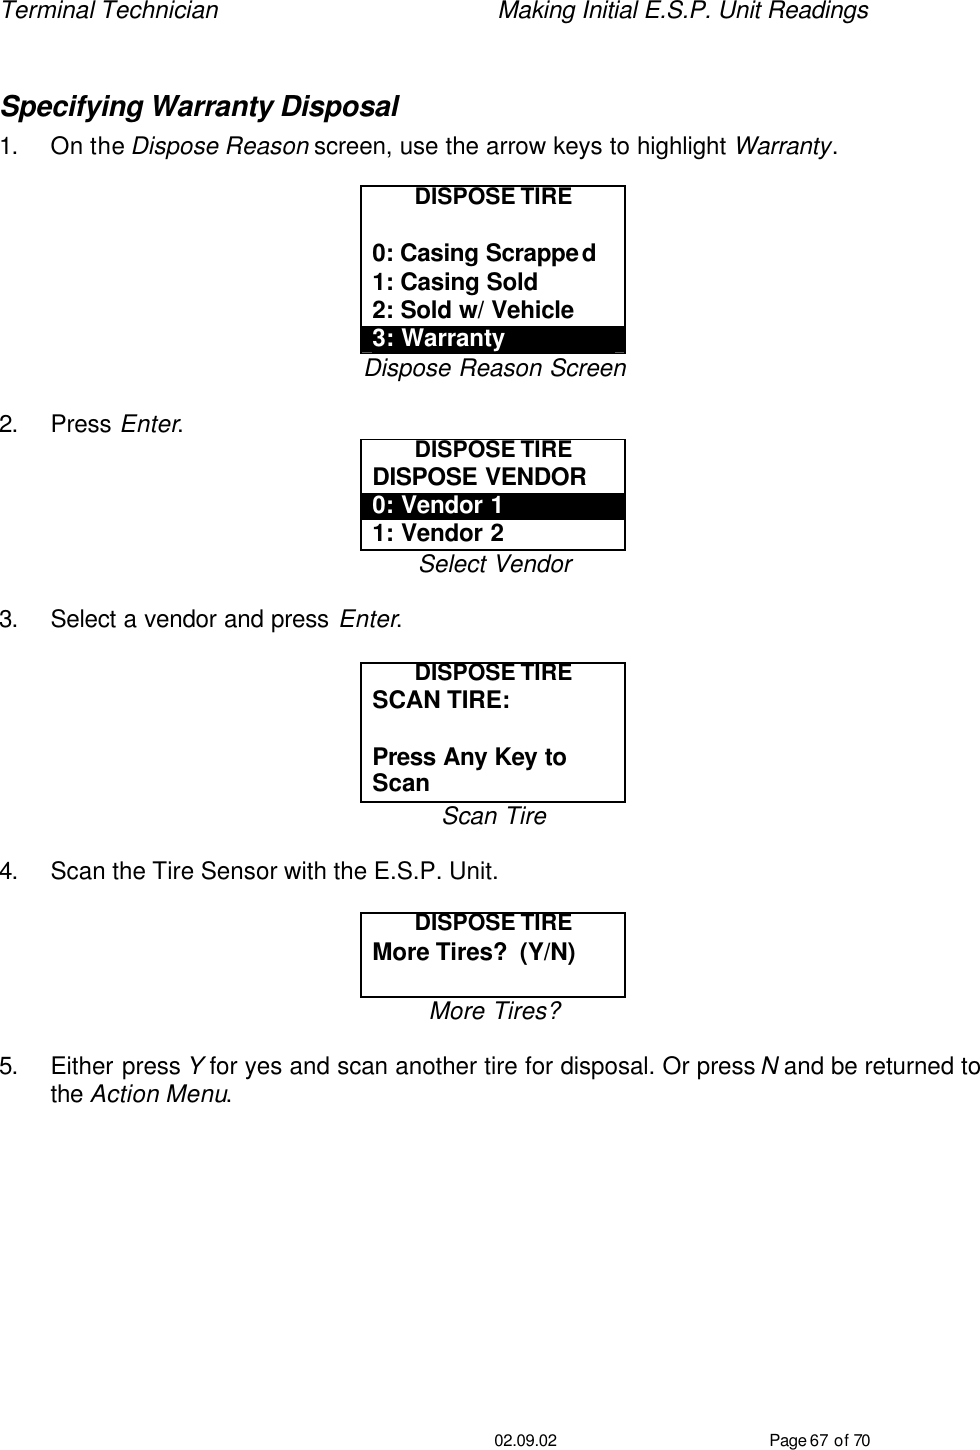
Texas Instruments Inc Radio Frequency Identification (RFID) BIB TRACK ESP Unit User Guide3
Contents
- 1. Users Manual
- 2. FCC Declaration
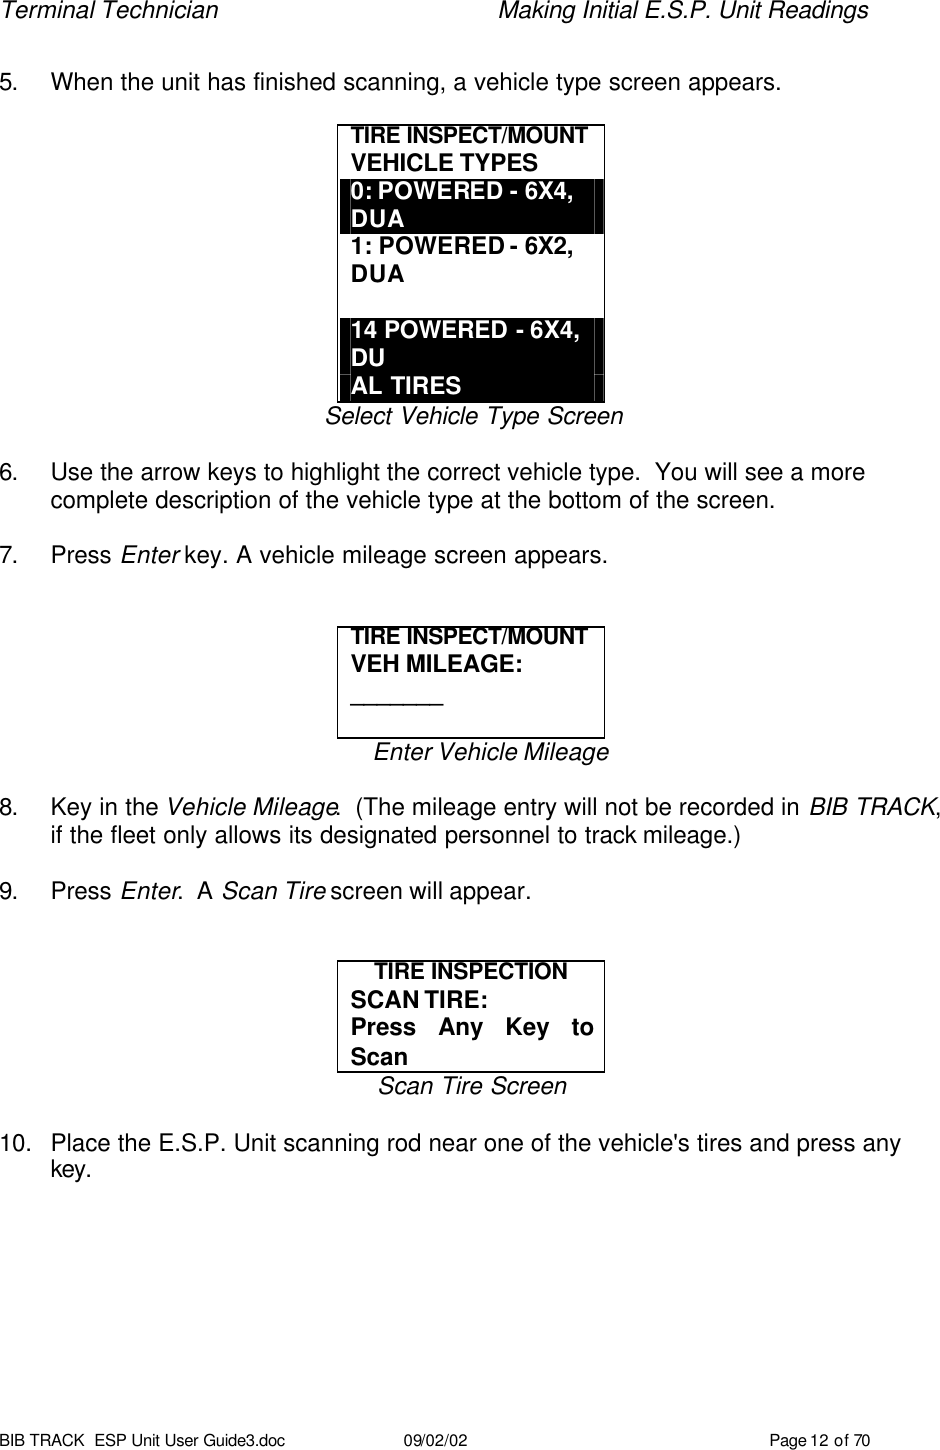
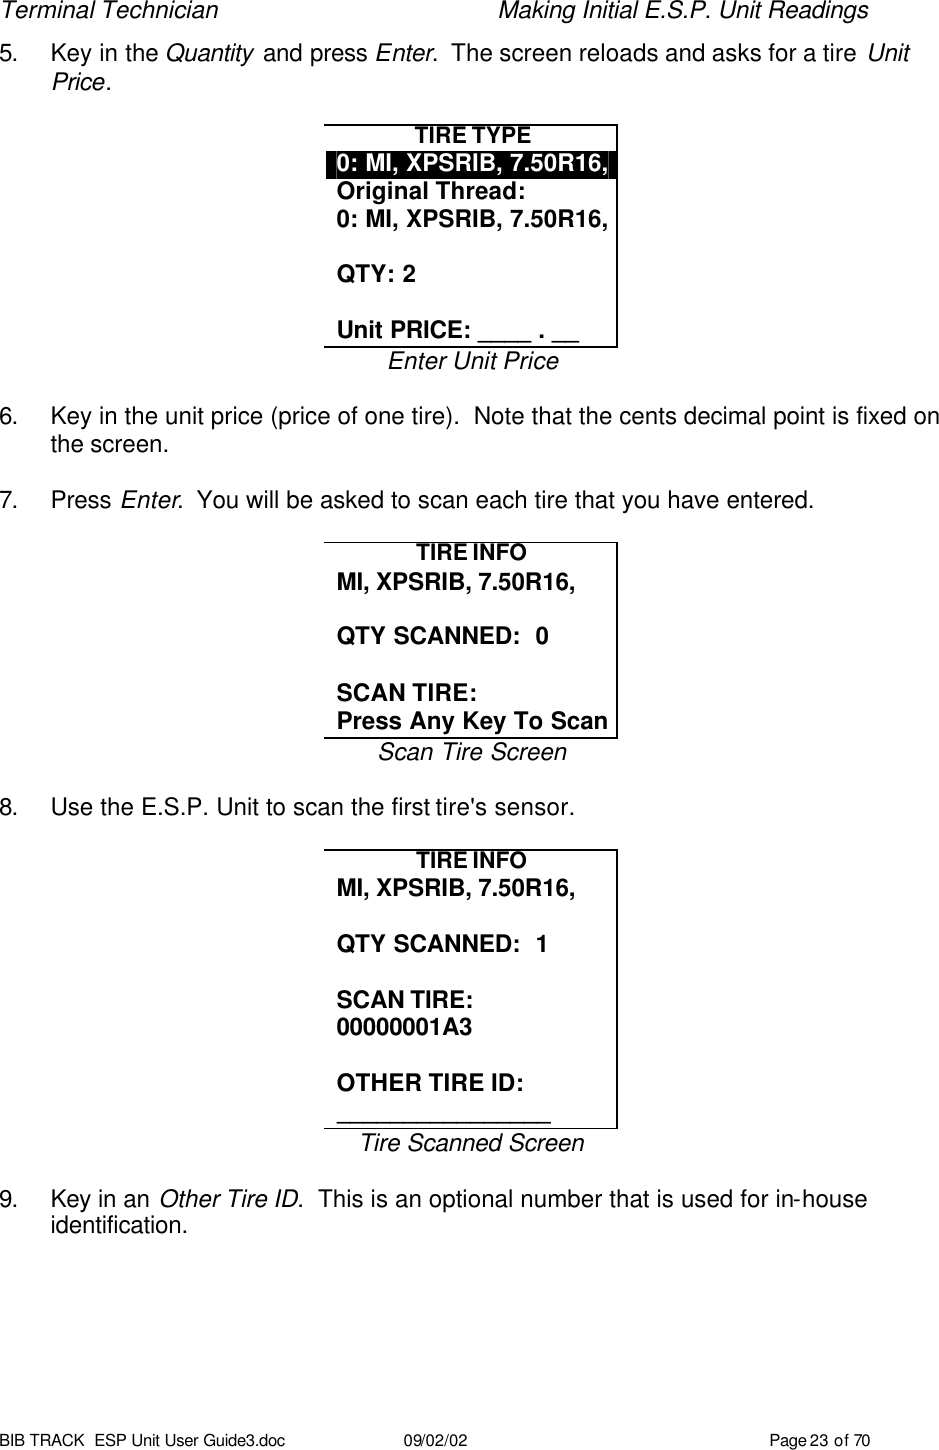
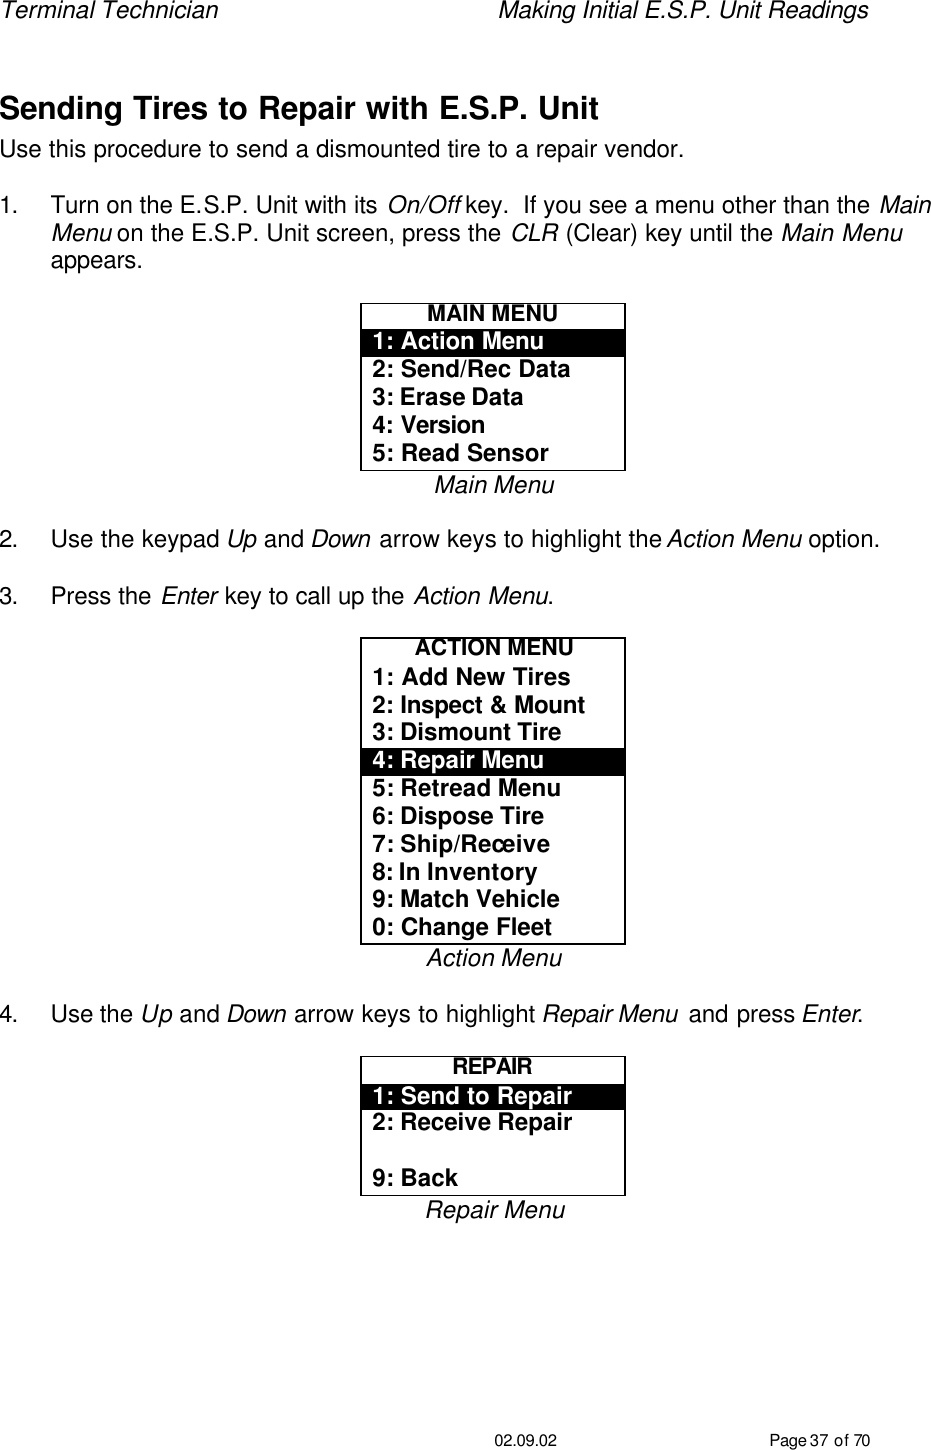
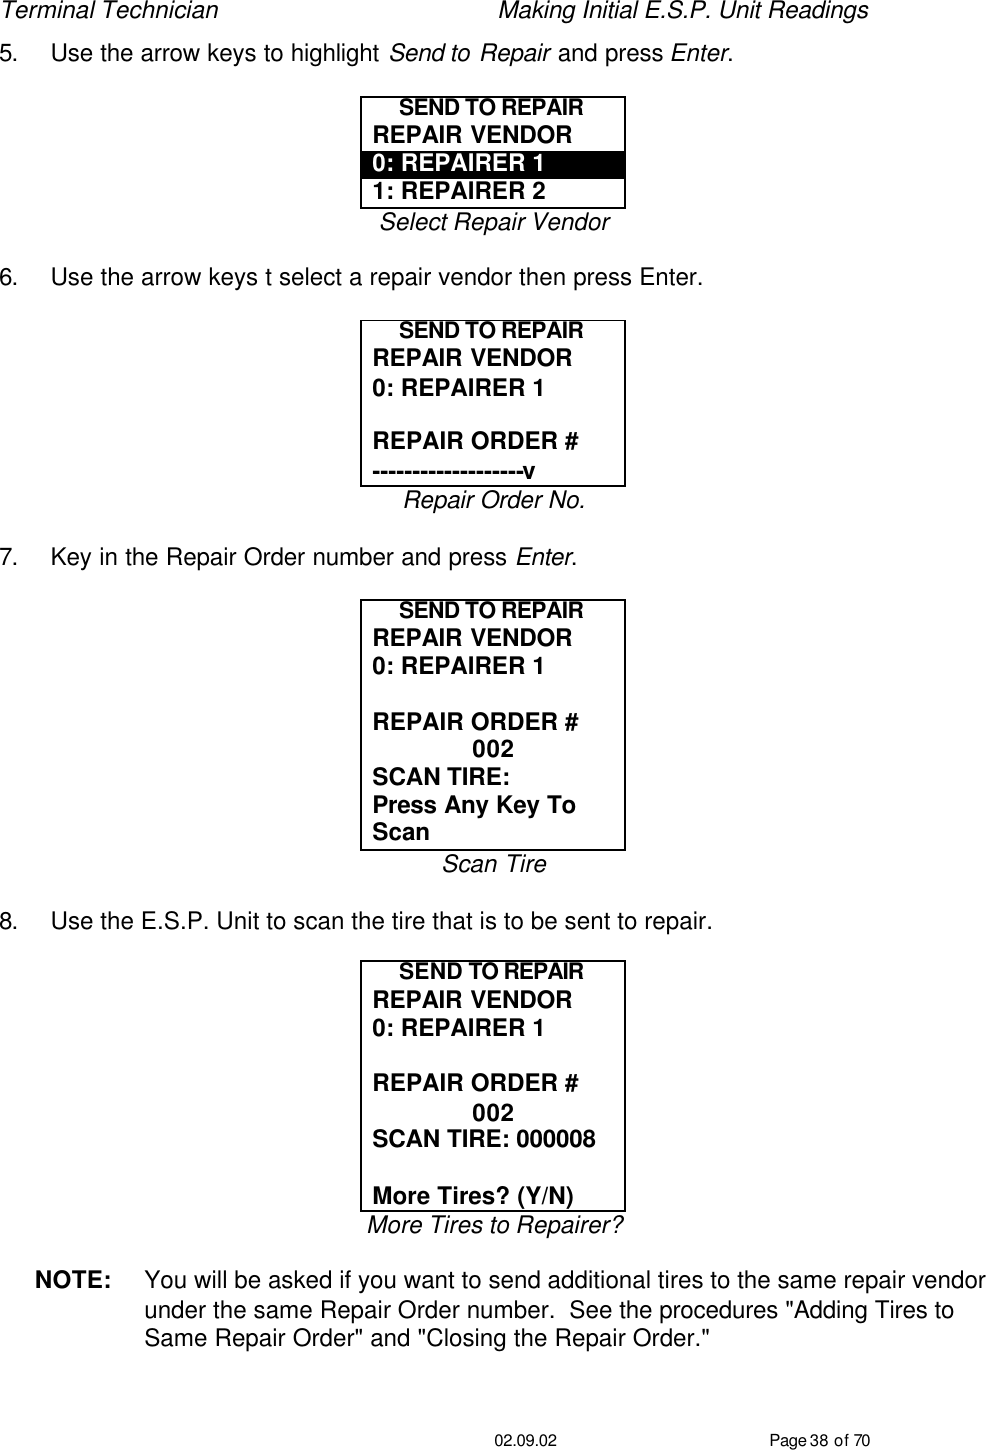
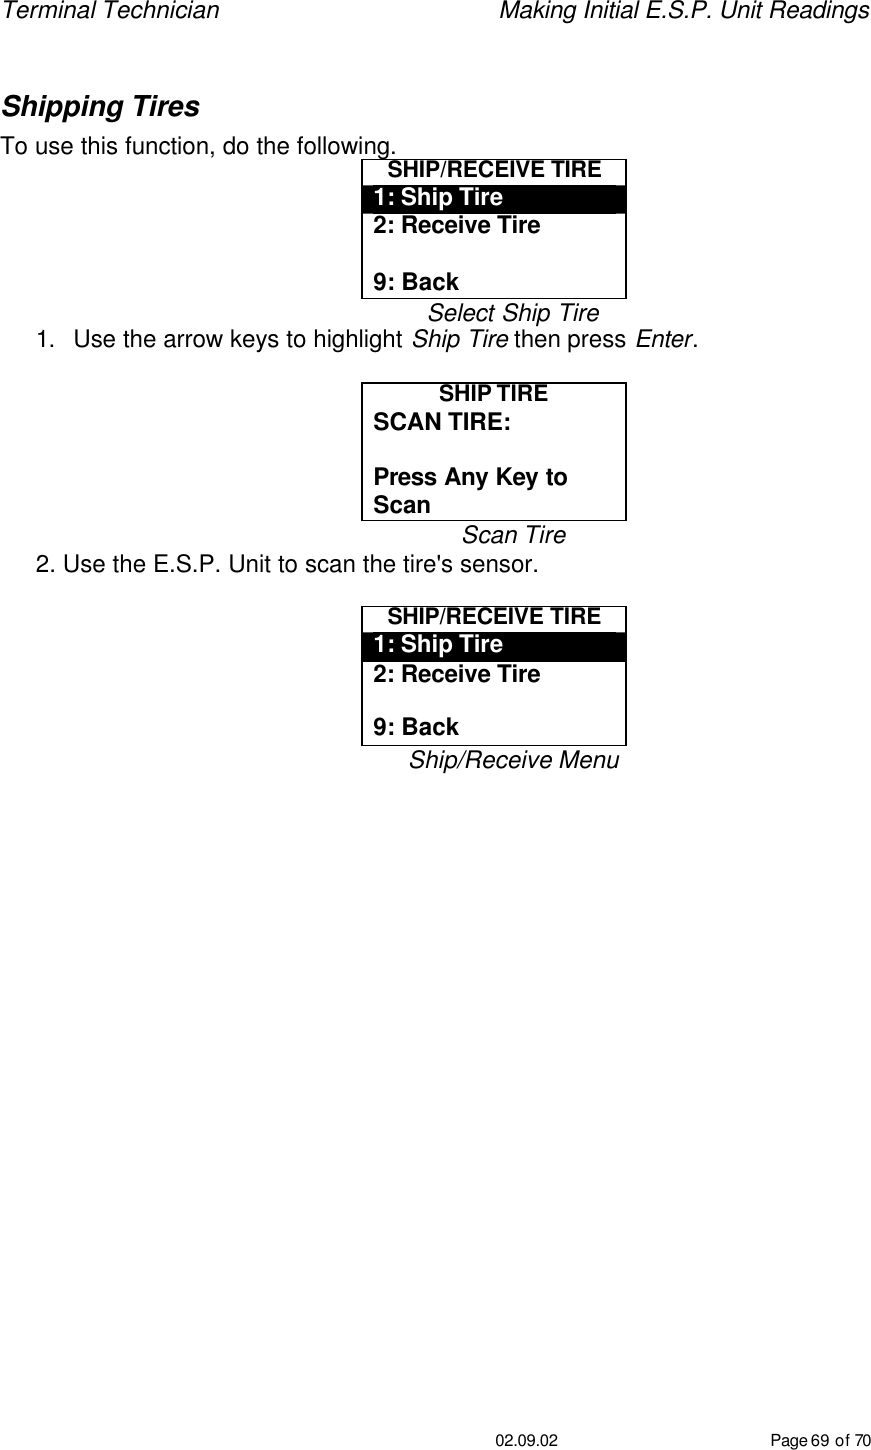
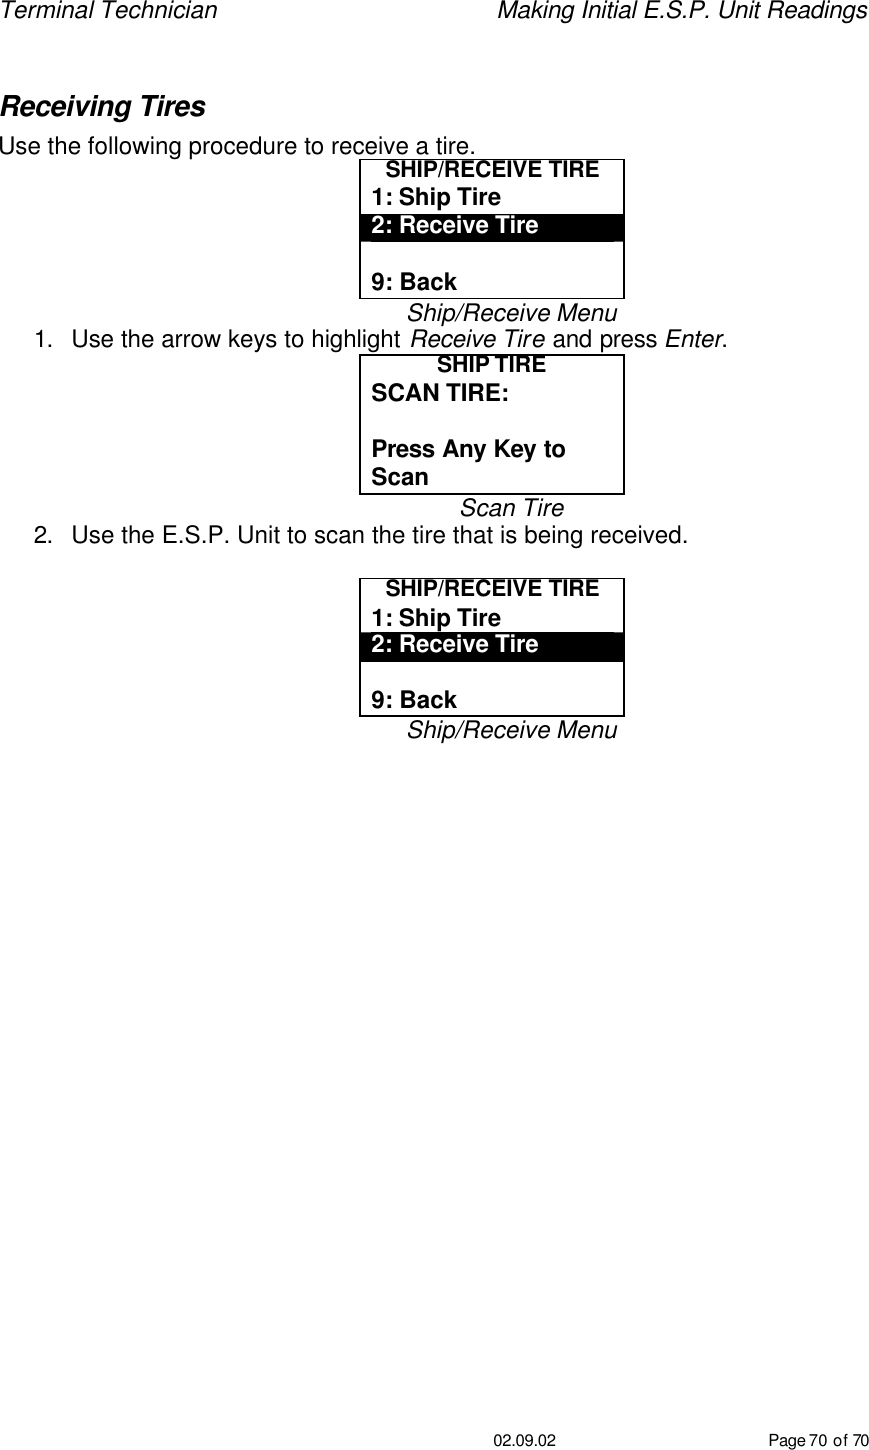
Users Manual