The Heil TECV4 3rd Eye Cam User Manual Manual
The Heil Co. 3rd Eye Cam Manual
UserManual.wiki
>
The Heil
>
TECV4 User Manual
>
Manual
Contents
1.
Manual
2.
Manual Host
3.
Manual RF Module
Manual
Navigation menu
Upload a User Manual
Namespaces
Wiki Guide
HTML
PDF
Info
Views
User Manual
Discussion / Help
Navigation
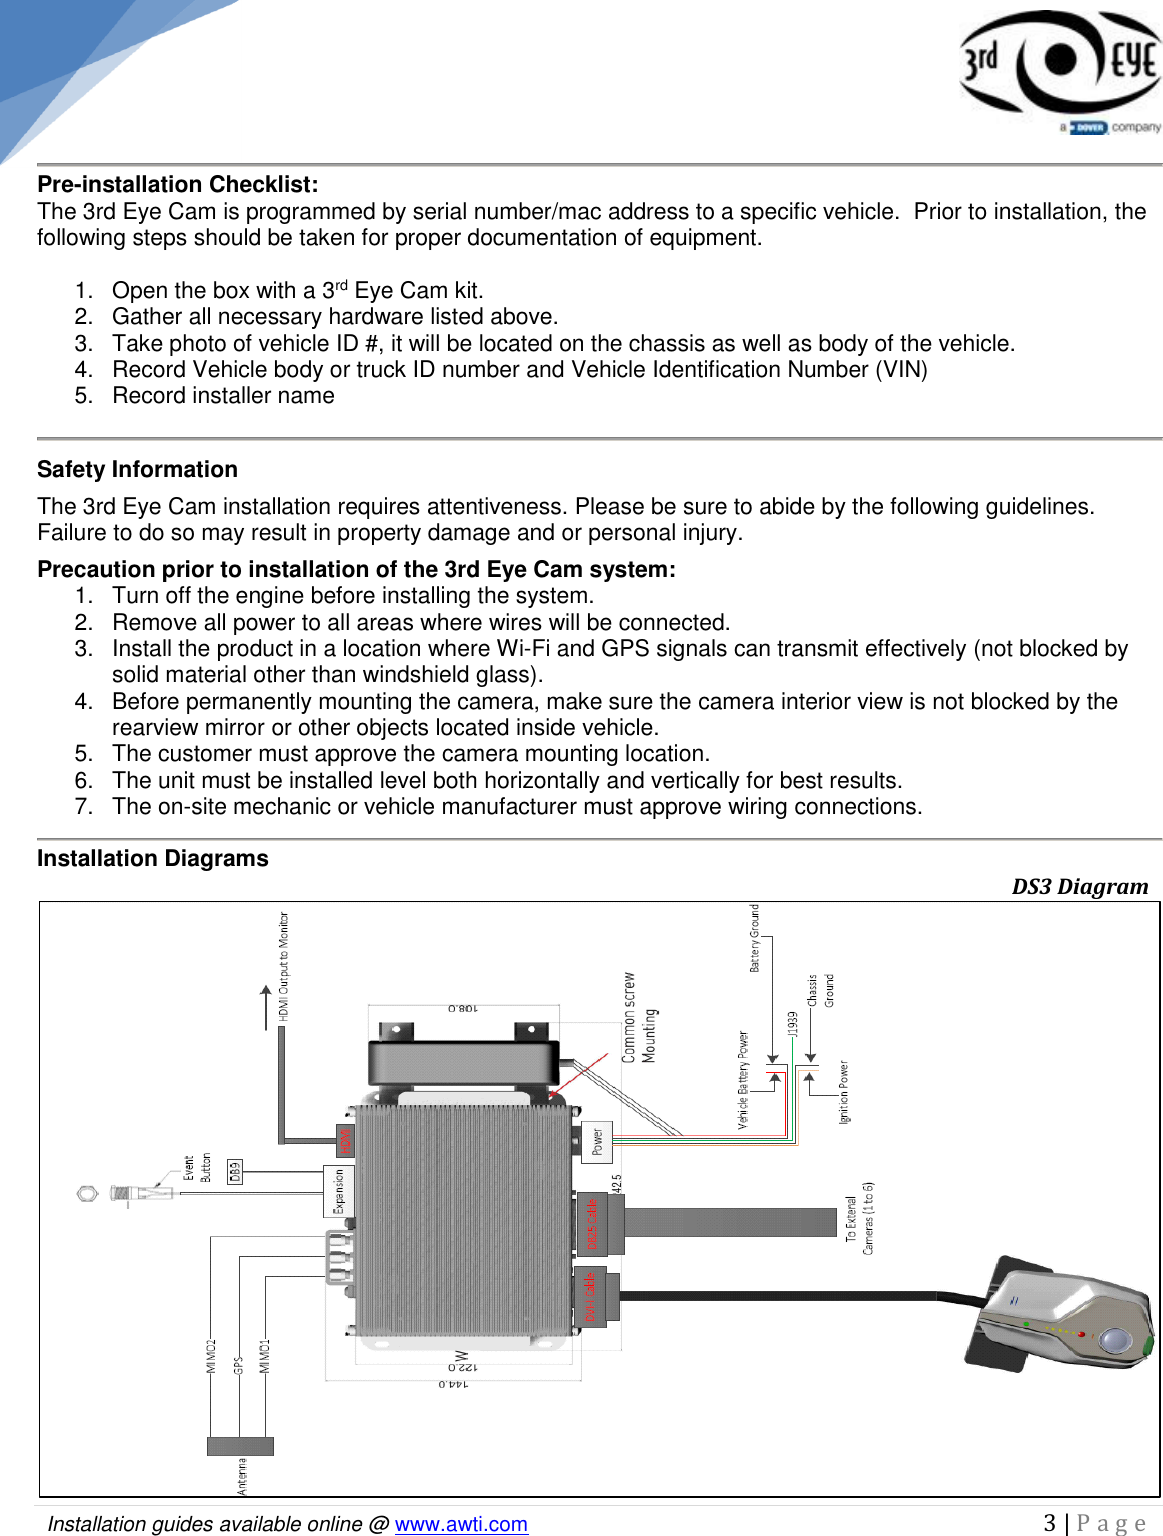
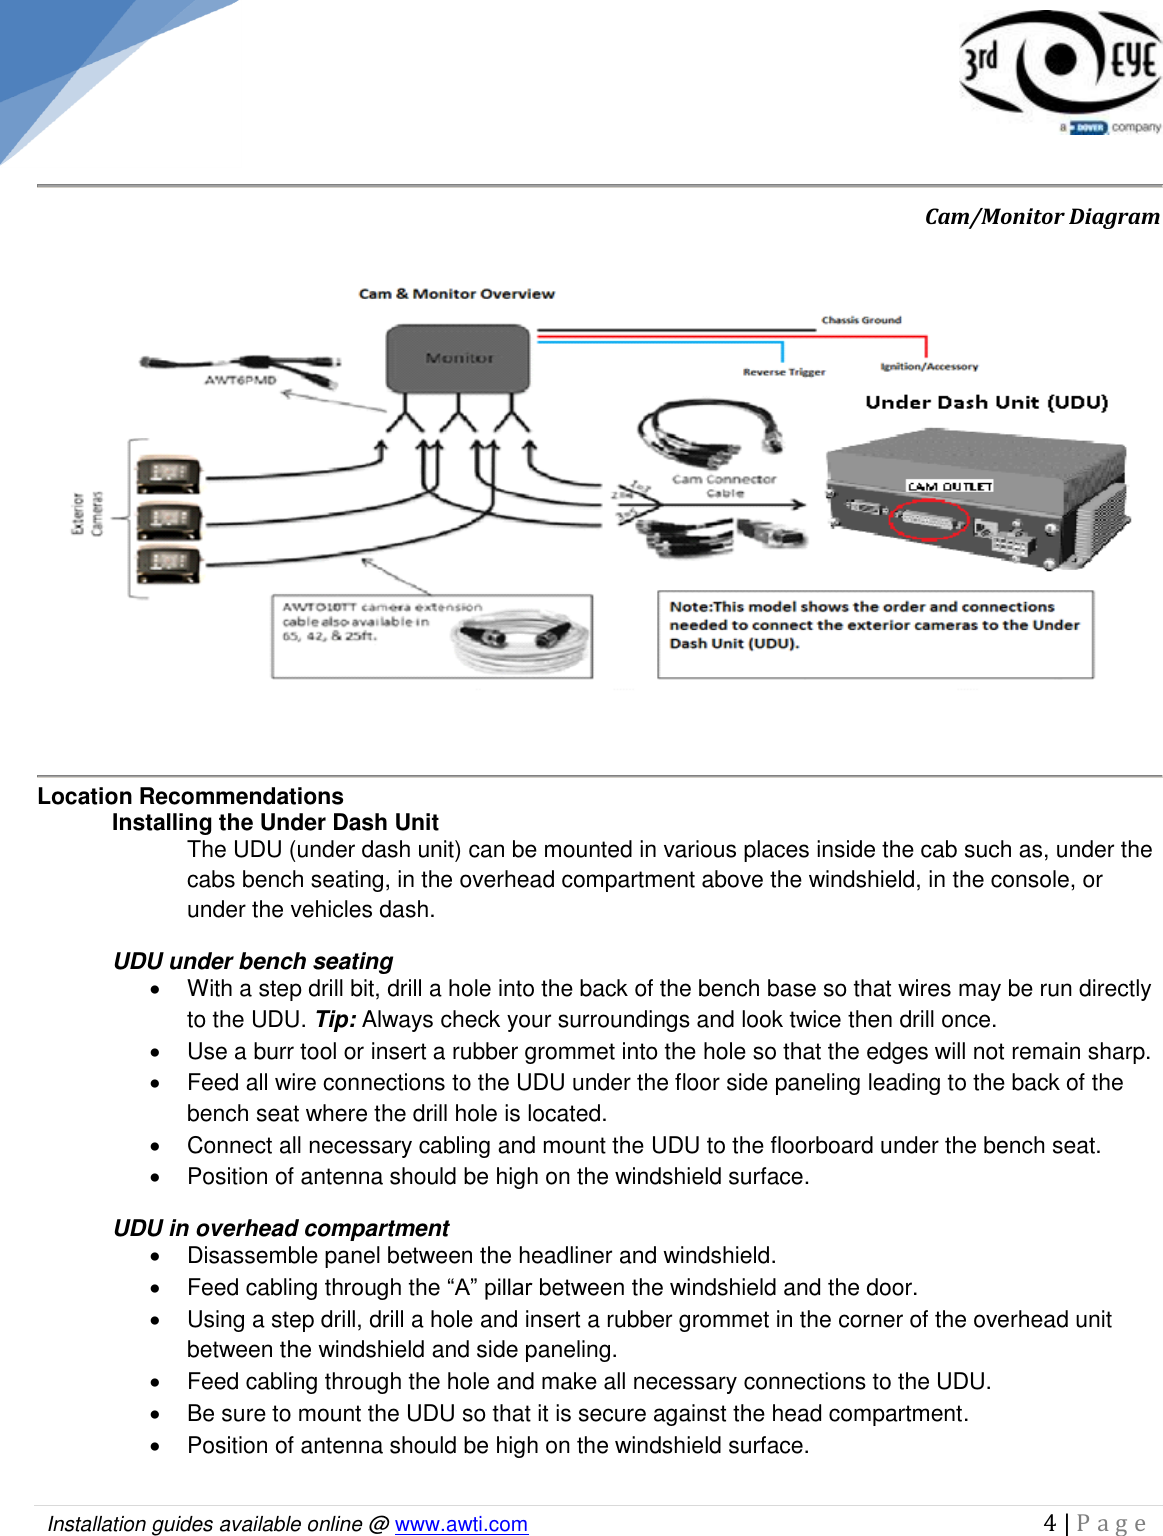
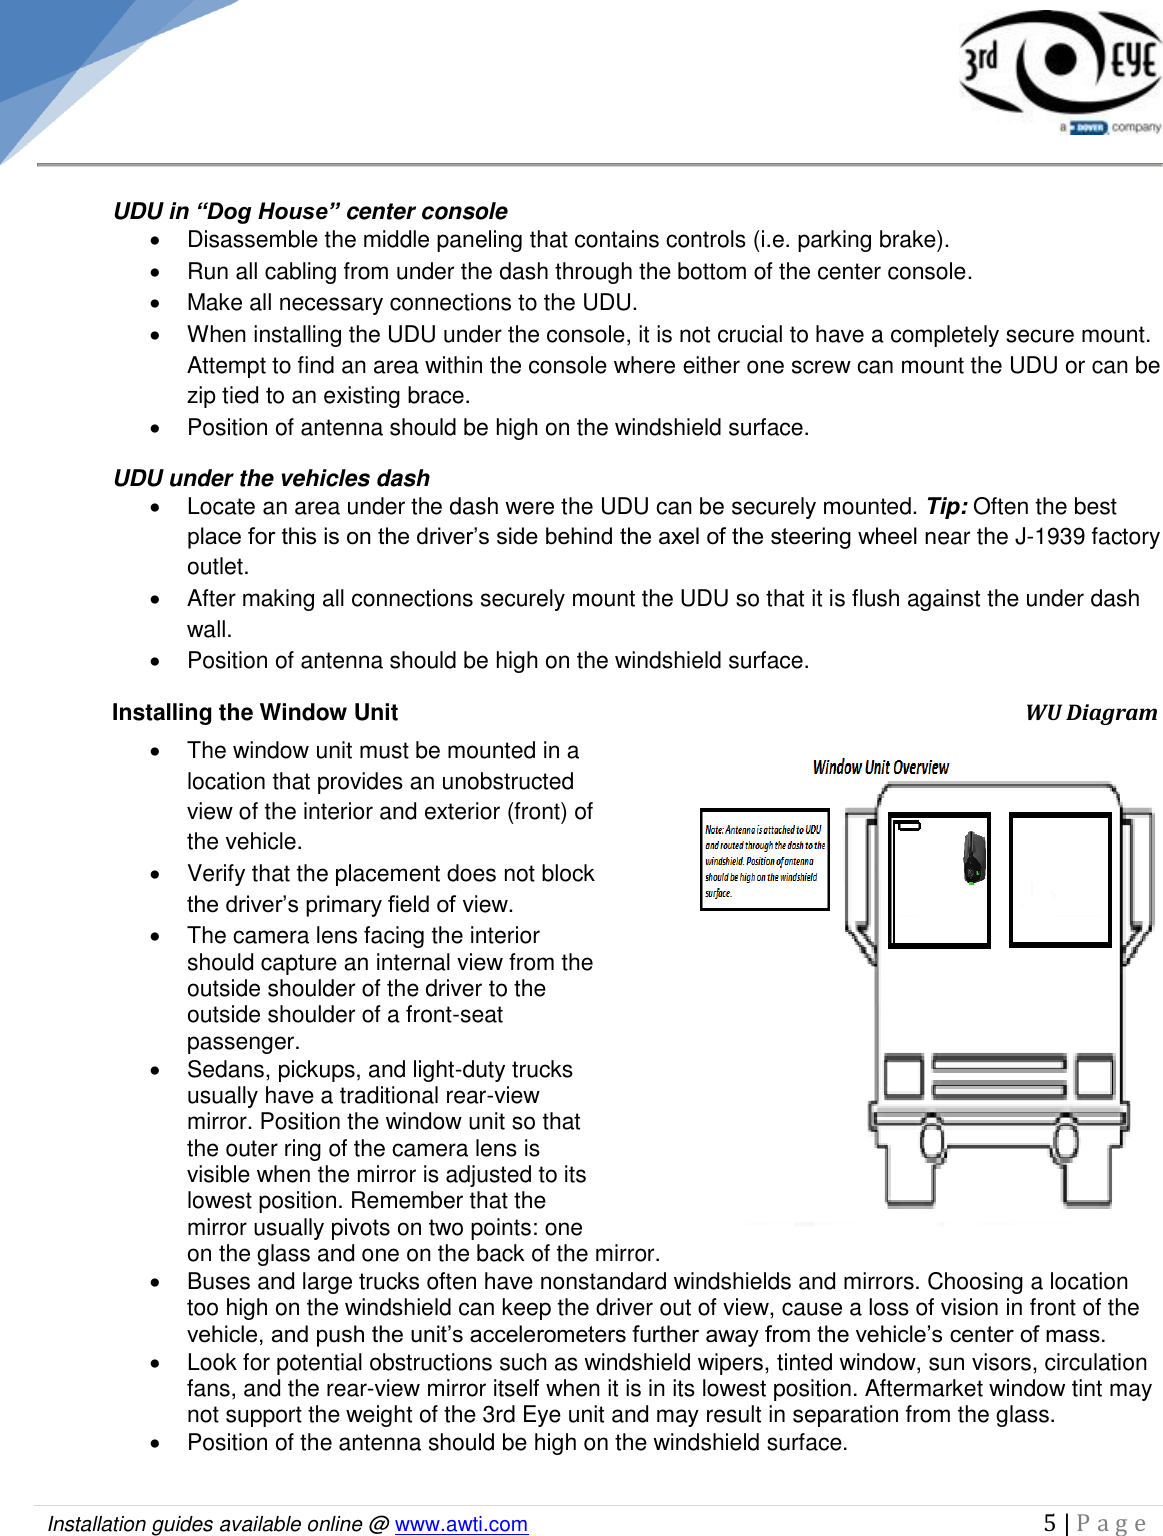
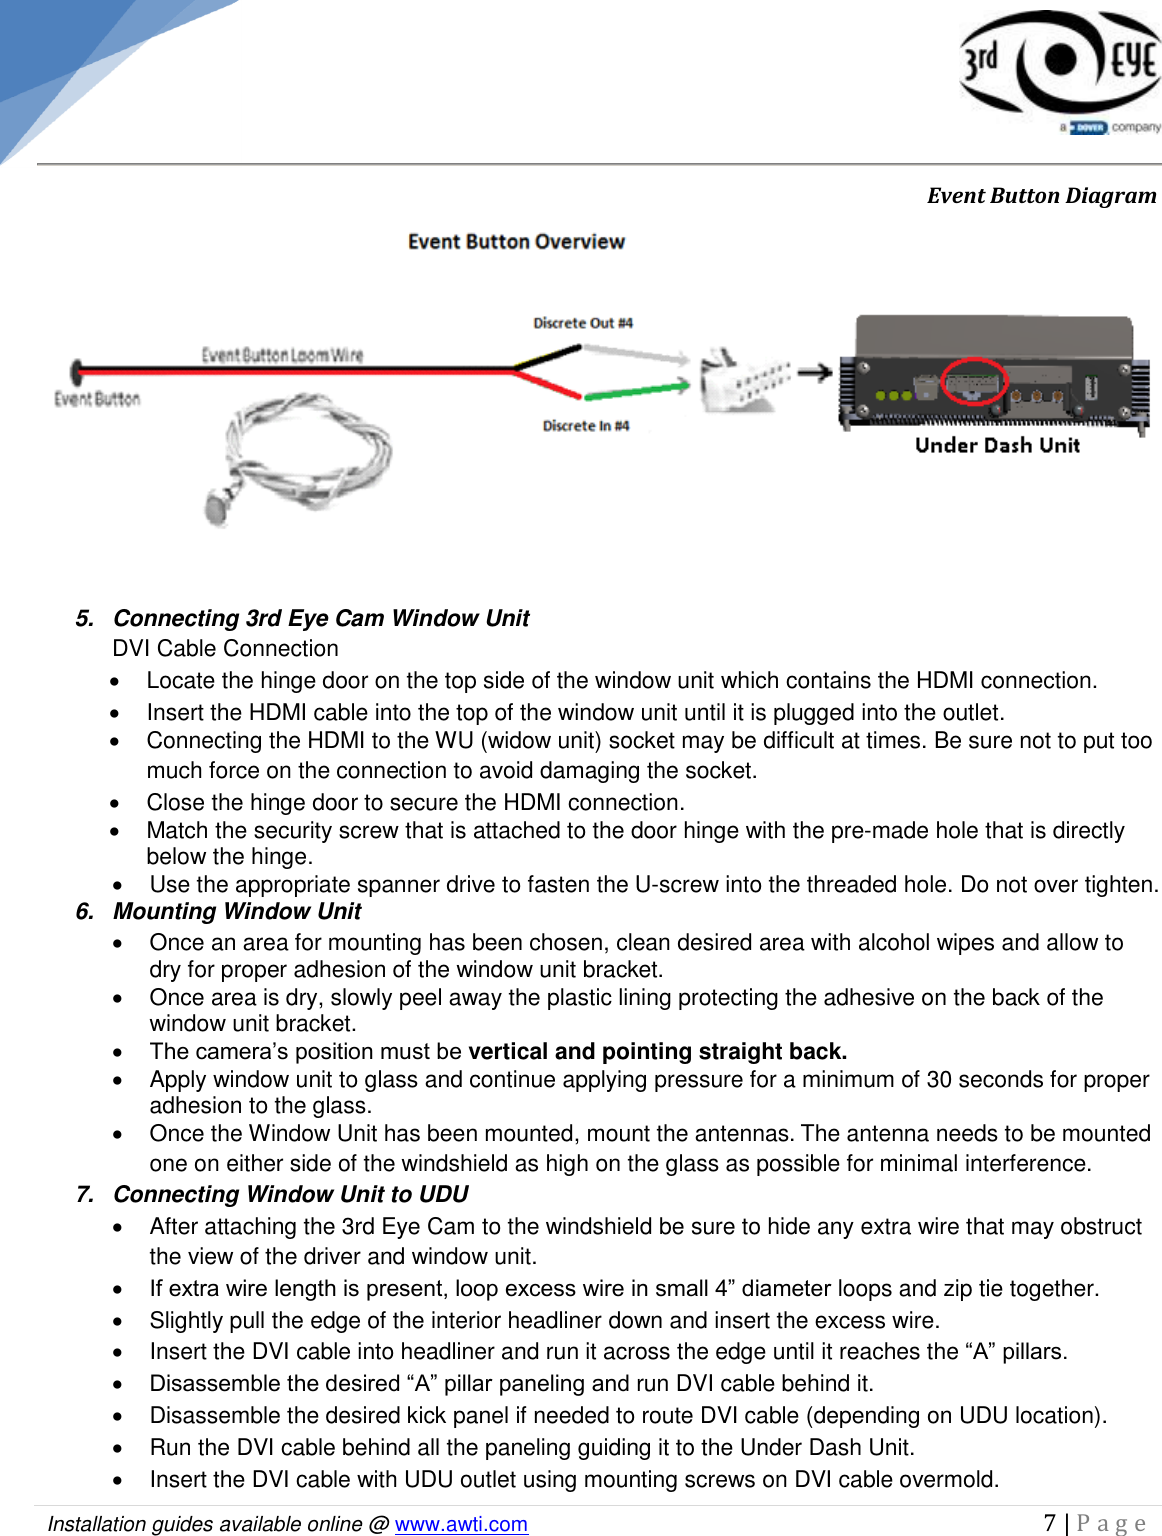
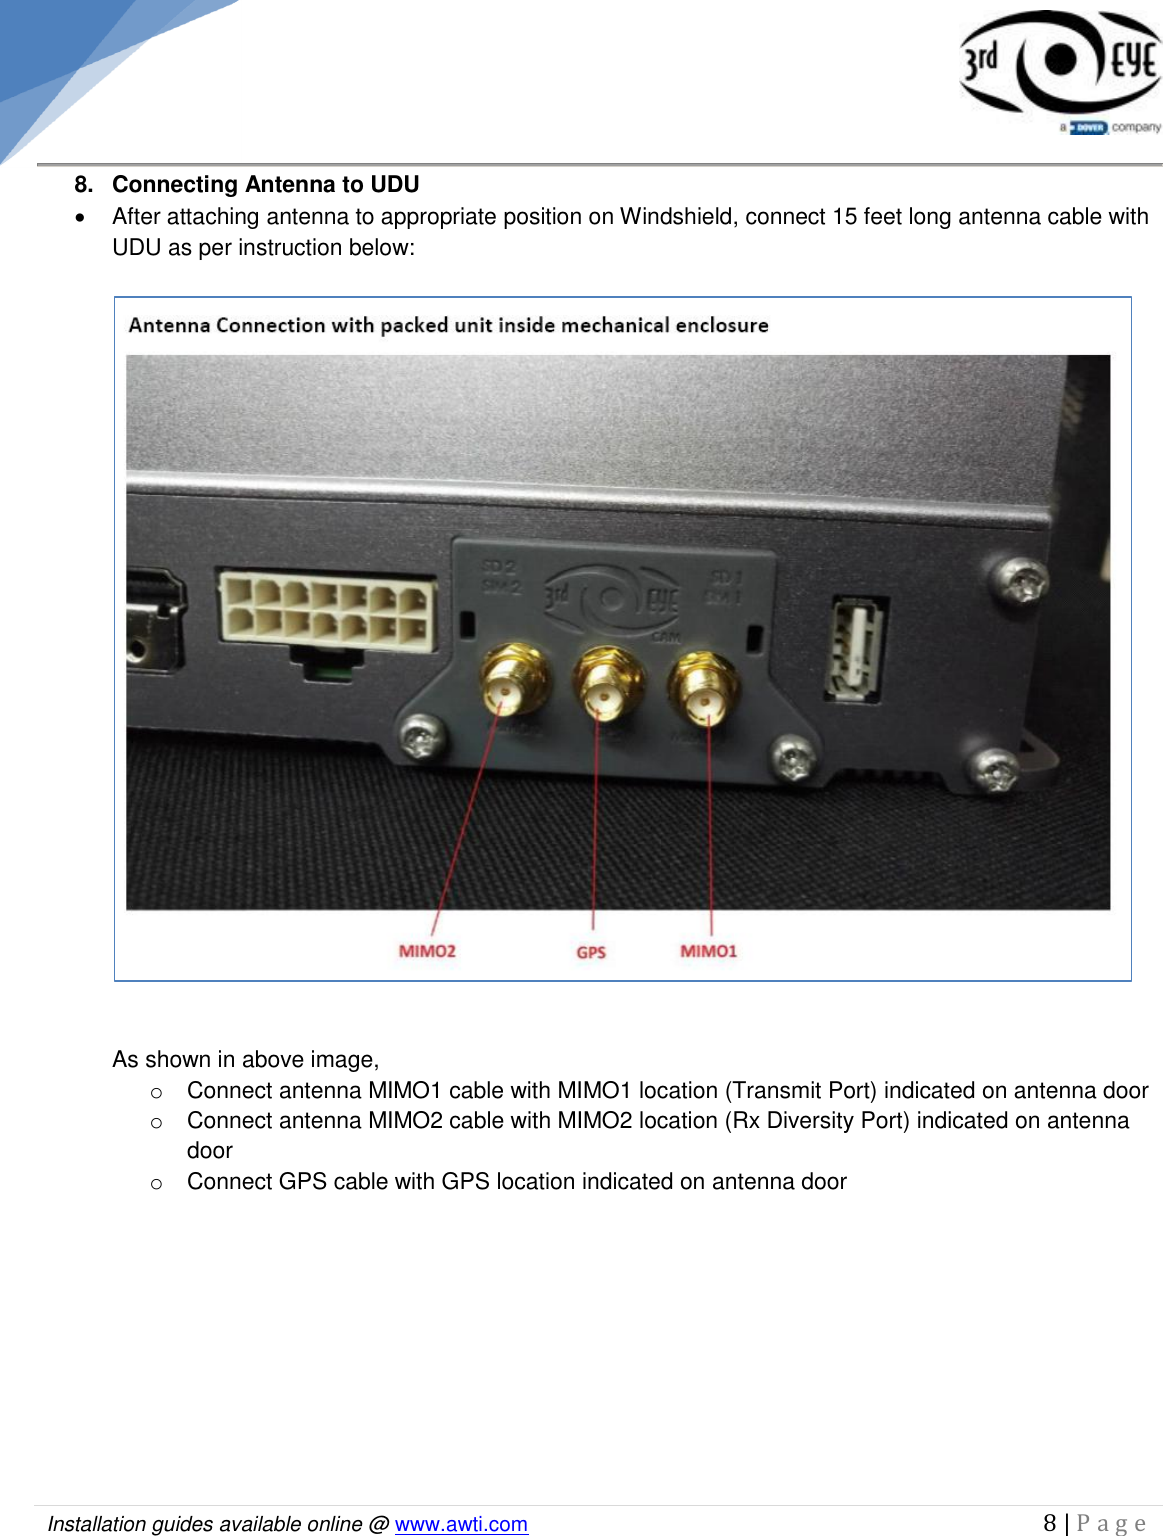
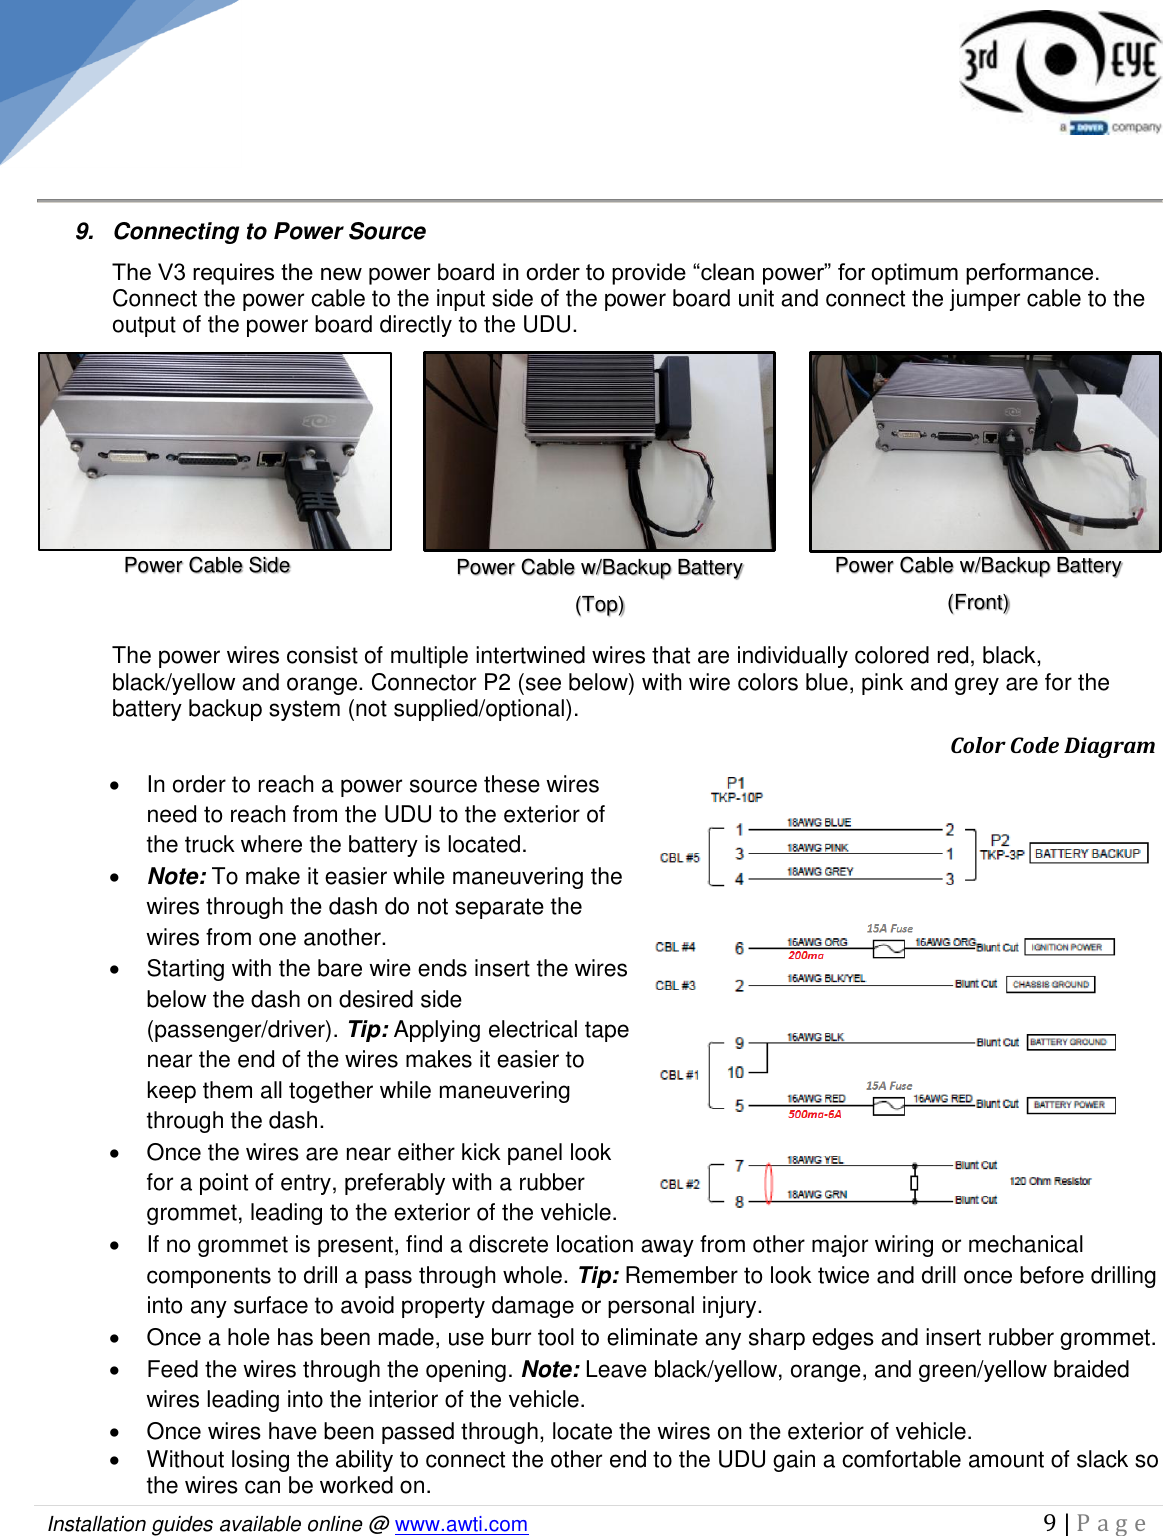
![V0.5|7/2017 Installation guides available online @ www.awti.com 1 | P a g e Installation Instructions 3EC With External Cam & Viewing Monitor Installation Required Tools……………………...pg.1 Hardware……………………………. pg.1 Pre-Installation Checklist………... pg.2 Safety Information……………....... pg.2 Installation Diagrams……………...pg.2,3 Location Recommendations……..pg.3,4 Installation Instructions…………..pg.5,6,7,8 Wiring Connection/Descriptions…pg.8,9 Component Connection……………pg.10 Required Tools Drill (Cordless) Wire Strippers Crimper Plier Driving Bit Set Magnetic Drive Guide Burr Tool Step Drill Bits (3/16 in.-7/8 In.) Digital Multimeter Plastic Antenna Tool Panel Popper End Wire Brush (3/4 In.) Magnetic Tray Additional Items (optional) Wire Connectors Zip Ties Wire (18 Gauge) Grease Marker Tamper Seal Alcohol Wipes Replacement Fuses (5,10,15,20 amp) Star Washers Self-Tapping Screws Hardware UDU WU Power Cable HDMI DVI Cable Expansion Event Button 10 ft. Extension AV Splitter Cable External Cam & Monitor Antenna (MA240.LBI.012) [Length=15feet] Under Dash Unit (UDU) Window Unit (WU)](https://usermanual.wiki/The-Heil/TECV4.Manual/User-Guide-3493792-Page-1.png)