The Neat Company Receipts For Mac Mobile Scanner 322 Users Manual NeatReceipts_Installation_Aug2011_1
322 to the manual 35db997d-b166-49d6-b52e-7fce88e89a54
2015-02-02
: The-Neat-Company The-Neat-Company-Neat-Receipts-For-Mac-Mobile-Scanner-322-Users-Manual-449796 the-neat-company-neat-receipts-for-mac-mobile-scanner-322-users-manual-449796 the-neat-company pdf
Open the PDF directly: View PDF ![]() .
.
Page Count: 2
INSTRUCTIONS FOR SCANNER SETUP
AND SOFTWARE INSTALLATION
Continue with setup and installation
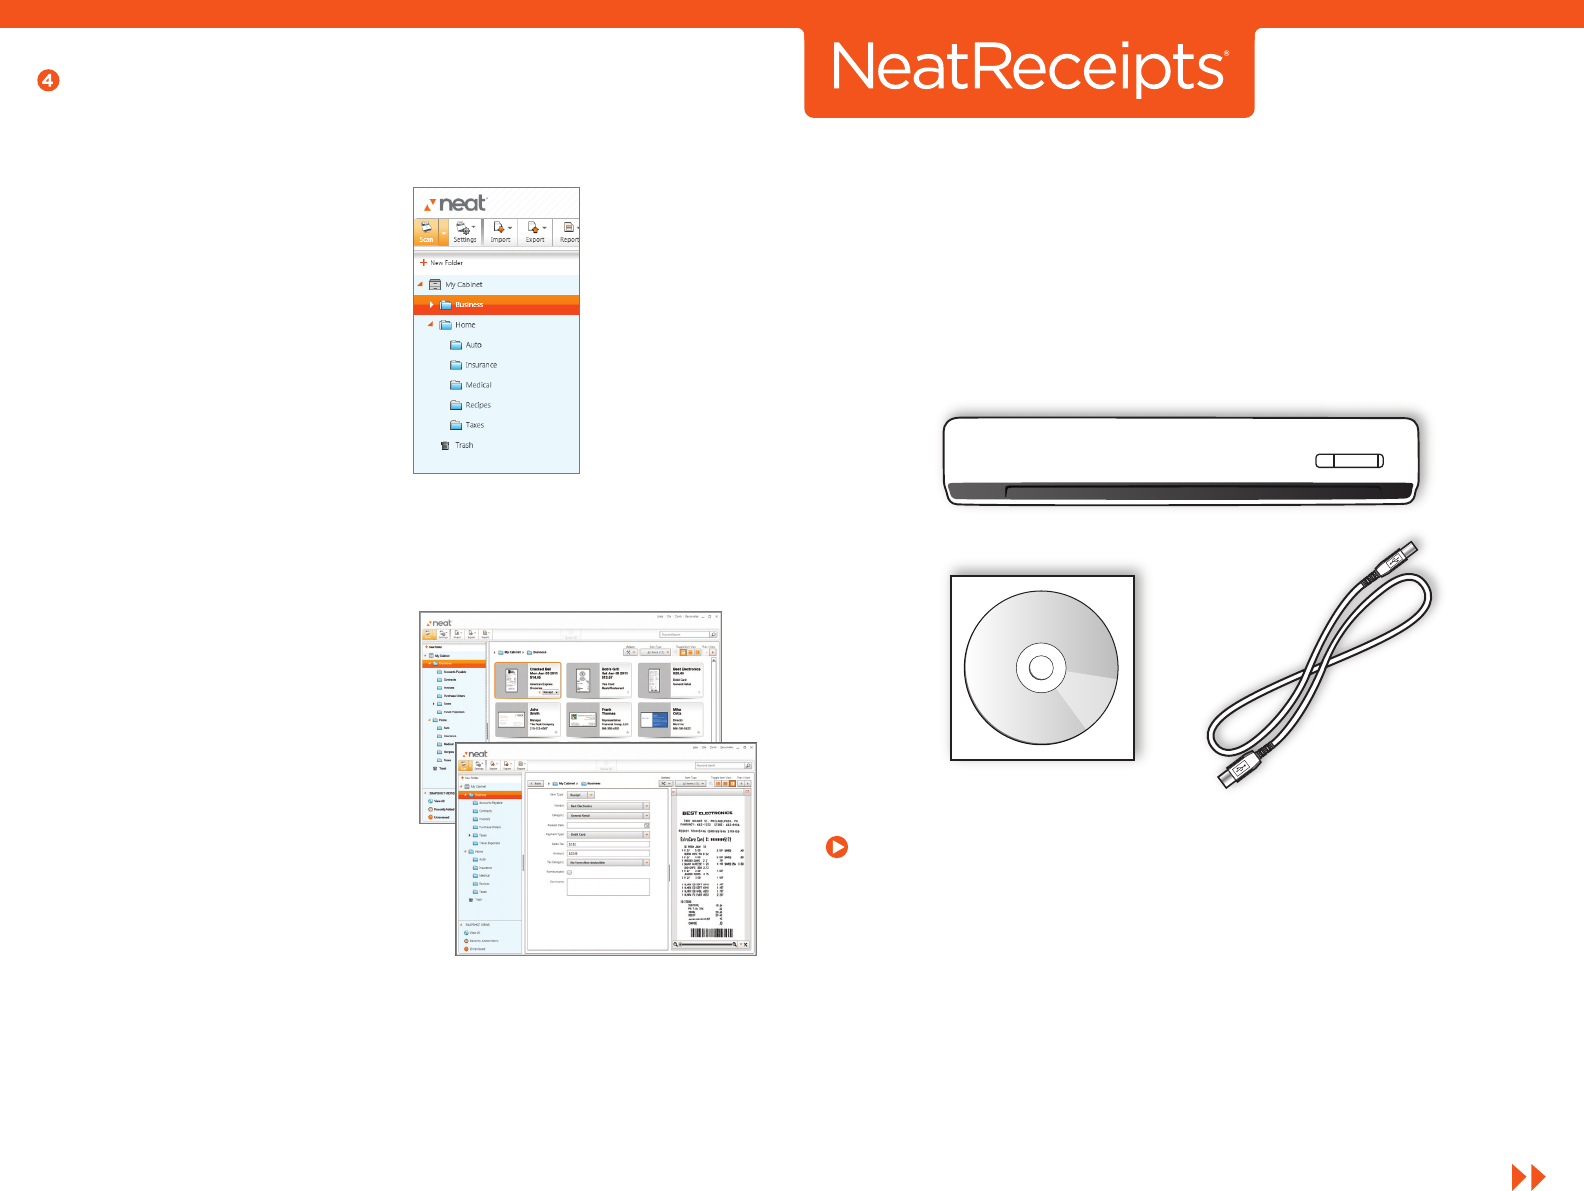
The NeatReceipts box contains everything you need to begin using
the Neat Mobile scanner with Neat Software. Just follow these
installation instructions and you’ll be scanning in no time!
To begin, you’ll need the following items:
NEAT MOBILE SCANNER
NEAT INSTALLATION CD USB CABLE
Before you Begin
You must install Neat Software prior to connecting your scanner to
your computer.
If you have NeatReceipts 3 installed on your computer, the Neat
Software on the enclosed CD will upgrade your current software.
If you have NeatReceipts 2 or an earlier version installed, you’ll need
to back up your database and uninstall the software. For detailed
instructions on backing up and restoring your data, please visit
www.neat.com/database-backup. To uninstall the software, select
Start > Control Panel > Add or Remove Programs > NeatReceipts.
Temporarily disable any security or anti-virus software.
And that’s it! You are now ready to say goodbye to paper clutter,
and hello to an organized, digital life.
Be sure to check out the back cover of the Quick Start Guide for
more information on getting help and participating in our online
user forums.
The scanned items will be
processed in a queue in the
software. Once complete, the
items will appear in the folder.
Double click on the item to
review the extracted data and
add comments.
Open the software and create
folders by clicking on + New
Folder. Create folders based
on your organizational style.
For example, Home, Business,
Auto , Medical etc. Select the
folder in which you wish to
place the scanned items.
Press the Scan button on the
scanner or click on the top-left
corner of the Neat Software.
You can also modify scanner
settings by clicking on the
Settings button.
TIP: Neat Software also allows you to scan and create PDF files. Simply
press the PDF button on the scanner or click on PDF in the Menu Bar to
initiate the scan and save your documents as PDF files.
Getting Started
All items should be inserted FACE DOWN, in the far right side of the
scanner.
NRF4
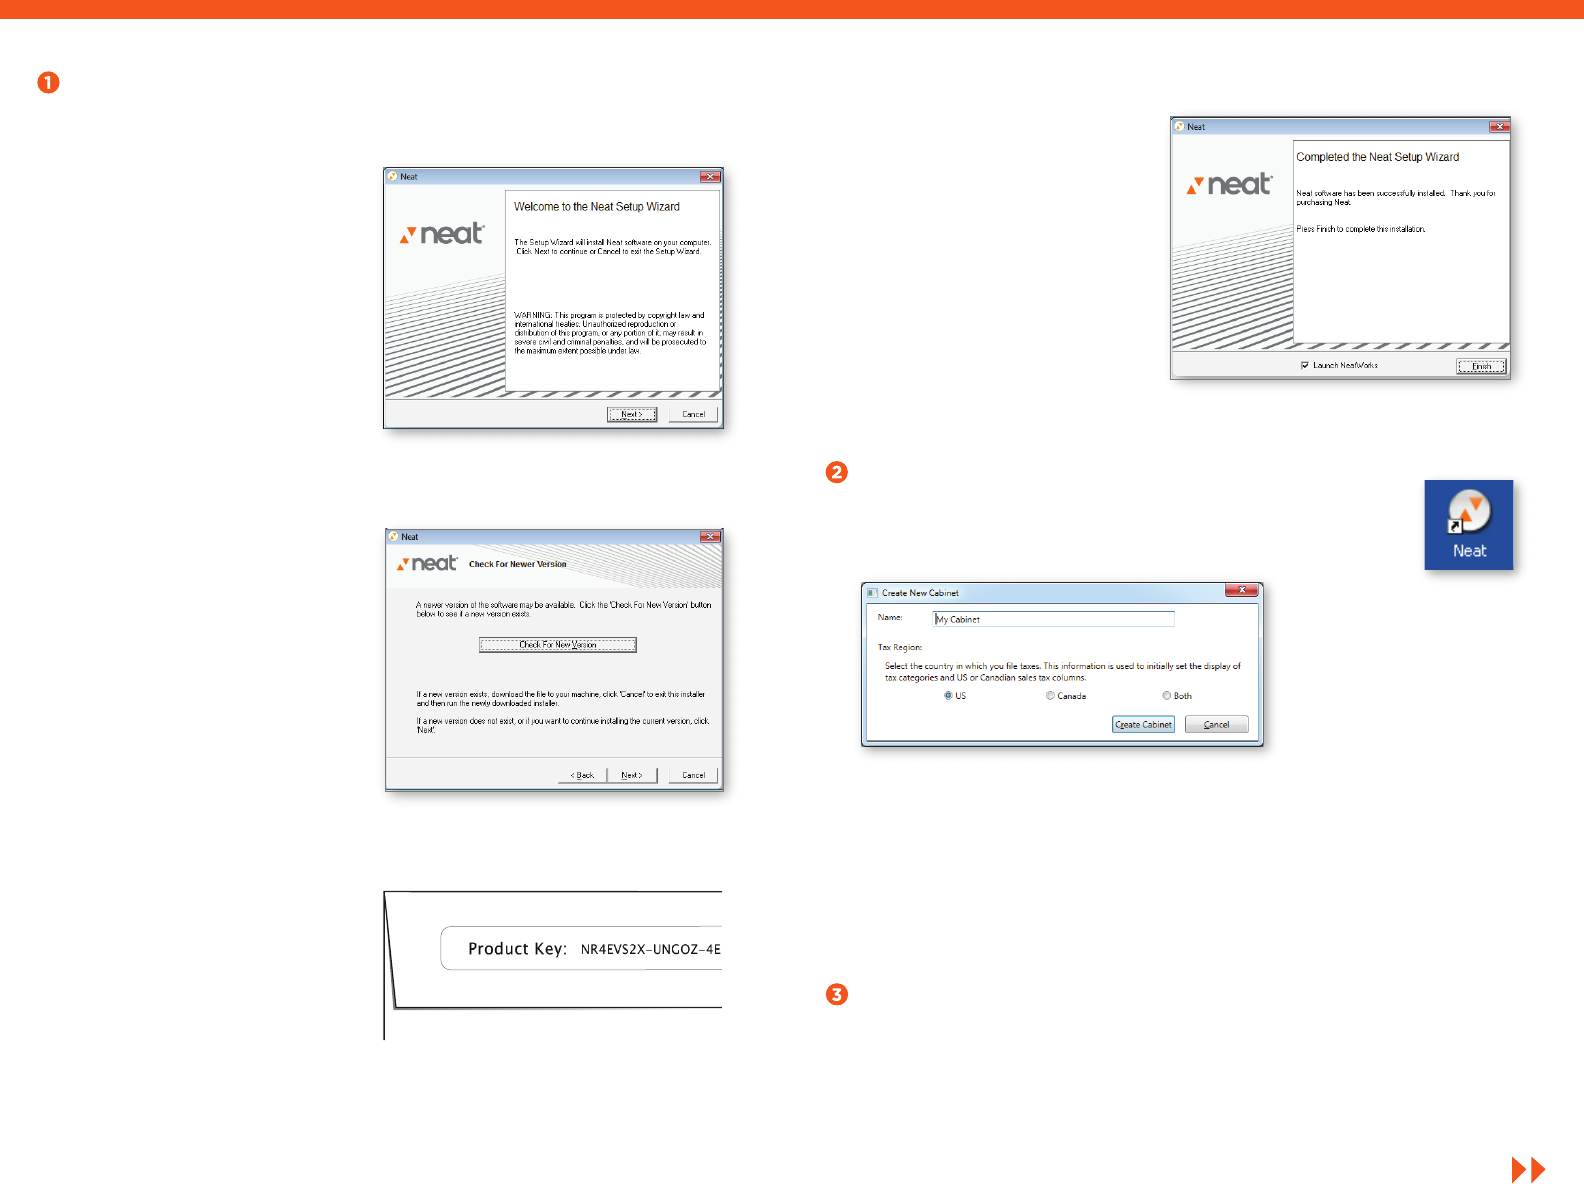
Launching Neat Software
A shortcut has been installed on your desktop.
Double-click the shortcut to launch the application.
Installing Neat Software
Insert the installation CD into your CD-Rom drive.
Next, you must activate your
software by entering your
name, email address and
product key. Your product
key is located on the CD
sleeve.
Click Continue.
When prompted, register your copy of Neat Software. Registration is
REQUIRED to receive free technical support and to qualify for your
hardware warranty.
Continue
Connecting your Scanner
Use the provided USB cable to connect your scanner to any USB
port on your computer. Connect the scanner directly to your
computer – do not use a USB hub or USB port on the keyboard.
When the Installation
Completed screen displays,
click Finish.
Please take a moment to
enable your security and
anti-virus software.
Click Check for New Version
on the next screen to see if a
new version of Neat Software
exists. If it does, download
and install that version as
instructed; otherwise, click
Next to continue.
Read and accept the terms of
the license agreement,
then click I Agree.
Continue to follow the
on-screen instructions. Please
note database installation may
take up to 15 minutes.
When the Installation Wizard
screen displays, click Next.
The first time you launch the software you will be asked to create
a cabinet. Name your cabinet appropriately and select the country
in which you file taxes. This information is used to set the display of
tax categories. (This information can be changed later.)
