The Watt Stopper d b a Qmotion 0003072 Home Manager ST User Manual FCC Part 15
HomeRun Holdings Corp. Home Manager ST FCC Part 15
Manual

5015 B.U. Bowman Drive Buford, GA 30518 USA Voice: 770-831-8048 Fax: 770-831-8598
Certification Exhibit
FCC ID: X6P-0003072
IC: 8832A-0003072
FCC Rule Part: 15.249
IC Radio Standards Specification: Rss-210
ACS Report Number: 09-0074.W06.11.B
Manufacturer: HomeRun Holdings Corporation
Model: WDHA-30
Manual
HomeRun Holdings Corp. HomeManager ST
HomeManager ST
User Manual
HomeRun Holdings Corp. © 2010 1

HomeRun Holdings Corp. HomeManager ST
Table of Contents
Package Contents.............................................................................................................. 4
Glossary ............................................................................................................................. 5
Introduction....................................................................................................................... 7
Installation......................................................................................................................... 9
Configuration .................................................................................................................. 12
Date, Time, And Location .......................................................................................... 12
Passwords..................................................................................................................... 15
Restrictions.................................................................................................................. 17
Internet Settings.......................................................................................................... 19
Z-Wave Settings.......................................................................................................... 21
Update.......................................................................................................................... 23
Version ......................................................................................................................... 25
Management.................................................................................................................... 27
Add Device................................................................................................................... 27
Remove Device ............................................................................................................ 29
Configure Device......................................................................................................... 31
Add Scene .................................................................................................................... 33
Remove Scene.............................................................................................................. 36
Configure Scene .......................................................................................................... 38
Add Schedule............................................................................................................... 41
Remove Schedule ........................................................................................................ 44
Configure Schedule..................................................................................................... 46
Add Floorplan ............................................................................................................. 49
Remove Floorplan....................................................................................................... 51
Configure Floorplan ................................................................................................... 53
Replication Send.......................................................................................................... 55
Replication Receive..................................................................................................... 58
Promote........................................................................................................................ 60
Reset ............................................................................................................................. 62
Poll................................................................................................................................ 64
Rediscover.................................................................................................................... 66
Interaction ....................................................................................................................... 68
Introduction................................................................................................................. 68
Device Window............................................................................................................ 69
Switch........................................................................................................................... 70
Dimmer ........................................................................................................................ 71
Thermostat................................................................................................................... 72
Sensor........................................................................................................................... 73
Window Covering ....................................................................................................... 74
Entry Control .............................................................................................................. 75
Static Controller.......................................................................................................... 76
Portable Controller..................................................................................................... 77
HomeRun Holdings Corp. © 2010 2

HomeRun Holdings Corp. HomeManager ST
Scene............................................................................................................................. 78
Schedule ....................................................................................................................... 78
Reference ......................................................................................................................... 79
HomeManager ST....................................................................................................... 79
Home Screen................................................................................................................ 81
Control Panel Screen.................................................................................................. 82
Devices Screen............................................................................................................. 83
Scenes Screen............................................................................................................... 84
Floorplan Screen......................................................................................................... 86
Journal Screen............................................................................................................. 87
HomeRun Holdings Corp. © 2010 3

HomeRun Holdings Corp. HomeManager ST
Package Contents
HomeManager ST Ethernet Cable Power Adapter
Quick Start Guide
F.P.O.
F.P.O.
F.P.O. F.P.O
HomeRun Holdings Corp. © 2010 4

HomeRun Holdings Corp. HomeManager ST
Glossary
Device An item that is Z-Wave enabled or plugs into a Z-Wave module
enabling it to be controlled by Z-Wave.
Include Add a module to the controller.
Exclude Remove a module from the controller.
Network A collection of Z-Wave modules controlled by primary and
secondary controllers operating on the same system. A network
has its own unique identification code so that no one
else can control the system.
Primary Controller The first controller used to set up your modules and network.
Only the Primary Controller can be used to include or delete
modules from a network. It is recommended that you mark the
primary controller for each network for ease in modifying your
network.
Secondary Controller A controller containing network information about other
modules within the network and is used for controlling devices.
Secondary controllers are created from the Primary Controller
and cannot include or delete modules to the network.
Inclusion Controller A controller containing network information about other
modules within the network and is used for controlling devices.
Inclusion controllers are created from the Primary Controller in
a SIS enabled Z-Wave network. Inclusion Controller has the
ability to add and remove devices from the network.
Replication Send A mode where the network information from one controller is
copied to another. The receiving controller must be in
Replication Receive or learn mode.
Replication Receive A mode where the network information is received from a
controller put in Replication Send or Promote mode.
Promote A mode where the Primary Controller is to copy network
information to another controller. Upon copying the network
information the Primary Controller transfers its role to the
receving controller which now becomes the Primary Controller.
Poll A feature to manually update the status and configuration of
devices in the network.
Rediscover A feature to manually update the network routes and optimize
the performance of the Z-Wave network.
Reset Remove all Z-Wave devices from the network, deletes scenes
and schedules.
Scene A collection of Z-Wave devices configured to turn to a specific
level, setting, mode, or perform an operation. Scenes are usually
activated by a controller, timed event, or specific conditions.
HomeRun Holdings Corp. © 2010 5

HomeRun Holdings Corp. HomeManager ST
Schedule A schedule is a timed event based on time or day even sunrise
or sunset. A schedule is used to activate a scene based on the
chosen time and day settings.
Wizard A series of steps involving selecting options or providing
feedback for configuring or using features in a user-friendly
way.
Floorplan An image used to represent the location of the HomeManager.
Static Update
Controller A controller that receives updates about the network and device
routes.
Static Id Server A controller that can enable the creation of Inclusion
Controllers which can then be used in adding and removing
devices in a network.
HomeRun Holdings Corp. © 2010 6

HomeRun Holdings Corp. HomeManager ST
Introduction
The HomeManager is a controller that will allow you to manage Z-Wave enabled
modules from within your home or remotely using a web browser. Additionally, you can
activate scenes, setup schedules, and monitor the status of your home.
You can create a complete home control and access network by combining using your
HomeManager with other Z-Wave certified products. Indoor and outdoor lighting,
security systems, garage door openers, thermostats, and other Z-Wave certified products
can all be controlled by the HomeManager.
The HomeManager is compatible with the complete range of HomeRun Holdings Corp.
Z-Wave certified products. Furthermore, other Z-Wave enabled products, regardless of
brand, will also work with the HomeManager. Please consult a Z-Wave product supplier
for more details.
Some of the features of HomeManager are:
• Access and control your network from a web browser
• Setup and control up to 230 Z-Wave devices
• Import a floorplan of your home and see the state of all your devices
• View multiple floors and the devices located on each floor
• Activate mood lighting or scenes in your home
• Schedules activate scenes at specific times including sunrise / sunset
• Schedules can be set for individual or multiple days in the week
• Turn all devices on or off with the push of one button
• Monitor the health, optimze, and repair your network of Z-Wave devices
• Log daily activities of Z-Wave devices when their state changes
• Easily configure and manage controllers and their scenes
• Energy conservation and monitoring
• Events activate scenes based on various conditions
HomeRun Holdings Corp. © 2010 7

HomeRun Holdings Corp. HomeManager ST
Basics
To begin using Z-Wave home control technology it is helpful to understand that each Z-
Wave module, including the HomeManager, communicate with each other using a low
power radio transmitter and receiver. Large metal objects, house wiring, walls, furniture,
refrigerators, microwaves and similar items can interfere with communication between
the modules to reduce the range or even prevent communication. Therefore, placement of
the HomeManager and Z-Wave modules is very important.
A Z-Wave network is a collection of Z-Wave modules in a mesh type of network.
Therefore, each Z-Wave module, regardless of manufacturer, communicates with all the
other modules within its range to route and repeat the signals from one device to the next,
thus creating a highly robust transmission throughout the home.
A Z-Wave network can have only one primary controller. The primary controller
establishes the network security to ensure your network will not operate your neighbors
network and vice-versa. It is a good practice to label and protect your primary controller
since it is the only Z-Wave controller that can add modules to or remove modules from
your network. It is easy to add secondary controllers or inclusion controllers as your
network grows.
HomeRun Holdings Corp. © 2010 8

HomeRun Holdings Corp. HomeManager ST
Installation
1) Power on your Internet router, hub, or switching device.
2) Connect one end of the provided ethernet cable to the HomeManager Ethernet
Port and the other end to an available port on your router.
3) Connect the provided power adapter to the HomeManager Power Port and then
plug the adapter into an electrical outlet.
HomeRun Holdings Corp. © 2010 9

HomeRun Holdings Corp. HomeManager ST
HomeRun Holdings Corp. © 2010 10
Access
1) After the HomeManager is properly connected, powered up, and running. The
Power Indicator and Ethernet Indicator should be on while the Activity Indicator
blinks.
2) Double-click on the icon for My Network Places, an icon for the HomeManager
should appear in the list. Double-click the icon for HomeManager.
F.P.O.
3) A web browser window will open with the HomeManager interface. Click the
Connect button.
F.P.O.
4) The login screen will appear. In the account field, select Guest, Admin, or
Installer and provide the password in the password field. If this is the first time
configuring HomeManager select Installer and leave the password field empty
(blank). Click Login.

HomeRun Holdings Corp. HomeManager ST
F.P.O.
5) After login is complete the Home menu screen will appear. From here you can
begin to use the HomeManager interface. The section Configuration describes
several features that can be configured or personalized for the user. The section
Management describes how to setup devices for the Z-Wave network.
F.P.O.
HomeRun Holdings Corp. © 2010 11

HomeRun Holdings Corp. HomeManager ST
HomeRun Holdings Corp. © 2010 12
Configuration
Date, Time, And Location
1) In HomeManager, click on the Control Panel menu item. Next, select the System
section under the Control Panel Menu.
2) Click on Date, Time, And Location menu item.
F.P.O.
3) The Date, Time, And Location Wizard will appear describing this feature and the
process. Click Next on the wizard to make configuration changes or Cancel to
abort the process.

HomeRun Holdings Corp. HomeManager ST
4) To configure the date and time:
• Select the correct time in hours and minutes for your current location.
• Select the correct date by providing the month, day, and year.
• Select the appropriate time zone for your location.
F.P.O.
5) Click Next once the time and date have been properly filled out.
HomeRun Holdings Corp. © 2010 13

HomeRun Holdings Corp. HomeManager ST
6) To configure your location:
• Select the correct country.
• Select the correct region or state.
• Select the correct or nearest city if yours is not listed.
F.P.O.
7) Click Next once the location has been propery filled out. Finally, click Finish to
save your settings.
HomeRun Holdings Corp. © 2010 14

HomeRun Holdings Corp. HomeManager ST
HomeRun Holdings Corp. © 2010 15
Passwords
1) In HomeManager, click on the Control Panel menu item. Next, select the System
section under the Control Panel Menu.
2) Click on the Security menu item.
F.P.O.
3) The Security Wizard will appear describing this feature and the process. Click
Next on the wizard to make configuration changes or Cancel to abort the process.

HomeRun Holdings Corp. HomeManager ST
4) To configure the password for a specific account:
• Select the account whose password you would like to modify.
• Provide the current password for the account selected.
• Provide a new password for the account selected.
• Retype the new password in the verify section.
F.P.O.
5) Click Next once the current and new password has been propery filled out.
Finally, click Finish to save your settings.
HomeRun Holdings Corp. © 2010 16

HomeRun Holdings Corp. HomeManager ST
HomeRun Holdings Corp. © 2010 17
Restrictions
1) In HomeManager, click on the Control Panel menu item. Next, select the System
section under the Control Panel Menu.
2) Click on the Restrictions menu item.
F.P.O.
3) The Restrictions Wizard will appear describing this feature and the process. Click
Next on the wizard to make configuration changes or Cancel to abort the process.

HomeRun Holdings Corp. HomeManager ST
4) To enable or disable features for a specific account:
• Control features provide the account the ability to activate scenes,
schedules, and to interact with devices.
• Manage features provide the account the ability to add, remove, and
configure devices as well as use Z-Wave network management functions
such as replication or resetting the network.
• System features provide the account the ability to configure system
settings such as passwords, restrictions, and internet settings.
• Check the features you want to enabled.
• Uncheck the features you want to disabled.
F.P.O.
5) Click Next once the Control, Manage, and System features have been properly
checked or unchecked. Finally, click Finish to save your settings.
HomeRun Holdings Corp. © 2010 18

HomeRun Holdings Corp. HomeManager ST
HomeRun Holdings Corp. © 2010 19
Internet Settings
1) In HomeManager, click on the Control Panel menu item. Next, select the System
section under the Control Panel Menu.
2) Click on the Internet Options menu item.
F.P.O.
3) The Internet Options Wizard will appear describing this feature and the process.
Click Next on the wizard to make configuration changes or Cancel to abort the
process.

HomeRun Holdings Corp. HomeManager ST
4) To specify internet options:
• Select the method of IP Assignment, Dynamic will have HomeManager
get its IP Address and Subnet settings by DHCP, this is the most common
method of IP Assignment. If Static IP Assignment is selected, provide the
specific IP Address and Subnet you would like to have HomeManager
aquire.
• Changing of the IP Assignment method will not take effect until the
HomeManager power has been reset.
F.P.O.
5) Click Next once the correct Internet settings have been selected. Finally, click
Finish to save your settings. Remember, if the IP Assignment method was
changed to unplug the HomeManager and plug it back in, resetting the power and
applying the new Internet Options.
HomeRun Holdings Corp. © 2010 20

HomeRun Holdings Corp. HomeManager ST
HomeRun Holdings Corp. © 2010 21
Z-Wave Settings
1) In HomeManager, click on the Control Panel menu item. Next, select the System
section under the Control Panel Menu.
2) Click on the Z-Wave Options menu item.
F.P.O.
3) The Z-Wave Options Wizard will appear describing this feature and the process.
Click Next on the wizard to make configuration changes or Cancel to abort the
process.

HomeRun Holdings Corp. HomeManager ST
4) To specify Z-Wave options:
• Select the Polling interval, this will determine how frequently
HomeManager will ask devices for their status. The default is every 5
minutes. Caution: Frequent polling can slow performance of network.
• Select the Rediscover interval, this will determine how frequently
HomeManager will update the routing of devices on the network. This will
require controller devices to be updated in order to take advantage of the
new routing information. The default is OFF.
• Select the SUC (Static Update Controller) / SIS (Static Id Server) options.
Disabled will prevent HomeManager from being able to add or remove
devices remotely by using an Inclusion Controller. The default is SIS.
F.P.O.
5) Click Next once the correct Z-Wave settings have been selected. Finally, click
Finish to save your settings.
HomeRun Holdings Corp. © 2010 22

HomeRun Holdings Corp. HomeManager ST
HomeRun Holdings Corp. © 2010 23
Update
1) In HomeManager, click on the Control Panel menu item. Next, select the System
section under the Control Panel Menu.
2) Click on the Update menu item.
F.P.O.
3) The Update Wizard will appear describing this feature and the process. Click
Next on the wizard to make configuration changes or Cancel to abort the process.

HomeRun Holdings Corp. HomeManager ST
4) The Update Wizard will check for the latest version of the software. If a new
version is available an option will be available to Install the latest. Check the
Install option if you want to update HomeManager to the latest version. Click
Next to download the latest update; this process may take several minutes.
F.P.O.
5) Click Next once the update has completed. Finally, click Finish to restart
HomeManager.
HomeRun Holdings Corp. © 2010 24

HomeRun Holdings Corp. HomeManager ST
HomeRun Holdings Corp. © 2010 25
Version
1) In HomeManager, click on the Control Panel menu item. Next, select the System
section under the Control Panel Menu.
2) Click on the Version menu item.
F.P.O.
3) The Version Wizard will display a list of features, system information, and
settings. Click Close t ish viewing the list and close the wizard. o fin
F.P.O.
4) The features and information are.

HomeRun Holdings Corp. HomeManager ST
• Library: Z-Wave Library type; Static, Bridge, or Installer
• Library Version: Z-Wave Library API and SDK version
• Controller: Z-Wave Controller Type; Primary, Secondary, or Inclusion
• SUC/SIS: Static Update Controller (SUC), Static Id Server (SIS), or
Disabled
• HomeID: Z-Wave device unique Home Id
• NodeID: Z-Wave device Node Id
• Software Version: HomeManager software version
• Memory: HomeManager memory available as percentage and megabytes
• Storage: HomeManager storage available as percentage and megabytes
• Operating System: HomeManager operating system
• TimeZone: The configured Time Zone and offset
• MAC: HomeManager network Machine Address
• Internet Type: Configured IP settings, Static or Dynamic
• IP Address: Configured IP to use if Internet Type is Static
• Subnet Mask: Configured Subnet Mask to use if Internet Type is Static
HomeRun Holdings Corp. © 2010 26

HomeRun Holdings Corp. HomeManager ST
HomeRun Holdings Corp. © 2010 27
Management
Add Device
1) In HomeManager, click on the Control Panel menu item. Next, select the Devices
section under the Control Panel Menu.
2) Click on the Add menu item.
F.P.O.
3) The Add Device Wizard will appear describing this feature and the process. Click
Next on the wizard to begin or Cancel to abort the process.

HomeRun Holdings Corp. HomeManager ST
4) The Add Device Wizard will then prompt you to Activate or press the Node
Information button on the device. The method for learning a new device into the
network varies, consult the specific product information for more details. Once
the device is added the H eManager will prompt you to configure the device. om
F.P.O.
5) To configure the device:
• Provide the na location, and category of the device. me,
F.P.O.
6) Click Next once the device has been configured. Finally, click Finish to save your
settings.
HomeRun Holdings Corp. © 2010 28

HomeRun Holdings Corp. HomeManager ST
HomeRun Holdings Corp. © 2010 29
Remove Device
1) In HomeManager, click on the Control Panel menu item. Next, select the Devices
section under the Control Panel Menu.
2) Click on the Remove menu item.
F.P.O.
3) The Remove Device Wizard will appear describing this feature and the process.
Click Next on the wizard to begin or Cancel to abort the process.

HomeRun Holdings Corp. HomeManager ST
4) The Remove Device Wizard will then prompt you to Activate or press the Node
Information button on the device. The method for removing a device from the
network varies, consult the specific product information for more details.
F.P.O.
5) The details, if any, of the device being removed are then displayed.
F.P.O.
6) Click Next if the device details are showing. Finally, click Finish to save your
settings.
HomeRun Holdings Corp. © 2010 30

HomeRun Holdings Corp. HomeManager ST
HomeRun Holdings Corp. © 2010 31
Configure Device
1) In HomeManager, click on the Control Panel menu item. Next, select the Devices
section under the Control Panel Menu.
2) Click on the Configure menu item.
F.P.O.
3) The Configure Device Wizard will appear describing this feature and the process.
Click Next on the wizard to begin or Cancel to abort the process.

HomeRun Holdings Corp. HomeManager ST
4) The Configure Device Wizard will then prompt you select the device you want to
modify.
F.P.O.
5) To configure the device:
• Provide the na location, and category of the device. me,
F.P.O.
6) Click Next once the device has been configured. Finally, click Finish to save your
settings.
HomeRun Holdings Corp. © 2010 32

HomeRun Holdings Corp. HomeManager ST
HomeRun Holdings Corp. © 2010 33
Add Scene
1) In HomeManager, click on the Control Panel menu item. Next, select the Scenes
section under the Control Panel Menu.
2) Click on the Add menu item.
F.P.O.
3) The Add Scene Wizard will appear describing this feature and the process. Click
Next on the wizard to begin or Cancel to abort the process.

HomeRun Holdings Corp. HomeManager ST
4) The Add Scene Wizard will then prompt you to name the scene. It is
recommended to name the scene relative to its purpose such as ‘Outdoor Lights –
On’ or ‘All Off’.
F.P.O.
5) To configure the scene:
• Select the device to place in the scene from Available Devices.
• Select the state of the chosen device, the state can vary depending on the
device type such as off or on, a specific dim level, or thermostat mode and
setpoint.
• To add a device from the Available Devices to the scene, click the right
arrow or add button.
• To remove a device from the scene, click the device in the Scene Devices
list and click the left arrow or remove button.
• There can be many devices in a scene, to add multiple devices, continue to
select devices form the Available Devices list, choose the device state, and
press the add button.
• The Scene Devices list shows which devices are currently in the scene.
The Device column lists the specific device while the State column
identifies the state that device will go to when the scene is activated.
HomeRun Holdings Corp. © 2010 34

HomeRun Holdings Corp. HomeManager ST
F.P.O.
6) Click Next once the scene has been configured. Finally, click Finish to save your
settings.
HomeRun Holdings Corp. © 2010 35

HomeRun Holdings Corp. HomeManager ST
HomeRun Holdings Corp. © 2010 36
Remove Scene
1) In HomeManager, click on the Control Panel menu item. Next, select the Scenes
section under the Control Panel Menu.
2) Click on the Remove menu item.
F.P.O.
3) The Remove Scene Wizard will appear describing this feature and the process.
Click Next on the wizard to begin or Cancel to abort the process.

HomeRun Holdings Corp. HomeManager ST
4) The Remove Scene Wizard will then provide a list of scenes, select the one you
would like to remove and then click Next.
F.P.O.
5) Lastly, the Remove Scene wizard displays what devices are in the scene such that
you can review the scene before deciding to remove it.
F.P.O.
6) Click Next to finish removing the scene or Cancel to abort the process. Finally,
click Finish to save your settings.
HomeRun Holdings Corp. © 2010 37

HomeRun Holdings Corp. HomeManager ST
HomeRun Holdings Corp. © 2010 38
Configure Scene
1) In HomeManager, click on the Control Panel menu item. Next, select the Scenes
section under the Control Panel Menu.
2) Click on the Configure menu item.
F.P.O.
3) The Configure Scene Wizard will appear describing this feature and the process.
Click Next on the wizard to begin or Cancel to abort the process.

HomeRun Holdings Corp. HomeManager ST
7) The Configure Scene Wizard will then prompt you select the scene you want to
modify.
F.P.O.
7) The Configure Scene Wizard will then prompt you to name the scene. It is
recommended to name the scene relative to its purpose such as ‘Outdoor Lights –
On’ or ‘All Off’.
F.P.O.
8) To configure the scene:
• Select the device to place in the scene from Available Devices.
• Select the state of the chosen device, the state can vary depending on the
device type such as off or on, a specific dim level, or thermostat mode and
setpoint.
• To add a device from the Available Devices to the scene, click the right
arrow or add button.
• To remove a device from the scene, click the device in the Scene Devices
list and click the left arrow or remove button.
HomeRun Holdings Corp. © 2010 39

HomeRun Holdings Corp. HomeManager ST
• There can be many devices in a scene, to add multiple devices, continue to
select devices form the Available Devices list, choose the device state, and
press the add button.
• The Scene Devices list shows which devices are currently in the scene.
The Device column lists the specific device while the State column
identifies the state that device will go to when the scene is activated.
F.P.O.
9) Click Next once the scene has been configured. Finally, click Finish to save your
settings.
HomeRun Holdings Corp. © 2010 40

HomeRun Holdings Corp. HomeManager ST
HomeRun Holdings Corp. © 2010 41
Add Schedule
1) In HomeManager, click on the Control Panel menu item. Next, select the
Schedules section under the Control Panel Menu.
2) Click on the Add menu item.
F.P.O.
3) The Add Schedule Wizard will appear describing this feature and the process.
Click Next on the wizard to begin or Cancel to abort the process.

HomeRun Holdings Corp. HomeManager ST
4) The Add Schedule Wizard will then prompt you to name the schedule. It is
recommended to name the schedule relative to its purpose such as ‘Landscape
Lights Off’ or ‘Morning Routine’.
F.P.O.
5) Select the scene in Available Scenes to be activated when the schedule runs and
then click Next.
F.P.O.
6) To configure when the selected scene is activated:
• Select the Frequency such as Daily, Weekday, or Weekend. If Daily is
selected, individual days can be chosen.
• Select the Time such as Specific Time, Sunrise, or Sunset.
HomeRun Holdings Corp. © 2010 42

HomeRun Holdings Corp. HomeManager ST
F.P.O.
7) Click Next to finish creating the schedule or Cancel to abort the process. Finally,
click Finish to save your settings.
HomeRun Holdings Corp. © 2010 43

HomeRun Holdings Corp. HomeManager ST
HomeRun Holdings Corp. © 2010 44
Remove Schedule
1) In HomeManager, click on the Control Panel menu item. Next, select the
Schedules section under the Control Panel Menu.
2) Click on the Remove menu item.
F.P.O.
3) The Remove Schedule Wizard will appear describing this feature and the process.
Click Next on the wizard to begin or Cancel to abort the process.

HomeRun Holdings Corp. HomeManager ST
4) The Remove Schedule Wizard will then provide a list of schedules, select the one
you would like to remove and then click Next.
F.P.O.
5) Lastly, the Remove Schedule wizard displays what devices are in the schedule
such that you can review the schedule before deciding to remove it.
F.P.O.
6) Click Next to finish removing the schedule or Cancel to abort the process. Finally,
click Finish to save your settings.
HomeRun Holdings Corp. © 2010 45

HomeRun Holdings Corp. HomeManager ST
HomeRun Holdings Corp. © 2010 46
Configure Schedule
1) In HomeManager, click on the Control Panel menu item. Next, select the
Schedules section under the Control Panel Menu.
2) Click on the Configure menu item.
F.P.O.
3) The Configure Schedule Wizard will appear describing this feature and the
process. Click Next on the wizard to begin or Cancel to abort the process.

HomeRun Holdings Corp. HomeManager ST
4) The Configure Schedule Wizard will then prompt you select the scene you want
to modify.
F.P.O.
5) Select the scene in Available Scenes to be activated when the schedule runs and
then click Next.
F.P.O.
6) To configure when the selected scene is activated:
• Select the Frequency such as Daily, Weekday, or Weekend. If Daily is
selected, individual days can be chosen.
• Select the Time such as Specific Time, Sunrise, or Sunset.
HomeRun Holdings Corp. © 2010 47

HomeRun Holdings Corp. HomeManager ST
F.P.O.
7) Click Next to finish modifying the schedule or Cancel to abort the process.
Finally, click Finish to save your settings.
HomeRun Holdings Corp. © 2010 48

HomeRun Holdings Corp. HomeManager ST
HomeRun Holdings Corp. © 2010 49
Add Floorplan
1) In HomeManager, click on the Control Panel menu item. Next, select the
Floorplan section under the Control Panel Menu.
2) Click on the Add menu item.
F.P.O.
3) The Add Floorplan Wizard will appear describing this feature and the process.
Click Next on the wizard to begin or Cancel to abort the process.

HomeRun Holdings Corp. HomeManager ST
4) The Add Floorplan Wizard will then provide a Browse button to select an image
file on your computer. The image selected will be added to the HomeManager list
of floorplans available.
F.P.O.
5) Click Next to finish uploading the floorplan or Cancel to abort the process.
Finally, click Finish to complete the process.
HomeRun Holdings Corp. © 2010 50

HomeRun Holdings Corp. HomeManager ST
HomeRun Holdings Corp. © 2010 51
Remove Floorplan
1) In HomeManager, click on the Control Panel menu item. Next, select the
Floorplan section under the Control Panel Menu.
2) Click on the Remove menu item.
F.P.O.
3) The Remove Floorplan Wizard will appear describing this feature and the process.
Click Next on the wizard to begin or Cancel to abort the process.

HomeRun Holdings Corp. HomeManager ST
4) The Remove Floorplan Wizard will then provide a list of floorplan images
available in HomeManager. After selecting an image, click Next to remove the
floorplan.
F.P.O.
5) Click Next to finish removing the floorplan or Cancel to abort the process.
Finally, click Finish to complete the process.
HomeRun Holdings Corp. © 2010 52

HomeRun Holdings Corp. HomeManager ST
HomeRun Holdings Corp. © 2010 53
Configure Floorplan
1) In HomeManager, click on the Control Panel menu item. Next, select the
Floorplan section under the Control Panel Menu.
2) Click on the Configure menu item.
F.P.O.
3) The Configure Floorplan Wizard will appear describing this feature and the
process. Click Next on the wizard to begin or Cancel to abort the process.

HomeRun Holdings Corp. HomeManager ST
4) To configure the rooms or locations:
• Select the number of levels or floors, there can be one floorplan image per
level configured. Provide the Level Name and select the floorplan image.
F.P.O.
5) To configure the rooms or locations:
• Click the Add button and provide the Room Name and Room Level or
floorplan image this location will reside in. Click the Remove button after
selecting a room he Rooms list. in t
F.P.O.
6) Click Next to finish configuring the floorplan or Cancel to abort the process.
Finally, click Finish to complete the process.
HomeRun Holdings Corp. © 2010 54

HomeRun Holdings Corp. HomeManager ST
HomeRun Holdings Corp. © 2010 55
Replication Send
1) In HomeManager, click on the Control Panel menu item. Next, select the Network
section under the Control Panel Menu.
2) Click on the Replication Send menu item.
F.P.O.
3) The Replication Send Wizard will appear describing this feature and the process.
Click Next on the wizard to begin or Cancel to abort the process.

HomeRun Holdings Corp. HomeManager ST
4) To configure controller scene settings:
• In the Controller list select how many scenes or buttons the controller you
are about to add supports.
• In the Controller Mapping list click each button listed and select a specific
scene or ‘Unmapped Scene’ from the Available Scenes list.
F.P.O.
5) The wizard will display it is starting to replicate the network. Set the receiving
controller in Replication Receive mode or learn mode. The method for setting a
controller in learn mode is product specific, consult the product documentation.
F.P.O.
6) To configure the controller:
• Provide the name, location, and category of the device.
HomeRun Holdings Corp. © 2010 56

HomeRun Holdings Corp. HomeManager ST
F.P.O.
7) Click Next to complete the process or Cancel to abort the process. Finally, click
Finish to save your settings.
HomeRun Holdings Corp. © 2010 57

HomeRun Holdings Corp. HomeManager ST
HomeRun Holdings Corp. © 2010 58
Replication Receive
1) In HomeManager, click on the Control Panel menu item. Next, select the Network
section under the Control Panel Menu.
2) Click on the Replication Receive menu item.
F.P.O.
3) The Replication Receive Wizard will appear describing this feature and the
process. Click Next on the wizard to begin or Cancel to abort the process.

HomeRun Holdings Corp. HomeManager ST
4) A message indicating scenes will not be copied from the Primary Controller to
HomeManager while it is receiving replication. Click Next to continue.
F.P.O.
5) The wizard will display it is starting to replicate the network. On the Primary
Controller begin adding a new device or put it in Replication Send mode. The
method for setting a replication send mode is product specific, consult the product
documentation.
F.P.O.
6) Click Next to complete the process or Cancel to abort the process. Finally, click
Finish to save your settings.
HomeRun Holdings Corp. © 2010 59

HomeRun Holdings Corp. HomeManager ST
HomeRun Holdings Corp. © 2010 60
Promote
1) In HomeManager, click on the Control Panel menu item. Next, select the Network
section under the Control Panel Menu.
2) Click on the Promote menu item.
F.P.O.
3) The Promote Wizard will appear describing this feature and the process. Click
Next on the wizard to begin or Cancel to abort the process.

HomeRun Holdings Corp. HomeManager ST
4) To configure controller scene settings:
• In the Controller list select how many scenes or buttons the controller you
are about to add supports.
• In the Controller Mapping list click each button listed and select a specific
scene or ‘Unmapped Scene’ from the Available Scenes list.
F.P.O.
5) The wizard will display it is starting to replicate the network. Set the receiving
controller in Replication Receive mode or learn mode. The method for setting a
controller in learn mode is product specific, consult the product documentation.
F.P.O.
6) Click Next to complete the process or Cancel to abort the process. Finally, click
Finish to save your settings.
HomeRun Holdings Corp. © 2010 61

HomeRun Holdings Corp. HomeManager ST
HomeRun Holdings Corp. © 2010 62
Reset
1) In HomeManager, click on the Control Panel menu item. Next, select the Network
section under the Control Panel Menu.
2) Click on the Reset menu item.
F.P.O.
3) The Network Reset Wizard will appear describing this feature and the process.
Click Next on the wizard to begin or Cancel to abort the process.

HomeRun Holdings Corp. HomeManager ST
4) The Network Reset Wizard will warn you that resetting the network will remove
the devices, scenes, and schedules. You will no longer be able to control the
devices on your network with HomeManager until the network is created again.
F.P.O.
5) A final message will be displayed, to reset your Z-Wave network and device
settings, click Finish.
F.P.O.
6) Click Finish to continue after the reset has completed.
HomeRun Holdings Corp. © 2010 63

HomeRun Holdings Corp. HomeManager ST
HomeRun Holdings Corp. © 2010 64
Poll
1) In HomeManager, click on the Control Panel menu item. Next, select the Network
section under the Control Panel Menu.
2) Click on the Poll menu item.
F.P.O.
3) The Network Poll Wizard will appear describing this feature and the process.
Click Next on the wizard to begin or Cancel to abort the process.

HomeRun Holdings Corp. HomeManager ST
4) The Network Poll Wizard will warn you this process may take a long time to
complete, this will depe n network size and health. nd o
F.P.O.
5) Each device is displayed as it is being polled, the polling will update the status of
each device in the network.
F.P.O.
6) Click Finish to continue after the poll has completed.
HomeRun Holdings Corp. © 2010 65

HomeRun Holdings Corp. HomeManager ST
HomeRun Holdings Corp. © 2010 66
Rediscover
7) In HomeManager, click on the Control Panel menu item. Next, select the Network
section under the Control Panel Menu.
8) Click on the Rediscover menu item.
F.P.O.
9) The Network Rediscover Wizard will appear describing this feature and the
process. Click Next on the wizard to begin or Cancel to abort the process.

HomeRun Holdings Corp. HomeManager ST
10) The Network Rediscover Wizard will warn you this process may take a long time
to complete, this will depend on network size and health.
F.P.O.
11) Each device is displayed as it is being updated, the rediscovery will update the
routes of each device in the network to improve network efficiency.
F.P.O.
12) Click Finish to continue after the rediscover has completed.
HomeRun Holdings Corp. © 2010 67

HomeRun Holdings Corp. HomeManager ST
Interaction
Introduction
Devices all have a few things in common such as Type, Name, Location, Category,
Status, a Device Id, and a Device Icon. The value of each of these can depend on the
status of the device or the device type.
The Device Type is a description of the device dependant on its supported features or
functionality. The Device Type is one of many available types such as Switch, Dimmer,
Thermostat, Window Covering, Sensor, Entry Control, Portable Controller, Static
Controller, etc.
The Device Name, Location, and Category are customized by the user to aid in
identifying and organizing devices according to their own preferences.
The Device Id is the identifier for each device in the Z-Wave network, also known as the
node id.
The Device Icon is a representation of the Device Type.
The Device Status is dependant upon the actual condition of the device and the
communication reliability or routes to the device. Typically the device status will show as
Okay, however sometimes it may be shown as Unknown or even Failed. If the status is
Unknown, make sure the device is in a good location and the network has been optimized
through Rediscovery. An Unknown status occurs when the communication to and from
the device has timed out waiting for a response. If the status is Failed, make sure the
device is plugged in and functioning correctly. If the actual device has failed it may need
replacing or removed.
HomeRun Holdings Corp. © 2010 68
HomeRun Holdings Corp. HomeManager ST
Device Window
F.P.O.
10
9
7
8
6
1
4
2
3
(1) Device Icon – Iconic representation of device based on the device type.
5
(2) Device Status – Communication status of device such as Okay, Unknown, or
Failed.
(3) Device Id – Z-wave network node id.
(4) Device Controls – Items that enable control of the device, varies based on device
type.
(5) Advanced Controls – Advanced controls such as Battery Level, About, and
Association management. The options vary based on device type and supported
features.
(6) Poll – Manually poll the device requesting a status update.
(7) Device Name – Name of the device, configured by user.
(8) Device Location – Physical location of device, configured by user.
(9) Device Category – Category of device, configured by user.
(10) Device Type – Type of the device such as Switch, Dimmer, Thermostat,
etc.
HomeRun Holdings Corp. © 2010 69

HomeRun Holdings Corp. HomeManager ST
Switch
F.P.O.
3
1
2
(1) Device On – Turn device On.
(2) Device Off – Turn device Off.
(3) Switch State – Current state of device; Off or On.
HomeRun Holdings Corp. © 2010 70

HomeRun Holdings Corp. HomeManager ST
Dimmer
F.P.O.
1
3
2
4
(1) Device On – Turn device On.
(2) Device Off – Turn device Off.
(3) Light Level – Set device to specific dim level.
(4) Switch State – Current state of device; 0% (Off) to 100% (On)
HomeRun Holdings Corp. © 2010 71
HomeRun Holdings Corp. HomeManager ST
Thermostat
F.P.O.
1
3
2
4
(1) Operating Mode – Set thermostat in specific mode.
(2) Setpoint – Thermostat setpoint and temperature to configure.
(3) Temperatire – Current temperature.
(4) Target – Target temperature and thermostat mode.
HomeRun Holdings Corp. © 2010 72

HomeRun Holdings Corp. HomeManager ST
Sensor
F.P.O.
1
2
3
(1) Sensor State – Current state of the sensor; Active or Inactive.
(2) Activation – Scene to trigger when the sensor changes to the Active state.
(3) Deactivation – Scene to trigger when the sensor changes to the Inactive state.
HomeRun Holdings Corp. © 2010 73

HomeRun Holdings Corp. HomeManager ST
Window Covering
F.P.O.
1
4
3
2
(1) Device Open – Open device.
(2) Device Close – Close device.
(3) Device Position – Set device to specific position or level.
(4) Window Covering State – Current state of device; 0% (Close) to 100% (Open).
HomeRun Holdings Corp. © 2010 74
HomeRun Holdings Corp. HomeManager ST
Entry Control
F.P.O.
1
3
2
(1) Device Lock – Lock device.
(2) Device Unlock – Unlock device.
(3) Lock State – Current state of device; Locked or Unlocked.
HomeRun Holdings Corp. © 2010 75

HomeRun Holdings Corp. HomeManager ST
Static Controller
F.P.O.
1
2
(1) Scene Mapping – Configuration of buttons to activate scenes.
(2) Update – Update routing and scene configuration of controller.
HomeRun Holdings Corp. © 2010 76

HomeRun Holdings Corp. HomeManager ST
Portable Controller
F.P.O.
1
2
(1) Scene Mapping – Configuration of buttons to activate scenes.
(2) Update – Update routing and scene configuration of controller.
HomeRun Holdings Corp. © 2010 77
HomeRun Holdings Corp. HomeManager ST
Scene
F.P.O.
1
2
(1) Scene Devices – Configuration of states to set devices in when scene is triggered.
(2) Trigger – Manually activate or trigger the scene.
Schedule
F.P.O.
1
2
3
4
(1) Schedule Days – Days when the schedule is to run.
(2) Schedule Time – Specific time when schedule is to run or Sunrise or Sunset.
(3) Scene – Scene to activate when the scheduled day and time elapses.
(4) Trigger – Manually activate or trigger the schedule.
HomeRun Holdings Corp. © 2010 78
HomeRun Holdings Corp. HomeManager ST
Reference
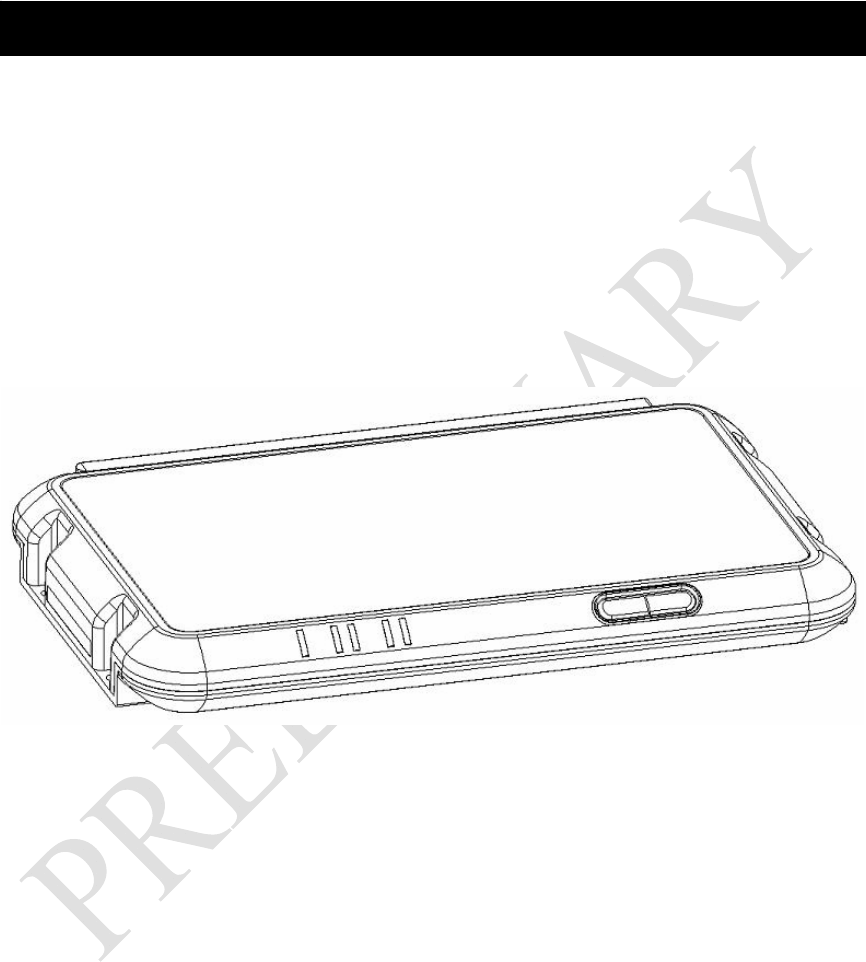
HomeManager ST
F.P.O.
3
2
1
5
4
(1) Power Reset
(2) Power Port
(3) USB Port
(4) Serial Port
(5) Ethernet Port
F.P.O.
5
6
7
8
2
1
3
4
(1) Machine Address
(2) Power Indicator
(3) Ethernet Indicator
(4) Web Indicator
(5) ZWave Indicator
(6) Activity Indicator
(7) Include Button
(8) Exclude Button
HomeRun Holdings Corp. © 2010 79
HomeRun Holdings Corp. HomeManager ST
HomeRun Holdings Corp. © 2010 80
Login Screen
6
5
4
3
1
F.P.O.
2
(1) Network Health – Health of network from better to worse: green, yellow, red.
(2) Login Window – Login screen to select account level and password.
(3) Access Type – Local access or Remote access to HomeManager.
(4) Access Level – Account level of user
(5) Messages – Number of journal messages available.
(6) Time – Local time of HomeManager.
HomeRun Holdings Corp. HomeManager ST
HomeRun Holdings Corp. © 2010 81
Home Screen
7
6
5
4
3
2
2
1
F.P.O.
(1) Main Menu – Menu to access Control Panel, Devices, Floorplan, etc.
(2) Menu Navigation Arrows – Move menu items left or right to access more
options.
(3) Lighting Devices – Shortcut to access devices in the lighting category.
(4) Climate Devices – Shortcut to access devices in the climate category.
(5) Security Devices – Shortcut to access devices in the security category.
(6) Controller Devices – Shortcut to access devices in the controllers category.
(7) Miscellaneous Devices – Shortcut to access devices in the miscellaneous
category.

HomeRun Holdings Corp. HomeManager ST
HomeRun Holdings Corp. © 2010 82
Control Panel Screen
1
F.P.O.
2
(1) Control Panel Menu – Menu to select control panel items.
(2) Control Panel Window – Wizard for control panel item.

HomeRun Holdings Corp. HomeManager ST
HomeRun Holdings Corp. © 2010 83
Devices Screen
2
1
F.P.O.
3
(1) Devices Menu – Menu to select devices.
(2) Devices Menu Filter – Sort devices by various options.
(3) Devices Window – Window for selected device.

HomeRun Holdings Corp. HomeManager ST
HomeRun Holdings Corp. © 2010 84
Scenes Screen
2
1
F.P.O.
3
(1) Scenes Menu – Menu to select scenes.
(2) Scenes Menu Filter – Sort scenes by various options.
(3) Scenes Window – Window for selected scene.

HomeRun Holdings Corp. HomeManager ST
HomeRun Holdings Corp. © 2010 85
Schedules Screen
2
1
F.P.O.
3
(1) Schedules Menu – Menu to select schedules.
(2) Schedules Menu Filter – Sort schedules by various options.
(3) Schedules Window – Window for selected schedule.
HomeRun Holdings Corp. HomeManager ST
HomeRun Holdings Corp. © 2010 86
Floorplan Screen
3
1
F.P.O.
2
(1) Floorplan Tools – Tools to navigate and change display settings of floorplan.
(2) Floorplan Image – Image representing floorplan for current level.
(3) Floorplan Level Selection – Select level of floorplan.

HomeRun Holdings Corp. HomeManager ST
HomeRun Holdings Corp. © 2010 87
Journal Screen
2
1
F.P.O.
(1) Journal Date Selection – List of dates to view journal entries.
(2) Journal Entries – List of journal entries or events occurred for the selected date.

HomeRun Holdings Corp. HomeManager ST
HomeRun Holdings Corp. © 2010 88
Compliance
FCC Regulatory Information:
NOTE: This equipment has been tested and found to comply with the limits for a Class B
digital device, pursuant to Part 15 of the FCC Rules. These limits are designed to provide
reasonable protection against harmful interference in a residential installation.
This equipment generates, uses, and can radiate radio frequency energy and, if not
installed and used in accordance with the instructions, may cause harmful interference to
radio communications. However, there is no guarantee that interference will not occur in
a particular installation. If this equipment does cause harmful interference to radio or
television reception, which can be determined by turning the equipment off and on, the
user is encouraged to try to correct the interference by one or more of the following
measures:
• Reorient or relocate the receiving antenna.
• Increase the separation between the equipment and receiver.
• Connect the equipment into an outlet on a circuit different from that to which the
receiver is connected.
• Consult the dealer or an experienced radio/TV technician for help.
Warning: Changes or modifications to this device not expressly approved by HomeRun
Holdings Corp. could void the user’s authority to operate the equipment.
IC Regulatory Information:
This Class B digital apparatus meets all requirements of the Canadian Interference
Causing Equipment Regulations. Operation is subject to the following two conditions: (1)
this device may not cause harmful interference, and (2) this device must accept any
interference received, including interference that may cause undesired operation.
Cet appareillage numérique de la classe B répond à toutes les exigences de l'interférence
canadienne causant des règlements d'équipement. L'opération est sujette aux deux
conditions suivantes: (1) ce dispositif peut ne pas causer l'interférence nocive, et (2) ce
dispositif doit accepter n'importe quelle interférence reçue, y compris l'interférence qui
peut causer l'opération peu désirée.
The term “IC:” before the radio certification number only signifies that Industry Canada
technical specifications were met.