The Whistler Group SC10 Digital Trunking Handheld Radio Scanner User Manual
The Whistler Group Digital Trunking Handheld Radio Scanner
UserManual.wiki
>
The Whistler Group
>
SC10 User Manual
>
User Manual
Contents
1.
User Manual
2.
User Manual ws1080 and 1088 Part 1
3.
User Manual ws1080 and 1088 Part 2
4.
User Manual pro-668
User Manual
Navigation menu
Upload a User Manual
Namespaces
Wiki Guide
HTML
PDF
Info
Views
User Manual
Discussion / Help
Navigation

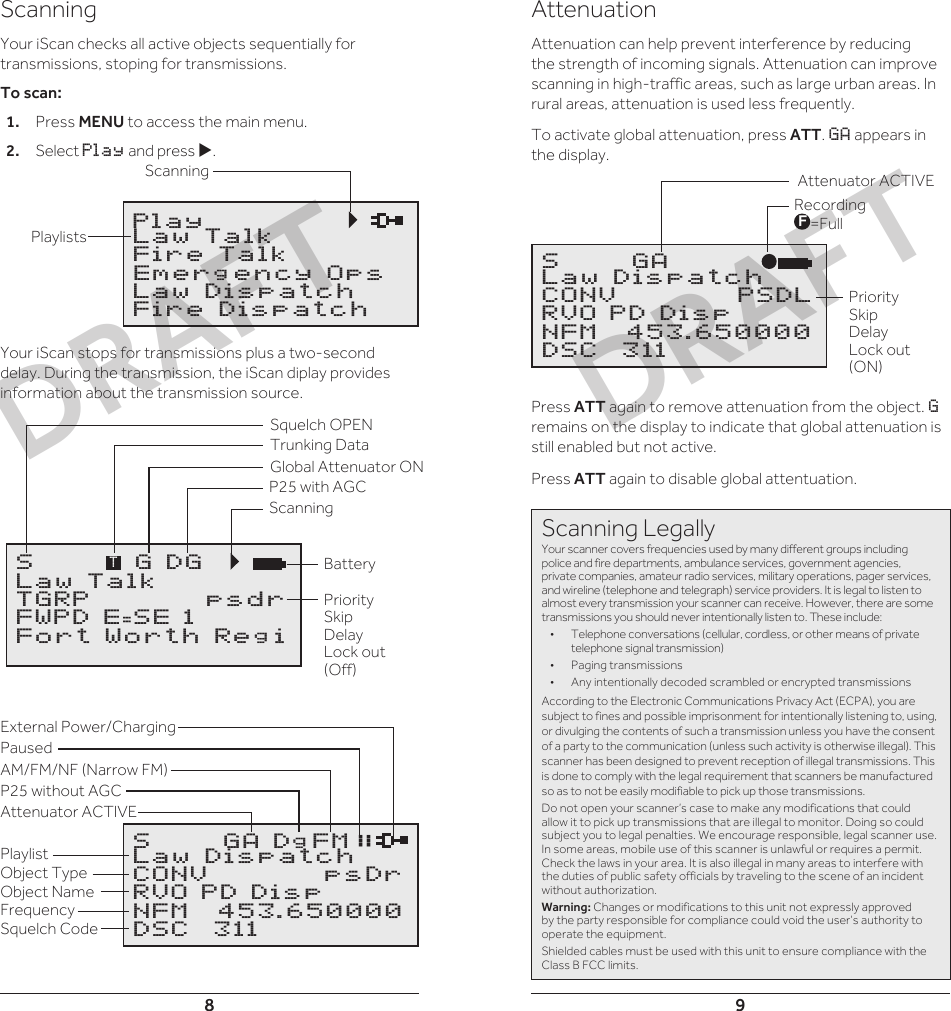
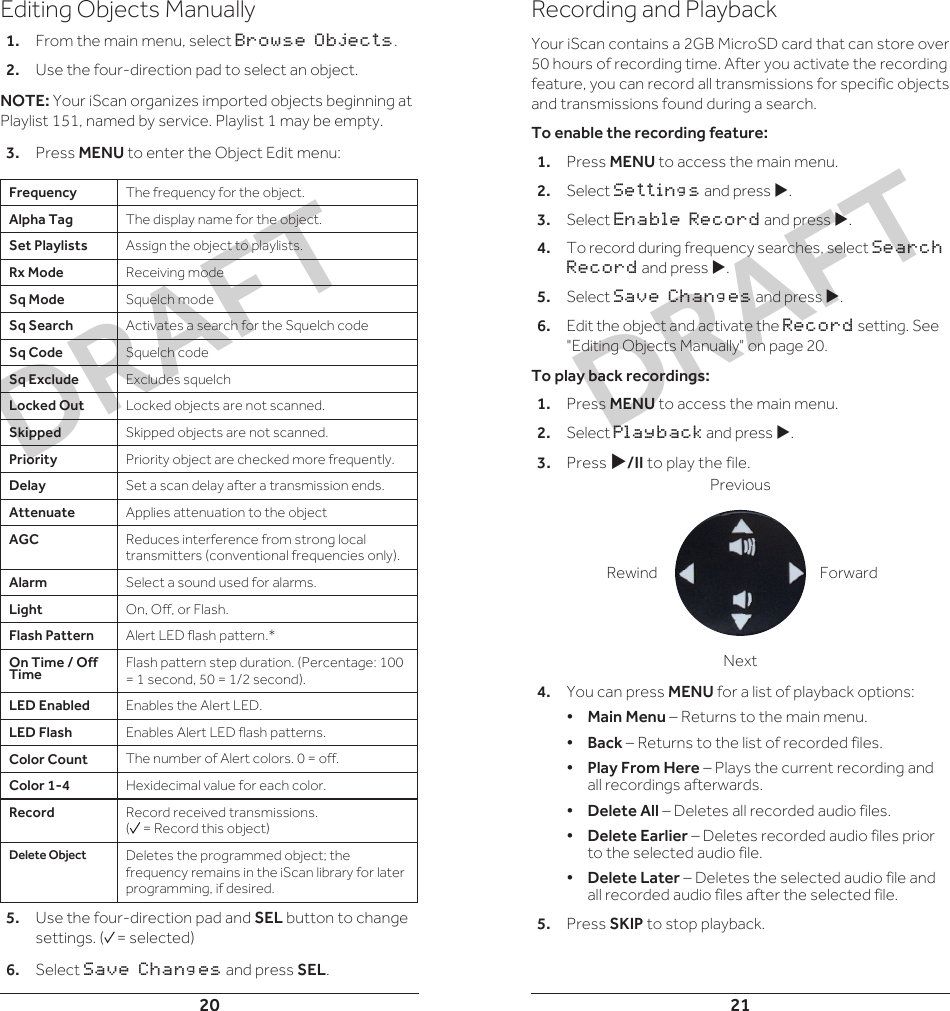
![22 23Alert LED Settings1. From the main menu, select Browse Objects. 2. Use the four-direction pad to select an object.3. Press MENU to enter the Object Edit menu:Flash PatternsEach character defines a flash pattern step, and eight characters (steps) define the flash pattern. On Time / O TimeOn Time and Off Time determine the flash rate:• 100 = 1 second, 50 = 1/2 second• Lower Value = Faster RateCommon Hexidecimal Color Codes• FF0000 (red)• 00FF00 (green)• FFFF00 (yellow)• FFFFFF (white)• 0000FF (blue)• 9900CC (purple)FlashPattern =on =off0123456789ABCDEFSingle-Color Solid (Red)FlashPattern: [Blank]LEDEnable:√ColorCount: 1Color1: FF0000Single-Color FlashingFlashPattern: AAAAAAAAOnTime: 50 OffTime: 50 LEDEnable:√LEDFlash:√ColorCount: 1Color1: FF0000 (Red)Two-Color StrobeFlashPattern: A8A8A8A8OnTime: 10 OffTime: 10 LEDEnable:√LEDFlash:√ColorCount: 2Color1: FF0000 (Red)Color2: 0000FF (Blue)Three-Color Flashing (Slow)FlashPattern: 22222222OnTime: 50 OffTime: 50 LEDEnable:√LEDFlash:√ColorCount: 3Color1: FF0000 (Red)Color2: FFFFFF (White)Color2: 0000FF (Blue)A A AA A A A A2 2 22 2 2 2 2AlertLEDA 8 AA 8 A 8 8DRAFTDRAFT](https://usermanual.wiki/The-Whistler-Group/SC10.User-Manual/User-Guide-2397508-Page-12.png)