The Whistler Group TP01 Tire Scout User Manual tirescout qxp
The Whistler Group Tire Scout tirescout qxp
UserManual.wiki
>
The Whistler Group
>
TP01 User Manual
User Manual
Navigation menu
Upload a User Manual
Namespaces
Wiki Guide
HTML
PDF
Info
Views
User Manual
Discussion / Help
Navigation

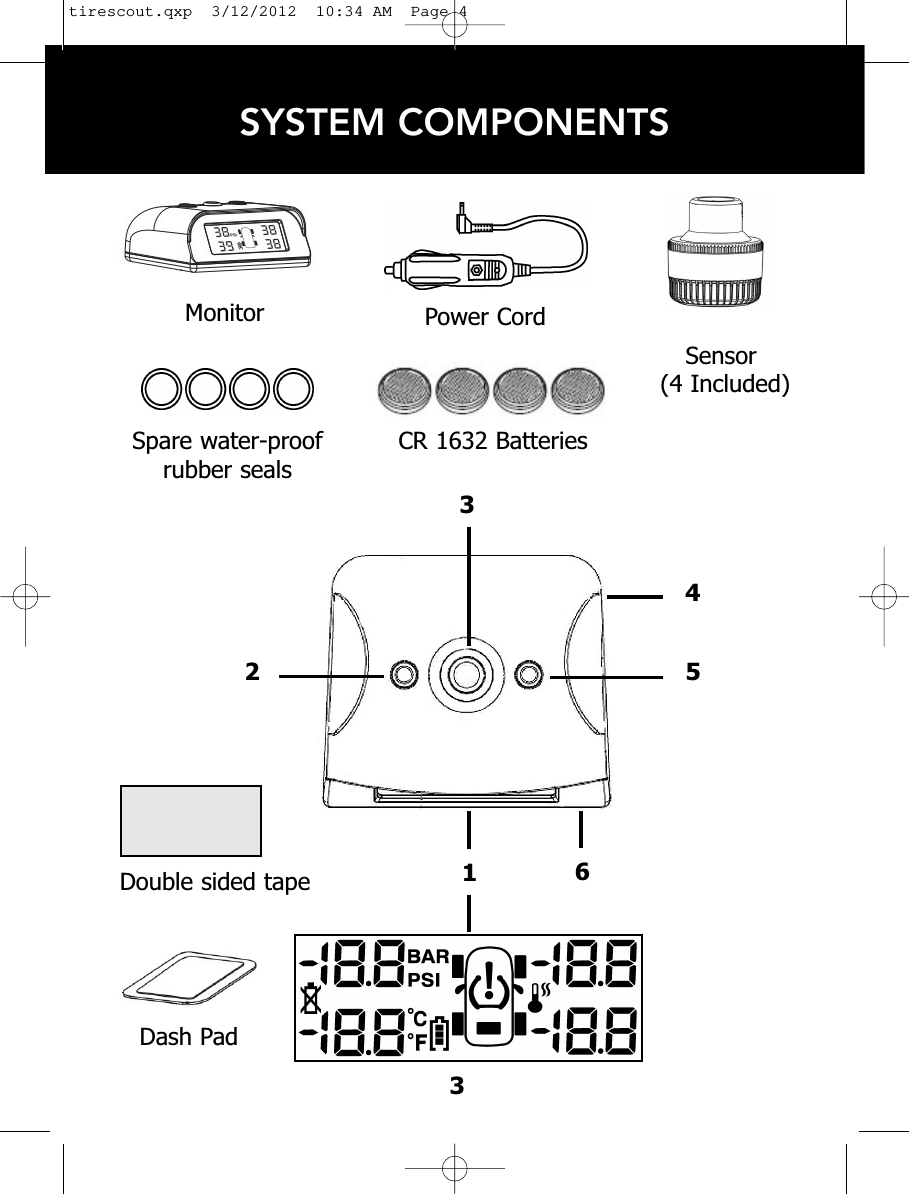
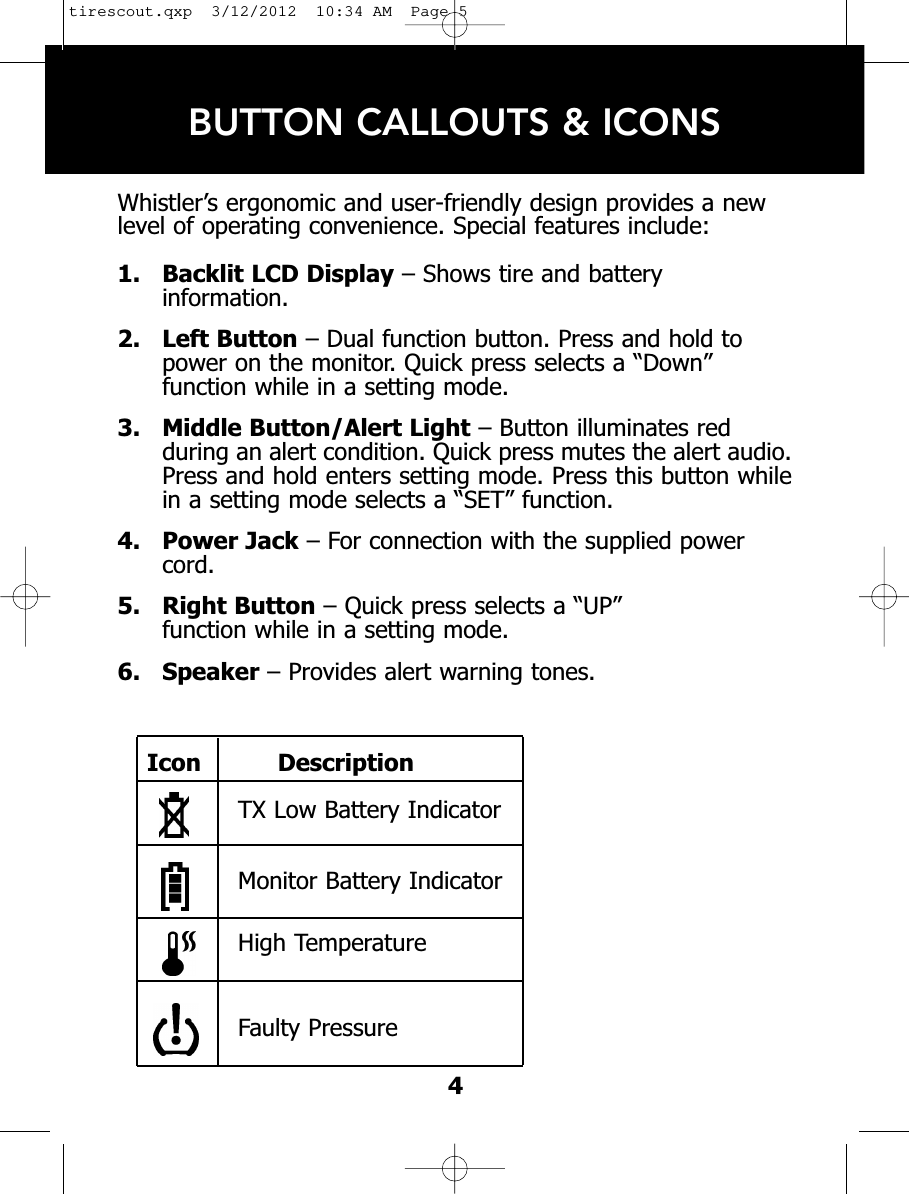
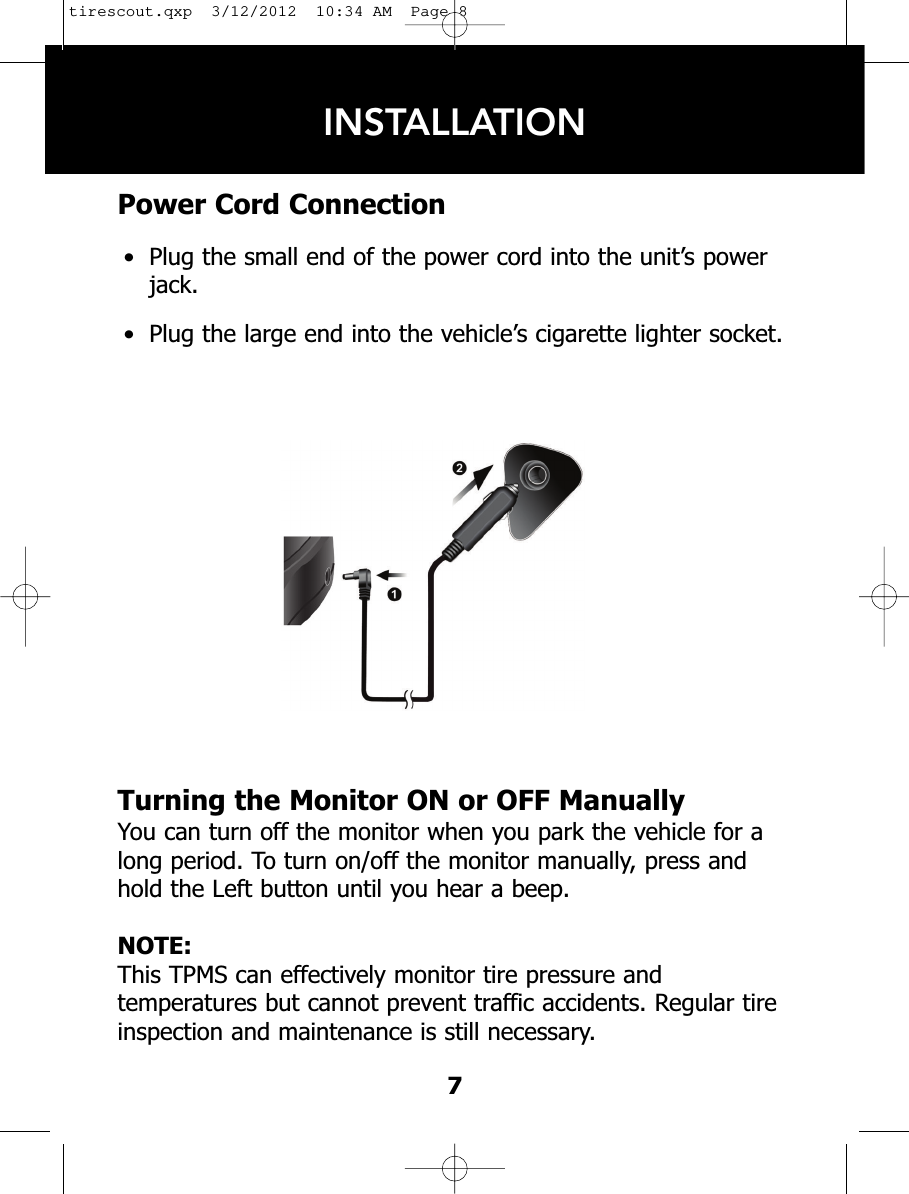
![INSTALLATIONSensor LocationThe factory has already set up the codes for the 4 sensorswhich are provided and matched withthe monitor, and each sensor ismarked with the corresponding tireposition [LF, RF, LR, RR, SP (sparetire)]. Install each sensor in the correcttire position as per the diagram.Sensor Battery Installation1. Unscrew the sensor cap.2. Insert battery into sensor ensuring that thepositive “+” is facing up. 3. Replace the sensor cap.Repeat for the remaining sensors.Sensor Installation1. Unscrew the tire valve cap and mount the tire sensor in its place.2. Save the tire valve cap in the vehicle’s storage compartment. Important: Only hand tighten the sensor cap to prevent possible damage to the sensor.CAUTION:After proper sensor installation, it ishighly recommended to check for anyair leakage. Test by spraying soapywater on the valve stem and look forbubbles. No bubbles, no leaks.Retighten if bubbles appear.5tirescout.qxp 3/12/2012 10:34 AM Page 6](https://usermanual.wiki/The-Whistler-Group/TP01/User-Guide-1676979-Page-6.png)