Thermodynamic Process Control LFC002TPCSA ARM 9 - 2.4 GHz transmitter User Manual usr manual
Thermodynamic Process Control, LLC ARM 9 - 2.4 GHz transmitter usr manual
UserManual.wiki
>
Thermodynamic Process Control
>
LFC002TPCSA User Manual
usr manual
Navigation menu
Upload a User Manual
Namespaces
Wiki Guide
HTML
PDF
Info
Views
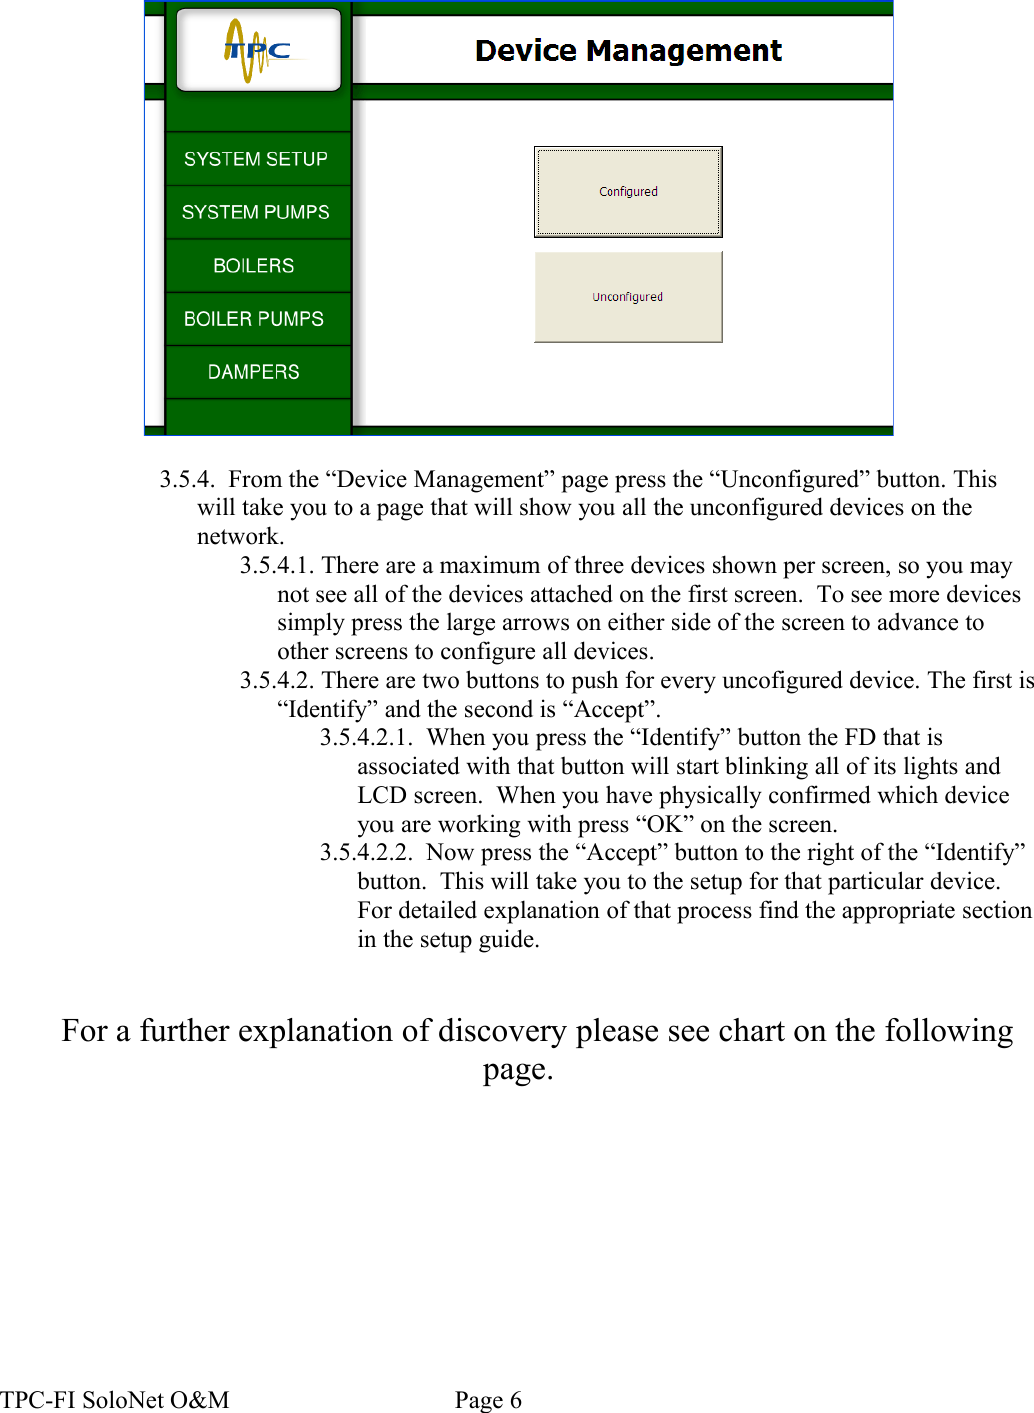
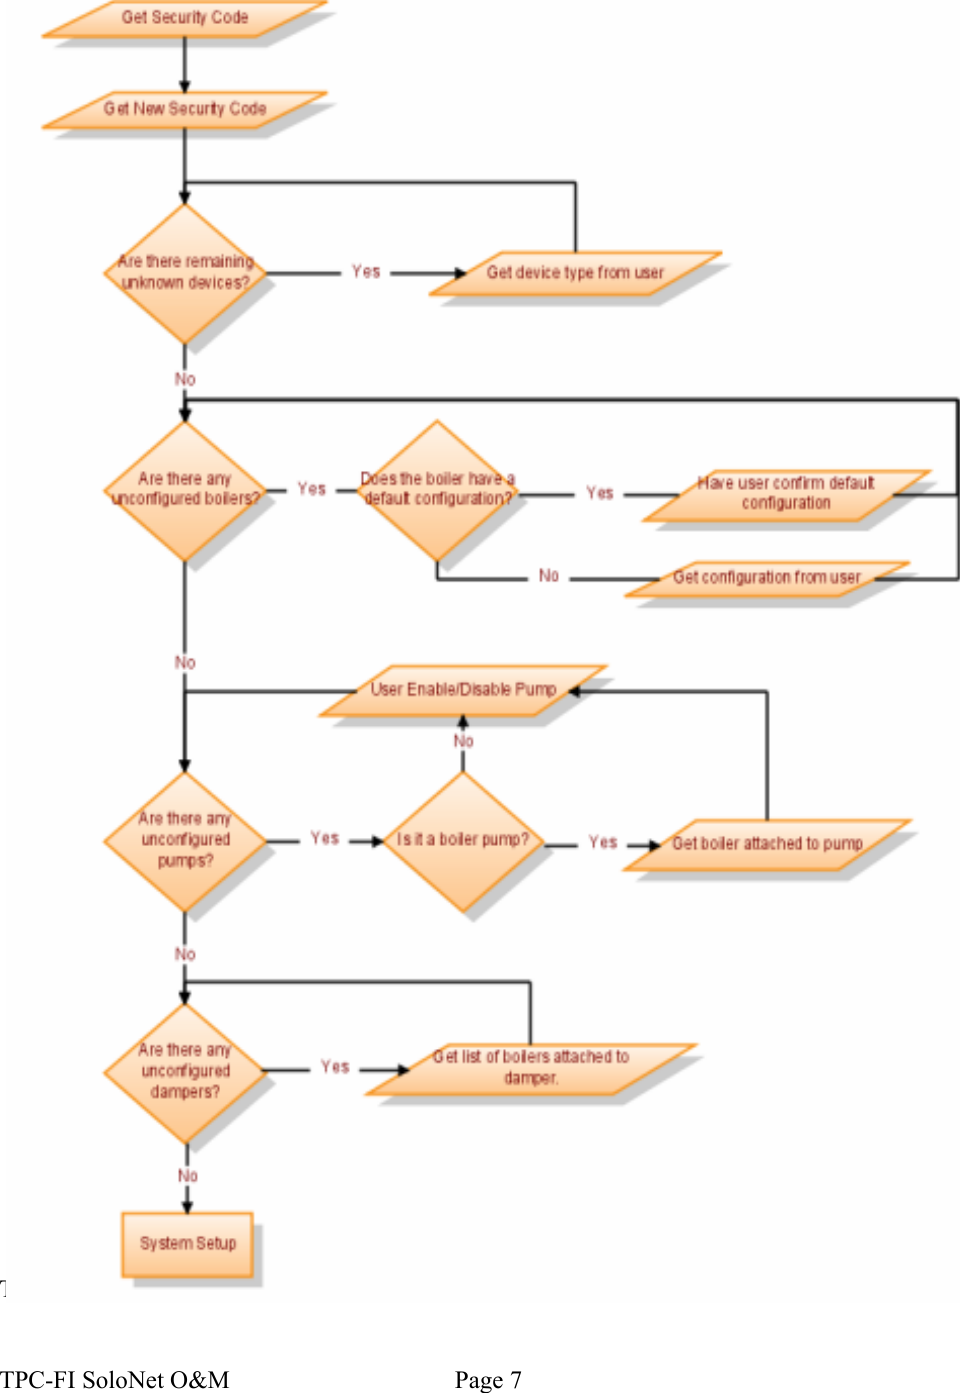
User Manual
Discussion / Help
Navigation