Thomson 2-8223A DECT 6.0 CORDLESS HANDSET SPEAKERPHONE/ANSWERING User Manual USERES MANUAL
Thomson Inc. DECT 6.0 CORDLESS HANDSET SPEAKERPHONE/ANSWERING USERES MANUAL
UserManual.wiki
>
Thomson
>
2 8223A User Manual
USERES MANUAL
Navigation menu
Upload a User Manual
Namespaces
Wiki Guide
HTML
PDF
Info
Views
User Manual
Discussion / Help
Navigation


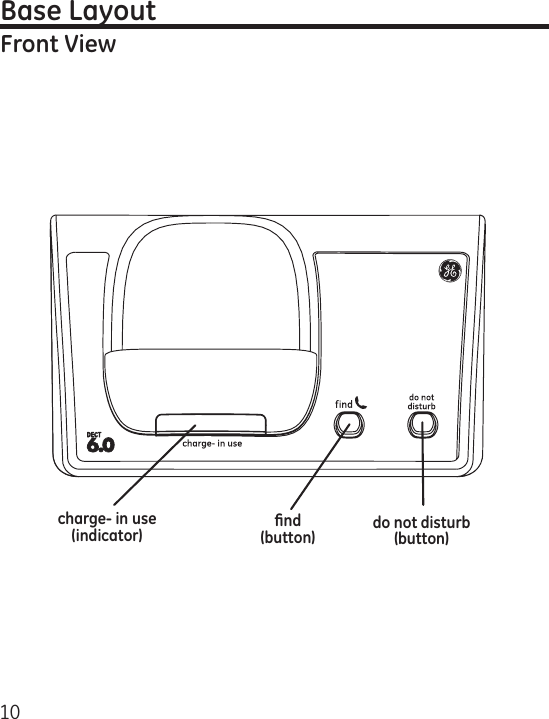
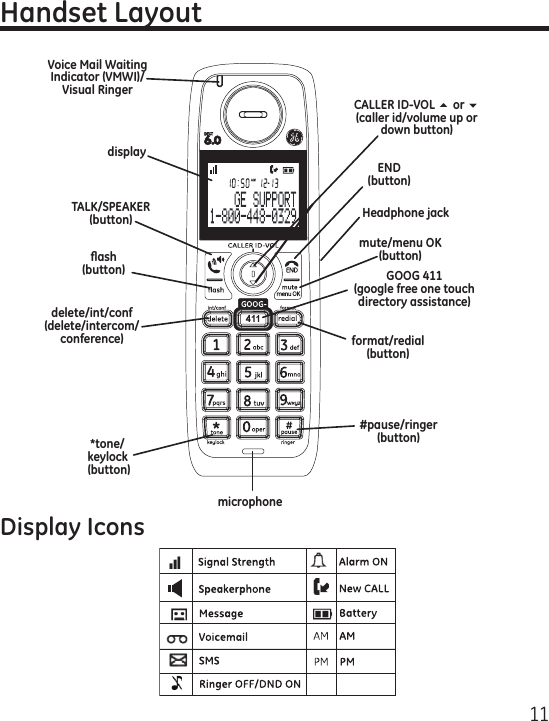
![0You may erase messages in the following three ways:1. Press and release button.. Press the and buttons to select and play the message you want to erase.. Press the button, the current message is erased, and the next message plays.1. Make sure the phone is (not in TALK mode). Press and hold the button until “ALL OLD MESSAGES ERASED” is announced. 1. Press button to access the answering system. The screen displays ANSWERER REMOTE ACCESS.. Press the (Key ] on the handset.. Press the button on the handset to erase a message during playback.You may access the answering system with the cordless handset or from any tone-dial compatible telephone.Use the corresponding handset keys just like you would use the base buttons (see “Answering System Setup”). The button functions are located on the handset above each number key. For example, to play messages:• Press the button to access the answering system.• Press the button to play the message.• When you are nished listening to your messages, press the button to exit.](https://usermanual.wiki/Thomson/2-8223A/User-Guide-914740-Page-40.png)