Thomson 2-8300A US DECT Phone - Base User Manual users manual
Thomson Inc. US DECT Phone - Base users manual
UserManual.wiki
>
Thomson
>
2 8300A User Manual
users manual
Navigation menu
Upload a User Manual
Namespaces
Wiki Guide
HTML
PDF
Info
Views
User Manual
Discussion / Help
Navigation


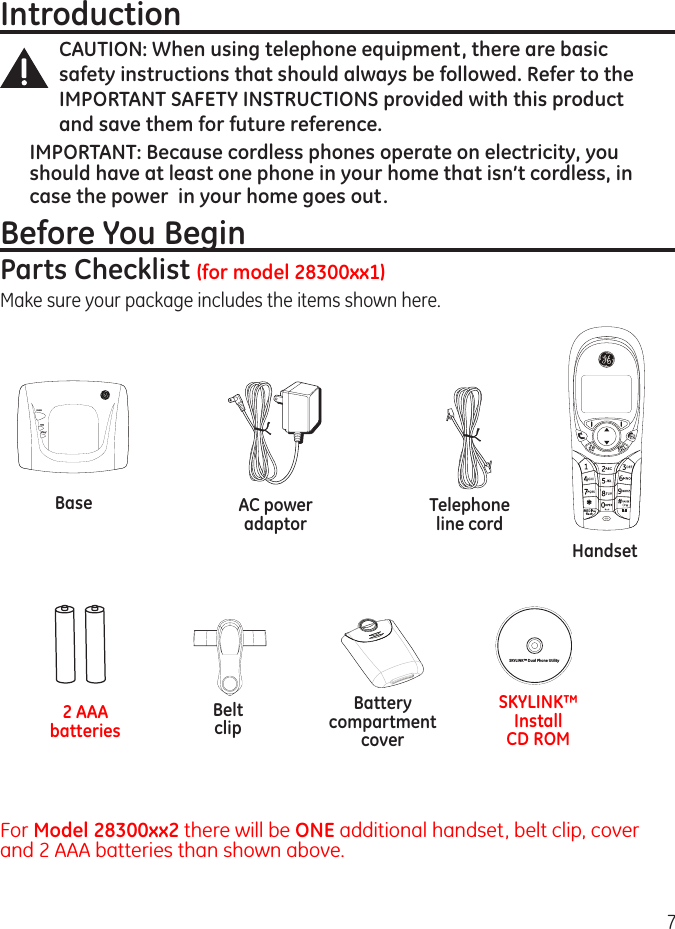
![9PAGEBase LayoutHandset LayoutSoft Key Left (SKL/ | )(button)displayspeaker(button)#/PAUSE/lock (button)INT (intercom button)END CALL(button)REDIAL/flash (button)* (button)5/6Navigational(button)Landline (button) [traditional call]earpieceSkype (button)[computer call]Soft Key Right (SKR/ | )(button)microphoneIN USE/CID/VM(indicator)CHARGE(indicator)PAGE(indicator)](https://usermanual.wiki/Thomson/2-8300A/User-Guide-693610-Page-9.png)
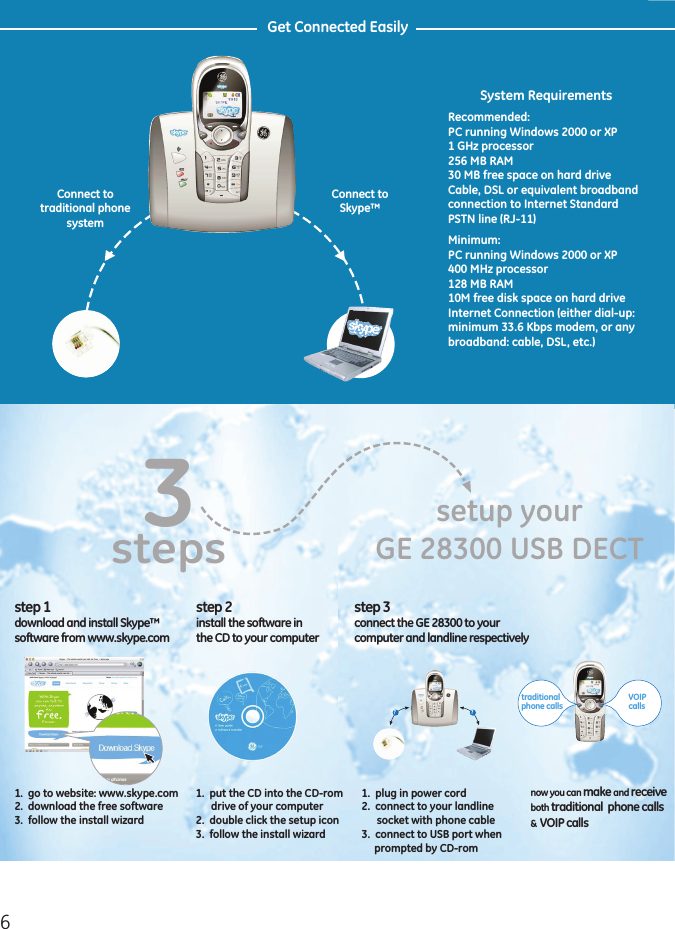
![11. Plug one end of the telephone line cord into the TEL jack on the back of the base and the other end into a modular jack.3. Plug the AC power converter into the electrical outlet and the DC connector into the jack on the back of the base.4. Place the handset in the base cradle. The CHARGE indicator turns on, verifying the battery is charging.Allow handset to charge for 16 hours prior to first use. If you do not properly charge the handset, battery performance is compromised.CAUTION: Use only the model 5-2711 power adaptor that came with this unit. Using other power adaptors may damage the unit.Software InstallationVerify that the USB cable is NOT connected to computer before starting this installation.1. Insert the SKYLINK™ -in-1 Phone Utility CD in your personal computer. Select the install language, and click [Next] to continue. -OR- If the following screen does not appear, nd SKYLINK™ Setup and click on icon to start the SKYLINK™ -in-1 Phone Utility procedure.. Wait while the program prepares setup. Click [Cancel] ONLY if you wish to stop the installation.3. The Welcome screen appears. Click [Next] to continue or [Cancel] to terminate the procedure.](https://usermanual.wiki/Thomson/2-8300A/User-Guide-693610-Page-11.png)
![14. Select "I accept the terms of the license agreement" and click [Next] to continue. 5. The folder where setup installs the les can be changed. The default directory is “C:\Program Files\SKYLINK\SKYLINK™ -in-1 Phone Utility”. Press [Change…] to change the directory. Click [Next] to continue.6. The Install screen appears. Click [Install] to continue.7. Connect USB cable when prompted. Wait 10 seconds, then press [OK].8. Install is complete. Click [Finish] to exit the program.NOTE: If the Skype program is not installed on the computer, it will prompt you to install. Click [Yes], to automatically go to the Skype website where you can download the Skype software. Click [No] to cancel.9. A Skype prompt window will pop-up, select "Allow this program to use Skype" to assure that the Skylink ™-in-1 Phone Utility works properly with Skype.Important: If you do not select “Allow this program to use Skype” the Skype connection will not work with this phone and you will have to remove and reinstall the SKYLINK™ 2-in-1 Phone Utility software.After successful installation, a SKYLINK™ -in-1 Phone Utility icon will appear in your toolbar menu. Right-Click on the icon to view the following options;Open Monitor Opens the SKYLINK™ -in-1 Phone Utility Monitor window, see SKYLINK™ Operation Guide section for more detail.](https://usermanual.wiki/Thomson/2-8300A/User-Guide-693610-Page-12.png)

![14To Uninstall the SoftwareIf you choose to uninstall the software from the PC. 1. Go to the START/Setting/Control Panel, choose the icon "Add or Remove Programs".. Select "SKYLINK™ -in-1 Phone Utility" from the list and click [Remove] to uninstall. 3. A message box appears. Click [Yes] to continue, or [No] to cancel.4. After uninstalling the program, click [Finish] to exit.Programming the TelephoneLCD Standby ScreenThe screen displays various information regarding the status of your phone the handset name, time, battery charge status and wallpaper when idle. It also displays information when using Skype.The handset menu gives you access to all of the built-in features. Press the Menu (SKL) button to display the rst menu Contacts, and press 5 or 6 buttons to navigate to the desired menu option. Press the OK (SKL) button to activate a menu option. For details on programming, refer to the applicable section.The "Tools" screen allows you to register handsets, easily deregister handsets from the drop down menu, reset your base's PIN code to "0000" and update your SKYLINK™ software by clicking on the [Start] button in "Online Update".](https://usermanual.wiki/Thomson/2-8300A/User-Guide-693610-Page-14.png)
![0Auto AnswerIf Auto Answer is set to ON, you can answer the phone by lifting it from cradle. If Auto Answer is OFF, you must press the (Skype) or (landline) or (speaker) or INT button on the handset From the HANDSET SETTINGS menu;1. Use the 6 or 5 button to scroll to AUTO ANSWER.. Press the OK (SKL) button to enter the menu.3. Use the 6 or 5 button to scroll to On or Off. 4. Press the OK (SKL) button to save your selection.Handset NameThis menu allows you to enter a name for the handset, which displays on the idle screen. From the HANDSET SETTINGS menu;1. Use the 6 or 5 button to scroll to HANDSET NAME.. Press the OK (SKL) button to enter the menu.3. Enter the handset name (up to 10 characters). More than one letter is stored in each of the number keys. Directory Keypad Character Selection Button Character Order Button Character Order 1 [- ? ! , . & = : # ” $] 7 [p q r s] [P Q R S] [a b c] [A B C] 8 [t u v] [T U V] 3 [d e f] [D E F] 9 [wxy z] [W XY Z] 4 [g h i] [G H I] 0 space 5 [j k l] [J K L]] * shift lowercase, capitals, numbers 6 [m n o] [M NO] # [* + % @ ( ) / [ ] ; _ ’ ^]4. Press the OK (SKL) button to save your selection.NOTE: If you make a mistake, use the DELETE (SKR) button to backspace and delete one character at a time or press and hold to delete all.](https://usermanual.wiki/Thomson/2-8300A/User-Guide-693610-Page-20.png)
![5Function1. Make sure your phone is OFF (not in talk mode). . Press the MENU (SKL) button and use the 6 or 5 button to scroll to FUNCTION. 3. Press the OK (SKL) button to enter the menu.GamesThis menu allows you to choose from two different games. From the FUNCTION menu;1. Use the 6 or 5 button to scroll to GAMES.. Press the OK (SKL) button to enter the menu.3. Use the 6 or 5 button to select the desired game.6. Press the OK (SKL) button to conrm your selection. NOTE: Select [Play] to start the game. Select [Help] to get operational guide for the game.Telephone OperationPower On/Off OperationThe handset is powered on by connecting the battery or if the handset has been powered down, press and hold the END CALL button for seconds.To power off the handset, press and hold the END CALL button for seconds.Note: If the handset is on the cradle, only the (speaker) and END CALL buttons are functional.Making a CallTraditional Landline Calls1. Pick up the handset, and press the (landline) or (speaker) button. Wait for a dial tone, then dial the desired number. -OR- Dial the number and then press the (landline) or (speaker) button.NOTE: If you make a mistake, use the DELETE (SKR) button to backspace and delete one number at a time.. When nished, press the END CALL button or place the handset in the base cradle to hang up.](https://usermanual.wiki/Thomson/2-8300A/User-Guide-693610-Page-25.png)