Tiankan Electronic Technology TX4060 Professional Wireless Pool Thermometer User Manual WT0122 manual
Tiankan Electronic Technology CO.,LTD. Professional Wireless Pool Thermometer WT0122 manual
Users Manual
Professional Wireless Pool Thermometer
Manual
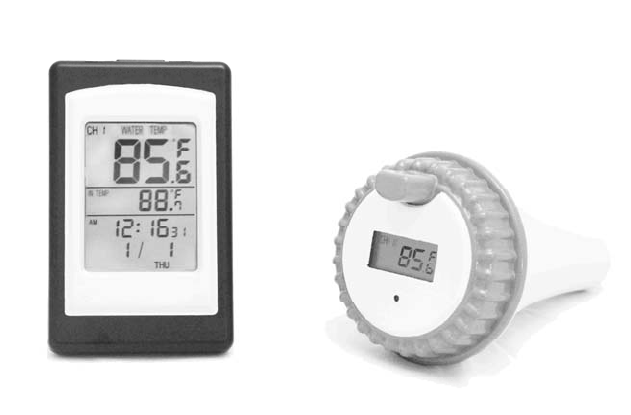
Receiver WT0122
z Specifications:
1、Calendar from Jan. 1st, 2000 to Dec.31st ,2099
2、Alarm with snooze;
3、Water temperature range:-40 to +70℃℃;
4、Indoor temperature range:-50 to +70℃℃;
5、433MHZ wireless receives 3 channel's water temperature;
6、Max/min record of indoor and water temperature.
z Keys:
Totally has 6 keys:
1﹑[MAX/MIN]: (1)In normal clock mode, press [MAX/MIN] to toggle the display of
maximum ,minimum and current data of indoor temperature and water
temperature.
(2)In hour setting mode, press [MAX/MIN] to toggle 12/24 hour format.
2﹑[CHANNEL]:(1)In normal clock mode, press [CHANNEL] to toggle water temperature of
channel 1/2/3.
(2)While alarming, press [CHANNEL] to get into snooze.
(3)In date mode, press [CHANNEL] to enter the RF test mode.
3﹑[CLEAR]:While displaying max/min indoor temperature and water temperature, press [CLEAR] to
clear maximum/minimum data.
4﹑[MODE]:Press [MODE] to toggle modes
5﹑[SET]:Press [SET] to get into setting mode.(Such as year, month, date, hour, minute, second etc.)
6﹑[/]℃℉: (1)Press [ / ] to toggle temperature unit between or .℃℉ ℉ ℃
(2) Press [ / ] to adjust the data.℃℉
(3) In alarm non-setting mode, press [ / ] to turn on/off the℃℉ bell.

z Reset operation
LCD displays fully for 2 seconds, then enter clock non-setting mode. At this time, it begins checking
indoor temperature immediately, and entering RF testing state to receive 3 channels data.
z Operation statement
Press [MODE] to toggle between clock mode and alarm mode.
1﹑Clock Mode
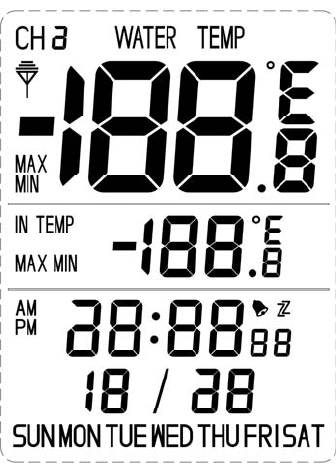
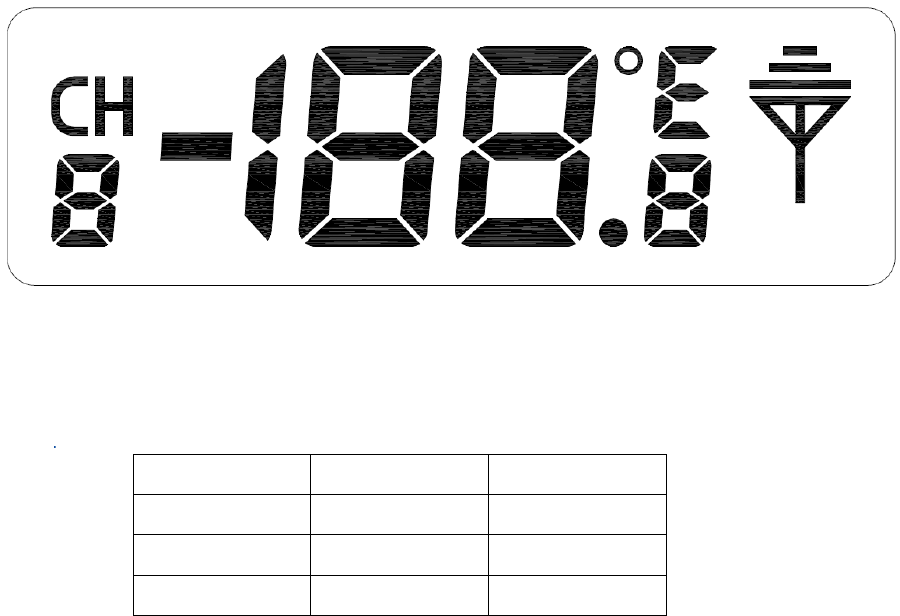
In normal clock mode, LCD displays indoor temperature, water temperature, month, date, week, hour,
minute, second, and reception channel.As shown below:
1) Press [SET] to enter hour setting mode. While the number of hour is flashing, press [ /℃℉] to
adjust it. And press [ / ] for more than 2 seconds to adjust in 8HZ.℃℉
2) Press [SET] to switch to minute setting mode. While the number of minute is flashing, press
[ / ] to adjust it. And press [ / ] for more than 2 seconds to adjust in 8HZ.℃℉ ℃℉
3) Press [SET] to switch to second setting mode. While the number of second is flashing, press
[ / ] to clear it. ℃℉
4) In clock setting mode, press [MAX/MIN] to toggle between 12/24 hour format.
5) Press [SET] to confirm and quit clock setting mode, then back to normal clock mode.
6) In normal clock mode, press [MAX/MIN] to toggle the maximum, minimum and current data of
indoor temperature and water temperature. When displaying maximum/minimum data of indoor
and water temperature, press [CLEAR] to clear the data.
7) Press [CHANNEL] to toggle channel 1,channel 2 and channel 3.
8) Press [ / ] to toggle temperature unit between and .℃℉ ℉ ℃
9) If no button is pressed in 1 minute in clock setting mode, it will be back to clock mode
automatically.
10) Press [MODE] to enter alarm mode.
2﹑Alarm Mode
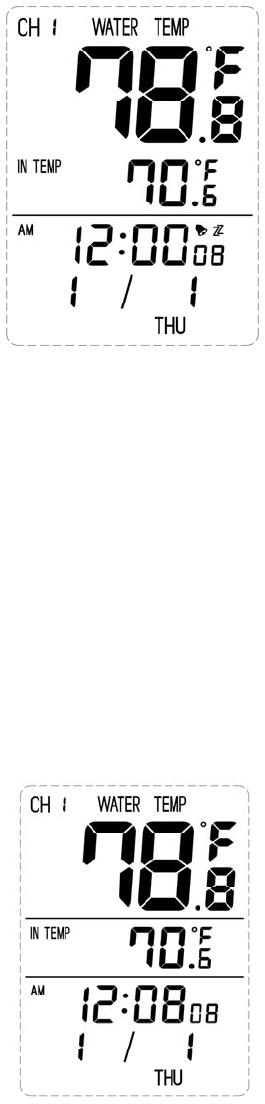
In normal clock mode, press [MODE] to enter alarm mode. LCD displays indoor temperature, water
temperature, month, date, week, hour, minute, and reception channel.As shown below:
1) Press [SET] to enter hour setting mode. While the number of hour is flashing, press [ / ] to ℃℉
adjust it. And press [ / ] for℃℉ more than 2 seconds to adjust in 8HZ;
2) Press [SET] to enter munite setting mode. While the number of minute is flashing, press [ / ] ℃℉
to adjust it. And press [ / ] for more than 2 seconds to adjust in 8HZ℃℉ ;
3) Press [SET] to confirm and quit.
4) In alarm non-setting mode, press [ / ] to open/close alarm.℃℉
5) If no button is pressed in 1 minute in alarm setting mode, it will be back to clock mode
automatically.
6) Press[MODE] to enter date mode.
3﹑Date Mode
In normal clock mode, press [MODE] 2 times to enter date mode. LCD displays indoor temperature,
water temperature, month, date, week. As shown below:
1) Press [SET] to enter year setting mode. While the number of year is flashing, press [ / ] to ℃℉
adjust it. And press [ / ] for more than 2 seconds to adjust in 8HZ.℃℉
2) Press [SET] to switch to month setting mode. While the number of month is flashing, press
[ / ] to adjust it. And press [ / ] for more than 2 seconds to adjust in 8HZ.℃℉ ℃℉
3) Press [SET] to switch to date setting mode. While the number of date is flashing, press [ / ] ℃℉
to adjust it. And press [ / ] for more than 2 seconds to adjust in 8HZ. ℃℉
4) Press [SET] to confirm and quit.
5) If no button is pressed in 1 minute in date setting mode, it will be back to clock mode
automatically.
6) In date mode, press [CHANNEL] to enter the RF test condition, and it will quit this mode
automatically 10 minutes later.
4﹑Alarm with Snooze
1)When alarm is open, and it reaches the alarm time,it will buzzer“BI“ for one minute with the
alarm icon flashing.
2)While alarming, press [CHANNEL] or no key pressed to stop alarming. At this time, "ZZ" icon
flashing, it will enter snooze. Five minutes later, it will alarm. After the 5th alarming, it will no
longer enter snooze.
3)While alarming, press any key to stop alarming, but not enter Snooze;
4)While snoozing, quit snoozing if enter setting mode.
5)In any mode, when reaches alarming time, press any key to close the alarm.
z Power Consumption:
1、Alkaline battery:2×AAA 1.5V
2、Battery life:about 12 months
z Dimension(H×W×D)
119mm×74mm×21mm.
Transmitter TX4060
z Temperature Range:-40 to +℃60℃
z Operating instructions:
After the batteries are inserted it starts to sense water temperature and transmit temperature data to
main station. Red LED flashes while transmission is proceeding.
z Channel and unit option instructions:
1 2 CHANNEL
DOWN DOWN CH1
UP DOWN CH2
DOWN UP CH3
Pull down both the switch 1 and 2 to enter Channel 1.
Push up the switch 1, and pull down the switch 2 to enter Channel 2.
Pull down the switch 1 and push up the switch 2 to enter Channel 3.
DOWN UP
3
℉ ℃
Pull down the switch 3 to choose ℉.
Push up the switch 3 to choose ℃.
z Power consumption
1、Alkaline battery:2×AA 1.5V
2、Battery life:about 12 months
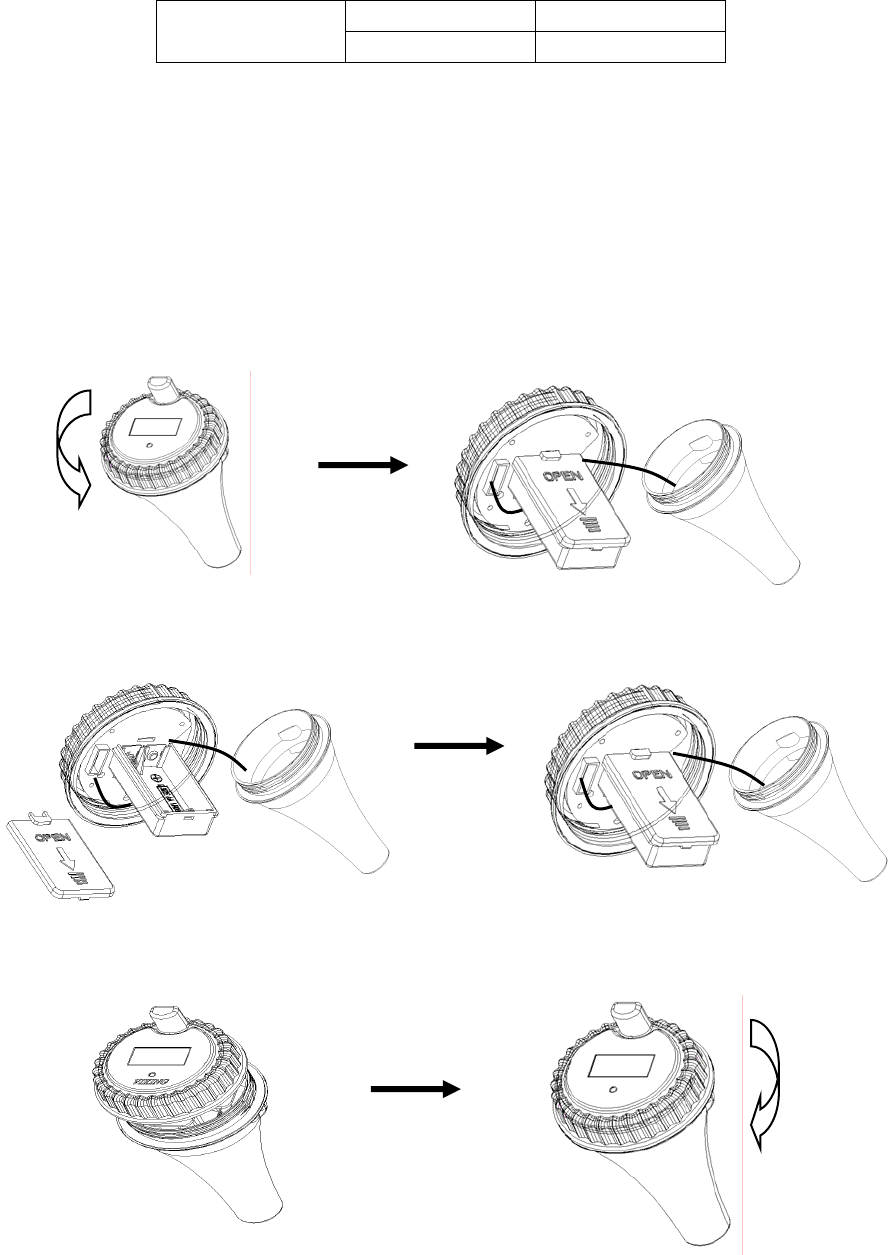
z Battery Installation Instruction
1. Twist off the cover of the transmitter, then take out the battery compartment:
2. Open the cover of battery compartment, install batteries, then close the battery cover:
3. Install the waterproof loop, then close and tighten the cover of the transmitter.
Changes or modifications not expressly approved by the party responsible for compliance could void the
user’s authority to operate the equipment.
This device complies with Part 15 of the FCC Rules. Operation is subject to the following
two conditions:
(1) this device may not cause harmful interference, and
(2) this device must accept any interference received, including interference that may cause
undesired operation.