Tiankan Electronic Technology WT0224 Wireless Swimming Pool Thermometer User Manual WT0222 WT0224
Shenzhen TianKan Electronic Technology Co.,Ltd Wireless Swimming Pool Thermometer WT0222 WT0224
Users manual
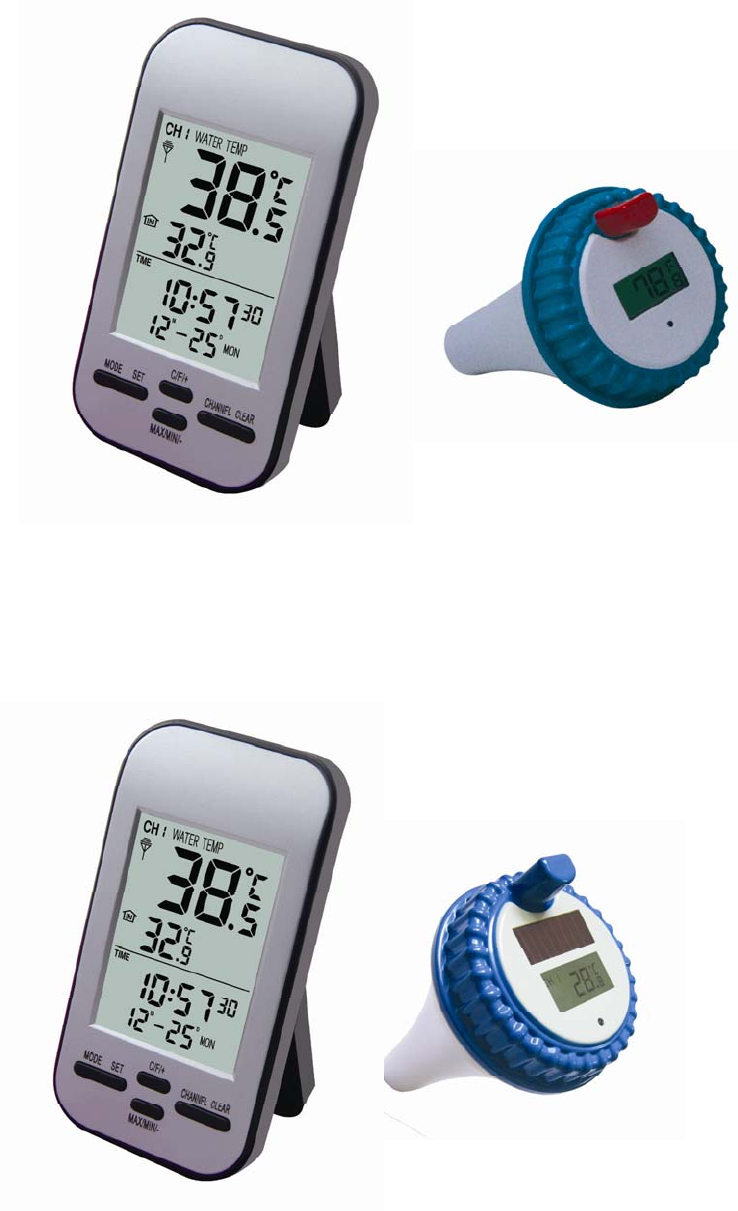
Wireless Pool Swimming Thermometer
WT0222
WT0224
Receiver
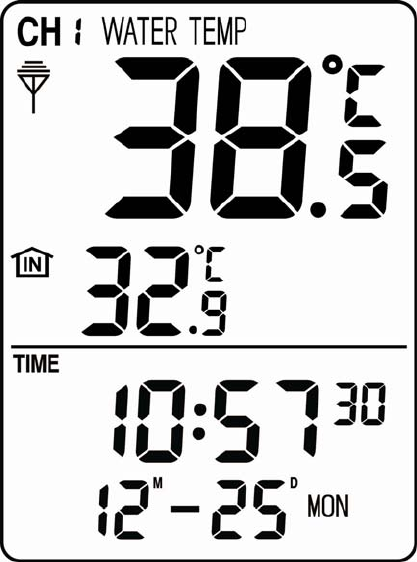
z LCD Display
1﹑Water temperature
2.Indoor temperature
3.Clock
4.Date
5.Week
6.Alarm
7.Max/Min reacord of indoor temperature & water temperaure;
8.Receiver with 433MHz frequencey can receive water
temperature from 3 channels
1
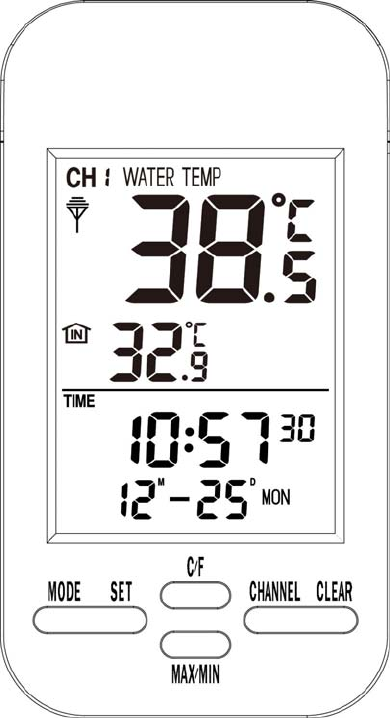
z Front View
z Buttons Configuration
1. [MODE]button: press [MODE]button to switch and enter in
model of alarm, date and clock.
2. [SET] button: press [SET]button to enter in setting mode.
3. [C/F] button: press [C/F] to switch temperature unit between
℉ and ℃.
4. [MAX/MIN] button: press [MAX/MIN] to review max/min
recorde to temperature.
5. [CHANNEL] button: press [CHANNEL] to switch channel
2
among CH1, CH2 & CH3.
6. [CLEAR] button: Clear temperature record in max/min
temperature record display by pressing [CLEAR] button.
z Operation Setting
Power on the receiver with full display for 2 seconds and a beep
indicates staring normal display,and immediately monitor indoor
temperature and search receiving water temperaure.
Clock setting
(1)In normal display mode, press [SET] button to set clock.
(2)The being set data will flash with 1HZ frequency.
(3)The setting sequency: 12/24ÆHourÆMinuteÆSecond
(4)Press [MODE] to exist setting mode when finished setting.
(5)Press [C/F] to increase the setting value.
(6)Press [MAX/Min] button to decrease the setting value.
(7)Press [EXIT] button to save the setting and return normal display
mode.
(8)In the setting mode, it will return the normal display mode if
there is any operation within 30 seconds.
Alarm setting.
(1)In the normal display mode, press[MODE]button to enter in
Clock and sart setting by pressing [SET].
(2)The being set column flahes with 1HZ frequency.
(3)The setting sequency: HourÆMinuteÆAlarm on/Off
3
(4)Press [MODE] button to exit setting after finish setting.
(5)Press[C/F] button to increase the setting value
(6)Press[MAX/Min] button to derease the setting value.
(7)Press [EXIT] to save the setting and return normal display mode.
(8)In the setting mode, it will return the normal display mode if
there is any operation within 30 seconds.
Remark: in the clock setting mode, press [C/F] button to turn on/off
alarm.
Date setting
(1)In the normal display mode, press[MODE] button , and then
press [SET] Button to set date.
(2)The being set column flashes with frequency of 1HZ.
(3)The setting sequency is YearÆMonthÆDay
(4)Press [MODE] button to save setting after finish setting.
(5)Press [C/F] button to increase the setting value.
(6)Press [Max/Min] button to decrease the setting value.
(7)Press[EXIT] to save the setting and exit the setting mode.
(8)In the setting mode, it will return normal display mode if there is
not any operation within 30 seconds.
Specification
1. Indoor Temperature ange: 0℃ to 50℃,Accuracy:+/-1℃
2.Water temperature: 0℃ to 60℃,Accuracy:+/-1℃
3.RF working distance: within 100m in opern space.
4
4.Data updating: 30 seconds/per time.
Factory Setting
1﹑Time: January 1, 2004, AM12:00:00
2﹑12 hour format
3﹑Alarm: AM12:00
4﹑Alarm status: OFF
5﹑Channel of water temperature: CH1
6﹑Max/Min temperature record of indoor temperature and water
temperaure: NO
7. RF Receiver can receiver water temperature from 3 channels.
Power consumption
1、Alkaline battery: 2x AAA 1.5V
2、Batteries life span: 12 month
5

Transmitter
z Feature
1﹑0℃ to +60℃ water temperature monitoring
2﹑Temperature unit: ℉/℃
3﹑Frequency: RF 433MHz, Working Distance: 100m in open
space
4﹑Channel for option: CH1, CH2 & CH3
5、Solar panel charges batteries if rechargeable batteries are
used(This function only applies to WT0224, WT0222 has not this
function)
● Operation:
Temperature monitor and data transmitter
1﹑Interval of data transmitting: 30seconds
2﹑Where data is transmitting, there is signal icon on the LCD and
meanwhiel the LED light flashes.
● Switches description
Taking the following chart to set channel, temperature unit and turn
on solar charging function accordingly (the machine must has solar
6
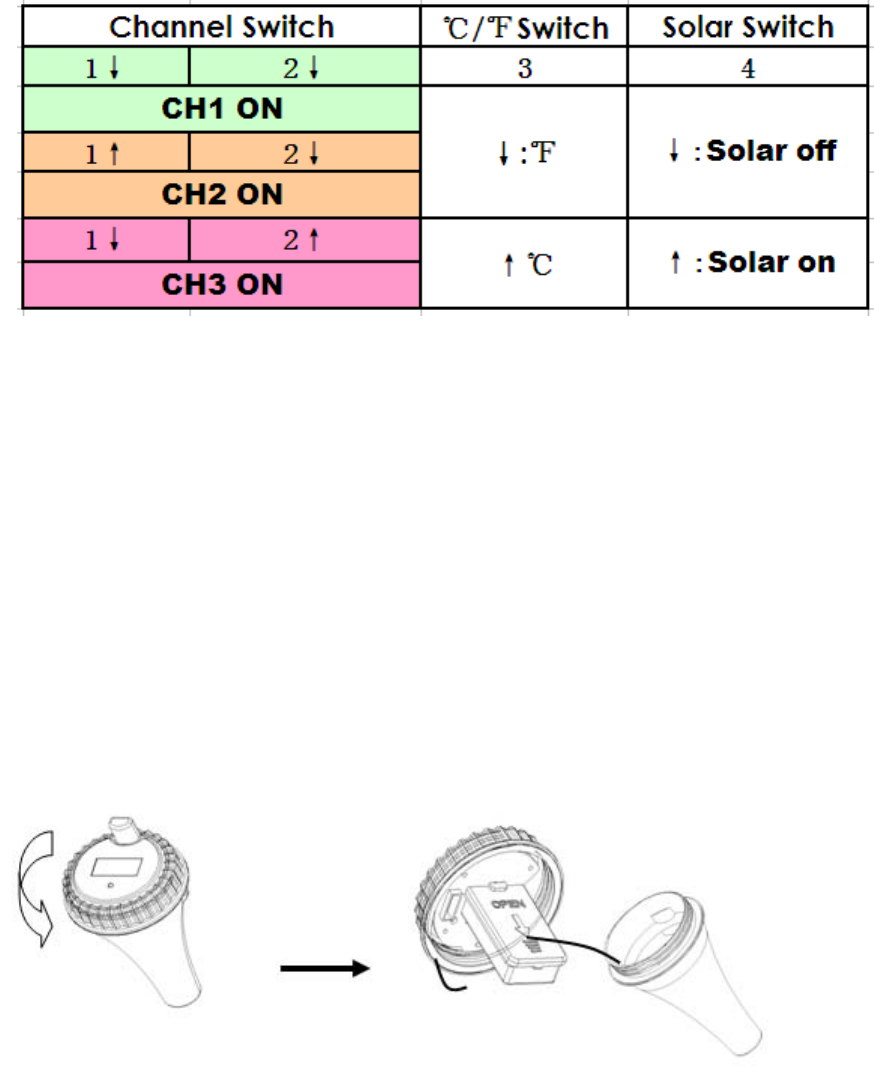
panel and use rechargeable batteries if you turn on solar charging
function, Otherwise, pls keep solar switch in off position).
● Power supply
1、 Alkaline battery or rechargeable battery: 2×AA 1.5V
2、 Battery life span: alkaline battery 12 months
Rechargeable battery 2 year.
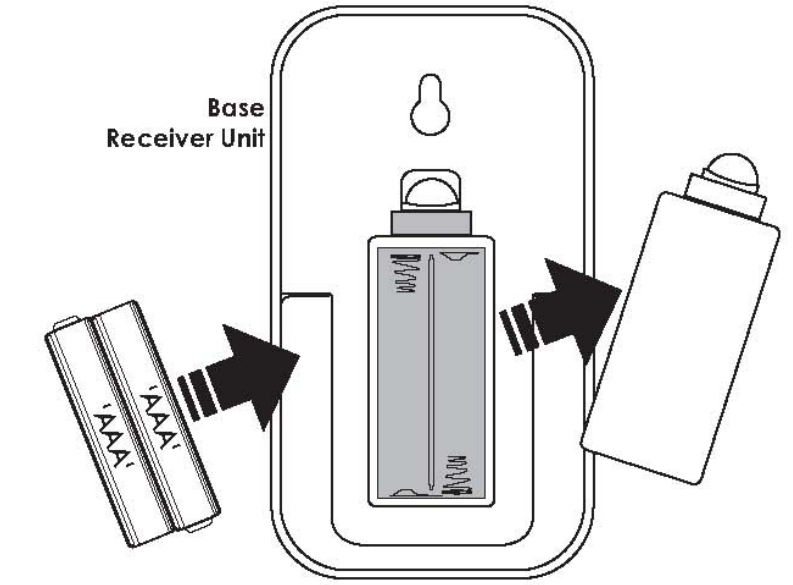
● Battery Installation Instruction
1. Twist off the cover of the transmitter, then take out the battery
compartment:
2.Open the cover of battery compartment, install batteries, then
close the battery cover:
7
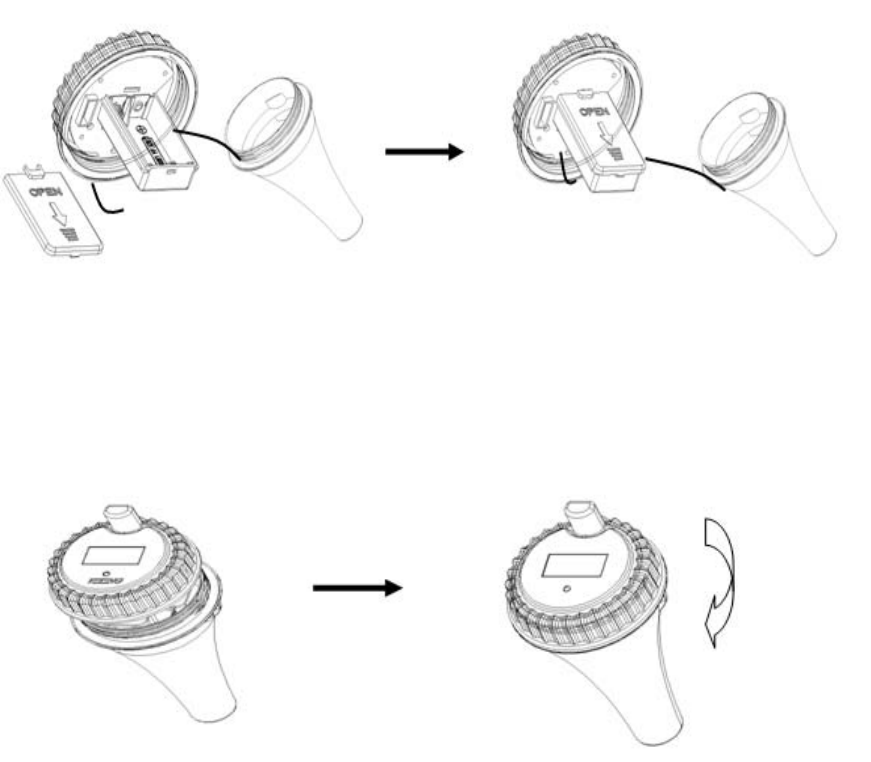
3.Install the waterproof loop, then close and tighten the cover of
the transmitter.
8
FCC Statement
Changes or modifications not expressly approved by the party responsible for compliance could void
the user's authority to operate the equipment.
This equipment has been tested and found to comply with the limits for a Class B digital device,
pursuant to Part 15 of the FCC Rules. These limits are designed to provide reasonable protection
against harmful interference in a residential installation. This equipment generates uses and can
radiate radio frequency energy and, if not installed and used in accordance with the instructions, may
cause harmful interference to radio communications. However, there is no guarantee that
interference will not occur in a particular installation. If this equipment does cause harmful
interference to radio or television reception, which can be determined by turning the equipment off
and on, the user is encouraged to try to correct the interference by one or more of the following
measures:
-- Reorient or relocate the receiving antenna.
-- Increase the separation between the equipment and receiver.
-- Connect the equipment into an outlet on a circuit different from that to which the receiver is
connected.
-- Consult the dealer or an experienced radio/TV technician for help
This device complies with part 15 of the FCC rules. Operation is subject to the following two
conditions (1)this device may not cause harmful interference, and (2) this device must accept any
interference received, including interference that may cause undesired operation.