Tobii Dynavox T10 DynaVox T10 User Manual S6 DynaVoxT10 Book
Dynavox Systems LLC DynaVox T10 S6 DynaVoxT10 Book
UserManual.wiki
>
Tobii Dynavox
>
T10 User Manual
>
User Manual
Contents
1.
User Manual
2.
Users Manual
User Manual
Navigation menu
Upload a User Manual
Namespaces
Wiki Guide
HTML
PDF
Info
Views
User Manual
Discussion / Help
Navigation


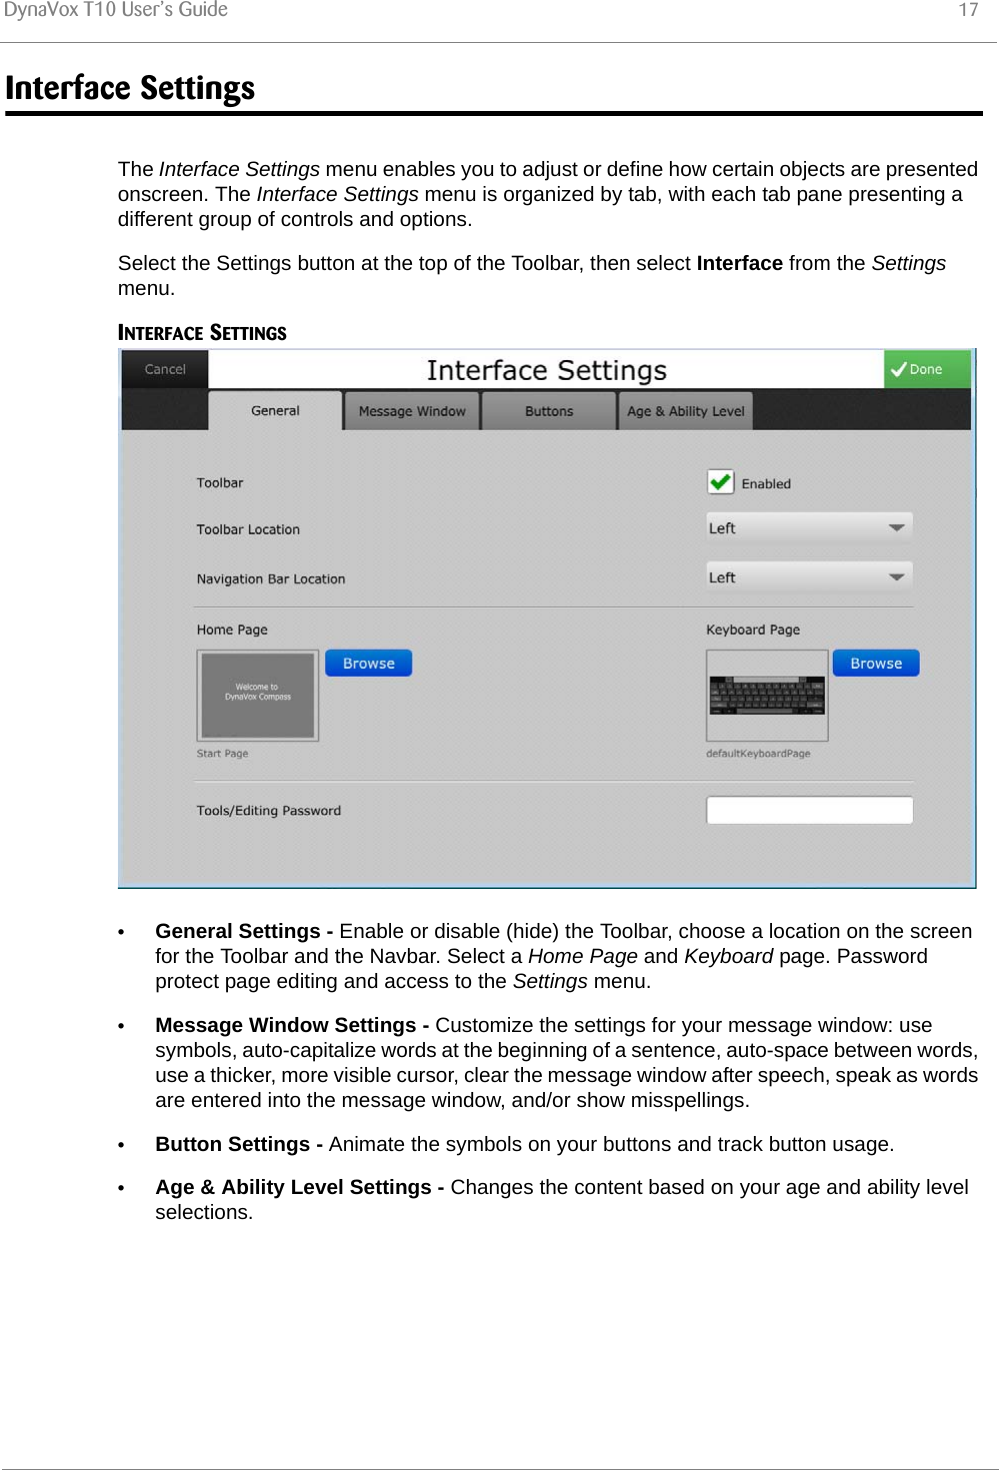
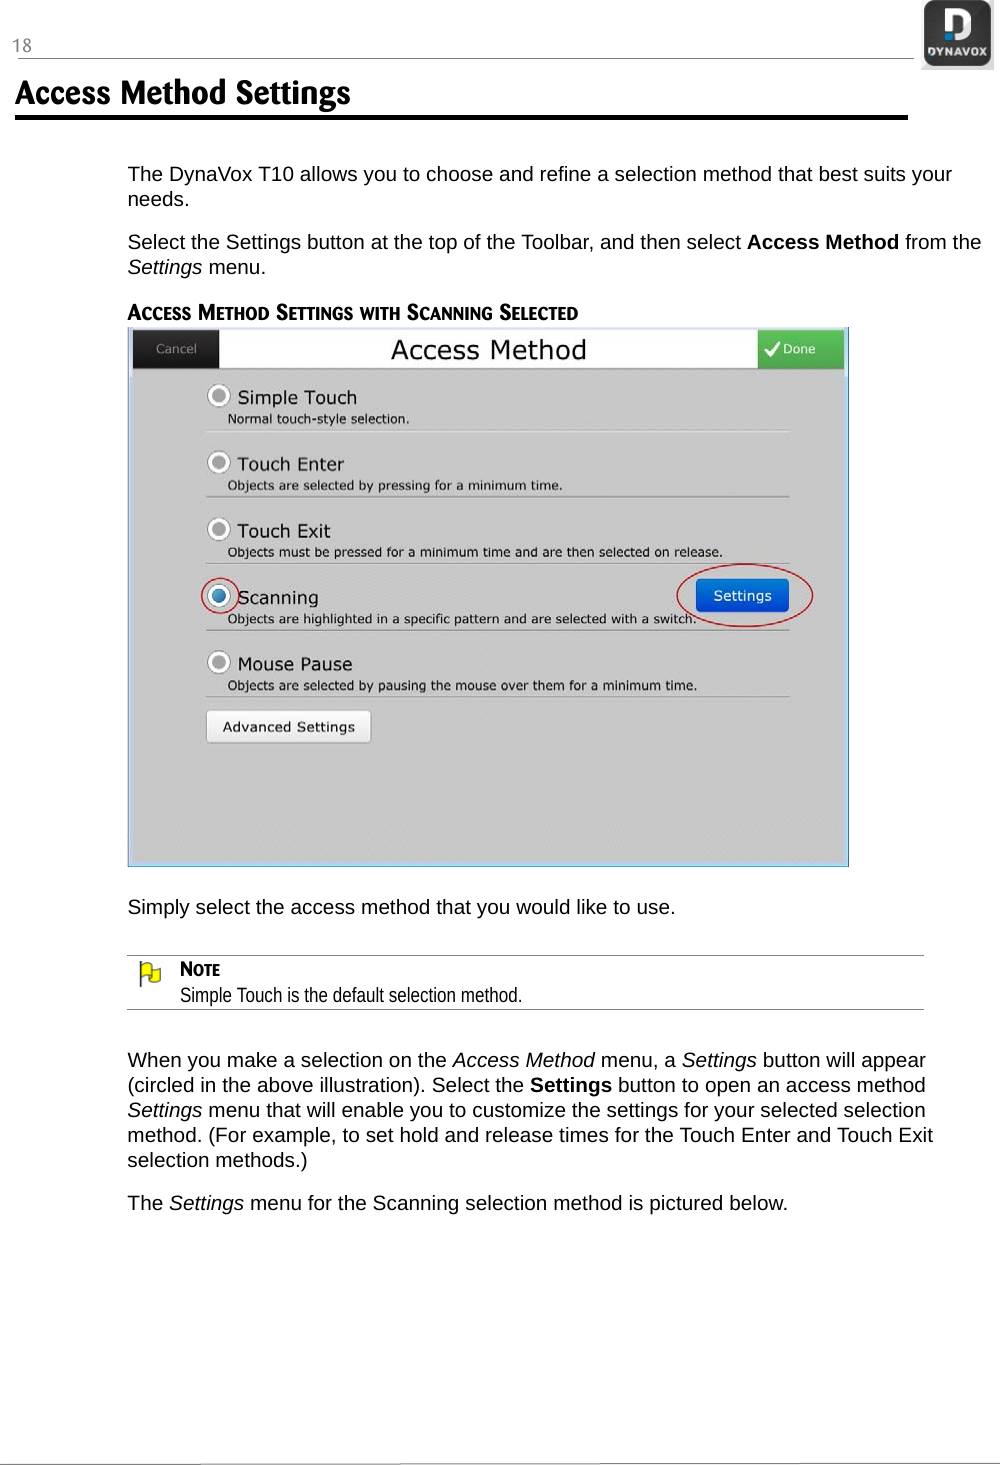
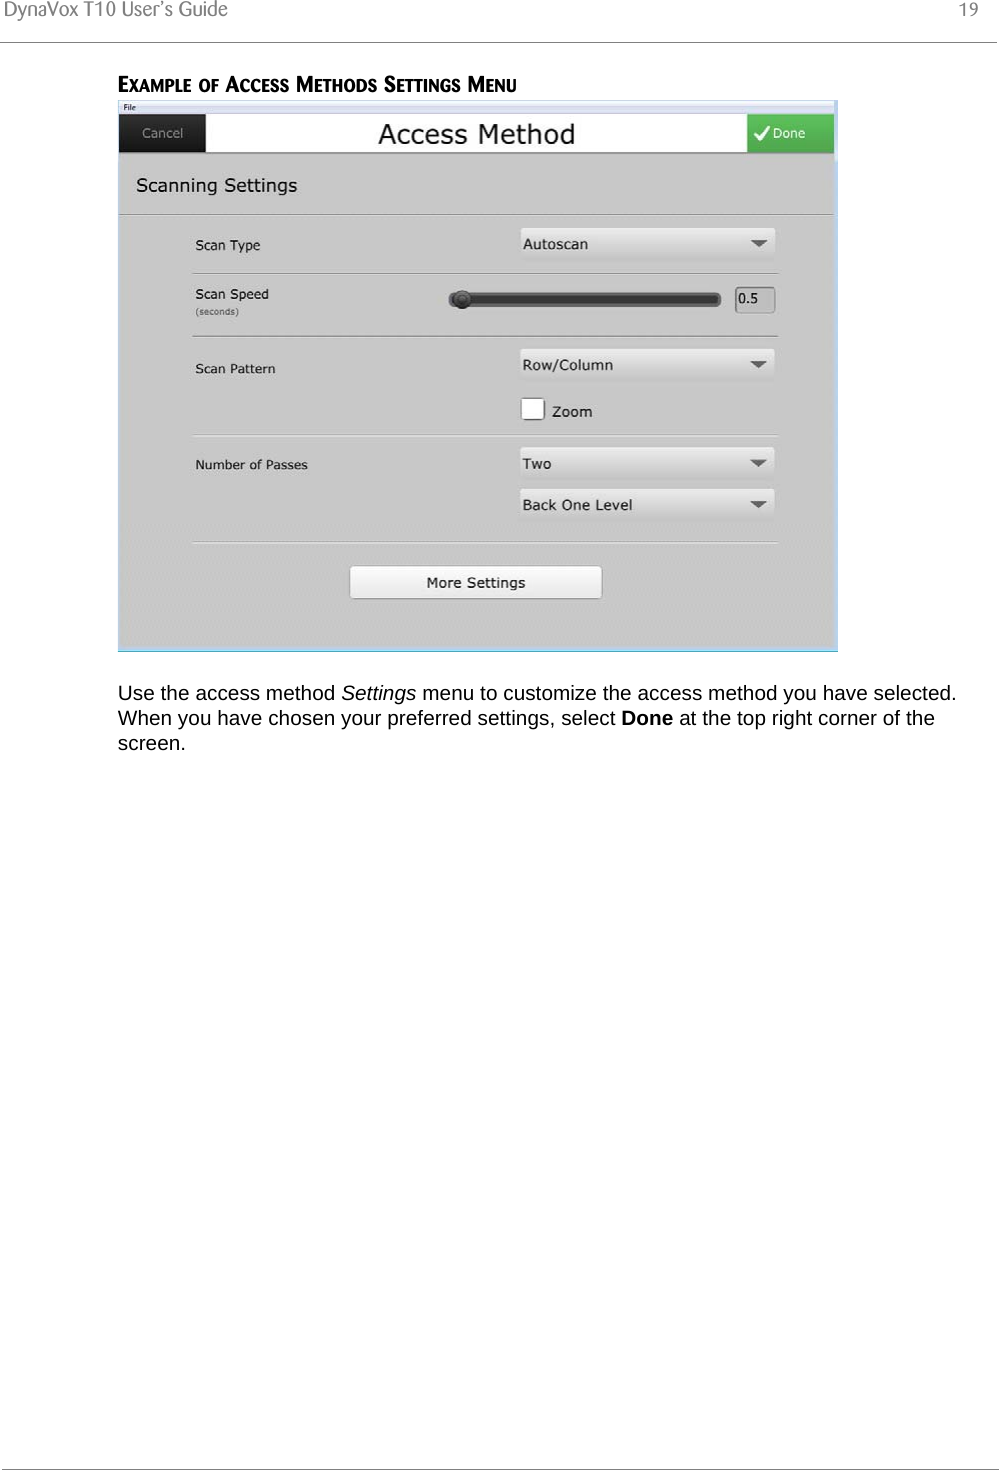
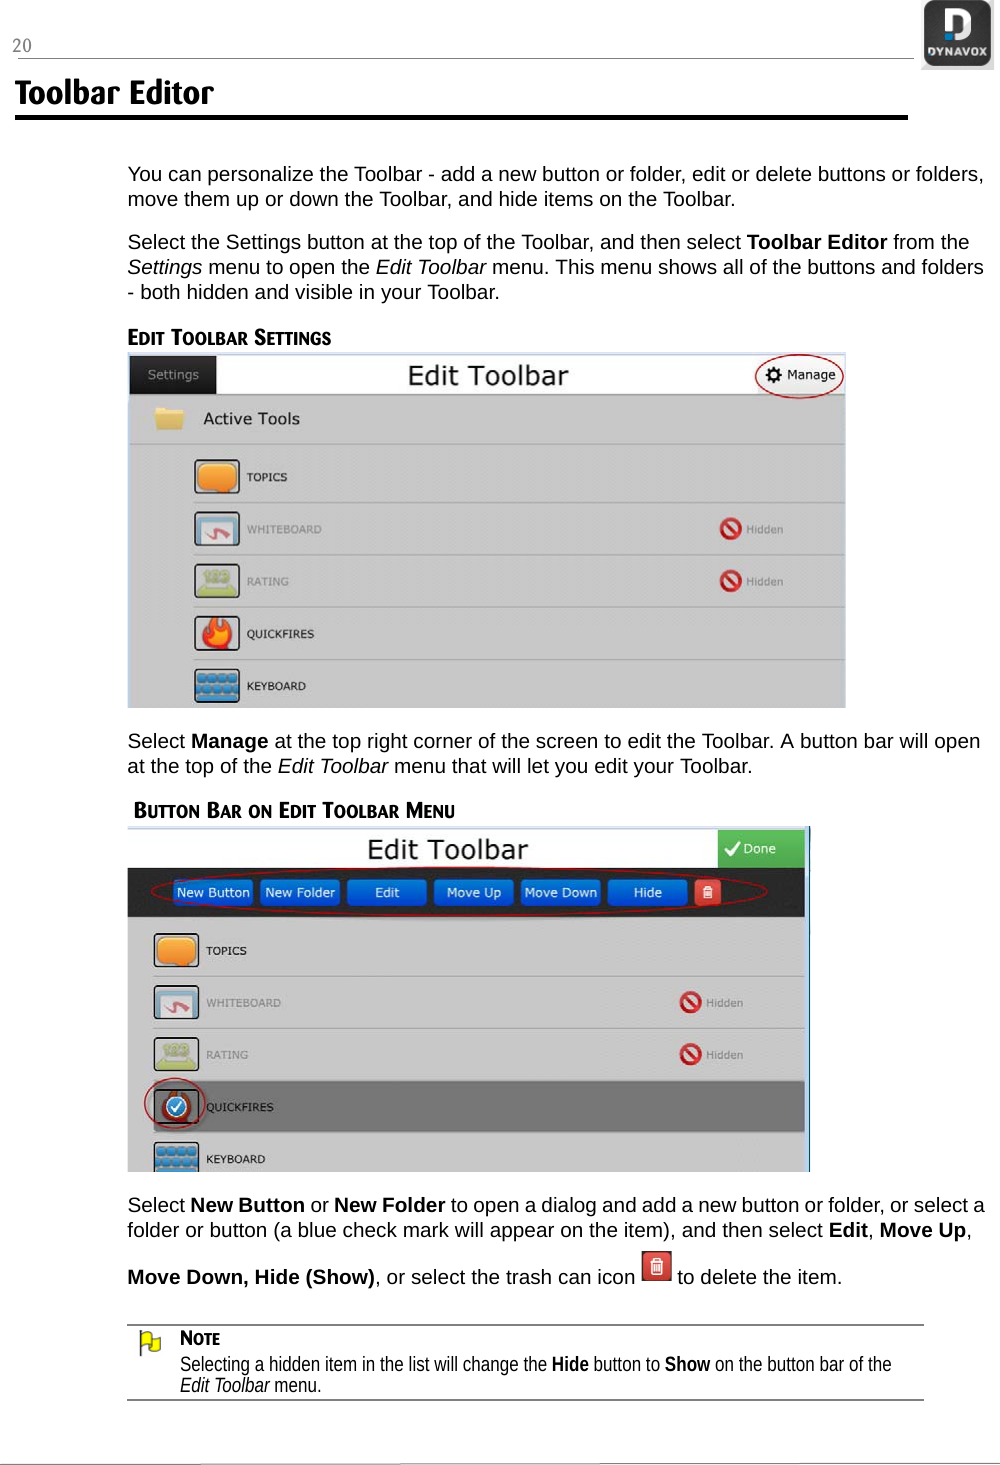
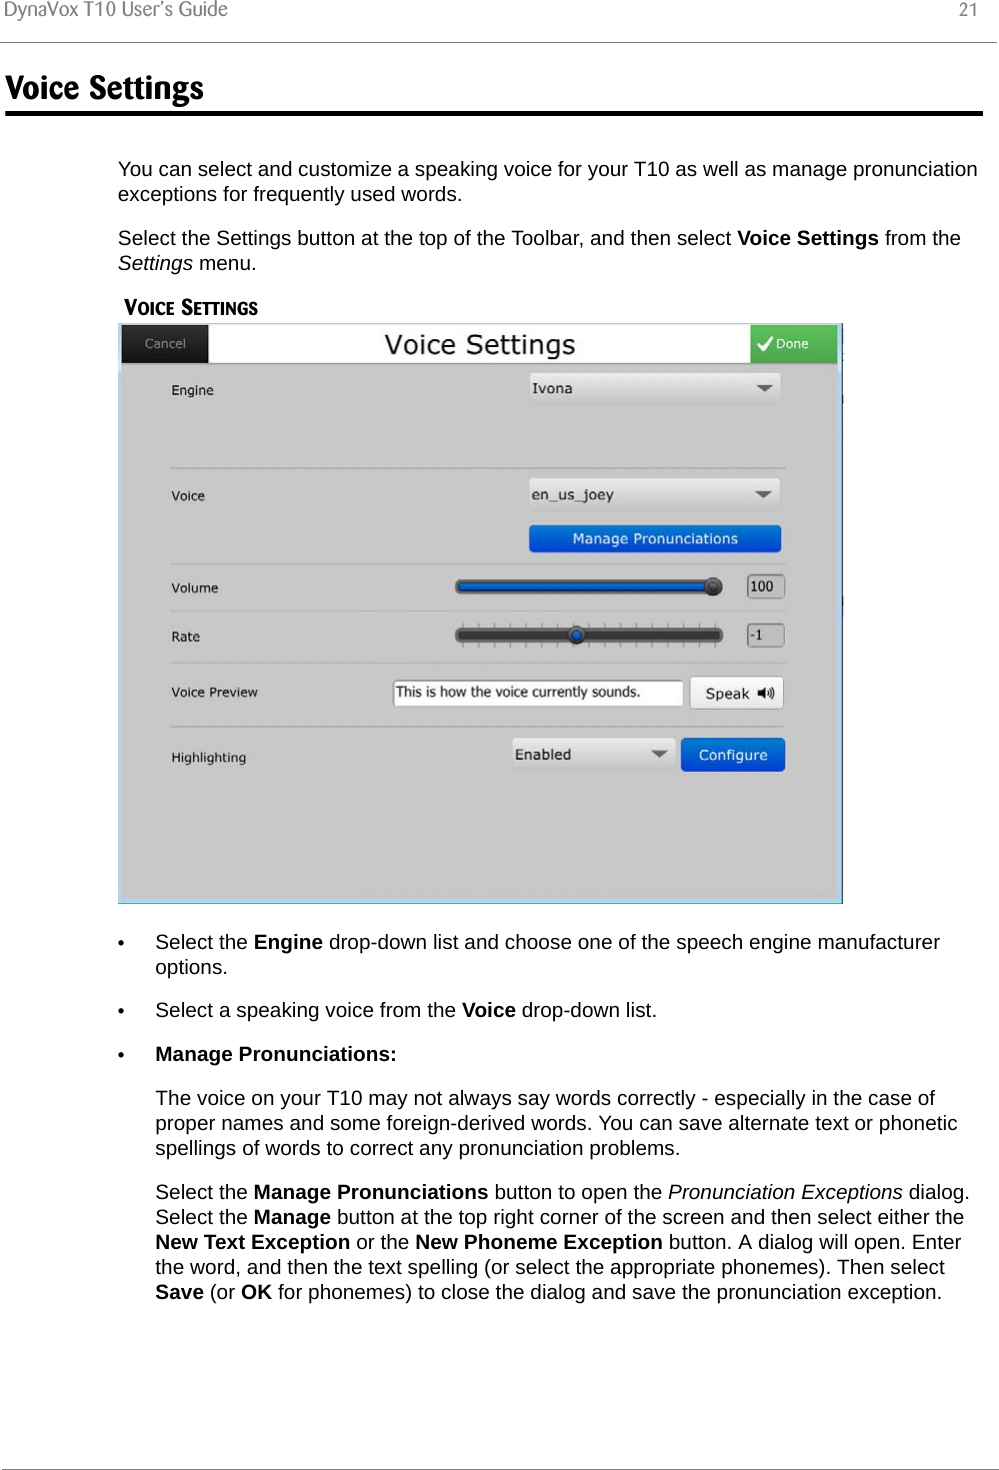
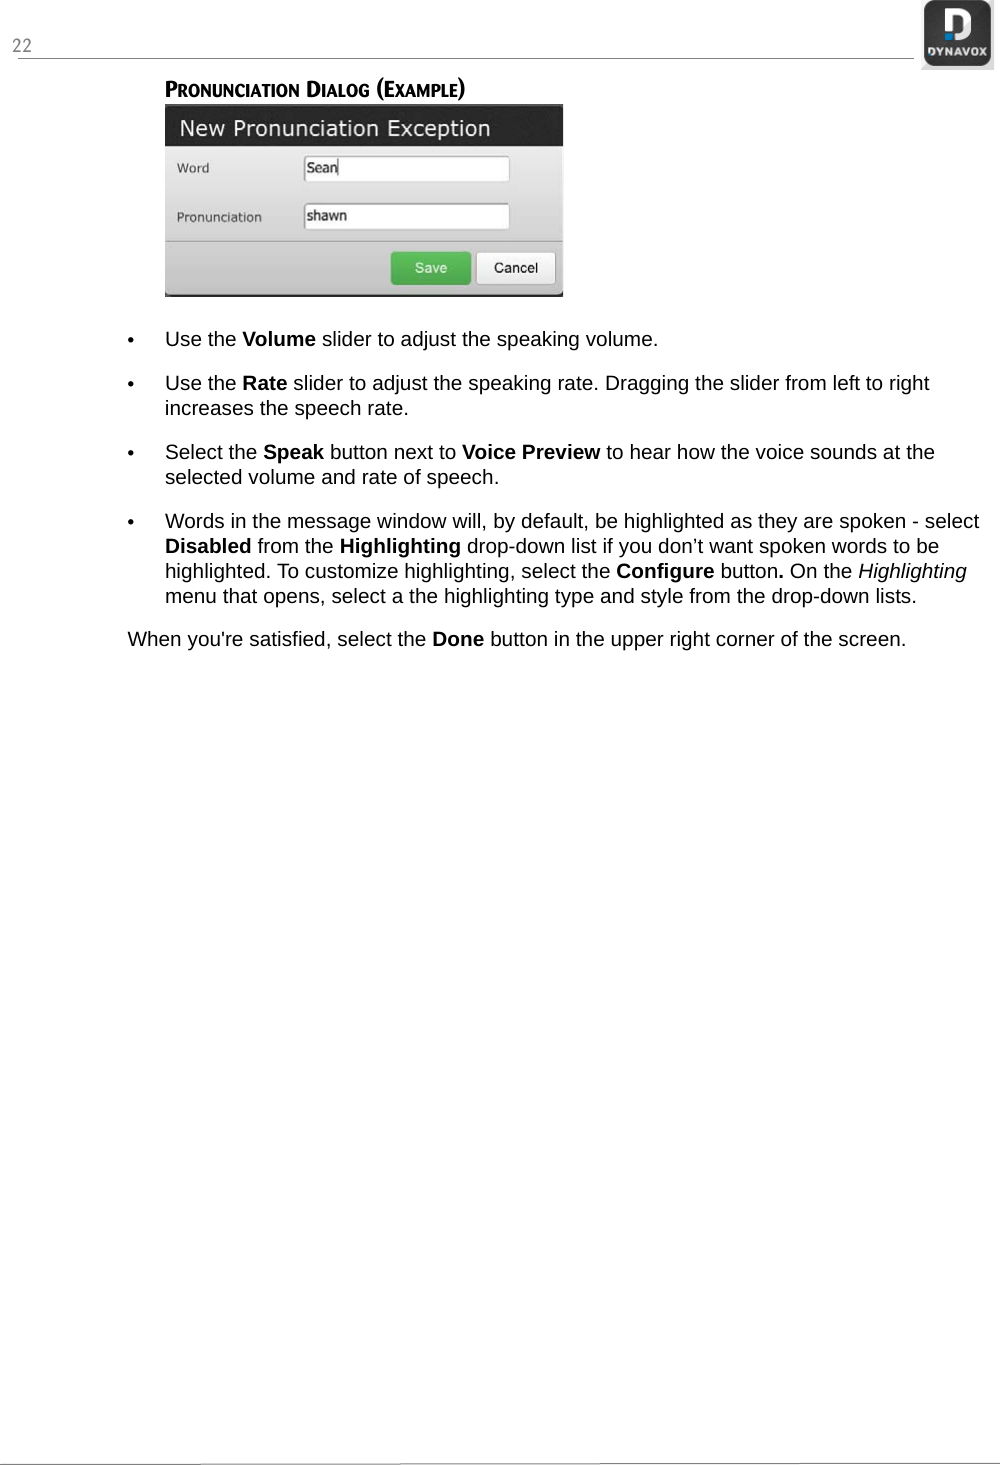
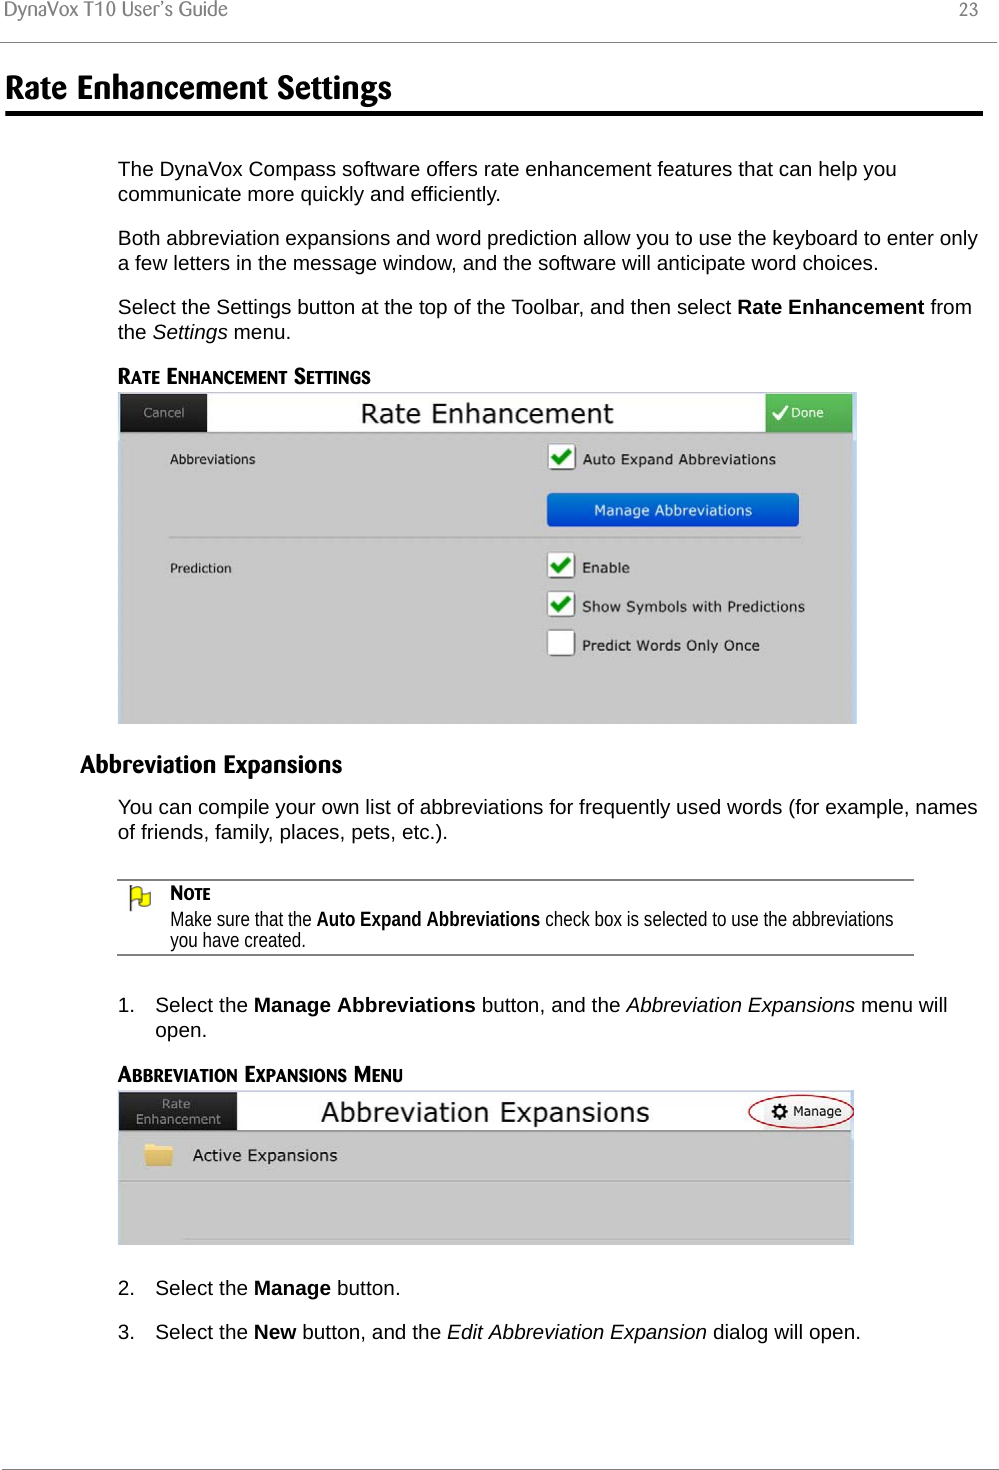
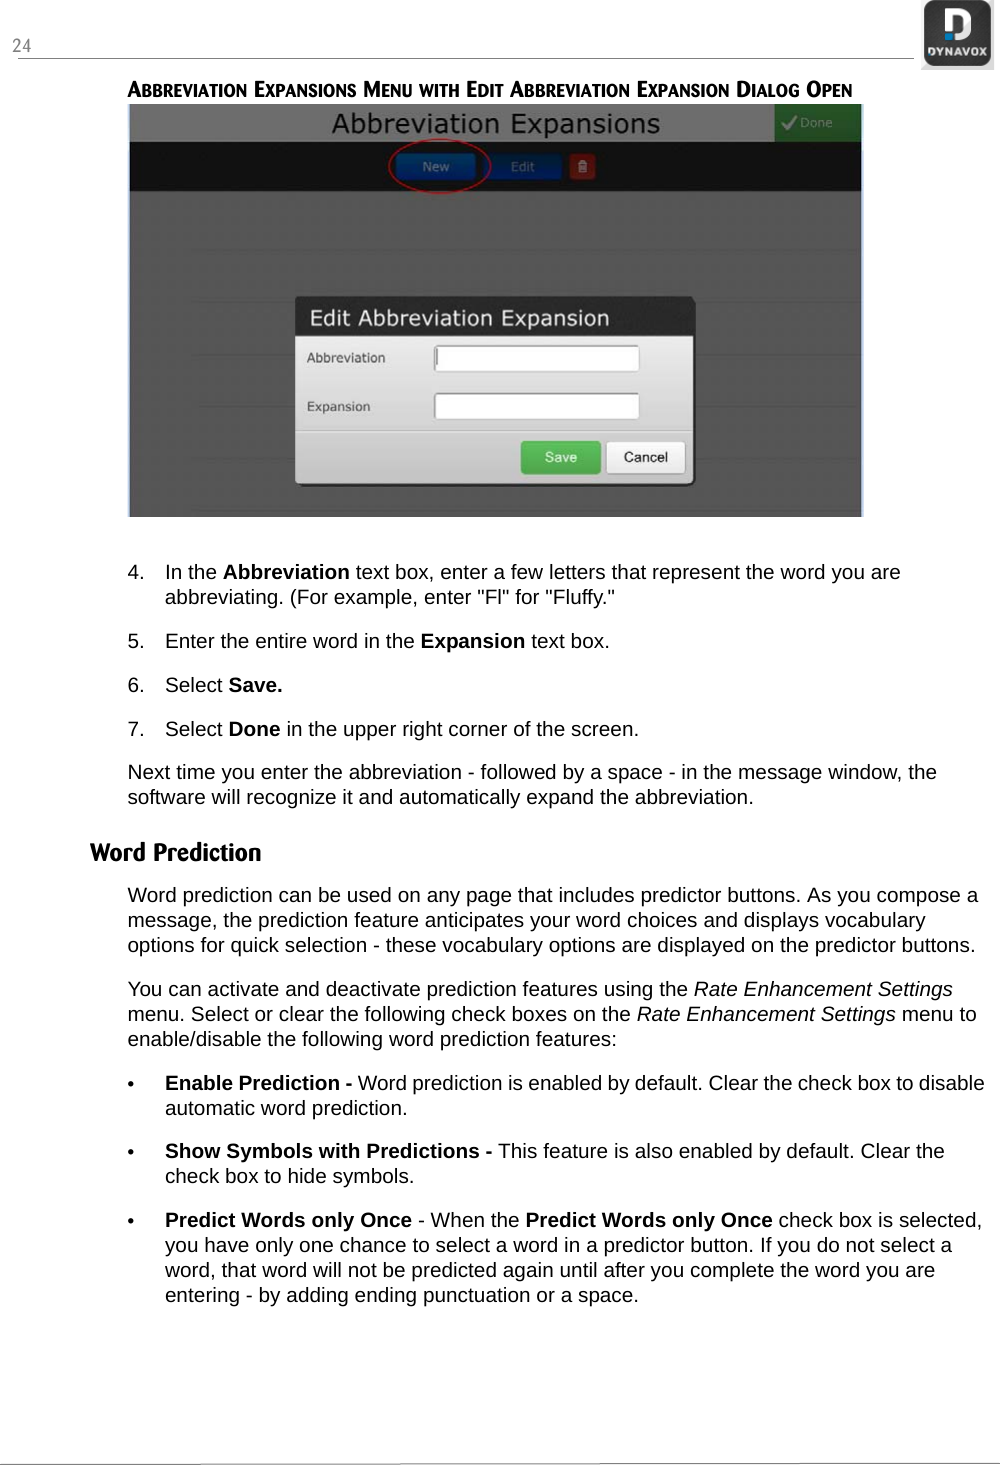
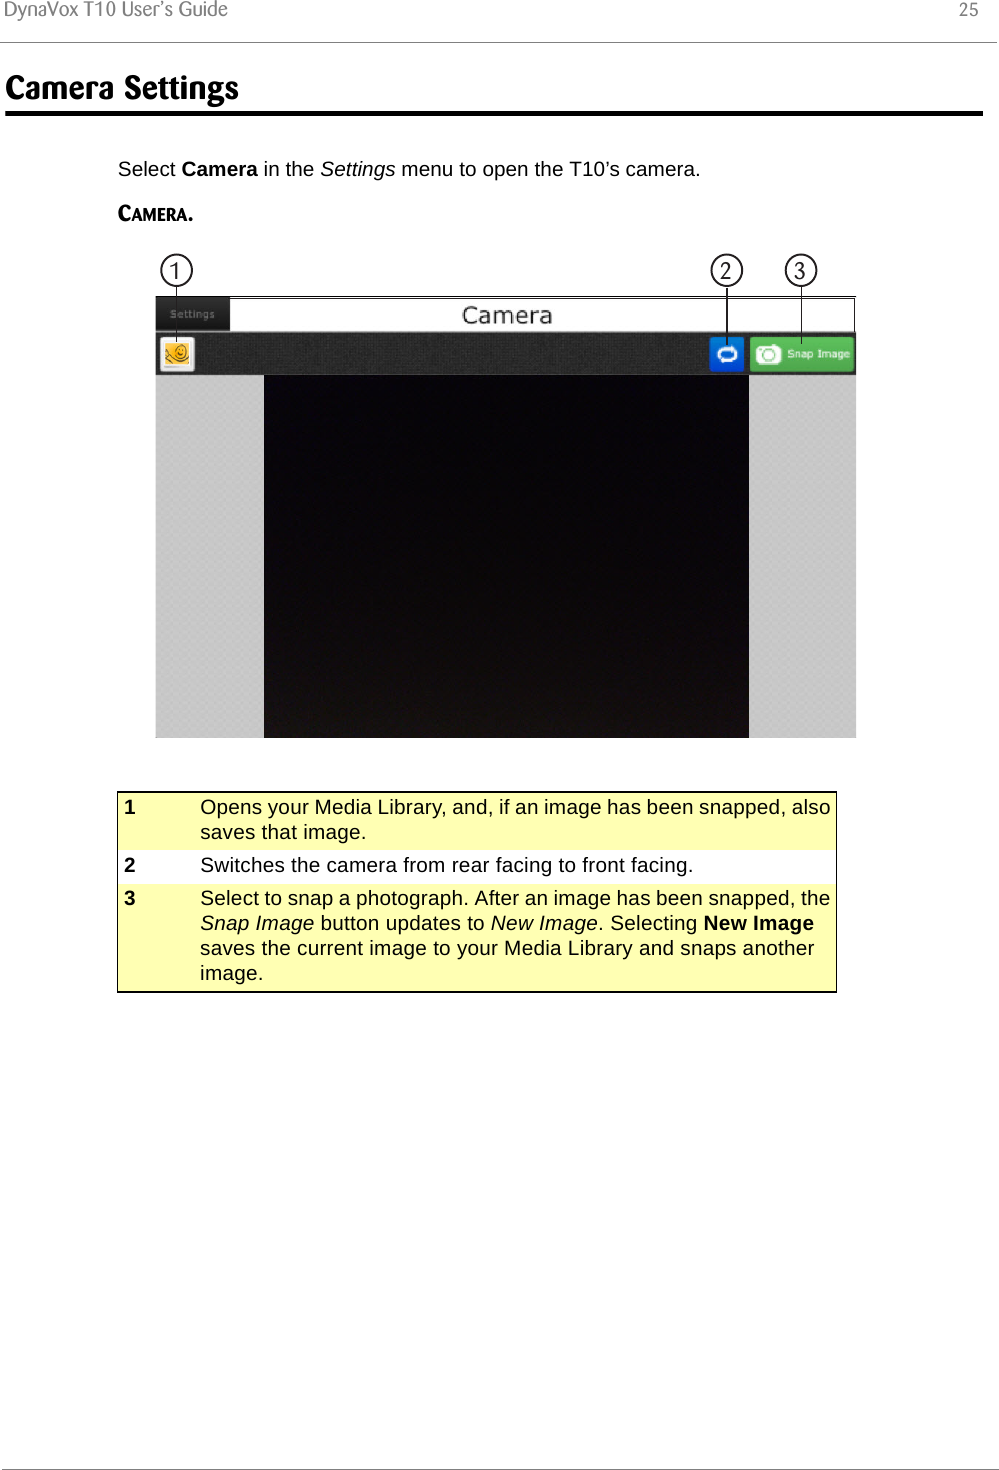
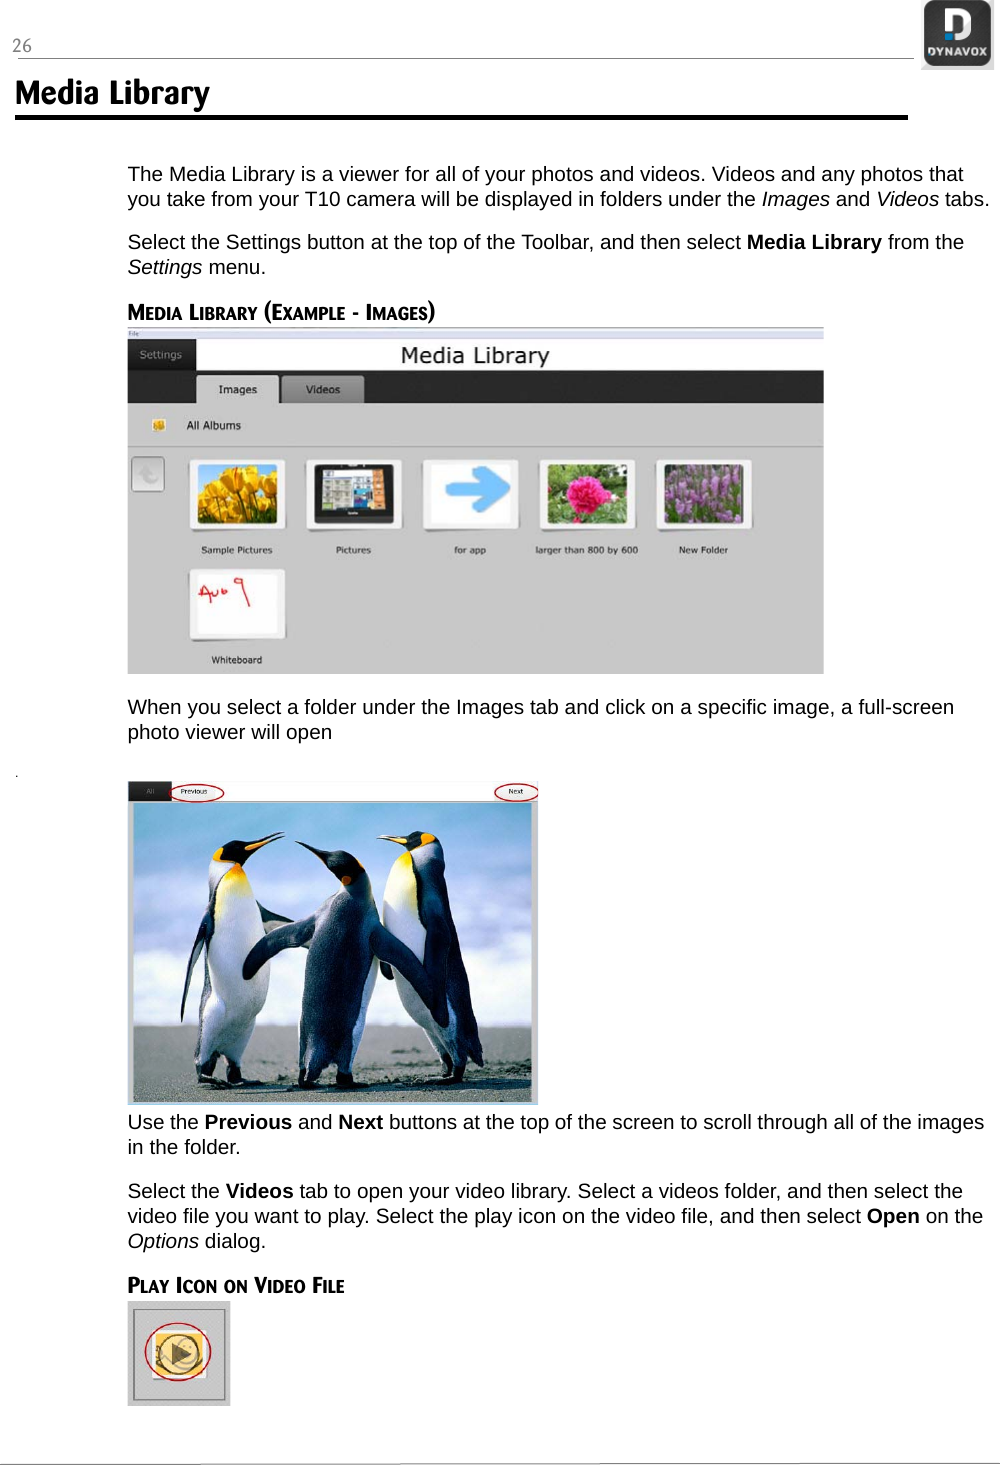
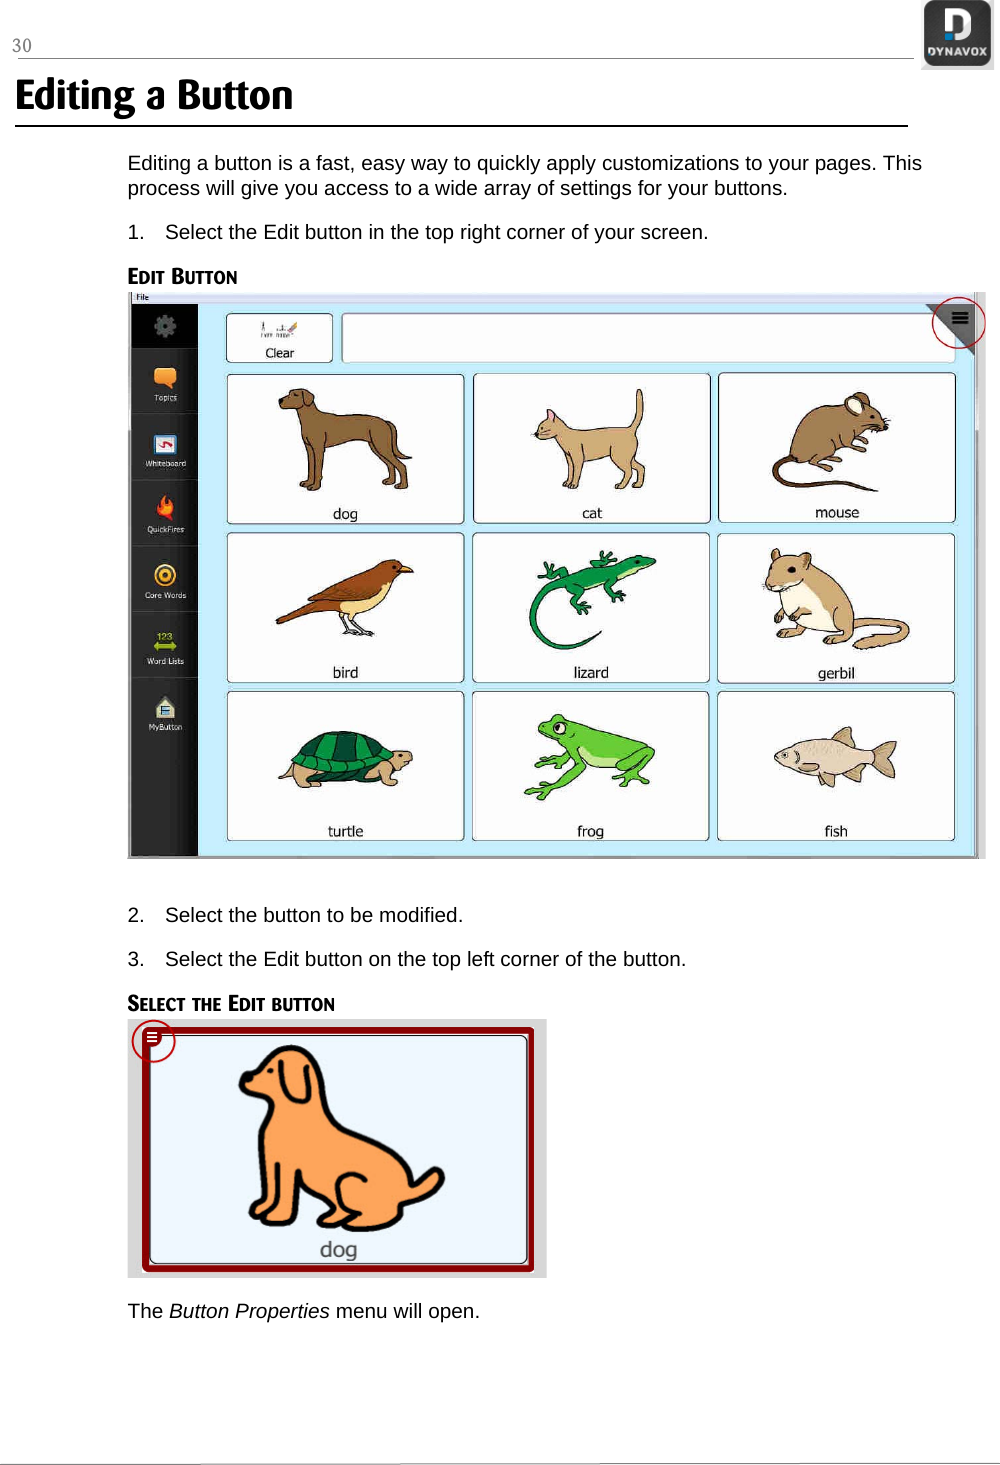
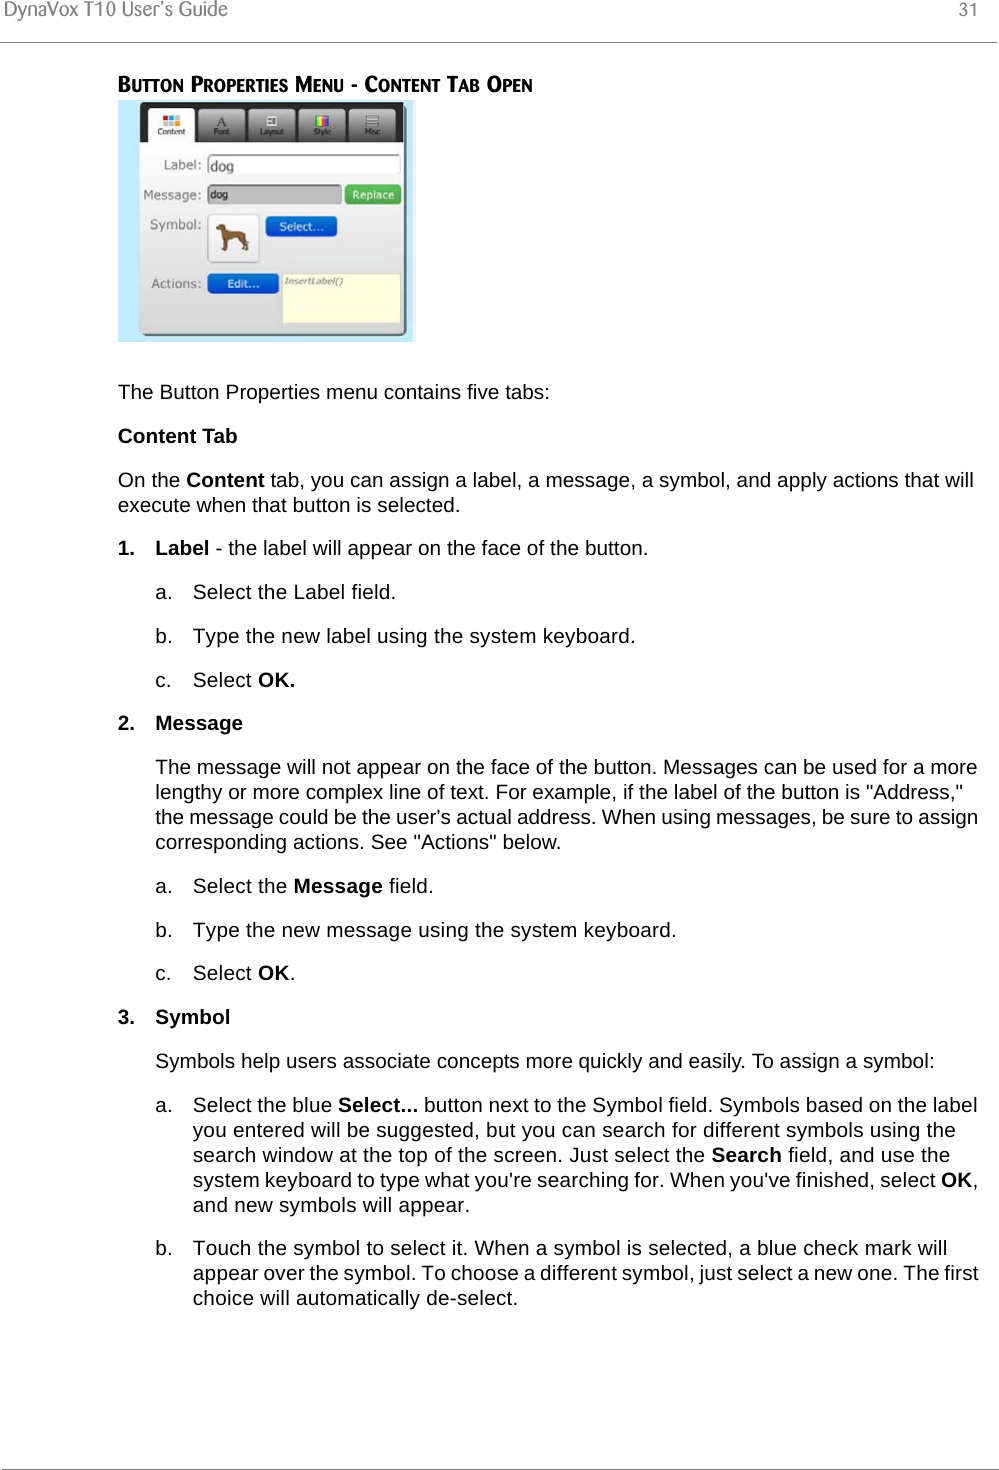
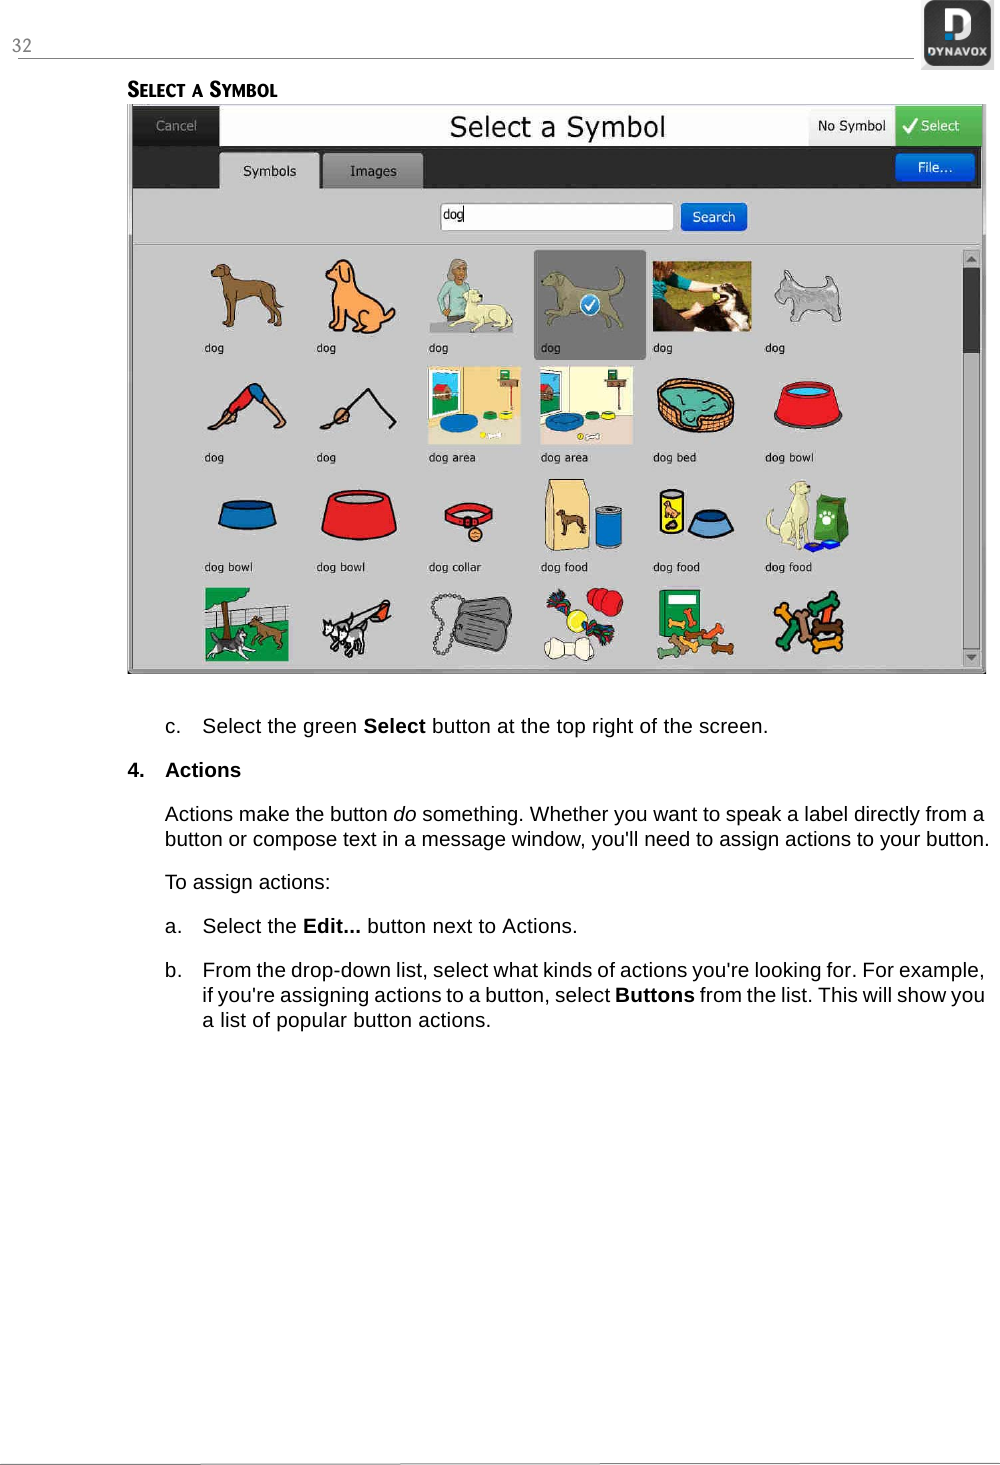
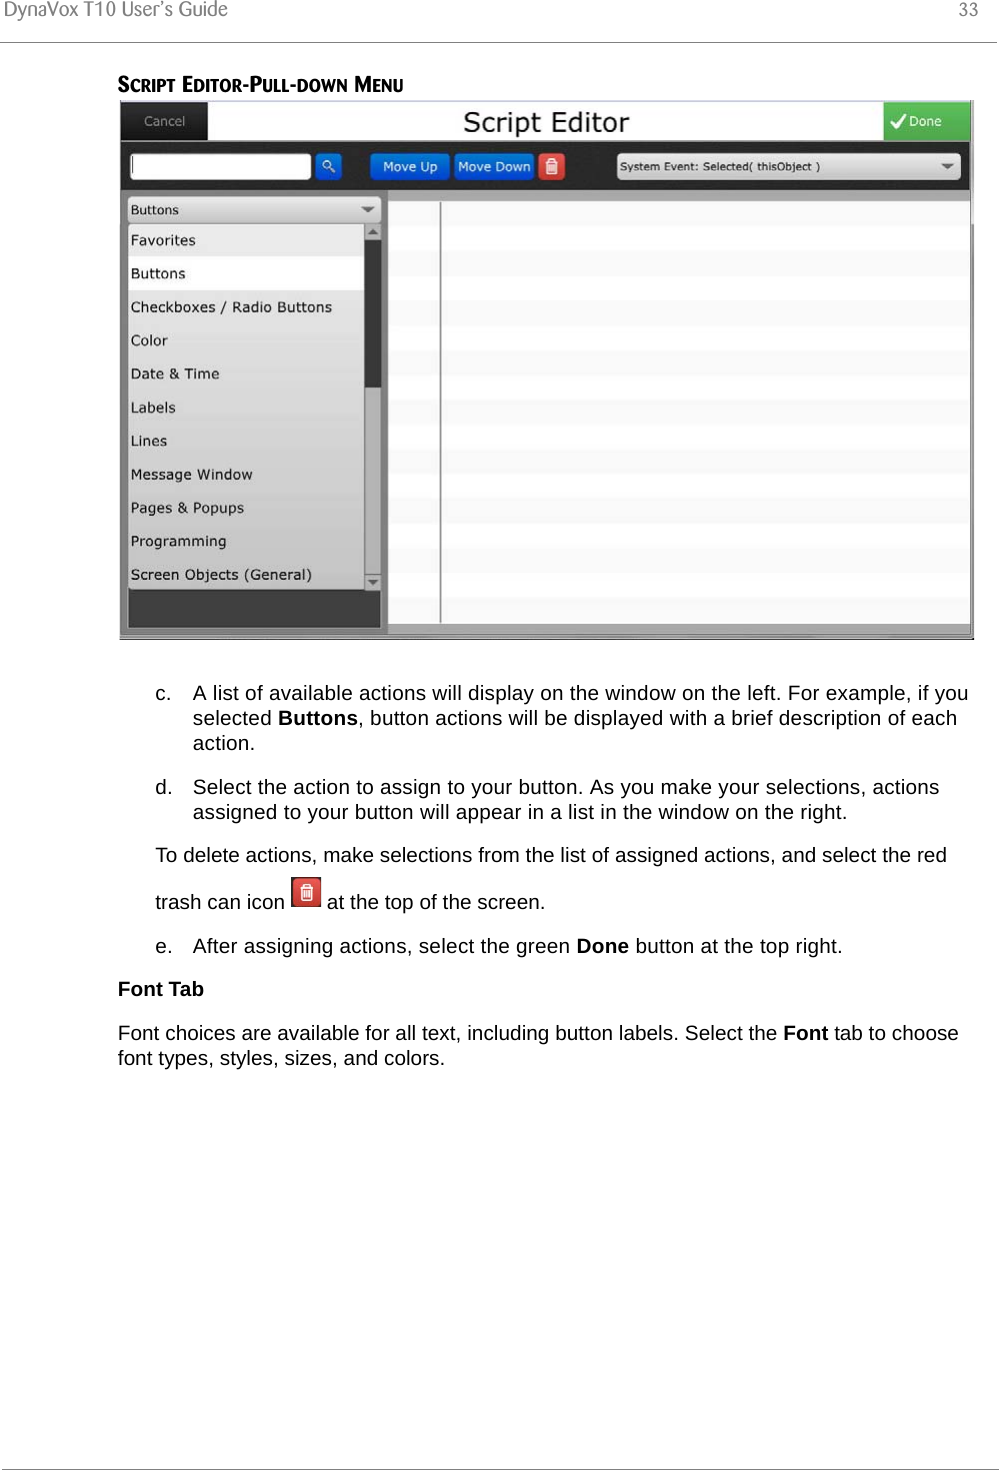
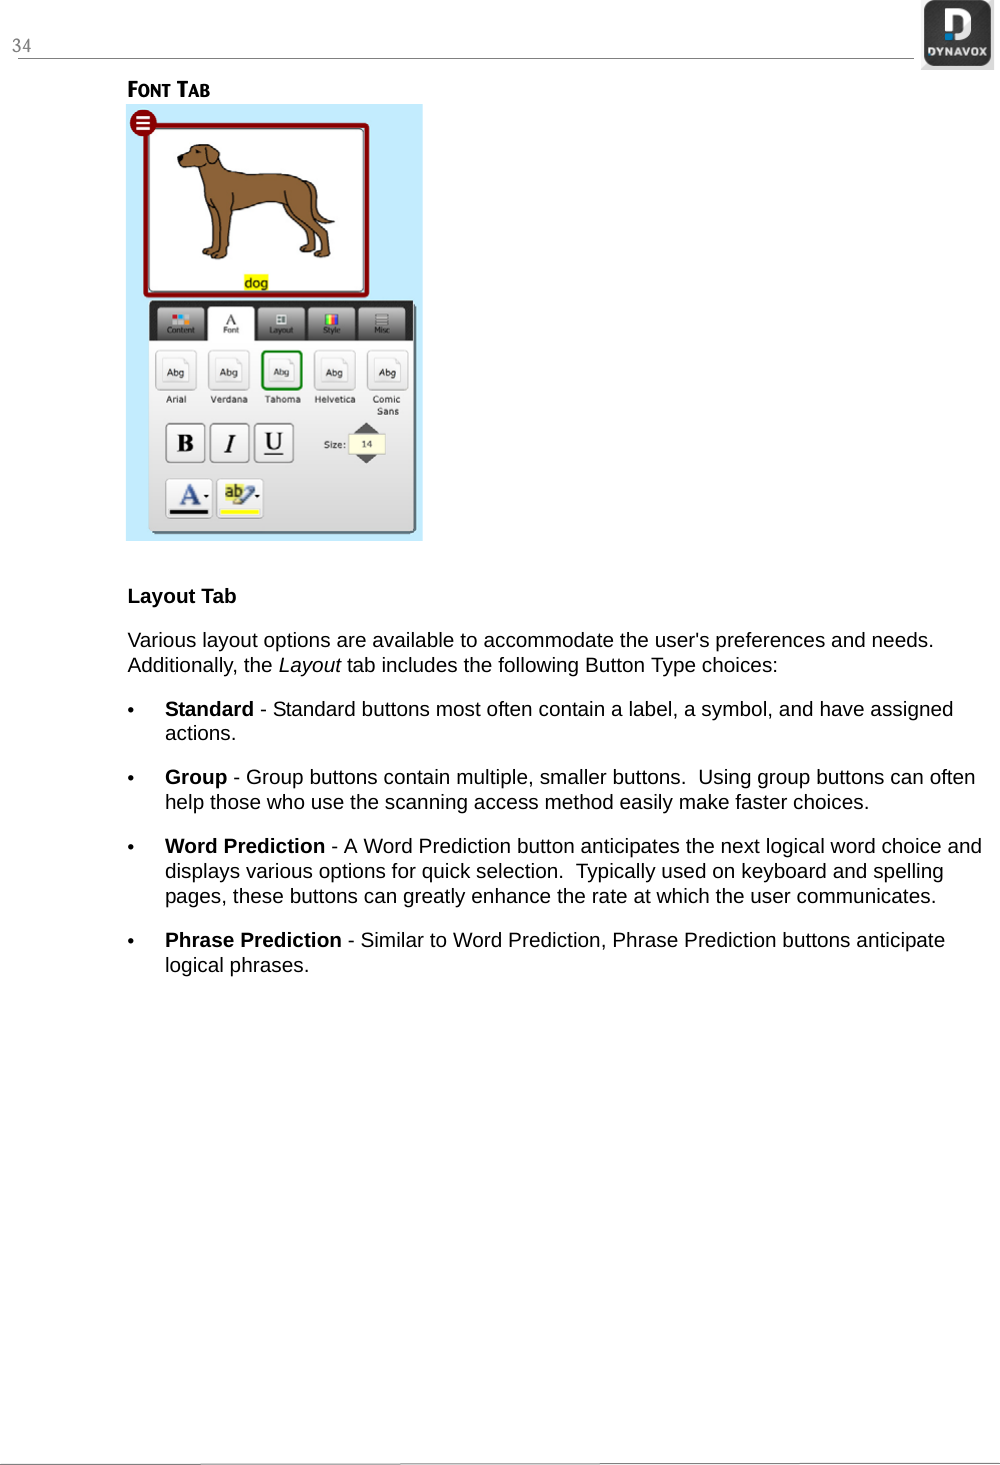
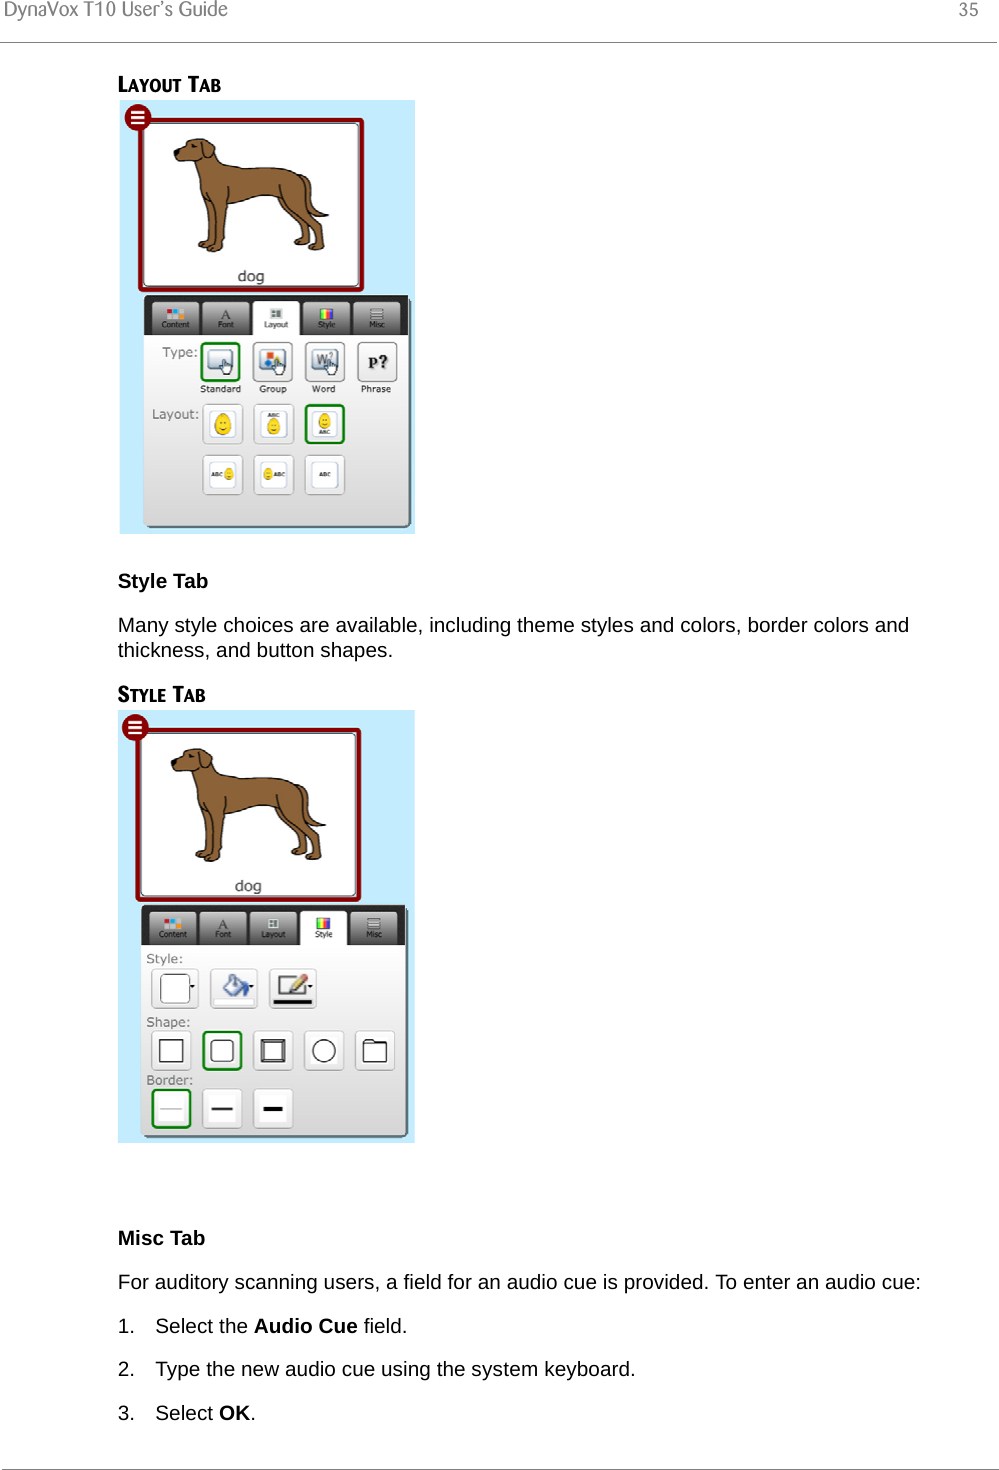
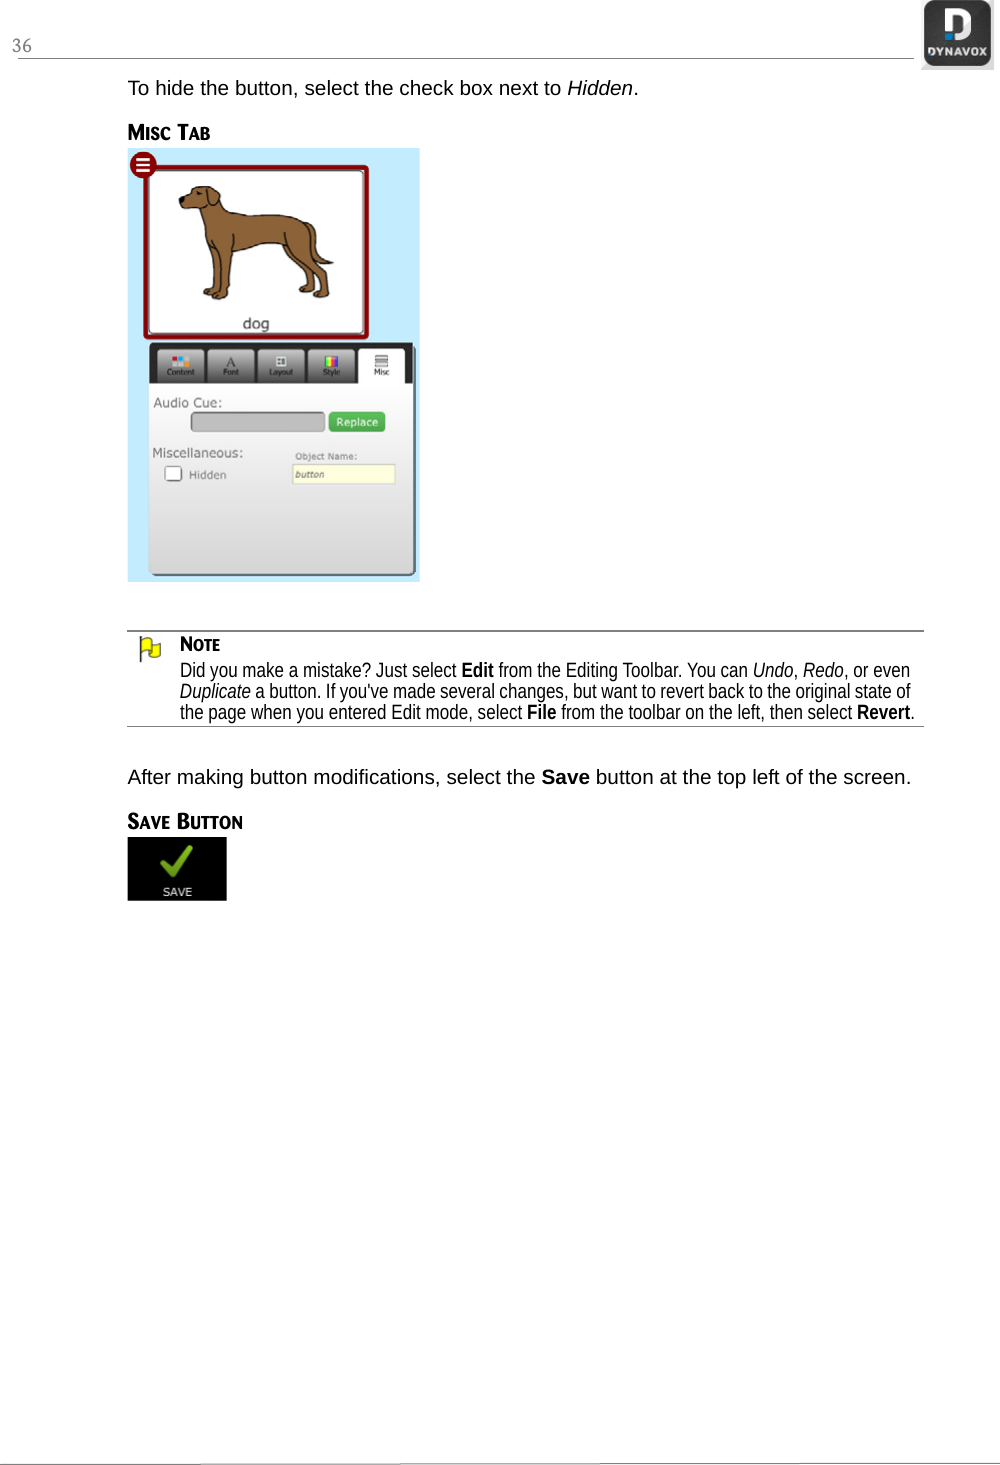
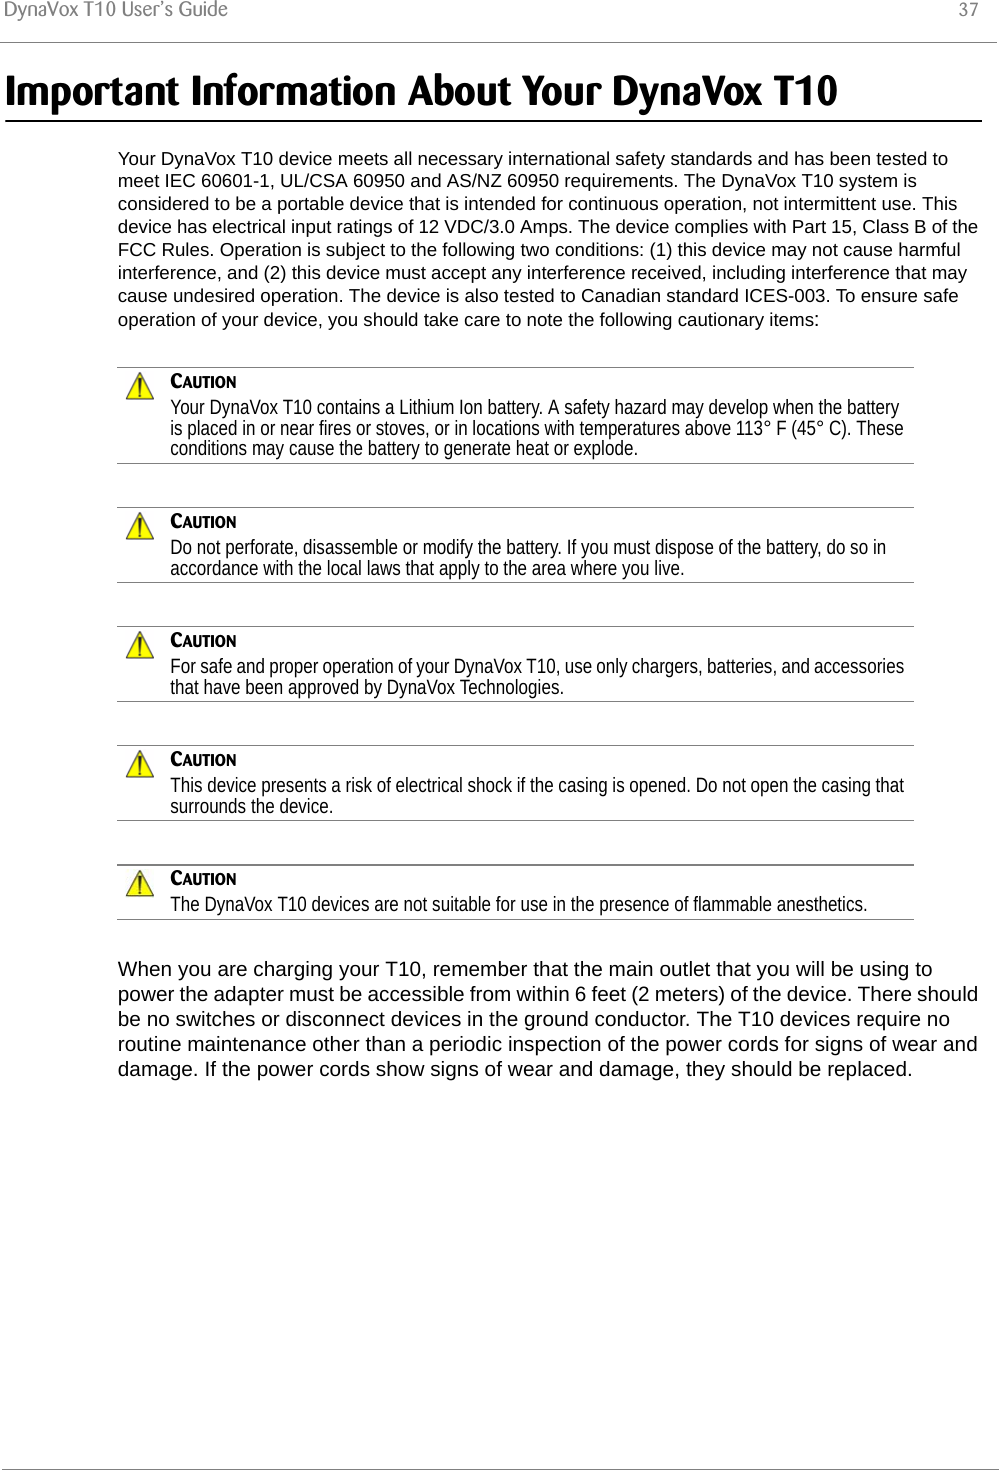
![DynaVox T10 User’s Guide 27Backup/Restore SettingsWhen you completed the Setup Wizard, you named and created a "user." This "user" is a set of files that includes your page set, vocabulary, media library, rate enhancement information, selection method settings, etc. This set of files is saved as a user file.Select the Settings button at the top of the Toolbar, and then select Backup/Restore from the Settings menu.BACKUP/RESTORE SETTINGSYou can backup and restore your user file either locally (to a folder on your T10) or to myDynavox.Backup to myDynaVox.com1. Select the Backup to myDynaVox button.2. If you are prompted, sign in to your account by entering your username and password.3. Enter a name (and description [optional]) for your backup file in the text box. (It’s a good idea to include the date in the file name.)4. Select Save.Backup Locally1. Select the Backup Locally button. A dialog will open.2. Enter a name for your backup file in the text box. (It’s a good idea to include the date in the file name.)3. Select Save.CAUTIONBacking up locally does not save your file "off system" if your T10 is lost or damaged. It is recommended to back up to myDynaVox.](https://usermanual.wiki/Tobii-Dynavox/T10.User-Manual/User-Guide-2056310-Page-31.png)