Tomy TFY3040C 49MHz Transmitter Baby Unit User Manual 099 Y3040A6 test
TOMY International, Inc. 49MHz Transmitter Baby Unit 099 Y3040A6 test
Tomy >
users manual
Y3040
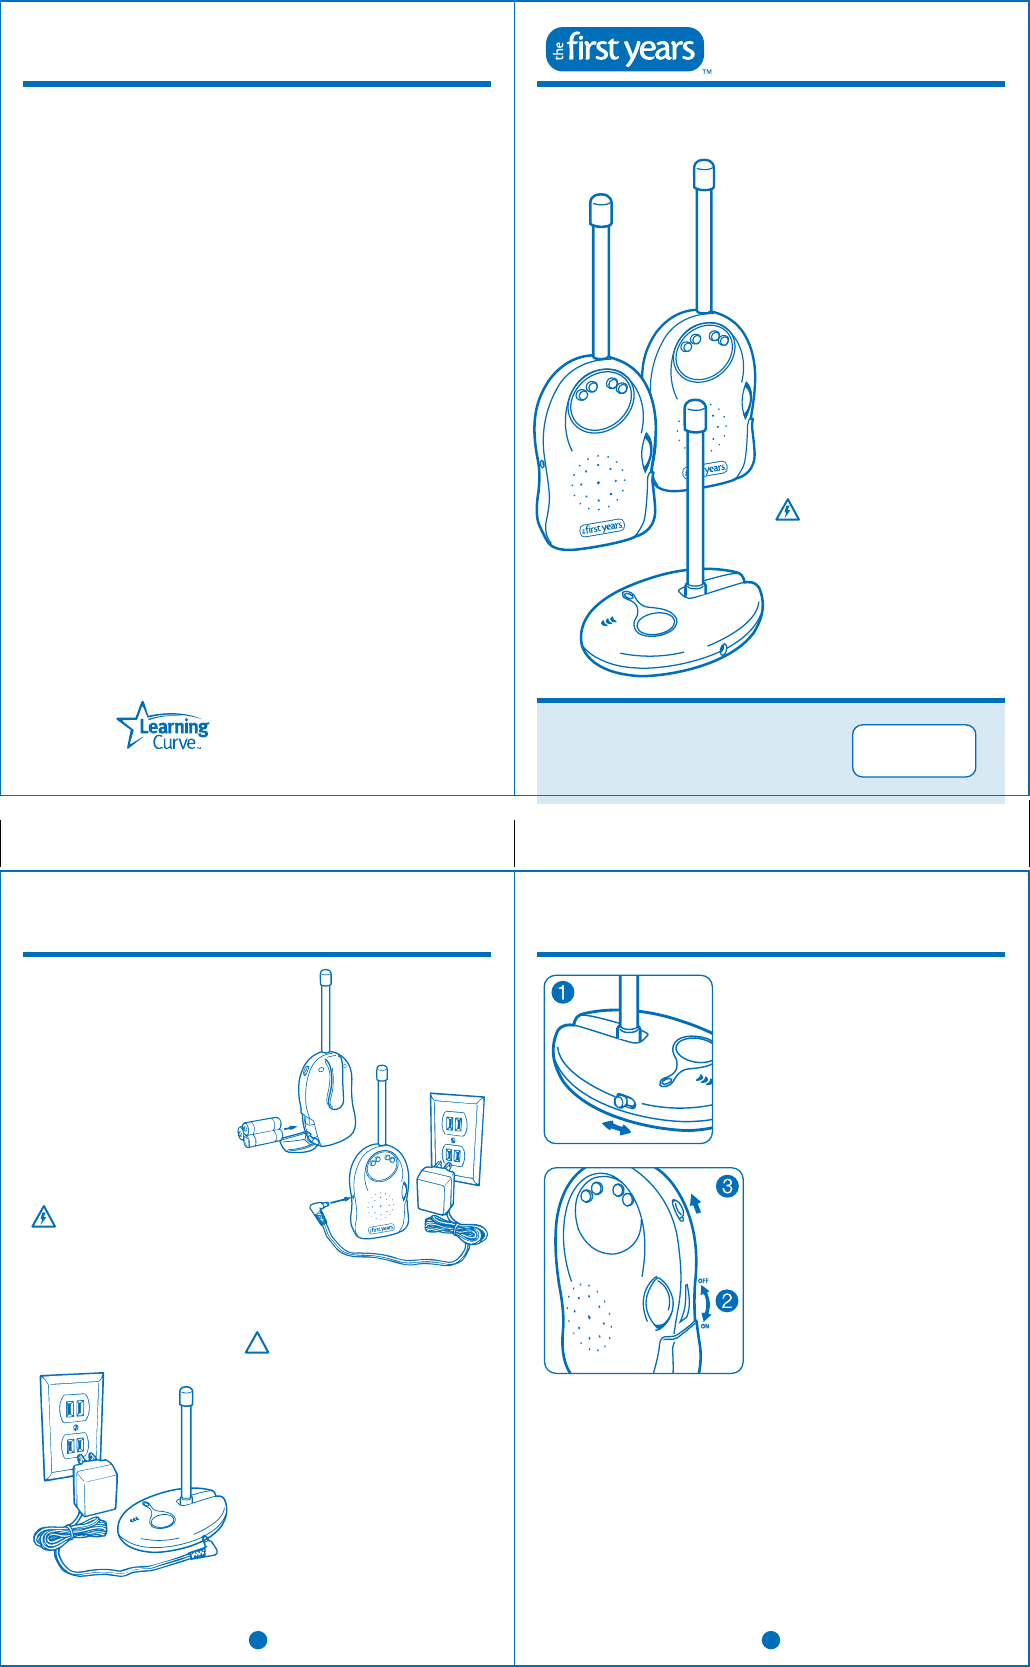
QUICK START INSTRUCTIONS
You’ll find detailed instructions inside.
Please read the safety instructions on page 2.
Set up the Parent’s Units
• Install three AA batteries. Battery compartment
is located on the side of unit. Slide button down
to release cover.
• Or, plug one of the three AC adapters provided
into each Parent’s Unit.
Set up the Child’s Unit
• Place the unit near your child (within 6 feet, but
well beyond child’s reach).
• Position the antenna straight up.
• Plug in the third AC adapter provided.
• Slide the channel switch to A or B.
• Press the ON/OFF button to turn on the unit.
Use the Monitor (Parent’s Unit)
• Slide the channel switch to the same channel as
the Child’s Unit (A or B).
• Rotate the volume dial clockwise to the on
position. Adjust to desired volume level.
• Keep the Parent’s Unit with you, and keep it
positioned upright.
• This product is a monitoring device designed
to assist in the monitoring of children, not as a
prevention for injury to or loss of child.
• This product is not a substitute for adult
supervision. All children should be monitored
at all times by responsible adults.
• This product is not a toy. Do not allow children
to play with it.
• To prevent electric shock, strangling by cord,
choking, or eye injury, do not place the
monitor in, or attach it to, a crib or playpen.
• Never place these units within a child’s reach.
WARNING:
Two Receiver Monitor
49.83 MHz Clear Reception
Warranty
Our Limited Warranty and Warranty Period When we use the terms
"we," "us" and "our," we are referring to Learning Curve Brands,
Inc., and when we use the terms "you" and "your" we mean the
original end-user customer. Our products are guaranteed to be free
from defects in material and workmanship under normal and
intended use for a period of 90 days from the date of your purchase.
Repair/Replacement If our product fails to meet our limited
warranty during the warranty period, we will, at our option, repair or
replace the product free of charge.
What Our Limited Warranty Does Not Cover We offer this limited
warranty only when the product is used by the original end-user
customer. We offer no other warranty. Additionally, while our
warranty is excellent, there are other limits to it. We offer NO
WARRANTY in cases of damage in transit, inadequate care, abuse,
abnormal use, misuse, accidents, normal wear and tear, damage due
to environmental or natural elements, failure to follow product
instructions, immersion in water (except for products specifically
identified by us in writing as intended for water use), battery
leakage or improper storage or maintenance of the products.
Disclaimer of Other Warranties: THE EXPRESS WARRANTIES IN THE
PRECEDING SECTION ARE EXCLUSIVE AND IN LIEU OF ALL OTHER
WARRANTIES. However, to the extent applicable law does not
permit disclaimers of certain implied warranties, such warranties
are limited to the warranty period identified above. Some states
and countries do not allow limitations on how long an implied
warranty lasts, so the above limitations may not apply to you.
Limitation on Damages: IN NO EVENT SHALL WE BE LIABLE FOR
INCIDENTAL, COMPENSATORY, PUNITIVE, CONSEQUENTIAL,
INDIRECT, SPECIAL OR OTHER DAMAGES. OUR AGGREGATE
LIABILITY WITH RESPECT TO DEFECTIVE PRODUCTS IS LIMITED TO
THE MONIES PAID TO US FOR THE DEFECTIVE GOOD. Some states
and countries do not allow the exclusion or limitation of incidental,
consequential or other damages, so the above limitation or
exclusion may not apply to you.
State Variations: This warranty gives you specific legal rights, and
you may also have other rights which vary based on state, province
or country.
Contact Us: If you have a warranty claim or request, any customer
care questions, please contact via our website
www.learningcurve.com or call us at 1-800-704-8697.
Questions? Comments?
Contact Consumer Care
www.learningcurve.com
800-704-8697
© 2011 Learning Curve Brands, Inc.
Oak Brook, IL 60523 U.S.A.
All Rights Reserved.
Made in China.
Y3040.04.12.10
WARNING:
!
4
To Set Up
Child’s Unit
1. Position the Child’s Unit within approximately
6 feet of your child, yet out of the child’s reach.
Do not place Child’s Unit in crib or attach to crib.
(To prevent heat build-up, place on an open
surface away from heat sources; do not place in an
enclosed space.)
2. Position the antenna straight up, as shown.
3. Insert the AC adapter plug into the jack on the
side of the unit, then plug the adapter into an
electrical outlet.
CAUTION:
Parent’s Units
To operate with batteries:
1. Press on the tab to release the battery
compartment cover, then pull it open.
2. Insert three AA batteries. Position them so
the + and - contacts are aligned with the
corresponding contacts on the battery clip.
3. Close the battery compartment cover;
be sure it clicks shut.
4. When it’s time to change the batteries,
the power indicator light will turn red.
Replace batteries with three new AA
batteries at that time.
To operate with AC adapter:
Insert the AC adapter plug into the jack on
the side of the unit, then plug the adapter
into an electrical outlet.
Always use the AC adapter(s) supplied with
this product. Do not use any other adapter.
Monitor could become damaged, and
warranty would become void.
For wall mounting (optional):
1. Securely fasten one #6 flat head wood screw on the
wall. (For best results, use a 3/4-inch screw; mount
in a solid wood panel, or use a screw anchor).
2. Leave the screw head protruding from the wall by
at least 1/4-inch.
3. Fit the screw head slot (on the back of the unit)
over the screw head and slide the unit down to seat
it firmly.
4. To test that the unit is securely mounted, press on
its edges.
POWER ON/OFF
POWER LED
B
A
5
1. Slide the channel A/B switch on the Child’s Unit
to either A or B. Turn the unit on by pressing the
ON/OFF button.
2. Slide the channel selector switch on the Parent’s
Units to the same channel as the Child’s Unit
(A or B). For the Monitor to work properly, both
units must be set to the same channel.
3. Rotate the volume dial clockwise on the parent
units to the on position and adjust the volume to
the desired level.
4. Keep a Parent Unit with you. For best reception
keep all units as near upright as possible.
Range:
The range of the Monitor will vary with the
surroundings. You may want to test its workable
range by walking through your house and yard
and listening for the volume and clarity of the
sounds being transmitted.
Using belt clip:
Slide onto your belt or waistband.
Changing channels:
Always keep both units set to the same channel
(A or B). If you experience interference or static
with one channel, switch to the other.
Positioning antennas:
Always be certain the antennas on both units
are straight up.
To Use Monitor
A
B
A
B
POWER LED
POWER ON/OFF
POWER ON/OFF
POWER LED
This device complies with part 15 of the FCC Rules.
Operation is subject to the following two conditions: (1) This device may not cause harmful interference,
and (2) This device must accept any interference received, including interference that may cause undesired operation.
WARNING: Changes or modifications to this unit not expressly approved by the party responsible for compliance
could void the user’s authority to operate the equipment.
NOTE: This equipment has been tested and found to comply with the limits for a Class B digital device, pursuant
to Part 15 of the FCC Rules. These limits are designed to provide reasonable protection against harmful
interference in a residential installation. This equipment generates, uses and can radiate radio frequency energy
and, if not installed and used in accordance with the instructions, may cause harmful interference to radio
communications. However, there is no guarantee that interference will not occur in a particular installation. If this
equipment does cause harmful interference to radio or television reception, which can be determined by turning
the equipment off and on, the user is encouraged to try to correct the interference by one or more of the following
measures:
• Reorient or relocate the receiving antenna.
• Increase the separation between the equipment and receiver.
• Connect the equipment into an outlet on a circuit different from that to which the receiver is connected.
• Consult the dealer or an experienced radio/TV technician for help.
This Category II radio communication device complies with Industry Canada Standard RSS-310.
Child Unit’s field strength: 74.6 dBuV/m at 3 m.
Ce dispositif de radiocommunication de catégorie II respecte la norme CNR-310 d’Industrie Canada.
6
To Use Monitor (continued)
To Clean Units
Wipe exterior surfaces with a clean, dry cloth.
Keep batteries away from children. Parents are urged to exercise care in the storage, use, and disposal
of all batteries.
• Do not dispose of batteries in fire. They may explode.
Failure to follow the following instructions may cause the batteries to make "popping" sounds and
leak battery acid resulting in personal injury and damage to the monitor. If battery leakage occurs,
thoroughly wash the affected skin and clothes. Keep battery acid away from your eyes and mouth.
Contact the battery manufacturer for further information. To avoid battery leakage:
• Be sure to insert batteries correctly following instructions. Do not put batteries in backwards
(positive (+) and negative (-) ends must face the proper direction).
• Do not mix old and new, rechargeable and non-rechargeable or carbon zinc and alkaline batteries.
• Always remove exhausted batteries from the product.
• Never use a screwdriver or any other tool to pry batteries from the compartment, as the supply
terminals may be short-circuited.
• Do not leave batteries in the monitor for long periods of non-use.
Replacing Batteries (Parent Units):
Remove old batteries and see “To Set Up Parent Units” on page 4.
1 Power Indicator
Light is Green Both units are ON, and the Monitor is ready to transmit sound.
Light is Red Batteries in Parent Unit are weak. Replace with three "AA" batteries.
Not Lit Unit is not receiving power. (See “Troubleshooting,” “No power.”)
2 Two Quiet Sound Lights
No Lights Lit No sound from Child’s Unit (baby is quiet).
One or Two Lights Green Quiet sounds (baby may be whimpering or talking).
3 One Loud Sound Light
Light is Red Loud sounds (baby may be crying or talking loudly).
Lights
Here’s how to interpret the lights on the Parent Units.
WARNING:
!
7
PROBLEM POSSIBLE CAUSE SOLUTION
No power Parent Units:
Unit is not turned on. Turn the unit on.
Batteries are dead. Replace batteries or plug in adapter.
(See “Care of Your Monitor.”)
Child’s Unit:
Unit is not turned on. Press ON/OFF button.
Adapter not plugged in. Plug in adapter.
Adapter plugged into outlet If outlet is controlled by a wall switch,
that’s turned off. be sure switch is turned on.
Hissing sound Parent’s Unit is turned on, Leave Child’s Unit plugged in and
but Child’s Unit is off. turned on at all times (or if you turn
it off, turn off Parent's Unit also.)
Static or interference Units set to different channels. Set both units to same channel.
Appliances (fan, hair dryer, or mixer Try turning off any nearby appliances
for example) causing interference. or switching channels.
Cross talk from cordless phone Try switching channels.
or some other nearby transmitter.
Child’s Unit not receiving power. Make sure adapter is plugged in
and outlet is receiving power.
Batteries are low. Replace batteries or plug in adapter.
Noisy feedback Units too close together. Be sure Parent’s Unit is at
(high-pitched “screech”) least 3 feet from Child’s Unit.
Volume too high. Lower volume setting on Parent’s Unit.
No sound or very weak Unit is getting little or no power. Parent’s Unit:
reception Replace batteries or plug in adapter.
Child’s Unit:
Make sure adapter is plugged in and
outlet is receiving power.
Out of range. Move Parent’s Unit closer to Child’s Unit
(and be sure Child’s Unit is turned on.)
Antenna is not vertical or is covered. Be sure antenna is straight up and
not obstructed.
Units are set to different channels. Set both units to the same channel.
Weak batteries. Replace batteries or use AC adapter.
Volume is set too low. Raise volume setting.
Troubleshooting
2
Safety Instructions
1. THE USER SHOULD NOT ATTEMPT TO SERVICE THIS PRODUCT.
READ ALL SAFETY AND OPERATING INSTRUCTIONS BEFORE
OPERATING THIS PRODUCT
2. RETAIN THESE INSTRUCTIONS FOR FUTURE REFERENCE
3. OBSERVE ALL WARNINGS
4. FOLLOW ALL OPERATING INSTRUCTIONS
5. WATER AND MOISTURE
This product should not be used near water, for example, near a
bathtub, or sink, in a wet basement or near a swimming pool.
6. VENTILATION
This product should be situated in such a way that it has proper
ventilation. Do not place on a bed, sofa, rug, or similar surface
that may block ventilation openings. Do not place in an enclosed
area, such as a cabinet or book case that might impede the flow
of air through the ventilation openings.
7. HEAT
This product should be situated away from heat sources such
as radiators, heat registers, stoves, or other appliances that
produce heat.
8. POWER SOURCE
This product should be connected to a power supply only of
the type described in these instructions or marked on the
product itself.
IMPORTANT: The following applies only to UL LISTED UNITS. This
product is being supplied with the required safety feature of a
Polarized Plug. You will note that one prong is larger than the other
so that the plug fits into the outlet only one way. DO NOT TAMPER
WITH THE PLUG under any circumstances.
9. POWER CORD PROTECTION
The power supply cord should be routed so that it is not likely to
be walked on or pinched by items placed upon or against it. Pay
particular attention to the cord at the plug, at the convenience
receptacle, and at the point it exits from the appliance.
10. CLEANING
Before cleaning, be sure to unplug. Clean only as recommended
in these instructions.
11. NON-USE PERIODS
The power cord of the product should be unplugged from the
outlet when the Monitor will be unused for a long period of time.
12. OBJECT AND LIQUID ENTRY
Care should be taken so that objects do not fall and liquids are
not spilled into the enclosure through the openings.
13. DAMAGE REQUIRING SERVICE
This product should be serviced by qualified service personnel
(see below) when:
a. The power supply cord or plug has been damaged; or
b. Objects have fallen or liquid has been spilled into it; or
c. The product has been exposed to rain; or
d. The product does not appear to operate normally or exhibits a
marked change in its performance; or
e. The product has been dropped or the enclosure damaged.
14. WALL MOUNTING
The monitor should be mounted to a wall only as recommended
in these instructions.
This symbol is intended to
alert the user to the presence
of important operating and
maintenance (servicing)
instructions in the literature
accompanying the product.
This symbol is intended to alert
the user to the presence of
uninsulated “dangerous
voltage” within the product’s
enclosure that may be of
sufficient magnitude to
constitute the risk of electric
shock.
RISK OF ELECTRICAL SHOCK. DO NOT
OPEN.
CAUTION: TO REDUCE THE RISK OF
ELECTRICAL SHOCK, DO NOT REMOVE
THE COVER OR BACK OF EITHER UNIT.
THERE ARE NO USER-SERVICEABLE
PARTS INSIDE.
REFER ALL SERVICING TO A QUALIFIED
THE FIRST YEARS TECHNICIAN
(Call 1-800-704-8697 if you believe your
unit needs service).
TO REDUCE THE RISK OF FIRE OR
ELECTRICAL SHOCK, DO NOT EXPOSE
THIS PRODUCT TO WATER OR MOISTURE.
!
CAUTION:
3
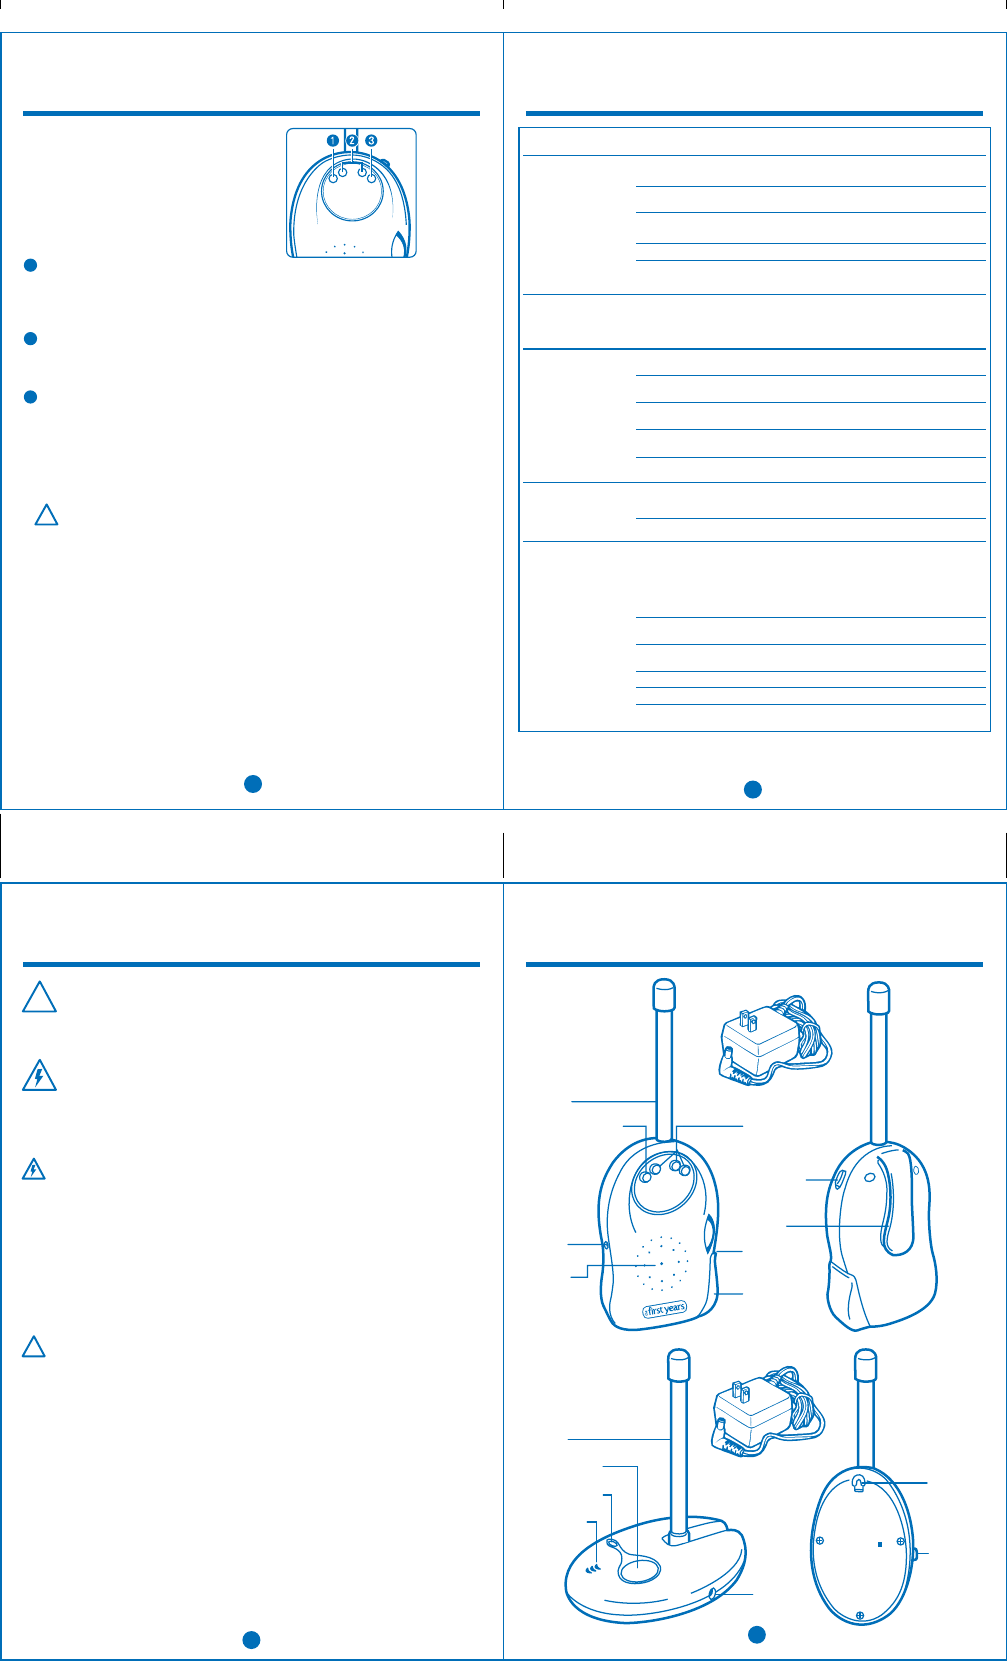
Contents
Child’s Unit
(transmitter)
AC adapter
antenna
ON/OFF button
power indicator
microphone
jack for
AC adapter
wall mount
slot
two
channel
A/B switch
POWER ON/OFF
POWER LED
Parent’s Unit
(receiver)
antenna
power/low battery
indicator
jack for
AC adapter
speaker
sound lights
two channel
A/B switch
belt clip
ON/OFF
volume dial
battery
compartment
AC adapter
B
A
WARNING:
!