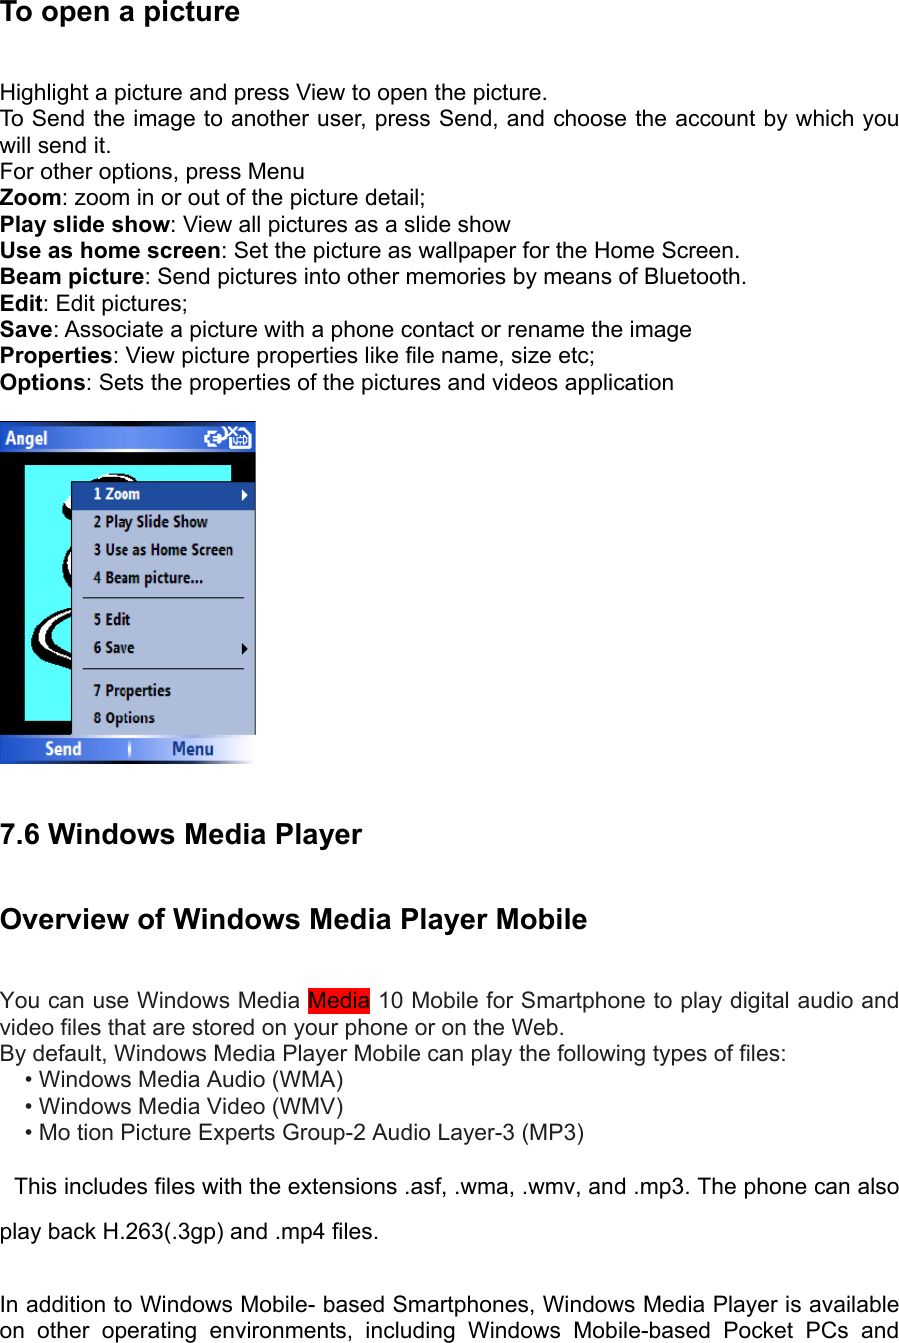
Toshiba Information Systems RG4-E01 GSM/UMTS/HSDPA Mobile Phone User Manual for SP2RG4E01
Toshiba Information Systems (UK) Ltd, Mobile Communications Division GSM/UMTS/HSDPA Mobile Phone for SP2RG4E01
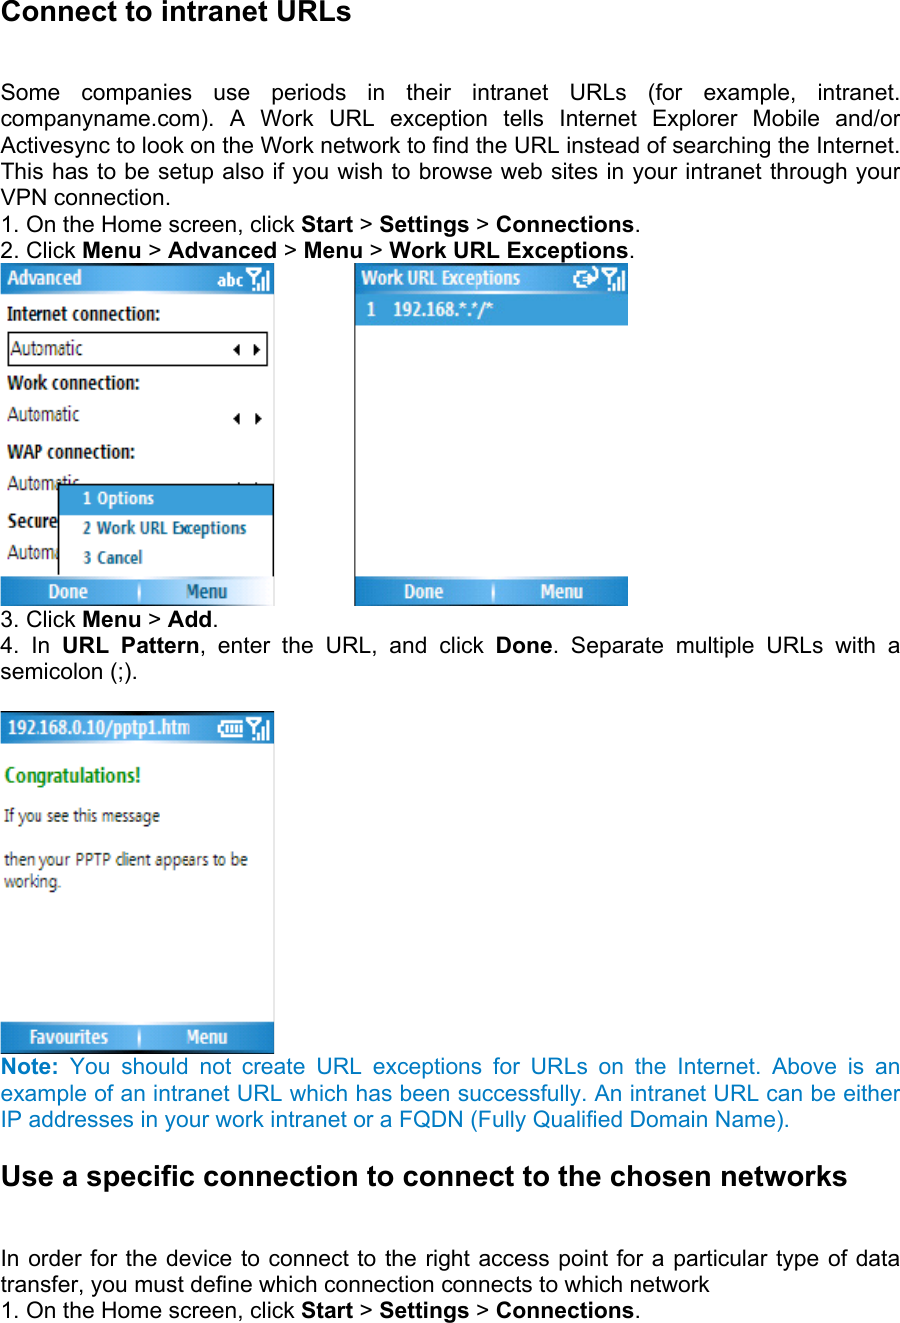
Contents
- 1. User Manual for SP2RG4E01
- 2. User Manual
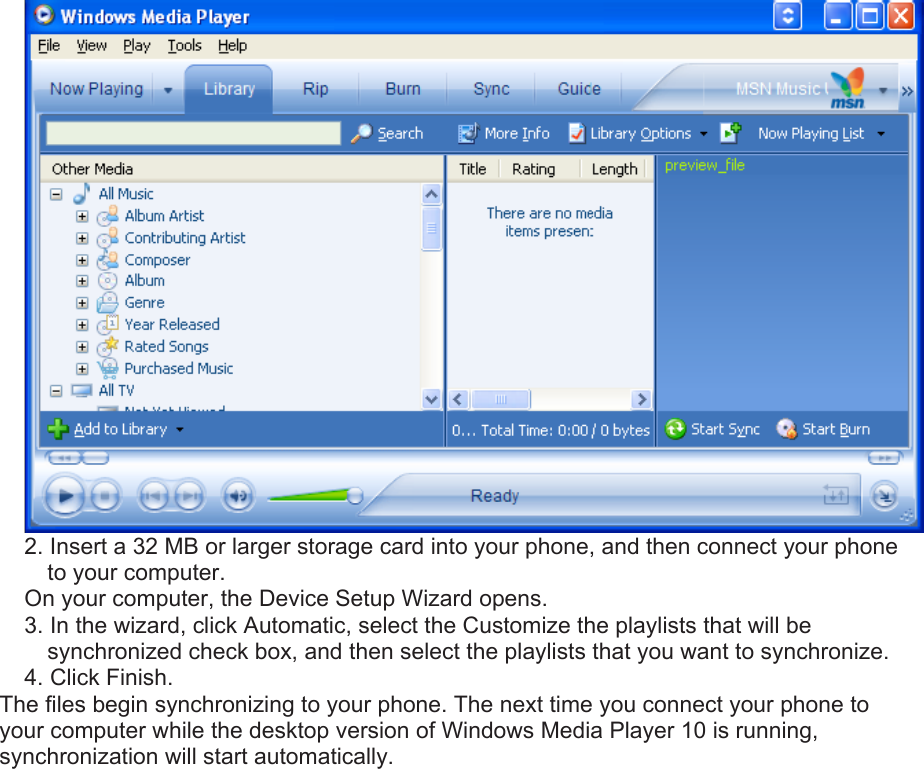
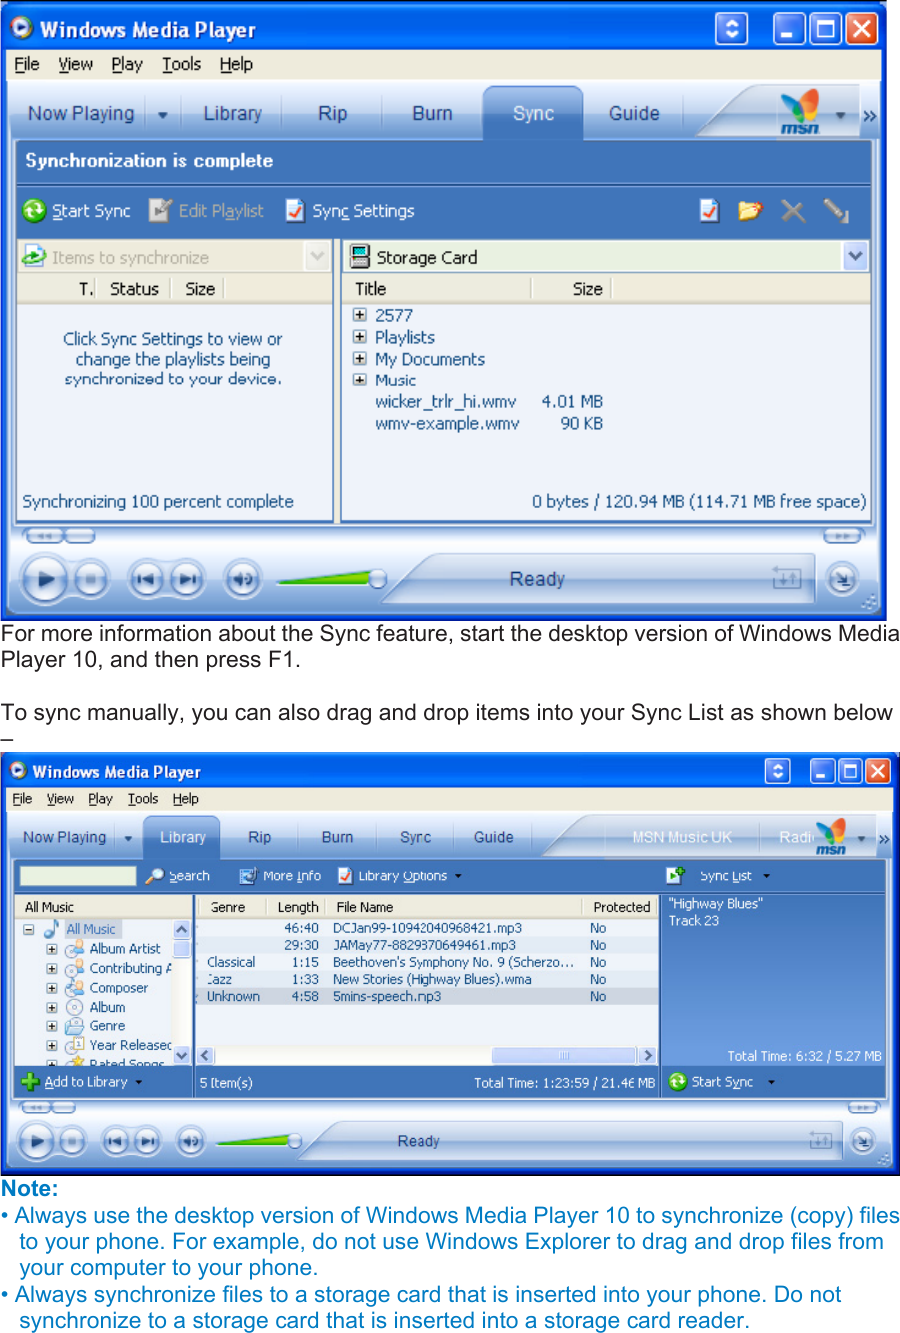
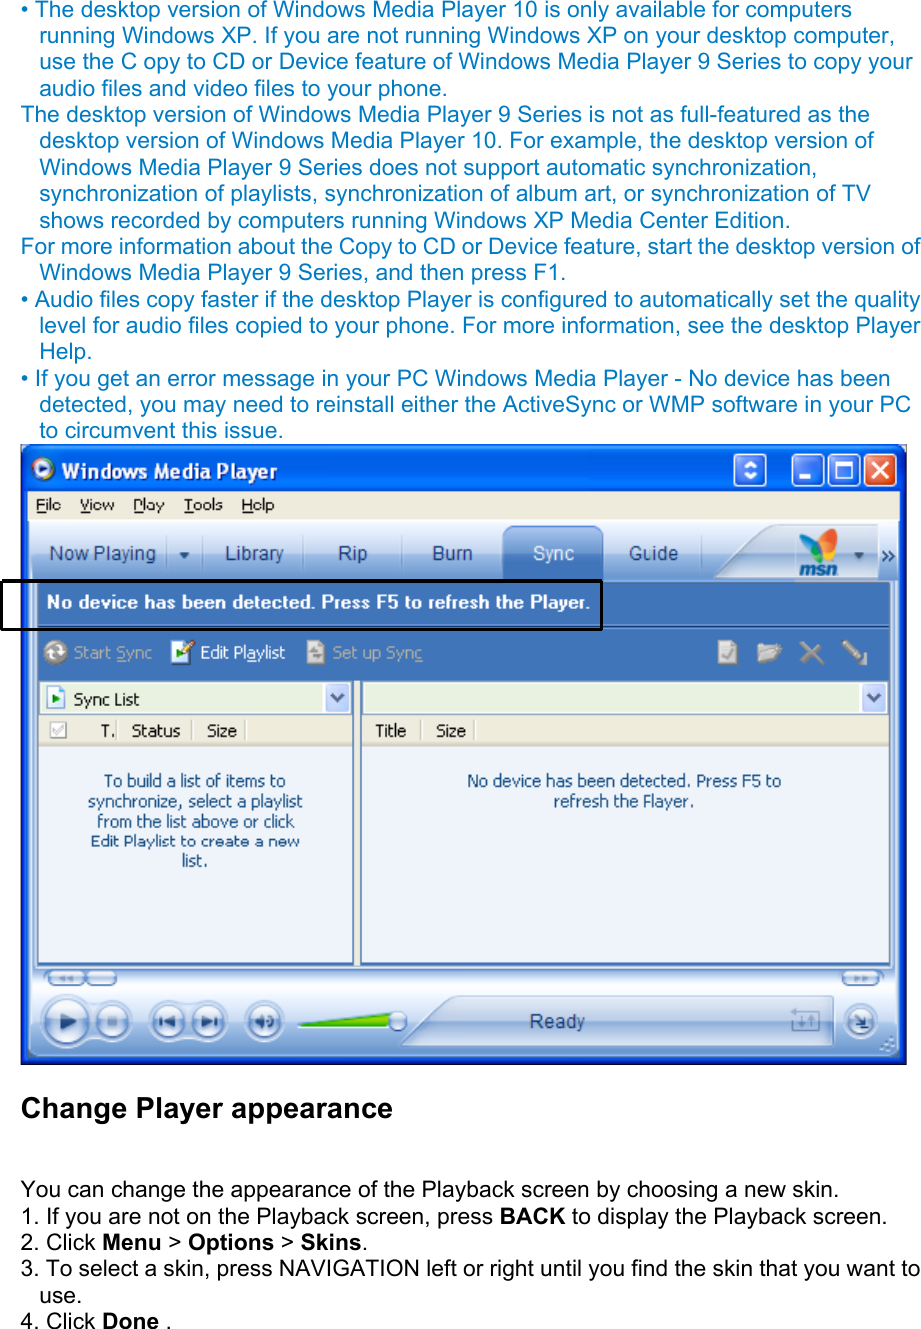
User Manual for SP2RG4E01
![electronic medical equipment, radio waves may interfere with such a device or equipment Observe the following guidelines 1. If you have an implanted cardiac pacemaker or defibrillator, carry and use the handset at a distance of at least 22 centimetres away from the implanted device. 2. Turn off the handset in crowded places such as packed trains because a person with an implanted cardiac pacemaker or defibrillator may be nearby. Radio waves can interfere with the operation of a cardiac pacemaker or other medical device. 3. Follow the precautions below in medical institutions. ٛ ・Do not bring the handset into an operating room, intensive care unit or coronary care unit. ٛ ・Turn off the handset in a hospital ward. ٛ ・Turn off the handset in a lobby or other location close to medical equipment. ٛ ・Observe the instructions of individual medical institutions and do not use the handset in or bring it into prohibited areas. ٛ ・Turn off the handset after cancelling any settings such as schedule and alarm settings that turn on the handset automatically. 4. When using electronic medical devices other than an implanted cardiac pacemaker or defibrillator outside of medical institutions (such as at home), consult with the individual medical device manufacturer about the possible influence of radio waves. The above information conforms to "The Guidelines on Use of Mobile Phones and Other Devices to Prevent Electromagnetic Wave Interference with Electronic Medical Equipment" (Electromagnetic Compatibility Conference Japan, April 1997), as well as refers to "The Investigative Research Report on the Influence of Electromagnetic Waves on Medical Equipment" (Association of Radio Industries and Businesses, March 2001). Do not use the rapid charger with any power supply other than a 100 to 240 V AC household power supply Doing so may result in a fire, as well as cause the charger to overheat, catch fire or malfunction. Do not insert the dry battery of BluetoothTM Stereo Headset with wrong polarity [(+) & (-)]. Doing so may cause the malfunction of the equipment as well as cause the dry battery to leak. Do not use the dry battery of BluetoothTM Stereo Headset after the “Recommended Use-by Date” displayed on the battery expired, or do not leave the used-up dry battery as being inserted. Doing so may cause the malfunction of the equipment as well as cause the dry battery to leak. Keep the dry battery of BluetoothTM Stereo Headset out of the reach of small children. If it is mistakenly swallowed, consult a doctor as soon as possible because this may cause suffocation or injury to stomach etc.](https://usermanual.wiki/Toshiba-Information-Systems/RG4-E01.User-Manual-for-SP2RG4E01/User-Guide-739261-Page-8.png)

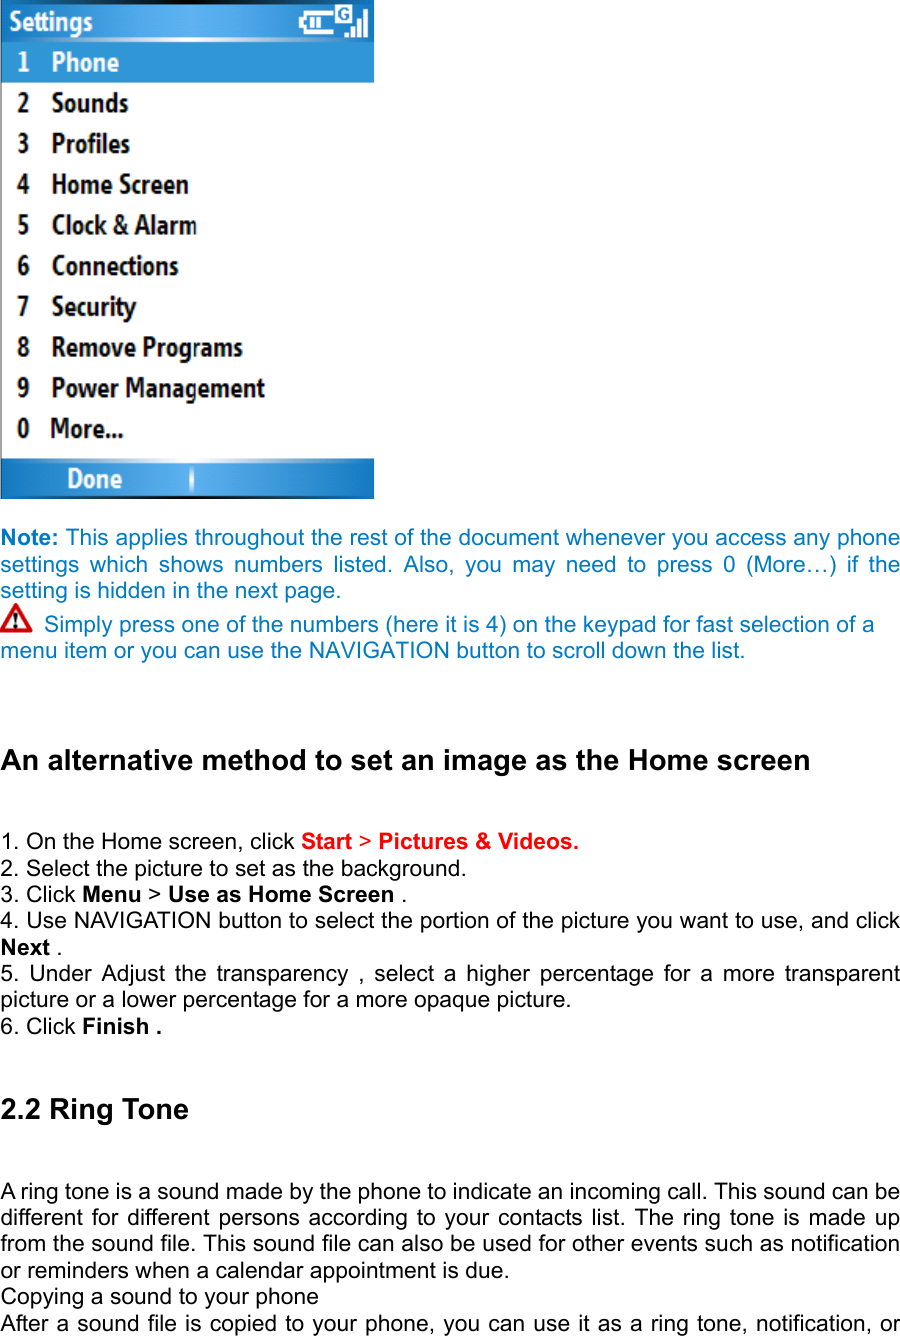
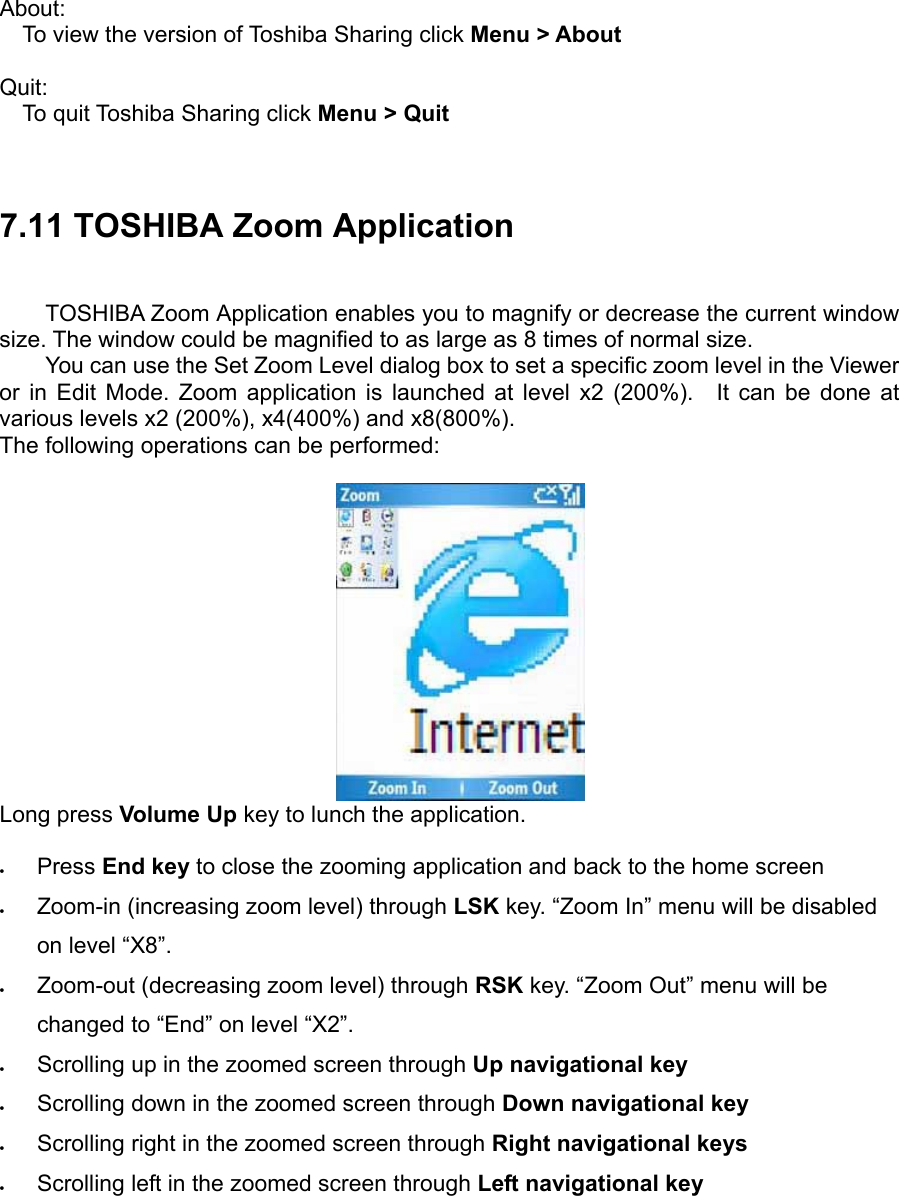
![reminder. 1. Connect the phone to your PC using a USB connection (see the chapter on ActiveSync setup for your PC). 2. On your PC, copy the sound file you want. 3. In ActiveSync on your PC, click Explore and double-click My Windows Mobile device . Note: For ring tones, the sound files can be in either midi, wma, mp3, mmr or wav file format. For notifications or reminders, use either midi, wma, mp3, mmr or wav files. When you select a sound, let the sound plays. To hear it again, select Menu > Play. 4. Do one of the following: • To save the sound file on your phone, double-click Application Data , double-click Sounds , and paste the file into that folder. • To save the sound file on your storage card, double-click Storage Card , and paste the file into the folder you want. Specifying the sound for an event 1. On the Home screen, click Start > Settings > Sounds . 2. Under an event, click a sound. The phone plays each sound as you select it. Click None if you don’t want to hear a sound. 3. Repeat for each event, and click Done . To change the current profile The Profile feature defines how your phone notifies you of incoming calls, alarms etc. For example Normal – For day-to-day use. Device will ring. Silent – Device will not ring or vibrate. Meeting – vibrates as you are in a meeting 1. On the Home screen, click Profile [Type] . Example: Profile Normal . 2. Click a new profile, and click Done. Note:Some profiles are selected by the device depending how it is being used at the time. For example, the device will move to ‘Headset’ profile when you plug in a headset You can also change the profile by using the Quick List. Long-press the Volume Up key on the side of the phone to select the desired profile. The Automatic profile has special features. If you choose this profile the phone will act as if in ‘Normal’ mode. However, if you have set up a calendar appointment, then the phone will move to ‘meeting’ profile when the appointment takes place. Customizing a Profile 1. On the Home screen, scroll down the screen then select and click Profile [Type] . Example: Profile Normal . 2. Select the profile to edit. 3. Click Menu > Edit .](https://usermanual.wiki/Toshiba-Information-Systems/RG4-E01.User-Manual-for-SP2RG4E01/User-Guide-739261-Page-24.png)


![Create a dial-up connection Every network connection is different. You should gather all of the relevant information or network settings you need before starting this process. 1. On the Home screen, click Start > Settings > Connections. 2. Click Dial-up . 3. Click Menu > Add. 4. Enter the following information, and click Done. • In Description , enter a name for the connection. • In Connects to , select the network. • In Phone number , enter the phone number to be used to dial the network. • In User name , enter your network user name, if required. • In Password , enter your password, if required. • In Domain , enter the domain name, if required. Create a proxy connection Dependent on your Mobile Service Provider’s configuration, you may need to add a proxy connection to allow your phone to access the internet or WAP services. Every network connection is different and your service provider will be able to advise if there is a requirement for this. You should gather all of the relevant information or network settings you need before starting this process. 1. On the Home screen, click Start > Settings > Connections. 2. Click Proxy . 3. Click Menu > Add. 4. Enter the following information, and click Done. • In Description , enter a name for the connection. • In Connects from , select the type of network from which you will connect. • In Connects to , select the type of network to which you will connect. • In Proxy [name:port] enter the proxy server name and port number in this form: server name:port number. • In Type , select the type of proxy connection to create. • In User name , enter your user name for the network to which you will connect.](https://usermanual.wiki/Toshiba-Information-Systems/RG4-E01.User-Manual-for-SP2RG4E01/User-Guide-739261-Page-36.png)