Toy Island 02030PM-RX Voice Command Pitching Machine User Manual VC Pitching INSTRUCTION 1
Toy Island Manufacturing Co., Ltd. Voice Command Pitching Machine VC Pitching INSTRUCTION 1
Manual
Warning: Changes or modifications to this unit not expressly approved by the party responsible for
compliance could void the user’s authority to operate the equipment.
NOTE: This equipment has been tested and found to comply with the limits for a Class B digital device,
pursuant to Part 15 of the FCC Rules. These limits are designed to provide reasonable protection against
harmful interference in a residential installation. This equipment generates, uses and can radiate radio
frequency energy and, if not installed and used in accordance with the instructions, may cause harmful
interference to radio communications.
However, there is no guarantee that interference will not occur in a particular installation. If this equipment
does cause harmful interference to radio or television reception, which can be determined by turning the
equipment off and on, the user is encouraged to try to correct the interference by one or more of the
following measures:
- Reorient or relocate the receiving antenna.
- Increase the separation between the equipment and receiver.
- Connect the equipment into an outlet on a circuit different from that to which the receiver is connected.
- Consult the dealer or an experienced radio/TV technician for help.
This device complies with Part 15 of the FCC Rules. Operation is subject to the following two conditions:
(1) this device may not cause harmful interference, and
(2) this device must accept any interference, including interference that may cause undesired operation
of the device.
1) Unscrew the battery cover from under the pitching machine.
2) Install the 6 D-size batteries into the battery compartment
as illustrated making certain that negative (-) and
positive (+) poles are positioned properly.
PITCHING MACHINE ASSEMBLY INSTRUCTIONS
3) Place the battery cover back over the compartment and
secure with 4 screws - be sure not to over tighten.
4) Place the ball funnel on the pitching machine and push down
until secure atop the machine.
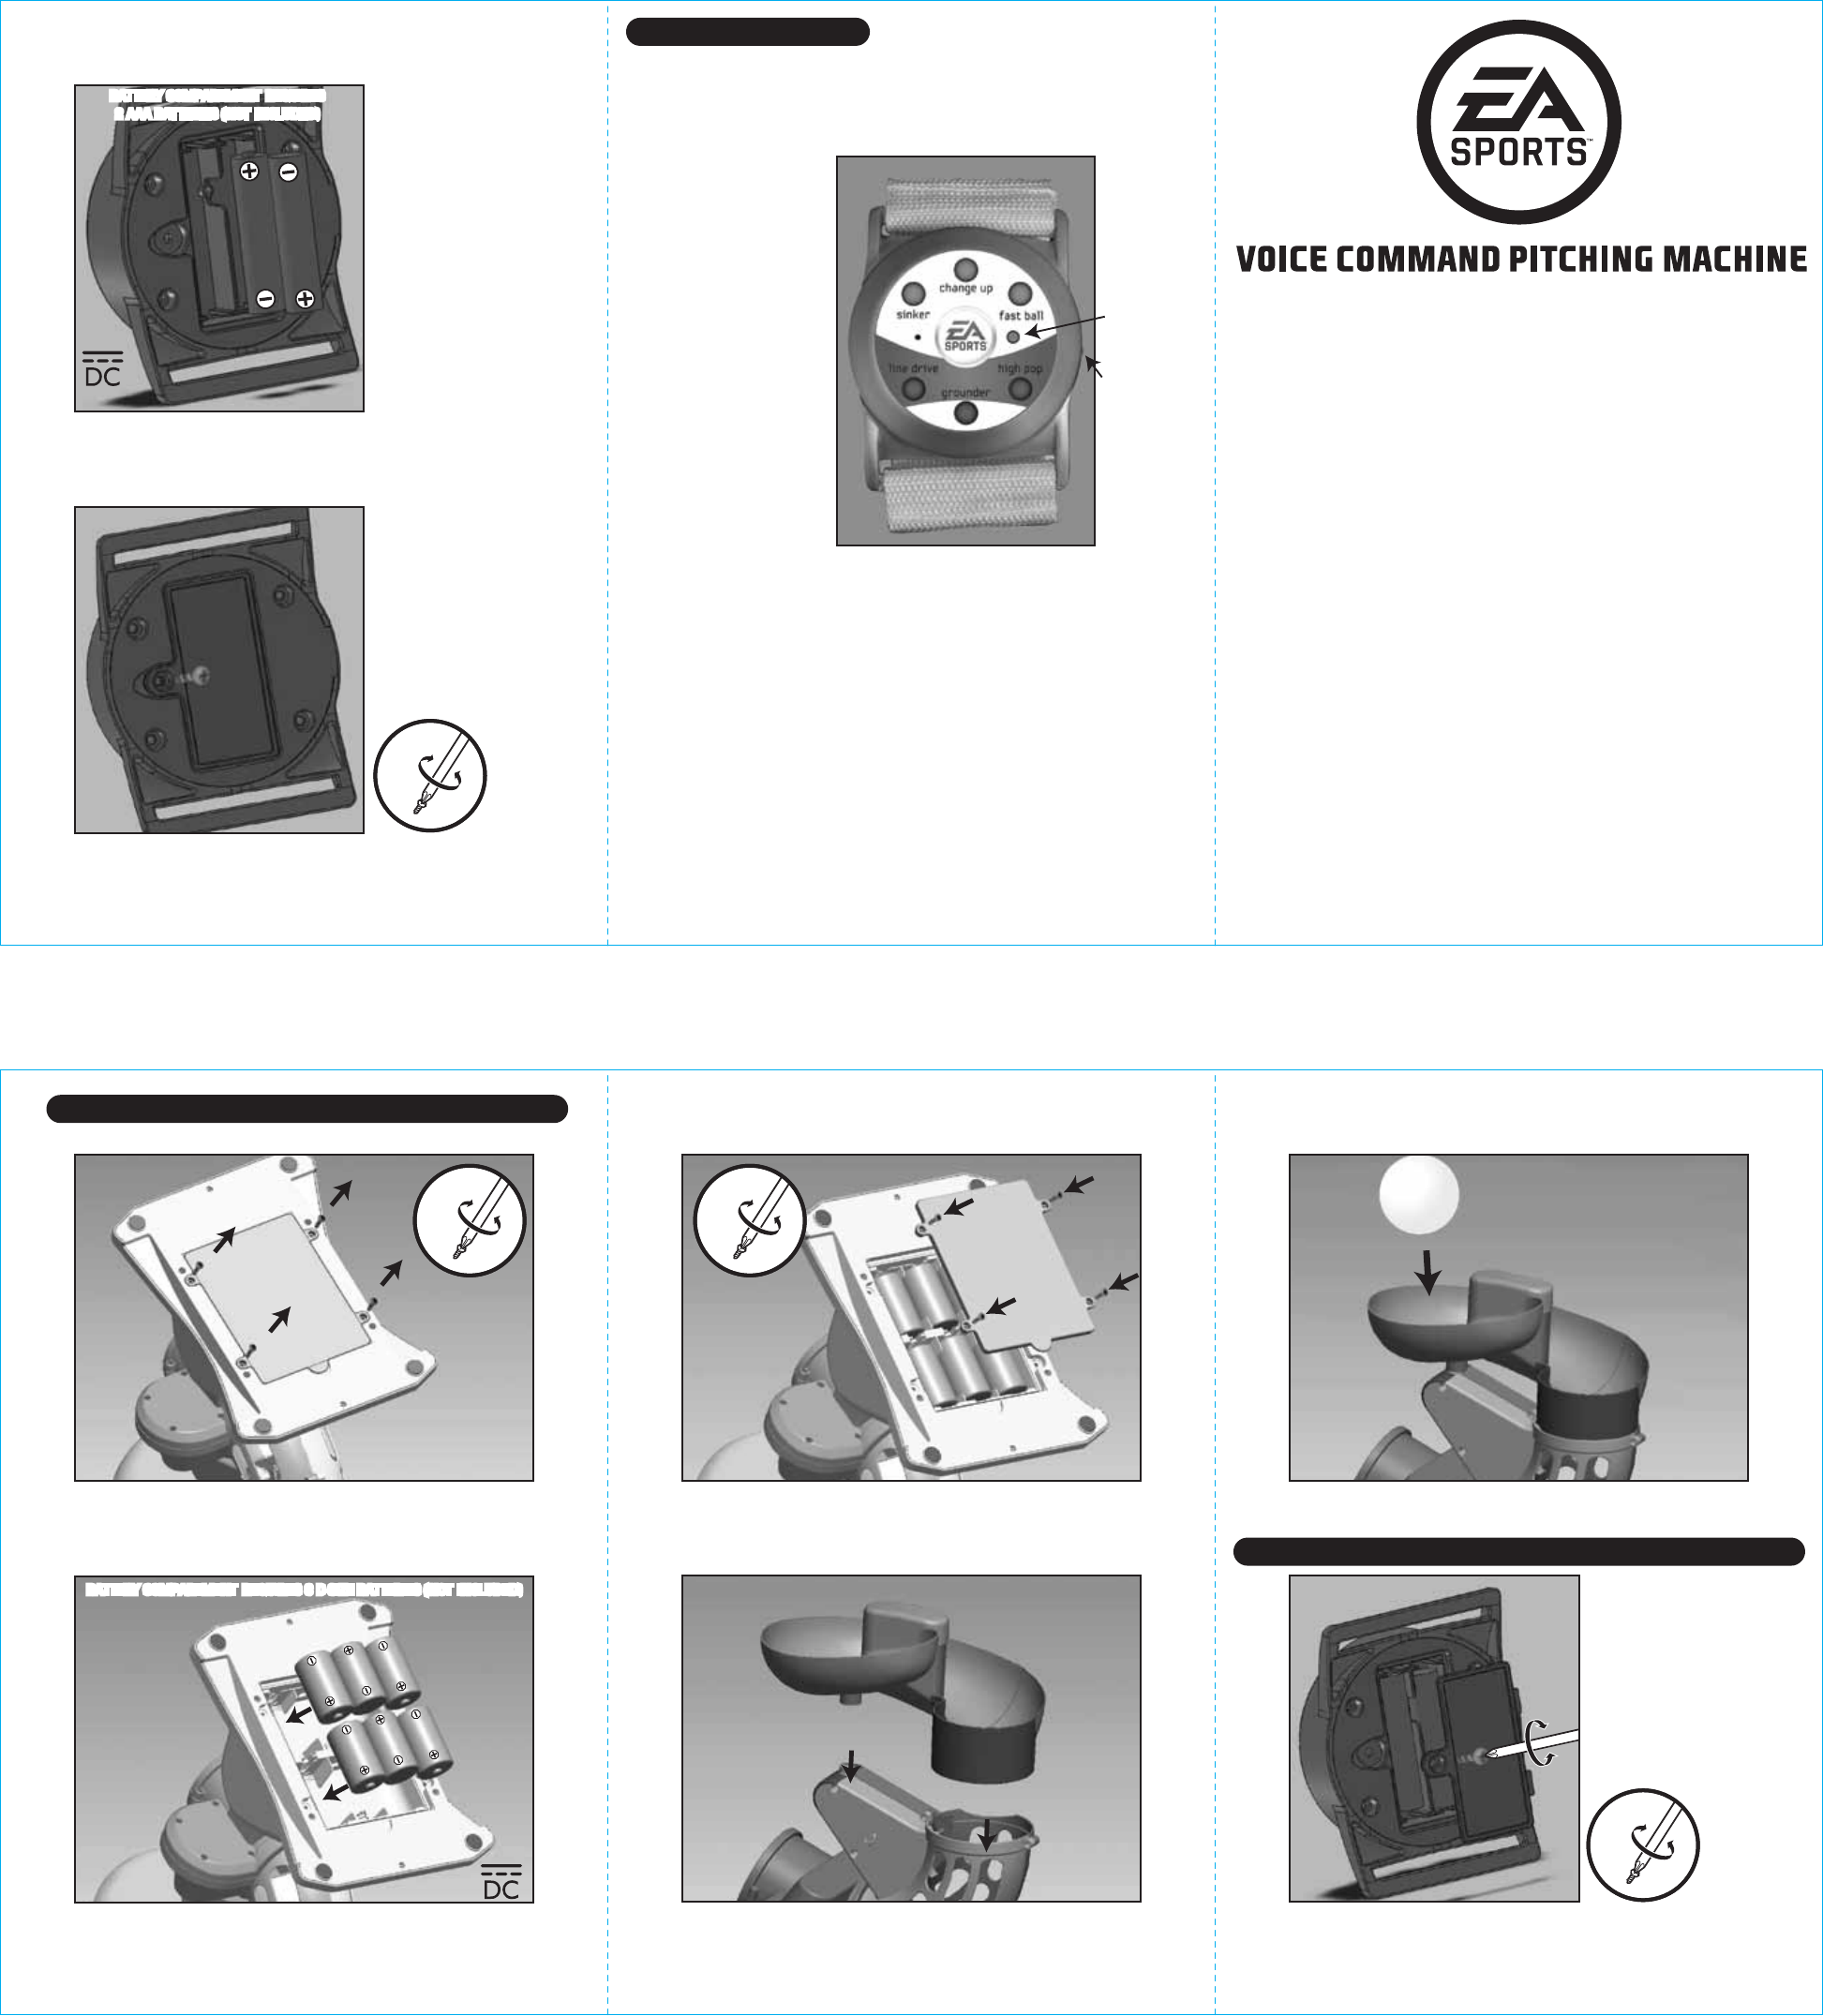
6) Unscrew the battery cover from the
back of the wrist communicator.
WRIST COMMUNICATOR ASSEMBLY INSTRUCTIONS
5) Load balls on to the funnel.
7) Install the 2 AAA batteries
into the battery
compartment of the wrist
communicator.
8) Place the battery cover
back over the compartment
and secure with screw
- be sure not to over tighten.
PLAY INSTRUCTIONS
1) To turn on unit, slide the switch to either manual or random.
2) Slide the wrist communicator switch on the side of the communicator
to ON.
Pitching speed:
Fastball - 15mph Pitch
Change Up - 15mph Pitch
Sinker - 12mph Pitch
Fielding:
Pop-up - ball reaches
10’ high
ON/OFF
Switch
Power
Indicator
LED
*Power indicator LED on wrist controller will flash when the player is in
range and the machine is on. The LED will turn a solid RED when pitch or
fielding ball is ready.
In pitch mode, select pitch/fielding from the wrist controller. When ready
to begin, call out PITCH or FIELD to start the machine.
In random mode, every 3-5 seconds a random pitch will be thrown.
Note: Power LED will illuminate when the unit is on manual or random
mode. Signal LED will illuminate when unit is in manual mode, the wrist
controller is on and in communication range.
*Recognition system will work up to 26 away in ideal conditions.
CAUTION: Do not stand directly in front of the pitching machine as the
close range may cause harm when balls are pitched from the machine.
EA, EA SPORTS, the EA SPORTS logo and It’s In the Game are trademarks or
registered trademarks of Electronic Arts Inc. in the U.S. and/or other countries.
Toy Island is an authorized Electronic Arts licensee.
Manufactured by Toy Island Manufacturing Co. Ltd.
H.K. Office Address: 1/F., HK Spinners Industrial Building Phase I & II,
800 Cheung Sha Wan Road, Kowloon, Hong Kong.
Contact Toy Island at 888 238 8095 (U.S. Only)
MADE IN CHINA.
ALL RIGHTS RESERVED.
• Do not use rechargeable batteries.
• Non-rechargeable batteries should not be recharged.
• Do not mix old and new batteries.
• Do not mix alkaline, standard (carbon - zinc),
or rechargeable (nickel - cadmium) batteries.
• Battery installation / replacement should be done by adult.
• Batteries are to be inserted with the correct polarity.
Product is water resistant but do not leave out in severe weather.
• Exhausted batteries are to be removed from
the product.
• The supply terminals are not to be short-circuited.
• Do not dispose of batteries in fire; batteries may
explode or leak.
• Remove batteries if the product will not be used
for a long period of time.
< THE PRODUCT IS TO BE ASSEMBLED BY AN ADULT >
1.5V D-SIZE
1.5V D-SIZE 1.5V D-SIZE
1.5V D-SIZE
1.5V D-SIZE 1.5V D-SIZE
OPEN
CLOSE
OPEN
CLOSE
OPEN
CLOSE
OPEN
CLOSE
BATTERY COMPARTMENT REQUIRES 6 D-SIZE BATTERIES (NOT INCLUDED)BATTERY COMPARTMENT REQUIRES 6 D-SIZE BATTERIES (NOT INCLUDED)
1.5V AAA
1.5V AAA
BATTERY COMPARTMENT REQUIRES
2 AAA BATTERIES (NOT INCLUDED)
BATTERY COMPARTMENT REQUIRES
2 AAA BATTERIES (NOT INCLUDED)
OPEN
CLOSE
P.6 P.1P.5
P.3 P.4P.2