Toy State 38721-49 Remote Control Toy Transmitter User Manual 38721 CAT Instr 101703
Toy State Industrial Ltd Remote Control Toy Transmitter 38721 CAT Instr 101703
manual
CAUTION-ELECTRICALLY
OPERATED PRODUCT:
NOT RECOMMENDED FOR CHILDREN UNDER 5 YEARS
OF AGE. AS WITH ALL ELECTRIC PRODUCTS,
PRECAUTIONS SHOULD BE OBSERVED DURING
HANDLING AND USE TO PREVENT ELECTRIC SHOCK.
INPUT: 120V AC 60Hz 3.8W. OUTPUT: 12V DC 200mA.
RADIO CONTROL
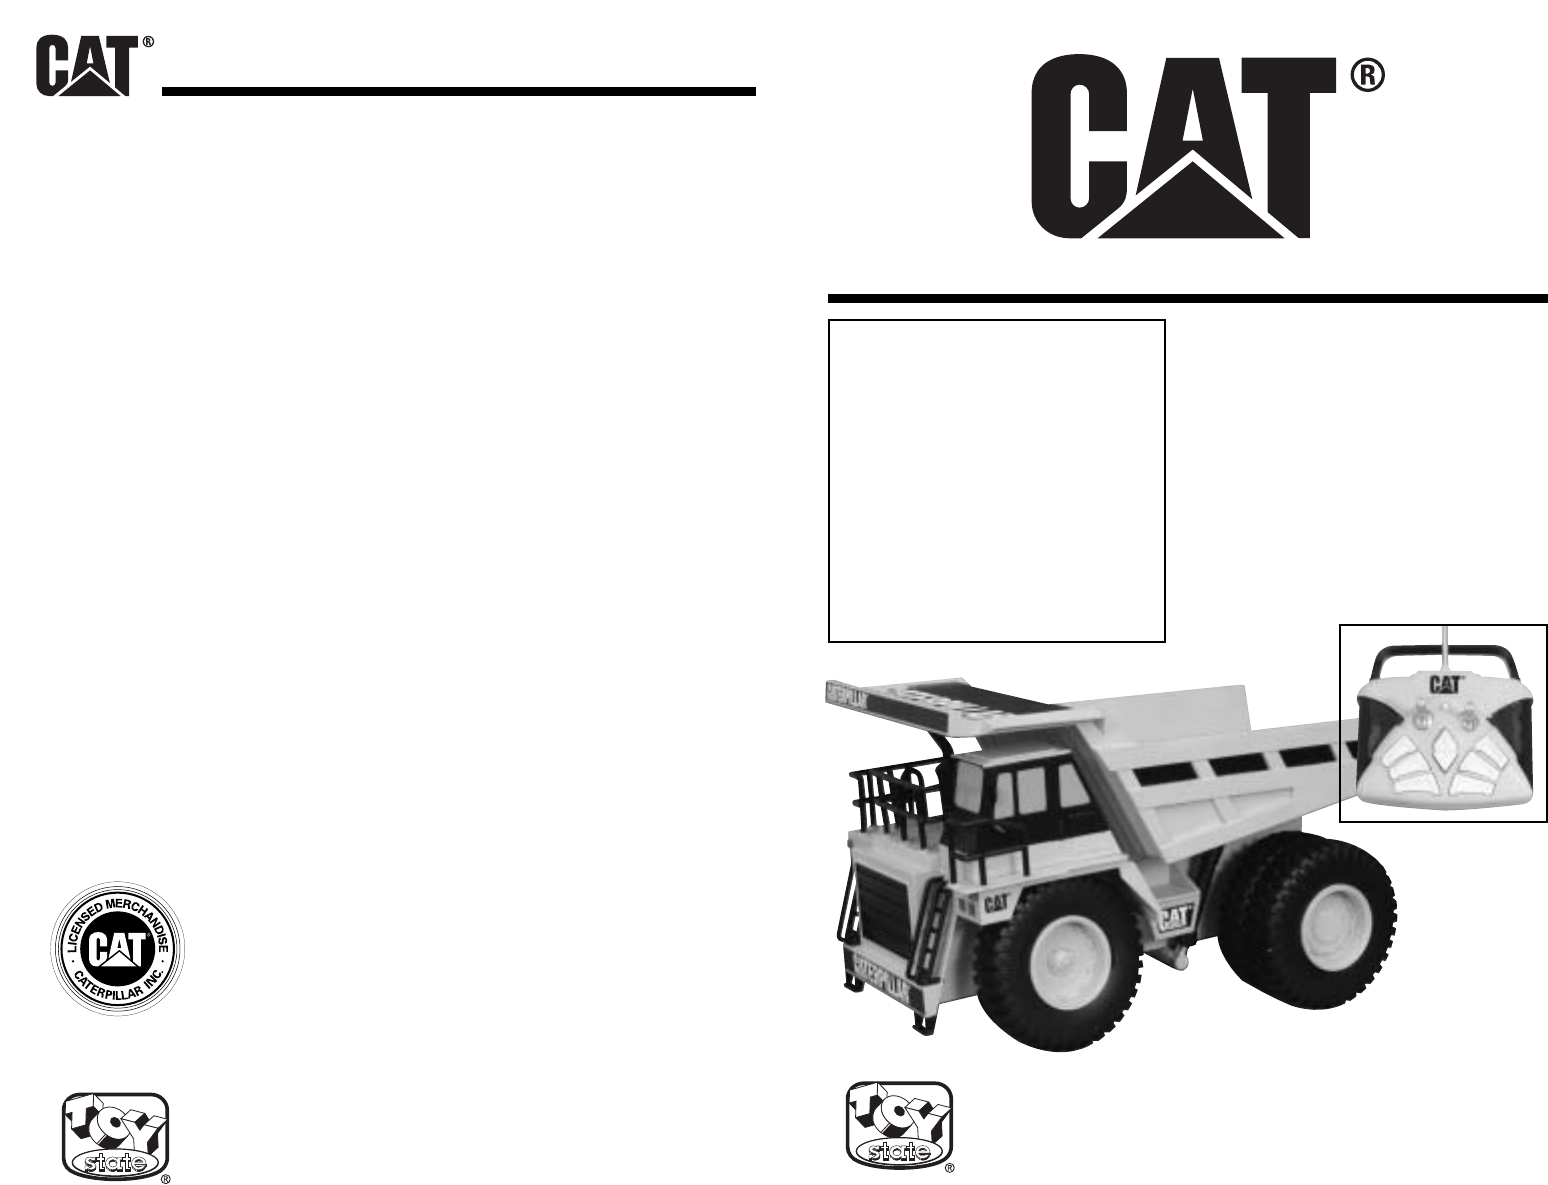
DUMP TRUCK
OWNER’S MANUAL
BATTERY REQUIREMENTS:
4 “AA” Batteries (for Controller)
One 9.6V Rechargeable Power
Pack/Charger
(for Truck).
MADE IN CHINA
TOY STATE INDUSTRIAL LTD.
14 Science Museum Road, Kowloon, Hong Kong
Call for Help!
If you have questions about this toy
Call Toll-Free: 1-877-473-8015
Between 9:00 a.m. – 5:00 p.m. E.S.T. Monday thru Friday
Contact via e-mail: consumerservice@toystate.com
© 2004 Caterpillar
CAT, CATERPILLAR, and their design marks
are registered trademarks of Caterpillar Inc.
8
MANUFACTURERS NOTE
1
FEDERAL COMMUNICATIONS COMMISSION COMPLIANCE
“Modifications not authorized by the manufacturer may void users authority to operate the device.”
CAUTION
Important Battery Information
RECHARGEABLE BATTERY PACK IS NICKEL CADMIUM, BATTERY MUST BE RECYCLED OR DISPOSED
OF PROPERLY.
NOTE: 10 hour charging is recommended. The minimal time for charging is no less than 5 to 6 hours
to assure proper performance of the dump truck.
•Allow the battery pack to cool before recharging.
•Do not recharge batteries that are leaking or broken.
•Always disconnect battery pack from truck when not in use.
•Do not dispose of battery pack in fire.
•Dispose of NiCd battery packs properly.
•Always remove battery pack from vehicle before charging.
•Do not use charger for any other use other than instructed in directions.
•Use only batteries of the type recommended.
•Do not mix alkaline, standard (carbon-zinc) or rechargeable (nickel-cadmium) batteries.
•Do not mix old and new batteries.
•Remove batteries from truck if vehicle will not be used for a long period.
NOTE:
This equipment has been tested and found to comply with the limits for a Class B digital device, pursuant
to Part 15 of the FCC Rules. These limits are designed to provide reasonable protection against harmful
interference in a residential installation. This equipment generates, uses and can radiate radio frequency
energy and, if not installed and used in accordance with the instructions, may cause harmful interference
to radio communications. However, there is no guarantee that interference will not occur in a particular
installation. If this equipment does cause harmful interference to radio or television reception, which can
be determined by turning the equipment off and on, the user is encouraged to try to correct the
interference by one or more of the following measures:
•Reorient or relocate the receiving antenna.
•Increase the separation between the equipment and receiver.
•Connect the equipment into an outlet on a circuit different from that to which the receiver is connected.
•Consult the dealer or an experienced radio/TV technician for help.
PROBLEM! TRUCK DOES NOT MOVE
PROBLEM! TRUCK MOVES BY ITSELF
PROBLEM! TRUCK RUNS SLOWLY
TROUBLESHOOTING AND CARE FOR R/C TRUCKS
• Are the + and –‘s contacts correctly matched in the controller?
• Are the metal contact tabs touching, rusty or dirty in controller?
• Are there batteries in the vehicle and controller?
• Is the power switch turned on?
• Is the battery/power pack weak or out of power?
• Is the Lock button on the controller activated? Press again to start the engine.
• Are there batteries in controller?
• There is radio interference in the area.
• Another R/C vehicle with the same frequency is close by.
• The antenna of controller is not screwed in tight.
• The antenna is not fully extended.
• A supernatural phenomenon.
• There is radio interference in the area.
• Another R/C vehicle with the same frequency is close by.
• The antenna of controller is not screwed in tight.
• The antenna is not fully extended.
PROBLEM?PERFORMANCE DROP, INCONSISTENT MOVEMENT OR FAILS TO RUN
Recharge battery power pack for 5 to 6 hours minimum and replace batteries in controller with
new alkaline batteries.
Call 1-877-473-8015 for help!
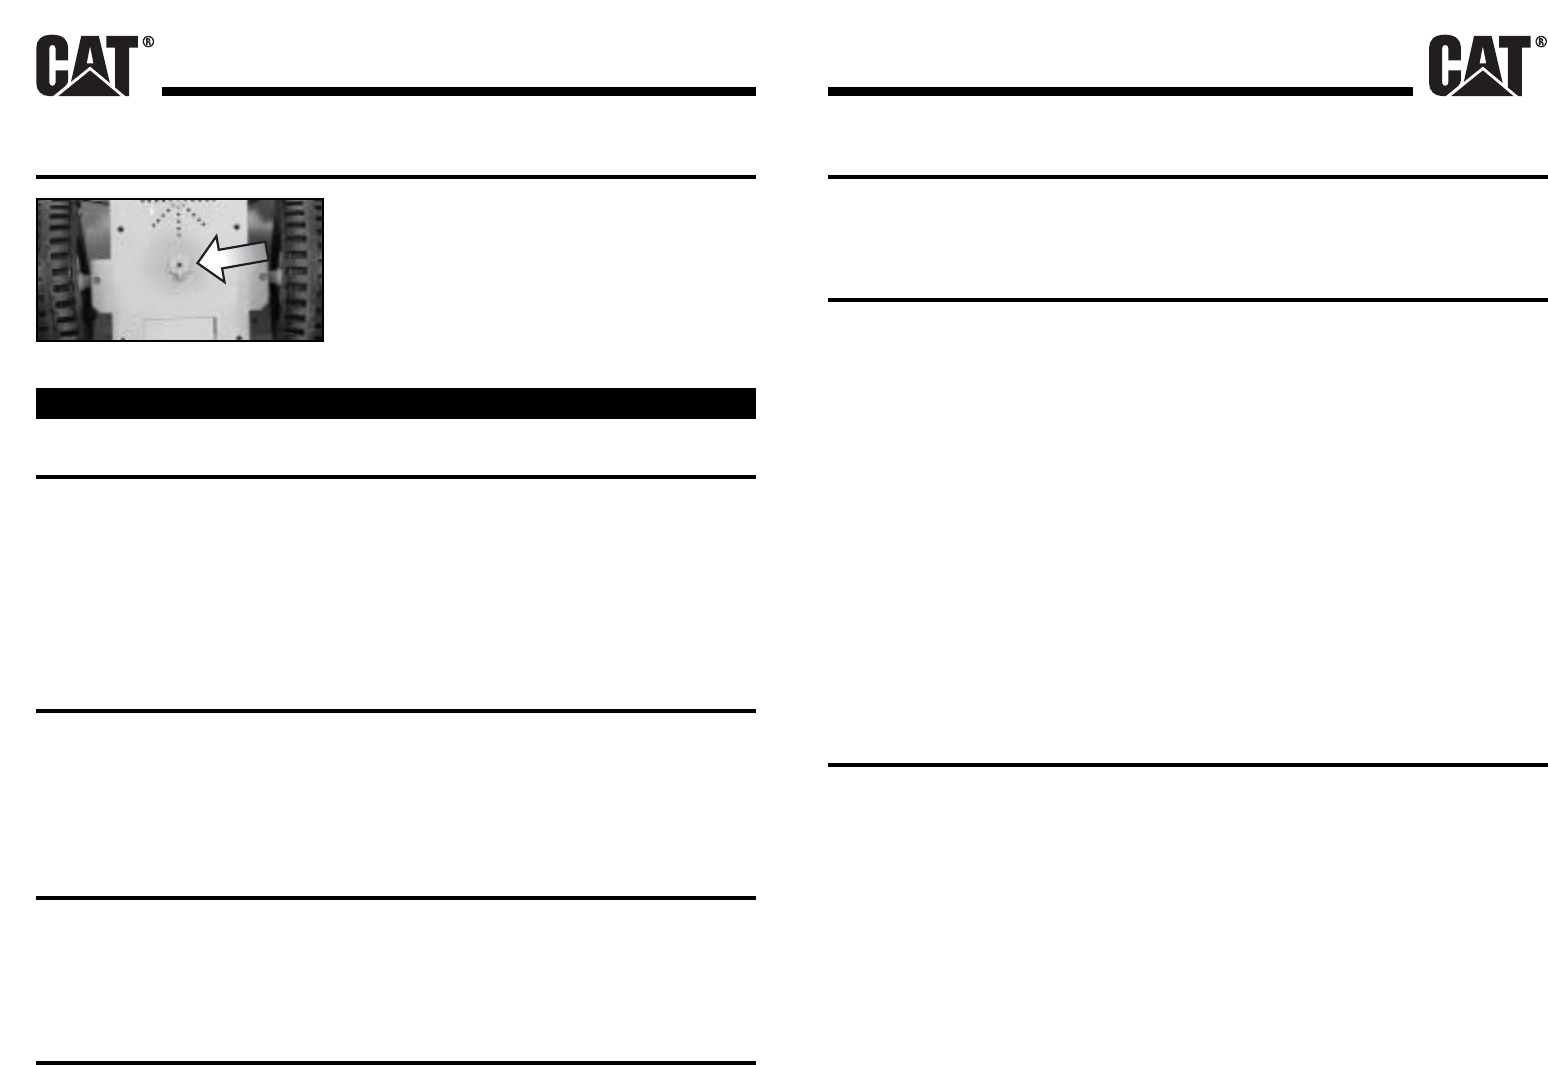
FRONT END ALIGNMENT
Trim adjustment is located under vehicle between front
wheels. Adjust trim to align wheels for straight line driving.
7
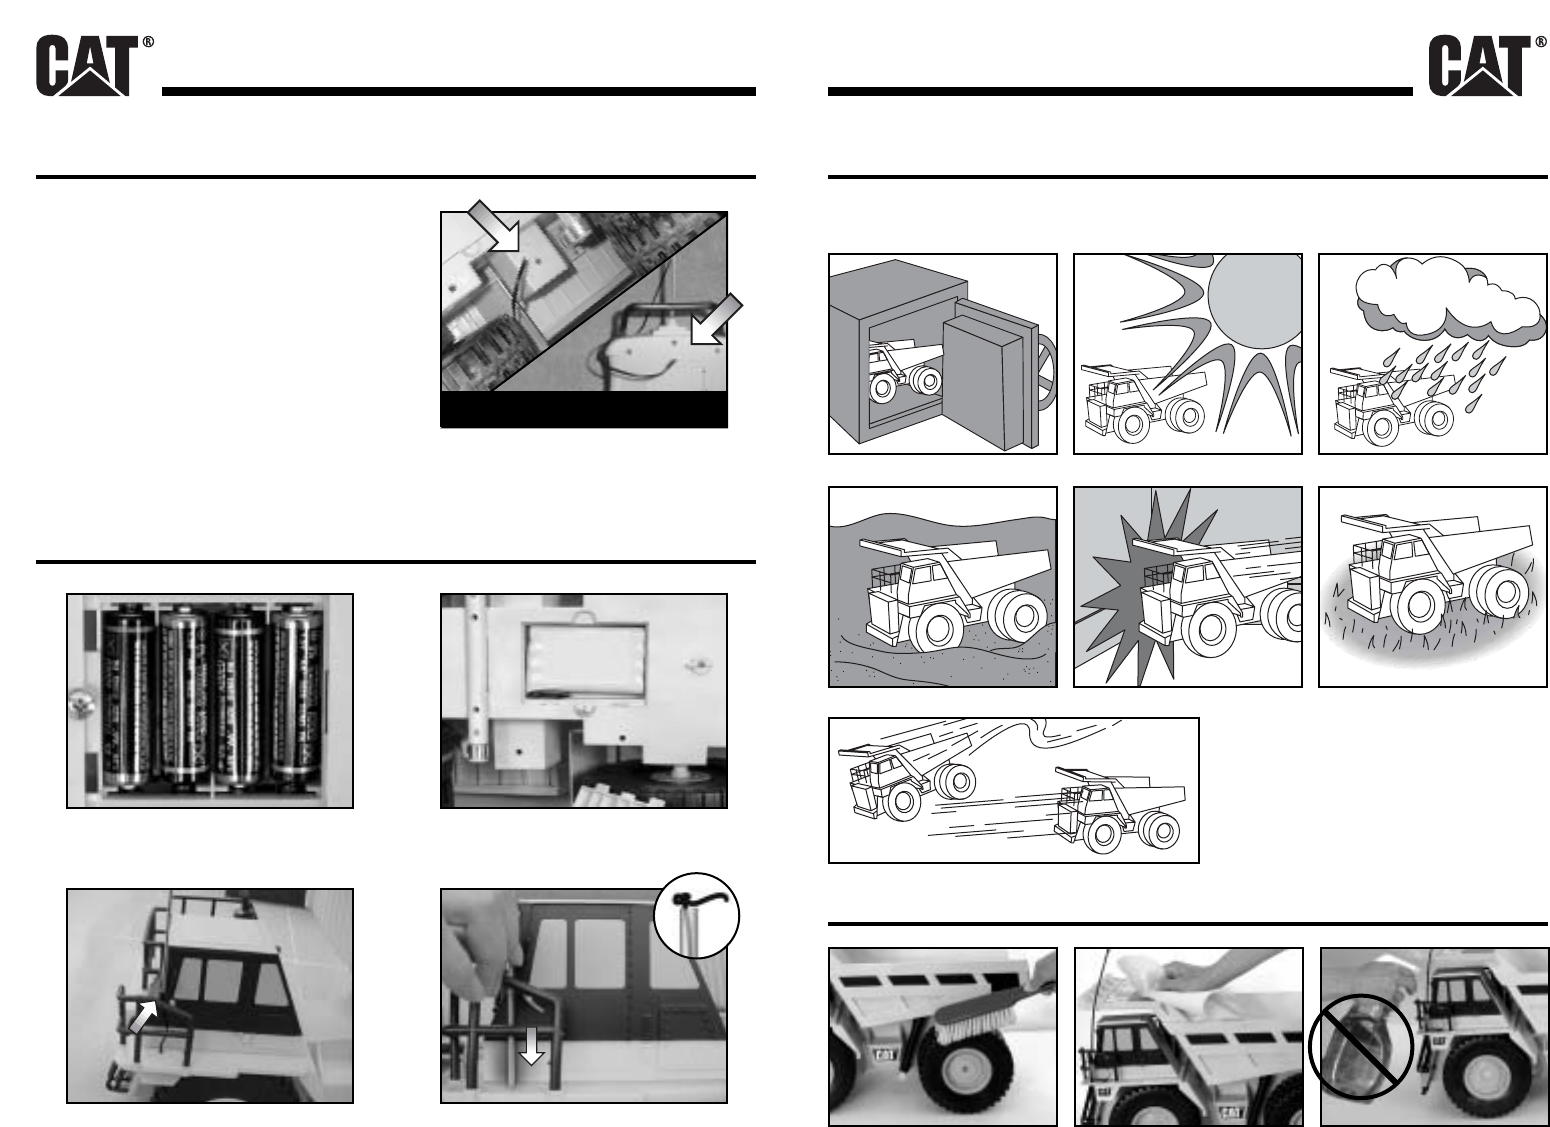
REMOVE THE “TRY ME” WIRE
2
Your CAT Radio Control Truck was sold in a
shelf demo package. Remove the vehicle and
controller from box. Remove and discard the “TRY
ME” wire from vehicle and controller. The wire is
not required for normal operation.
Charge the 9.6V Power Pack for at least 10
hours (first 2 charges) and your CAT truck is ready
to run.
2. Insert a fully charged 9.6V power pack into the truck,
mating the plug to the battery pack.
Remove and discard “Try Me” wire from
controller and vehicle.
TREAT YOUR TRUCK WELL
Radio waves control and drive the truck. Care for your truck and it will provide hours of fun!
Avoid water, heat, sand and high impact crashes! Off road vehicles may run on grassy dry areas.
Store in safe place. No direct sunlight. No rain.
No sand or dust. No Collisions. Truck may get stuck on carpet or grass.
Avoid running 2
vehicles with the
same radio control
frequencies.
CLEANING AND MAINTAINING HINTS
Brush areas where dirt and dust
get trapped. Wipe body off with a soft rag or
tact cloth. Do not clean vehicle with
chemicals or water.
1. Your controller comes equipped with 4 “AA” batteries.
Alkaline batteries are recommended.
1. A special wire (connecting the controller & the
chassis) is required for demonstration. Please
disconnect and discard this wire after purchase.
BATTERIES AND ANTENNA TUBE INSTALLATION
4. Insert tube into hole on vehicle. Tie a knot with wire at
the top of the tube. (Do not pull wire tight)
3. Push antenna through the hallow tube.
TRUCK FEATURES
5
BATTERY PACK INSTALLATION IN TRUCK
4
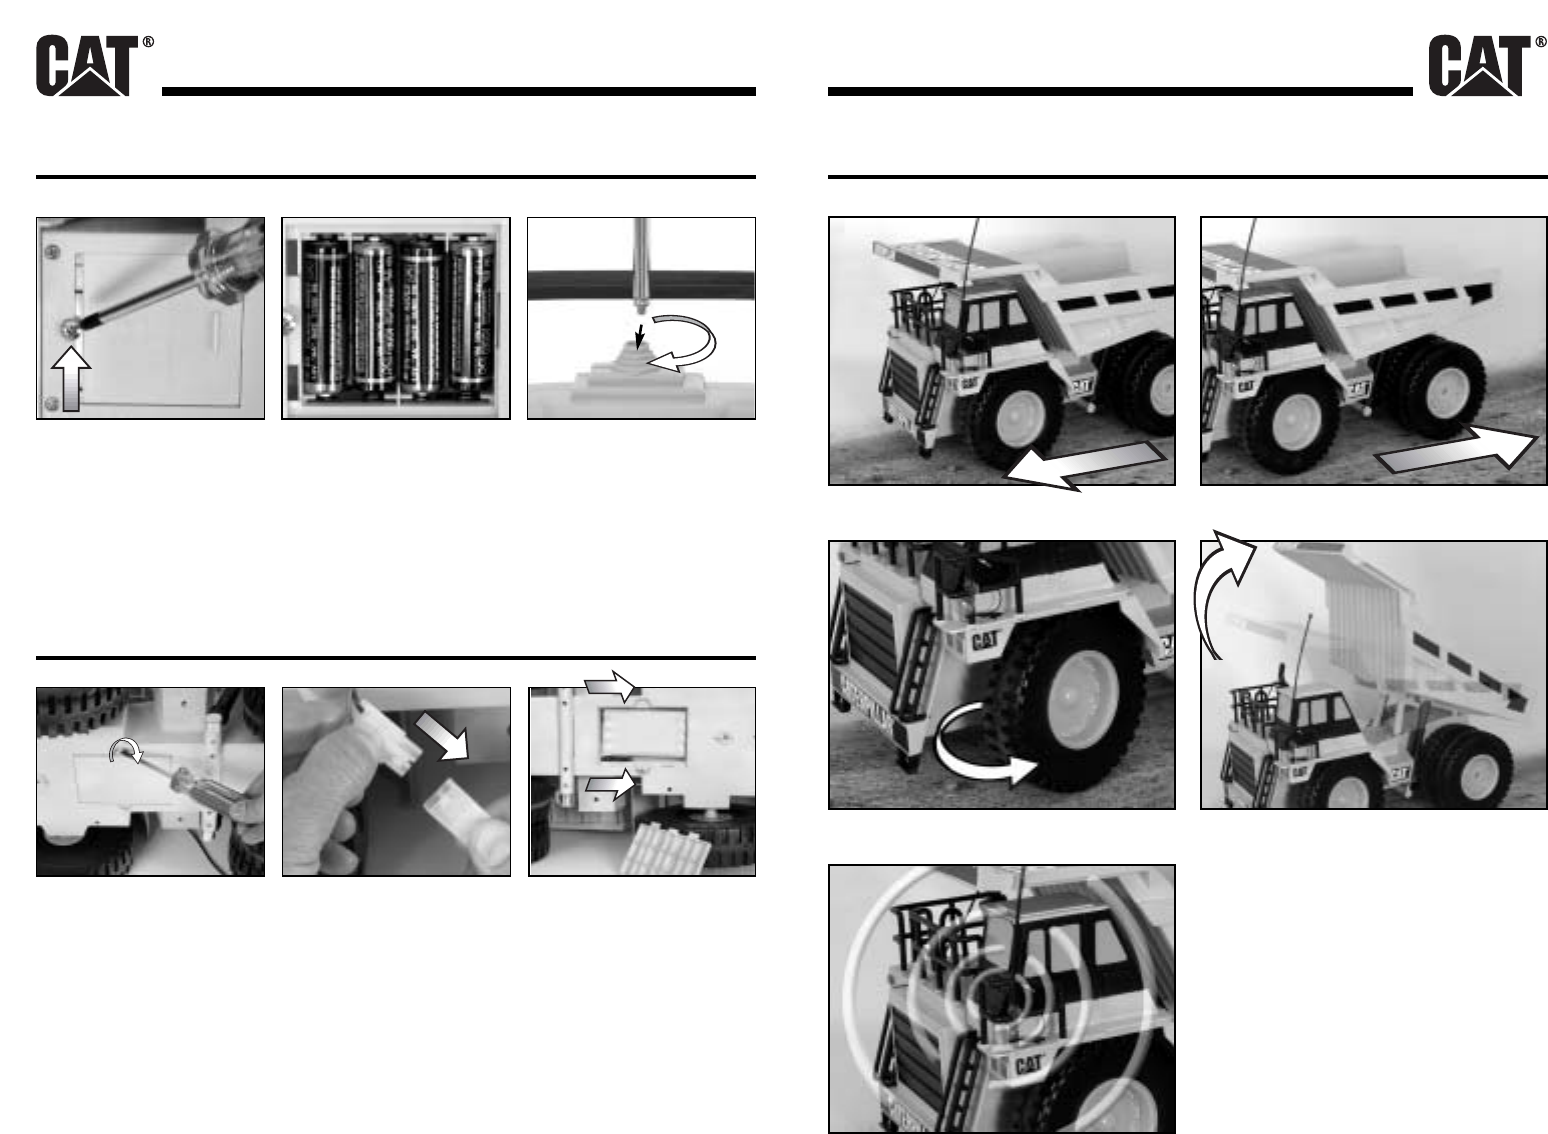
Forward Action! Reverse Action!
Turns Left or Right. Raise or Lower Dump Bed.
Activate Sound Effects.
To remove battery cover, loosen screw
to open.
IMPORTANT:
YOUR CAT 9.6V POWER CHARGE NiCd BATTERY PACK MUST BE FULLY CHARGED PRIOR TO USE.
FOR BEST RESULTS BE SURE TO CHARGE BATTERY PACK FOR 10 HOURS. WHEN CHARGING
BATTERY PACK FOR THE 2ND TIME, ALSO CHARGE BATTERY PACK FOR 10 HOURS. AFTER THE
INITIAL 2 CHARGES, BATTERY PACKS WILL THEN ACHIEVE FULL CHARGE IN 5 TO 6 HOURS.
NOTE: 10 hour charging is recommended. The minimal time for charging is no less than 5 hours to
assure proper performance of the dump truck.
Place 9.6V battery in compartment
and secure battery cover.
Connect battery by mating two
plastic clips.
BATTERY AND ANTENNA INSTALLATION IN CONTROLLER
Loosen screw to open battery
compartment. Insert 4 “AA” Batteries. Be sure the +
and – are properly matched. Screw antenna in tightly for best
transmission.
NOTE:
For best performance, always use alkaline batteries only.
NO PATIENCE. . . QUICK START GUIDE
3
DRIVING THE TRUCK
6
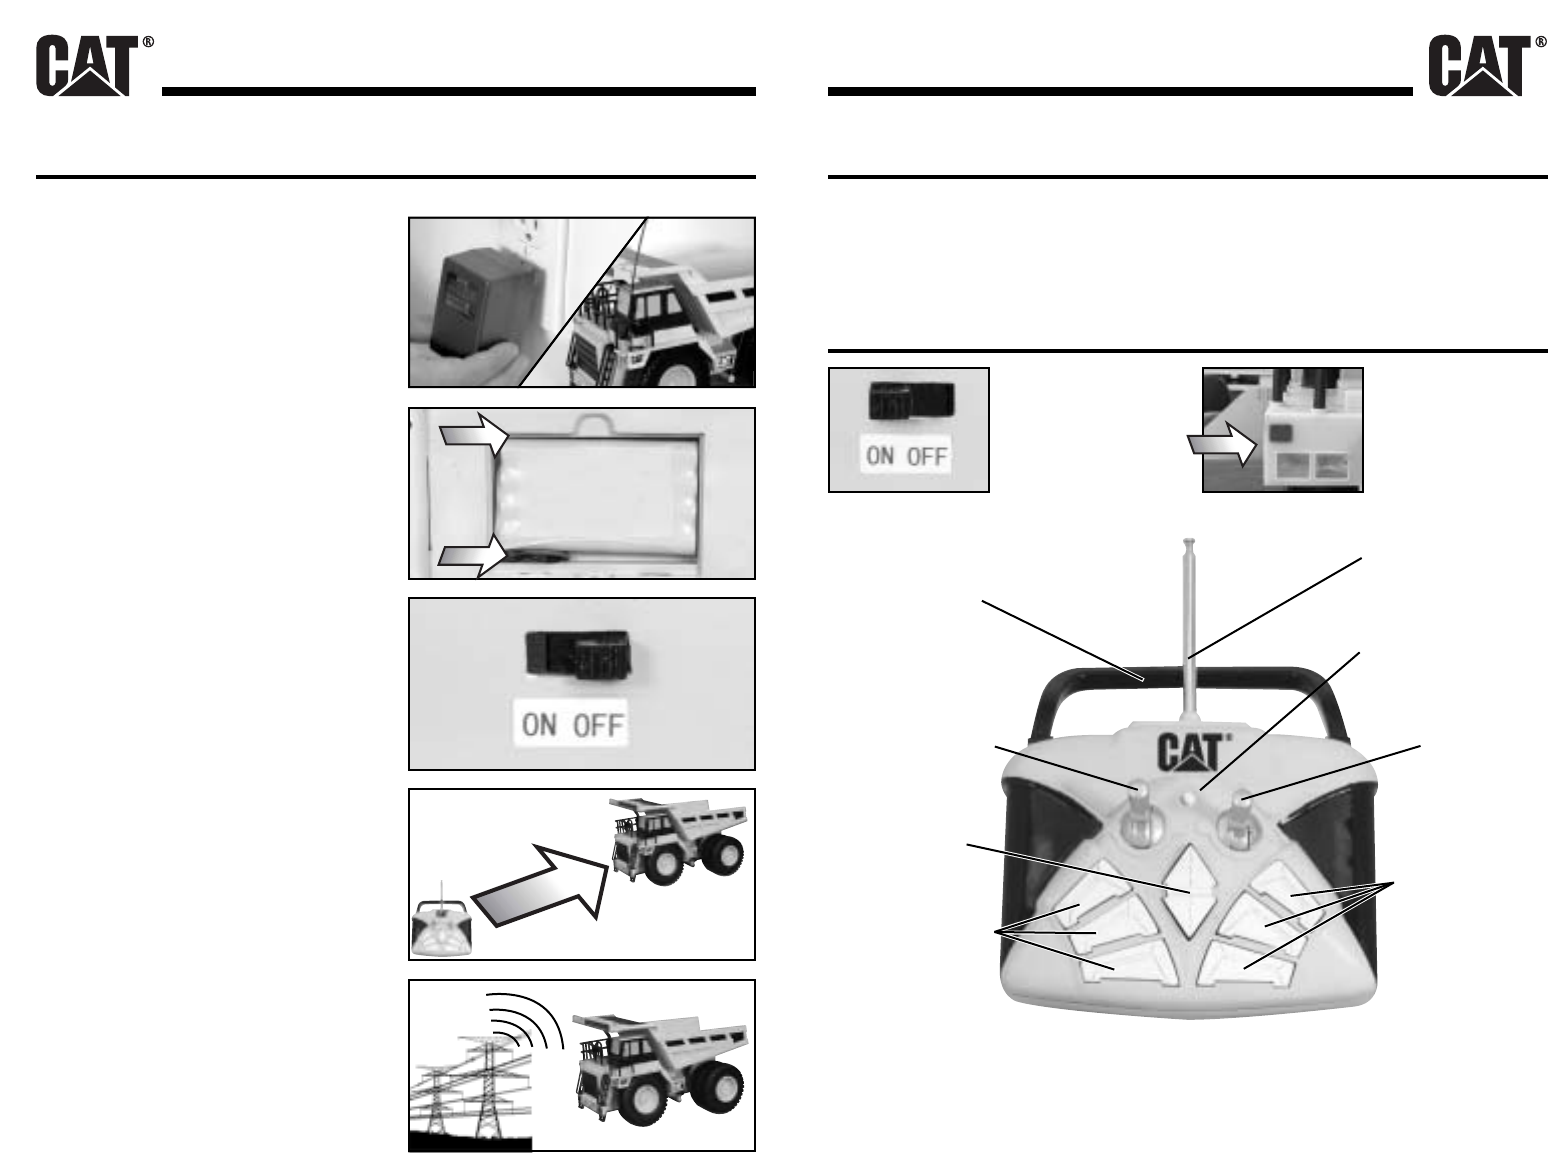
Turn ON/OFF switch
(on bottom of left
fuel tank) to the ON
position (as shown.)
Flashing LED on
truck indicates
power on.
Forward, Neutral and
Reverse
Dump Bed Control
(Up and Down)
Antenna
Extend controller
antenna to full
length. Indicator
light works when
in use.
Left and Right
Steering
Start, Horn, Music
After play, always turn vehicle off. Remove “AA” batteries from controller and 9.6V rechargeable Power
Pack from vehicle when not in use or when storing. Leakage may occur and cause damage if left for a
long period of time.
Easy Carry Handle
• Remove demo wire.
• Fully charge battery pack for 10 hours.
• Install battery pack in truck.
• Install antenna.
• Learn function of controller.
• Enjoy!
Start, Horn, Music
TIPS & TRICKS
FULLY CHARGE THE BATTERY PACK
Always use truck with a fully charged battery pack.
Partially charged packs will not provide optimal
performance.
NOTE: 10 hour charging is recommended. The minimal time
for charging is no less than 5 to 6 hours to assure proper
performance of the dump truck.
INSTALLATION OF POWER PACK
Align battery pack with arrows in battery
compartment. Connect wires from pack to mating
connector of truck.
STRONG BATTERY MEANS OPTIMUM
PERFORMANCE
Save the battery by turning off vehicle when not in use.
LIMITED RADIO CONTROL RANGE
While truck may be visible at a distance, full
operational control may be lost. Hold controller
high in the air and direct truck back.
INTERFERENCE
Other radio signals may cause loss of control.
Remove vehicle from an area of interference.
80-100 FT
.
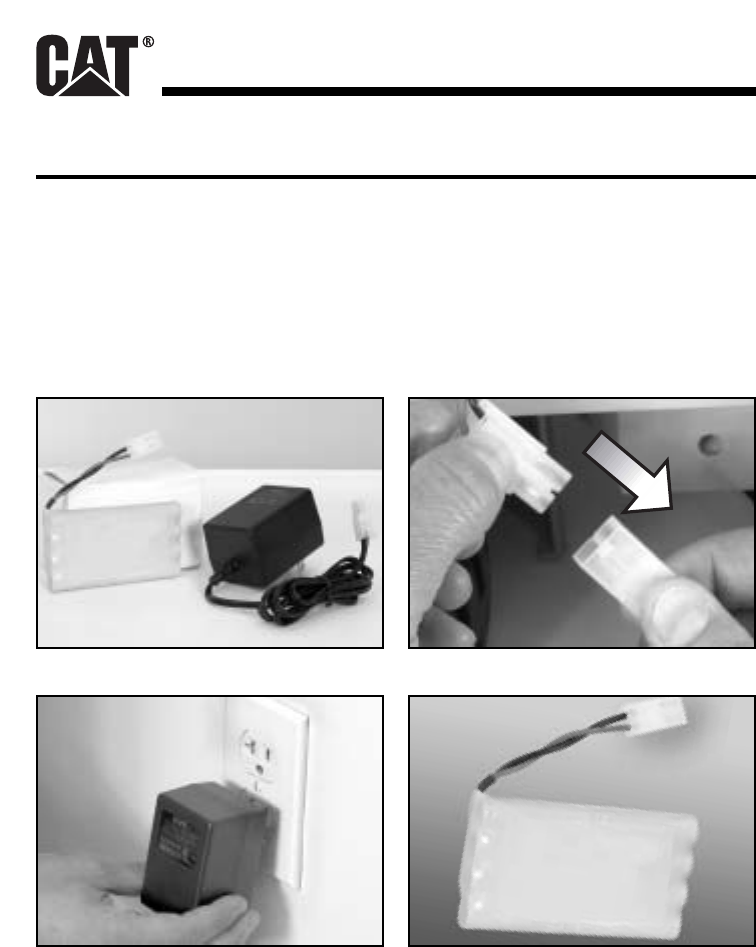
HOW TO RECHARGE THE Ni-Cd BATTERY PACK
Ni-Cd Rechargeable Battery Pack and Charger
(Not Included in the kit)
•The newly purchased Ni-Cd pack (4.8V, 9.6V, 600mAH-720mAH) is not charged.
Recharge before starting.
•How to use the special charger for Ni-Cd packs:
• Average recharging time is approximately 5 to 6 hours.
1. The charger with the battery pack.
3. Plug the charger into the socket.
2. Plug in the female connector.
4. The battery pack will be automatically
charged.