Quick Setup Guide For Standalone Omada Eaps
2018-04-12
: Tp-Link Quick Setup Guide For Standalone Omada Eaps quick_setup_guide_for_standalone_omada_eaps configurationguide
Open the PDF directly: View PDF ![]() .
.
Page Count: 10

Quick Setup Guide
for Standalone Omada Access Points
EAP110 / EAP115 / EAP225 / EAP245 / EAP320 / EAP330 / EAP115-Wall
EAP110-Outdoor / EAP225-Outdoor / EAP225-Wall
1910012398 REV1.0.0
April 2018
1
Omada EAP products provide wireless coverage solutions for small-medium business
and households. There are two methods to login to manage your EAPs:
To configure and manage mass EAPs (usually more than three), you can use EAP
controller. For detailed instructions about how to use EAP Controller, visit
http://www.
tp-link.com/en/download/EAP-Controller.html
to download EAP Controller and its
User Guide.
To configure a few EAPs (usually less than three), you can directly use the
management interface of each EAP via a web browser. In such situation, the EAP is in
standalone mode.
This article introduces how to build a wireless network using a standalone EAP.
Follow the steps below:
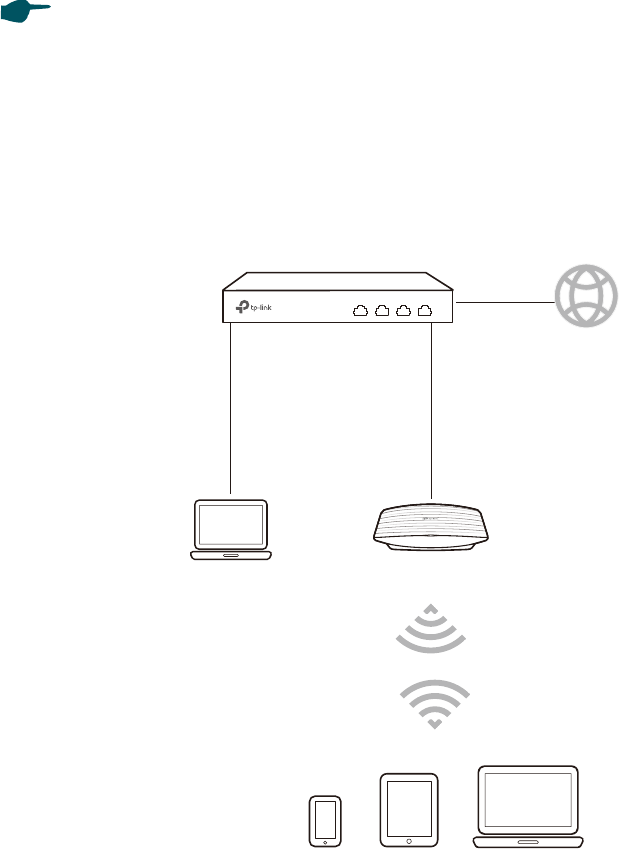
Step1: Connecting the EAP Device to the network
Refer to the following topology and connect the EAP device to your network.
EAPPC
IP: 192.168.0.100
Router (DHCP Server)
LAN: 192.168.0.1 Internet
Clients
1. Connect your PC and EAP to the LAN ports of your router with Ethernet cables.
2. Set your router to make sure that the PC and EAP can get dynamic IP addresses from
the router and surf the internet.
2
Step2: Logging In to the EAP Device
There are two methods to log in to the EAP. You can choose one as you like:
Method 1:
Log In via the Domain Name
and
Method 2: Log in via the IP Address of the EAP
.
Note: EAP320 and EAP330 are not currently available for login via domain name.
Method 1: Log In via the Domain Name
In this method, you needn’t know the IP address of the EAP, but you need to prepare a
wireless client device, such as a wireless laptop. Follow the steps below to log in to the
EAP wirelessly:
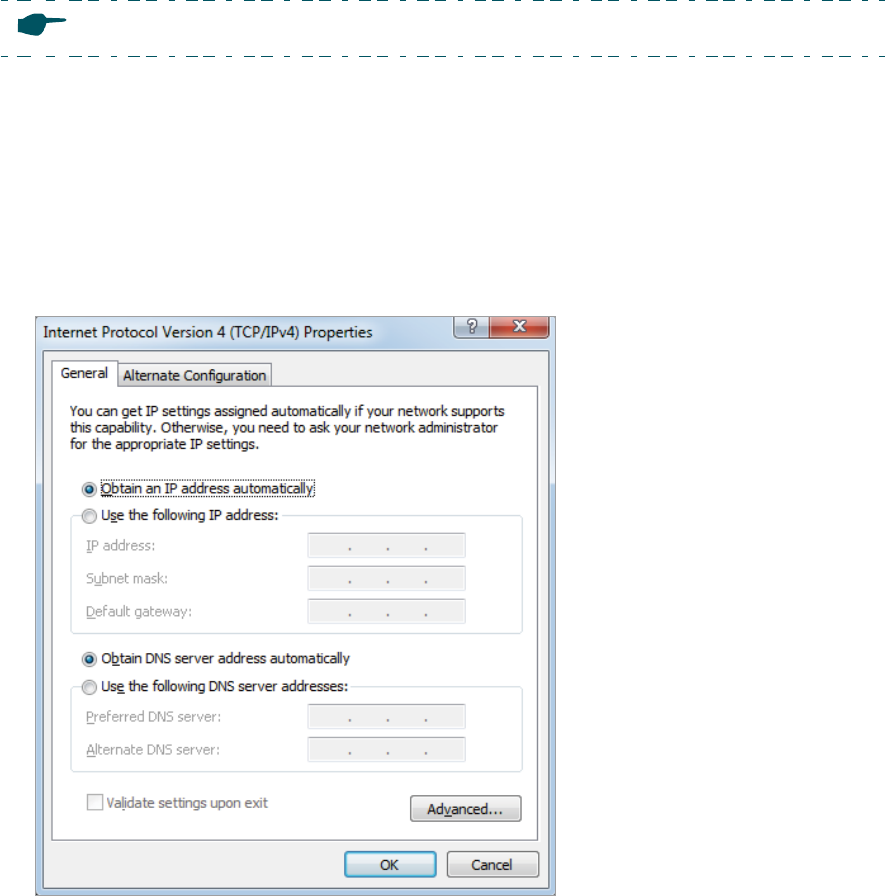
1. Set the wireless client device to get IP settings assigned automatically.
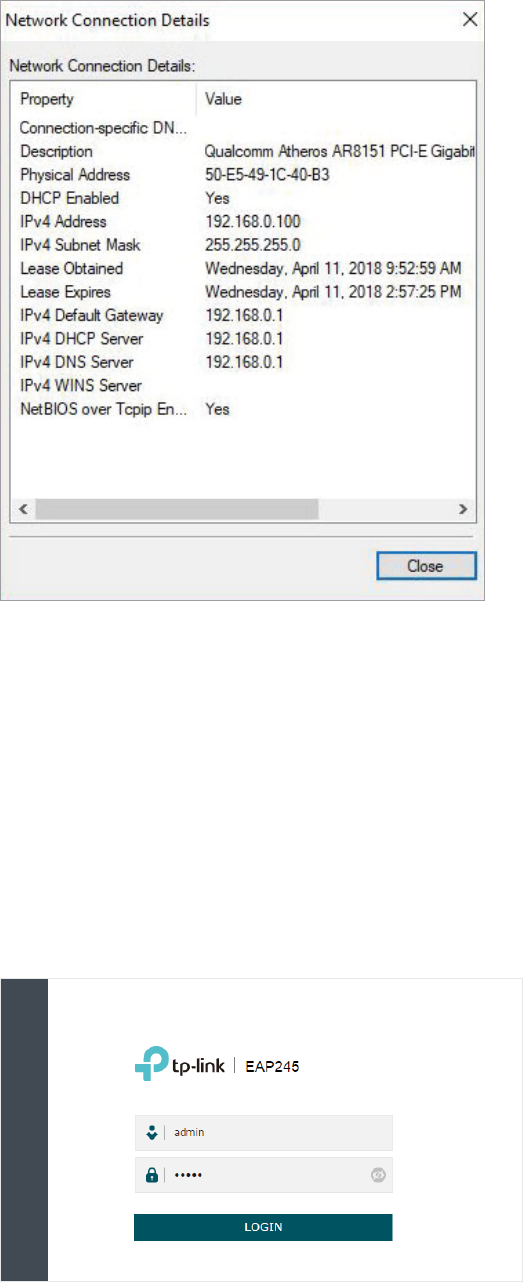
2. Make sure that the wireless client has been assigned with the IP address and has got
the IP address of the DNS server and the gateway.
3
3. Search the default SSID (Network name) using your wireless client device and
connect to the wireless network of the EAP. The default SSID of the EAP is printed
on the product label at the bottom of the device. The dual-band EAP has two default
SSIDs named TP-LINK_2.4GHz_XXXXXX and TP-LINK_5GHz_XXXXXX on the
2.4GHz band and 5GHz band, and the single-band EAP has a default SSID named TP-
LINK_2.4GHz_XXXXXX on the 2.4GHz band.
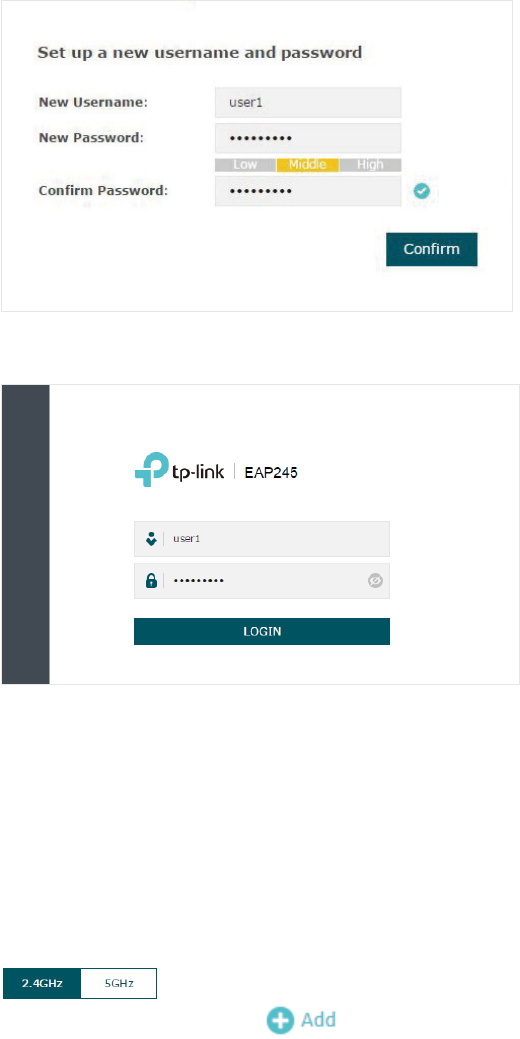
4. Launch a web browser on the client device and enter http://tplinkeap.net in the
address bar to load the login page of the EAP. Use admin for both of the username
and password to log in.
Tips:
If you cannot log in to the EAP via the domain name, try the operations below for
troubleshooting:
4
• Clear the browser cache or use anther browser to log in again.
• Go to the wireless setting of your wireless client device and turn off the Wi-Fi
button. Then turn it on and connect the network again. Or you can reboot the EAP
device.
• If you know the IP address of the EAP, you can login to the EAP via the IP address.
For the detailed steps, refer to
Method 2: Log in via the IP Address of the EAP
• If login still fails, reset the router to its factory default settings and try again.
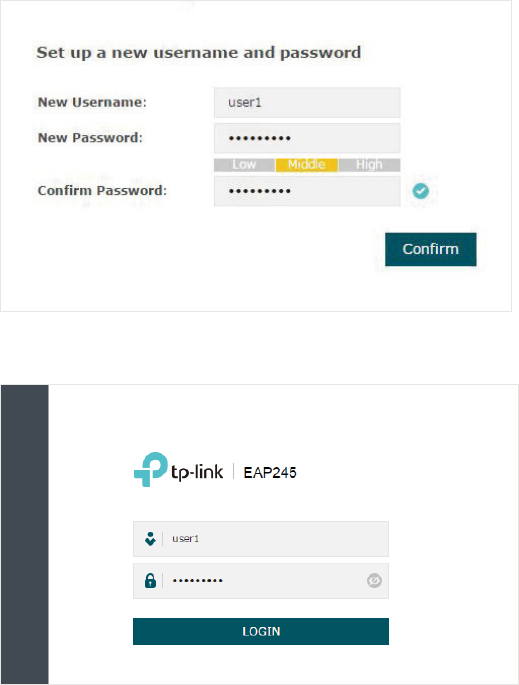
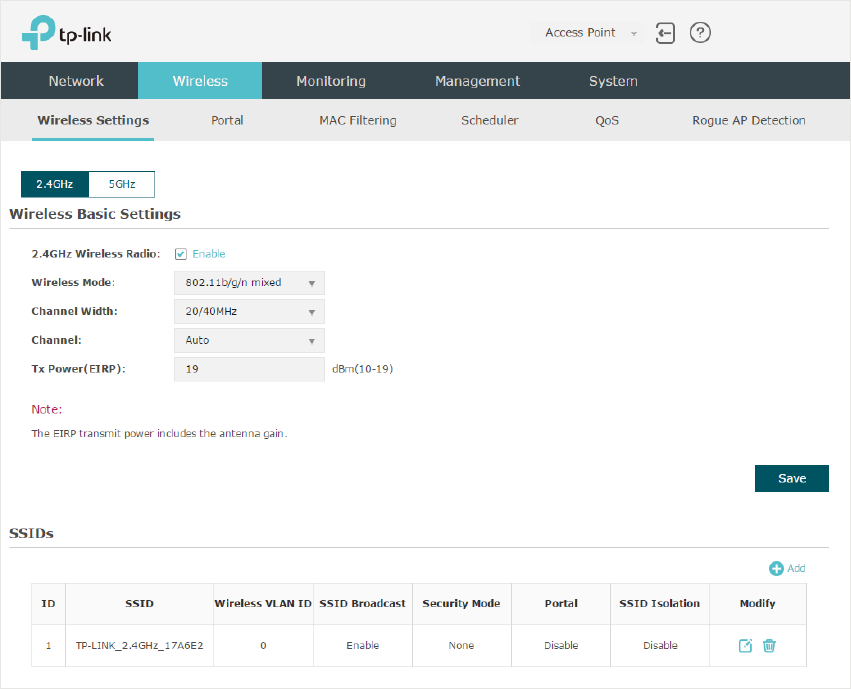
5. In the pop-up window, configure a new username and a new password for your user
account.
6. Use the new username and password to log in.
Method 2: Log in via the IP Address of the EAP
To log in to the EAP via the IP address of the EAP, you need to prepare an Ethernet cable
to connect your computer. Follow the steps below to log in via the IP address of the EAP:
1. Get the IP address of the EAP. There are two methods.
• Log in to the router which acts as the DHCP server. In the DHCP client list, find the
IP address of your EAP according to its MAC address. The MAC address can be
found at the bottom of the EAP.
5
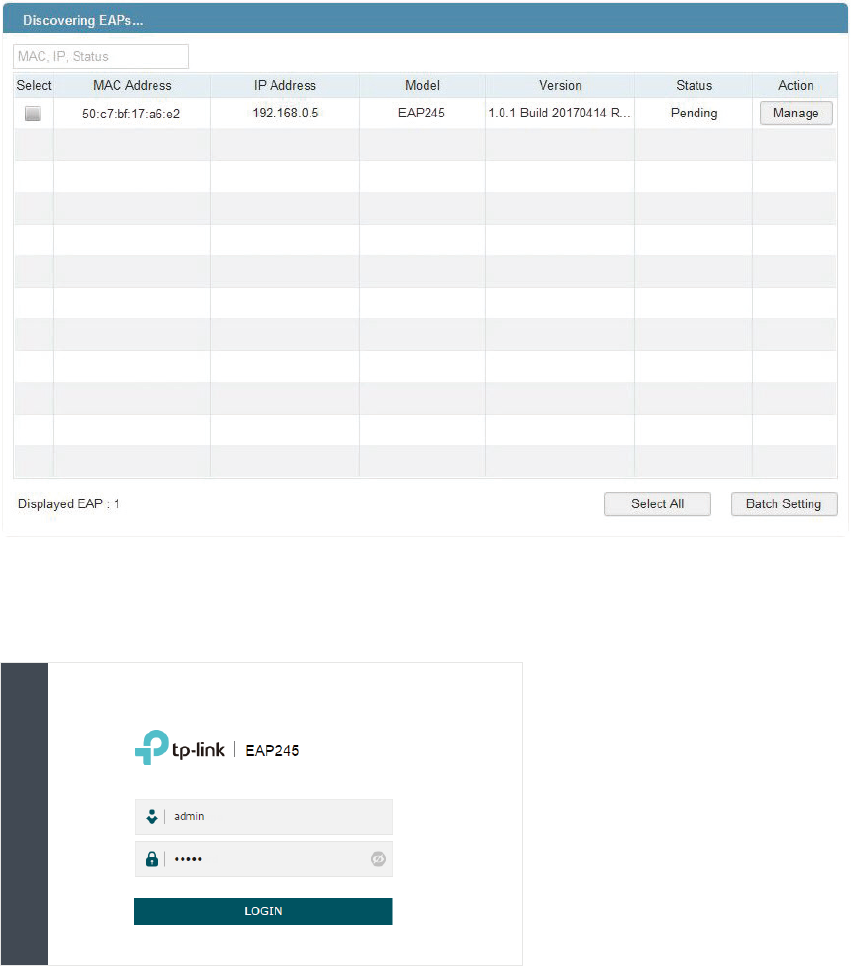
• Go to
http://www.tp-link.com/en/download/EAP-Controller.html#EAP_Discovery_
Tool
to download EAP Discovery Utility. EAP Discovery Utility is a software that can
scan all EAPs in the same network segment. Install and launch EAP Discovery Utility
on the PC, and find the IP address of the EAP. In the following figure, the IP address
of the EAP is 192.168.0.5.
2. Launch a web browser and enter 192.168.0.5 in the address bar to load the login
page of the EAP. Use admin for both of the username and password to log in.
3. In the pop-up window, configure a new username and a new password for your user
account.
6
4. Use the new username and password to log in.
Step3: Configuring the EAP Device
After logging in to the EAP, we recommend that you change the SSID configuration
immediately for secure management purpose.
Follow the steps below to add a new SSID:
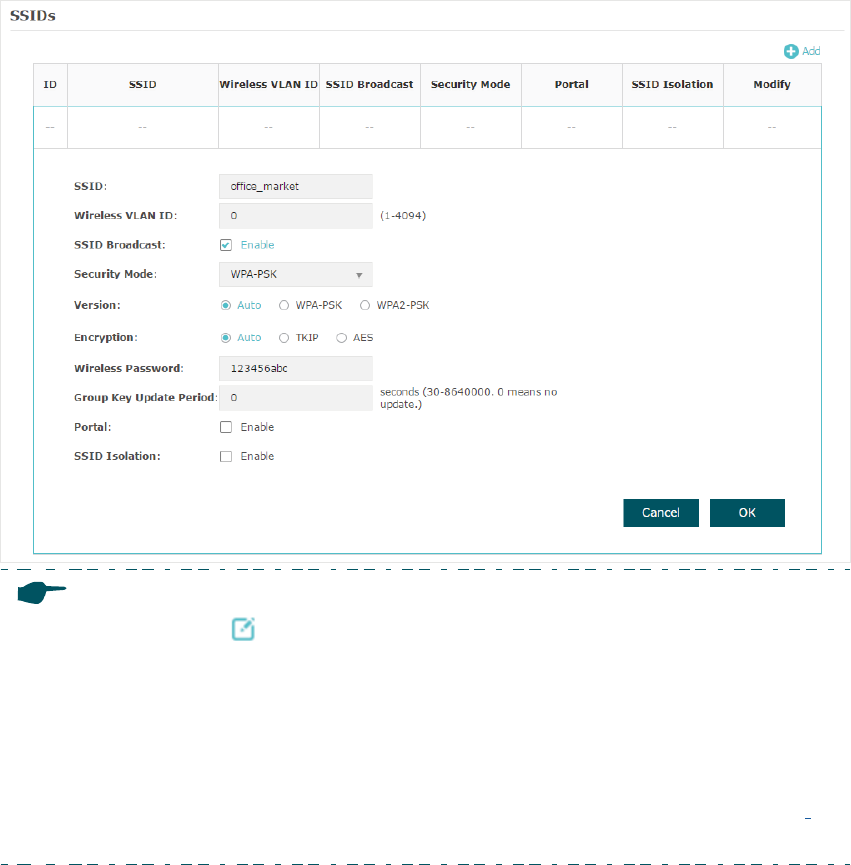
1. Go to the Wireless > Wireless Settings page. If your EAP is a dual-band device, click
to choose a frequency band on which the new SSID will be created.
In the SSIDs section, click to create a new SSID on the chosen band.
7
2. Set a network name and select the security mode. For security, we recommend
that you choose WPA-PSK and customize your own password. You can keep other
parameters as default. Click OK.
8
Note:
• You can click in the Modify column of the SSID entry to edit the SSID. For network
security, we recommend that you delete or edit the default SSIDs. By default, anyone
can access the network without authentication because the default SSID has no
password.
• The configurations for editing the SSID will take effect immediately. So you should
reconnect to the wireless network of the EAP.
• For more detailed configurations, visit
https://www.tp-link.com/us/support/
to
download the User Guide of EAP in the download center.
After all the steps above are completed, you can enjoy the internet via the EAP.
Tips:
The EAP is preset with a default IP 192.168.0.254, which you can use to log in to its web
management page. Follow the steps below:
1. Connect the EAP to your computer with an Ethernet Cable.
2. Assign a static IP address 192.168.0.X (X ranges between 2 and 253) together with
the subnet mask 255.255.255.0 to your computer.
3. Open a web browser and enter 192.168.0.254 in the address bar to load the login
page of the EAP.
4. Configure the SSID and password as the steps above. You can surf the internet after
connecting your EAP to a LAN port of the router.

COPYRIGHT & TRADEMARKS
Specifications are subject to change without notice. is a registered trademark
of TP-Link Technologies Co., Ltd. Other brands and product names are trademarks or
registered trademarks of their respective holders.
No part of the specifications may be reproduced in any form or by any means or used
to make any derivative such as translation, transformation, or adaptation without
permission from TP-Link Technologies Co., Ltd. Copyright © 2018 TP-Link Technologies
Co., Ltd.. All rights reserved.
