TransCore 05756 LOW POWER TRANSMITTER User Manual
TransCore LOW POWER TRANSMITTER
User Manual
PAWS Enforcement Module™
Installation and Operation
This document describes how to correctly install and operate a PAWS Enforcement
Module™. The PAWS Enforcement module is used with the PAWS SIDEKICK™ and the
PAWS ™ vehicle tracking unit to verify vehicle occupancy for HOT lane use.
These instructions cover what you need to know
to get your PAWS Enforcement module up and
running:
• Battery Installation
• Enforcement Module Installation
• Operation
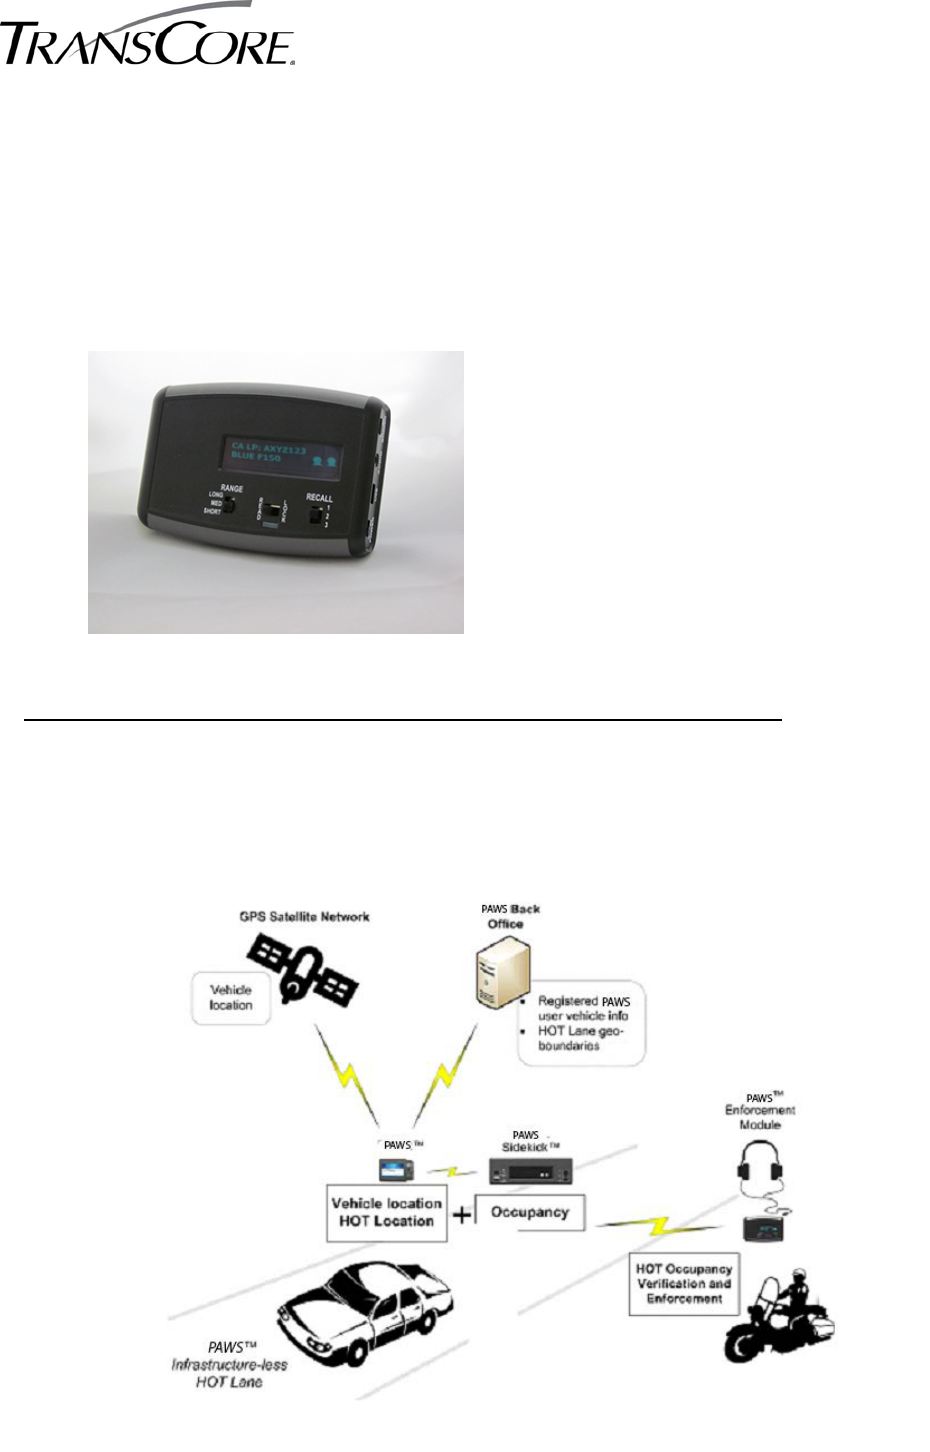
About the PAWS Enforcement Module
When an Enforcement Module detects a vehicle's PAWS device, it will display the vehicle
information including make, model, color, and license plate, along with the occupancy setting.
If the buzzer switch is on, the EM signals a read with an audible tone. You can hear the tone
directly from the device or through headphones, if connected.
PAWS ENFORCEMENT MODULE Installation and Operation v1.0 | Publication Number 16-0015-001 Page 1 of 6
PAWS Enforcement Module Kit
The kit includes the following items:
• PAWS™ Enforcement Module
• Suction cups
• Clip
• Handlebar clamp
You need to provide two (2) AA batteries for operation. Non-rechargeable lithium batteries are
recommended for maximum life. Some high capacity alkaline batteries and rechargeable batteries
will also be sufficient but have shorter lifetimes.
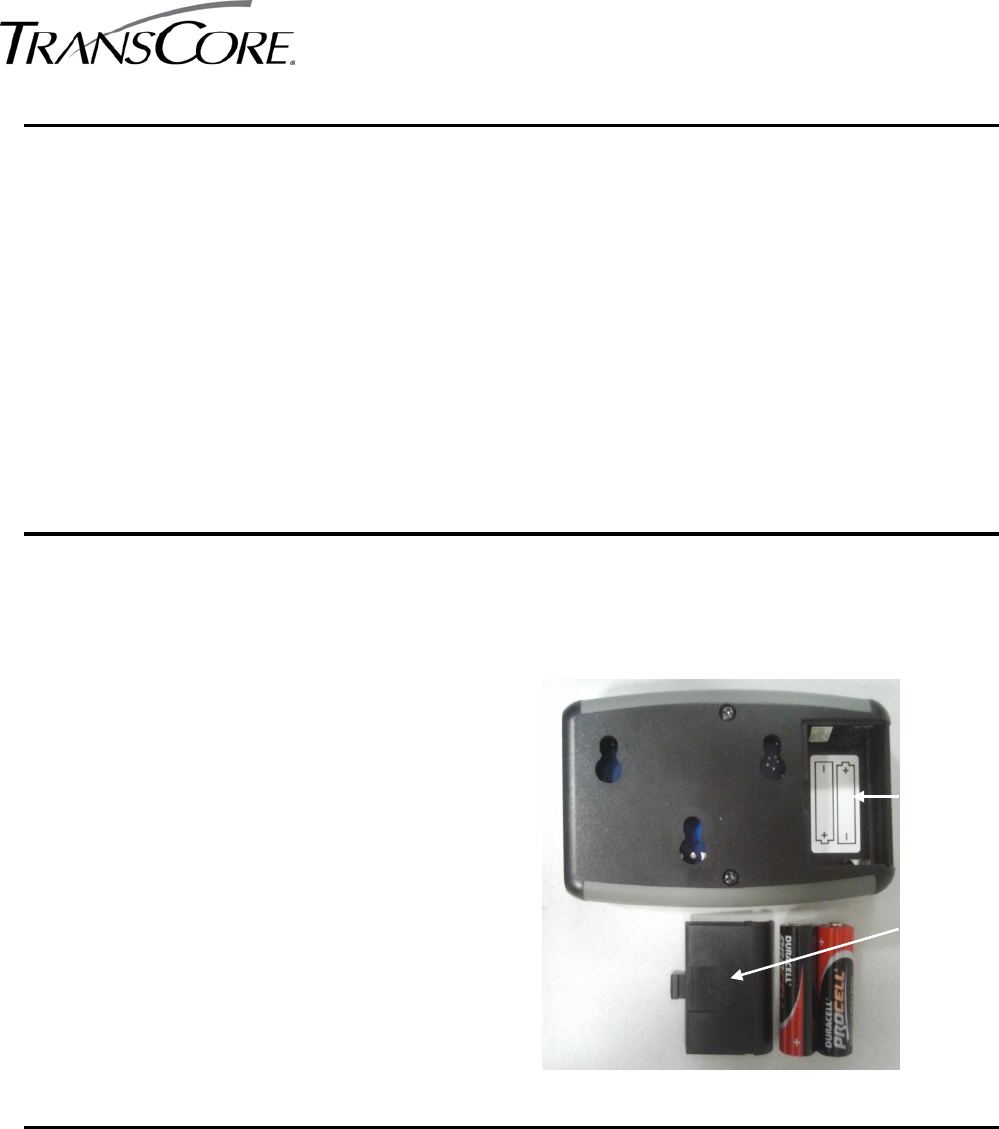
Battery Installation
The Enforcement Module battery
compartment is
on the back of the device.
The battery cover slides out, revealing
the
location for two side-by-side
batteries. The
correct battery polarity
is shown inside the
compartment.
Battery
compartment
Door (removed)
Enforcement Module Installation
You can operate the EM as a handheld unit. With the optional parts included in the kit, you can
also attach the unit to:
• A vehicle visor with a clip;
• Inside the windshield with either double-sided adhesive or suction cups; or
• Motorcycle handlebars with a clamp.
PAWS ENFORCEMENT MODULE Installation and Operation v1.0 | Publication Number 16-0015-001 Page 2 of 6
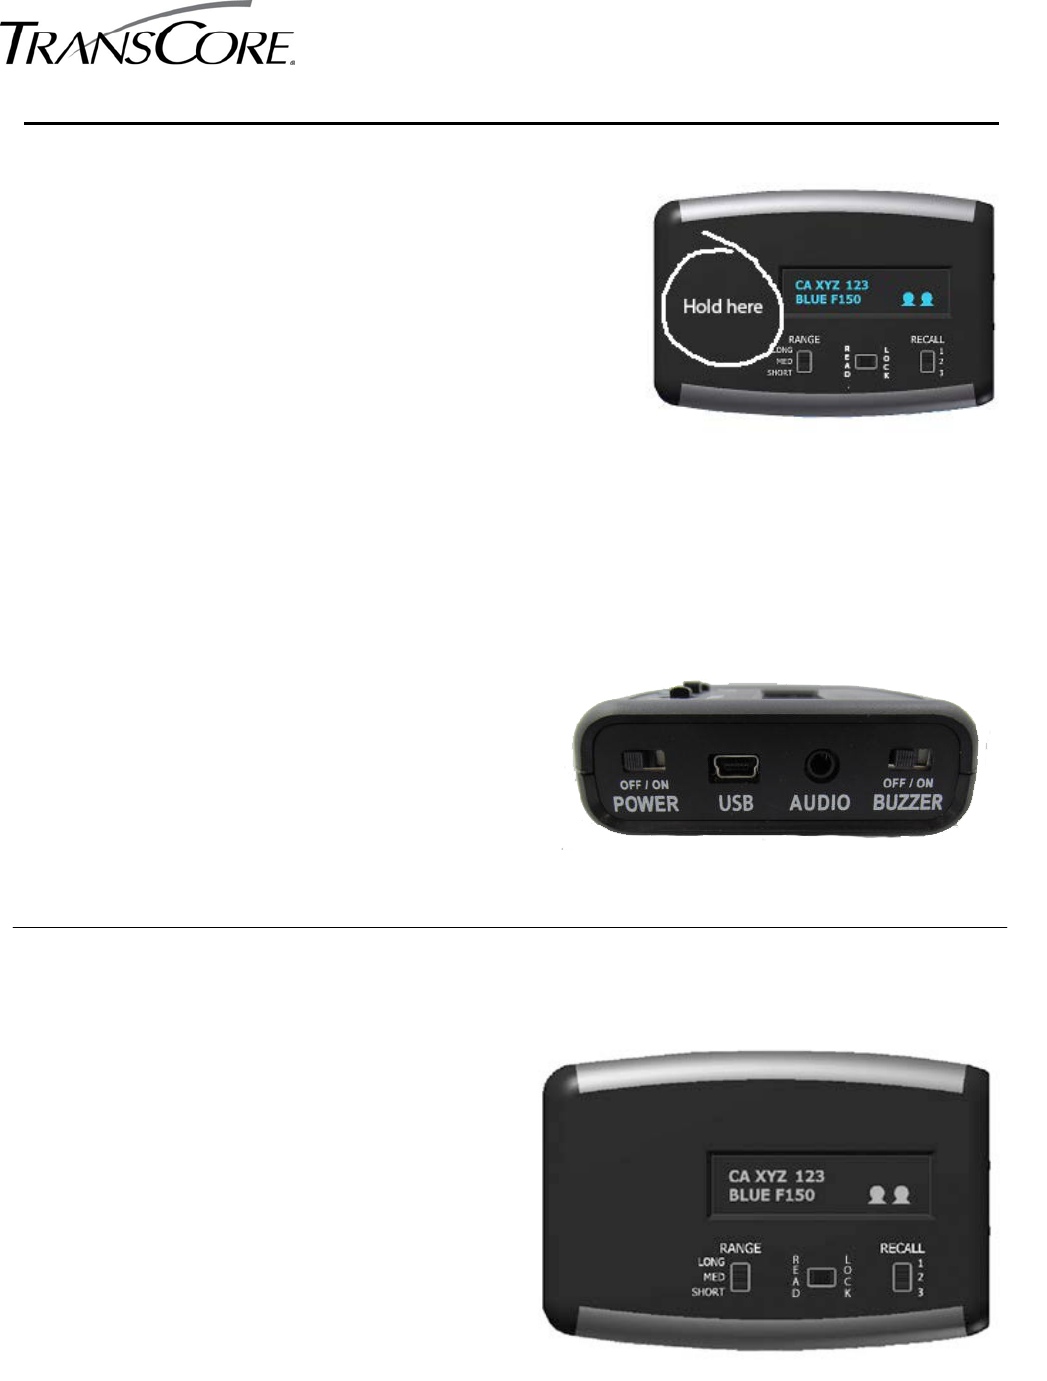
Operation
The EM emits a radio wave straight out from the back
of the unit, so you aim it by holding the unit with the
display in view, then turning so that the target car is
directly ahead.
However, the radio wave is not narrow like a laser
beam--it has a definable width that allows it to detect
objects away from the direct line of sight as well.
While you may use any convenient hand position that
does not block the display, we recommend that you
hold onto the left side of the unit, so as not to
interfere with the display.
Switch Functions
Hold here
POWER OFF/ON: Power for the device.
AUDIO: The headphone jack allows you to plug
in an
optional set of headphones to listen to the
buzzer.
BUZZER OFF/ON: Disables/enables the audible
sound
generated when a PAWS is detected. If
the buzzer
switch is enabled at power up, a
beep will also sound
about 5 seconds after
power on, lasting about 1
second. If you use the
headphone jack next to this
switch, it disables
the normal audio. We strongly
recommended
using headphones with volume
control.
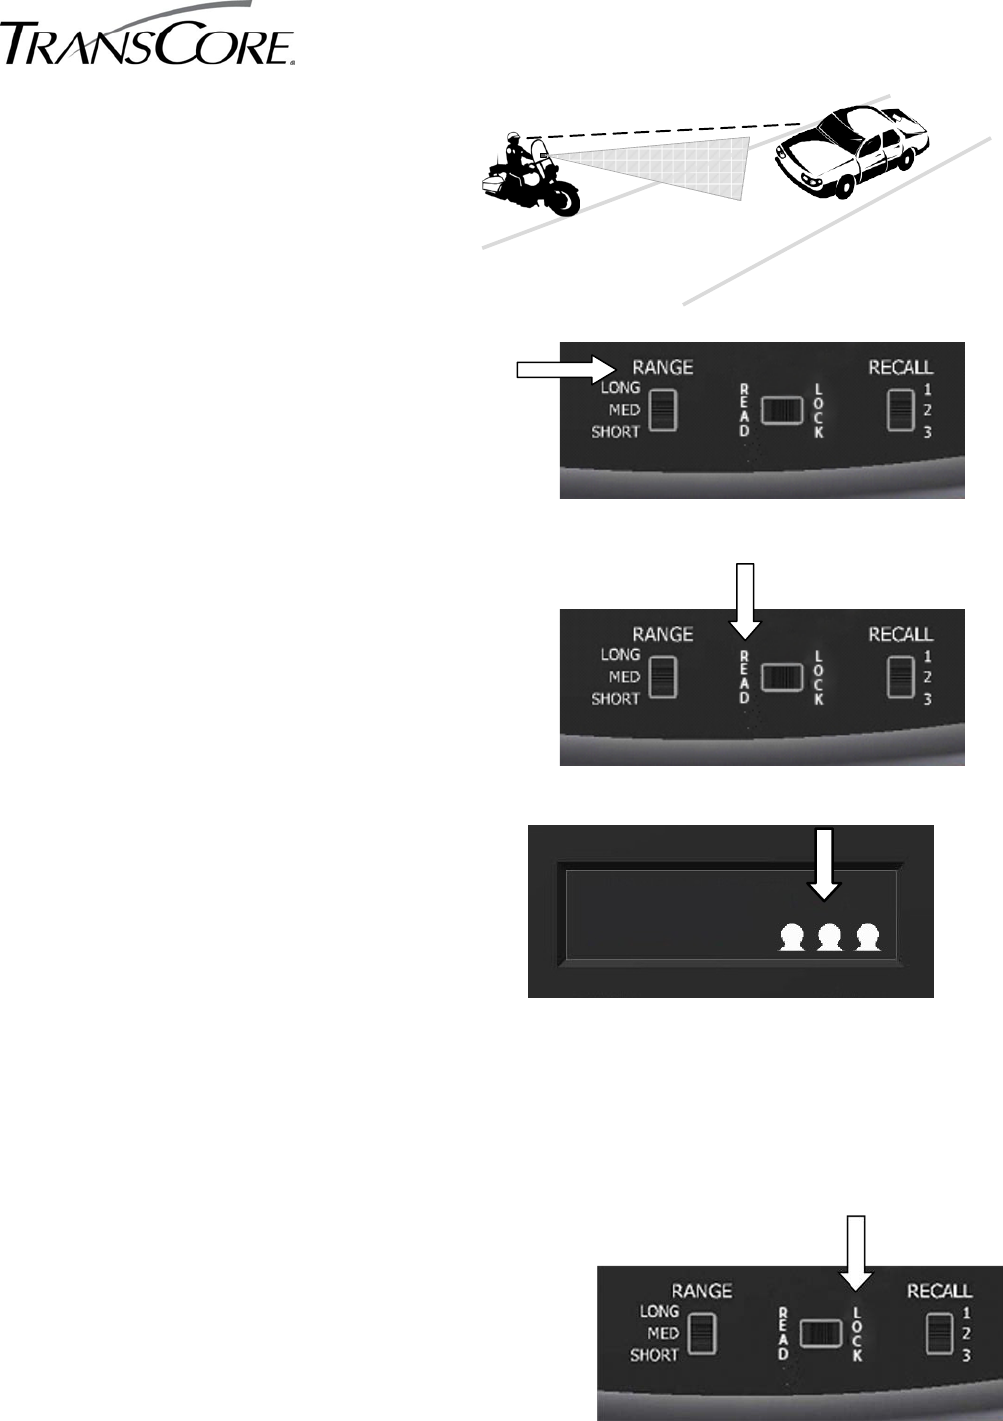
Right Side View of Enforcement Module
RANGE
• Long: For vehicles from approximately
100 to 300 feet away.
• Medium: For vehicles from
approximately 30 to 100 feet away.
• Short: For vehicles up to approximately
30 feet away.
Note: Range distances are approximate.
LOCK/READ
• Read mode: The EM continues to read
PAWS
devices in vehicles.
• Lock mode: The EM stops reading,
locks the
display and saves the last
three vehicles. This
setting is the same
as putting the unit “on hold.”
RECALL
You can view the last three vehicles read by
moving the switch to 1, 2, or 3, with 1 being the
most recent.
Top View of Enforcement Module
PAWS ENFORCEMENT MODULE Installation and Operation v1.0 | Publication Number 16-0015-001 Page 3 of 6
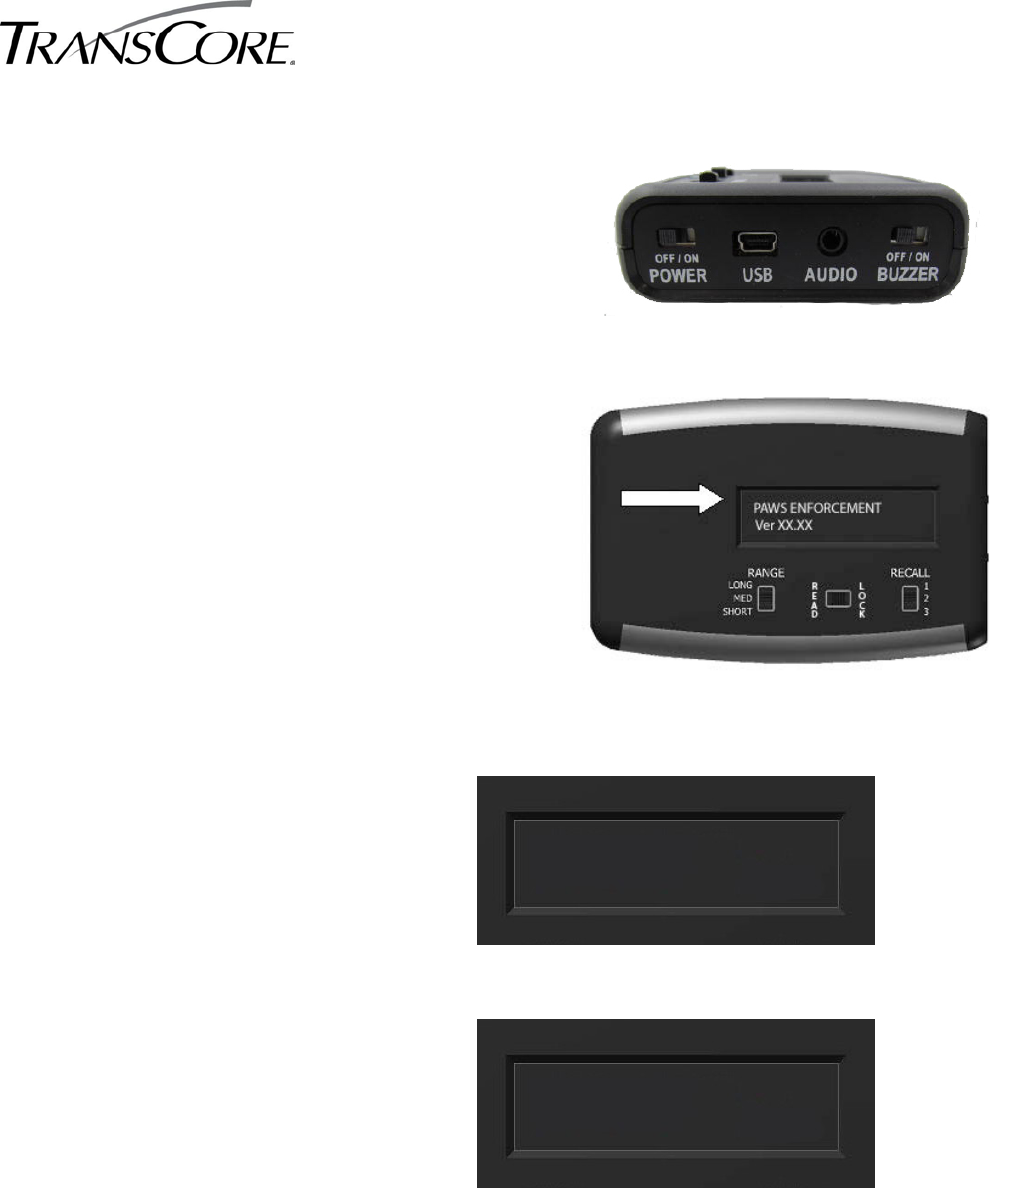
Power On the Enforcement Module
Press the POWER switch on the right side of
the unit to the ON
position.
The Enforcement Module display shows
this
message on power-up:
PAWS ENFORCEMENT
Ver XX.XX
…along with a version number,
followed by
another message showing
the Lock/Read
setting (see next section).
PAWS ENFORCEMENT
Ver XX.XX
VEHICLE DATA
UNLOCKED
Next, the EM displays the LOCK or READ
setting, depending on how this switch is set. …or
VEHICLE DATA
LOCKED
PAWS ENFORCEMENT MODULE Installation and Operation v1.0 | Publication Number 16-0015-001 Page 4 of 6
Read a Vehicle
Get into position for a clear sight of
traffic
and optimal EM read range.
Set Range based on distance to traffic.
• Long: Vehicles 100 to 300 feet away
• Medium: Vehicles 30 to 100 feet away
• Short: Vehicles 30 feet away
Make sure the LOCK/READ switch is set to
READ.
In READ mode, the EM reads PAWS Sidekick
devices automatically—you do not have to
press any other switches.
Watch the EM display. As it reads, the EM
displays the vehicle information and
number of passengers.
In the example at right, the driver has set
the number of passengers to 3.
056 LHR NM
BLUE F150
The number of passengers shown on the display should coincide with the number of
passengers visible in the vehicle.
If not, switch the EM to LOCK mode to capture the reading. If necessary, recall the reading in
question (refer to next section).
Lock & Recall Vehicle Reading
When you see a discrepancy between the EM
reading and the actual passenger count in a
vehicle, click the LOCK/READ switch to LOCK.
With the EM in Lock mode, you can step
through the last 3 vehicle readings to pull up
the one with the questionable passenger
setting.
PAWS ENFORCEMENT MODULE Installation and Operation v1.0 | Publication Number 16-0015-001 Page 5 of 6
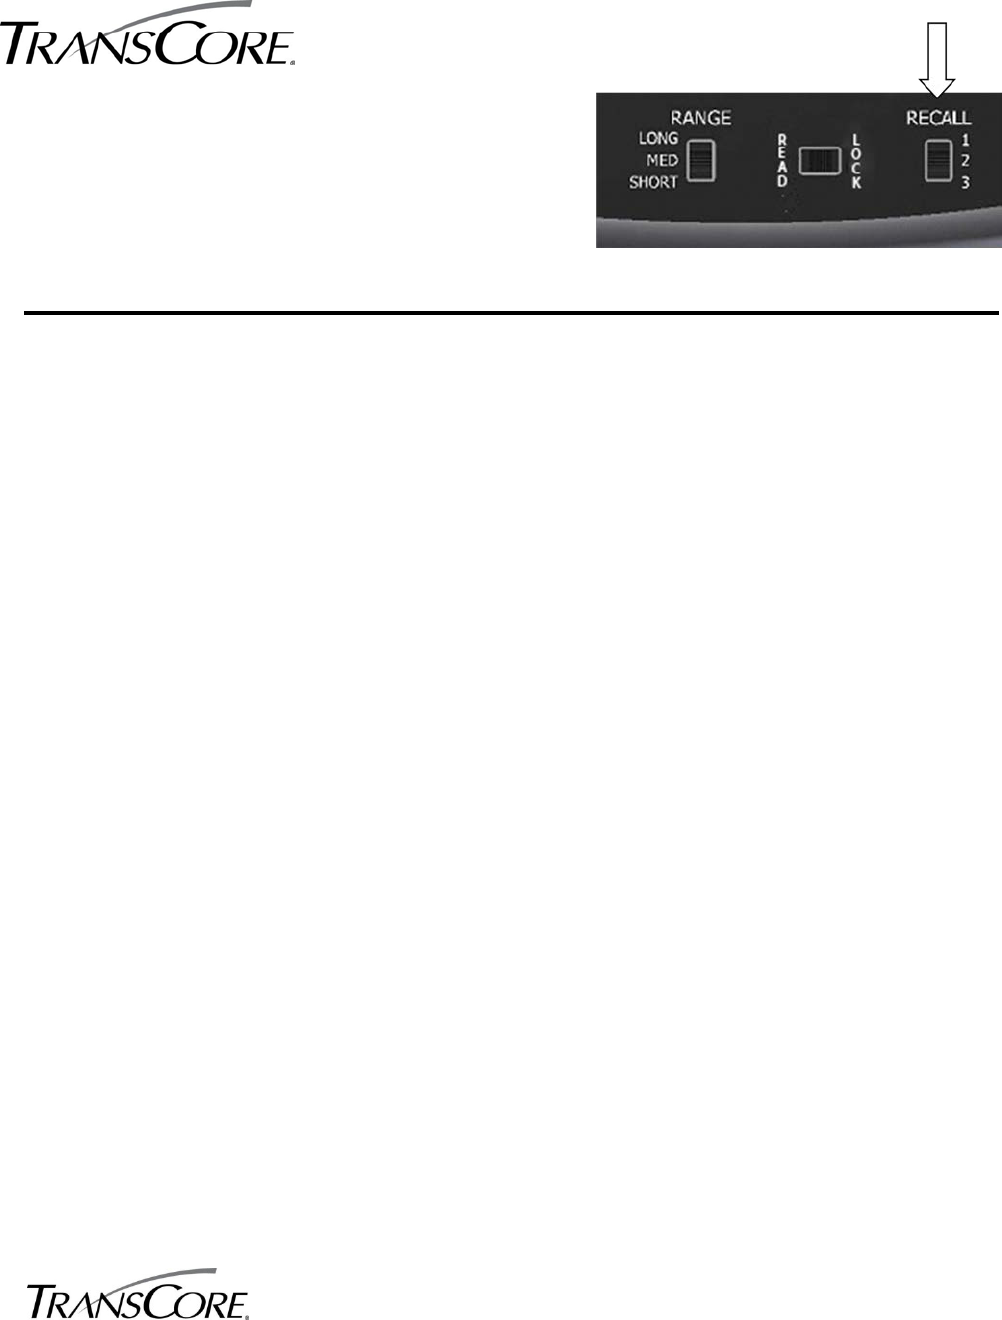
Move the RECALL switch to 1, 2, or 3 until the
reading in question appears.
With this information you are ready to follow
enforcement procedures.
Regulatory and Compliance
NOTE: This equipment has been tested and found to comply with the limits for a Class B digital
device, pursuant to part 15 of the FCC Rules. These limits are designed to provide reasonable
protection against harmful interference in a residential installation. This equipment generates,
uses and can radiate radio frequency energy and, if not installed and used in accordance with
the instructions, may cause harmful interference to radio communications. However, there is
no guarantee that interference will not occur in a particular installation. If this equipment does
cause harmful interference to radio or television reception, which can be determined by
turning the equipment off and on, the user is encouraged to try to correct the interference by
one or more of the following measures:
• Reorient or relocate the receiving antenna.
• Increase the separation between the equipment and receiver.
• -Connect the equipment into an outlet on a circuit different from that to which the
receiver is connected.
• -Consult the dealer or an experienced radio/TV technician for help.
This equipment has been tested and found to comply with the limits for a Class B digital device,
pursuant to Part 15 of the FCC Rules, and Industry Canada license-exempt RSS standard(s).
Operation is subject to the following two conditions: (1) This device may not cause harmful
interference, and (2) this device must accept any interference received, including interference
that may cause undesired operation.
Le présent appareil est conforme aux CNR d'Industrie Canada applicables aux appareils radio exempts de
licence. L'exploitation est autorisée aux deux conditions suivantes : (1) l'appareil ne doit pas produire de
brouillage, et (2) l'utilisateur de l'appareil doit accepter tout brouillage radioélectrique subi, même si le
brouillage est susceptible d'en compromettre le fonctionnement.
The Enforcement Module may not be modified, altered, or changed in any way without
permission from TransCore, LP. Unauthorized modification may void the equipment
authorization from the FCC and will void the TransCore warranty.
www.transcore.com
©2014 TransCore, LP. All rights reserved. TRANSCORE is a registered trademark. PAWS is a trademark of TransCoreAll other
trademarks listed are the property of their respective owners. Contents subject to change. Printed in the U.S.A.
Part Number: XXXXXX
PAWS ENFORCEMENT MODULE Installation and Operation v1.0 | Publication Number 16-0015-001 Page 6 of 6