TransCore 9700WBW Rugged Tablet PC User Manual Rugged Tablet PC Revised
TransCore Rugged Tablet PC Rugged Tablet PC Revised
Rugged Tablet PC User Manual Revised

Rugged Tablet PC
1
M9700 Rugged Tablet PC
(Intel® Atom Duo Core N2600 Based Tablet PC)
USERS MANUAL
Version: 1.2
9.7” Rugged Tablet PC

Rugged Tablet PC
2
IMPORTANT SAFETY INSTRUCTIONS
Please read these instructions carefully before using the product and save for later reference.
Follow all warnings and instructions marked on the product.
Unplug this product from the wall outlet before cleaning. Clean the product with a damp soft
cloth. Do not use liquid or aerosol cleaners as it may cause permanent damage to the screen.
Do not use this product near water.
Do not place this product on an unstable cart, stand, or table. The product may fall, causing
serious damage to the product.
This product should be operated from the type of power indicated on the marking label. If you
are not sure of the type of power available, consult your dealer or local power company.
This product is equipped with a 3-wire grounding type plug, a plug having a third (grounding)
pin. This plug will only fit into a grounding-type power outlet. This is a safety feature. If you are
unable to insert the plug into the outlet, contact your electrician to replace your obsolete outlet.
(For AC version only) Do not defeat the purpose of the grounding-type plug.
Do not allow anything to rest on the power cord. Do not locate this product where persons will
walk on the cord.
Never push objects of any kind into this product through cabinet slots as they may touch
dangerous voltage points or short out parts that could result in a risk of fire or electric shock.
Never spill liquid of any kind on the product.
Do not attempt to service this product by yourself, as opening or removing covers may expose
you to dangerous voltage points or other risks and will void the warranty. Refer all servicing to
qualified service personnel.
Unplug this product from the wall outlet and refer servicing to qualified service personnel under
the following conditions:
When the power cord or plug is damaged or frayed.
If liquid has been spilled into the product.
If rainy or water has been exposed to the product.
If the product does not operate normally that the operating instructions are followed. Adjust
only those controls that are covered by the operating instructions since improper adjustment of
other controls may result in damage and will often require extensive work by a qualified
technician to restore the product to normal operation.
If the product has been dropped or the cabinet has been damaged.
If the product exhibited a distinct change in the performance, that indicates a need for service.

Rugged Tablet PC
3
Copyright Notice
Copyright © 2012 Winmate Communication Inc., ALL RIGHTS RESERVED. No part of this document may
be reproduced, copied, translated, or transmitted in any form or by any means, electronic or mechanical, for
any purpose, without the prior written permission of the original manufacturer. Trademark
Acknowledgement
Brand and product names are trademarks or registered trademarks of their respective owners.
Disclaimer
Winmate Communication Inc. reserves the right to make any product changes without notice, including
circuits and/or software described or contained in this manual in order to improve design and/or performance.
Winmate Communication assumes no responsibility or liability for the use of the described product(s),
conveys no license or title under any patent, copyright, or masks work rights to these products, and makes
no representations or warranties that these products are free from patent, copyright, or mask work right
infringement, unless otherwise specified. Applications that are described in this manual are for illustration
purposes only. Winmate Communication Inc. makes no representation or warranty that such application will
be suitable for the specified use without further testing or modification.
Warranty
Winmate warrants that each of its products will be free from material and workmanship defects for a
period of one year from the invoice date. If the customer discovers a defect, Winmate will, at its option, repair
or replace the defective product at no charge to the customer, provided it is returned during the warranty
period of one year, with transportation charges prepaid. The returned product must be properly packaged in
it’s original packaging to obtain warranty service.
If the serial number and the product shipping data differ by over 30 days, the in-warranty service will be
made according to the shipping date. In the serial numbers the third and fourth two digits give the year of
manufacture, and the fifth digit means the month (e. g., with A for October, B for November and C for
December).
For example, the serial number 1W08Axxxxxxxx means October of year 2008.

Rugged Tablet PC
4
Customer Service
We provide service guide for any problem as follow steps :First, visit the website at
http://www.winmate.com.tw to find the update information about the product. Second, contact with your
distributor, sales representative, or our customer service center for technical support if you need additional
assistance. You may have the following information ready before you call:
? Product serial number
? Peripheral attachments
? Software (OS, version, application software, etc.)
? Description of complete problem
? The exact wording of any error messages
In addition, free technical support is available from our engineers every business day. We are always
ready to give advice on application requirements or specific information on the installation and operation of
any of our products. Please do not hesitate to call or e-mail us.
Notice
1. Do not touch the LCD panel surface with sharp or hard objects.
2. Do not use abrasive cleaners, waxes or solvents for cleaning, use only a dry or damp, soft cloth.
3. Use only with a high quality, safety-approved, AC/DC power adapter.
Rugged Tablet PC
5
Safety Precautions
Warning!
Always completely disconnect the power cord from your chassis
whenever you work with the hardware. Do not make connections
while the power is on. Sensitive electronic components can be
damaged by sudden power surges. Only experienced electronics
personnel should open the PC chassis.
Caution!
Always ground yourself to remove any static charge before touching the
CPU card. Modern electronic devices are very sensitive to static electric charges.
As a safety precaution, use a grounding wrist strap at all times. Place all
electronic components in a static-dissipative surface or static-shielded bag
when they are not in the chassis.
Rugged Tablet PC
6
FEDERAL COMMUNICATIONS COMMISSION
This equipment has been tested and found to comply with the limits for a
Class B digital device, pursuant to Part 15 of the FCC Rules. These limits
are designed to provide reasonable protection against harmful
interference in a residential installation. This equipment generates, uses
and can radiate radio frequency energy and, if not installed and used in
accordance with the instructions, may cause harmful interference to radio
communications. However, there is no guarantee that interference will not
occur in a particular installation. If this equipment does cause harmful
interference to radio or television reception, which can be determined by
turning the equipment off and on, the user is encouraged to try to correct
the interference by one or more of the following measures:
– Reorient or relocate the receiving antenna.
– Increase the separation between the equipment and receiver.
– Connect the equipment into an outlet on a circuit different from that to
which the receiver is connected.
– Consult the dealer or an experienced radio/TV technician for help.
CAUTION:
Any changes or modifications not expressly approved by the party
responsible for compliance could void the user's authority to operate the
equipment.
This transmitter must not be co-located or operating in conjunction with any
other antenna or transmitter.
RF exposure warning
The equipment complies with FCC RF exposure limits set forth for an uncontrolled
environment.
The antenna(s) used for this transmitter must not be co-located or operating in conjunction
with any other antenna or transmitter.
Rugged Tablet PC
7
RF exposure information (SAR)
This Rugged Table PC meets the government's requirements for exposure to radio waves.
This Rugged Table PC is designed and manufactured not to exceed the emission limits for
exposure to radio frequency (RF) energy set by the Federal Communications Commission
of the U.S. Government. The exposure standard for wireless Rugged Table PC employs a
unit of measurement known as the Specific Absorption Rate, or SAR. The SAR limit set by
the FCC is 1.6 W/kg. Tests for SAR are conducted using standard operating positions
accepted by the FCC with the Rugged Table PC transmitting at its highest certified power
level in all tested frequency bands. Although the SAR is determined at the highest certified
power level, the actual SAR level of the Rugged Table PC while operating can be well below
the maximum value. This is because the Rugged Table PC is designed to operate at multiple
power levels so as to use only the poser required to reach the network. In general, the
closer you are to a wireless base station antenna, the lower the power output. The highest
SAR value for US model Rugged Table PC as reported to the FCC when tested for use at
the body, as described in this user guide, is 0.770 W/kg.
Industry Canada Class B Statement
This Class [B] digital apparatus complies with Canadian ICES-003.
Cet appareil numérique de la classe [B] est conforme à la norme NMB-003 du Canada.
This device complies with Industry Canada licence-exempt RSS standard(s).Operation is
subject to the following two conditions: (1) this device may not cause interference, and (2)
this device must accept any interference, including interference that may cause undesired
operation of the device.
IEEE 802.11b or 802.11g operation of this product in the Canada is firmware-limited to
channels 1 through 11.
Déclarations d'exposition aux RF liéesAvertissement d'exposition RF: L'équipement est
conforme aux limites d'exposition aux RF établies pour un environnement non contrôlé.
L'antenne (s) utilisée pour ce transmetteur ne doit pas être co-localisés ou fonctionnant en
conjonction avec une autre antenne ou transmetteur.
Ce dispositif est conforme à la norme de l'industrie Candada exempts de licence RSS (s).
L'opération est soumise aux deux conditions suivantes: (1) Cet appareil ne peut causer
d'interférences nuisibles, et (2) cet appareil doit accepter toute interférence reçue, y
compris les interférences qui peuvent causer un mauvais fonctionnement de l'appareil.
Rugged Tablet PC
8
Packaging List
This product is shipped with the items list below. Please make sure that all are in your package.
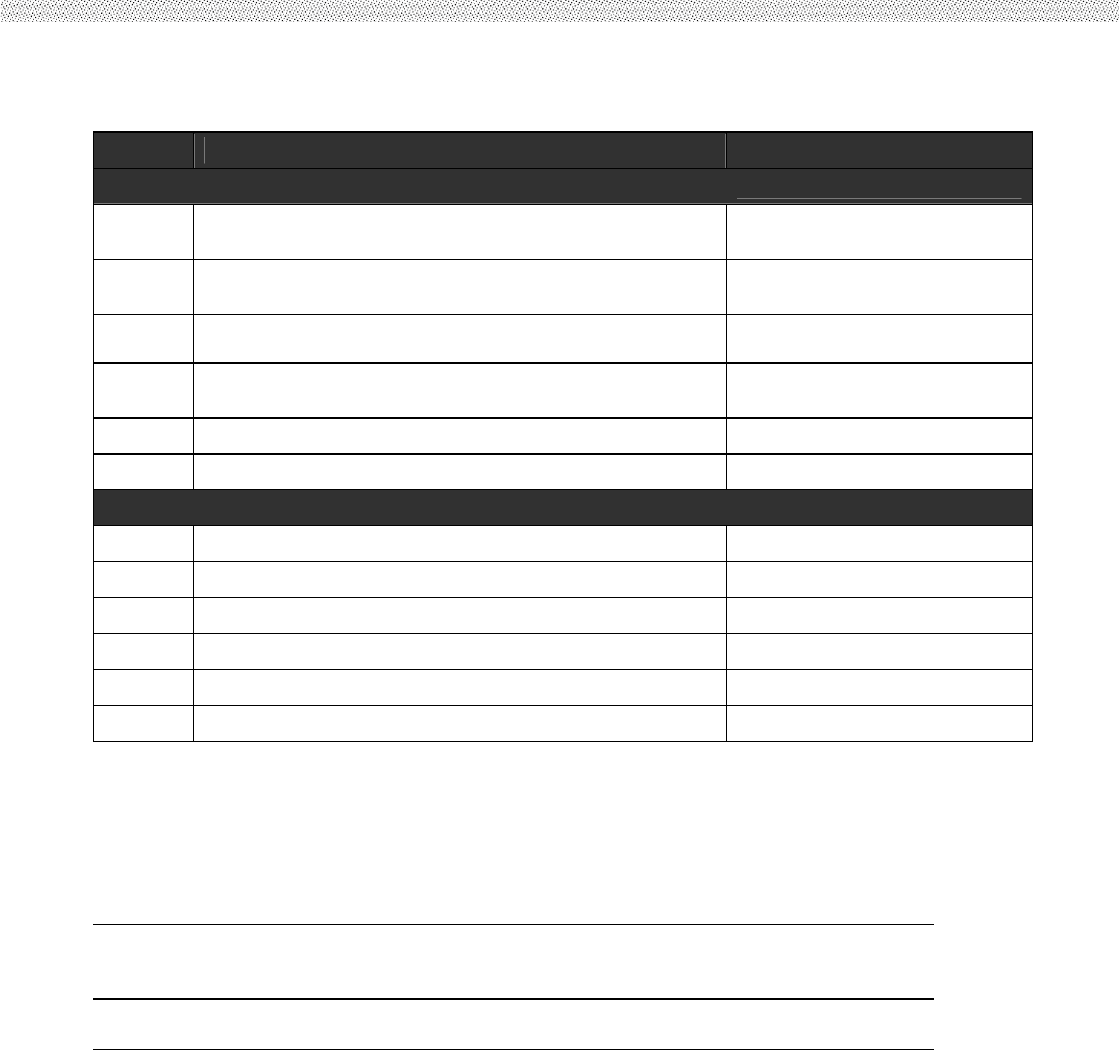
Item Description Note
Default Packing Accessories
1 1 piece of Rugged Tablet PC Quick Start
Guide.
2 1 piece of CD for Recovery CD for Operation
System (Windows embedded standard 7).
3 1 piece of CD for M970D Manual.
4 1 piece of 12V Adapter w/ Standard Power
Cord. (Euro / U.S. Std type, 1.8m)
5 LAN (female) Adapter cable
6
Optional Accessories
1 Table Stand
2 HDMI (female) Adapter cable
3 Hand Strap
4 Capacitive Touch Stylus
5 VESA Mounting Kit
6 Vehicle charger
1
2 Power Button
LED Indicator Press 2 seconds continuous to turn-on the PC. Press
once to turn off backlight when PC is on. Press once to tune
on backlight when backlight is off Need 8 seconds
continuous push to force the Tablet PC turn-off
immediately. From right to left shows the status about
Power mode, Battery mode, Storage and WiFi status mode.
3 Menu Push Menu function to show Brightness,
Volume,Battery status and WiFi/
Bluetooth on/off.
Chapter 2.2.1
4 Hotkey (F1) 1 programmable Hot-key for user to
define by application Chapter 2.2.2
Indicator
Status
Descriptio
n
Green light:
when Power On.
No light when
Power Off.
Orange Light:
Under charging
Red Blinking
Light:Low
Battery
Check Chapter
3.2.3/ 2.4 for
low battery and
replacing
battery
1 DC-in
Connect
wit
powe
ada
p
te
f

Rugged Tablet PC
9
Contents
IMPORTANT SAFETY INSTRUCTIONS............................................................2
PACKAGING LIST ..................................................................................................6
CHAPTER 1 GETTING STARTED...................................................................... 10
1.1 CONNECTING THE AC POWER................................................................................ 10
1.2 TURNING ON AND OFF THE TABLET PC..................................................................... 11
1.2.1 TURNING ON THE TABLET PC........................................................................11
1.2.2 TURNING OFFTHE TABLET PC.......................................................................11
1.3 THE OPTIMIZED USE FOR SUNLIGHT READABLE TOUCH SCREEN........................................ 12
1.4 TAKING A LOOK AT I/OFUNCTIONS (FOR 9.7 INCH TABLET PC).......................................13
1.5 PRODUCT FEATURES AND SPECIFICATION .................................................................. 17
1.5.2 Product Features ..................................................................................................................17
1.5.2 Product Specification...........................................................................................................18
CHAPTER 2 OPERATING TABLET PC AND HOTTAB HOTKEY UTILITY
................................................................................................................................. 21
2.2 STARTING AND STOPPING THE TABLET PC ................................................................. 21
2.2 QUICK TO KNOW MENU AND HOTTAB HOTKEY FUNCTION ............................................... 22
2.2.1 How to use Menu Function ................................................................................................22
2.2.2 How to use Hotkey Function.............................................................................................24
Use the HotTab software utility to make it easy to program and define hot key by customer’s usual
application. ..........................................................................................................24
2.2.3 Connecting to a Wireless Network ..................................................................................27
2.2.4 Using the Bluetooth Wireless Feature............................................................................28
2.2.4 Using the 3G Feature (Optional) .....................................................................................30
2.2.6 Using the Camera Feature.................................................................................................33
CHAPTER 3 TABLET PC POWER MANAGEMENT ........................................ 35
3.1 ABOUT AC ADAPTER .......................................................................................... 35
3.2 CHARGING AND CHECKING CHARGING STATUS ........................................................... 36
3.2.1 Charging the Battery Pack.................................................................................................36
3.2.3 Charging Approaches..........................................................................................................36
3.2.3 Checking the Battery Level ...............................................................................................37
3.2.4 Battery Low Signals and Actions .....................................................................................37
3.3 POWER MANAGEMENT......................................................................................... 37
FOR DETAILED INFORMATION ON POWER MANAGEMENT, SEE WINDOWS’ HELP.............................. 38
CHAPTER 4 EXPANDING YOUR TABLET PC................................................ 40
4.1 HOW AND WHEN TO USE BIOS SETUP .................................................................... 40
4.2 BIOS FUNCTIONS .............................................................................................41
4.2.1 Main Menu ..............................................................................................................................41
4.2.2 Advanced Menu.....................................................................................................................41
4.2.3 Chipset Menu.........................................................................................................................46
4.2.4 Boot Menu ..............................................................................................................................47
4.2.5 Security Menu .......................................................................................................................48
4.2.6 Save & Exit Menu…………………………………………………………………………………….. 49
Rugged Tablet PC
10
Rugged Tablet PC
11
CHAPTER 1
Getting Started
Rugged Tablet PC
12
CHAPTER 1 GETTING STARTED
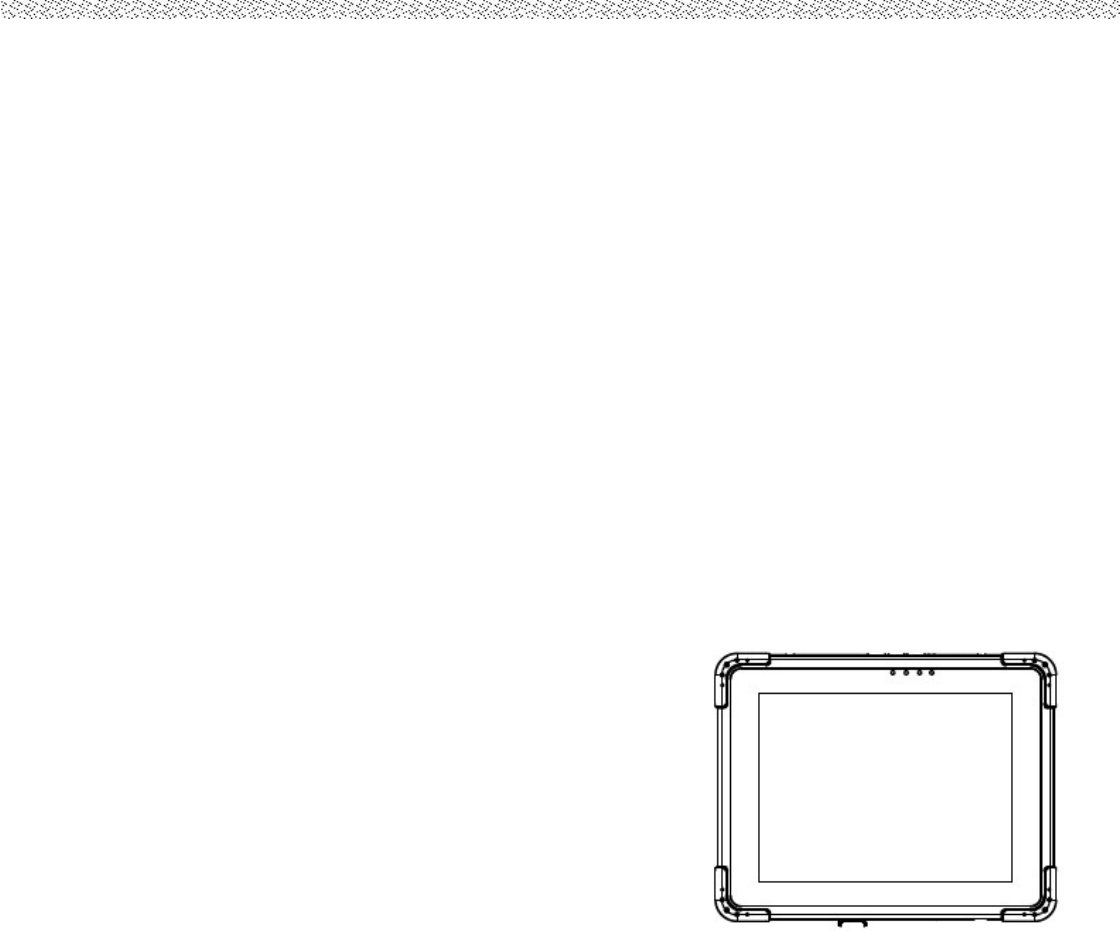
This chapter guides you to get the Rugged Tablet PC ready for operating.
1.1 Connecting the AC Power
Our tablet PC can operate either on the external AC power adapter or internal battery power. It
is suggested that you use AC power when you start up the tablet PC first time.
**Caution
Use only the AC adapter included with your tablet PC. Using other AC adapters may damage
the tablet PC.
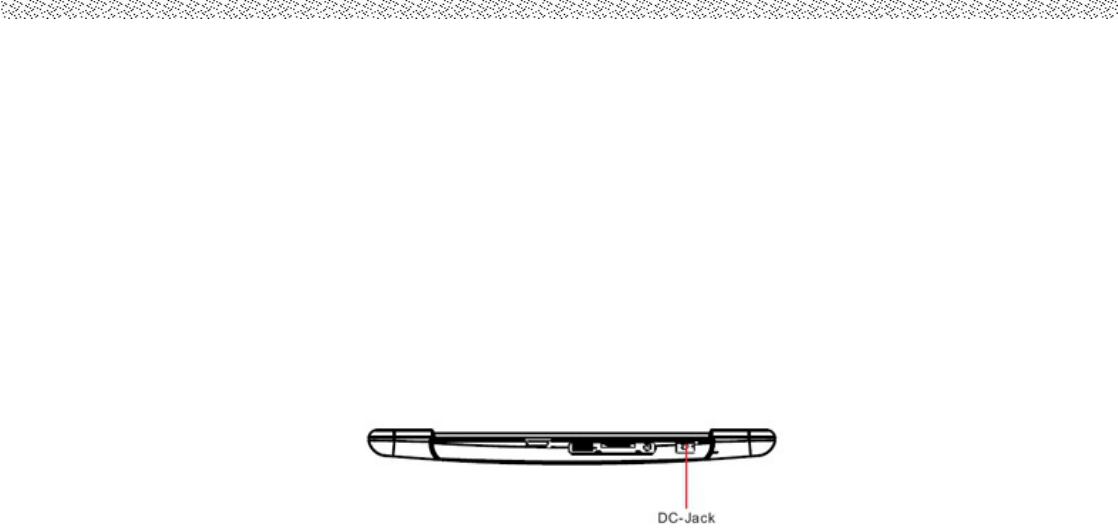
1. Plug the DC cord of the AC adapter to the
power connector of the tablet PC.
2. Plug the female end of the AC power cord to
the AC adapter and the male end to the power electrical outlet.
3. When the AC adapter is connected, the Battery Pack is also under charging. You can check the
Battery Status LED indicator to see the currently progress. The indicator turns to green when is
fully charged.
(For information on using battery power, see “Chapter 3 The Power Management”)
**Caution
When you disconnect the AC adapter, disconnect from the electrical outlet first and then from
the tablet PC. A reverse procedure may damage the AC adapter or the tablet PC. When
unplugging the connector, always hold the plug head. Never pull on the cord.
Rugged Tablet PC
13
1.2 Turning On and Off the Tablet PC
1.2.1 Turning on the Tablet PC
1. Place your tablet PC on a flat and stable surface or holding the tablet PC on your hand.
2. Make sure that the tablet PC is either connected to AC power or the battery pack with power.
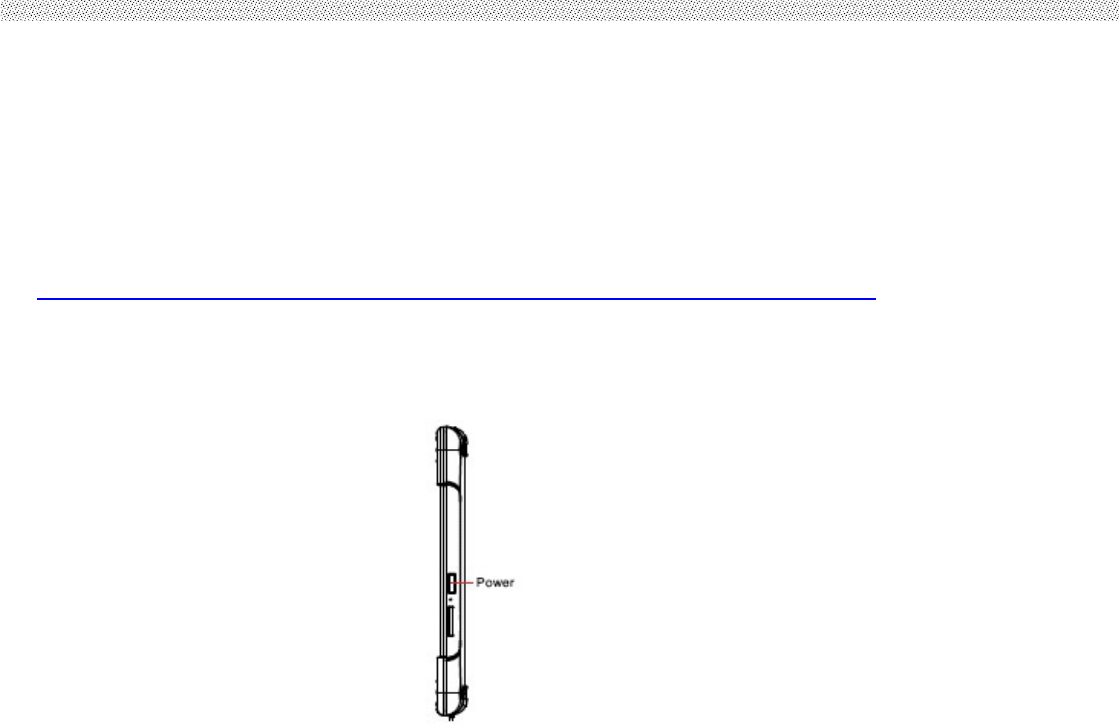
3. Press the power button on the right side by 2-3 seconds to start it.
1.2.2 Turning off the Tablet PC To turn off the tablet PC power, use the “Shut Down” command
of your operating system.
**Caution
If you have to turn the tablet PC on again immediately after turning
it off, wait for at least five seconds. Turning the tablet PC off and
on rapidly can damage it.
Rugged Tablet PC
14
1.3 The Optimized Use for Sunlight Readable Touch screen.
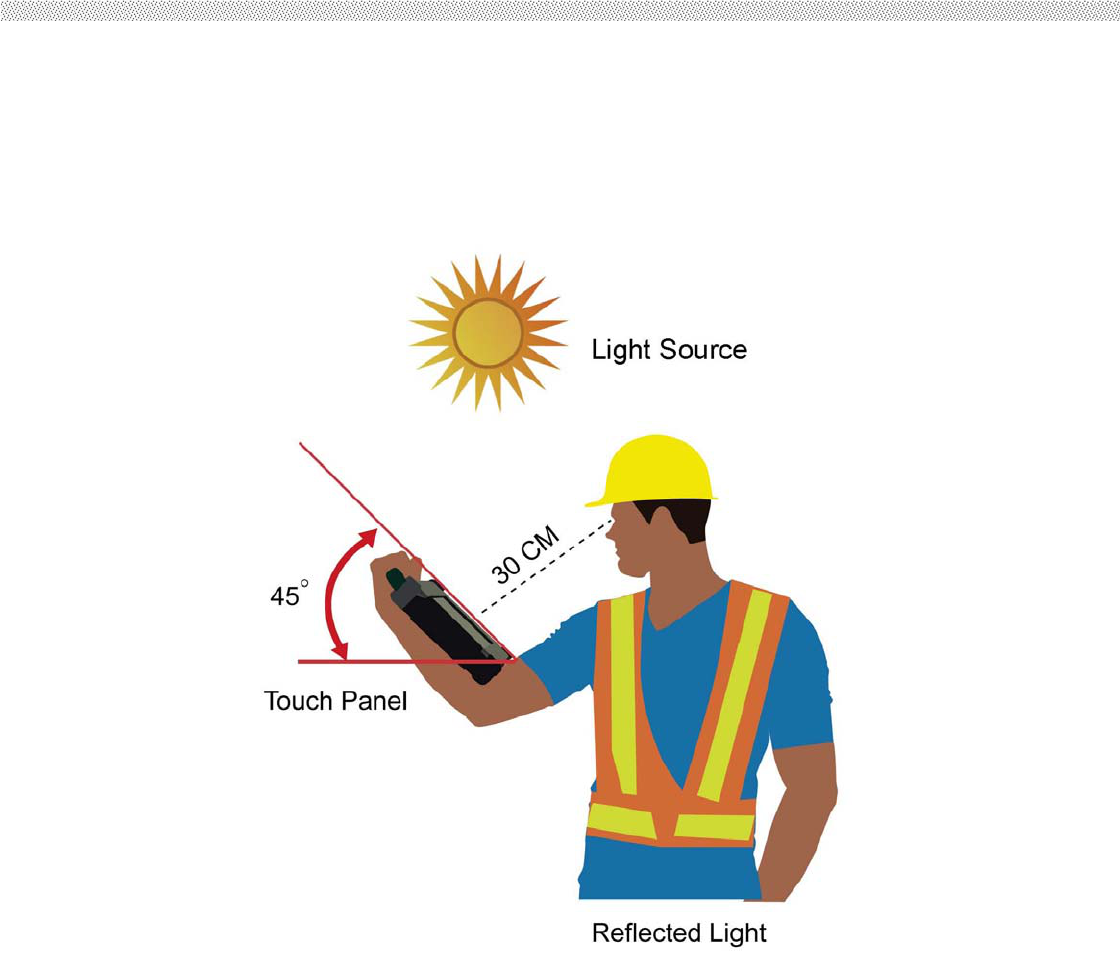
With the imposed reflective function, the modified LCD can reflect the ambient light passing the LCD cell and
utilize the reflected light beams as its illumination. The stronger the ambient light is, the brighter the LCD will
appear. As a result, the modified LCD is viewable under lighting conditions. The optimized angle of view is
fourty-five degree. And the optimized distance of view is 30cm.
Light Source
**Caution
Although transflective LCD is mainly
used in outdoor environment
and it may increase the reflective
lights under sunlight, it is suggested
that you should keep the LCD in
appropriate temperature for
operation and storage, and avoid
direct sunlight if possible. To
ensure the transflective
LCD work stably, 0~50°C
(32-121°F) operation and storage
temperature is suitable.
Rugged Tablet PC
15
1.4 Taking a Look at I/O Functions (for 9.7 inch Tablet PC)
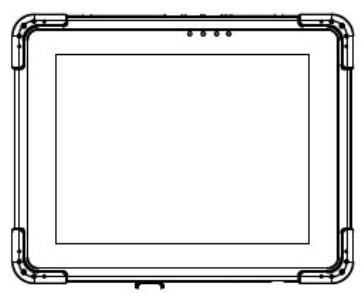
This section we will show the Tablet PC external connection parts and their functions.
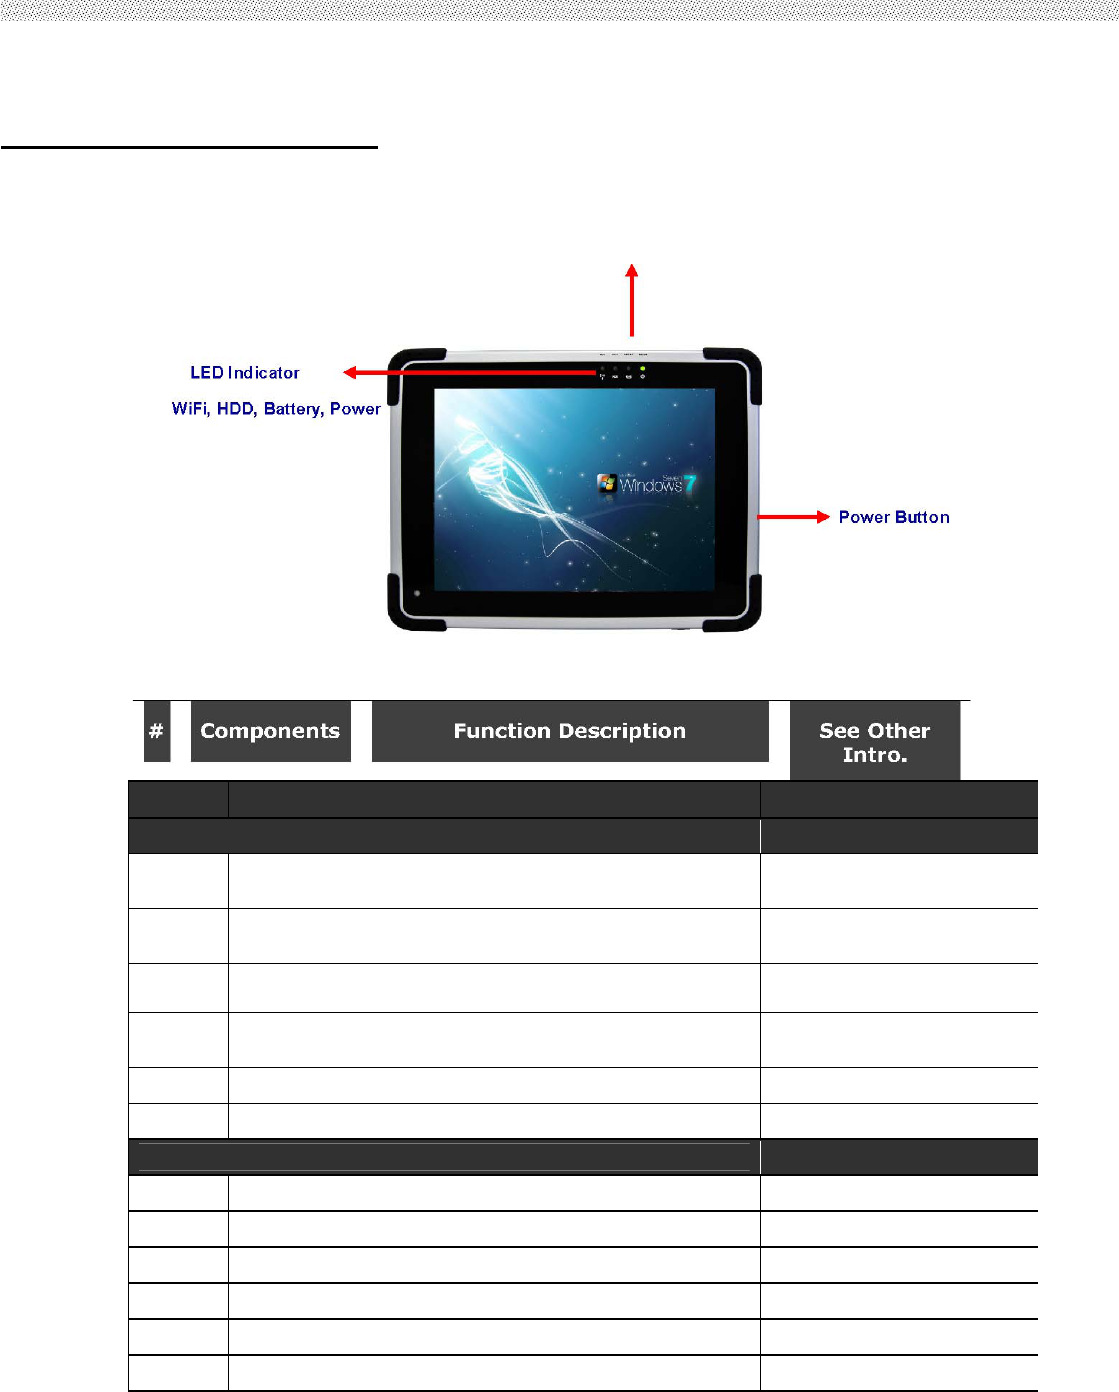
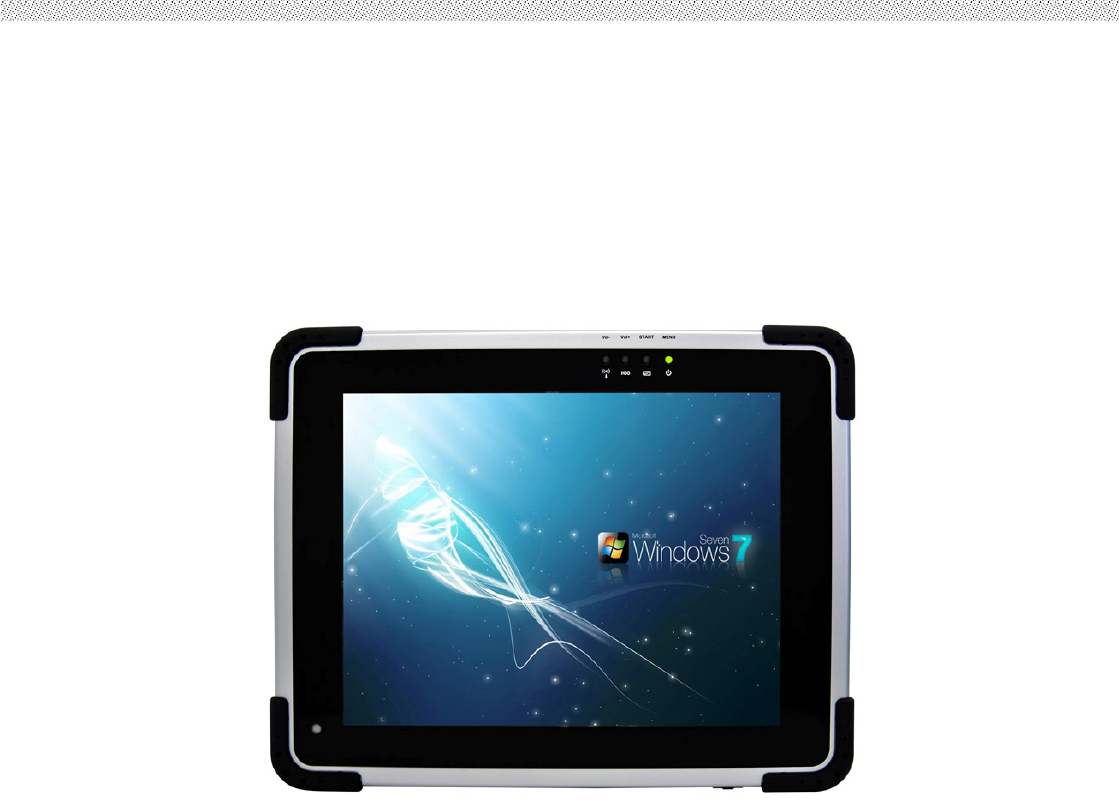
Front side Control Functions
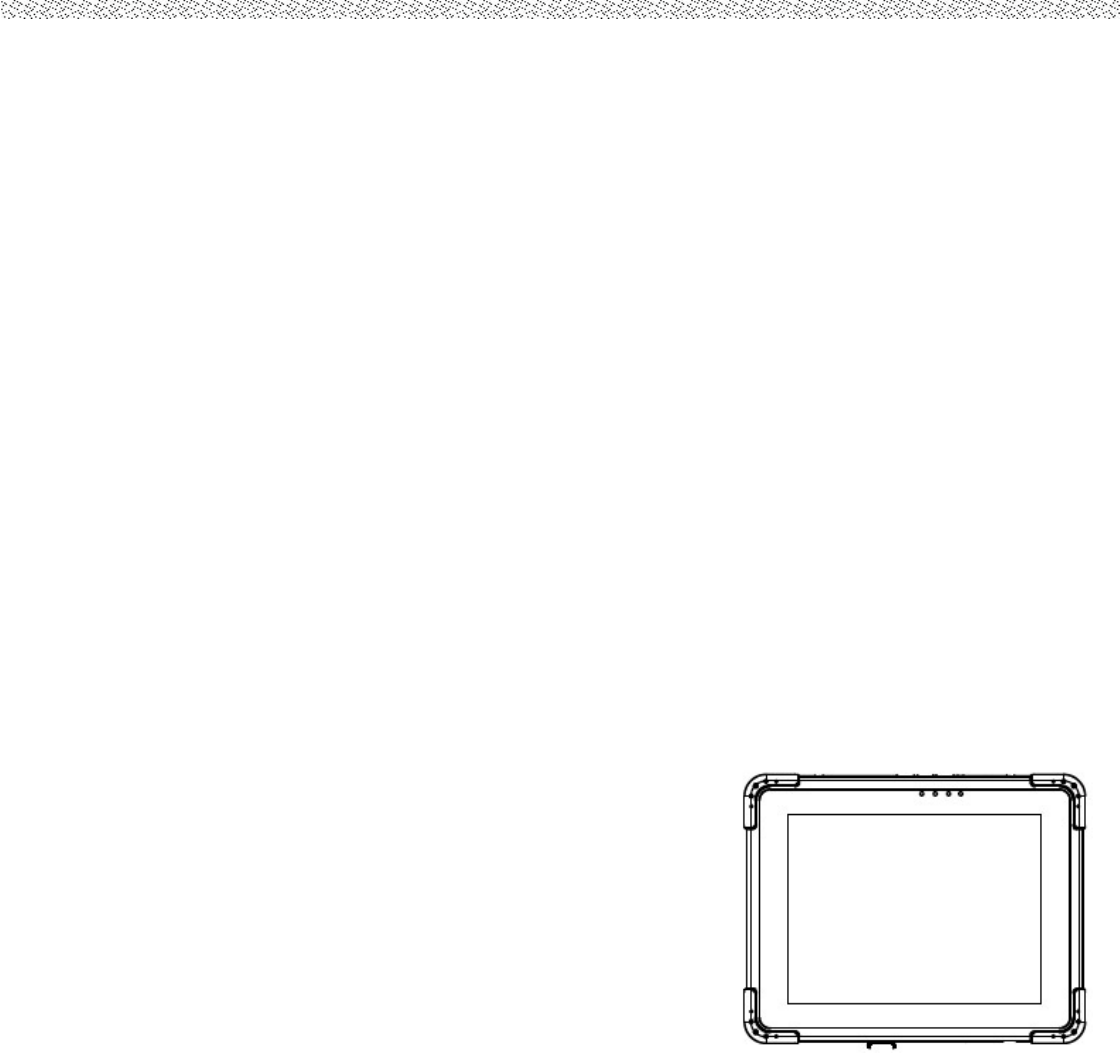
Hot Key: Vol-, Vol+, F1. Menu
Item
Description Note
Default Packing Accessories
1 1 piece of Rugged Tablet PC Quick Start
Guide.
2 1 piece of CD for Recovery CD for Operation
System (Windows embedded standard 7).
3 1 piece of CD for M970D Manual.
4 1 piece of 12V Adapter w/ Standard Power
Cord. (Euro / U.S. Std type, 1.8m)
5 LAN (female) Adapter cable
6
Optional Accessories
1 Table Stand
2 HDMI (female) Adapter cable
3 Hand Strap
4 Capacitive Touch Stylus
5 VESA Mounting Kit
6 Vehicle charger
1
2 Power Button
LED Indicator Press 2 seconds continuous to turn-on the PC. Press
once to turn off backlight when PC is on. Press once to tune
on backlight when backlight is off Need 8 seconds
continuous push to force the Tablet PC turn-off
immediately. From right to left shows the status about
Power mode Battery mode Storage and WiFi
status mode
Rugged Tablet PC
16
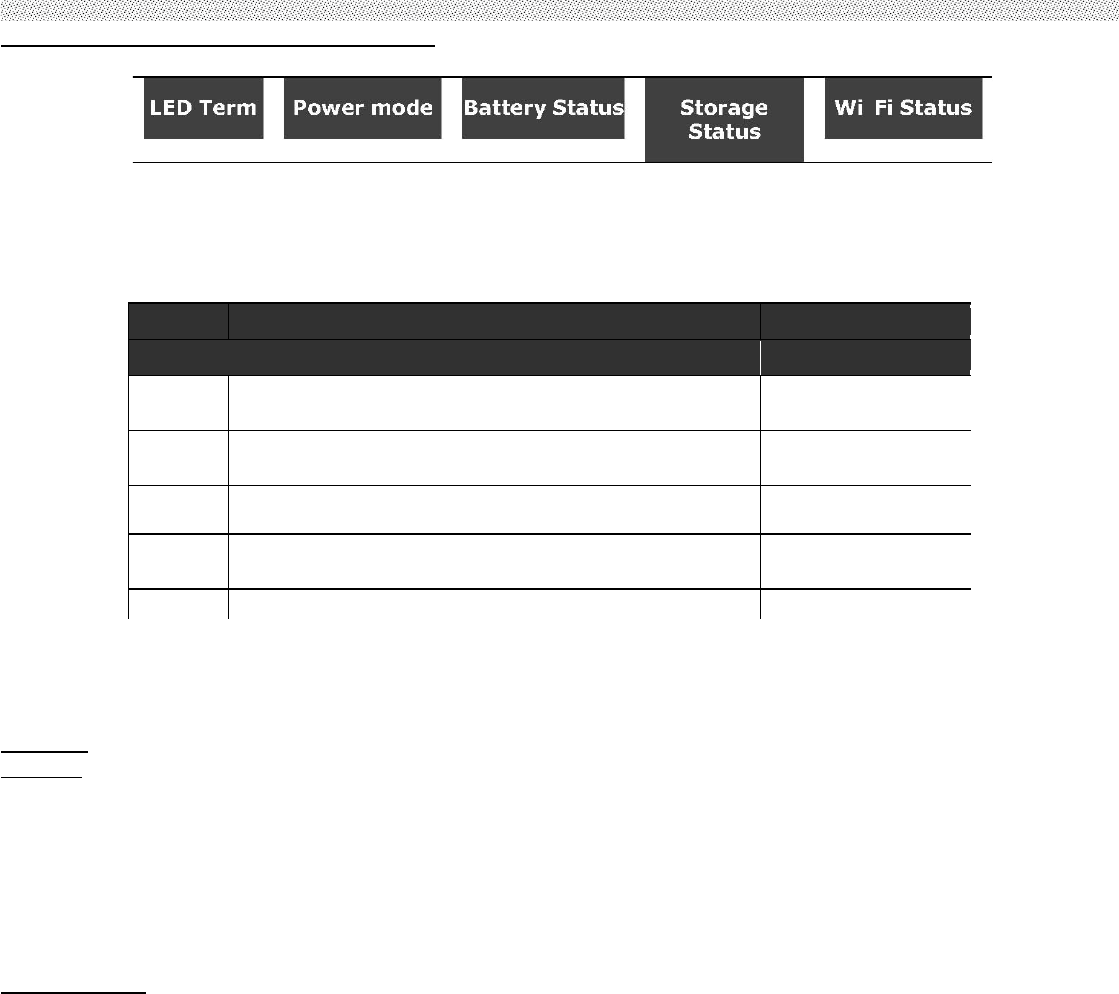
LED Indicator Status Description
LED Indicator
Green
light:
when storage
under
operation.
No light
when storage
stop
operation.
Green light:
when
Wi-Fi
under
operation.
No light
when Wi-Fi
stop
operation.
Item
Description Note
Default Packing Accessories
1 1 piece of Rugged Tablet PC Quick Start
Guide.
2 1 piece of CD for Recovery CD for Operation
System (Windows embedded standard 7).
3 1 piece of CD for M970D Manual.
4 1 piece of 12V Adapter w/ Standard Power
Cord. (Euro / U.S. Std type, 1.8m)
5 LAN
(
female
)
Ada
p
ter cable
Rugged Tablet PC
17
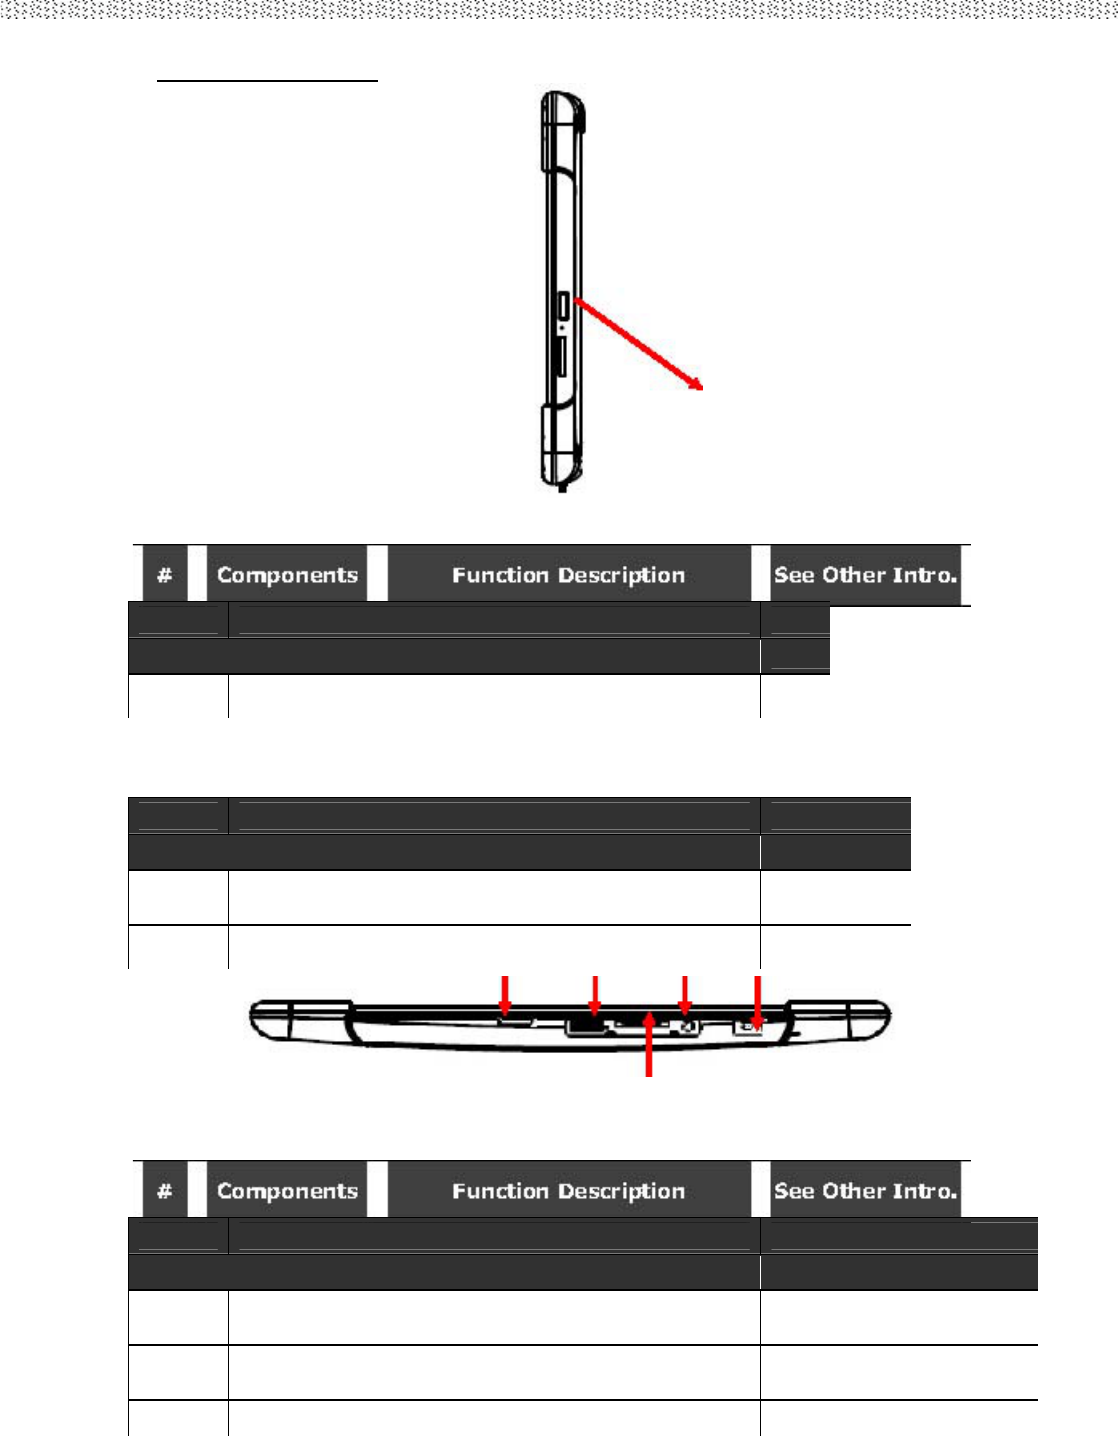
Right side Input
Power Button
LAN / HDMI
Item
Description
Default Packing Accessories
1 1 piece of Rugged Tablet PC Quick Start
Guide
Item
Description N
o
Default Packing Accessories
1 1 piece of Rugged Tablet PC Quick Start
Guide.
2 1 piece of CD for Recovery CD for Operation
System (Windows embedded standard 7)
Item
Description Note
Default Packing Accessories
1 1 piece of Rugged Tablet PC Quick Start
Guide.
2 1 piece of CD for Recovery CD for Operation
System (Windows embedded standard 7).
3 1
p
iece of CD for M970D Manual.

Rugged Tablet PC
18
Through the first Chapter 1.1 to 1.4, you can understand the basic information when you own the machine, in
next Chapter you will understand more detail about how to operate the tablet PC. Between this, you can
check our product function and specification.
Item
Description
Default Packing Accessories
1 1 piece of Rugged Tablet PC Quick Start
Guide.
2 1 piece of CD for Recovery CD for Operation
System (Windows embedded standard 7)
Rugged Tablet PC
19
1.5 Product Features and Specification
1.5.2 Product Features Our Rugged Tablet PCs are designed with state of the art industrial use,
versatile functionality and solid products. With great mobility support and battery management.
The 9.7” rugged tablet provides an alternative solution for those between general consumer
and extremely rugged application.
? 9.7” 1024x768 Resolution IPS LED Panel
? Low-power system with Intel® Atom N2600 processor
? 2GB SODIMM DDR3-800 memory
? Built-in Wi-Fi/ Bluetooth Module
? Support 3G&GPS function (optional)
? Standard Battery 5300 mAh
? Mobile Rugged-Shock, Vibration, and transit drop
? 4 points Projective-capacity touch
Rugged Tablet PC
20
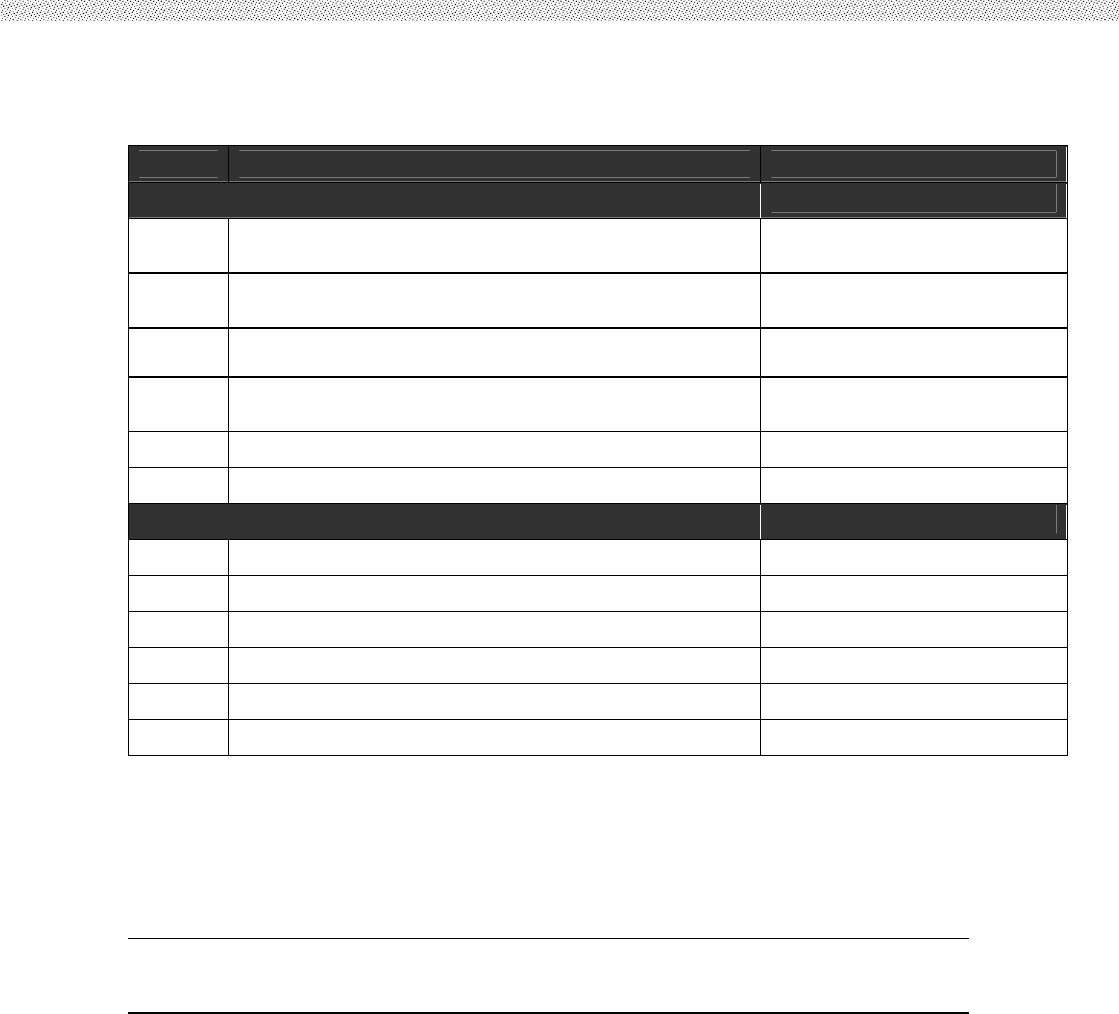
1.5.2 Product Specification The product specification as the following table description:
System Specification
Item
Description Note
Default Packing Accessories
1 1 piece of Rugged Tablet PC Quick Start
Guide.
2 1 piece of CD for Recovery CD for Operation
System (Windows embedded standard 7).
3 1 piece of CD for M970D Manual.
4 1 piece of 12V Adapter w/ Standard Power
Cord. (Euro / U.S. Std type, 1.8m)
5 LAN (female) Adapter cable
6
Optional Accessories
1 Table Stand
2 HDMI (female) Adapter cable
3 Hand Strap
4 Capacitive Touch Stylus
5 VESA Mounting Kit
6 Vehicle charger
1
2 Power Button
LED Indicator Press 2 seconds continuous to turn-on the PC. Press
once to turn off backlight when PC is on. Press once to tune
on backlight when backlight is off Need 8 seconds
continuous push to force the Tablet PC turn-off
immediately. From right to left shows the status about
Power mode, Battery mode, Storage and WiFi status mode.
3 Menu Push Menu function to show Brightness,
Volume,Battery status and WiFi/
Bluetooth on/off.
Chapter 2.2.1
4 Hotkey (F1) 1 programmable Hot-key for user to
define by application
Chapter 2.2.2
Rugged Tablet PC
21
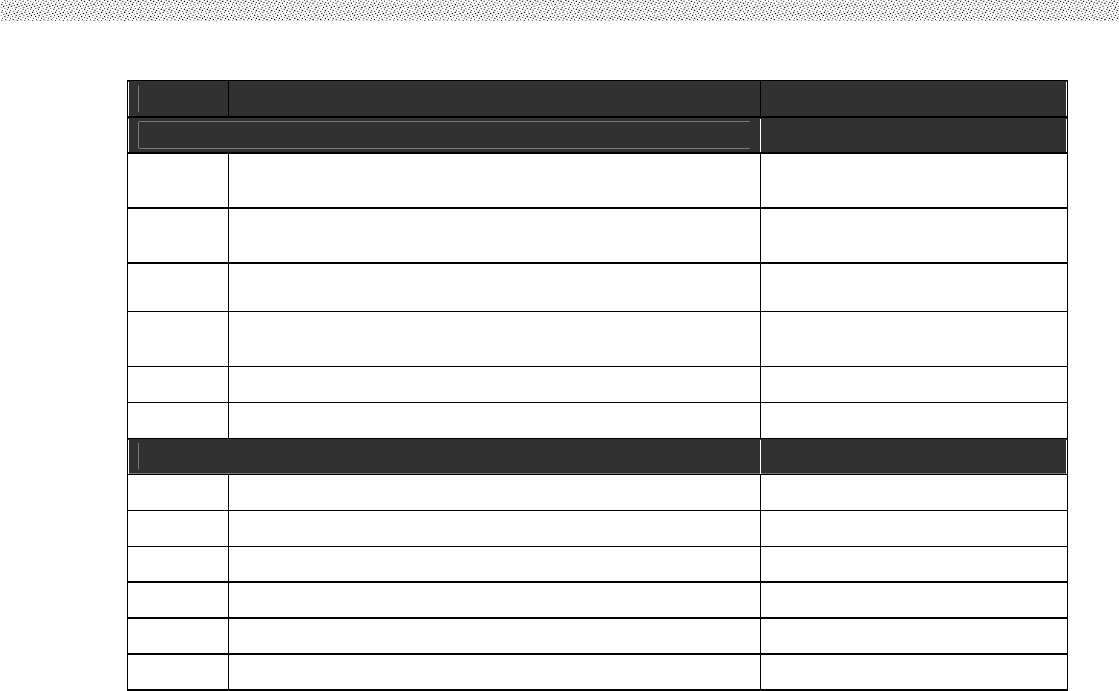
System Specification (continues)
Item
Description Note
Default Packing Accessories
1 1 piece of Rugged Tablet PC Quick Start
Guide.
2 1 piece of CD for Recovery CD for Operation
System (Windows embedded standard 7).
3 1 piece of CD for M970D Manual.
4 1 piece of 12V Adapter w/ Standard Power
Cord. (Euro / U.S. Std type, 1.8m)
5 LAN (female) Adapter cable
6
Optional Accessories
1 Table Stand
2 HDMI (female) Adapter cable
3 Hand Strap
4 Capacitive Touch Stylus
5 VESA Mounting Kit
6 Vehicle charger
1
2 Power Button
LED Indicator Press 2 seconds continuous to turn-on the PC. Press
once to turn off backlight when PC is on. Press once to tune
on backlight when backlight is off Need 8 seconds
continuous push to force the Tablet PC turn-off
immediatel
y
. From ri
g
ht to left shows the status about
Rugged Tablet PC
22
CHAPTER 2
Operating Tablet PC and HotTab
Hotkey Utility
Rugged Tablet PC
23
CHAPTER 2 OPERATING TABLET PC AND HOTTAB HOTKEY UTILITY
This Chapter will guide you how to operate the Tablet PC, including start / stop the PC, and how
to use menu function including basic hardware function adjustment and the HotTab hotkey
utility software that is very easy & helpful for operating the computer.
2.2 Starting and Stopping the Tablet PC
Starting the Tablet PC You always start the tablet PC using the power button, push the
Power Button continuously by 2 seconds to turn on the Tablet PC.
Our Tablet PC will starts up with an operating system (OS) existing on the storage device like
the hard disk. The computer will automatically load the OS after you turn it on. This is normal
booting process.
NOTE: The operating system is the platform for all software application programs to run on.
The Tablet computer is recommended to use the Microsoft Windows XP embedded
operating system for default solution.
Stopping the Tablet PC
When you finish your work, you can stop the tablet PC by turning off the power or leaving
the tablet PC in Standby mode:
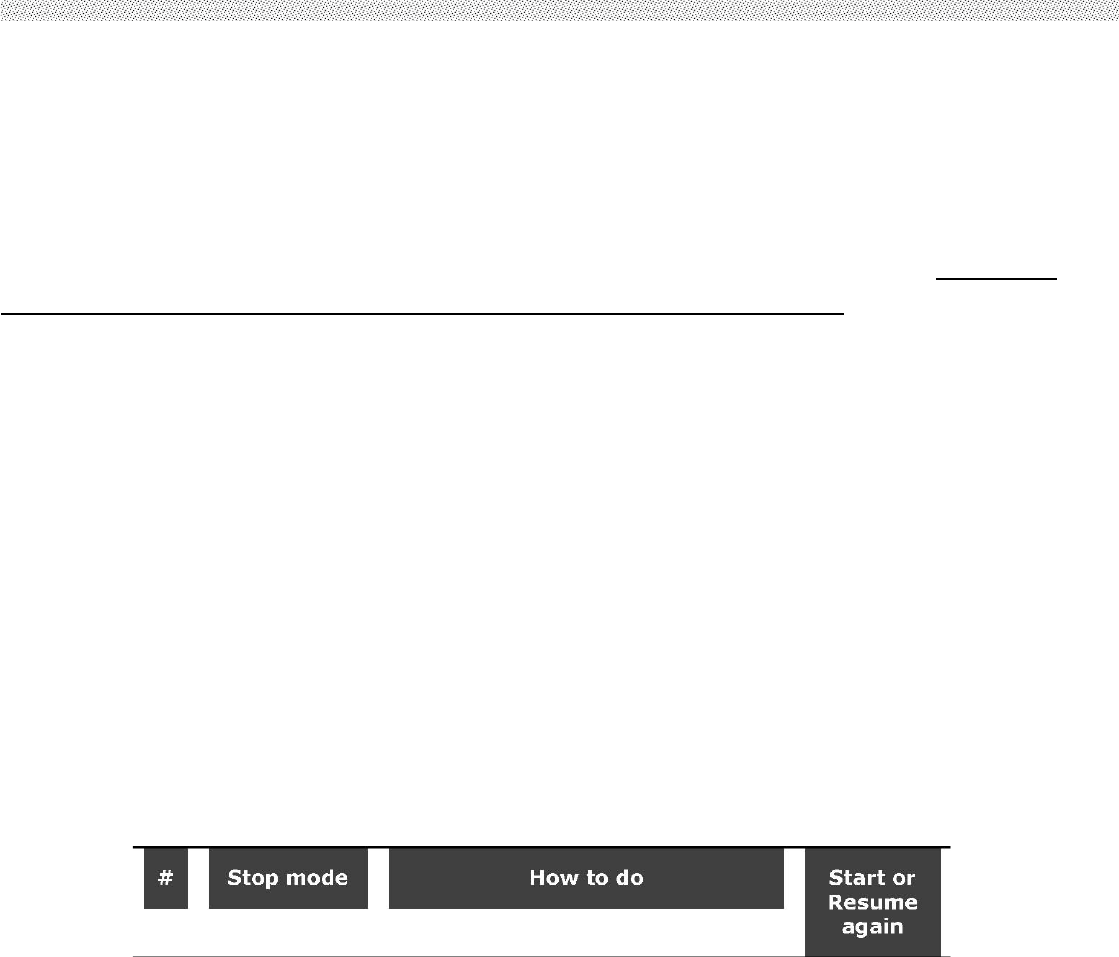
1 Power Off Following the shutdown process during operating system. The standard process can prevent
unsave data loss or damage your software programs.
2 Sleep (S3) Under normal operating system, Push the Power Button 0.5
second to go to sleep mode.
If you choose to stop in Standby mode, you can return to where you left off the next time you
start up the tablet PC. (See “Power Management” in Chapter 3 for more information.)
Rugged Tablet PC
24
2.2 Quick to Know Menu and HotTab Hotkey Function
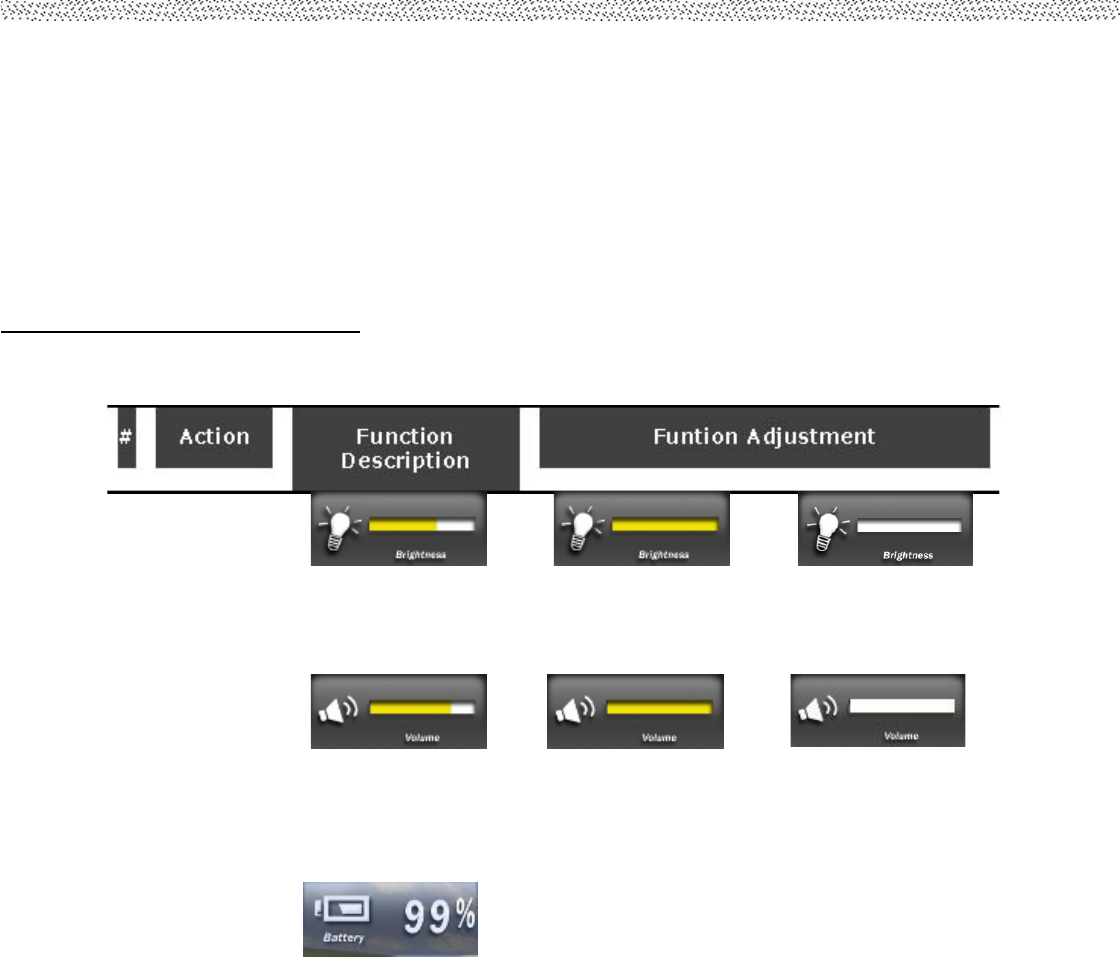
This section will introduce you about our easy-of-use function buttons. Our Tablet PC function
buttons support very easy way and useful function to adjust Brightness, Volume and watch
Battery current status. For programmable Hotkey function can also be defined by user to
control by their common use application.
2.2.1 How to use Menu Function
Menu Function Adjustment
S
h
o
w
C
u
r
r
e
n
t
B
r
i
g
h
t
S
how Current Brightness
Click “Vol+” button to Click ”Vol-” to decrease
1st Time
i
n
crease brightness (Or Drag
brightness(Or Drag by by Touch)
Touc
S
h
o
w
c
urrent Volume Click “Vol+” button to Click ” Vol-” to decrease
2nd Time
increase volume(Or Drag by
volume(Or Drag by Touch)
Touch)
Rugged Tablet PC
25
Menu Function Adjustment
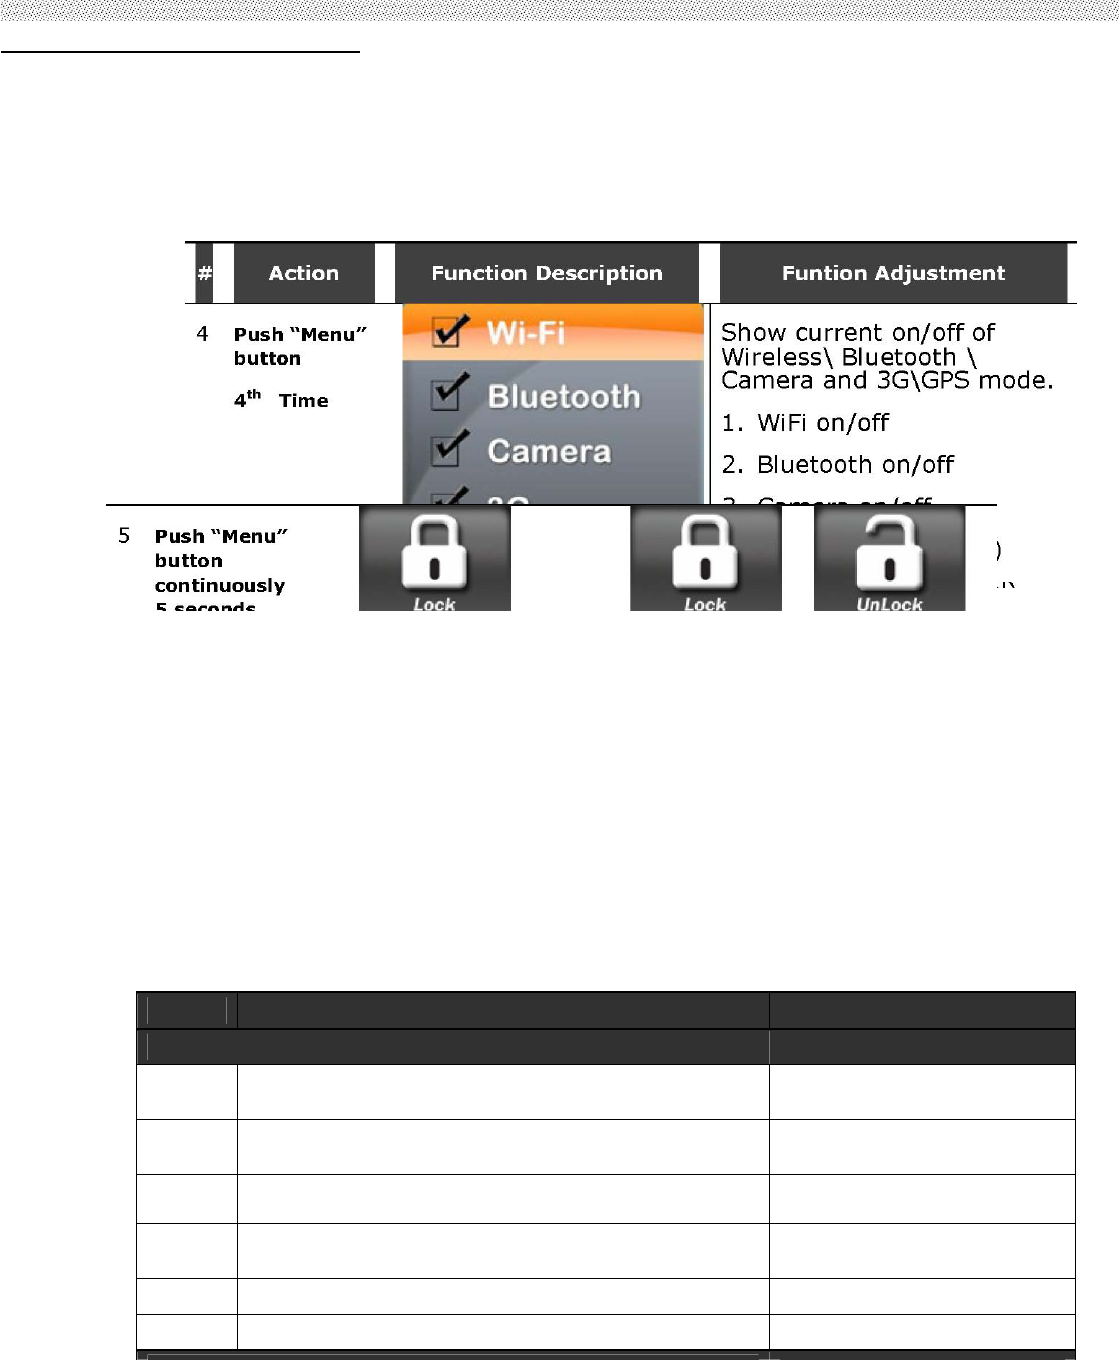
**NOTICE
If you
shutdown
the Tablet
PC during
operating
system(B
y Touch)
under
Lo
c
k
/
U
n
l
o
c
k
a
l
l
b
u
t
t
o
n
Item
Description Note
Default Packing Accessories
1 1 piece of Rugged Tablet PC Quick Start
Guide.
2 1 piece of CD for Recovery CD for Operation
System (Windows embedded standard 7).
3 1 piece of CD for M970D Manual.
4 1 piece of 12V Adapter w/ Standard Power
Cord. (Euro / U.S. Std type, 1.8m)
5 LAN (female) Adapter cable
6
Rugged Tablet PC
26
f
u
n
c
t
i
o
n
P
u
s
h
5
P
u
s
h
5
s
e
c
o
n
d
s
t
o
s
e
c
o
n
d
s
t
o
U
n
l
o
c
k
b
a
c
k
t
o
n
o
r
m
a
l
L
o
c
k
a
l
l
o
p
e
r
a
t
i
o
n
b
u
t
t
o
n
*
*
(
n
o
t
i
n
c
l
u
d
i
n
g
T
o
u
c
h
)
Rugged Tablet PC
27
2.2.2 How to use Hotkey Function
Hotkey Function
Use the HotTab software utility to make it easy to program and define hot key by customer’s
usual application.
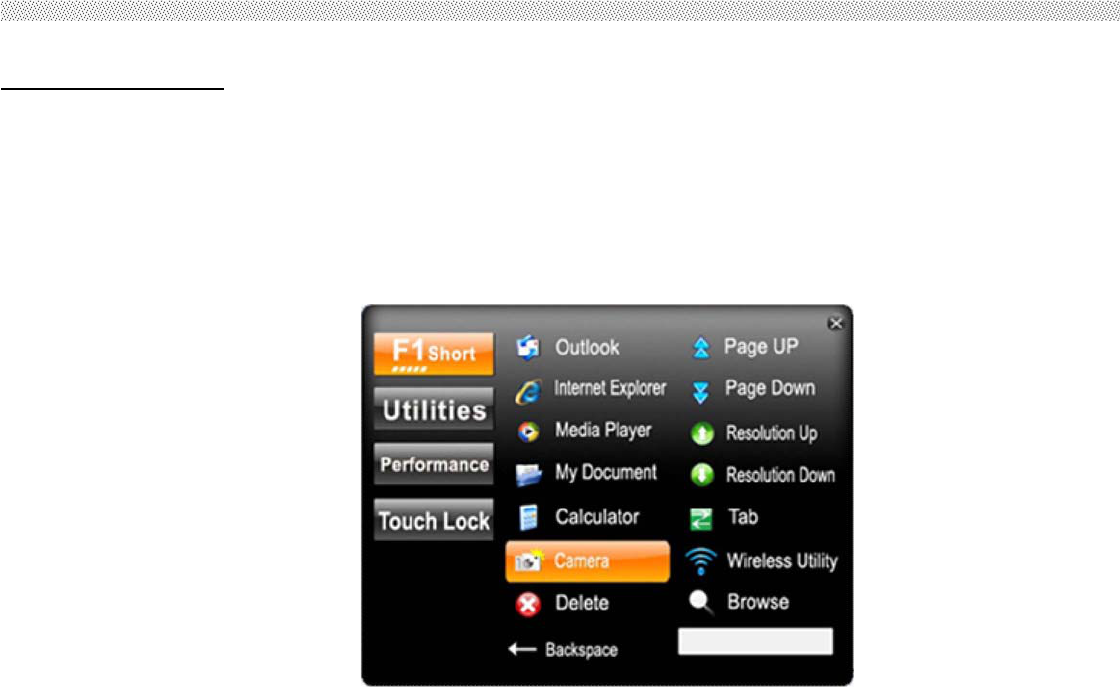
Long press (3~4 seconds) the “F1” button on the top of your M970D and you can see the
software application at center of desktop.
Choose one software application
as your hotkey function. After that, the
software application which you set will open
immediately when you short press “F1”
button.
The Hotkey software program is the
programmable application software for the
Hotkey; we choose some usual applied
function for default setup. For example, user
can choose his own application program very
easy by setting up the function from
the setup window.
Rugged Tablet PC
28
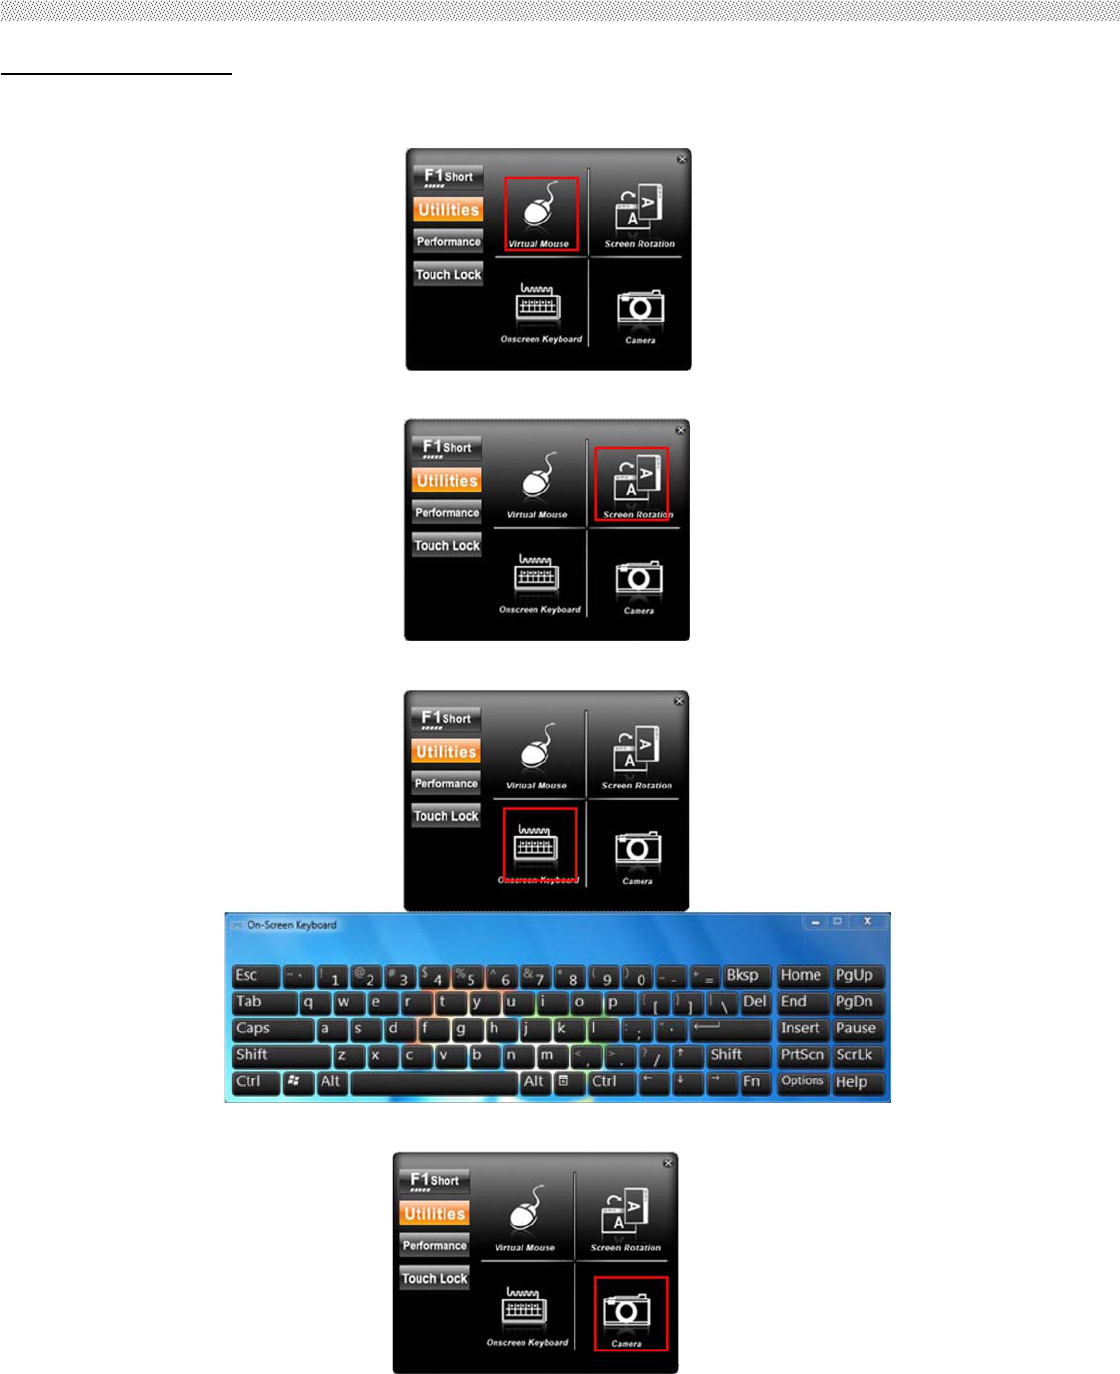
Utilities Function
A. The first is virtual mouse
B. Screen rotation
C. Onscreen Keyboard
D. Camera Function
Users Manual 25 Rugged Table PCs
Rugged Tablet PC
29
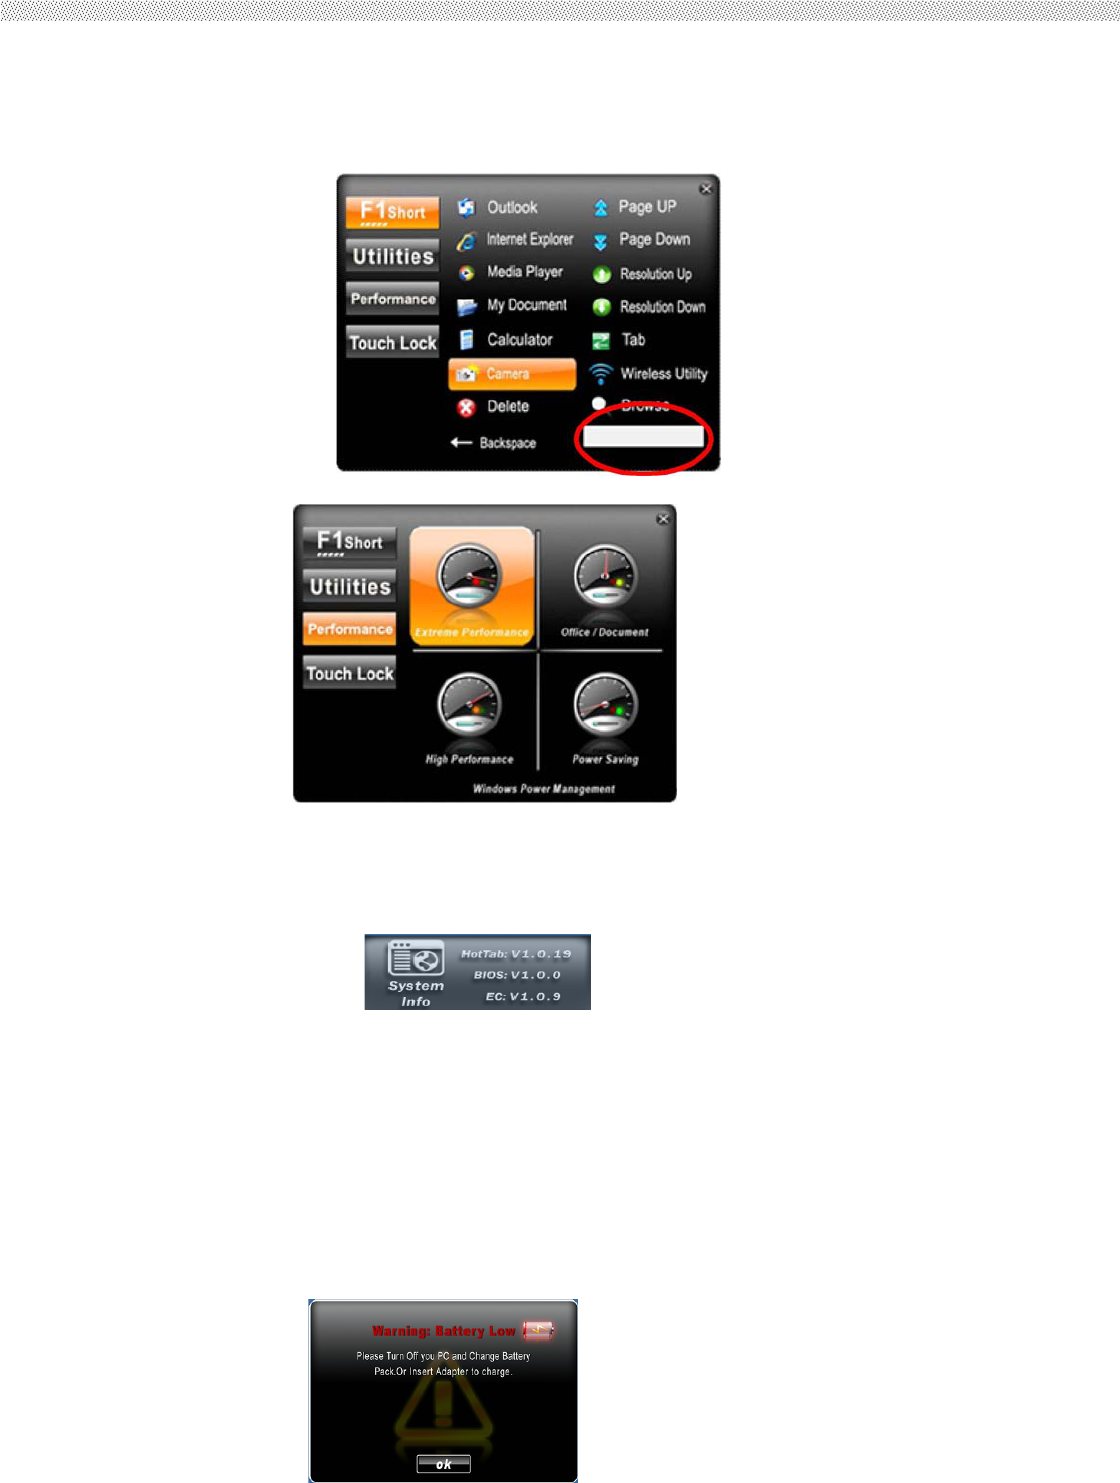
1 F1 Short function key You can set F1 button as a hotkey to open the programs listed on menu or use
“Browse” and choose the execution program file.
2 Power Manage
function
3 System Information When you press “menu button”
4 Low battery warning: When the battery under 10%, system will show the battery low to remind you to
change the new battery or insert adapter to charge.
Rugged Tablet PC
30
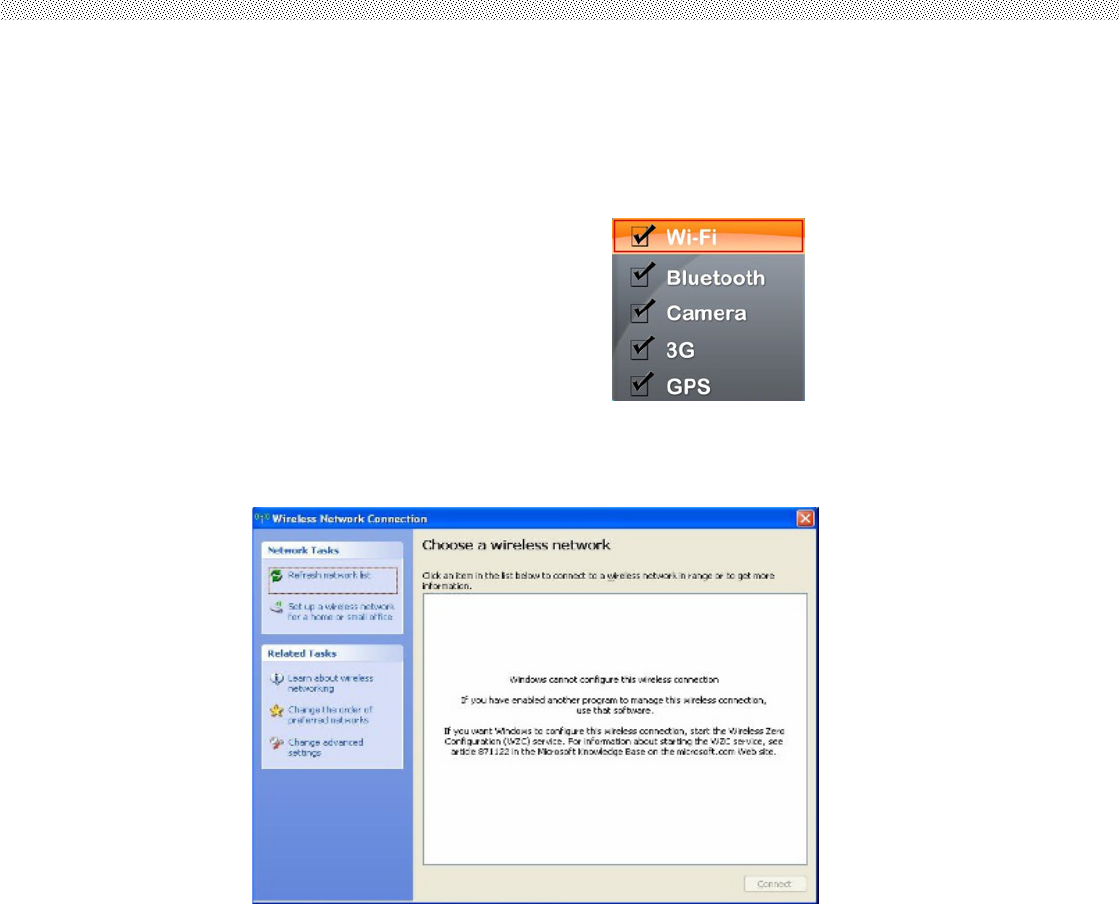
2.2.3 Connecting to a Wireless Network To connect to a wireless
network:
1. Push “Menu” button 4 times and making sure the Wireless function is
“On”.
2. Please using the defult Windows Wireless Network Connection utility.
Rugged Tablet PC
31
2.2.4 Using the Bluetooth Wireless Feature We apply Bluetooth 2.1+ EDR module for default
function of the Tablet PC series. Depending on your application, the Bluetooth module can give
you capability for short-range wireless communicaitons between devices without requiring a
cable connection. The transmission can go through walls, pockets and briefcases as long as two
devices are within range around 10 meters. Following the easy step to connect to the Bluetooth
communication.
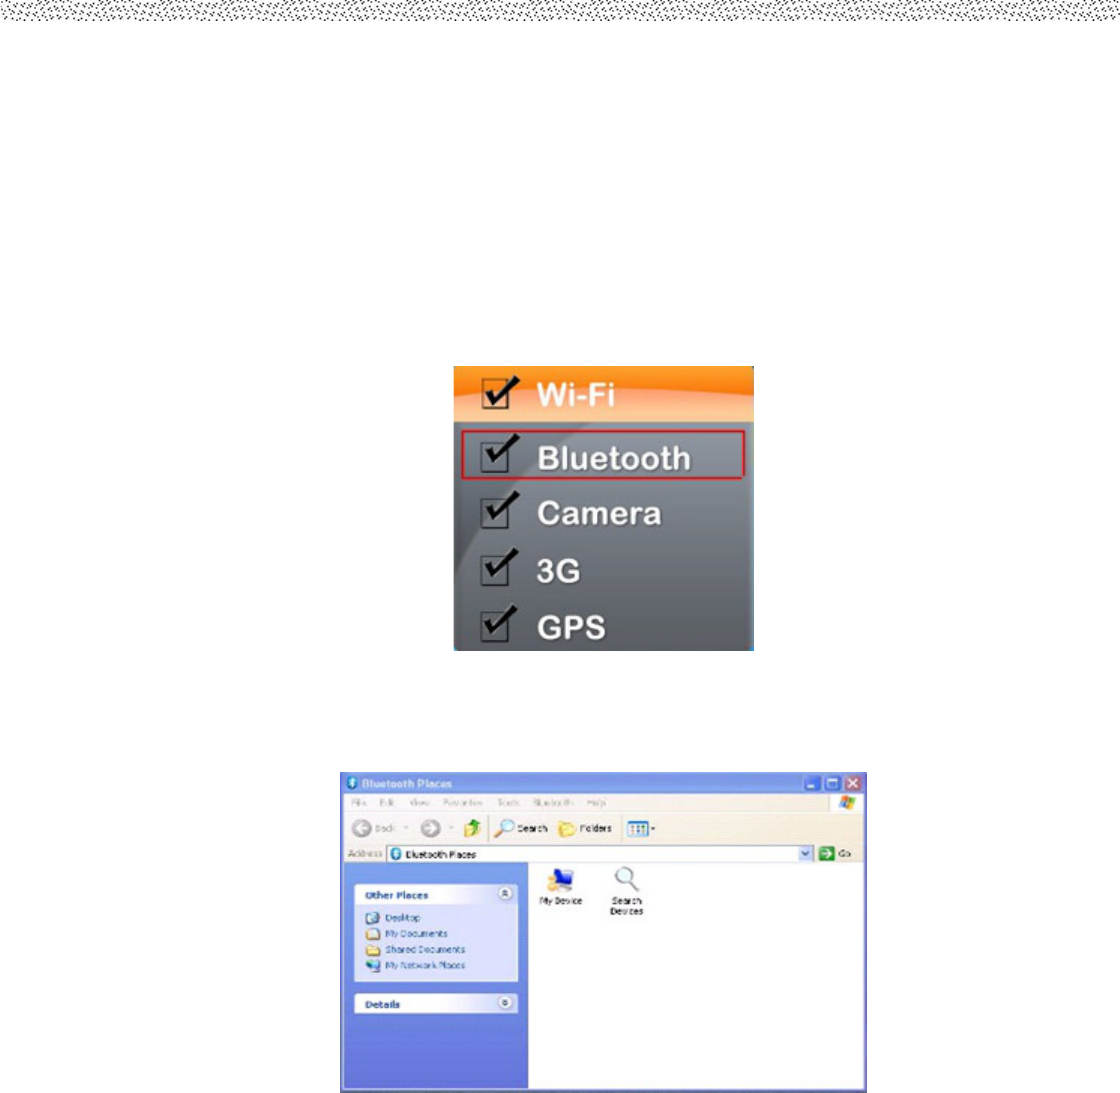
1. Push “Menu” button 4 times and making sure the Bluetooth
function is “On”.
2. Double click the Bluetooth shortcut and it will search any
bluetooth device automatically. Or double click “Search Devices” to search again.
Rugged Tablet PC
32
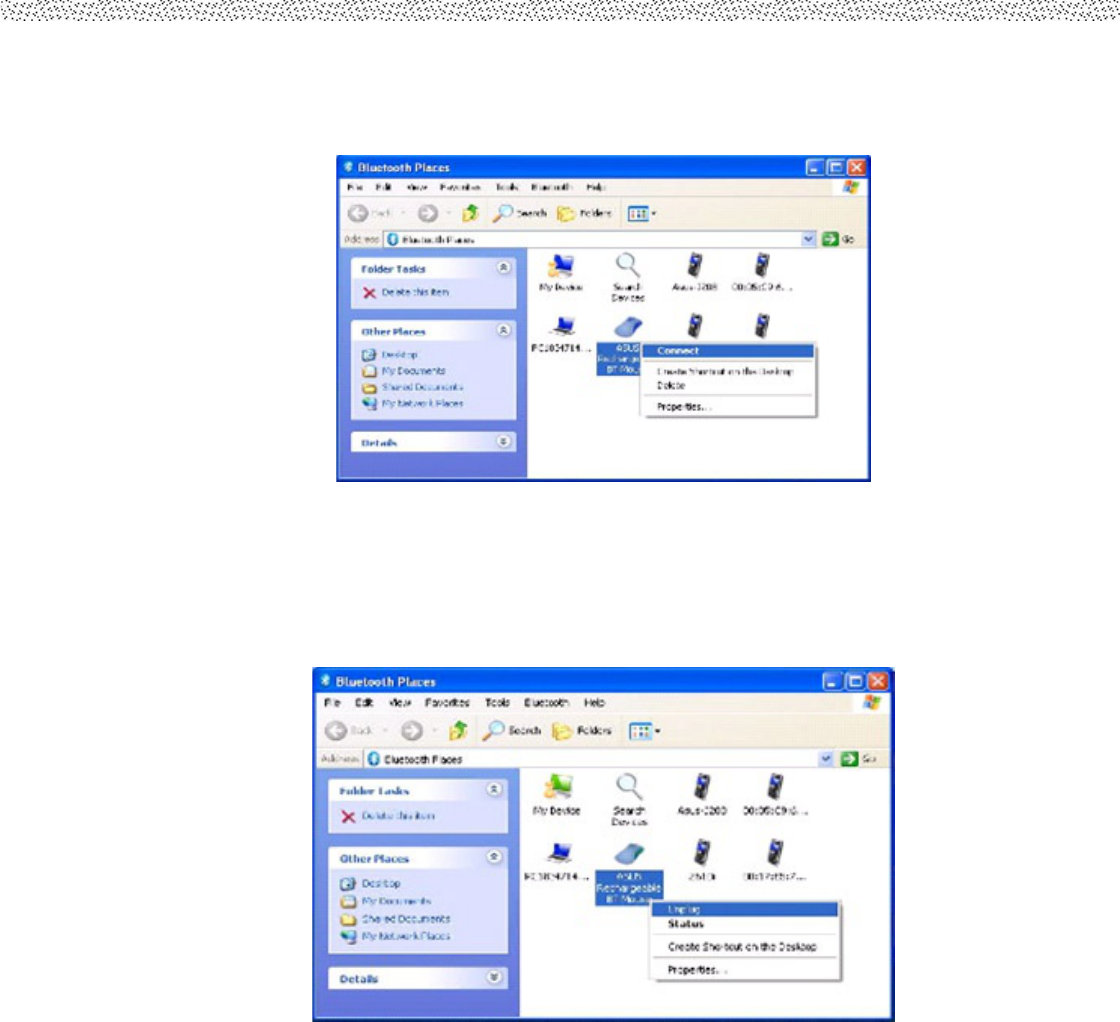
1. Choose the bluetooth device you want to connect, and left click to choose “Connect”. Then the device will
be connected to the module.
2. When under connecting, left click to
check the connection status, or choose “Unplug” to remove the connection.
Rugged Tablet PC
33
2.2.4 Using the 3G Feature (Optional) We apply a PCI Express® full size 3G module for optional
function of the Tablet PC series. Depending on your application, the 3G module can datacard
and host PC software combination deliver multiband CDMA2000® 1xEV-DO, UMTS, and GSM
wireless wide area network (WWAN) connectivity in a single hardware configuration.
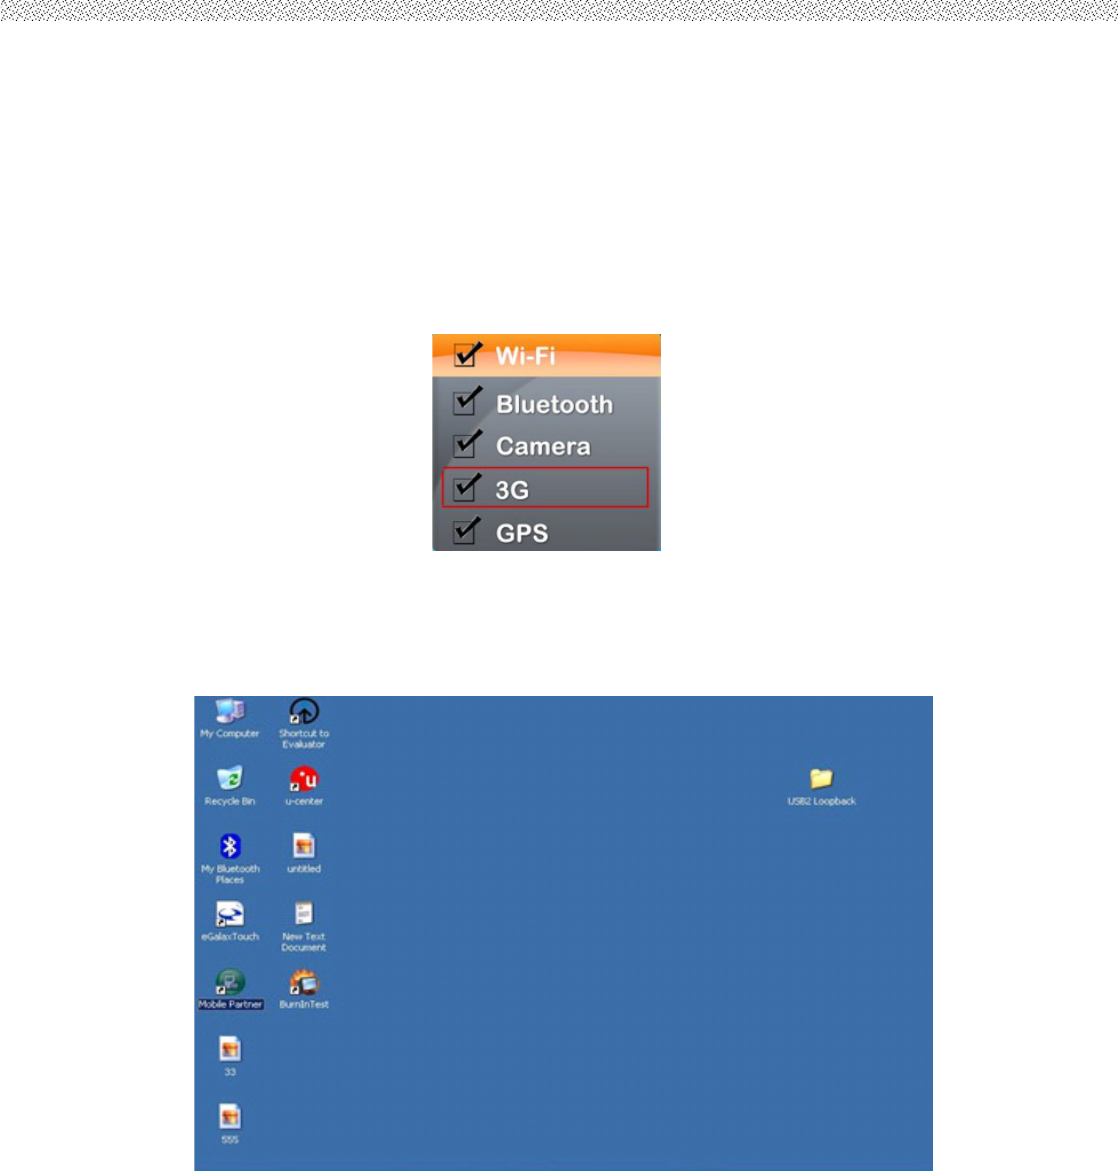
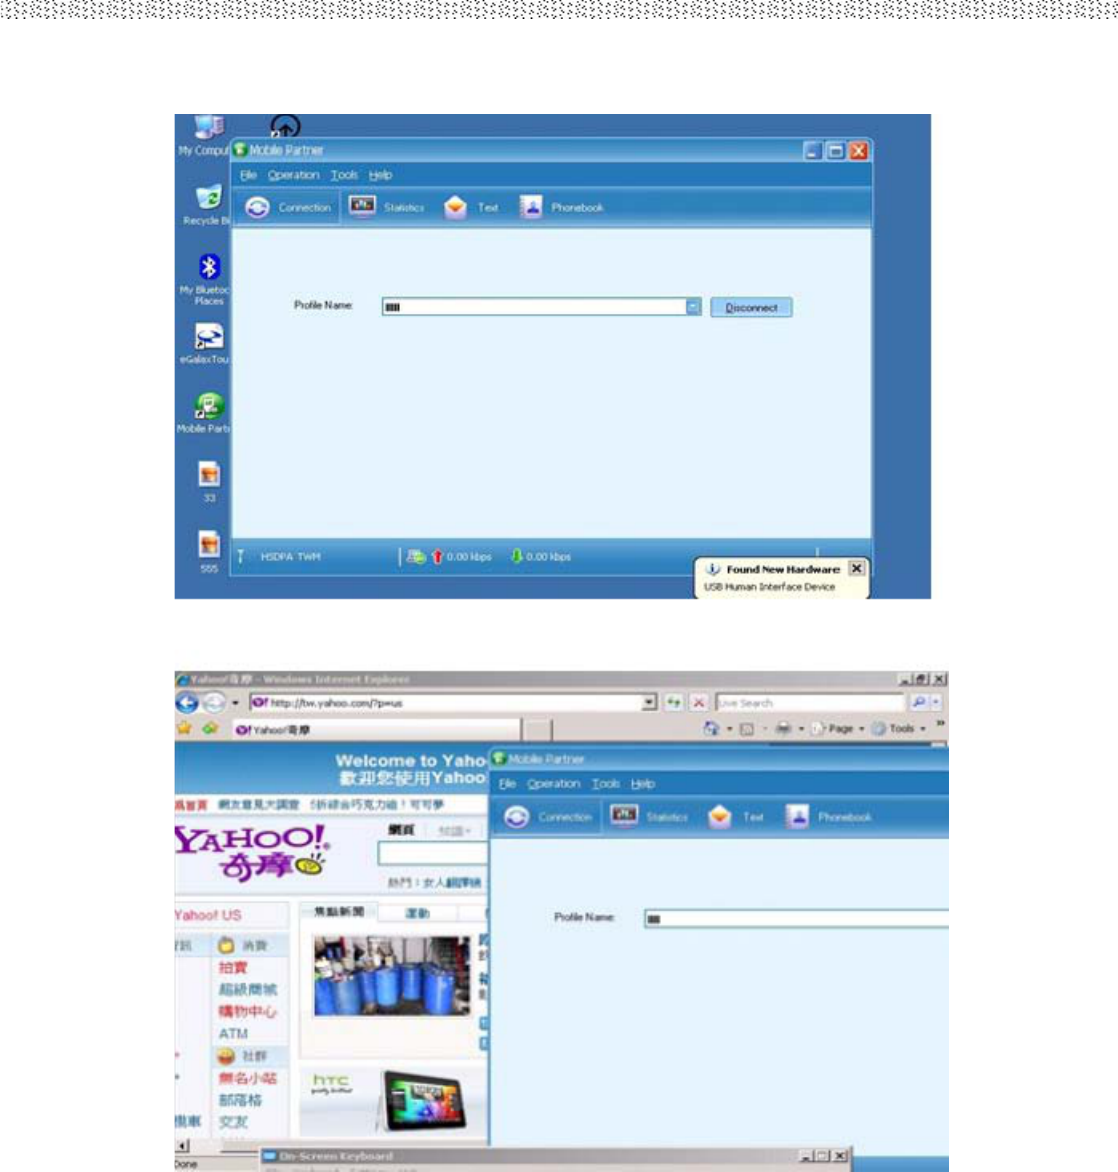
1. Push “Menu” button 4 times and making sure the 3G Module is
“On”.
2. The shortcut of 3G application program shown on screen, then
to executive Mobile Partner Internet connection management
application.
Users Manual 30 Rugged Table PCs
Rugged Tablet PC
34
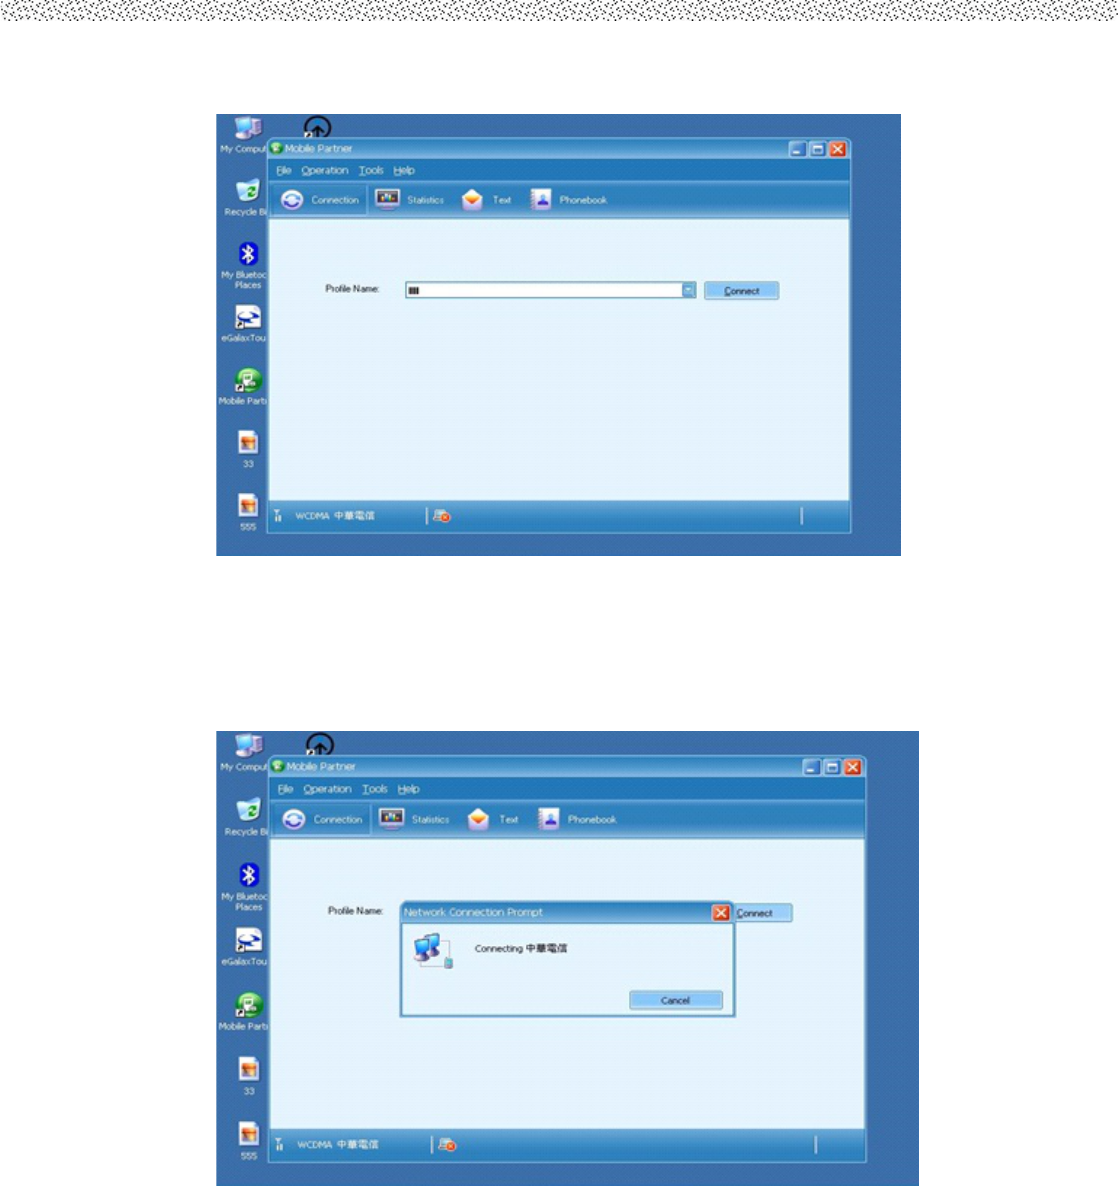
3. Confirm whether to detect the telecommunications system operators, then press the “Connect” connect to
3G networks.
Rugged Tablet PC
35
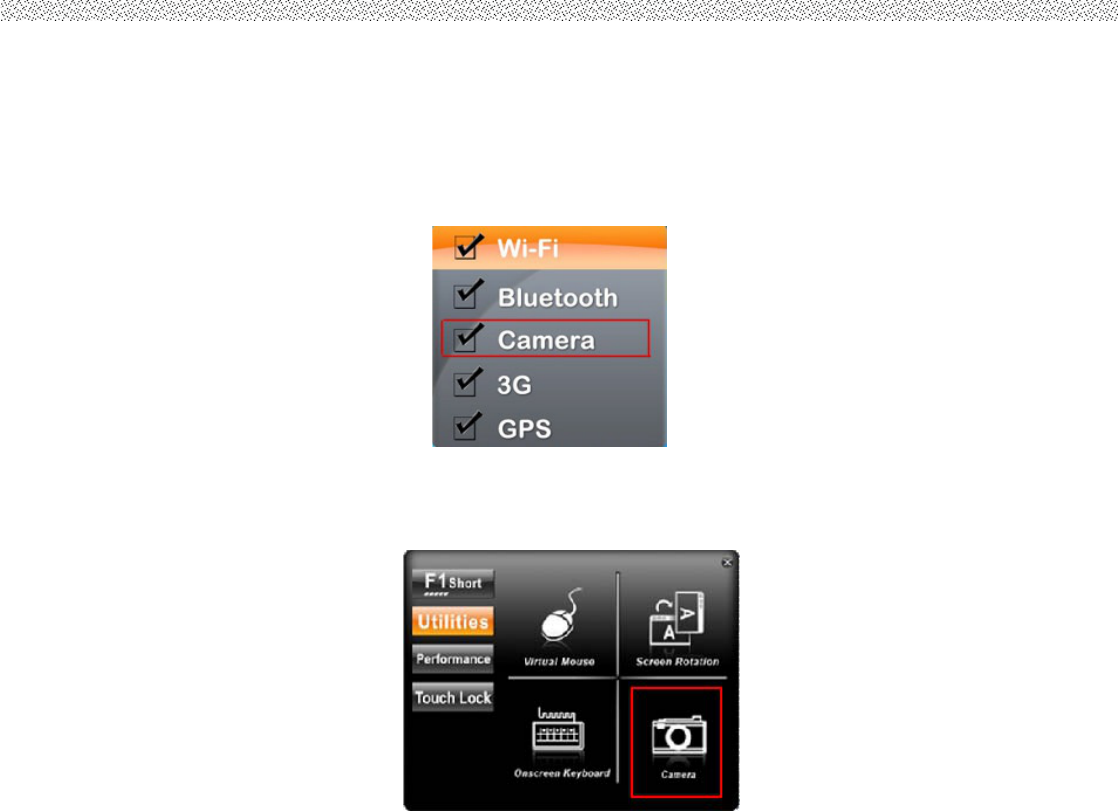
4. After initialization is completed, it will automatically connect to 3G networks.
Note: No
additional
driver
installation
is required
for 3G
module.
Rugged Tablet PC
36
2.2.6 Using the Camera Feature We apply a internal 2M Pixels Web Camera module for default
function of the Tablet PC series.
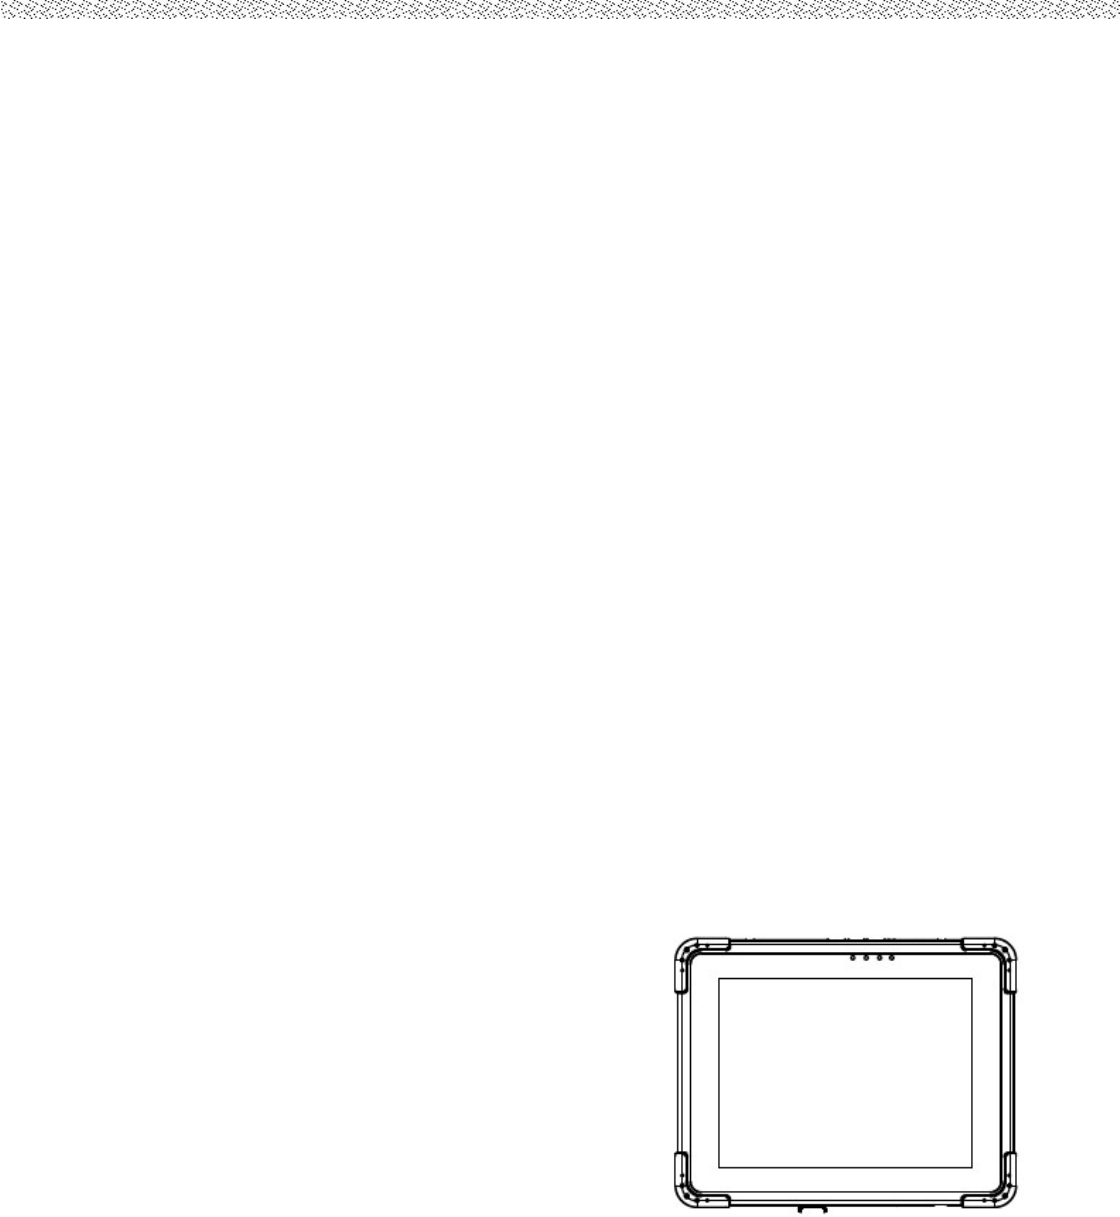
1. Push “Menu” button 4 times and making sure the Camera function
is “On”.
2. Press “F1” button about 5 seconds to into the HotTab utilities menu.
Then choose the camera function.
3. Click the
icon to take a picture.
* Picture & video save path: C:\Webcam
Rugged Tablet PC
37
CHAPTER 3
Tablet PC Power
Management
Rugged Tablet PC
38
CHAPTER 3 TABLET PC POWER MANAGEMENT
3.1 About AC Adapter
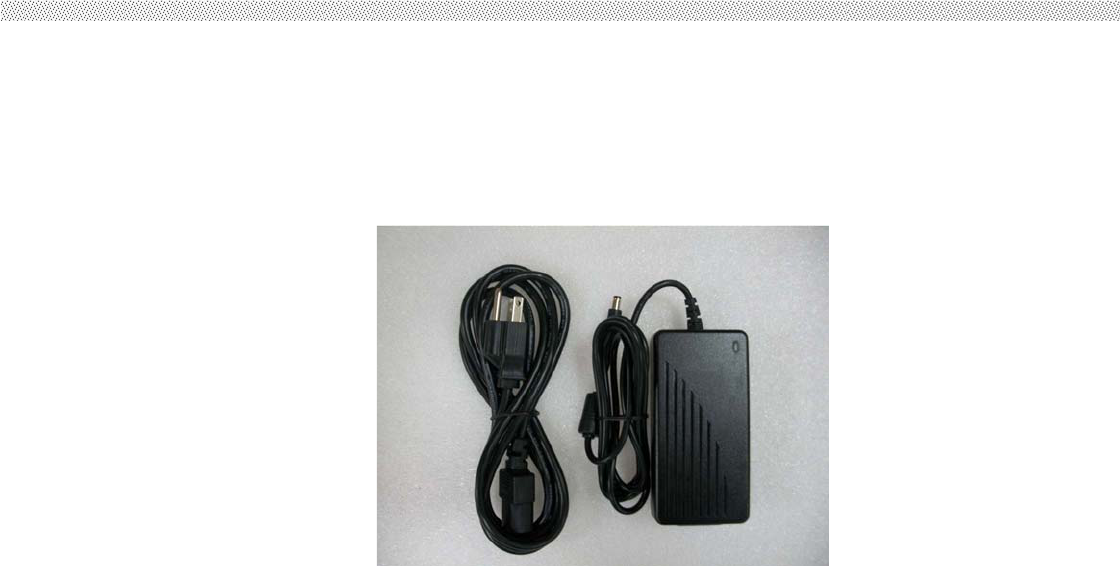
Our Tablet PC support one set of AC adapter and power cord by country area. Please contact
with your dealer for appropriate power cord if necessary.
**Caution
1. When you disconnect the AC adapter,
disconnect from the electrical
outlet first and then from the tablet PC.
A reverse procedure may damage the
AC adapter or tablet PC.
2. Always hold the plug head when you
unplug the connector, never pull out
the cord.
3. The AC adapter is designed for use with
your tablet PC only. Connecting
the AC adapter to another device can
damage the adapter.
The adapter operates on any voltage in the range of 100~240 V AC. The AC adapter serves as
a converter from AC (Alternating Current) to DC (Direct Current) power because the tablet PC
runs on DC power input, but an electrical outlet usually provides AC power.

Rugged Tablet PC
39
3.2 Charging and Checking Charging Status
3.2.1 Charging the Battery Pack The battery pack is the internal power source for the tablet PC.
It is rechargeable using the AC adapter. The operating time of a fully charged battery pack
depends on how you are using the tablet PC. When your applications often access peripherals,
you will experience a shorter operating time.
NOTE:
1. Charging will not start if the battery’s temperature is below 0 �C (32 �F). It is also
recommended not to charge the battery when temperature is above 45 �C (113 �F)
2. To prevent damage, the charging process may stop and the Battery Charge Indicator
flashes red when the environmental temperature gets above 55 �C (131�F)
3.2.3 Charging Approaches There is one way recommended to charge the battery pack. By
connecting the AC adapter to the tablet PC and an electrical outlet, the Battery Charge
Indicator on the tablet PC glowed orange to indicate that charging is in progress. You are
advised to keep the tablet PC power off while the battery is being charged. When the battery is
fully charged, the Battery Charge Indicator glows green.
CAUTION:
1 After the tablet PC has been fully recharged, do not immediately disconnect and
reconnect the AC adapter to charge it again. The above-mentioned may damage the
battery.
2 During charging, do not disconnect the AC adapter before the battery has been fully
charged; otherwise you will get a prematurely charged battery.

Rugged Tablet PC
40
Any battery level indication is an estimated result. The actual operating time can be different
from the estimated time, depending on how you are using the tablet PC.
In Windows operating system, you can check the approximate battery level using the battery
meter function. To read the battery level in Windows, click the icon on the taskbar. (Click the
icon if the tablet PC is using AC power.)
3.2.4 Battery Low Signals and Actions Battery Low occurs when the battery has approximately
10 % (Windows default setting) of its charge remaining. The tablet PC’s Battery Charge
Indicator (
) blinks red to alert you take actions.
NOTICE:
You can set up the Battery Low threshold and signals under Windows. Immediately save
your data upon Battery Low. The remaining operating time depends on how you are using
the tablet PC. If you are using the audio subsystem, hard or USB flash disk, the battery
might run out of charge very quickly.
CAUTION:
1. If you do not take any action, the tablet PC will automatically hibernate and turn off.
2. If you fail to save your data when the battery completely runs out of charge, then you
will lose your data.
3.3 Power Management
The Tablet PC supports ACPI (Advanced Configuration and Power Interface) for power
management. The power management feature allows you to reduce the power consumption for
energy saving. With an ACPI-compliant operating system such as Windows XP, power supply to
different tablet PC components is controlled on an as-needed basis. This allows maximum
power conservation and performance at the same time. In general, Windows’ power
management works in following state:
Rugged Tablet PC
41
* Depends on
your settings in
Windows. For detailed information on power management, see Windows’
Item
Description Note
Default Packing Accessories
1 1 piece of Rugged Tablet PC Quick Start
Guide.
2 1 piece of CD for Recovery CD for Operation
System (Windows embedded standard 7).
3 1 piece of CD for M970D Manual.
4 1 piece of 12V Adapter w/ Standard Power
Cord. (Euro / U.S. Std type, 1.8m)
5 LAN (female) Adapter cable
6
Optional Accessories
1 Table Stand
2 HDMI (female) Adapter cable
3 Hand Strap
4 Capacitive Touch Stylus
5 VESA Mounting Kit
Rugged Tablet PC
42
CHAPTER 4
Expanding Your Tablet PC
Rugged Tablet PC
43
CHAPTER 4 EXPANDING YOUR TABLET PC
4.1 How and When to Use BIOS Setup
For enter to the Tablet PC BIOS setup, you need to connect with an external USB keyboard,
press “Del” key when the prompt appears on the screen during start up. The prompt screen
shows only few seconds so need press Del key quickly.
**NOTICE
Updated BIOS version may be published after the manual is released. Check with the
latest version of BIOS on website.
You may need to run BIOS setup utility when the below status.
1. Error message on sreen indicate to check BIOS setup.
2. Restoring the factory default settings.
3. Modifing the specific hardware specification
4. Want to optimize the specification.
In order to control the keyboard to select BIOS utility setup, you need
**NOTICE
You can
press the F1,
F2, F3,
F4, –/+, and
Esc keys by
connecting a
USB
keyboard to
your tablet PC.
Make sure that
the item
“Legacy USB Support” under the Main menu is set at Enabled (default).
Item
Description Note
Default Packing Accessories
1 1 piece of Rugged Tablet PC Quick Start
Guide.
2 1 piece of CD for Recovery CD for Operation
System (Windows embedded standard 7).
3 1 piece of CD for M970D Manual.
4 1 piece of 12V Adapter w/ Standard Power
Cord. (Euro / U.S. Std type, 1.8m)
5 LAN (female) Adapter cable
6
Optional Accessories
1 Table Stand
2 HDMI
(
f
e
m
a
l
e)
A
dapte
r
cab
l
e
Rugged Tablet PC
44
4.2 BIOS Functions
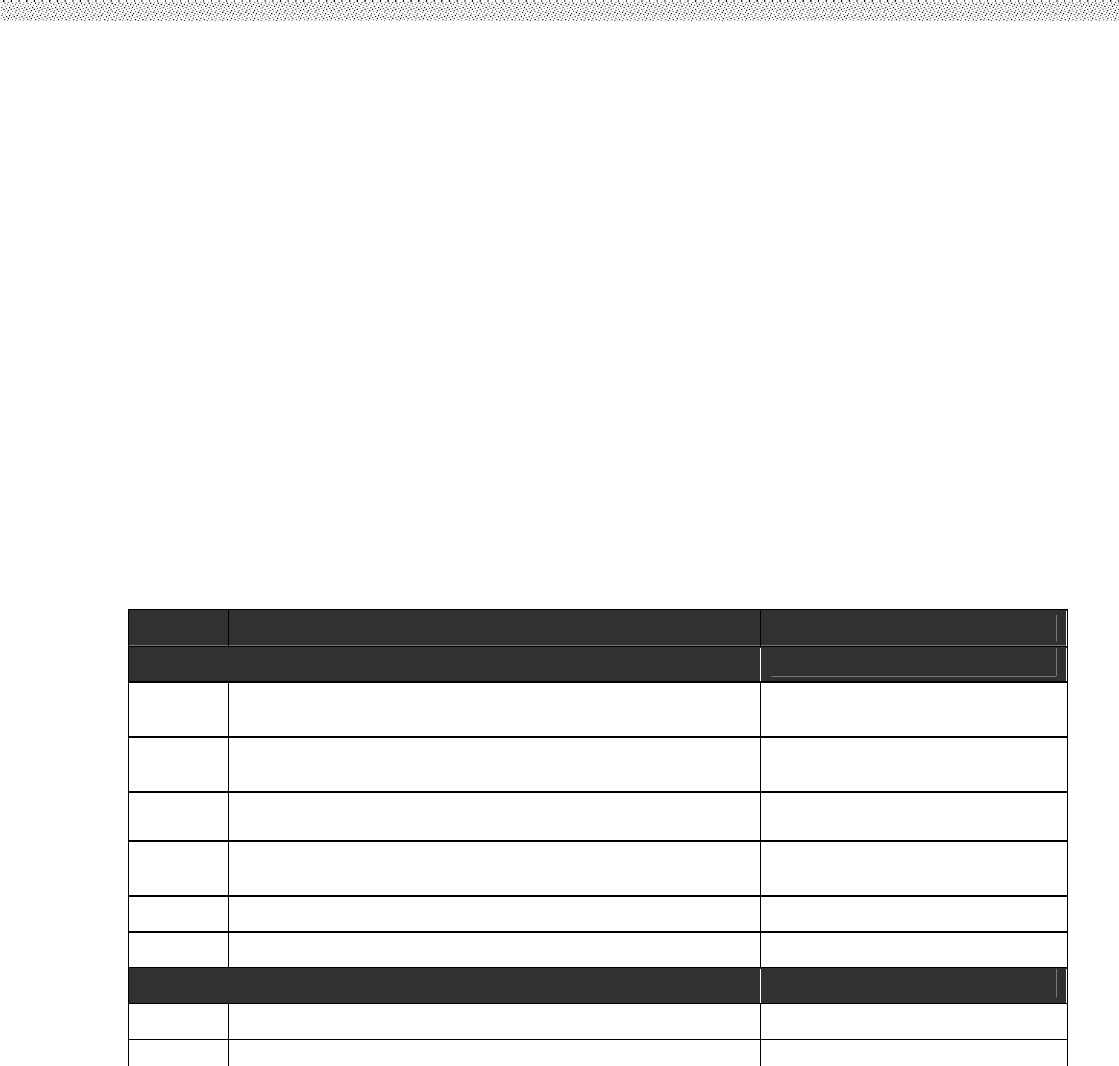
4.2.1 Main Menu The Main menu contains the information of the Tablet system including BIOS
version, processor RC
version, system
language, time, and
date.
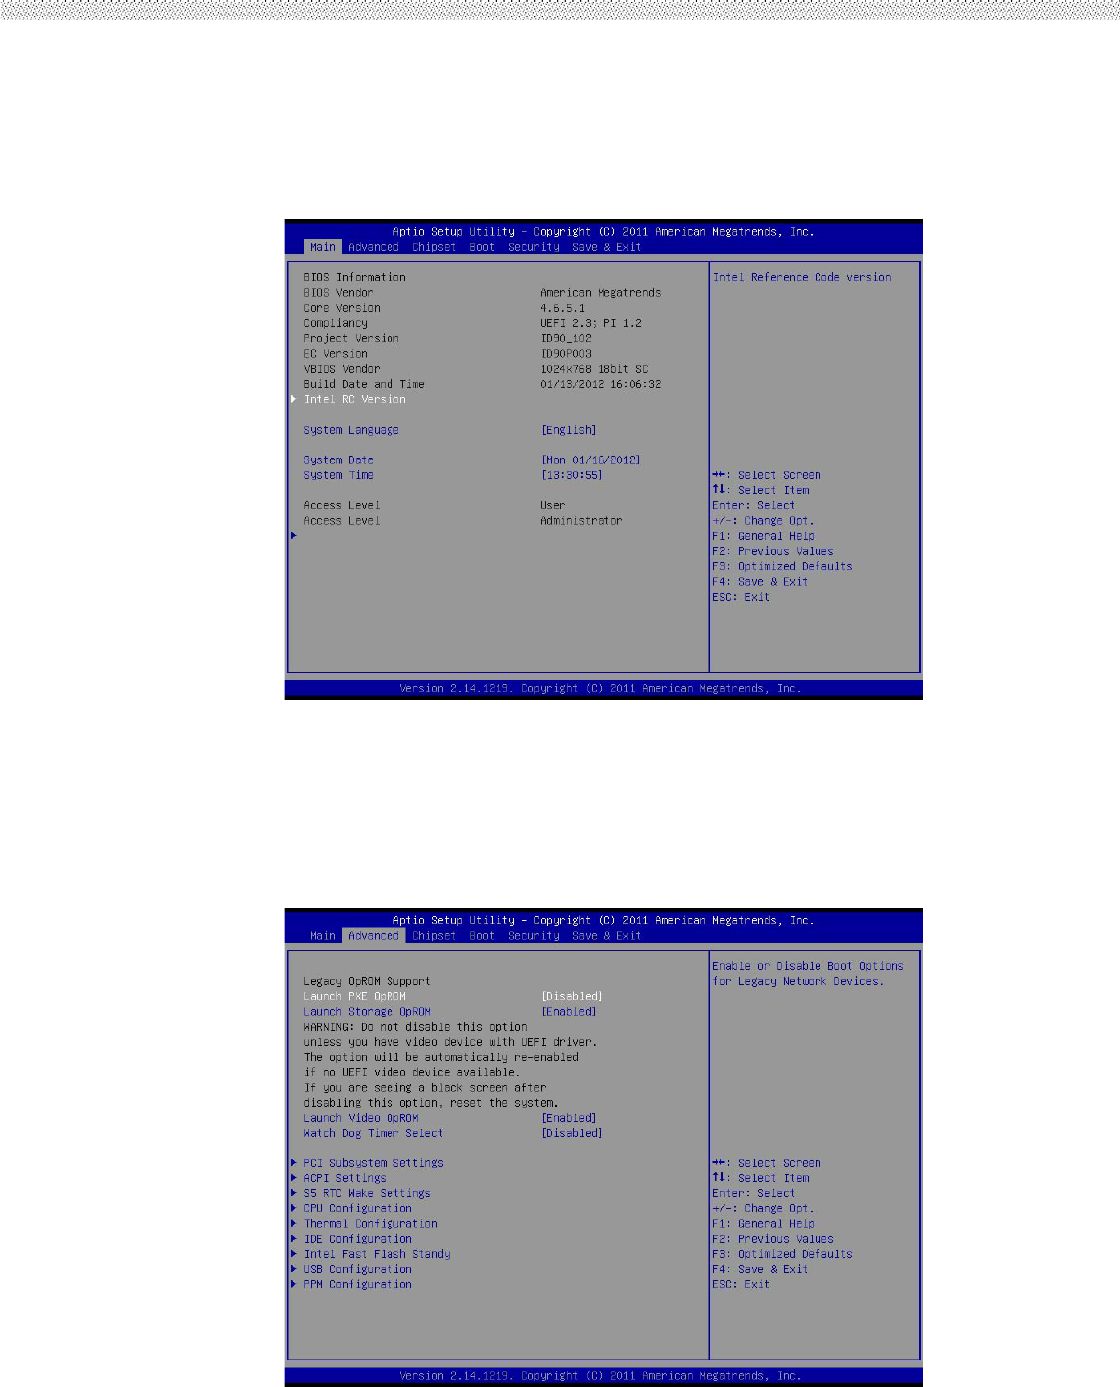
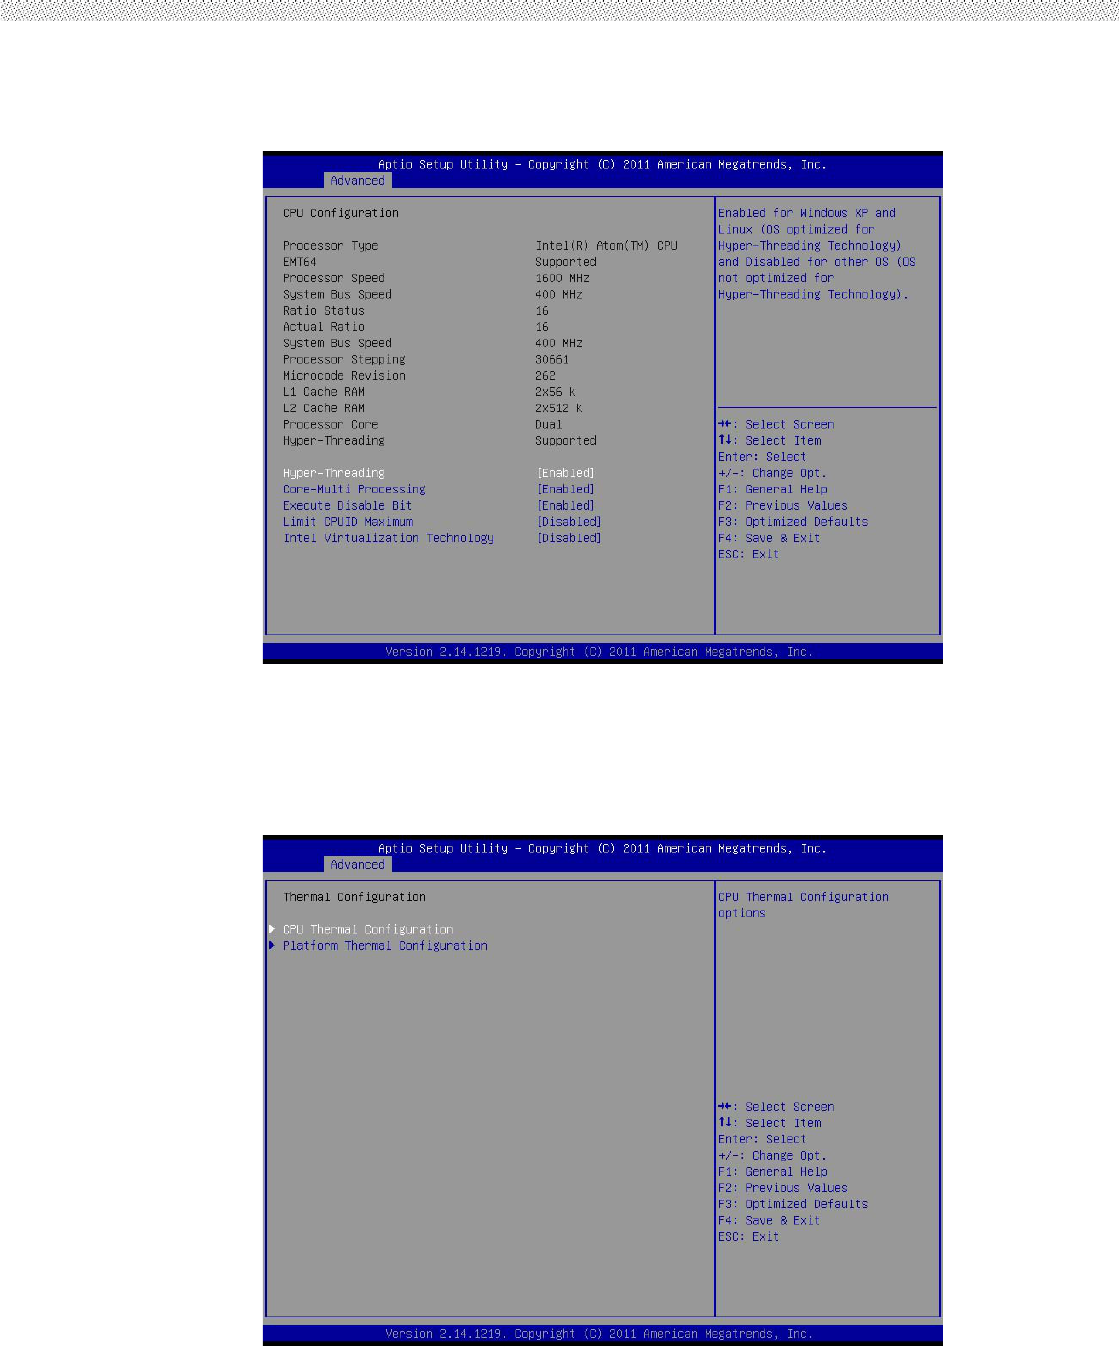
4.2.2 Advanced Menu
The Advanced menu
contains the selections
of PXE OpROM and
Watch Dog Timer, and
the settings of PCI
Subsystem, ACPI, and
S5 RTC Wake. Besides,
it also contains the
configuration
information of CPU,
Thermal, IDE/SATA, USB, and PPM Configuration.
Rugged Tablet PC
45
1. CPU Configuration
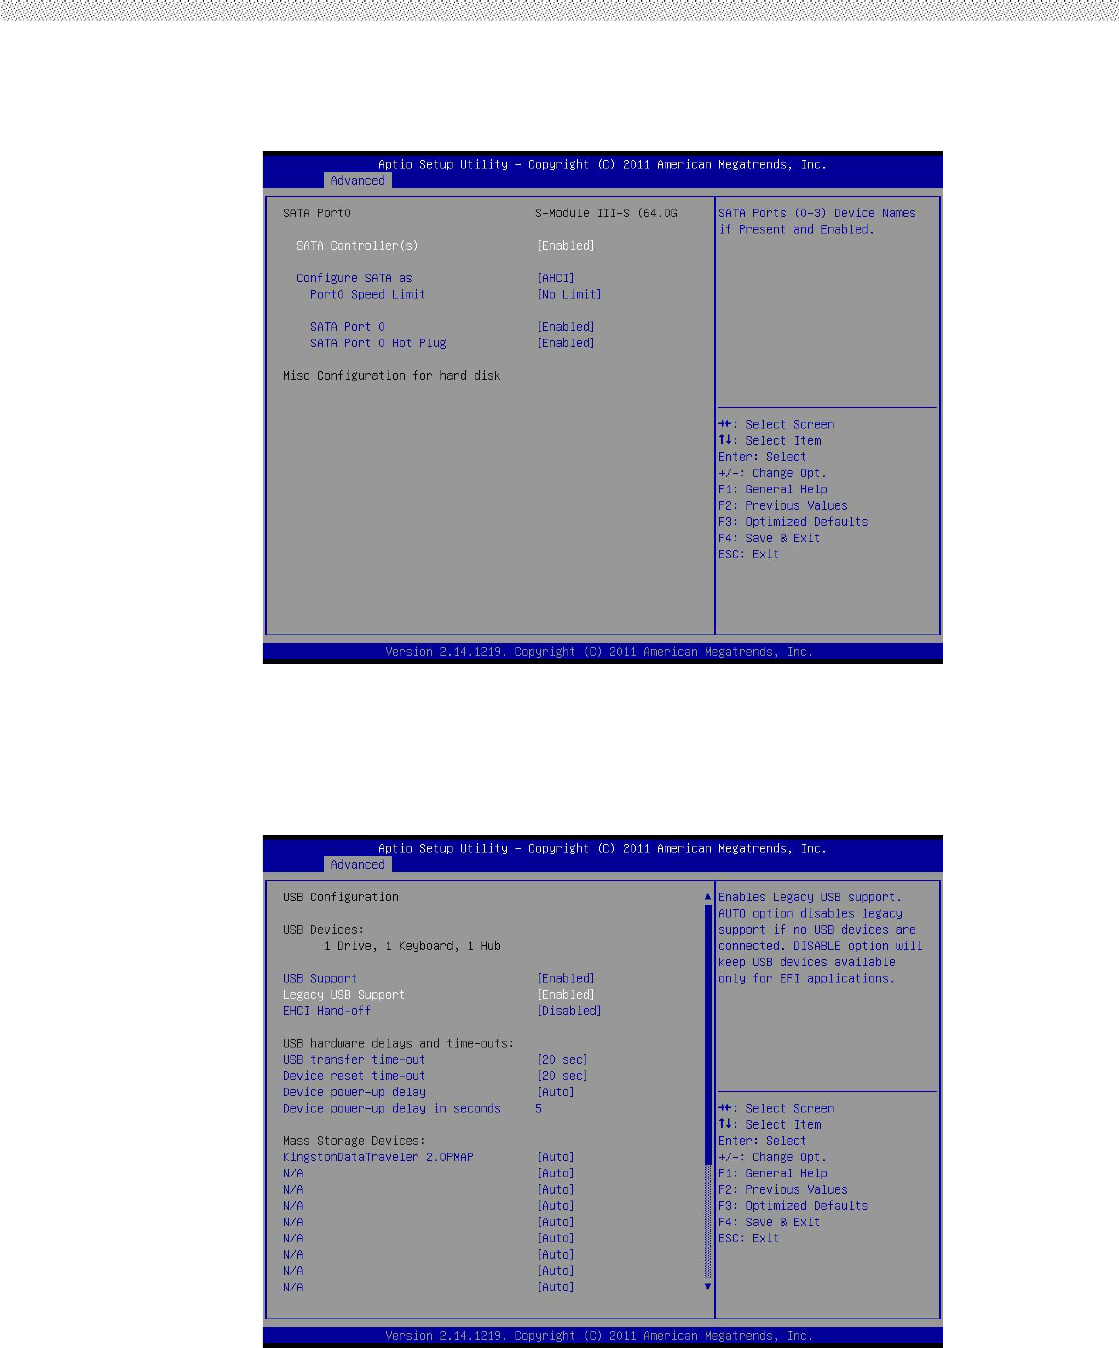
2. Thermal Configuration
Rugged Tablet PC
46
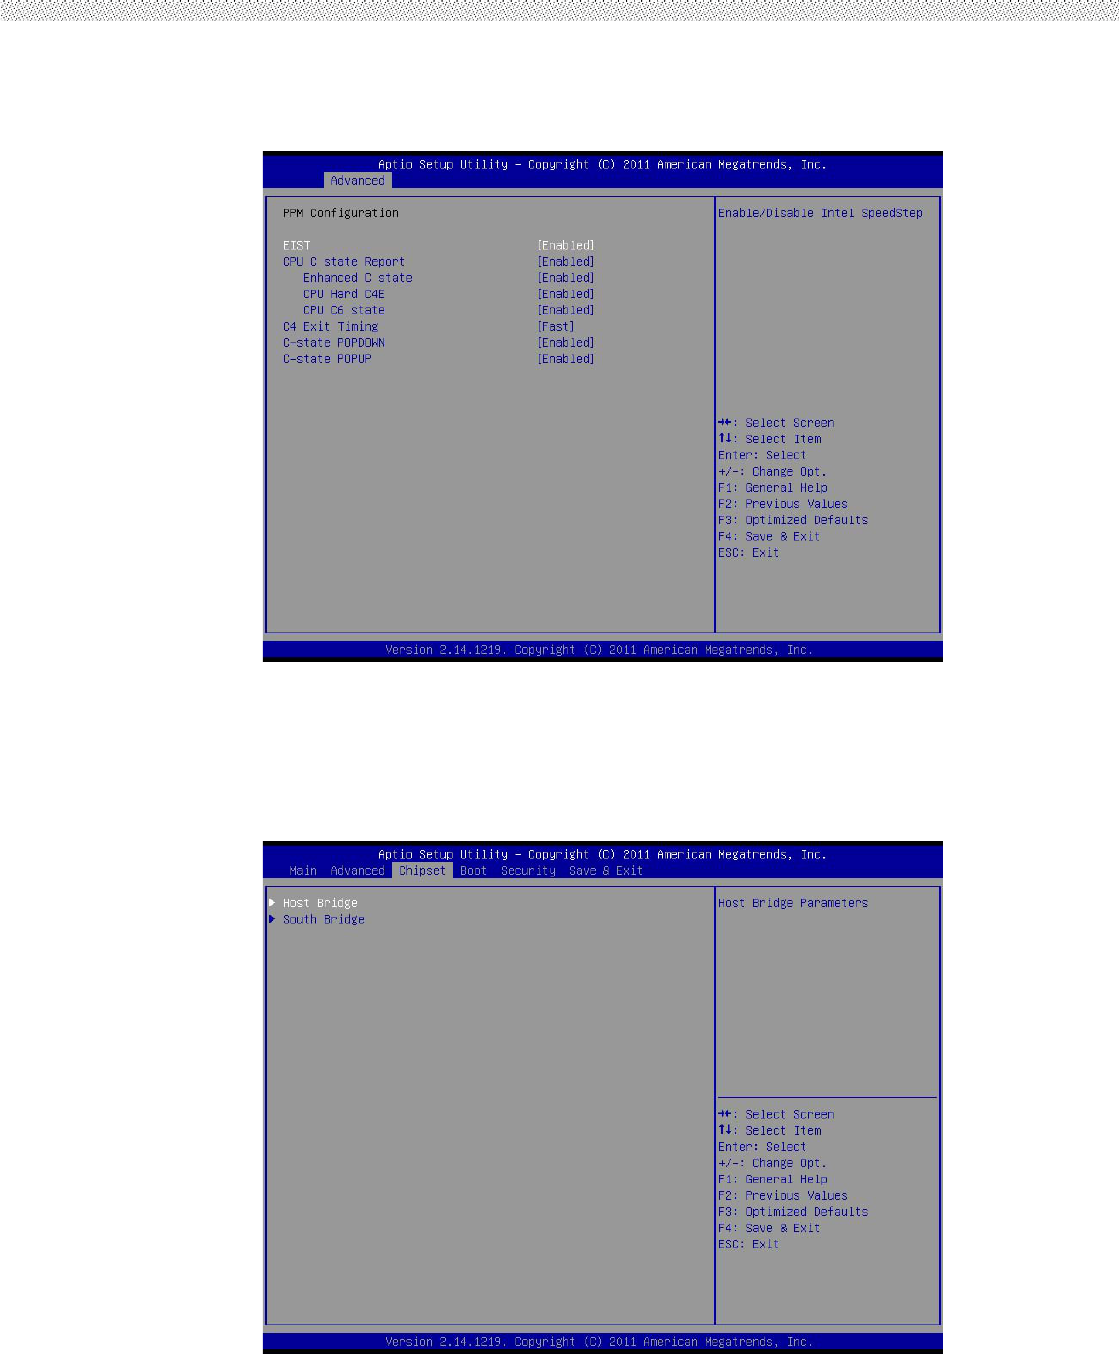
1. IDE / SATA
Configuration
2. USB Configuration
Rugged Tablet PC
47
5. PPM Configuration
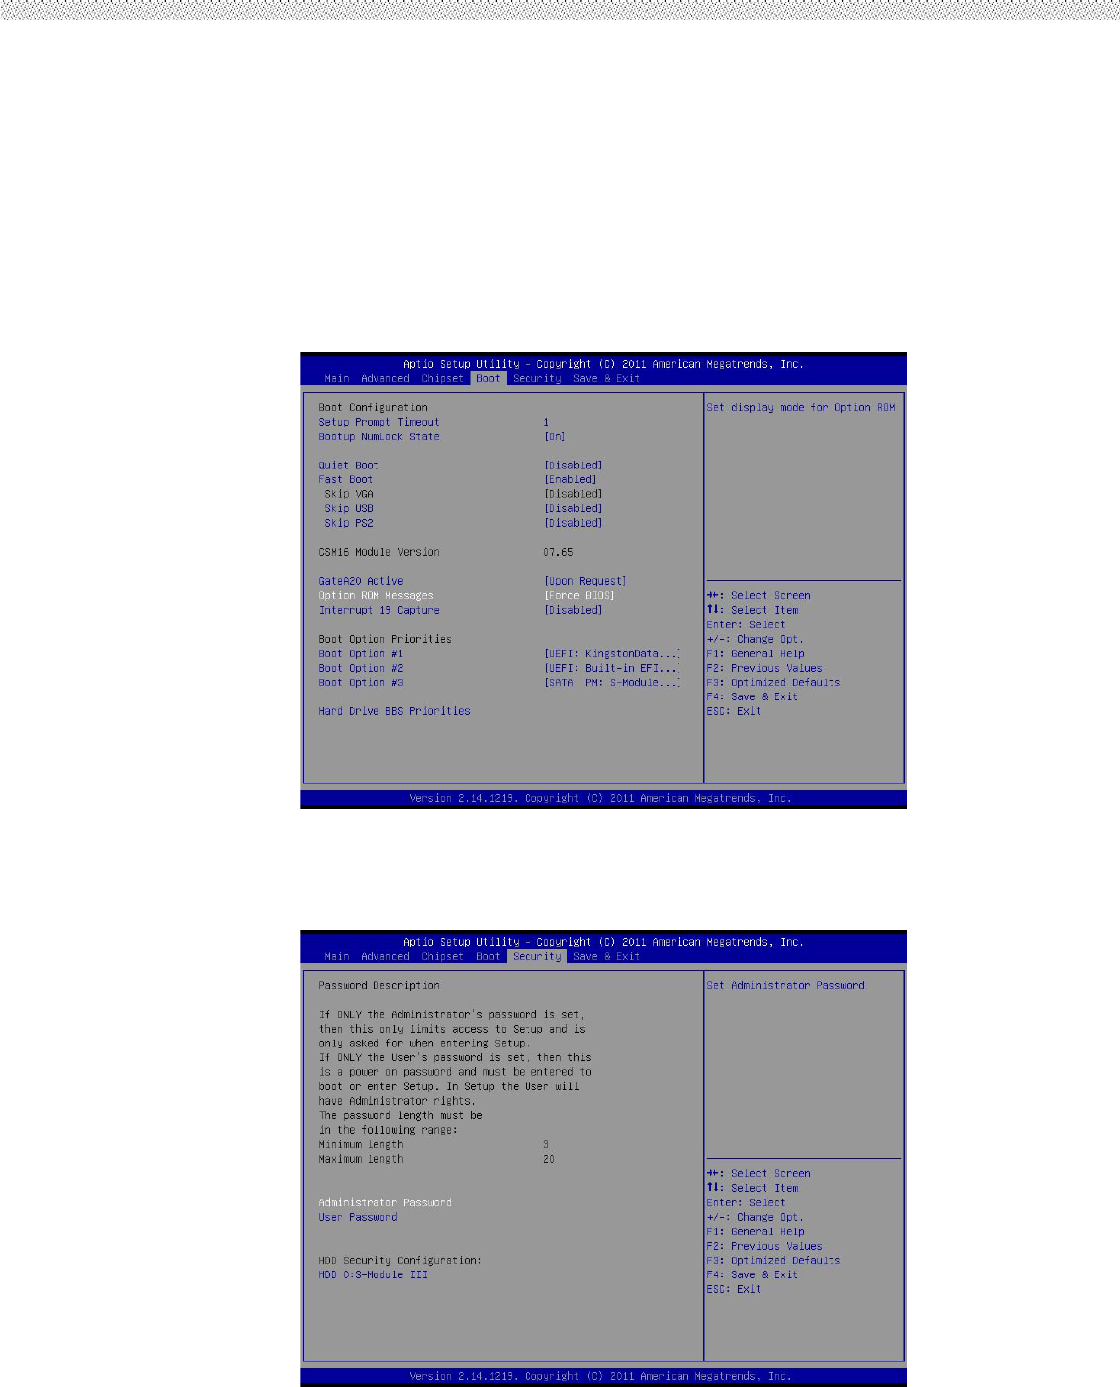
4.2.3 Chipset Menu
The Chipset menu
contains the
information of Host
Bridge and South
Bridge.
Rugged Tablet PC
48
4.2.4 Boot Menu The Boot menu sets the sequence of the devices to be searched for the
operating system.
The bootable devices will be automatically detected during POST and shown here, allowing you
to set the sequence that the BIOS uses to look for a boot device from which to load the
operating system. A brief description of button usage is listed next:
4.2.5 Security Menu In
the Security menu, users
can set Administrator
Password, User
Passwaord, and HDD
Security Configuration.
Rugged Tablet PC
49
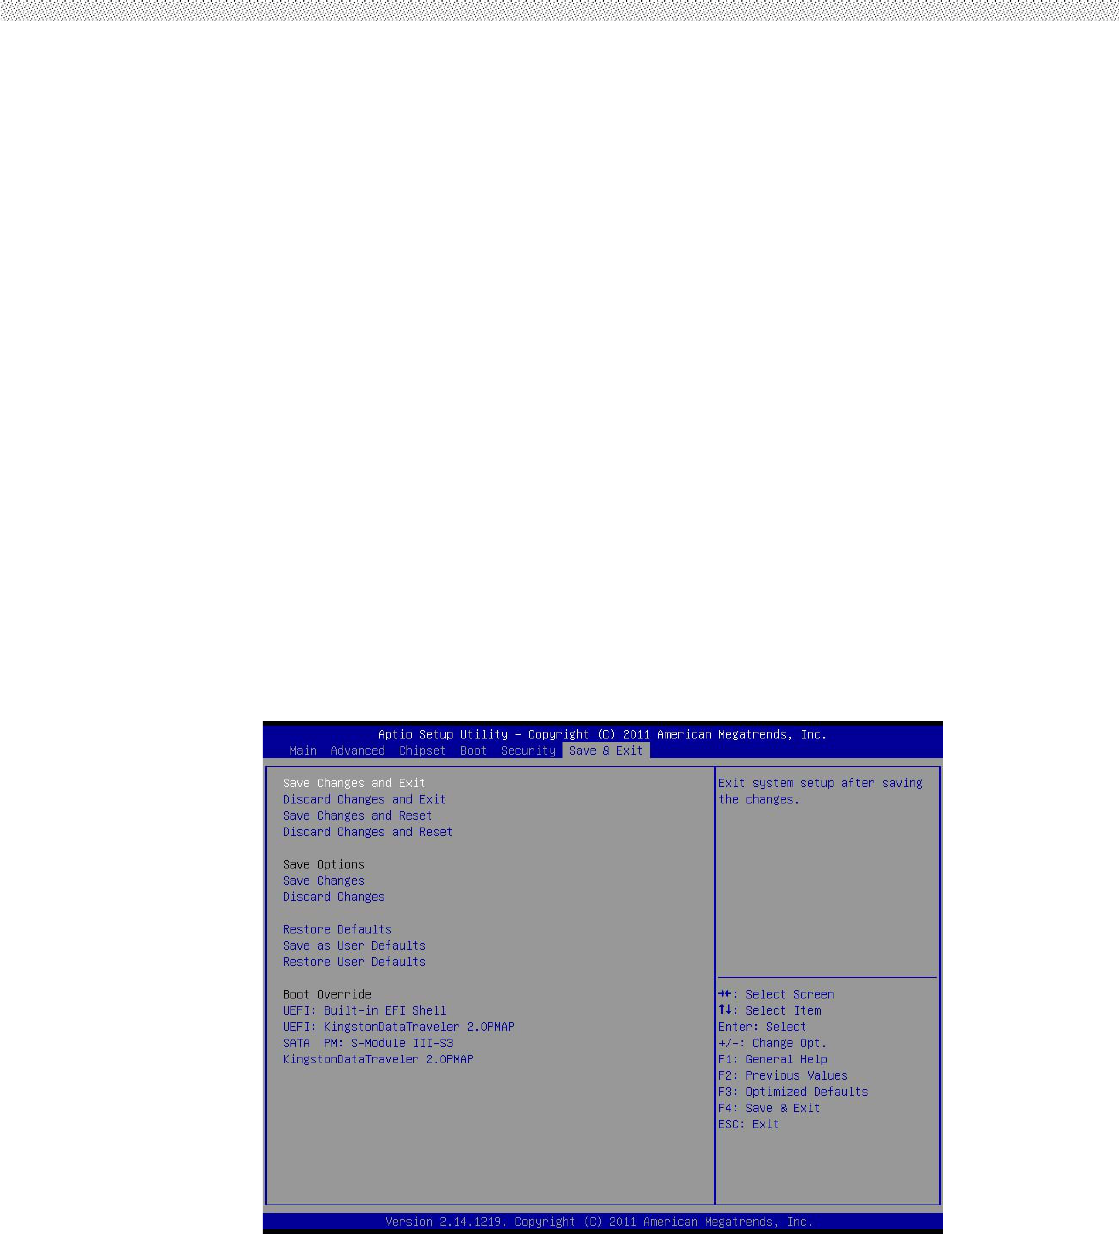
4.2.6 Save & Exit Menu The Exit menu displays ways of exiting BIOS Setup utility. After
finishing with your settings, you must save and exit so that the changes can take effect.
Save Canges and Exit saves the changes you have made and exits BIOS Setup utility.
Discarding Changes and Exit exits BIOS Setup utility without saving the changes you have
made. Save Canges and Rest saves the changes you have made and resets BIOS system.
Discarding Changes and Reset resets BIOS system without saving the changes you have
made. Save Changes done so far to any of the setup options. Discard Changes done so far
to any of the setup options. Resotre Defaults loads/restore the factory default values for all
the items. Save as User Defaults saves the changes one so far as User Defaults.
Restore User Defaults loads/restore the User default values for all the items.