TransCore X5 Location Monitoring Service Transmitter User Manual users manual
TransCore Location Monitoring Service Transmitter users manual
UserManual.wiki
>
TransCore
>
X5 User Manual
users manual
Navigation menu
Upload a User Manual
Namespaces
Wiki Guide
HTML
PDF
Info
Views
User Manual
Discussion / Help
Navigation
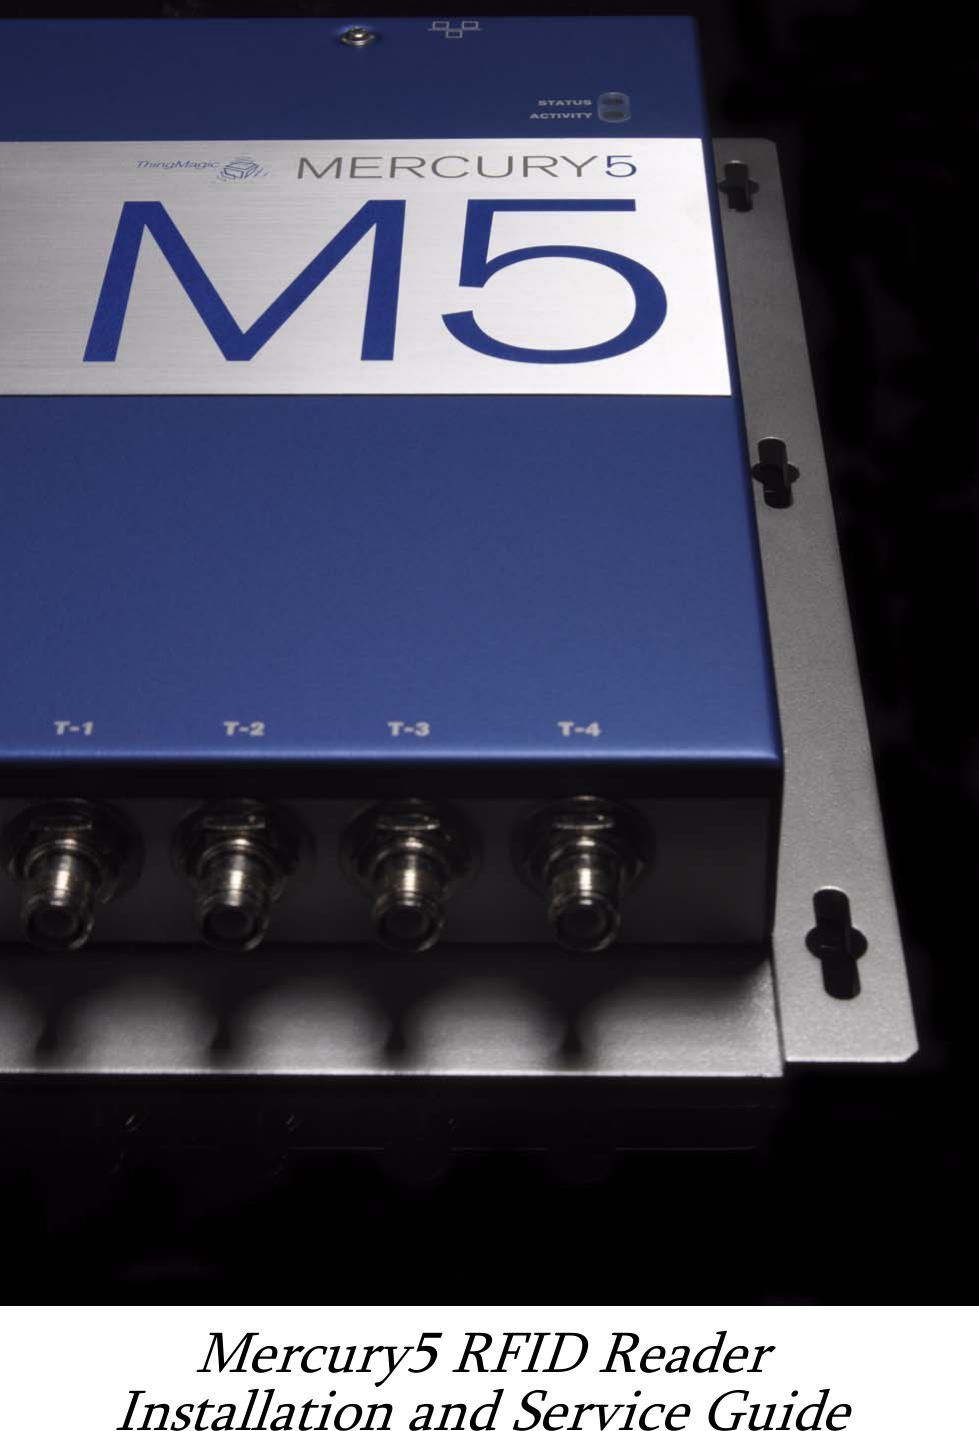
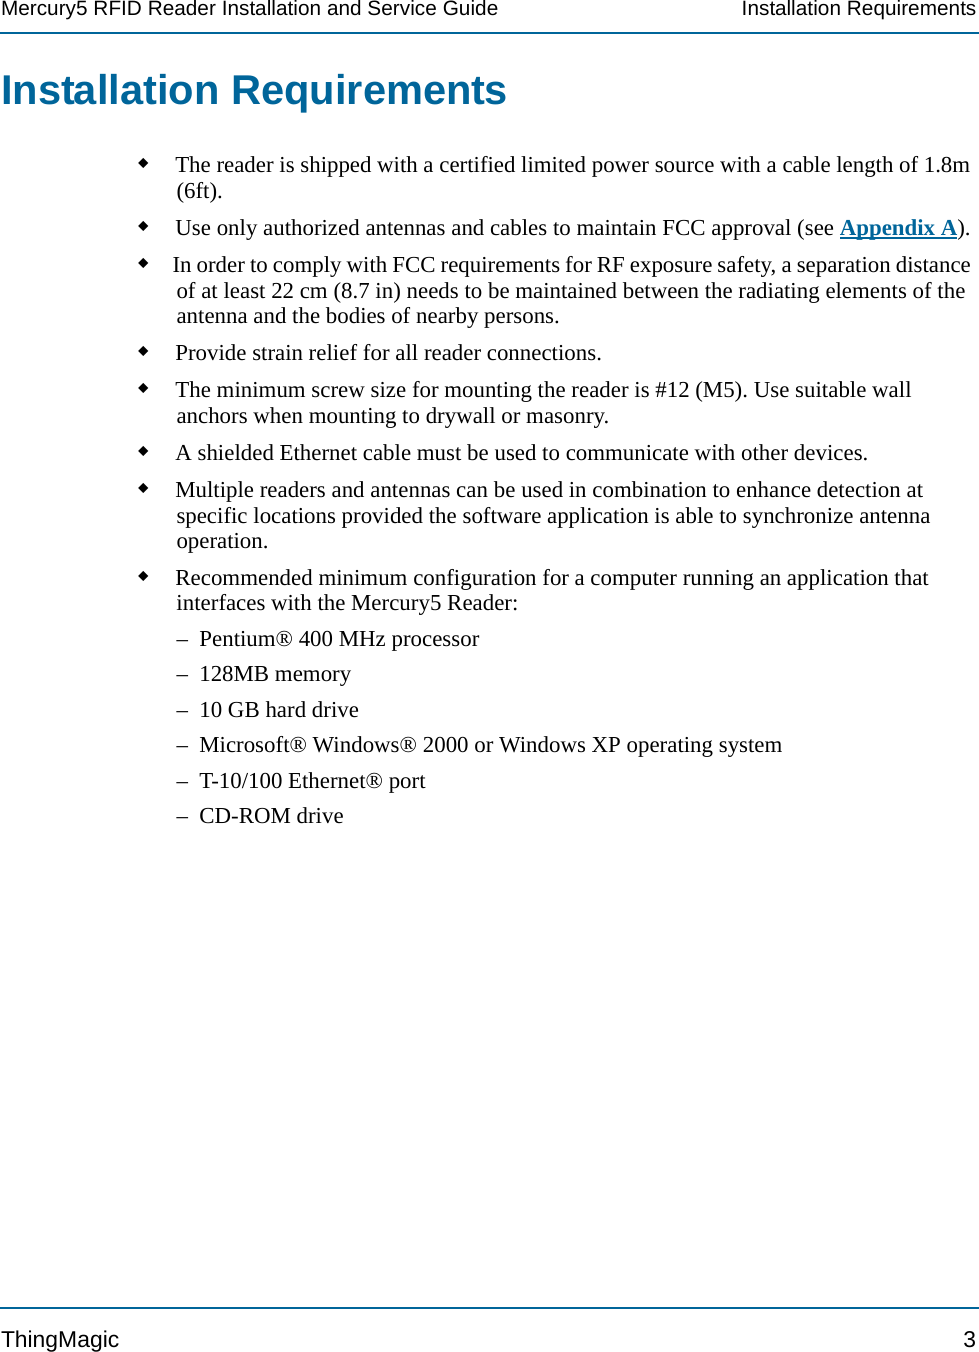
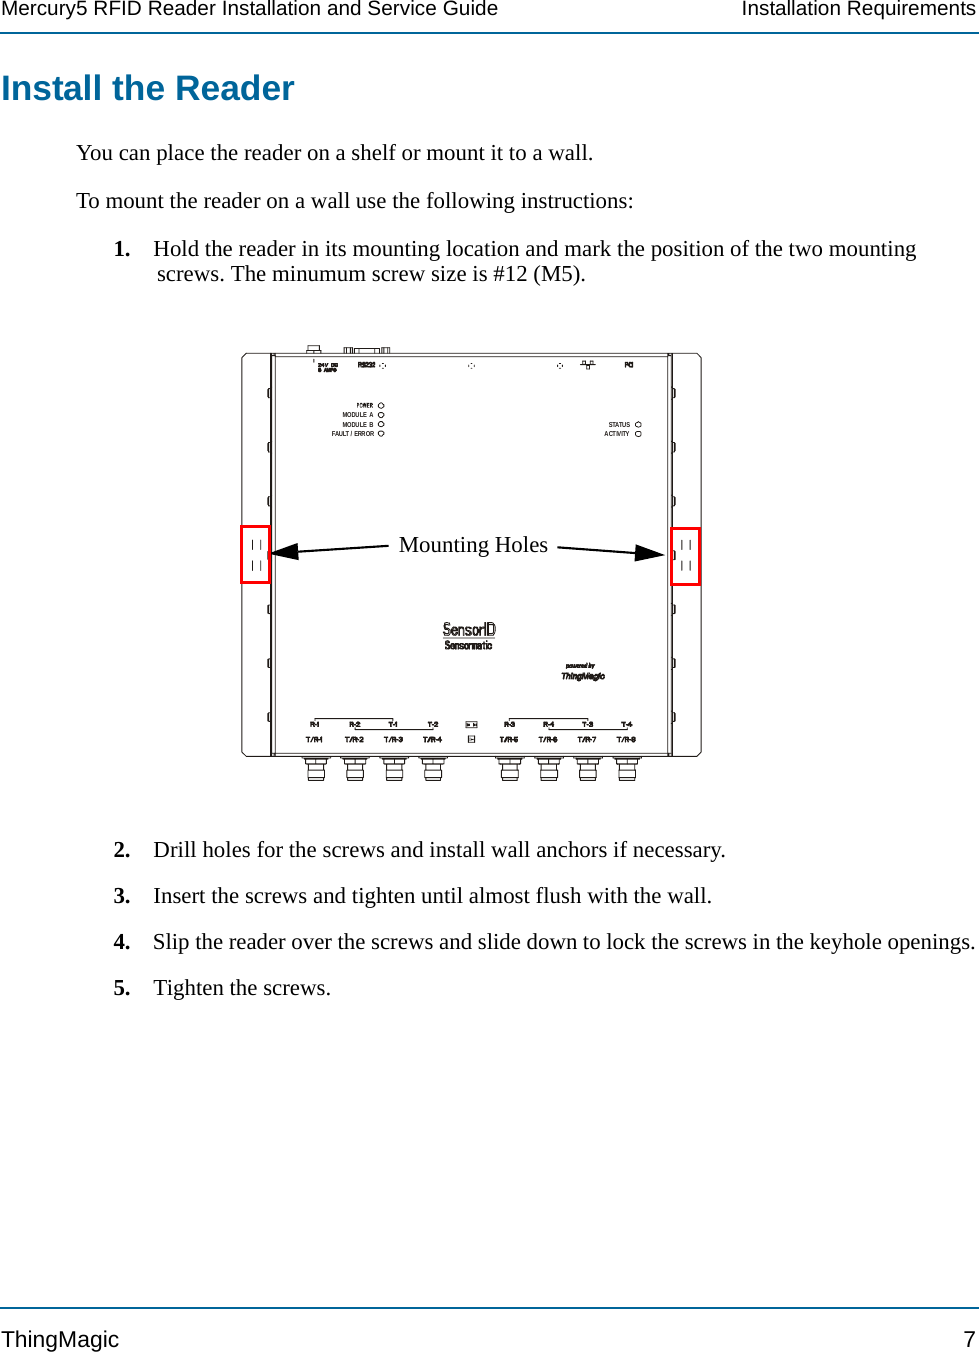

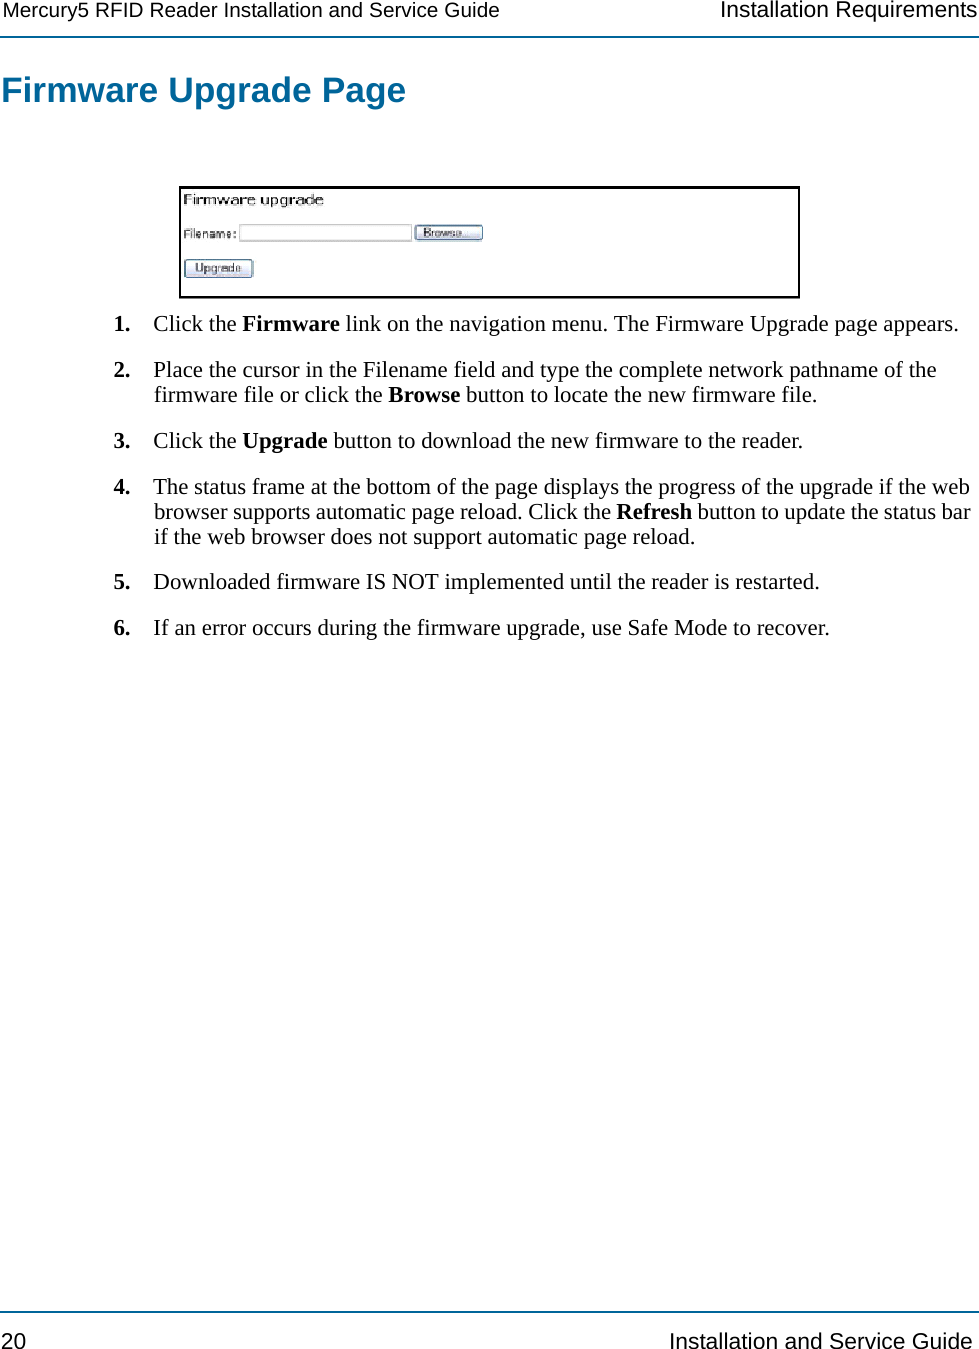
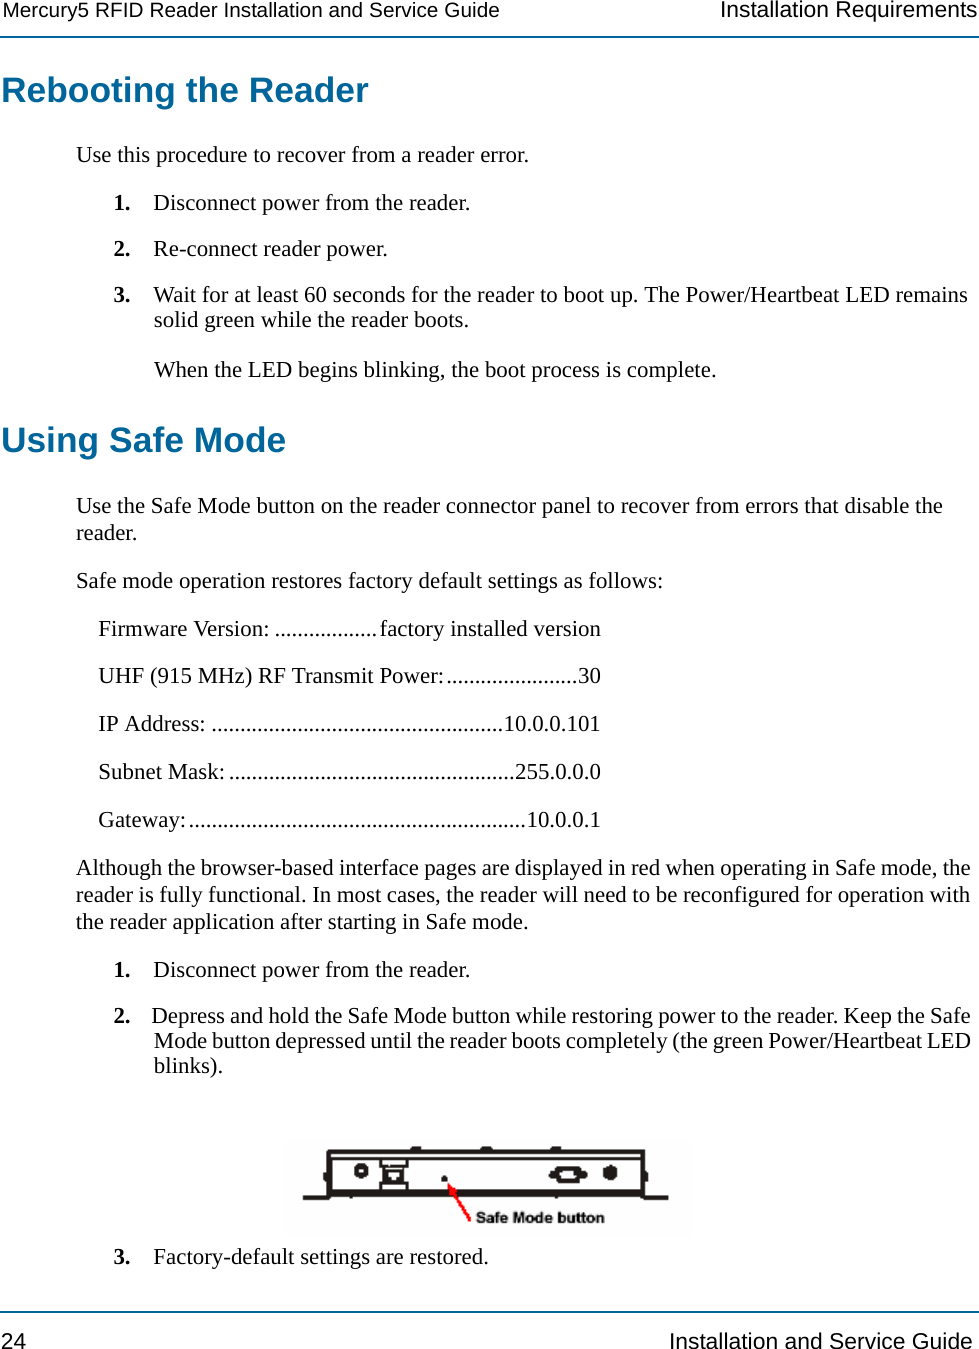
![Mercury5 RFID Reader Installation and Service Guide Installation RequirementsThingMagic 93. Connect the reader to the network by plugging an Ethernet cable into the Ethernet port. or Connect the reader to a PC (personal computer) by plugging a crossover Ethernet cable into the Ethernet port. [If DHCP is to be used, then the network must be connected before powering up the reader.]4. Plug the transformer provided with the reader into the DC power input connector. Then connect the transformer to a power outlet.When the reader powers up, one green, one yellow, and one red light comes on. After approximately 30 seconds, all lights except the green one will go out; the green light will blink after the reader finishes its power-on self-test. The reader is now ready for operation.A = RJ-45 Ethernet port C = RS-232B = Safe Mode button D = DC power input](https://usermanual.wiki/TransCore/X5/User-Guide-1202779-Page-13.png)