Trig Avionics 01155 AVIATION SERVICES TRANSPONDER TRANSMITTER User Manual USERS MANUAL
Trig Avionics Limited AVIATION SERVICES TRANSPONDER TRANSMITTER USERS MANUAL
USERS MANUAL

Pg Chg
Cover.. . 0
Page #.. 0
TOC-1.. 0
1…… 0
2……. 0
3……. 0
4……. 0
5….... 0
6…… 0
7…… 0
8.… 0
9…… 0
10…. 0
11….. 0
12….. 0
13….. 0
14….. 0
15….. 0
16….. 0
17….. 0
18….. 0
19….. 0
Index… .0
Inside Back Cover 0
Outside Back Cove .0

2
AXP340 Mode S Transponder with ADS-B Out | PILOT GUIDE
TABLE OF CONTENTS
SYSTEM OVERVIEW ...................................................................... 1
FUNCTIONAL OVERVIEW ............................................................. 2
DISPLAY ......................................................................................... 3
BEZEL CONTROLS ........................................................................ 3
Selector Knob .......................................................................................... 3
Numeric Buttons ...................................................................................... 3
CLR ......................................................................................................... 3
IDENT ...................................................................................................... 3
VFR ......................................................................................................... 4
FUNC ...................................................................................................... 4
POWER ON/OFF............................................................................. 5
MODE CONTROL ........................................................................... 6
SQUAWK CODE ENTRY ................................................................ 6
ADDITIONAL FUNCTIONS ............................................................. 7
Flight Timer .............................................................................................. 7
Stopwatch ................................................................................................ 7
Flight ID entry .......................................................................................... 8
Altitude Monitor ........................................................................................ 8
ADS-B Monitor ......................................................................................... 9
BRIGHTNESS AND LIGHTING CONTROLS ................................ 11
ALERTS ......................................................................................... 12
Alert Messages ...................................................................................... 12
Fault Annunciation ................................................................................. 12
CONFIGURATION MODE ............................................................. 13
LOW TEMPERATURE OPERATION ............................................ 13
SOFTWARE UPDATES ................................................................ 14
PLUG AND PLAY DETAILS .......................................................... 14
Deleted: 3
Deleted: 4
Deleted: 5
Deleted: 5
Deleted: 5
Deleted: 5
Deleted: 5
Deleted: 5
Deleted: 6
Deleted: 6
Deleted: 7
Deleted: 8
Deleted: 8
Deleted: 9
Deleted: 9
Deleted: 9
Deleted: 10
Deleted: 10
Deleted: 11
Deleted: 13
Deleted: 14
Deleted: 14
Deleted: 14
Deleted: 15
Deleted: 15
Deleted: 16
Deleted: 16
1
SYSTEM OVERVIEW
This manual assumes that the pilot is appropriately licensed, is
proficient in operation of the aircraft and its equipment, and is in
compliance with all Federal Aviation Regulations (FARs).
All images contained in this manual are for reference use only,
and are subject to change.
Avidyne strongly recommends that pilots use the AXP340 system
only under VFR conditions until completely familiar with its
operation and use.
Boxed areas marked as NOTE within this manual identify certain
situations or areas of operation having safety implications. While
it is important for the operator to be familiar with all of the
information in the manual, it is essential to the safe use of the
AXP340 that pilots give careful attention to the material contained
within these NOTEs.
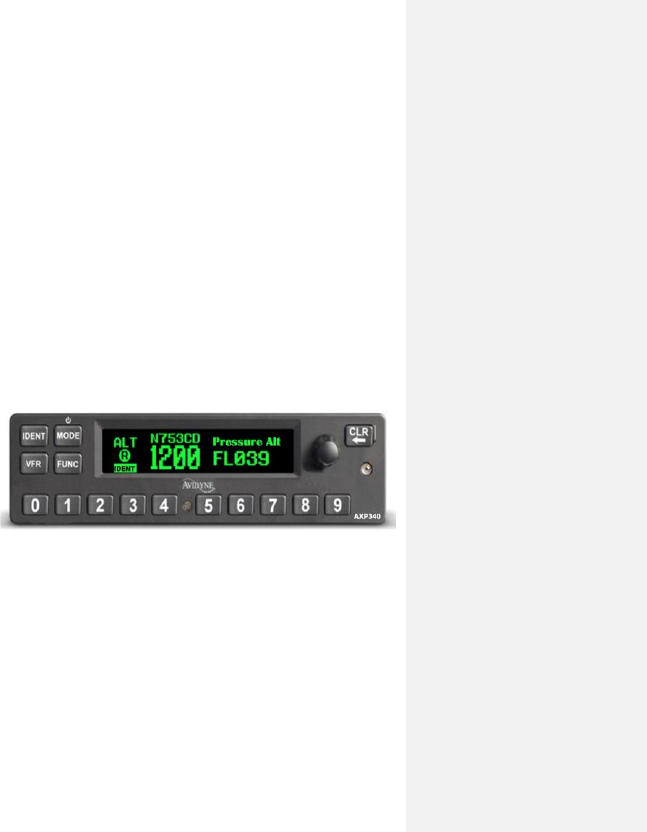
AXP340 Mode S ADS-B Out Transponder
The AXP340 is a panel-mount Mode S transponder with support
for 1090 MHz Automatic Dependent Surveillance Broadcast
(ADS-B) Extended Squitter (ES), also known as “ADS-B Out” that
meets all the requirements for Mode S elementary surveillance
transponders for both IFD and VFR flight.
The AXP340 transmits up to 240 watts and responds to both
legacy Mode A/C interrogations and to Mode S interrogations
from both ground radar and airborne collision avoidance systems.
It transmits the required ADS-B Out signals including GPS-
derived position along with ground track, ground speed, and
altitude information.
2
FUNCTIONAL OVERVIEW
The Avidyne AXP340 Mode S ADS-B Transponder supports the
following functions:
Mode C transponder operations;
Mode S transponder operations;
ADS-B Out compliant;
Flight Timer;
Stopwatch;
Altitude Monitor;
Flight ID reporting.
COOL FEATURE
ADS-B Compliance
When combined with any of Avidyne’s TAS6X0A
ADS-B capable Traffic Advisory Systems, and an
ADS-B compliant GPS source and display (e.g.
Avidyne IFD540 or 440), the combined system will
meet the full 1090 MHz ADS-B compliant mandate.
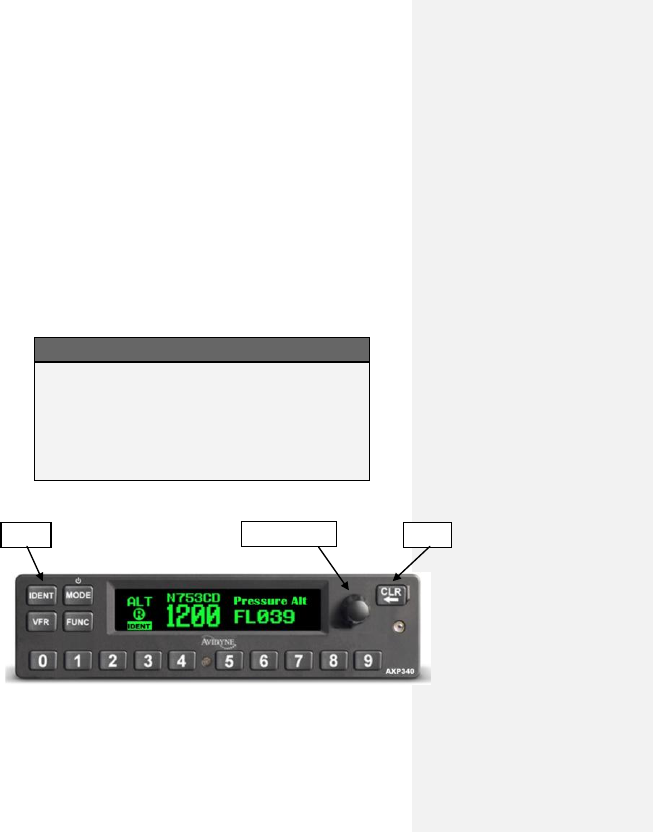
AXP340 Transponder
Selector Knob
Clear
Ident

3
DISPLAY
The display shows the operating mode of the transponder, the
reported pressure altitude, and the current squawk code. The
reply indicator is active when the transponder replies to
interrogations and the IDENT indicator is active when the bezel
IDENT button is pressed.
The reported altitude is displayed as a Flight Level, which is the
pressure altitude in hundreds of feet. When non-standard
atmospheric conditions apply, this may not match the altimeter
indicated altitude, but will be correctly displayed by the ATC
radar.
BEZEL CONTROLS
SELECTOR KNOB
The selector knob on the right side of the front panel is used to
select data such as characters for Flight ID or move through the
menu options. Pressing the selector knob confirms the selection
or selection of the options presented. A label on the right side of
the display describes the action when the selector knob is
pressed.
NUMERIC BUTTONS
The numeric buttons are used to select a new Squawk code or
flight ID numbers. Pressing buttons 0 through 7 will immediately
edit the current squawk code unless in flight ID edit.
CLR
Press the CLR button to return to original settings or back space
through partially complete data entry or reverse through a menu.
IDENT
Press the IDENT button when ATC instructs you to “Ident” or
“Squawk Ident”. This activates the ident pulse in the transponder
for 18 seconds. “IDENT” will appear in the display.

4
VFR
Pressing the VFR button sets the transponder to the pre-
programmed regional VFR code. Pressing the button again
restores the previous squawk code.
Pressing the VFR button while in Flight ID edit changes the Flight
ID to the pre-programmed ID set up during configuration of the
transponder.
FUNC
Pressing the FUNC button provides access to the flight timer,
stopwatch, Flight ID editing, ADS-B monitor (depending on
installation), altitude monitor and front panel dimming.
5
POWER ON/OFF
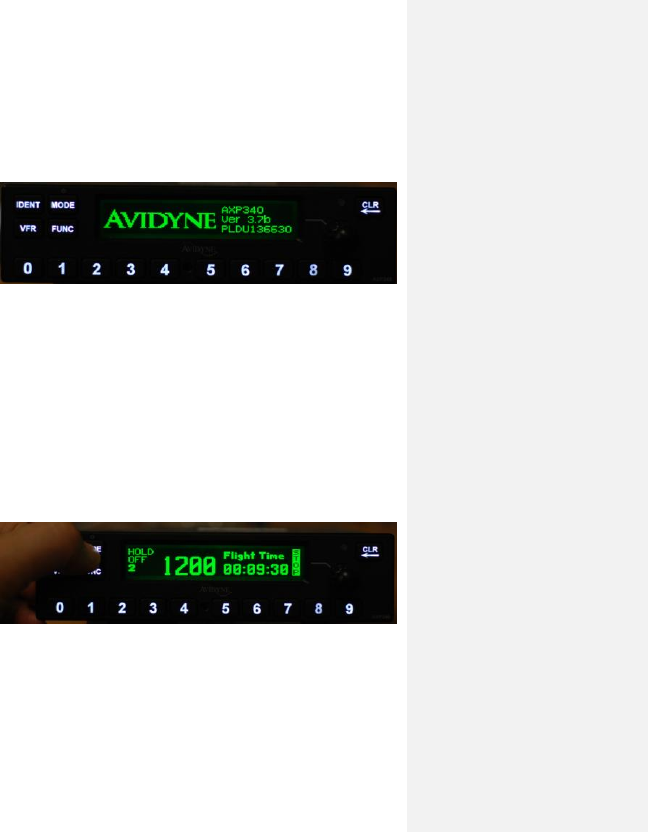
The AXP340 will automatically power on when avionics power is
applied and will display the Avidyne logo, product identification
and software version information while the unit is self-testing.
AXP340 Initialization Screen
Following a successful power-on self-test, the AXP340 will
transition to Standby mode (STBY) and present the squawk code
and Reported Altitude display page.
The AXP340 will automatically transition to ALT mode during
takeoff roll.
To manually power the AXP340 off, press and hold the MODE
button for at least 3 seconds. A countdown timer will be
displayed on the left side of the display and the unit will
completely power down upon reaching 0. To manually power the
AXP340 on following a manual power off, press and hold the
MODE button for approximately 1 second.
Manual Power Off Method

6
MODE CONTROL
The MODE button also controls the operation mode of the
transponder.
The following table shows the progression through the states:
ALT
The transponder will respond to all interrogations.
ON
The transponder will respond to all interrogations, but altitude
reporting is suppressed.
SBY
The transponder is on, but will not reply to any interrogations.
When airborne, the transponder should always be set to ALT
unless otherwise directed by Air Traffic Control. Aircraft
installations that include a gear squat switch will automatically
select GND on landing or while taxiing.
SQUAWK CODE ENTRY
Press any of the numeric buttons (0 through 7) to start modifying
the squawk code. A new squawk code is set when the fourth
digit is entered. If the code entry is not completed within 7
seconds, the changes are ignored and the previous code
restored.
Some standard squawk codes are listed below
1200
VFR code in the USA
7000
VFR code commonly used in Europe
7500
Hijack code
7600
Loss of communications
7700
Emergency code
7
ADDITIONAL FUNCTIONS
FLIGHT TIMER
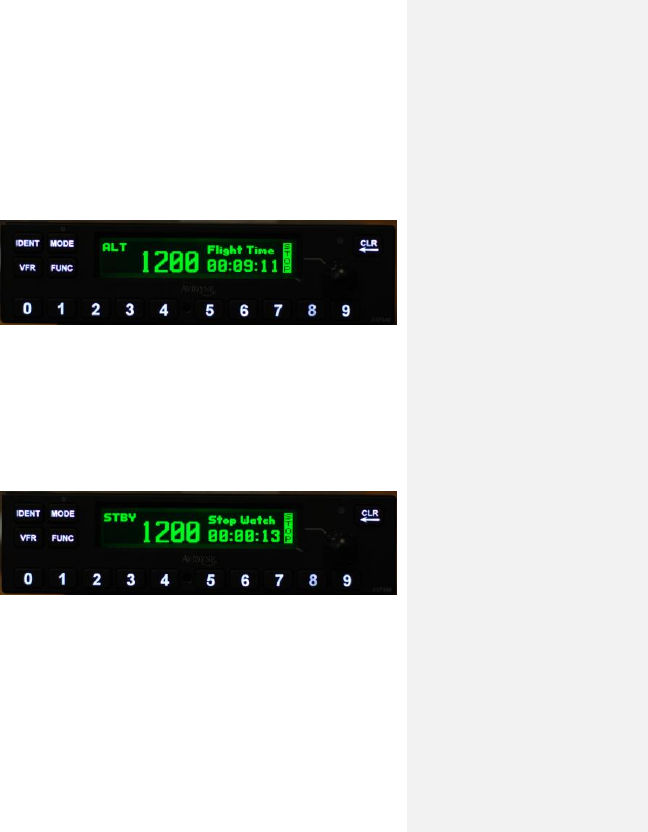
The Flight Timer (labelled “Flight Time”) records the time for
which the transponder has been powered on and operating in
flight mode – either ON or ALT. Press the FUNC button to
display the Flight Timer.
Flight Timer Function Display
Pressing the CLR button resets the flight time counter. Pressing
the selector knob starts or stops the flight timer. Pressing the
FUNC button moves to the next screen and leaves the flight timer
in the current state.
STOPWATCH
The stopwatch can be used as a convenient timer.
Stopwatch Function Display
Press the FUNC button to display the stopwatch. Pressing the
selector knob starts and stops the timer. Pressing the CLR button
resets the timer.
8
FLIGHT ID ENTRY
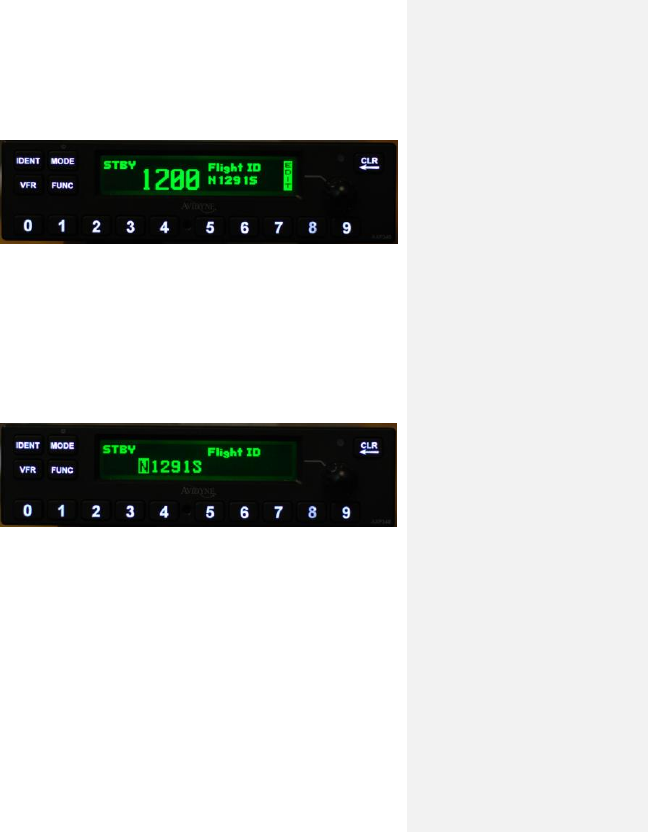
Select the Flight ID edit screen using the FUNC button.
Flight ID Entry Function Display
The display shows the alpha numeric characters selected via the
rotary selector knob or numeric buttons. When the correct
character is shown in the flight ID section of the screen, press the
selector knob to accept and advance to the next digit. When the
selector knob is pressed on the last digit or a space, the new
Flight ID will replace the previous value. If a button is not pressed
for 7 seconds, the changes are ignored and the previous code
restored.
Flight ID Entry In-Process Example
The Flight ID should correspond to the aircraft call sign entered
on your flight plan. If no flight plan is active, the aircraft
registration should be used as your Flight ID. Use only letters
and digits. If the Flight ID is less than 8 characters long, entering
a blank character will end it.
ALTITUDE MONITOR
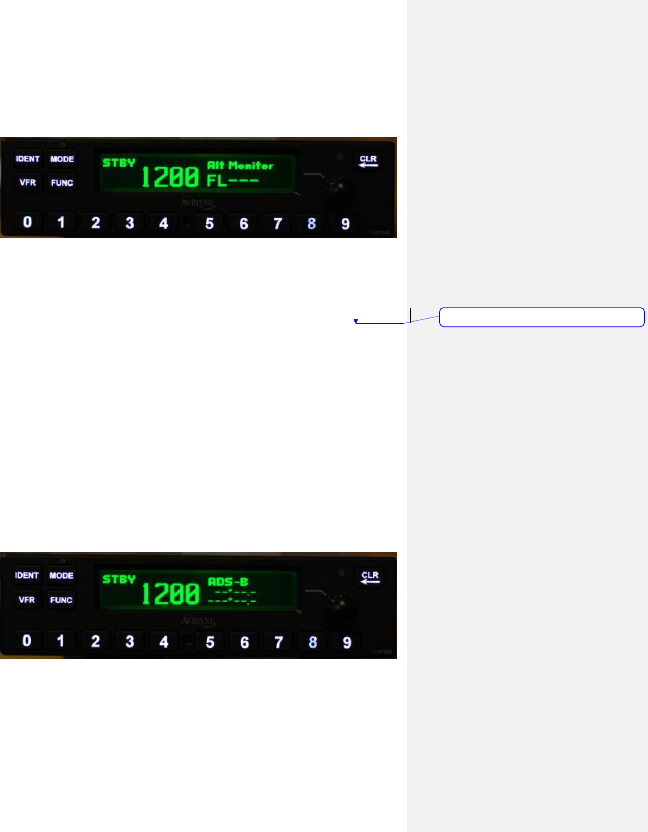
The Altitude Monitor activates an audio annunciator or
annunciator light (depending on installation) when the aircraft
pressure altitude differs from the selected altitude by more than
9
200 feet. Press the FUNC button to display the altitude monitor
enable screen.
Altitude Monitor Function Display
Pressing selector knob toggles the altitude monitor at the current
altitude. A two (2) second press of the selector knob captures the
present pressure altitude and enables the altitude monitor.
When altitude monitoring is in use, the deviation height will be
shown along with the “ABOVE or “BELOW” to indicate the aircraft
height relative to the target altitude.
ADS-B MONITOR
The ADS-B Monitor is only available on installations that include
an ADS-B position source. The ADS-B Monitor provides a
display of the position information that is being transmitted in
ADS-B position reports. This can provide confirmation that the
correct information is being transmitted, particularly where the
GPS source is remote from the transponder.
ADS-B Monitor Function Display
In the event that valid position information is NOT available from
the GPS, the latitude and longitude display will be replaced by
Deleted: 

10
dashes; if no valid latitude and longitude is shown then ADS-B
position information is NOT being transmitted.
Loss of ADS-B position information will also result in a WARNING
message being displayed.

11
BRIGHTNESS AND LIGHTING CONTROLS
The following table describes the means available by which to
control the display and bezel backlighting/brightness:
Control Method
Comments
Dimming Bus
If set up to use the dimming
bus in the Configuration pages
at time of installation, then both
the bezel and the display
brightness/backlighting will be
controlled via the cockpit
dimming bus controls, typically
a dimming rheostat.
Ambient Light Sensor
If set up to use the ambient
light sensor that is embedded
in the AXP340 bezel from the
Configuration pages at time of
installation, then both the bezel
and the display
brightness/backlighting will be
automatically controlled via
internal software algorithms in
response to measured ambient
light conditions.
Manual Control (display only)
Accessible via the FUNC key
on the AXP340 front panel.
Once the LCD Brightness page
is displayed, a scale of 1 to 10
is controllable via the bezel
selector knob.

12
ALERTS
ALERT MESSAGES
If the transponder detects a problem, the screen will indicate
WARNING and a brief statement of the problem. Depending on
the nature of the problem, your transponder may not be replying
to interrogations. Note the message on the screen and pass that
information to your avionics maintenance organization. The
WARNING message should clear when the event has cleared.
Press CLR to clear the message at any time; if the fault is still
present the message may reappear.
FAULT ANNUNCIATION
If the transponder detects an internal failure, the screen will
indicate FAULT and a brief statement of the problem. No replies
will be made to interrogations when a fault is detected.
Some FAULT indications can be recovered by switching the
transponder off and back on again, although in all cases a FAULT
code implies that there is a fault with the transponder or the
installation. Note the FAULT message at the bottom of the
screen and pass that information to your avionics maintenance
organization.
13
CONFIGURATION MODE
The system is configured when it is first installed by your avionics
supplier. Configuration items include the Mode S aircraft
address, the interface to the other aircraft systems (e.g. external
ident input, weight on wheels input, external standby input, serial
altitude output, Gray Code and serial altitude inputs, etc), the
aircraft category, and the pre-programmed values for VFR
squawk code. To view or change these settings you must use
Configuration Mode and described in the product Installation
Manual.
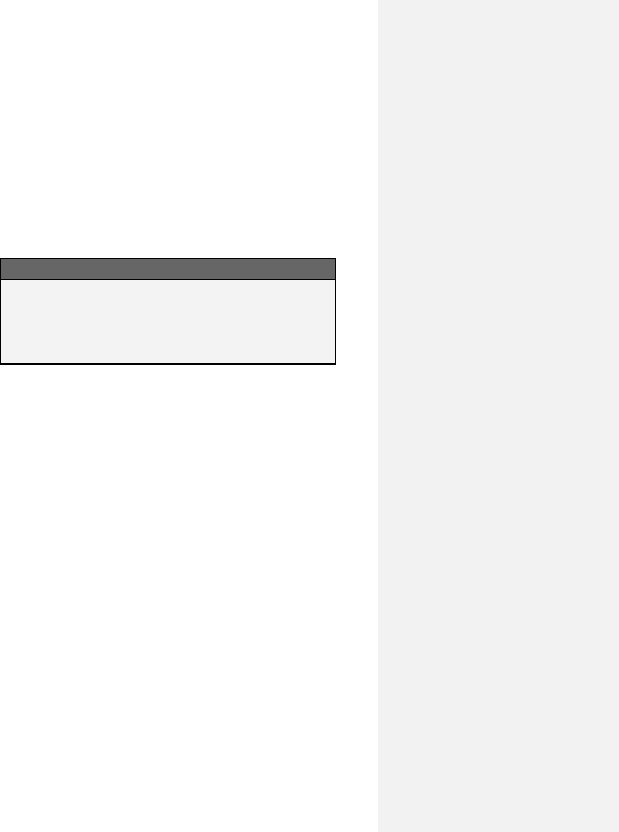
NOTE
Configuration Mode
Do not use Configuration Mode in-flight. Check with
your avionics installer before changing the
configuration.
To enter configuration mode, hold down the FUNC button whilst
switching on the transponder. Configuration items can be
changed using the selector knob or numeric buttons for data
input. Press the selector knob to accept the selection. Pressing
FUNC advances to the next configuration item.
When configuration is complete, switch the transponder off.
When it is switched back on the transponder will use the new
configuration.
LOW TEMPERATURE OPERATION
The AXP340 is certified to operate correctly down to -25C, but at
low temperatures the display may be impaired. On a cold day
you may need to wait for the cockpit to warm up to ensure normal
operation.

14
SOFTWARE UPDATES
The AXP340 is a software-enabled transponder and all
anticipated software updates can be performed at your avionics
shop.
PLUG AND PLAY DETAILS
The AXP340 is plug & play compatible with the King KT-76/76A
transponder. This means it can literally be installed in a KT-
76/76A tray and no further action or wiring is required. All
functions described in this manual will be supported in that case.

Index 1
ADS-B, 4
Additional Functions
ADS-B Monitor, 11
Altitude Monitor, 10
Flight ID Entry, 10
Flight Timer, 9
Stopwatch, 9
Alerts
Fault Annunciations, 14
Alert Messages, 14
Bezel Controls
CLR, 5
FUNC, 6
IDENT, 5
Numeric Buttons, 5
Selector Knob, 5
VFR, 6
Brightness and Lighting Controls, 13
Configuration Mode, 15
Low Temperature Operation, 15
Mode Control
ALT, 8
ON, 8
STBY, 8
Plug & Play Details, 16
Power On/Off, 7
Software Updates, 16
Squawk Code Entry, 8
System Overview, 3

Website There is a dedicated website that provides more information on
this product at http://www.axp340.com
FAQs http://www.avidyne.com/downloads/products/
AXP340/FAQs.pdf
Service Hotline A hotline has been established to service
questions or issues regarding Avidyne products. The U.S. Toll
Free number is 1-888-723-7592. International toll free numbers
are listed at http://www.avidyne.com/contact/intphones.asp
Email Customer/product support issues can be emailed as well
□ Europe – support@avidyneeurope.com
□ Australia & Asia – support@avidyneaustralasia.com
□ Everywhere else should email techsupport@avidyne.com
When calling or emailing for product-related help, please have the
following information available, if able:
Customer Name/Account Information
Aircraft tail number, AXP340 serial number, and software
versions.
A good description of the problem or question.
WARRANTY: AVIDYNE WARRANTS THE PRODUCT MANUFACTURED BY IT AGAINST
DEFECTS IN MATERIAL AND WORKMANSHIP FOR A PERIOD OF TWENTY-FOUR (24)
MONTHS FROM DELIVERY TO THE INSTALLER. A COMPLETE COPY OF THE
WARRANTY DATA IS ACCESSIBLE VIA THIS WEB ADDRESS:
WWW.AVIDYNE.COM/PRODUCTS/AXP340/INDEX.ASP
