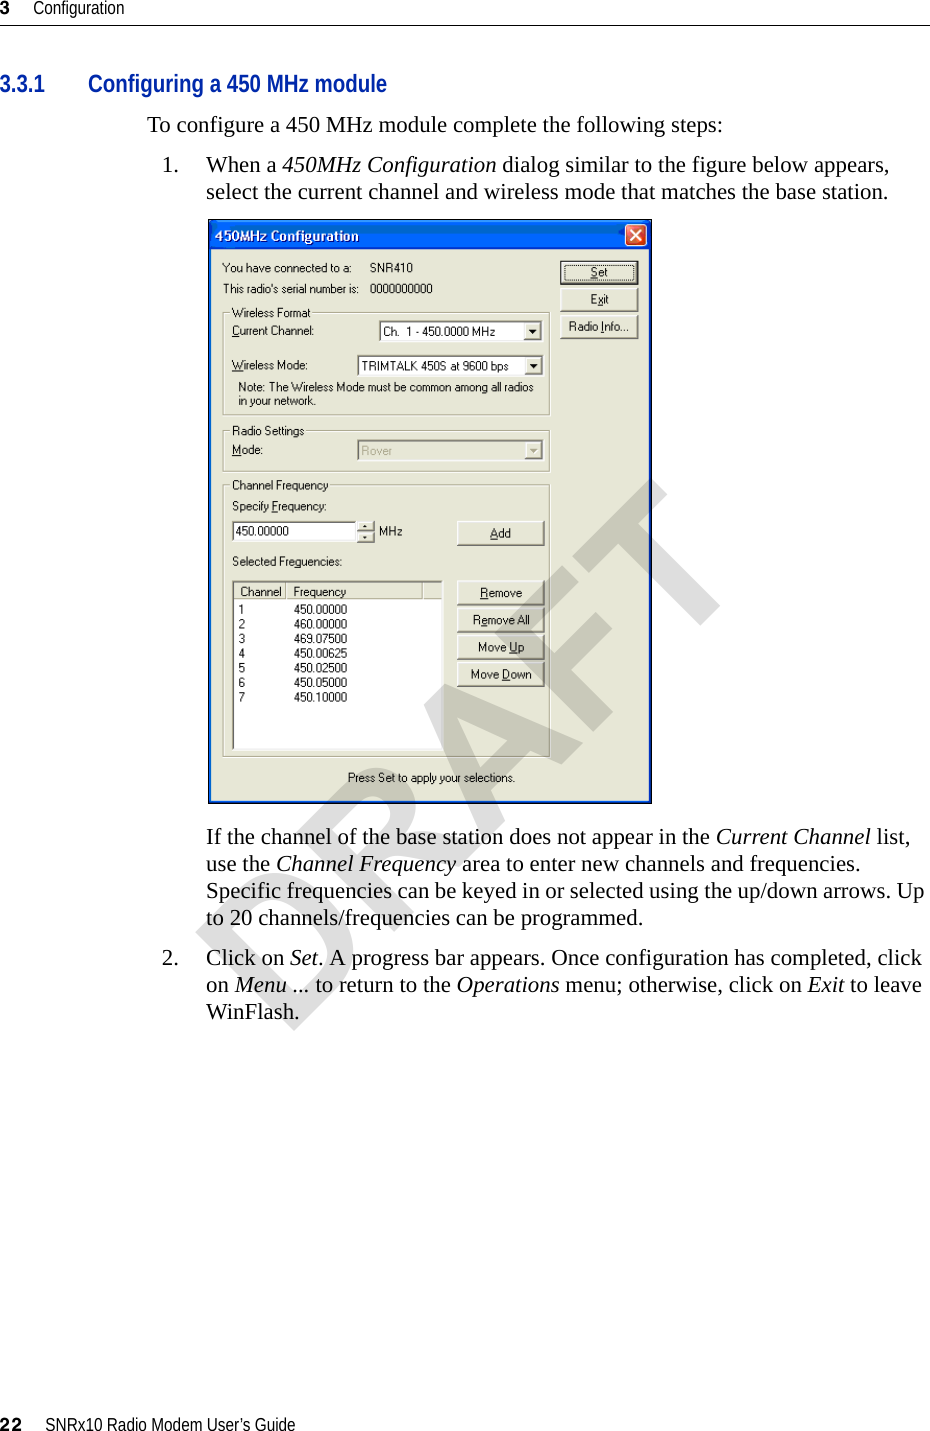
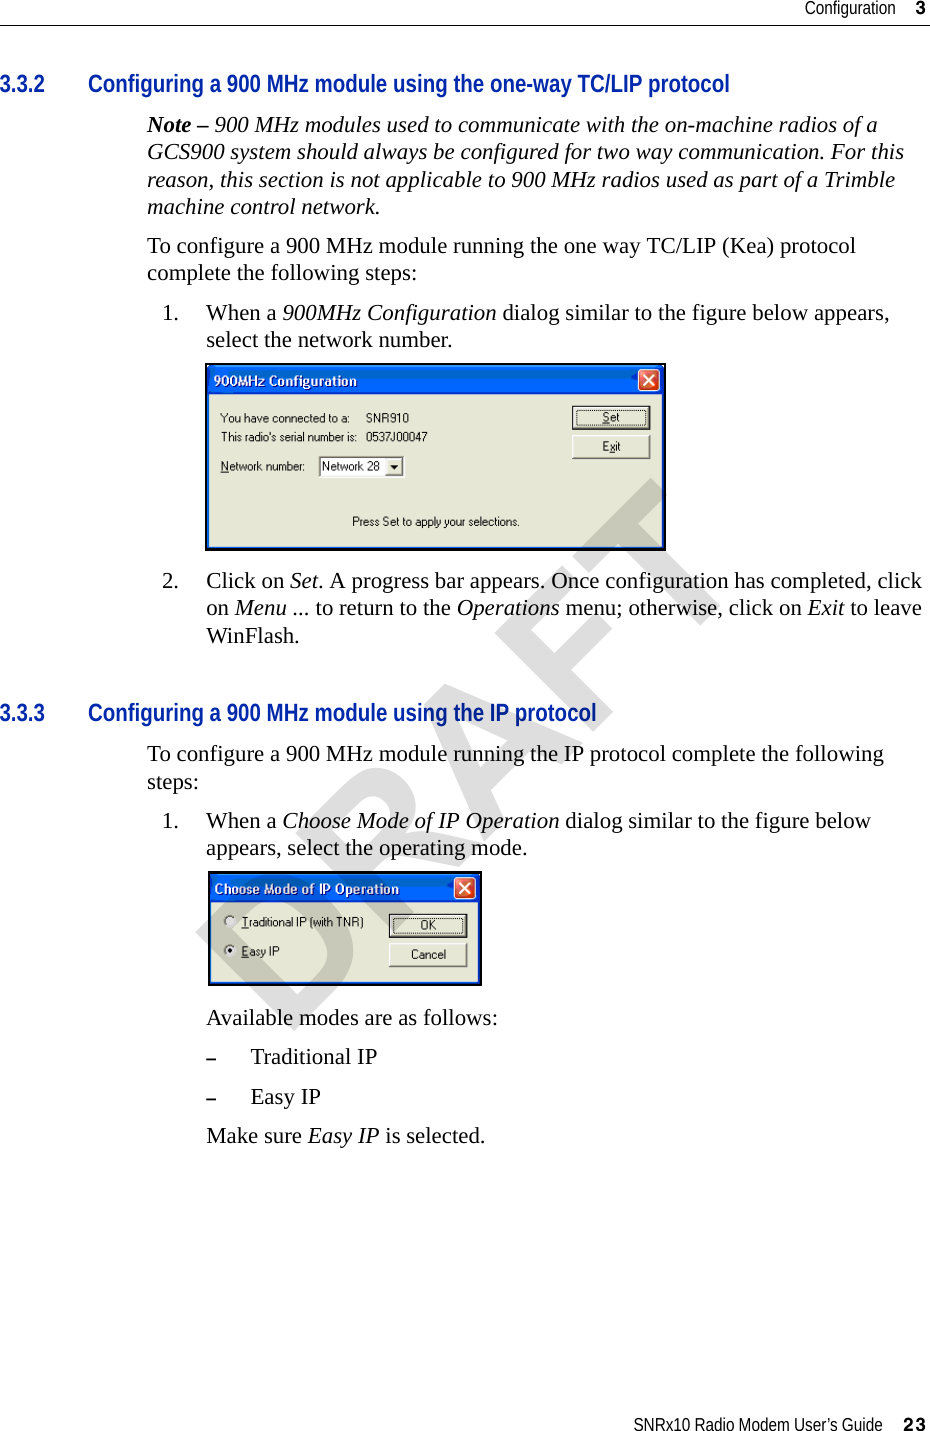
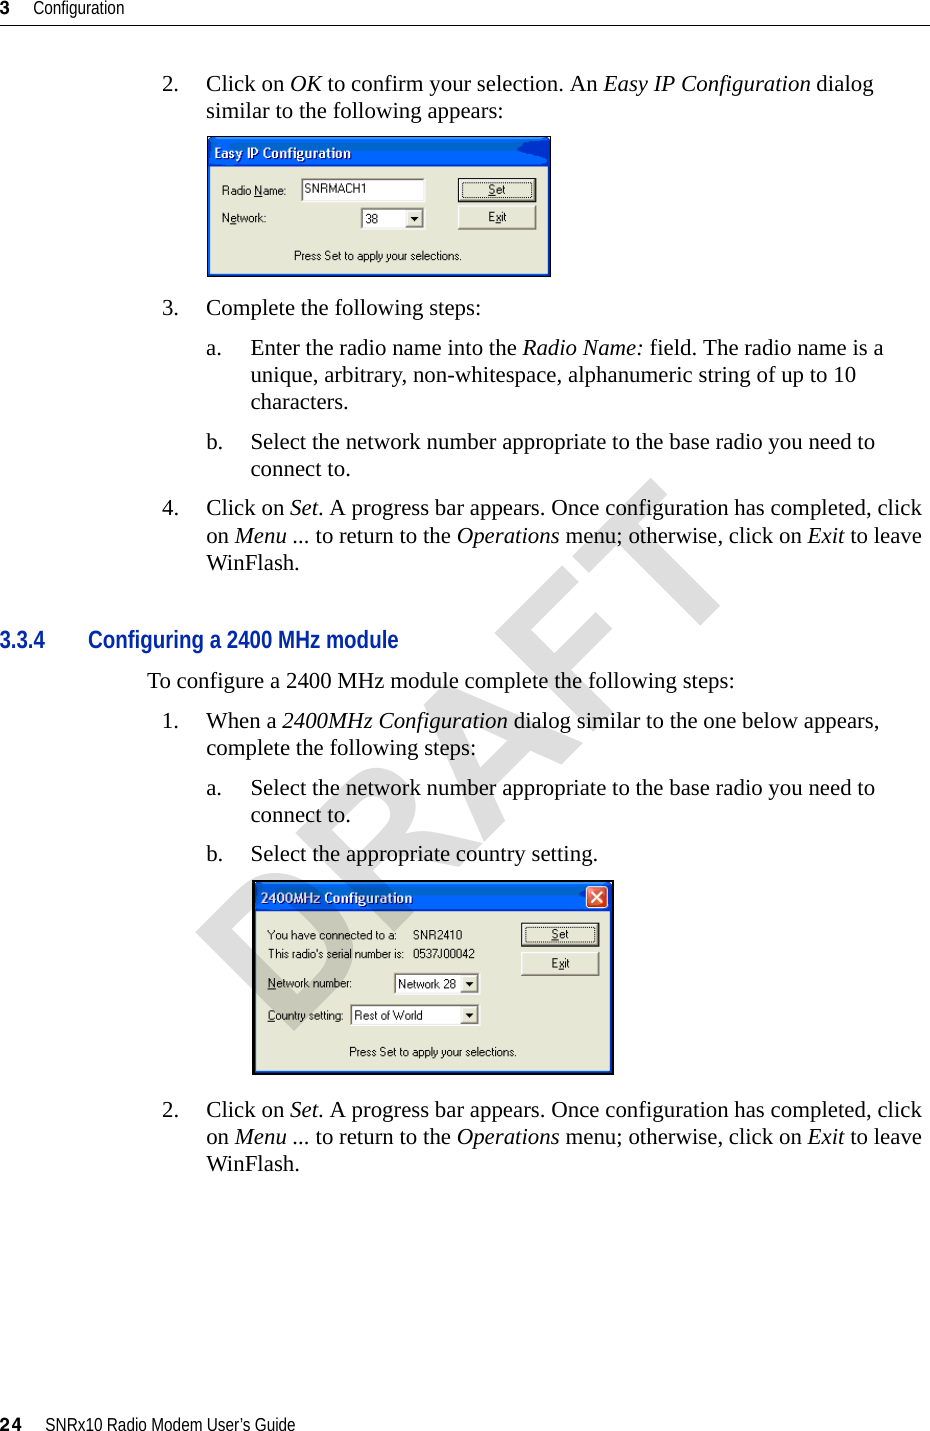
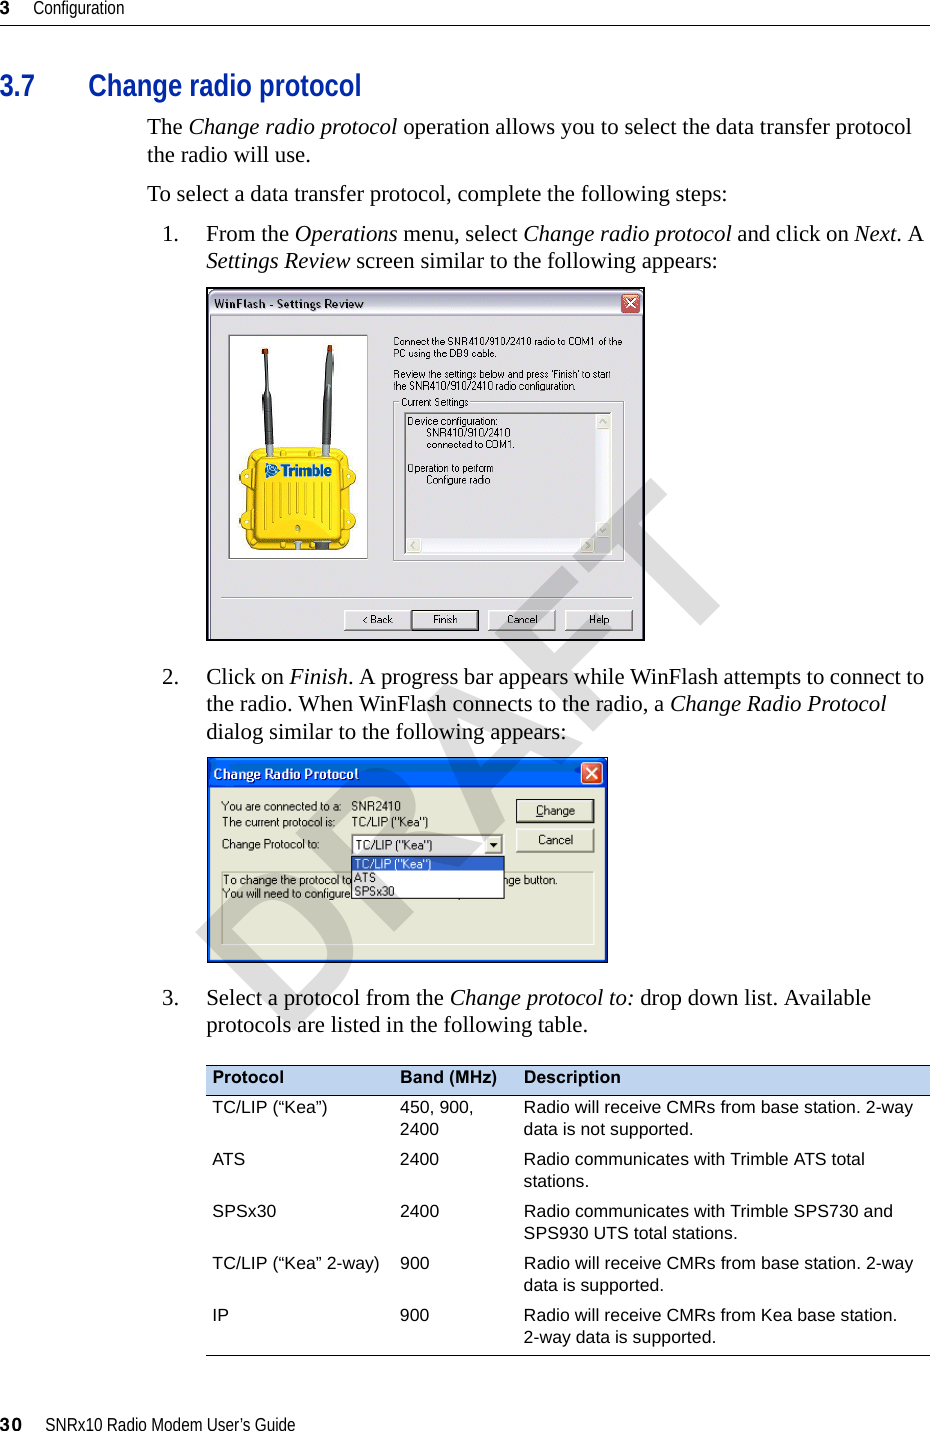
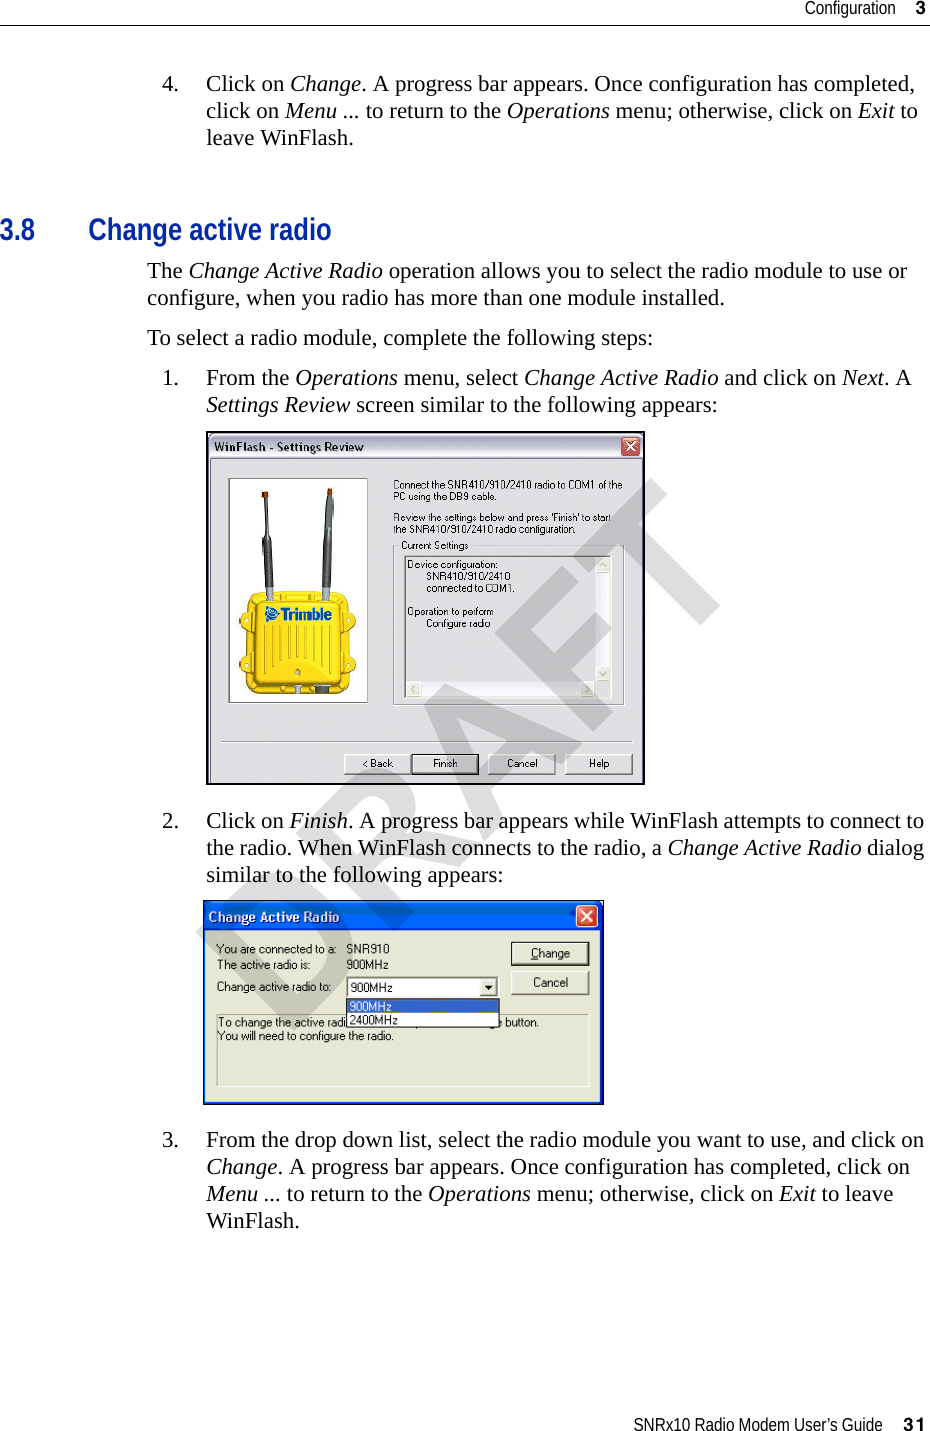
Trimble 8262090 900MHz FHSS and 2.4 GHz Wi-Fi Radio User Manual SNRx10 V100B UserGuide
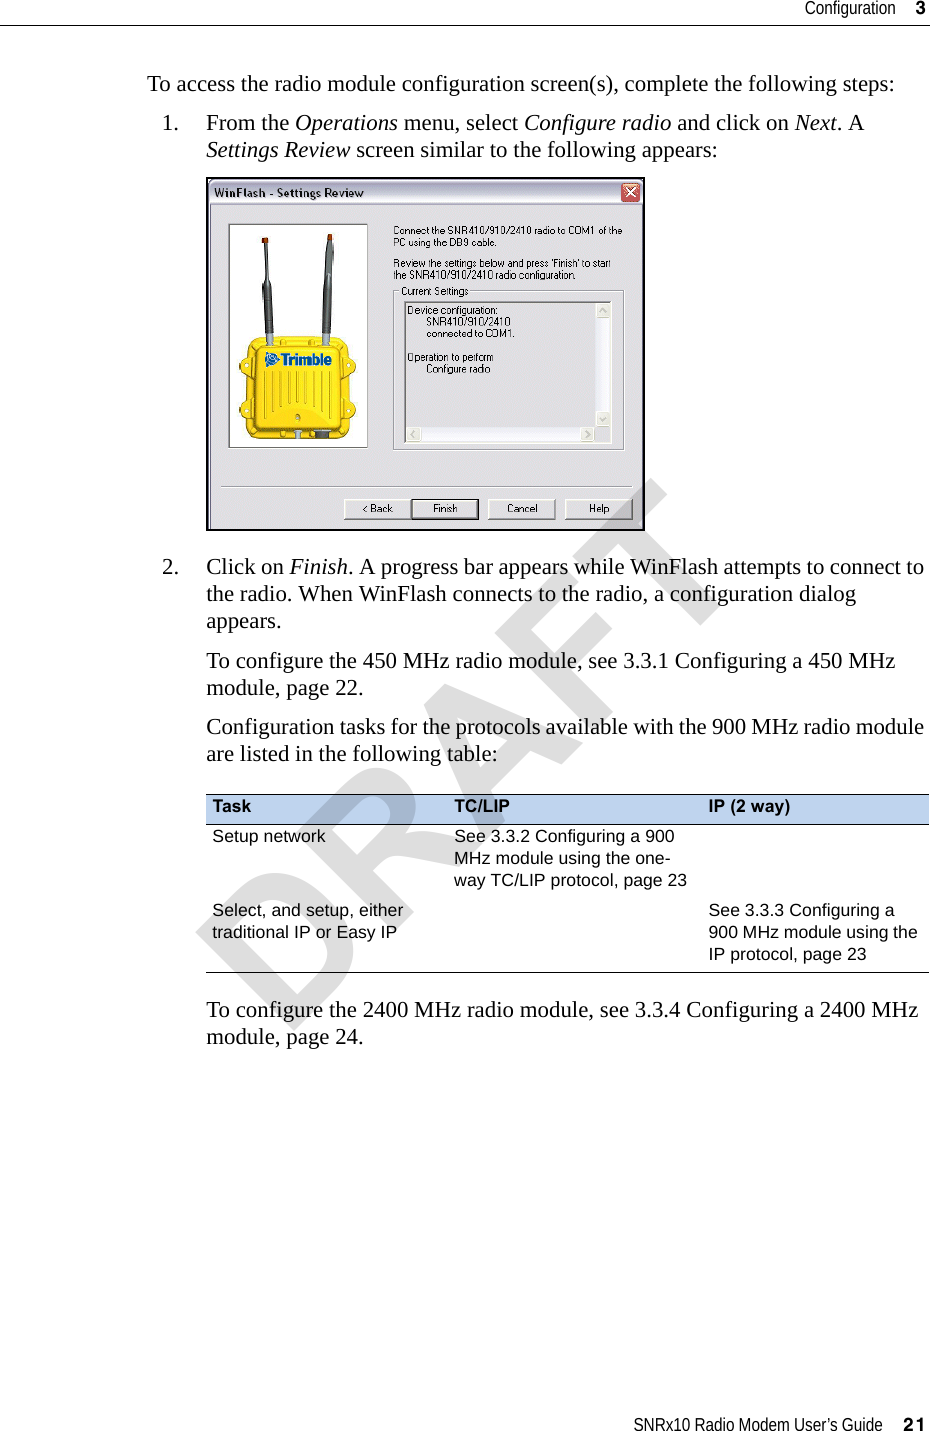
Trimble Navigation Ltd 900MHz FHSS and 2.4 GHz Wi-Fi Radio SNRx10 V100B UserGuide
UserManual.wiki
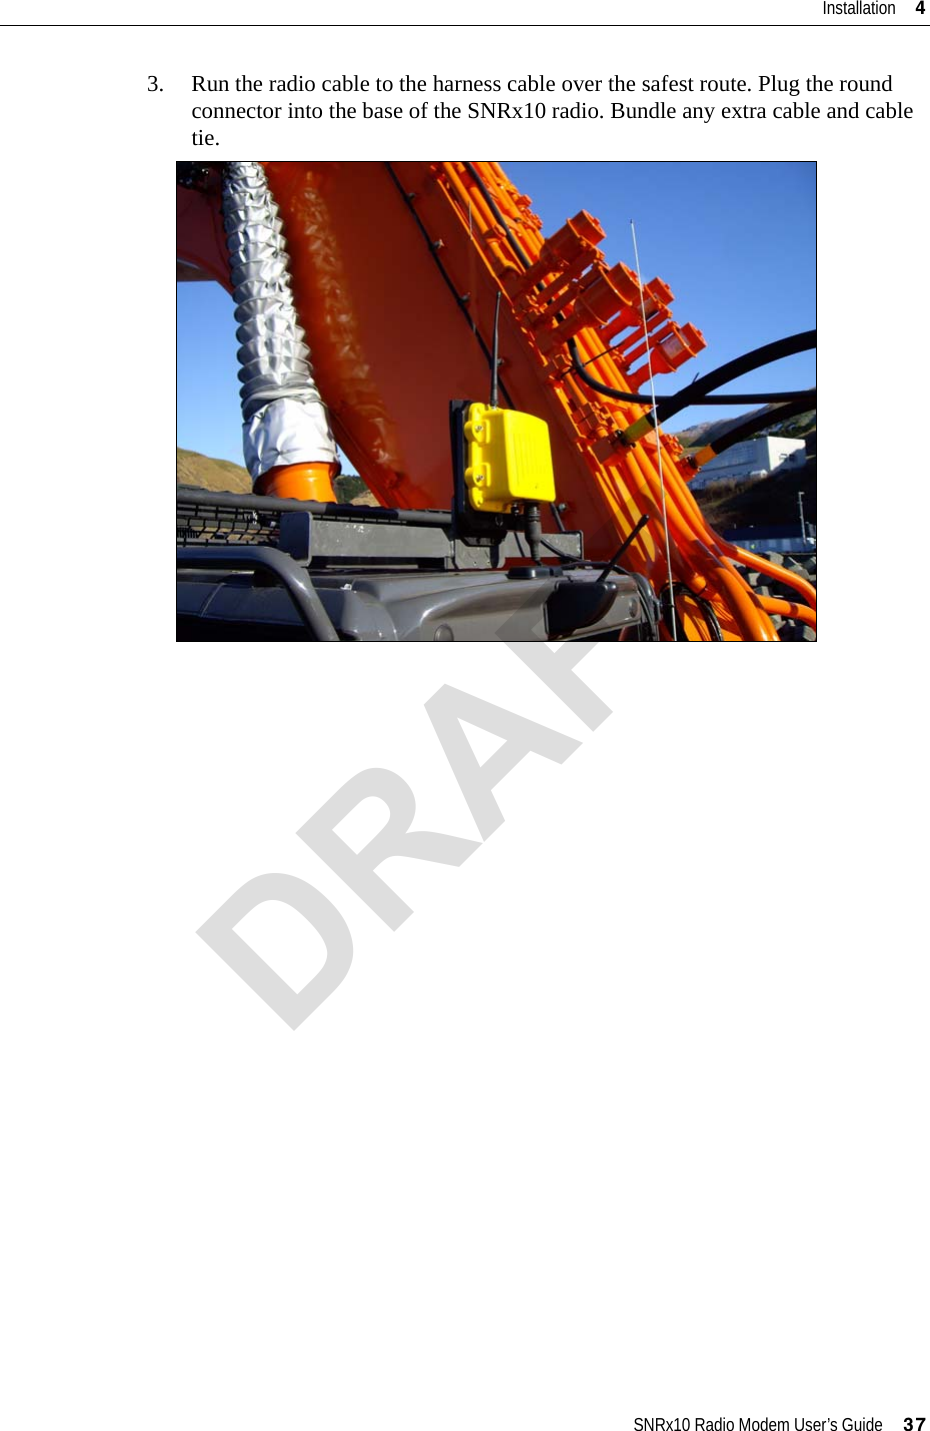
>
Trimble
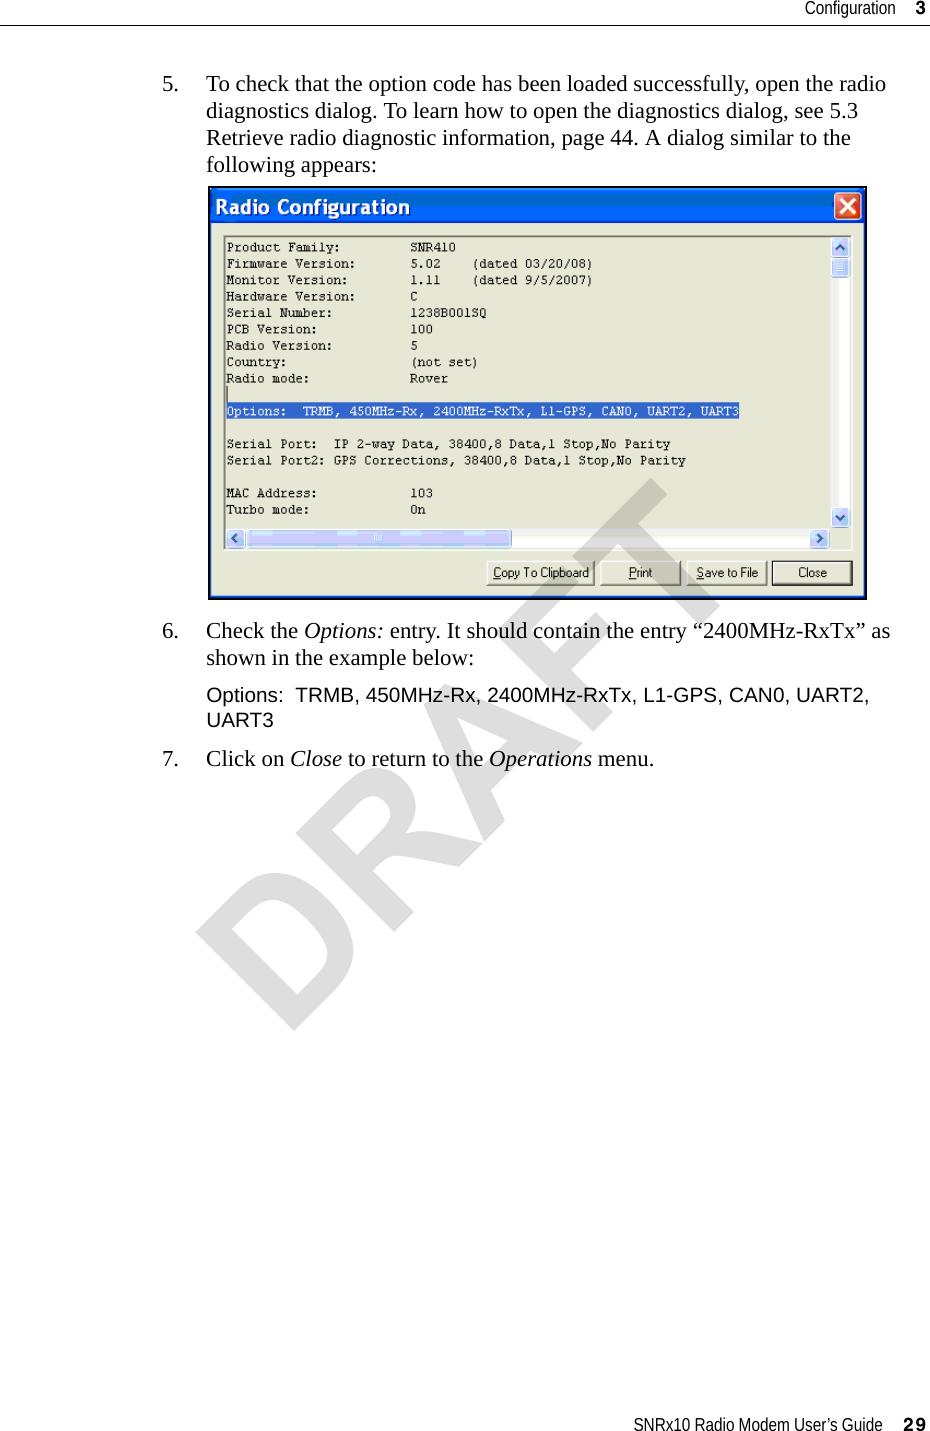
>
8262090 User Manual
Users Manual
Navigation menu
Upload a User Manual
Namespaces
Wiki Guide
HTML
PDF
Info
Views
User Manual
Discussion / Help
Navigation