Trimble NT0003 Bluetooth unit User Manual Trimble CU Model 3 User Guide
Trimble AB Bluetooth unit Trimble CU Model 3 User Guide
UserManual.wiki
>
Trimble
>
NT0003 User Manual
User Manual
Navigation menu
Upload a User Manual
Namespaces
Wiki Guide
HTML
PDF
Info
Views
User Manual
Discussion / Help
Navigation


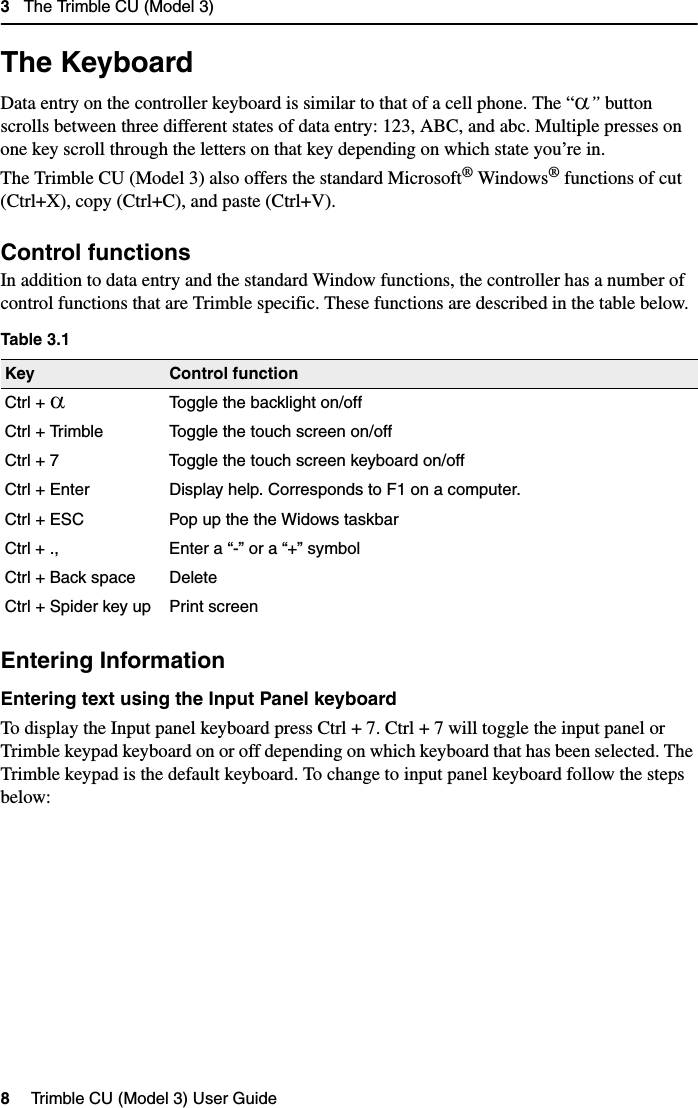
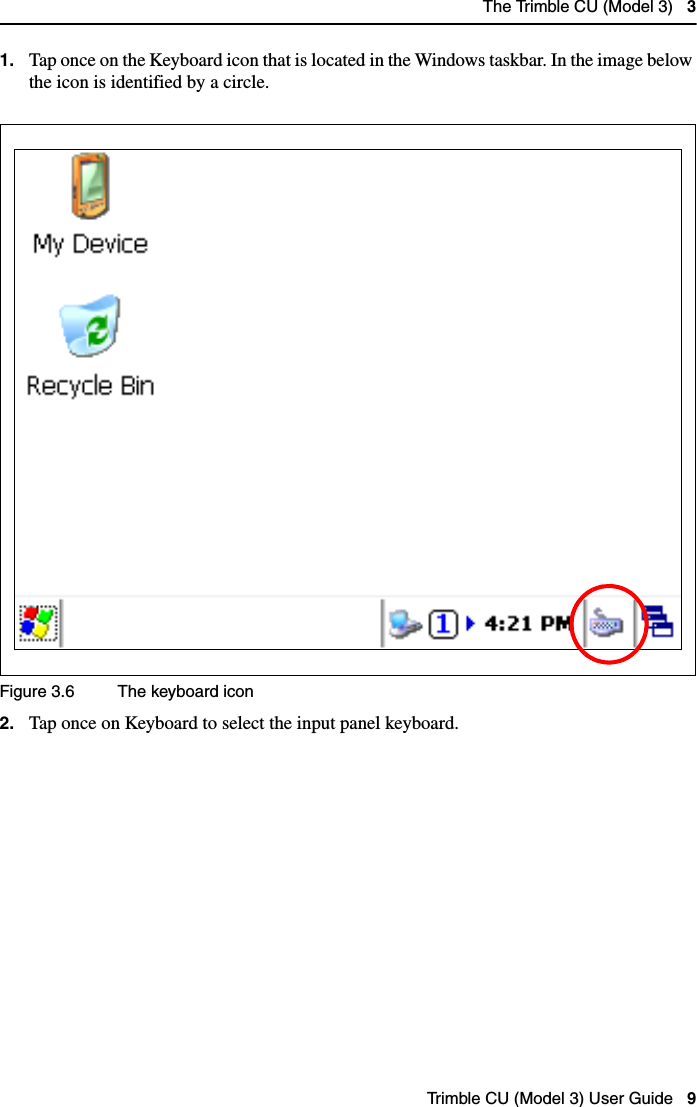
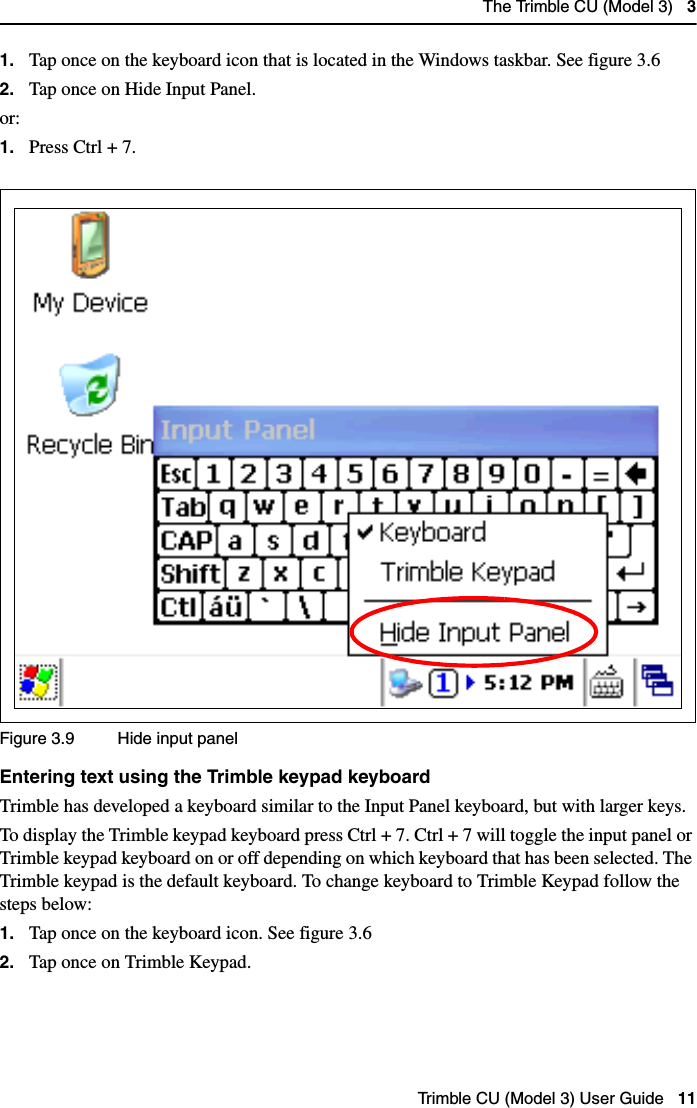
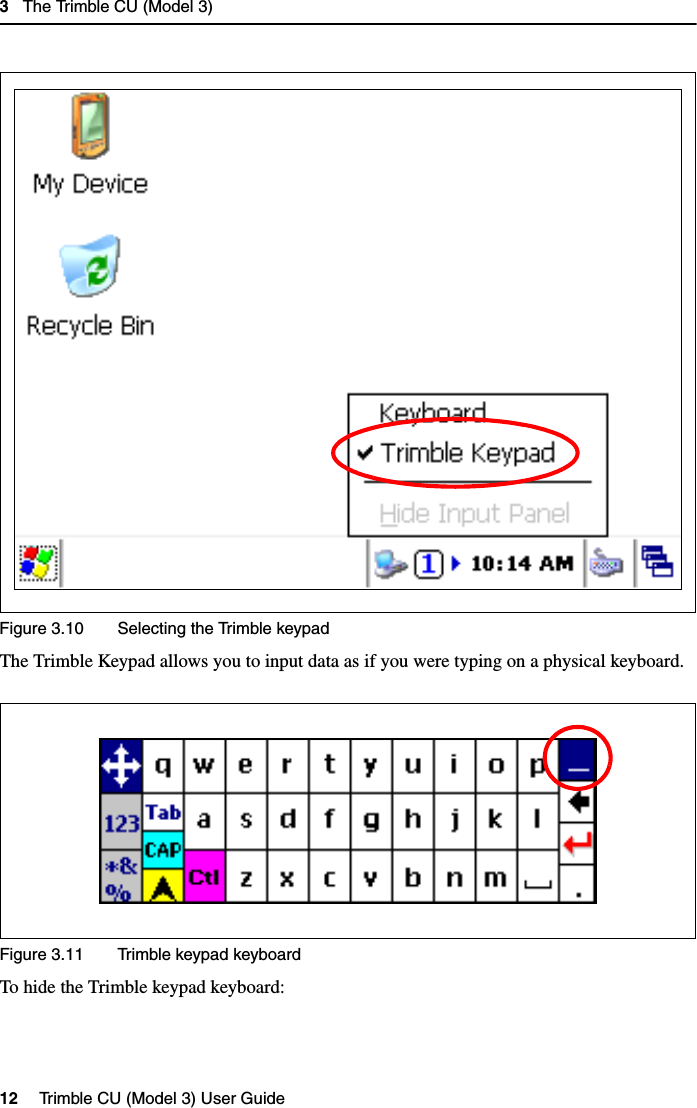
![3 The Trimble CU (Model 3)10 Trimble CU (Model 3) User Guide Figure 3.7 Selecting the input panel keyboardThe Input Panel keyboard allows you to input data as if you were typing on a physical keyboard. To change the keyboard to international symbols, tap the [áü] key, identified with a circle in the figure below. To access additional symbols, tap [Shift]:Figure 3.8 The input panel keyboardTo hide the input panel keyboard:](https://usermanual.wiki/Trimble/NT0003/User-Guide-1381650-Page-20.png)
![The Trimble CU (Model 3) 3Trimble CU (Model 3) User Guide 17Touch Screen 3.2The Trimble CU (Model 3) LCD screen can be viewed easily both in direct sunlight and in overcast conditions. It also incorporates a touch interface for navigation. Tap elements on the screen with a stylus or your finger.Calibrating the touch screen 32.1If the touch screen does not respond properly when you tap it, recalibrate it as follows:1. Tap the Start menu and select Settings/Control Panel/Stylus.The Stylus Properties appears.2. To recalibrate, tap Recalibrate in the Calibration tab.3. Follow the prompts on the screen.or:1. Press the power key until the power key window is displayed.2. Select Options.3. To recalibrate, select Align Touch Screen.Disabling the touch screen 30.1To clean the touch screen during a survey, press [Ctrl] + [Trimble] to disable it. To enable the touch screen again, press [Ctrl] + [Trimble].or:1. Press the power key until the power key window is displayed.2. Select Options.3. To disable touch screen, select Clean Touch Screen.Display light 30.1The display light is active by default and can be toggled on/off by pressing Ctrl + α.or:1. Press the power key until the power key window is displayed.2. Select Options.3. Select Backlight On/Off.To change the default display light settings:1. Tap the Start menu and then select Settings/ Control Panel/ Display.2. Select Display light and then make your changes.3. Tap OK.](https://usermanual.wiki/Trimble/NT0003/User-Guide-1381650-Page-27.png)