Trimble RNGR2410 Ranger/TSC3 User Manual part 2 of 2
Trimble Navigation Limited Ranger/TSC3 part 2 of 2
UserManual.wiki
>
Trimble
>
RNGR2410 User Manual
>
User Manual part 2 of 2
Contents
1.
Users Manual
2.
User Manual
3.
User Manual part 1 of 2
4.
User Manual part 2 of 2
User Manual part 2 of 2
Navigation menu
Upload a User Manual
Namespaces
Wiki Guide
HTML
PDF
Info
Views
User Manual
Discussion / Help
Navigation


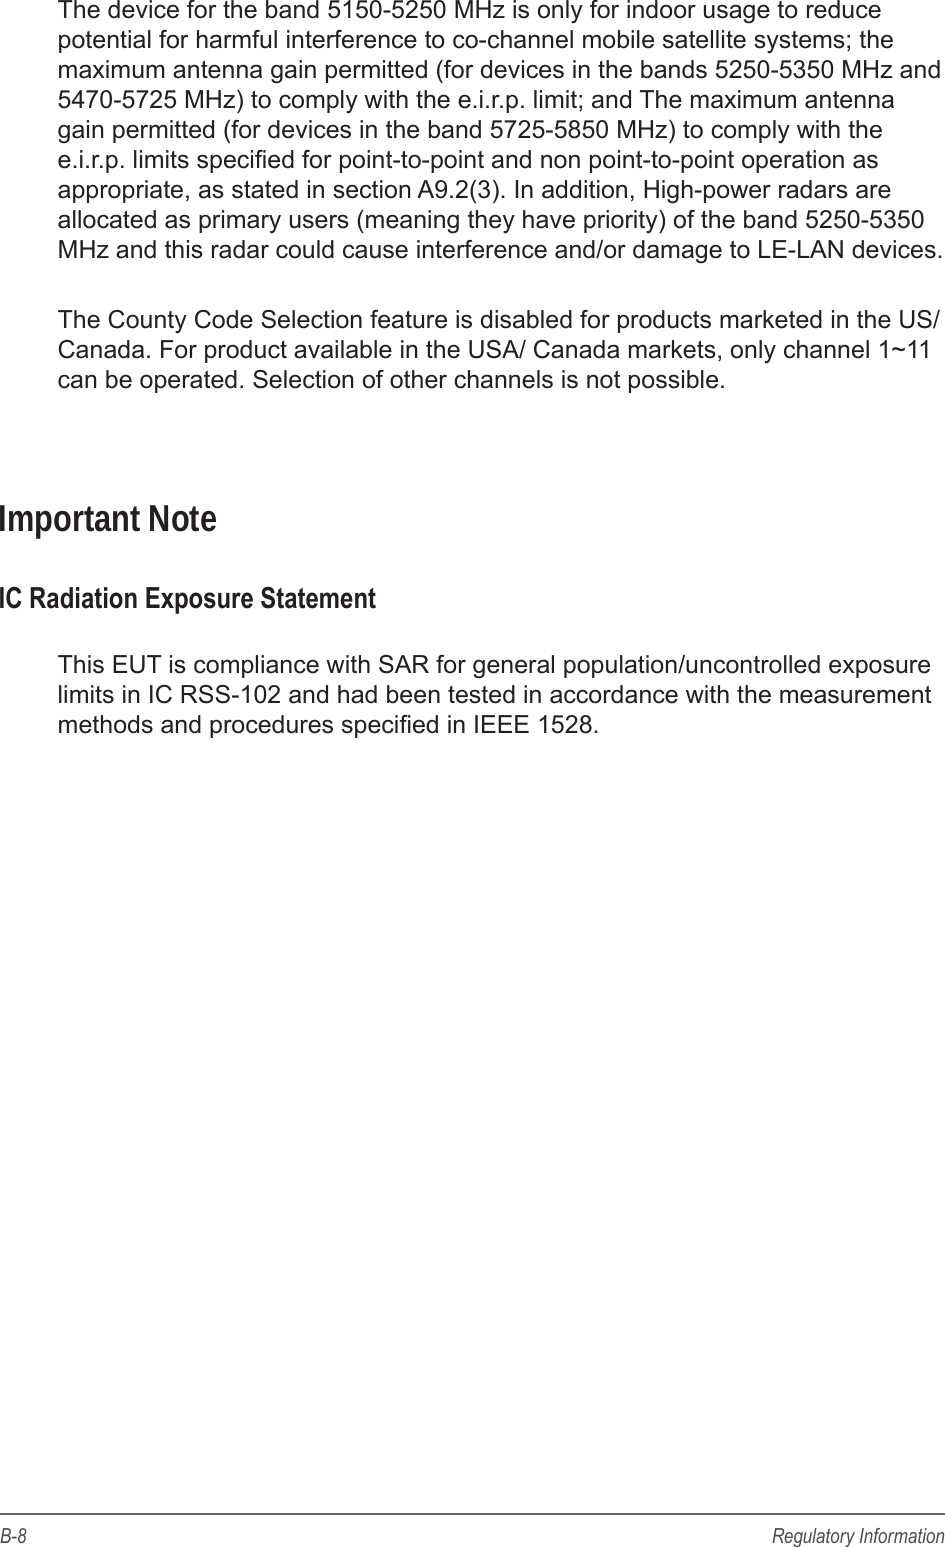
![5-3Using BIOS Setup and System RecoveryMain MenuThe Main menu contains the system date and time settings and shows the basic system information.Main Advanced Boot ExitAptio Setup Utility - Copyright (C) 2011 American Megatrends, Inc.Version 20.14.1219. Copyright (C) 2011 American Megatrends, Inc.System Date [Thu 09/06/2012]System Time [19:12:12]Model No. XXXXS/N No. xxxx-xxxx-xxxxxxProcessor Type Intel(R) Atom(TM) CPUProcessor Speed 1600 MHzSystem Memory Size 2048 MBSystem Storage Device 64GB SATA F1 (64GB)Bios Revision X22EC Revision X21Set the Date. Use Tab Key to switch between Date elements. : Select Screen : Select ItemEnter: Select+/_:Change Opt.F1: General HelpF2: Previous ValuesF3: Optimized DefaultsF4: Save & ExitESC: Exit• System Date: Sets the system date.• System Time: Sets the system time.Advanced MenuThe Advanced menu contains the advanced settings, such as GPS, LED, power initiation, and TPM (Trusted Platform Module) settings.Main AdvancedBoot ExitAptio Setup Utility - Copyright (C) 2011 American Megatrends, Inc.Version 20.14.1219. Copyright (C) 2011 American Megatrends, Inc.GPS Antenna [Built-in]LED Indicator [Disable]AC Initiation [Disable]TPMTo switch GPS Antenna. : Select Screen : Select ItemEnter: Select+/_:Change Opt.F1: General HelpF2: Previous ValuesF3: Optimized DefaultsF4: Save & ExitESC: Exit• GPS Antenna: Selects the GPS Antenna.• LED Indicator: Enables or disables the LED indicators.• AC Initiation: Enables or disables the system to wake up while the AC power is plugged in.• TPM (Trusted Platform Module): Enables or disables support for security devices.](https://usermanual.wiki/Trimble/RNGR2410.User-Manual-part-2-of-2/User-Guide-1861919-Page-25.png)
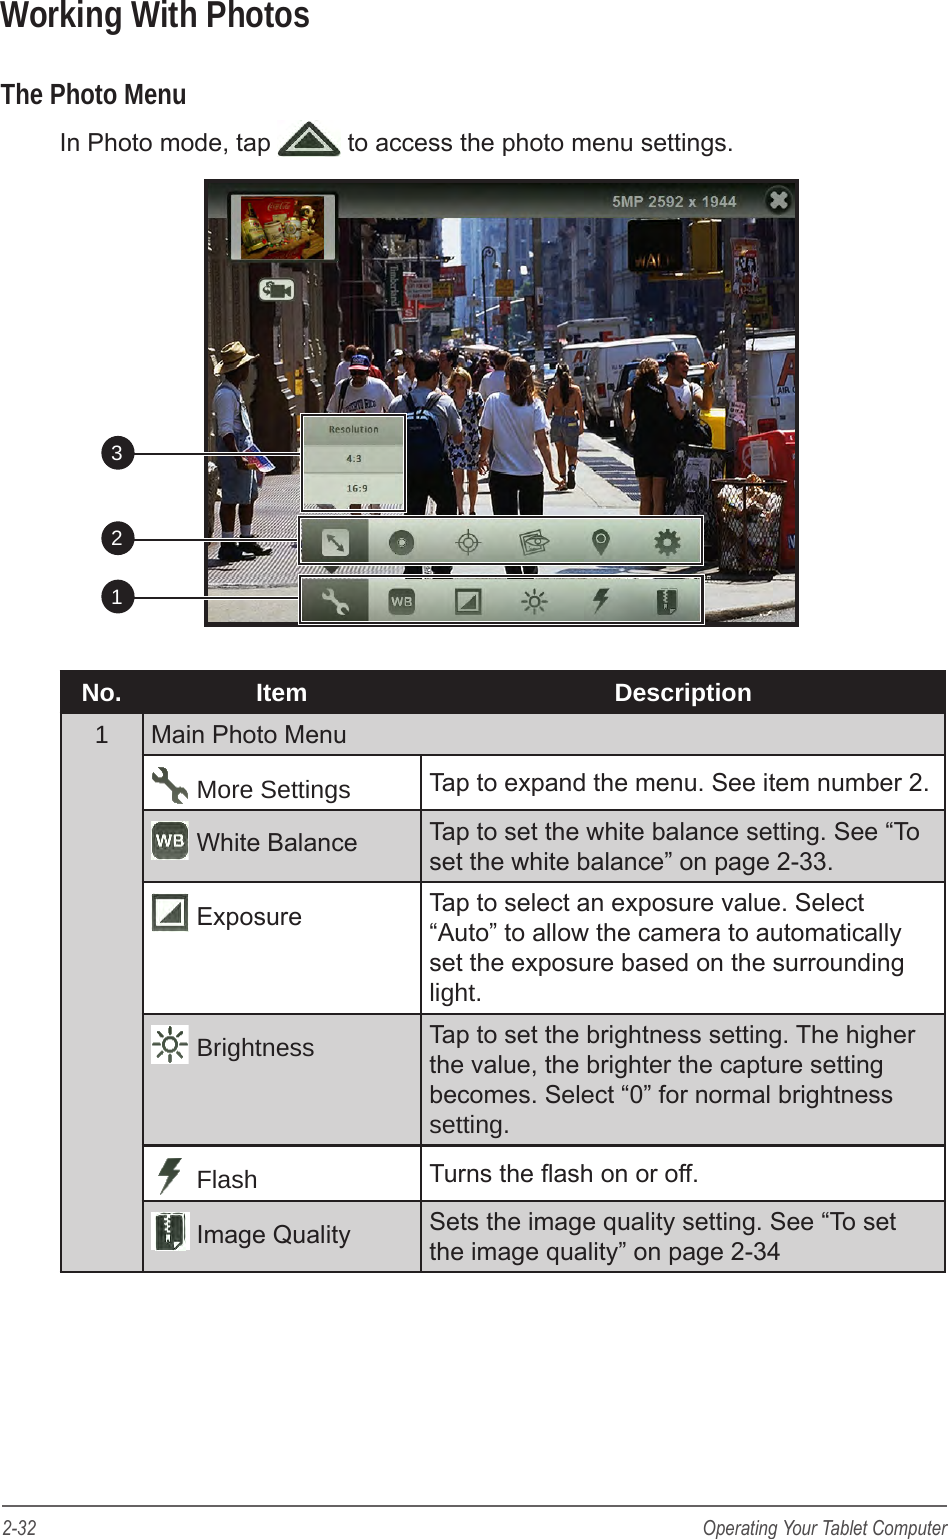
![5-4 Using BIOS Setup and System RecoveryBoot MenuThe Boot menu sets the boot order of devices.Main AdvancedBoot ExitAptio Setup Utility - Copyright (C) 2011 American Megatrends, Inc.Version 20.14.1219. Copyright (C) 2011 American Megatrends, Inc.Boot Option #1 [SATA PM:64GB SAT...]Boot Option #2 [USB-to-Ethernet (L...]Hard Drive BBS PrioritiesBEV Device BBS PrioritiesSet the system boot order. : Select Screen : Select ItemEnter: Select+/_:Change Opt.F1: General HelpF2: Previous ValuesF3: Optimized DefaultsF4: Save & ExitESC: Exit• Boot Option #1: Sets the rst device to boot.• Boot Option #2: Sets the second device to boot.• Hard Drive BBS Priorities: Sets the order of legacy devices in this group.• BEV Device BBS Priorities: Sets the order of legacy devices in this group.Exit MenuThe Exit menu displays ways of exiting BIOS Setup Utility. After modifying the settings, you must save and exit for the changes to take effect.Main AdvancedBootExitAptio Setup Utility - Copyright (C) 2011 American Megatrends, Inc.Version 20.14.1219. Copyright (C) 2011 American Megatrends, Inc.Exit Saving ChangesExit Discrading ChangesLoad Setup DefaultsDiscard ChangesSave ChangesReset the system after saving the changes. : Select Screen : Select ItemEnter: Select+/_:Change Opt.F1: General HelpF2: Previous ValuesF3: Optimized DefaultsF4: Save & ExitESC: Exit• Exit Saving Changes: Saves the changes you have made and exits BIOS Setup Utility.• Exit Discarding Changes: Exits BIOS Setup Utility without saving the](https://usermanual.wiki/Trimble/RNGR2410.User-Manual-part-2-of-2/User-Guide-1861919-Page-26.png)