Trust 15550 Wireless Optical Mouse User Manual usermanual part 1

Trust International BV Wireless Optical Mouse usermanual part 1

usermanual part 1

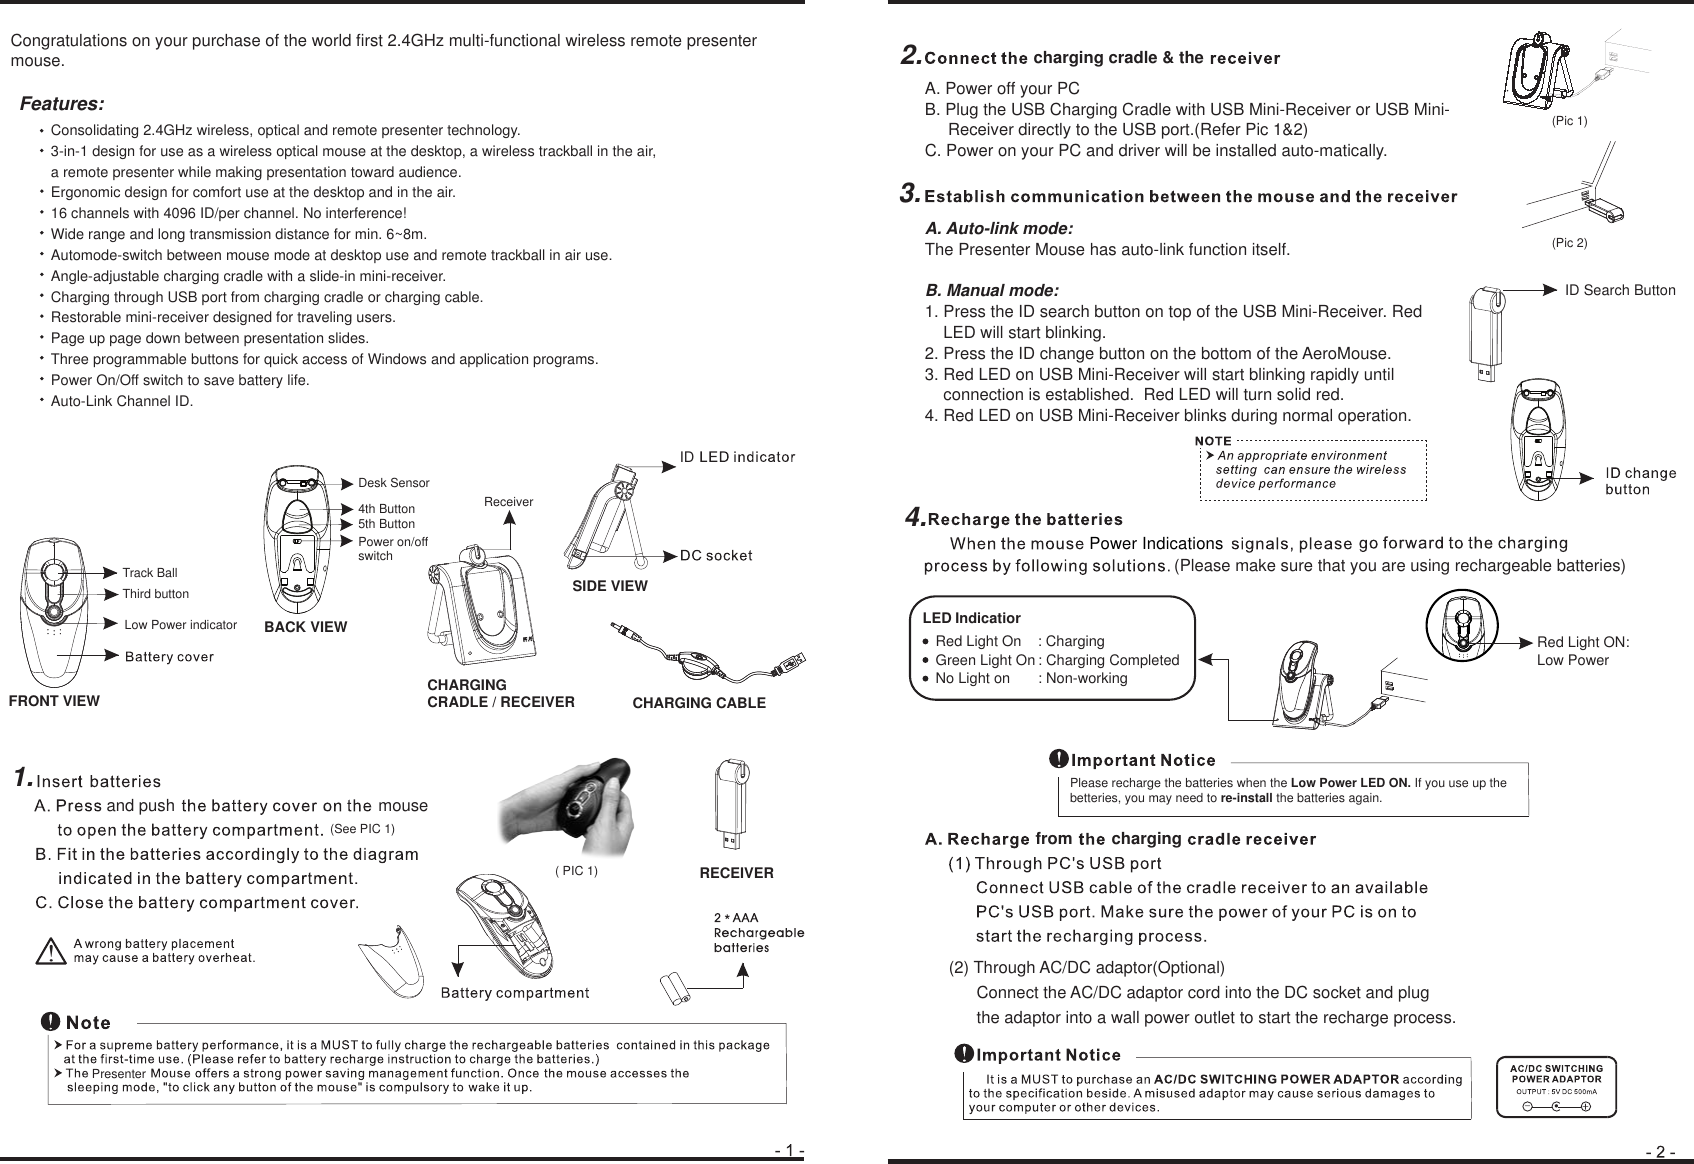
BACK VIEWFRONT VIEWConsolidating 2.4GHz wireless, optical and remote presenter technology.3-in-1 design for use as a wireless optical mouse at the desktop, a wireless trackball in the air, a remote presenter while making presentation toward audience. Ergonomic design for comfort use at the desktop and in the air.16 channels with 4096 ID/per channel. No interference! Wide range and long transmission distance for min. 6~8m.Automode-switch between mouse mode at desktop use and remote trackball in air use.Angle-adjustable charging cradle with a slide-in mini-receiver.Charging through USB port from charging cradle or charging cable. Restorable mini-receiver designed for traveling users.Page up page down between presentation slides.Three programmable buttons for quick access of Windows and application programs. Power On/Off switch to save battery life.Auto-Link Channel ID.!_+●CHARGING CRADLE / RECEIVERIndicatiorRed Light ON: Low PowerGreen Light On : Charging CompletedNo Light on       : Non-working Third buttonTrack Ball4th Button5th ButtonDesk SensorReceiverLow Power indicatorFeatures:Power on/offswitchcharging cradle & thePlease recharge the batteries when the Low Power LED ON. If you use up the betteries, you may need to re-install the batteries again.SIDE VIEWCHARGING CABLEIDRECEIVER*and push mousePresenterID Search ButtonLEDcharging(2) Through AC/DC adaptor(Optional)      Connect the AC/DC adaptor cord into the DC socket and plug       the adaptor into a wall power outlet to start the recharge process.(See PIC 1)( PIC 1)(Pic 1)(Pic 2)Congratulations on your purchase of the world first 2.4GHz multi-functional wireless remote presenter mouse.  1.2.3.4.fromRed Light On    : Charging(Please make sure that you are using rechargeable batteries)Power IndicationsA. Power off your PCB. Plug the USB Charging Cradle with USB Mini-Receiver or USB Mini-     Receiver directly to the USB port.(Refer Pic 1&2)C. Power on your PC and driver will be installed auto-matically.A. Auto-link mode:The Presenter Mouse has auto-link function itself.B. Manual mode:1. Press the ID search button on top of the USB Mini-Receiver. Red     LED will start blinking.2. Press the ID change button on the bottom of the AeroMouse.3. Red LED on USB Mini-Receiver will start blinking rapidly until     connection is established.  Red LED will turn solid red.4. Red LED on USB Mini-Receiver blinks during normal operation.

Navigation menu