Tsuen Shing BM-244TX 2.4GHz Digital Baby Monitoring System - Baby Unit User Manual Manual
Tsuen Shing Enterprises Limited 2.4GHz Digital Baby Monitoring System - Baby Unit Manual
UserManual.wiki
>
Tsuen Shing
>
BM 244TX User Manual
Manual
Navigation menu
Upload a User Manual
Namespaces
Wiki Guide
HTML
PDF
Info
Views
User Manual
Discussion / Help
Navigation
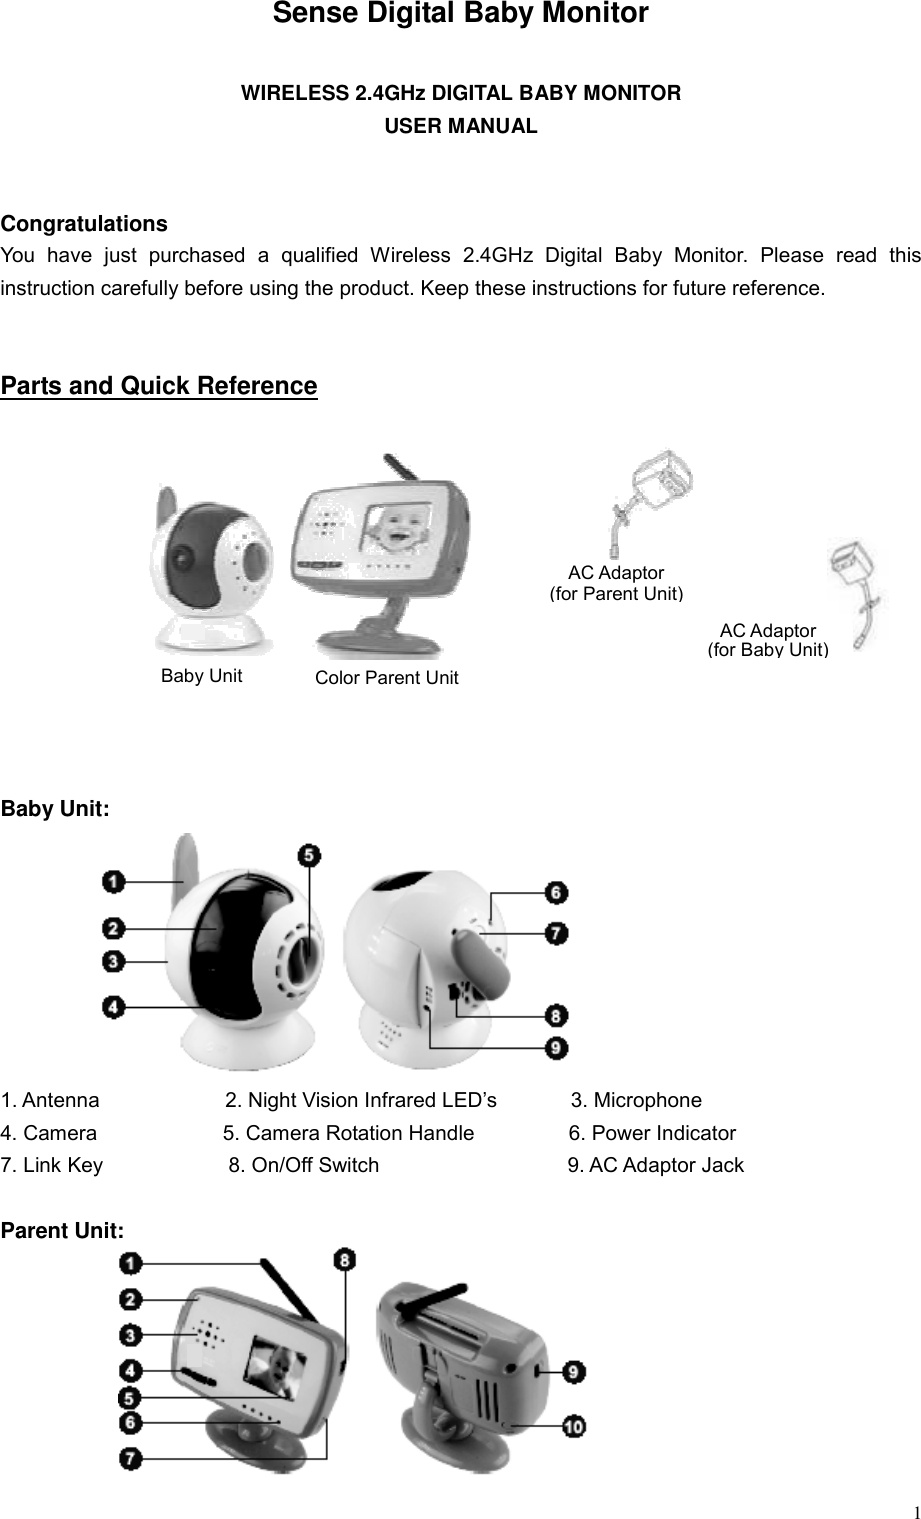
![6 B. Baby Monitor Functions Setup B1. Parent Unit Screen 1. Signal 2. Zoom-in 3. Alarm On 4. Night Vision 5. Parent unit Battery 6. Baby unit Battery 7. Clock Time 8. Baby live video B2. Main Menu 1. Mode 2. Night Vision 3. Camera 4. Settings 5. Info 6. Exit Press MENU key to open main menu. Use e/f key to choose the options. B3. Functions Description Note: After finishing operation for each functions of main menu, to return to the live video(if available), select and press Back/Exit, or wait for about 10 seconds and parent unit will return to live video on its own.—[ Use e/f key to select , MENU key to confirm ] The below menu operating , use e/f key to select , MENU key to confirm 1. Mode There are 3 operation mode: Normal, Video off & Sleep 1> Enter Mode menu. 2> Select the desired mode 3> Confirm and return to live video. mode Display Description Normal Video and voice. 5 sounds level meter will indicate the sound strength. Video off Voice transmission only. Press any key on the Parent unit to turn into Normal mode. Nothing can be seen or listened from Parent unit Press any key on the Parent unit to turn into Normal mode.Sleep When turned on VOX, the Parent unit can be wake up by a suddenly voice like baby crying.](https://usermanual.wiki/Tsuen-Shing/BM-244TX/User-Guide-1030784-Page-6.png)

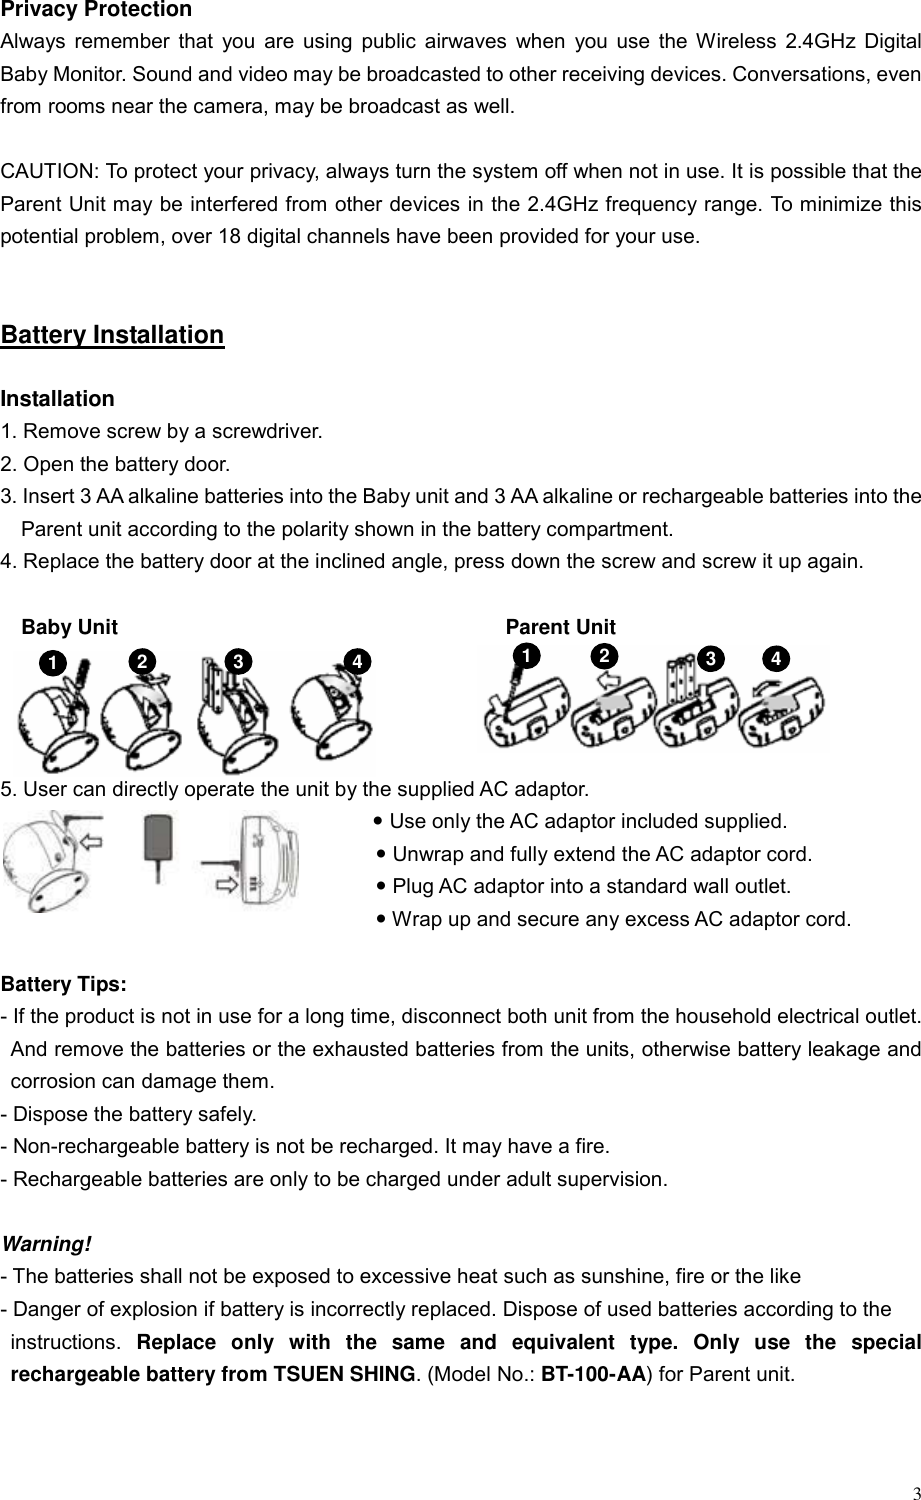
![143> Confirm and return the Night Vision menu. [ Use e/f key to select , MENU key to confirm ] 2. Melody Function There was lullaby function for baby sleeping. Baby unit can play 6 songs melody for baby. This function can be selected by Parent unit. Parent can select Melody 1, Melody 2, ……, Melody 6, Melody All, Melody off for baby. If selected the Melody function, the Settings menu in the Parent unit shows the below: 1> Select Melody option. then confirm and enter Melody menu. 2> Select your desired melody(1-6 or All). 3> Confirm and return Settings menu OR wait for about 10 seconds to return to the live video. [ Use e/f key to select , MENU key to confirm ] The selected melody will be played in the Baby unit even the Parent unit has been powered off. Only select Close in Melody menu of Parent unit, could the songs melody on the Baby unit be turned off. 3. Quality for 2.8” LCD screen version ( Resolution : 320 x 240 Pixel ) When selected 2.8” LCD, Quality setting as the below. Normal quality will have clear video and 2.8” size image but lower compression rate. Good quality will have 2.0” size image but faster compression rate than Normal quality. FCC Statement: Caution: The user is cautioned that changes and modifications made to the equipment without the approval of manufacturer could void the user’s authority to operate this equipment. Notes: This equipment has been tested and found to comply with the limits for a Class B digital device, pursuant to part 15 of the FCC Rules. These limits are designed to provide reasonable protection against harmful interference in a residential installation, this equipment generates, uses and can radiate harmful interference to radio communications. However, there is no guarantee that interference will not occur in a particular installation. If this equipment does cause harmful interference to radio or television reception, which can be determined by turning the equipment off and on, the user is encouraged to try to correct the interference by one or](https://usermanual.wiki/Tsuen-Shing/BM-244TX/User-Guide-1030784-Page-14.png)