Twinhead EM7355 Notebook PC User Manual
Twinhead International Corporation Notebook PC
UserManual.wiki
>
Twinhead
>
EM7355 User Manual
>
User Manual
Contents
1.
User Manual
2.
User manual
User Manual
Navigation menu
Upload a User Manual
Namespaces
Wiki Guide
HTML
PDF
Info
Views
User Manual
Discussion / Help
Navigation

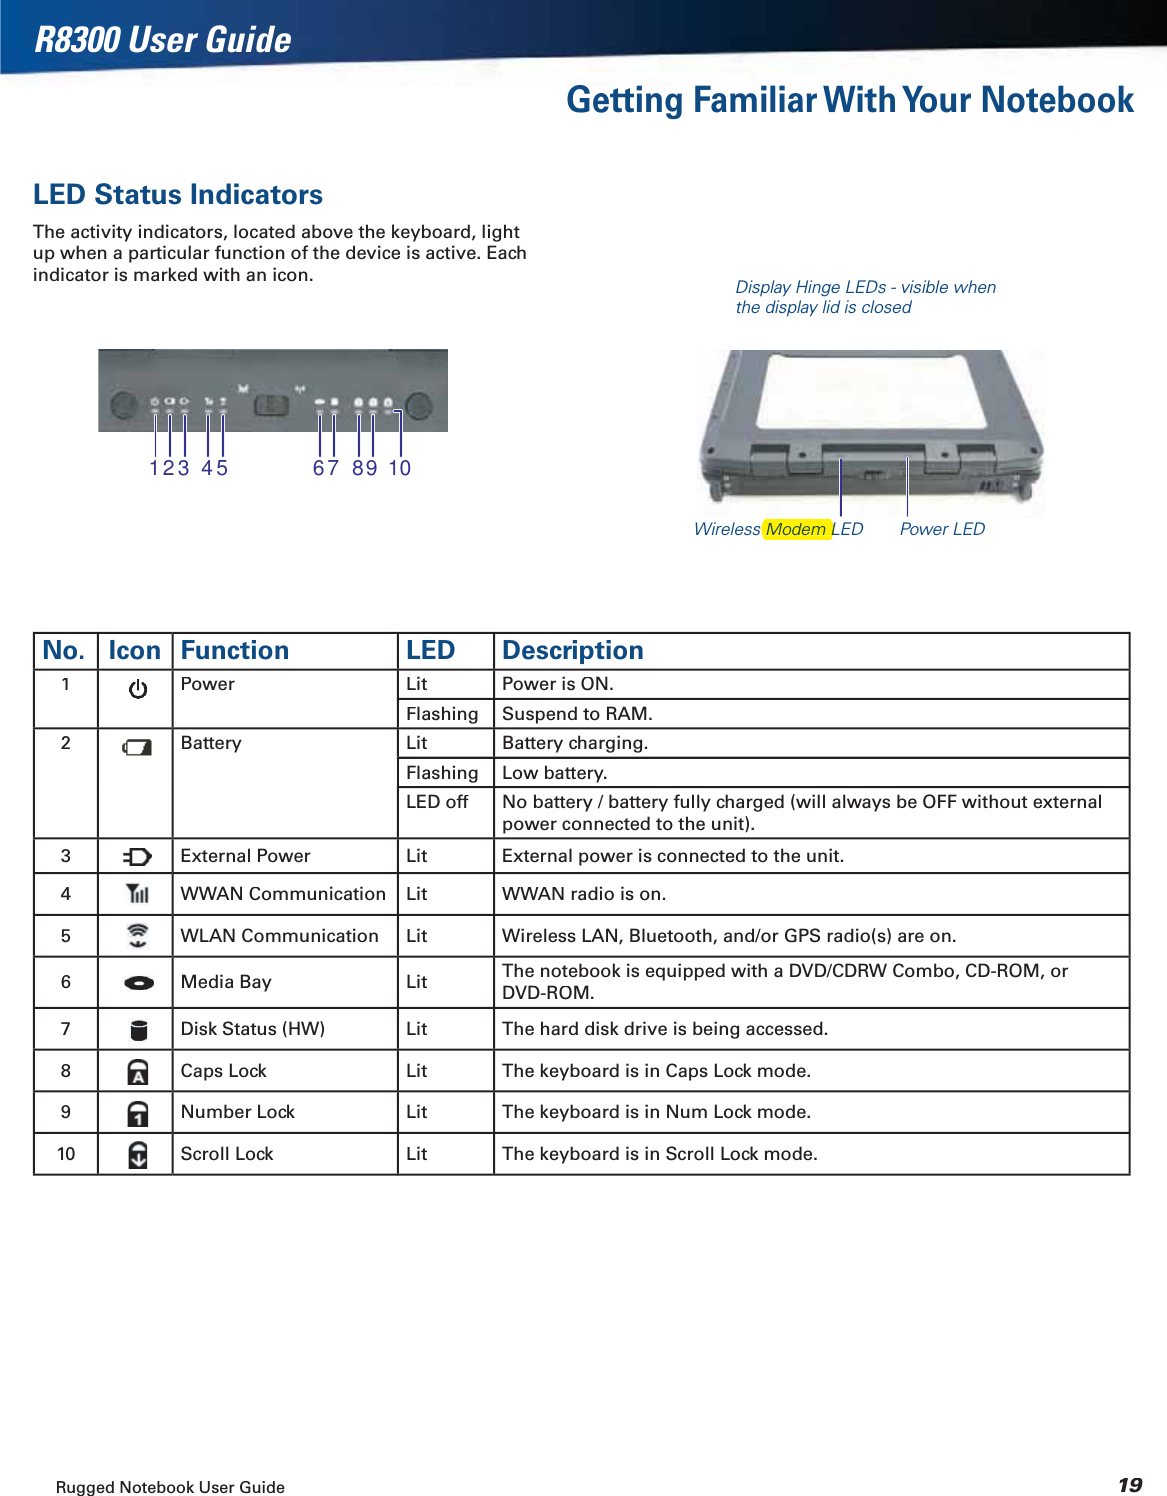
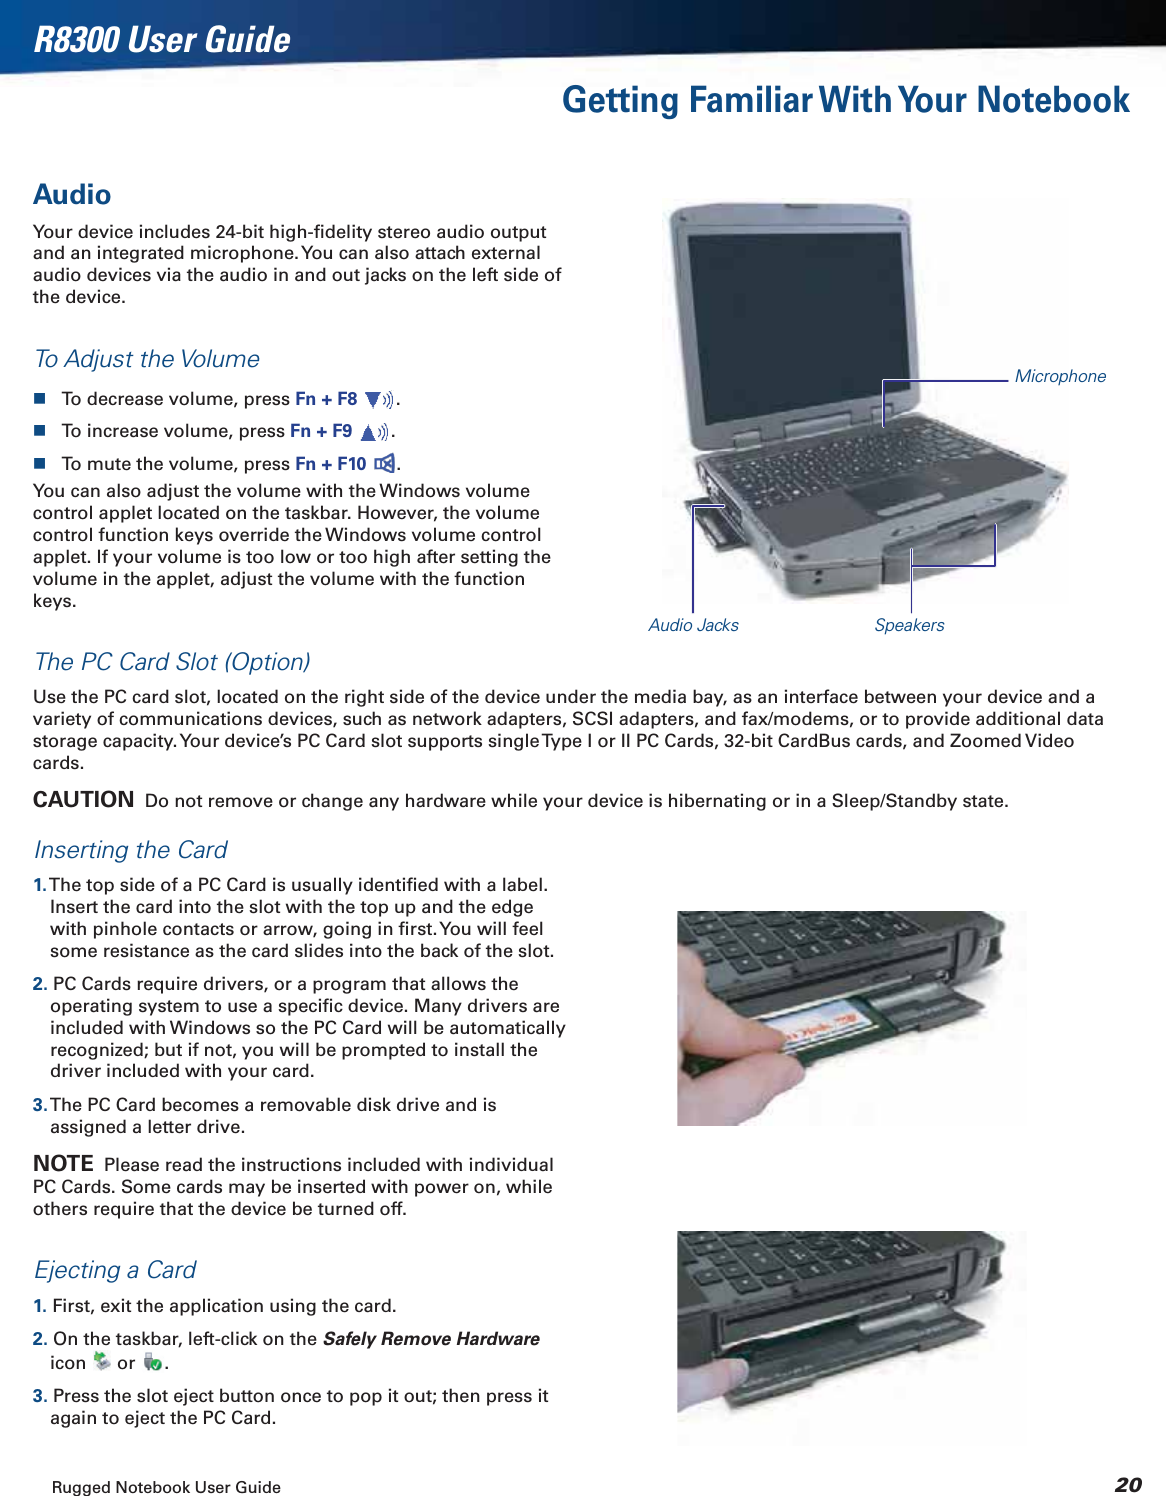
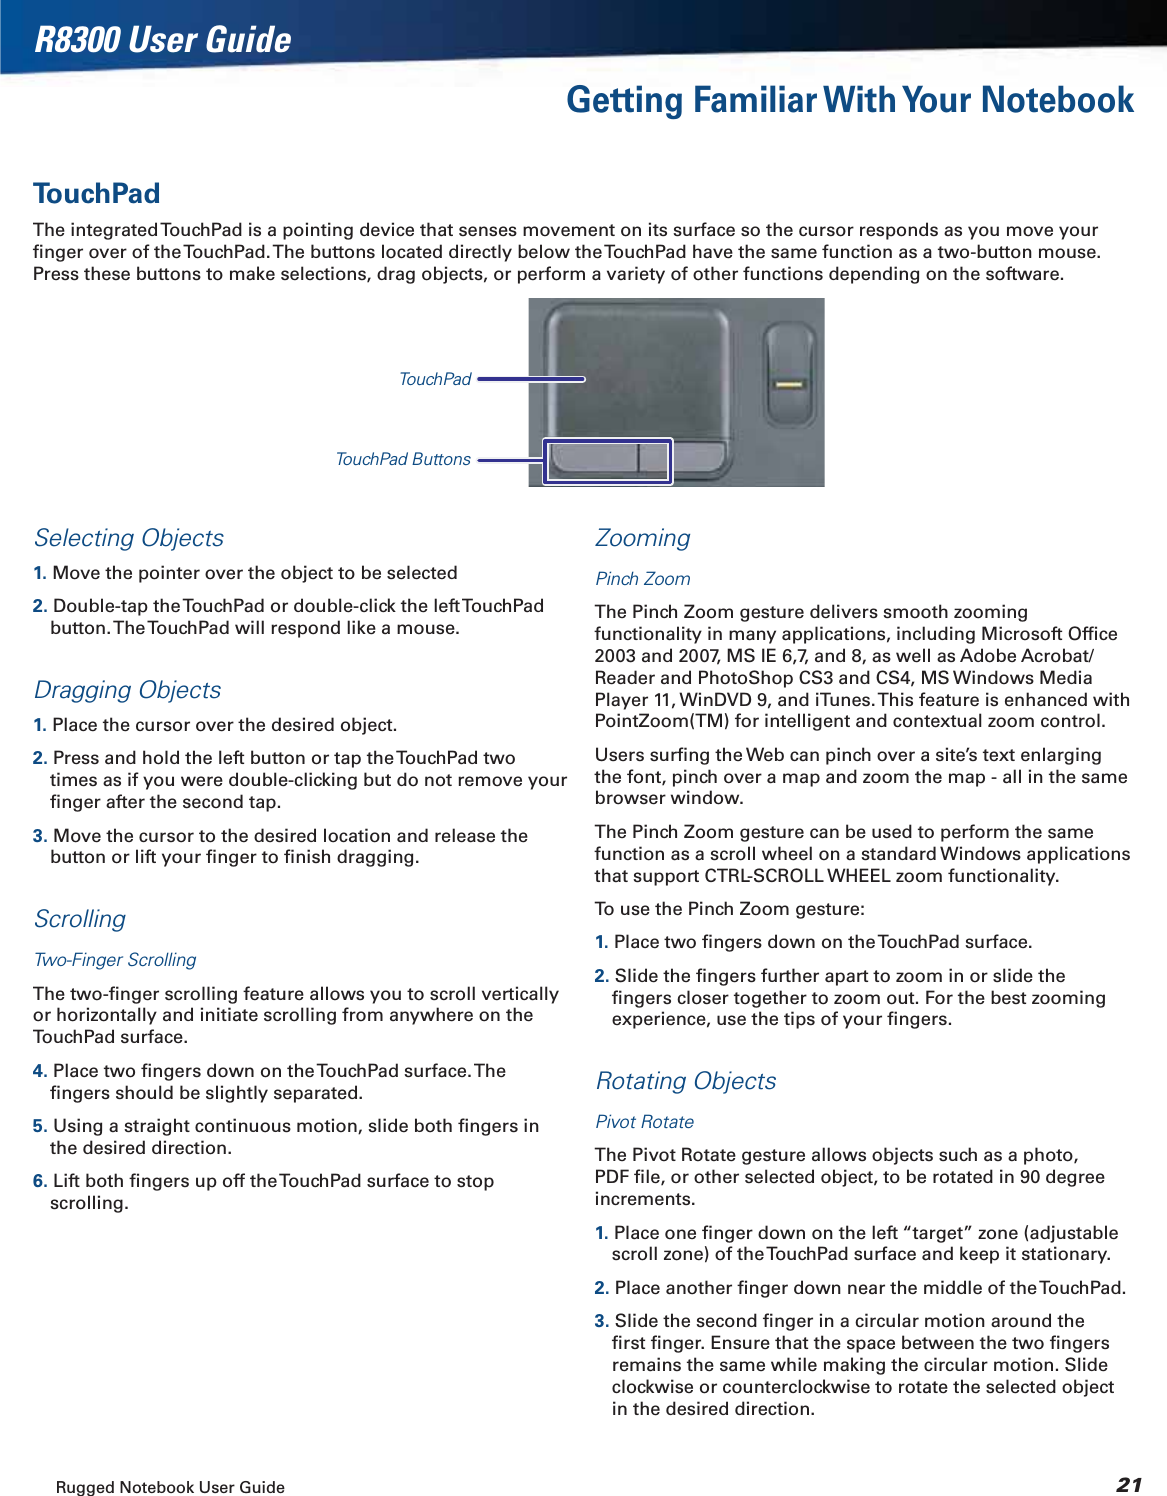
![Rugged Notebook User Guide 6R8300 User GuideNotices, Compliance and SafetyWarnings and CautionsWARNING It is important that only authorized personnel service and attempt repairs on the equipment. Unauthorized service or repair may void the warranty and any maintenance contract in effect for the equipment. Unauthorized service personnel might be subject to shock hazard on some equipment if removal of protective covers is attempted.There is danger of explosion if the battery is incorrectly replaced. Replace only with the same or equivalent type recommended by the manufacturer. Dispose of used batteries according to the manufacturer’s instructions.The product you have purchased is powered by a rechargeable battery. The battery is recyclable and, under various state and local laws, it may be illegal to dispose of this battery into the municipal waste stream. Do not crush the battery or place it in a fire. Check with your local solid-waste officials for details on recycling options or proper disposal.CAUTION Internal components of the notebook will be damaged if exposed to contaminants. When dust covers, the PC card door, or the bottom access panel are open on the device, shield the unit from all contaminants such as liquids, rain, snow, and dust.This device may contain a WLAN radio transmitter, a WPAN radio transmitter, and a WAN radio transmitter.Each internal radio may or may not have an individual FCC Identifier label. That FCC Identifier label is not applicable to this configuration. Only the external FCC ID label is applicable.Only the antenna with which an intentional radiator is authorized may be used with the intentional radiator.The WAN embedded antenna location is in the upper center edge of the display screen and is not to be modified.The WPAN embedded antenna location is near the lower left edge of the Keyboard and is not to be modified.The WLAN embedded dual antennas are located internally in the upper right and left edges of the display screen and are not to be modified.To comply with FCC RF exposure requirements when using the WAN radio transmitter, a minimum separation distance of 20 cm must be maintained between the upper center edge of the display screen antenna and all users/bystanders.When using the WLAN transmitter, a minimum separation distance of 20 cm must be maintained between the upper right and left edges of the display screen and all users/bystanders.,The WAN transmitter, WLAN transmitter and WPAN transmitter should be turned off before carrying the laptop PC in order to comply with FCC RF exposure requirements.The equipment has been approved to [Commission Decision “CTR21”] for pan-European single terminal connection to the Public Switched Telephone Network (PSTN). However, due to differences between individual PSTNs provided in different countries the approval does not, of itself, give an unconditional assurance of successful operation on every PSTN network termination point.In the event of problems, you should contact your equipment supplier in the first instance.SafetyDo not proceed beyond a WARNING or CAUTION until the indicated conditions are fully understood and met.Read these instructions carefully. Following these guidelines will help prevent damage to your device and help protect your personal safety.Read and follow all WARNINGS,CAUTIONS and instructions marked on the product and noted in this documentation.Before using your device, read the Power Management section to familiarize yourself with basic battery information and ensure optimum performance.CAUTION To reduce the risk of fire, only use a No. 26 AWG or larger telecommunication line cord.CAUTION This device is designed to be used with the provided dedicated AC Adapter or Vehicle Adapter.Unplug the device from the power outlet before cleaning.Use a damp cloth for cleaning. Aerosols, solvents, or strong detergents are not recommended cleaning solutions and may void your warranty. For system decontamination recommendations please contact your service technician.Slots and openings in the device case are for ventilation purposes. Do not block or cover these openings or the system could overheat.Do not place the product on a soft surface such as a bed, sofa, or rug where the ventilation slots and openings may be blocked.Do not place this product near or over a radiator or heat register.Do not place this product in a built-in installation unless proper ventilation is provided.Do not operate the device at temperatures above 140°F (60°C) or below -10°F (-23°C).Do not store the device at temperatures above 167°F (75°C) or below -67°F (-55°C).Do not step on or place anything on the power cord.Do not slam the display lid when you close it.Do not place any object on top of the device.If you use the device with an extension cord, ensure that](https://usermanual.wiki/Twinhead/EM7355.User-Manual/User-Guide-2262301-Page-6.png)

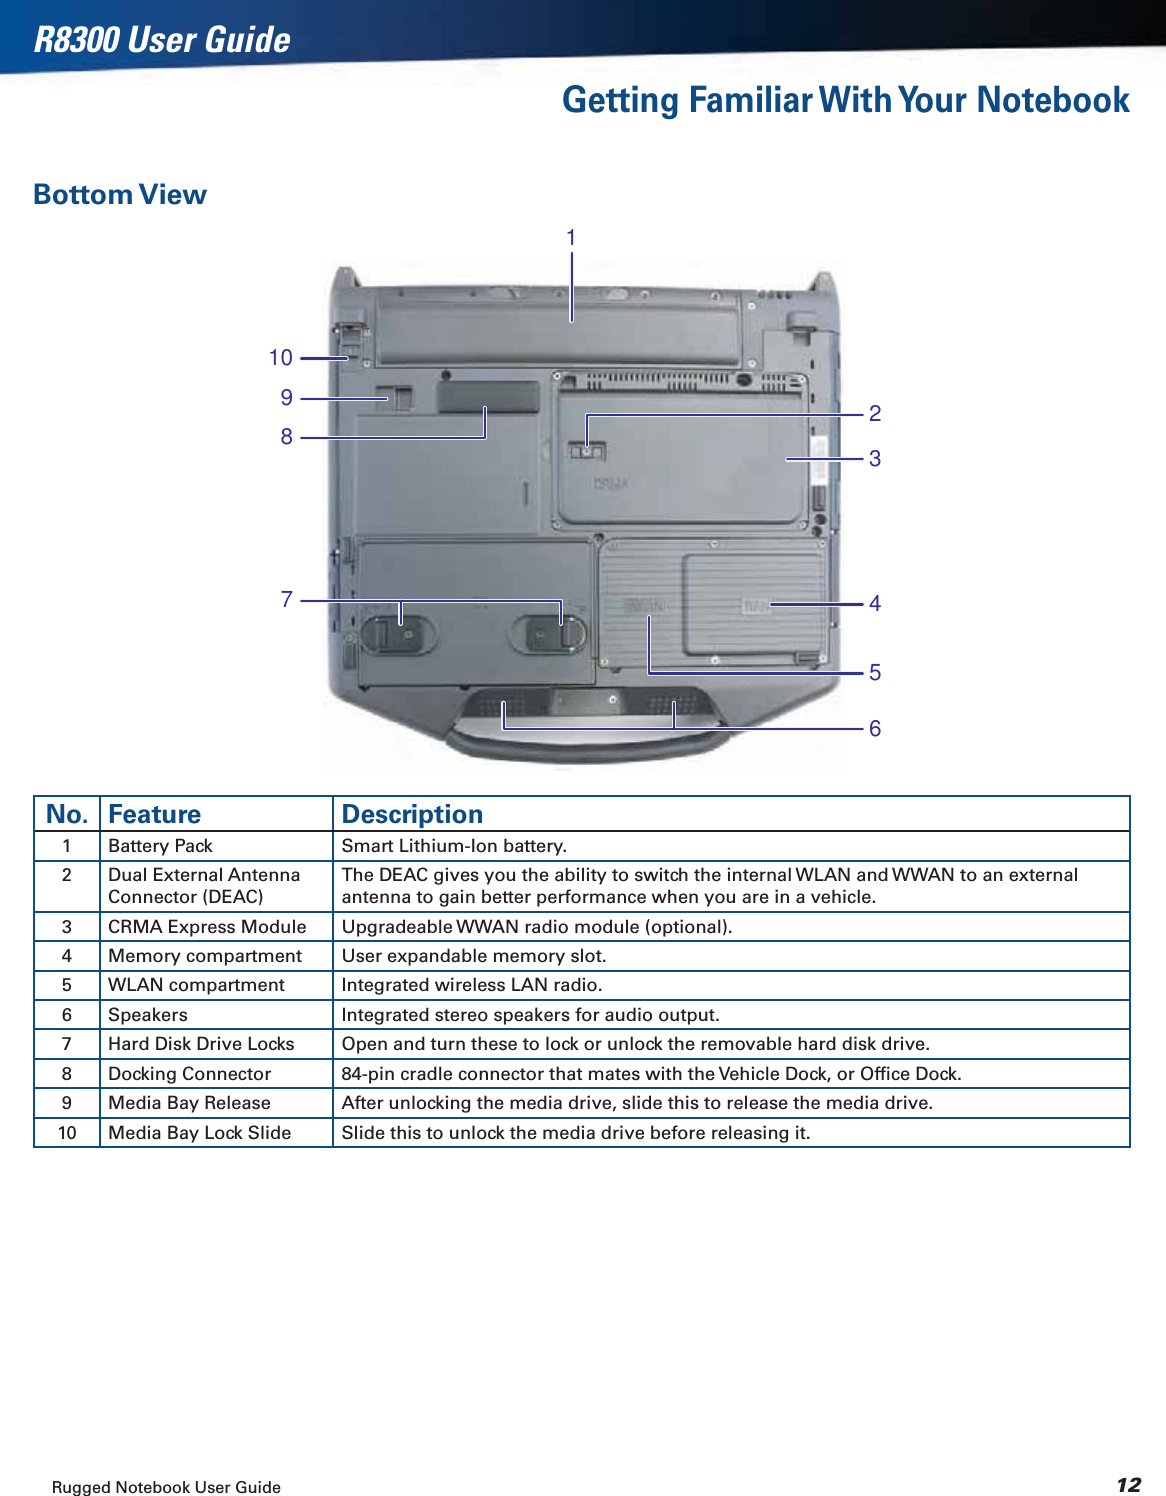
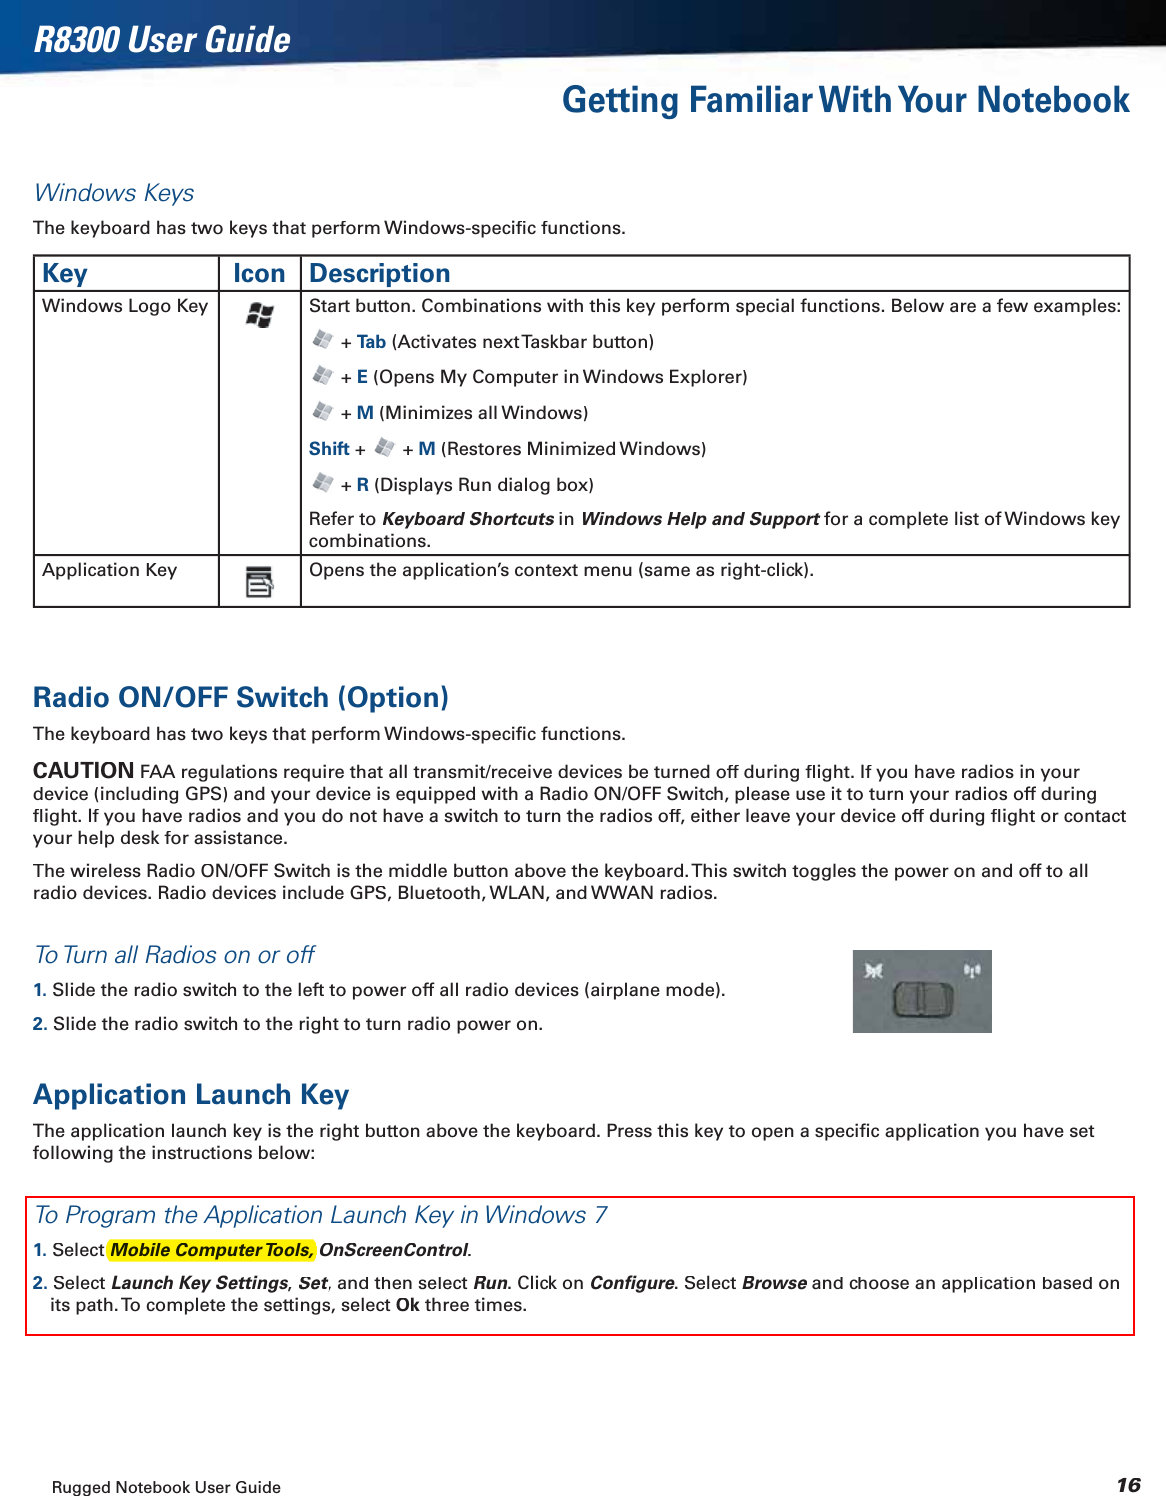


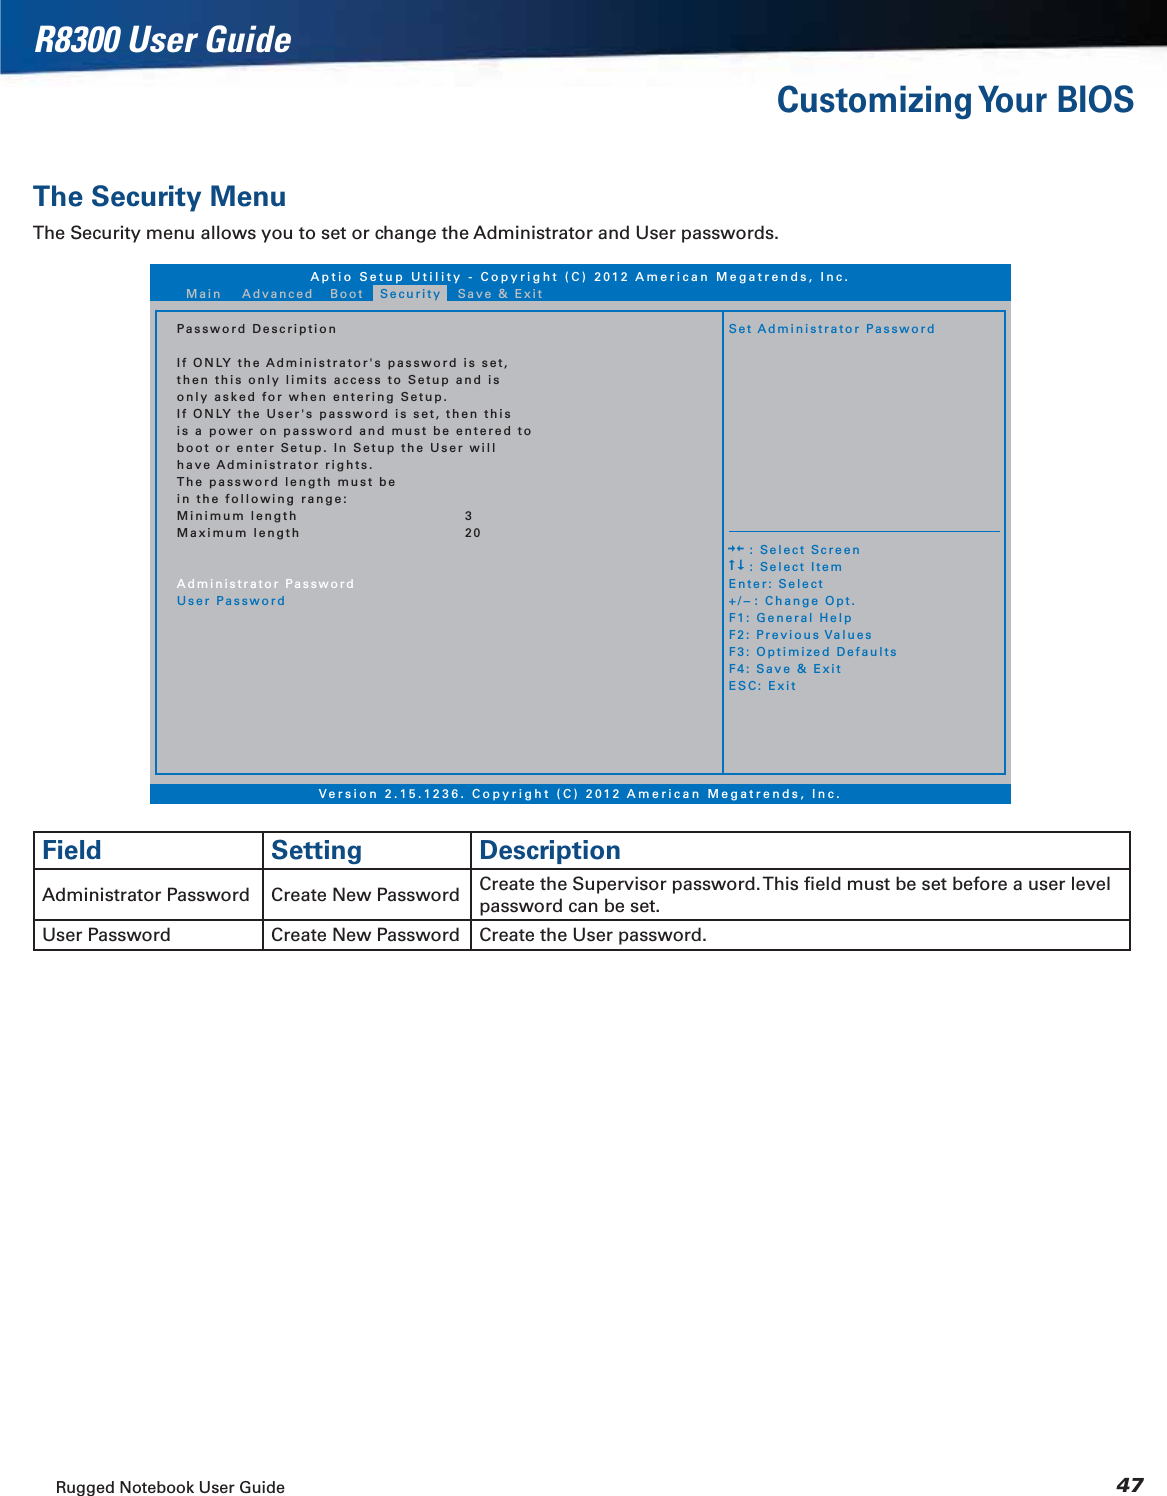
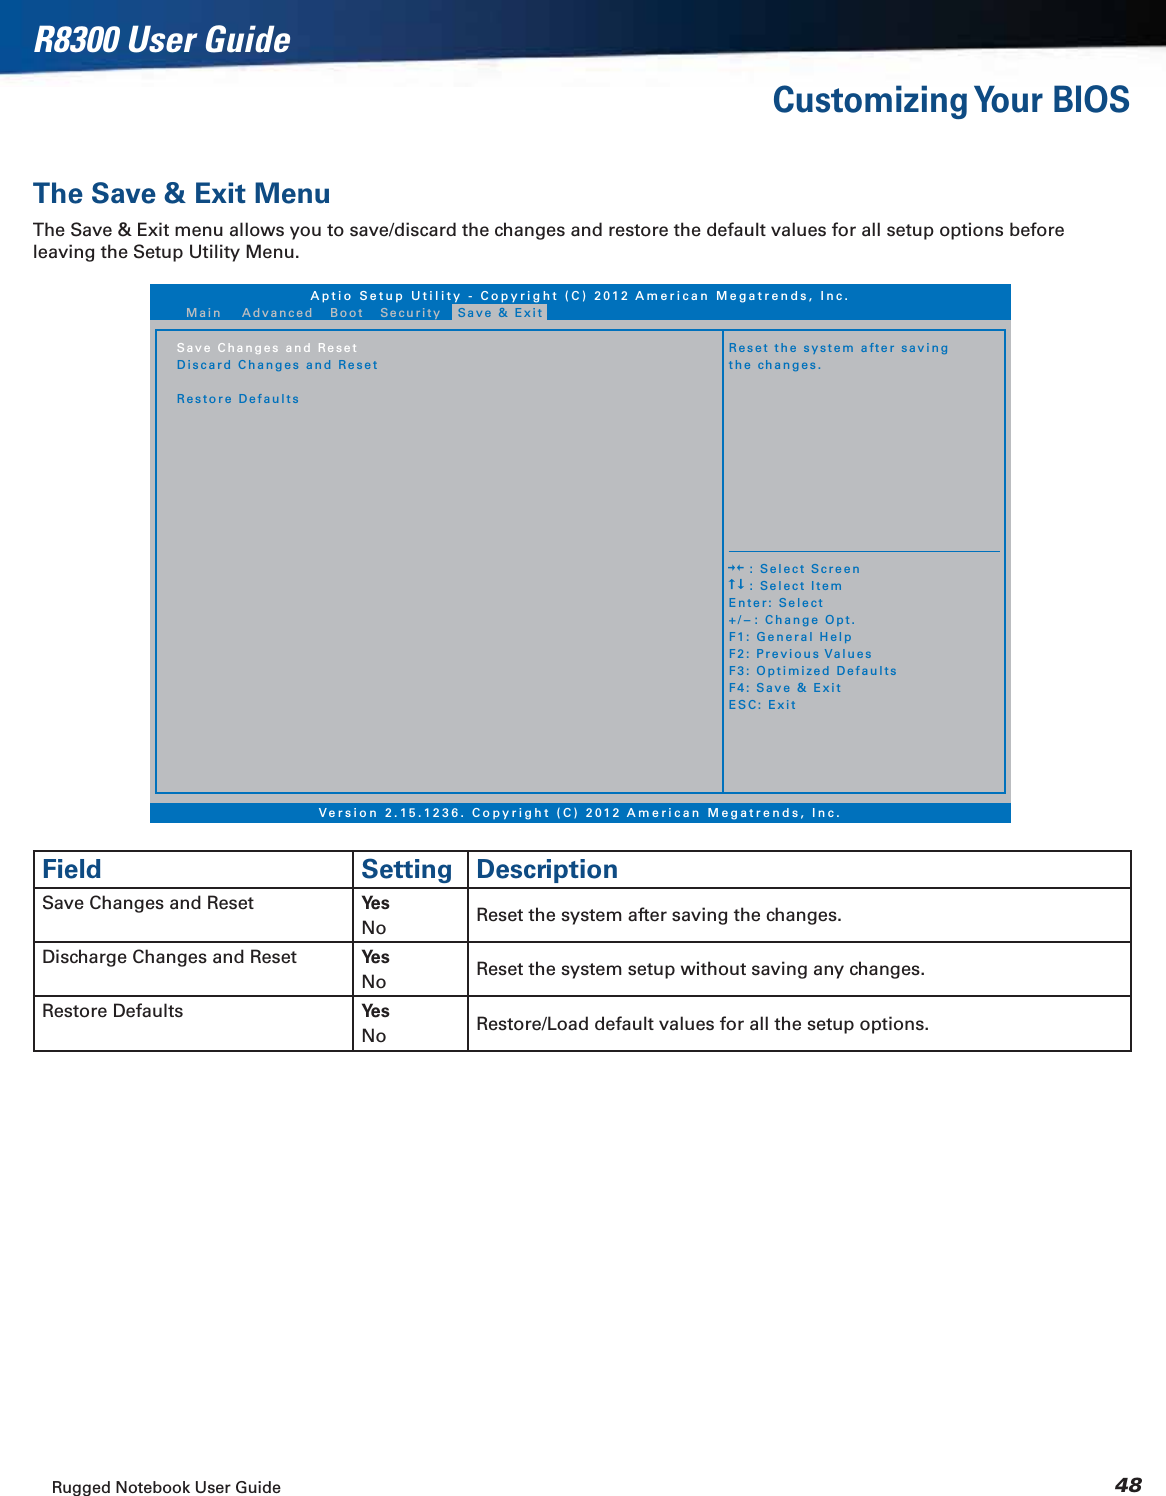
![Rugged Notebook User Guide 37R8300 User GuideCustomizing Your BIOSWhen you turn your device on, the system reads the BIOS Settings to test and initialize components and make sure everything runs properly when the system is operating. You can use the Setup Utility to change your device’s startup configuration. For example, you can change your system’s security routine.This notebook is configured with a set of default values. The default values may not be appropriate for your work environment. For example, you can set a boot password to protect your system when booting.CAUTION It is recommended that you use the default settings. If you set incorrect system option settings, the system may not run properly.In this section the default field values are shown in bold.Starting the Setup UtilityYou can only start the Setup Utility shortly after the device has been turned on or rebooted. To execute a controlled reboot, select Start, Shut Down, Restart. Shortly after the device restarts, press the Del key to enter Setup. Navigation and HelpThe Setup Utility has five menu options in the Menu Bar at the top of the window. Press the left or right arrow keys to cycle through these menu screens:Main: Displays basic system information and allows you to set the date and timeAdvanced: Use to set the advanced featuresBoot: Use to select the sequence of boot devices that are searched to load an operating systemSecurity: Use to set user and supervisor passwordsSave & Exit: Use to exit the current Setup sessionThe Field Help Window is on the right side of each menu. It displays the help text for the currently selected field. This text updates as you move the cursor from field to field.The General Help Window describes the legend keys. You can display it by pressing F1 on any menu.CAUTION Incorrect settings can cause your system to malfunction. To correct mistakes, restore the Optimized Defaults by pressing F3.Aptio Setup Utility - Copyright (C) 2012 American Megatrends, Inc.Version 2.15.1236. Copyright (C) 2012 American Megatrends, Inc.BIOS InformationBIOS VersionEC VersionBuild Date and TimeSystem InformationIntel(R) Core(TM) i7-3687U CPU @ 2.10GHzTotal MemoryMain Board VersionIntel PCH SKU NameME FW VersionME Firmware SKUSystem DateSystem TimeRC.000.00.0603/20/2014 13:04:0716384 MB (DDR3)BQM778.1.51.14715MB[Thu 01/02/2014][19:14:50]Sets the Date. Use Tap toswitch between Data elements. : Select Screen : Select ItemEnter: Select+/-: Change Opt.F1: General HelpF2: Previous ValuesF3: Optimized DefaultsF4: Save & ExitESC: ExitMain Advanced Boot Security Save & ExitField Help WindowMenu Bar](https://usermanual.wiki/Twinhead/EM7355.User-Manual/User-Guide-2262301-Page-37.png)
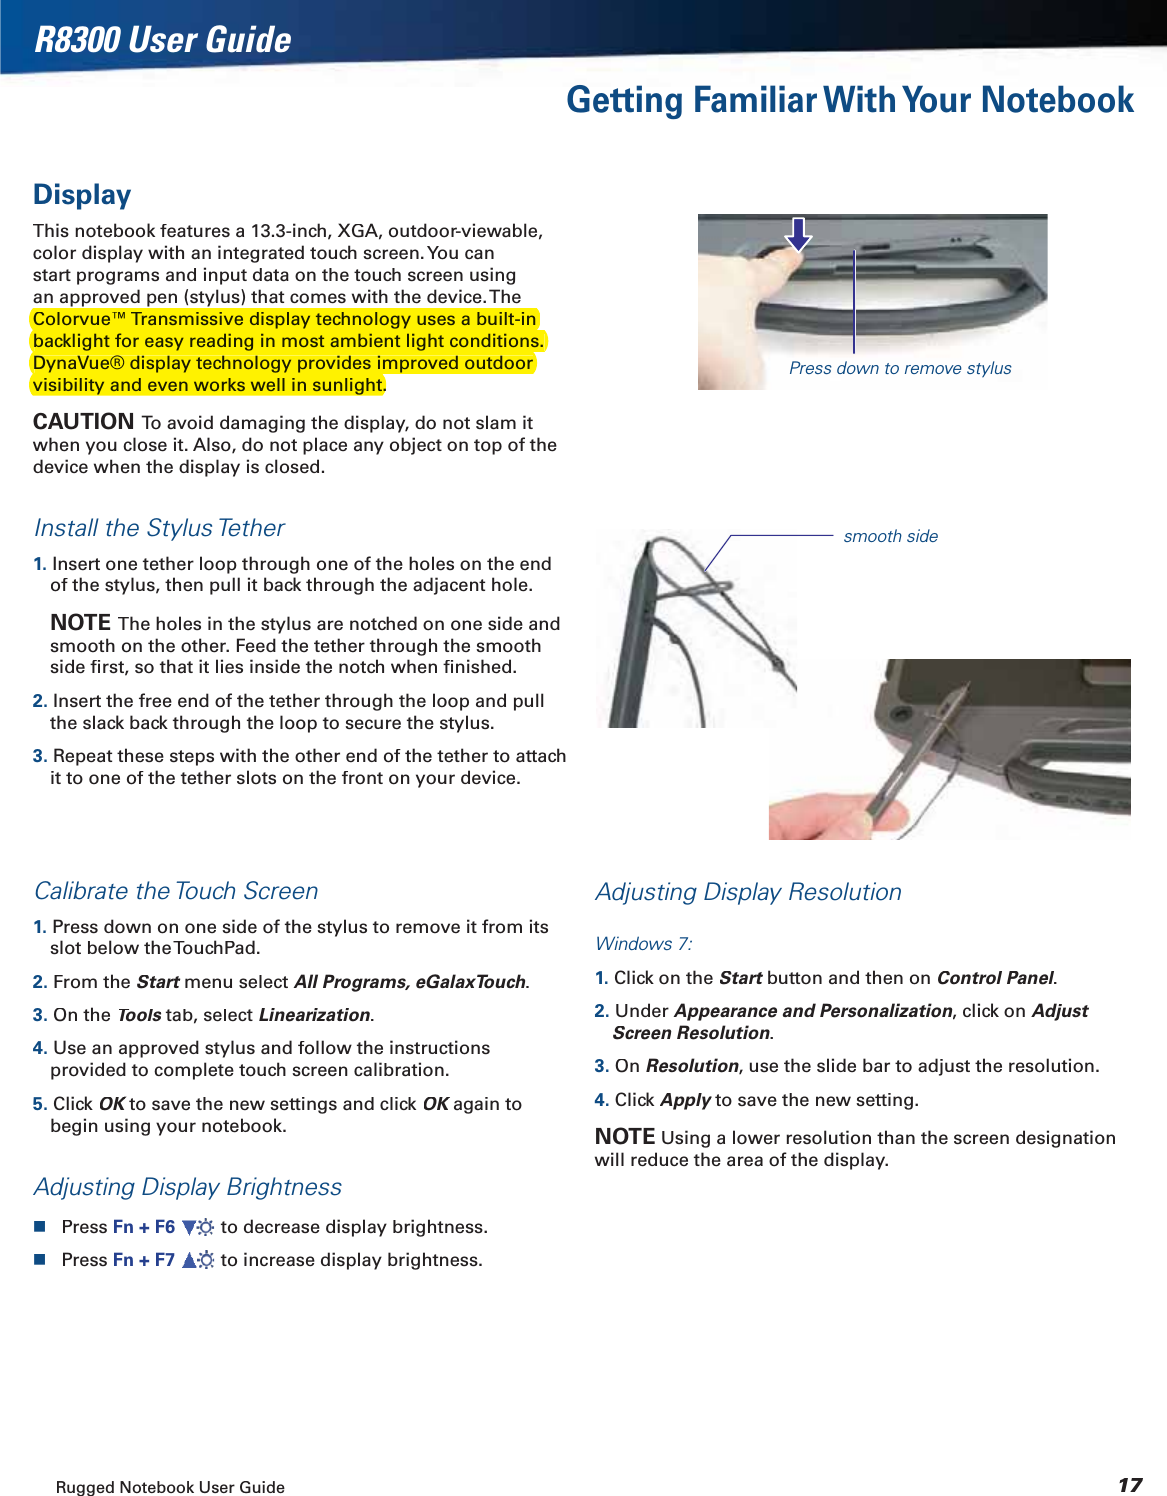
![Rugged Notebook User Guide 38R8300 User GuideCustomizing Your BIOSThe Main MenuThe Main menu displays detailed information about the device, including the system time and date.Aptio Setup Utility - Copyright (C) 2012 American Megatrends, Inc.Version 2.15.1236. Copyright (C) 2012 American Megatrends, Inc.BIOS InformationBIOS VersionEC VersionBuild Date and TimeSystem InformationIntel(R) Core(TM) i7-3687U CPU @ 2.10GHzTotal MemoryMain Board VersionIntel PCH SKU NameME FW VersionME Firmware SKUSystem DateSystem TimeRC.000.00.0603/20/2014 13:04:0716384 MB (DDR3)BQM778.1.51.14715MB[Thu 01/02/2014][19:14:50]Sets the Date. Use Tap toswitch between Data elements. : Select Screen : Select ItemEnter: Select+/-: Change Opt.F1: General HelpF2: Previous ValuesF3: Optimized DefaultsF4: Save & ExitESC: ExitMain Advanced Boot Security Save & ExitField Setting DescriptionBIOS Information N/A Displays the BIOS version detected during boot up.System Information N/A Displays the amount of memory detected during the boot process.System Date MM/DD/YYYYSets the date. The value set takes effect immediately.NOTE Once a change is made, press the Enter key to continue.System Time HH:MM:SSSets the time. The time is displayed in 24 hour format. The value set takes effect immediately.NOTE Once a change is made, press the Enter key to continue.](https://usermanual.wiki/Twinhead/EM7355.User-Manual/User-Guide-2262301-Page-38.png)
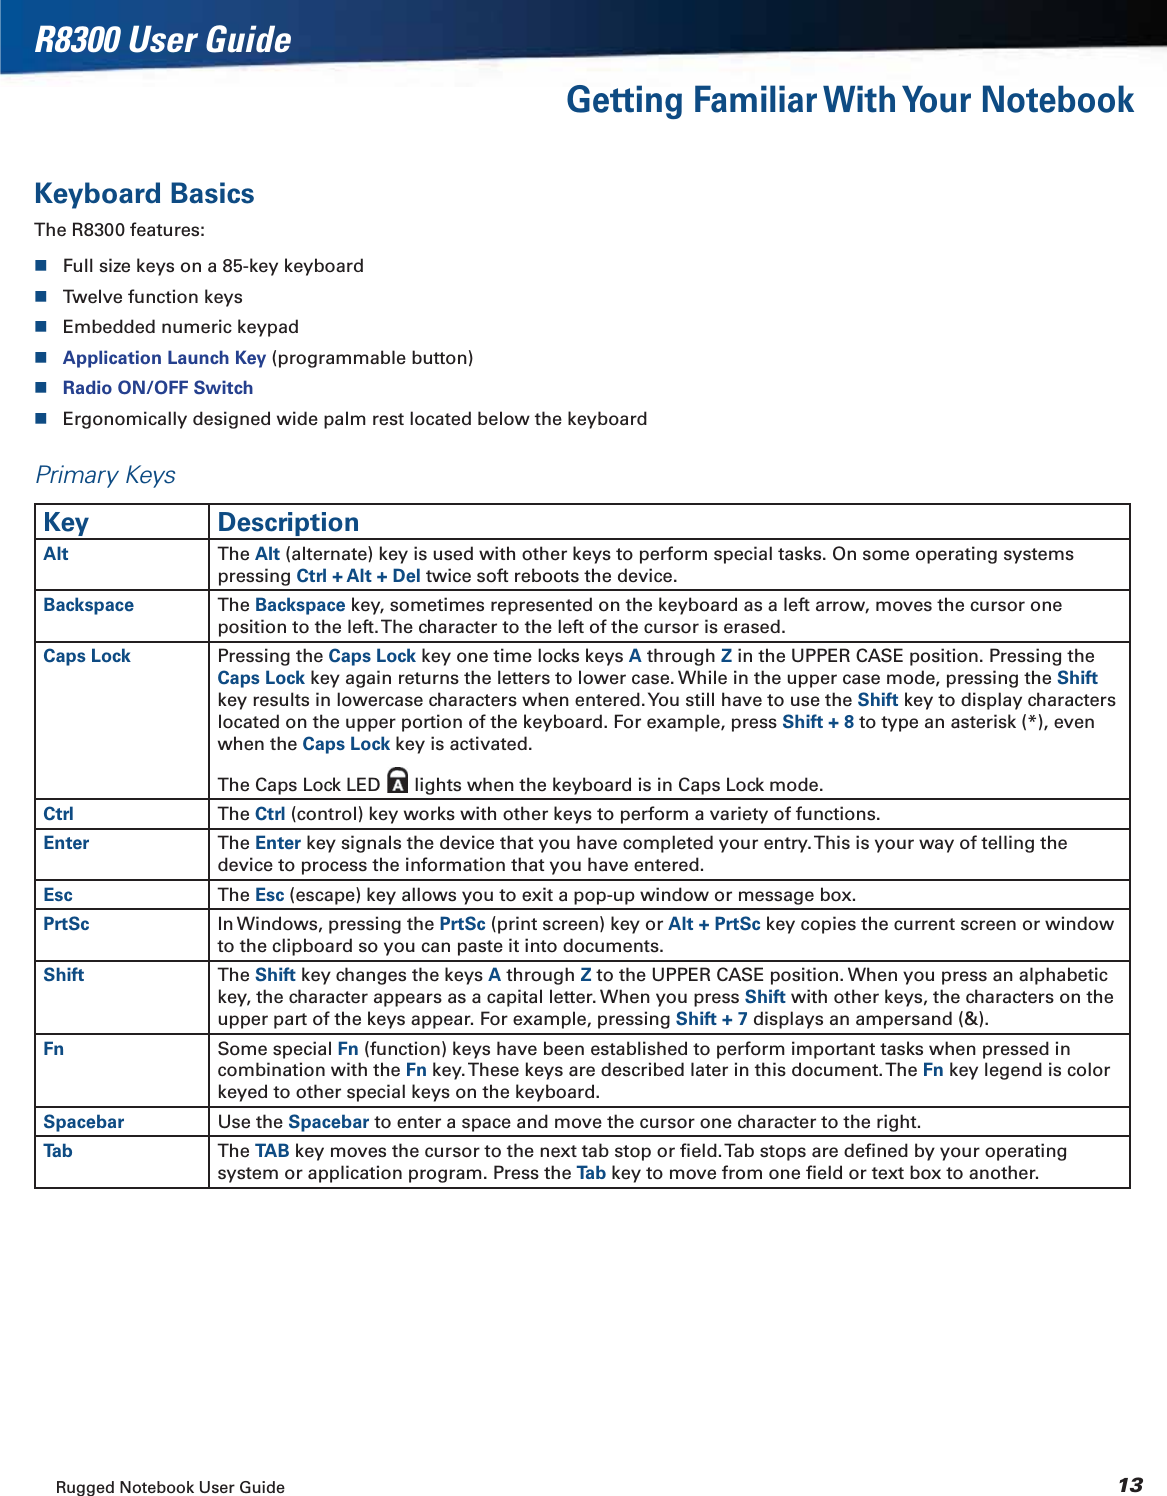
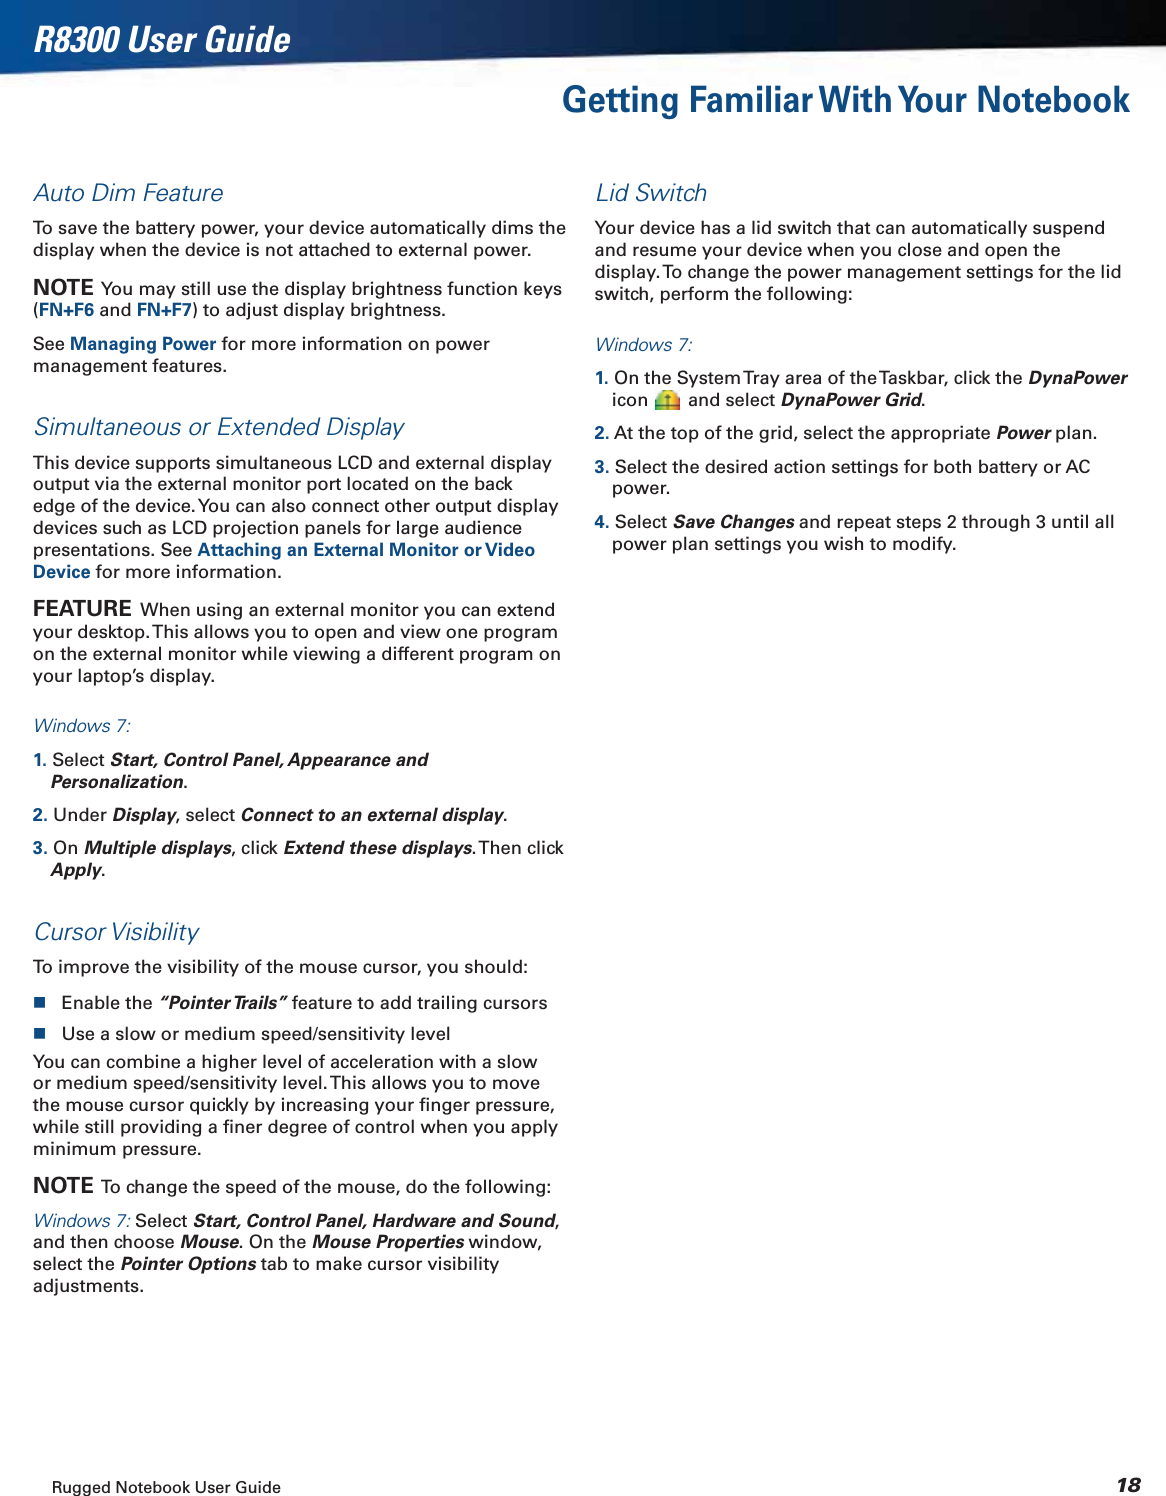
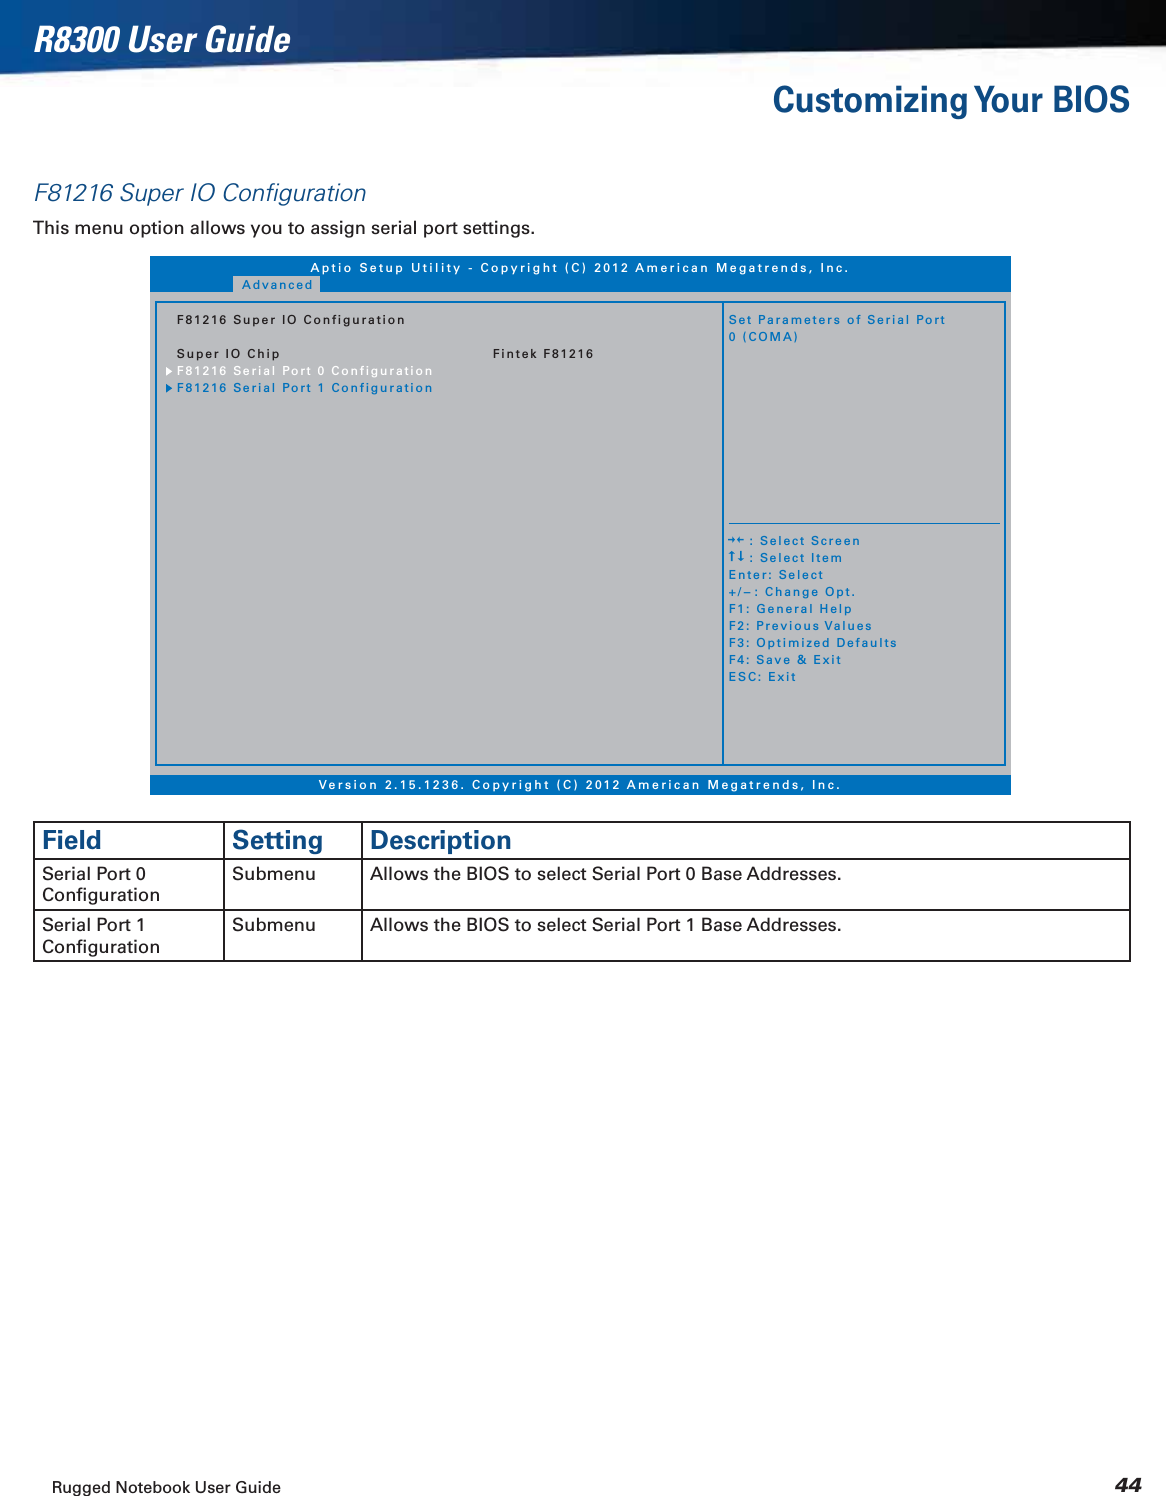
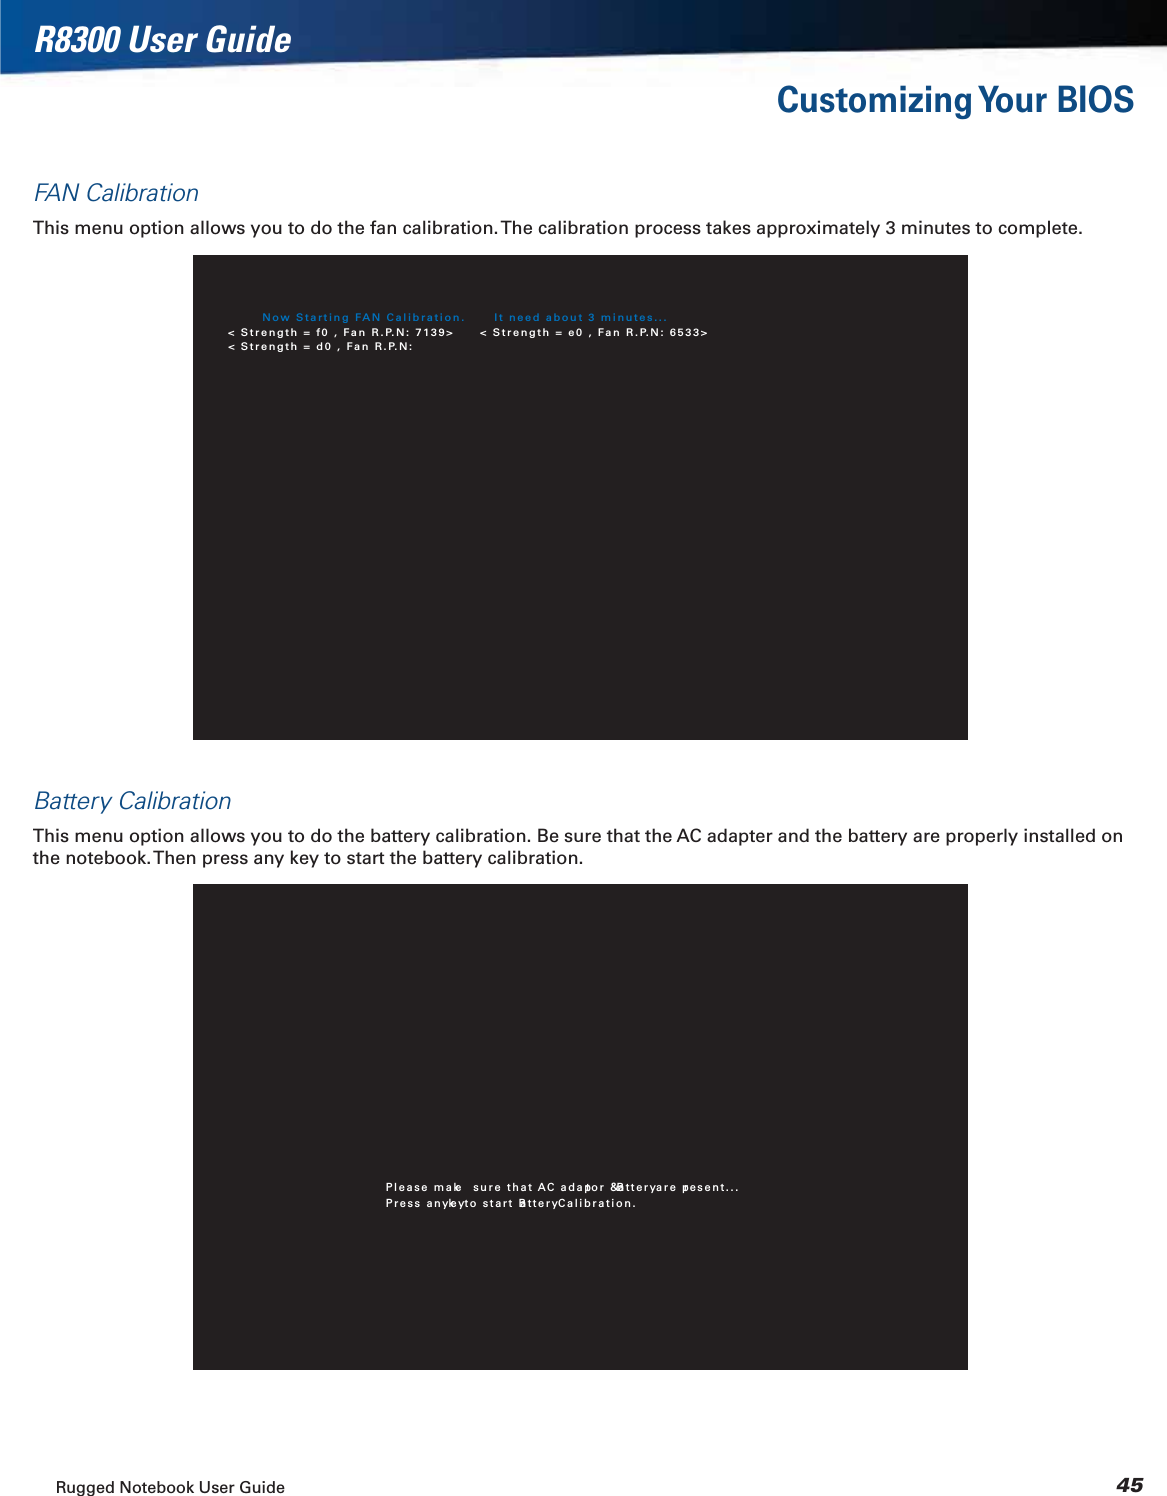
![Rugged Notebook User Guide 39R8300 User GuideCustomizing Your BIOSThe Advanced MenuThe Advanced menu provides the user with the ability to configure specific system settings.Active Processor CoresExecute Disable BitIntel Virtualization TechnologySATA Mode SelectionBattery Low Warning BeepResume on AC Power InsertionKeyboard backlight timer settingWake on LANTrusted ComputingIntel TXT(LT) ConfigurationRadio Devices ConfigurationStealth Mode IO ConfigurationF81216 Super IO ConfigurationFAN CalibrationBattery CalibrationNumber of cores to enable ineach processor package.[All][Enabled][Enabled][AHCI][Enabled][Disabled][Keyboard Backlight Off][Disabled]Main Advanced Boot Security Save & ExitAptio Setup Utility - Copyright (C) 2012 American Megatrends, Inc.Version 2.15.1236. Copyright (C) 2012 American Megatrends, Inc. : Select Screen : Select ItemEnter: Select+/-: Change Opt.F1: General HelpF2: Previous ValuesF3: Optimized DefaultsF4: Save & ExitESC: ExitField Setting DescriptionActive Processor Cores All1Sets the number of cores to enable in each processor package.Execture Disable Bit EnabledDisabledWhen enabled, XD can prevent certain classes of malicious buffer overflow attacks when combined with a supporting OS.Intel Virtualization Technology EnabledDisabledWhen enabled, a VMM can utilize the additional hardware capabilities provided by Vanderpook Technology.SATA Mode Selection AHCIIDEDetermines how SATA controller(s) operate.Battery Low Warning Beep EnableDisableWhen enabled, the system will sound 3 beeps per 10 seconds during both battery capacity below 7%.Resume on AC Power Insertion DisableEnableWhen enabled, the system will wake from standby or hibernation state when the AC power is plugged.Keyboard backlight timer setting Keyboard Backlight Off5~240 MinutesSelects the length of time for keyboard backlight to remain lit before turning off. If the device is left idle for a specified period of time, the keyboard backlight will automatically turn off to converse the battery power.Wake on LAN DisabledEnabledEnables or disables integrated LAN to wake the system. (The Wake On LAN cannot be disabled if ME is on at Sx state.)Trusted Computing Submenu Trusted Computing SettingsIntel TXT(LT) Configuration Submenu Intel Trusted Execution TechnologyRadio Devices Configuration Submenu Enable/Disable Radio Devices](https://usermanual.wiki/Twinhead/EM7355.User-Manual/User-Guide-2262301-Page-39.png)
![Rugged Notebook User Guide 40R8300 User GuideCustomizing Your BIOSField Setting DescriptionStealth Mode Configurations Submenu Stealth Mode SetupF81216 Super IO Configuration Submenu System Super IO Chip ParametersFAN Calibration Submenu FAN calibrationBattery Calibration Submenu Battery CalibrationTrusted ComputingTrusted Platform Module (TPM) is a secure micro-controller with added cryptographic functions.ConfigurationSecurity Device SupportCurrent Status InformationSUPPORT TURNED OF FEnables or Disables BIOSsupport for security device.O.S. will not show SecurityDevice. TCG EFI protocol andINT1A interface will not be available.[Disabled ]AdvancedAptio Setup Utility - Copyright (C) 2012 American Megatrends, Inc.Version 2.15.1236. Copyright (C) 2012 American Megatrends, Inc. : Select Screen : Select ItemEnter: Select+/-: Change Opt.F1: General HelpF2: Previous ValuesF3: Optimized DefaultsF4: Save & ExitESC: ExitField Setting DescriptionSecurity Device SupportDisableEnableEnables or disables BIOS support for security device. Operating system will not show Security Device. TCG EFI protocol and INT1A interface will not be available.Current Status Information N/A Displays the TPM status.](https://usermanual.wiki/Twinhead/EM7355.User-Manual/User-Guide-2262301-Page-40.png)
![Rugged Notebook User Guide 41R8300 User GuideCustomizing Your BIOSIntel TXT(LT) ConfigurationThis menu option only can be configured if the SMX is enabled. VT and VT-d support must be also enabled prior to TXT.Intel Trusted Execution Technology ConfigurationIntel TXT support only can be enabled/disabled if SMXis enabled. VT and VT-d support must also be enabledprior to TXT.Secure Mode Extensions (SMX) EnabledIntel TXT(LT) Support [Disabled]AdvancedAptio Setup Utility - Copyright (C) 2012 American Megatrends, Inc.Version 2.15.1236. Copyright (C) 2012 American Megatrends, Inc. : Select Screen : Select ItemEnter: Select+/-: Change Opt.F1: General HelpF2: Previous ValuesF3: Optimized DefaultsF4: Save & ExitESC: ExitField Setting DescriptionSecure Mode Extensions (SMX) N/A Displays the SMX status.Intel TXT(LT) Support N/A Displays the Intel TXT(LT) Support status.](https://usermanual.wiki/Twinhead/EM7355.User-Manual/User-Guide-2262301-Page-41.png)
![Rugged Notebook User Guide 42R8300 User GuideCustomizing Your BIOSRadio Devices ConfigurationThis menu option allows you to configure the Bluetooth, WLAN, and GPS function.BluetoothWLANWWANGPSSelect the item to turn on/offthe function of bluetooth[Enabled][Enabled][Disabled ][Enabled]AdvancedAptio Setup Utility - Copyright (C) 2012 American Megatrends, Inc.Version 2.15.1236. Copyright (C) 2012 American Megatrends, Inc. : Select Screen : Select ItemEnter: Select+/-: Change Opt.F1: General HelpF2: Previous ValuesF3: Optimized DefaultsF4: Save & ExitESC: ExitField Setting DescriptionBluetooth EnableDisableEnables or disable the Bluetooth function.WLAN EnableDisableEnables or disable the WLAN function.GPS EnableDisableEnables or disable the GPS function.](https://usermanual.wiki/Twinhead/EM7355.User-Manual/User-Guide-2262301-Page-42.png)
![Rugged Notebook User Guide 43R8300 User GuideCustomizing Your BIOSStealth Mode ConfigurationsStealth mode is a feature that allows the device to be used in an environment where sound and light could be dangerous or disruptive.Stealth Mode FunctionLEDsFANSystem SoundDisplay BrightnessRa dio DeviceStealth Mode Function[Disabled ][Enabled][Enabled][Enabled][Enabled][Enabled]AdvancedAptio Setup Utility - Copyright (C) 2012 American Megatrends, Inc.Version 2.15.1236. Copyright (C) 2012 American Megatrends, Inc. : Select Screen : Select ItemEnter: Select+/-: Change Opt.F1: General HelpF2: Previous ValuesF3: Optimized DefaultsF4: Save & ExitESC: ExitField Setting DescriptionStealth Mode FunctionDisabledEnabledWhen disabled, the LEDs, fan, system sound, display brightness, and system radio devices setting operate normally.LEDs EnabledDisabledEnables or disables the LED indicators when the Stealth mode is enabled.FAN EnabledDisabledEnables or disables the FAN function when the Stealth mode is enabled.System Sound EnabledDisabledEnables or disables the system output sound setting when the Stealth mode is enabled.Display Brightness EnabledDisabledEnables or disables the display brightness setting when the Stealth mode is enabled.Radio Device EnabledDisabledEnables or disables the system radio devices setting when the Stealth mode is enabled.](https://usermanual.wiki/Twinhead/EM7355.User-Manual/User-Guide-2262301-Page-43.png)
![Rugged Notebook User Guide 46R8300 User GuideCustomizing Your BIOSThe Boot MenuThe Boot menu allows you to configure the boot settings and boot sequence, depending on your configuration. The boot device fields are dynamic and change depending on the devices installed on your notebook during that boot sequence. For example, if you have a DVD/CDRW Combo drive or a USB floppy drive installed, they appear as options in the boot device fields. If you only have a hard disk drive, it will be the only option that displays. When you select a device, it is disabled in the other boot device fields.Bootup NumLock StateLaunch CSMBoot Option PrioritiesBoot Option #1Boot Option #2Boot Option #3Select the keyboard NumLockstate[Off][Enabled][P1: HL-DT-ST DVDRAM...][P0: SanDisk SD6SB1M...][IBA GE Slot 0 0C8 v1404]Main Advanced Boot Security Save & ExitAptio Setup Utility - Copyright (C) 2012 American Megatrends, Inc.Version 2.15.1236. Copyright (C) 2012 American Megatrends, Inc. : Select Screen : Select ItemEnter: Select+/-: Change Opt.F1: General HelpF2: Previous ValuesF3: Optimized DefaultsF4: Save & ExitESC: ExitField Setting DescriptionBootup NumLock StateOffOn Select the keyboard NumLock state.Launch CSM EnabledDisabled Enables or disables the system to launch an older operating system.Boot Option #1 Sets the system boot order.Boot Option #2 Sets the system boot order.Boot Option #3 Sets the system boot order.](https://usermanual.wiki/Twinhead/EM7355.User-Manual/User-Guide-2262301-Page-46.png)


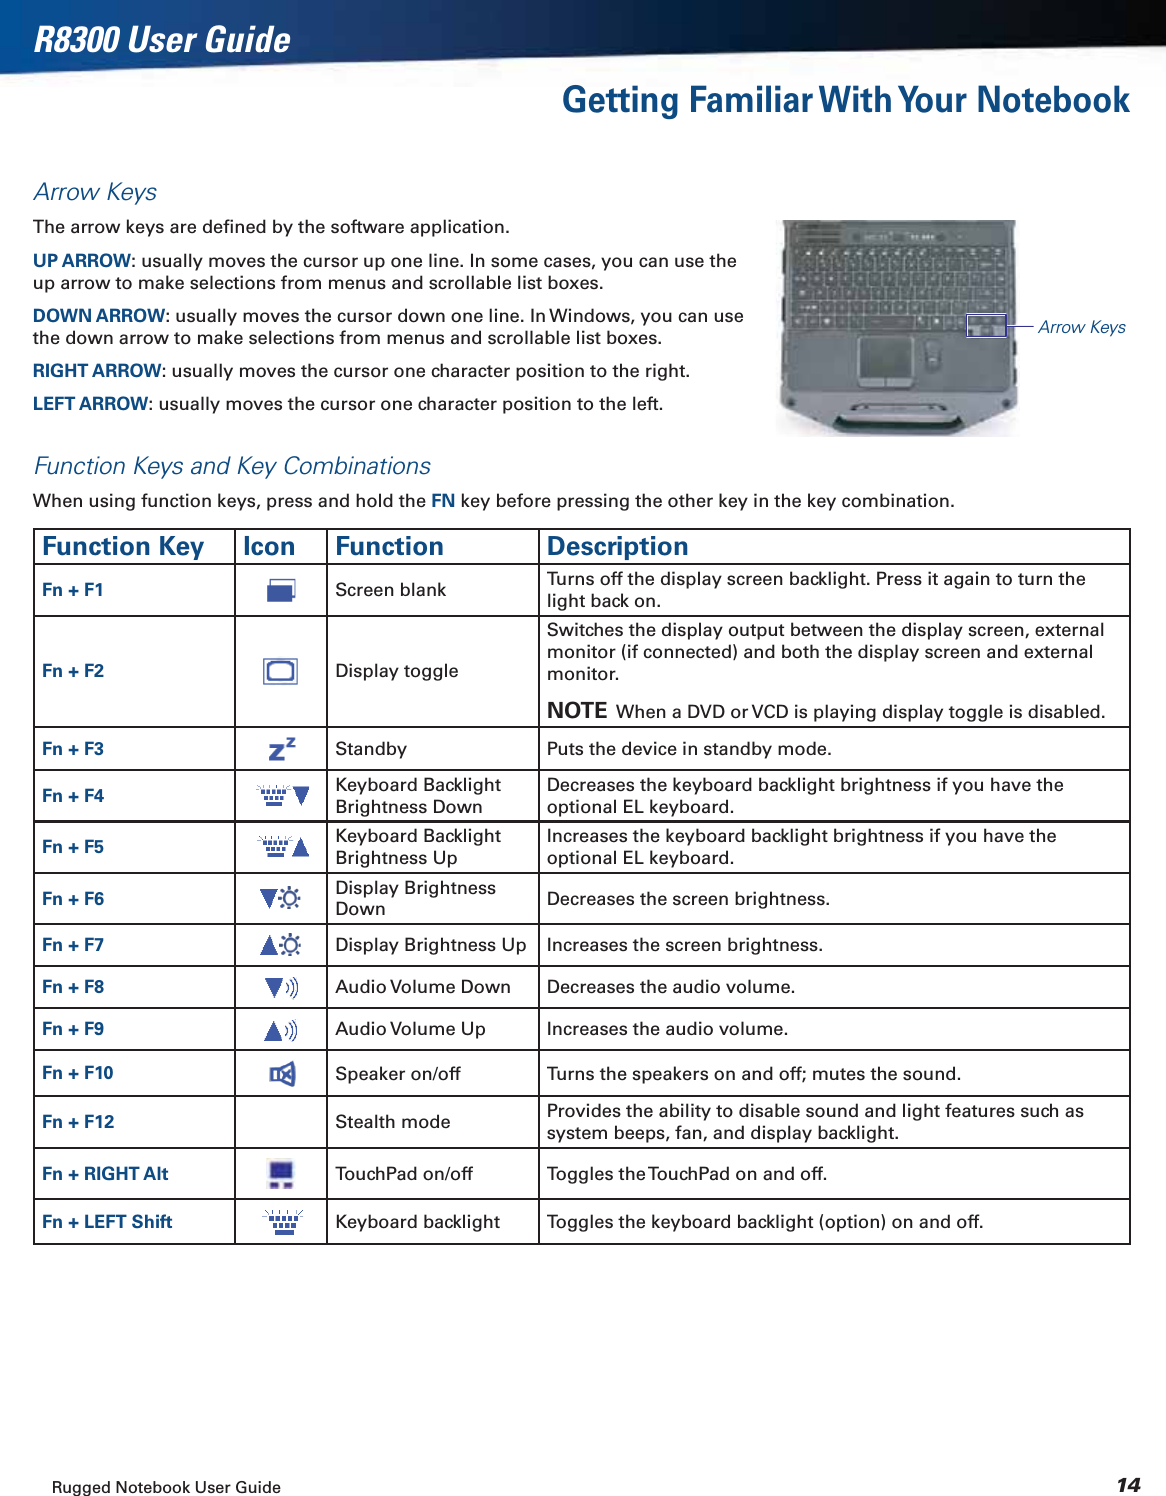
![Rugged Notebook User Guide 56R8300 User GuideTroubleshootingKeyboard and Mouse TroubleshootingSomething unexpected happens when I press a keyYou may have pressed a key combination that performs a Windows function. Make sure you are pressing the correct keys for the application you are running.Incorrect characters appear on the screen when I press certain keysYou may be in Num Lock mode. Press the NumLk key to toggle Num Lock mode off. NumLk is on the top row of buttons on your keyboard next to the F12 key.I have difficulty double-clicking the mouse fast enoughFor Windows 7:1. Select Start, Control Panel, Hardware and Sound.2. Under Devices and Printers, select Mouse. This will bring you to the Mouse Properties window.3. On the Buttons tab, use the Devices drop-down menu to select your mouse. Then you can set double-click speed.PC CardsI can’t remove the PC cardPress the ejector button located inside the PC card door on the side of the device. The button will pop out. Press the ejector button again to eject the PC card. Slide the card out.If the ejector button malfunctions when you press it, release the button and then press it again.Read ErrorIf a memory card that is not properly formatted is installed in the PC Card slot, it will cause this error.The device locks up when I remove the PC cardBefore you remove the card, select the PC card icon ( or ) on the taskbar (in the tray area near the clock in the lower right corner) and choose “Stop [card name] card.”Miscellaneous TroubleshootingThe device shuts off unexpectedlyThe device has entered suspend mode. Press any key to resume from the standby state. Press the POWER button to resume from the hibernate state.The battery capacity may be low. Connect external power to charge the battery, or replace the battery with a fully charged one.The speaker volume is too high or too lowRefer to the audio section for instructions on adjusting volume.The device won’t turn onMake sure a fully charged battery is properly installed.Connect external power to charge the battery if it is not charged.If you are using the AC adapter check the electrical outlet you are using to make sure it is working properly.If the device does not turn on, reset the device by holding down the POWER button for at least ten seconds, release it, then press the POWER button again.The device won’t turn offFor Windows 7:1. Select Start and click on the arrow next to the Shut downmenu. Then select Restart to reboot the device.2. If that does not work, press Ctrl + Alt + Del and then select Start Task Manager.3. If any programs are open, use your arrow keys to highlight each one and select End Task. Repeat this until all programs are closed.4. If that still does not work, press and hold the POWER button for approximately ten seconds and then release it.The device enters suspend mode too quicklyFor Windows 7:Select Start, Control Panel, System and Security. Under Power Options, select Change when the computer sleeps.Modify the Put the computer to sleep option.](https://usermanual.wiki/Twinhead/EM7355.User-Manual/User-Guide-2262301-Page-56.png)