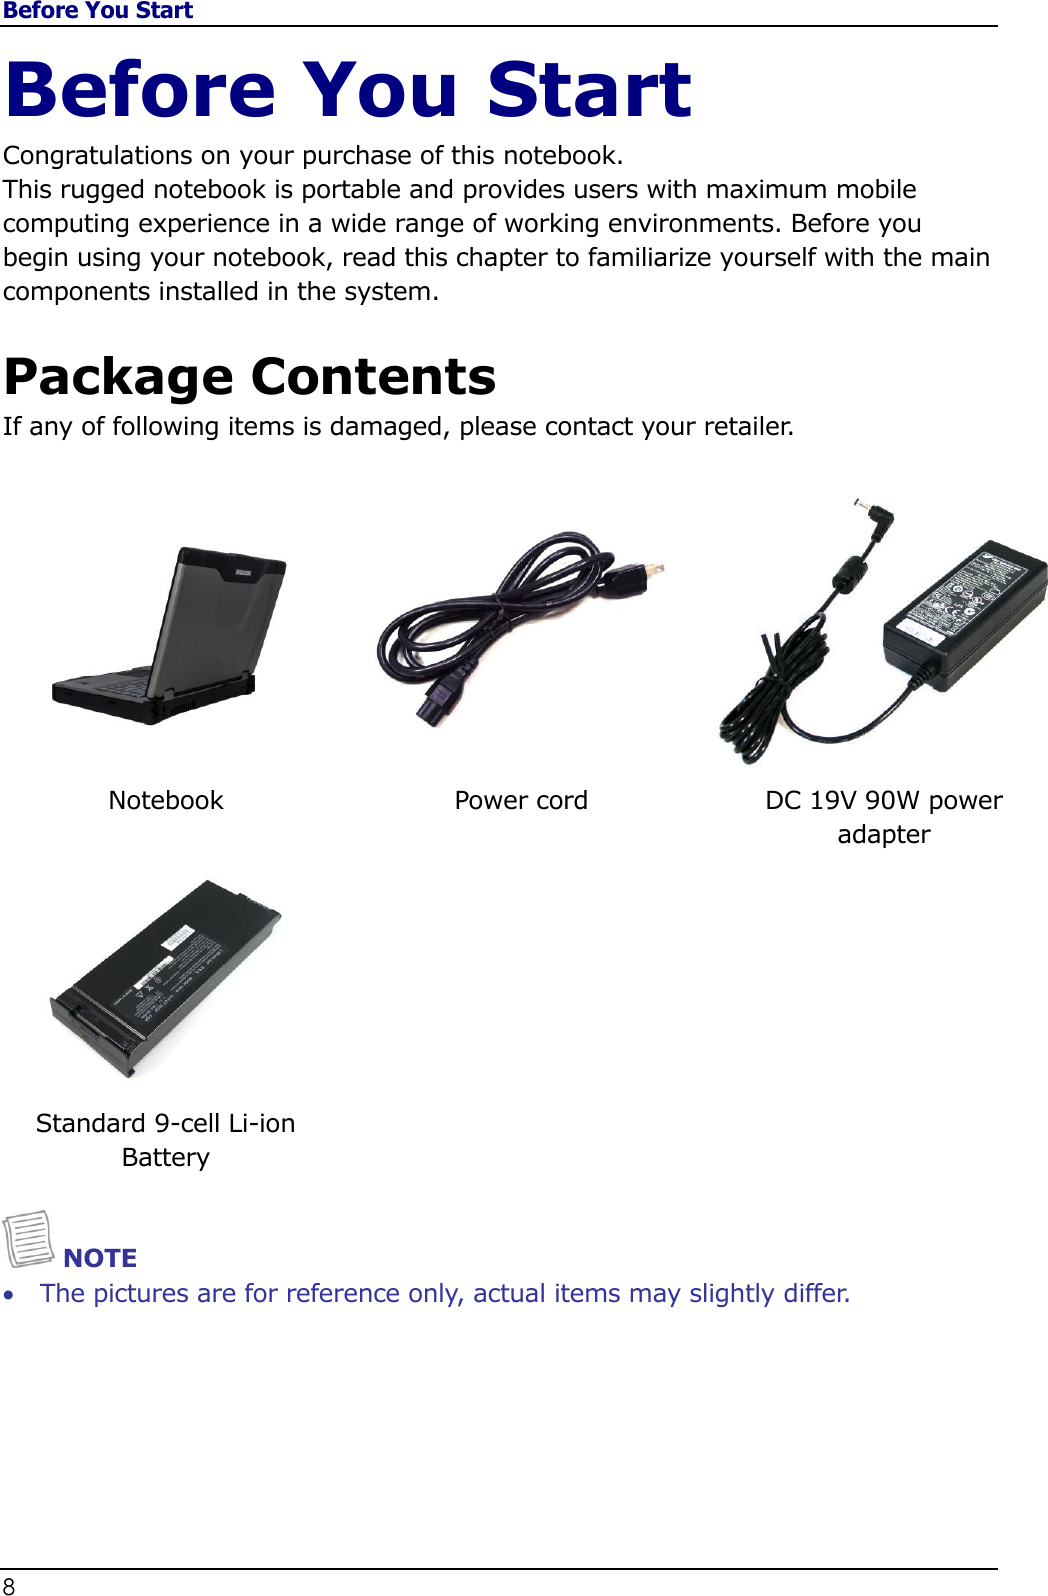
Twinhead MC7355 Notebook PC User Manual Twinhead U12C
Twinhead International Corporation Notebook PC Twinhead U12C
UserManual.wiki
>
Twinhead
>
MC7355 User Manual
User manual
Navigation menu
Upload a User Manual
Namespaces
Wiki Guide
HTML
PDF
Info
Views
User Manual
Discussion / Help
Navigation
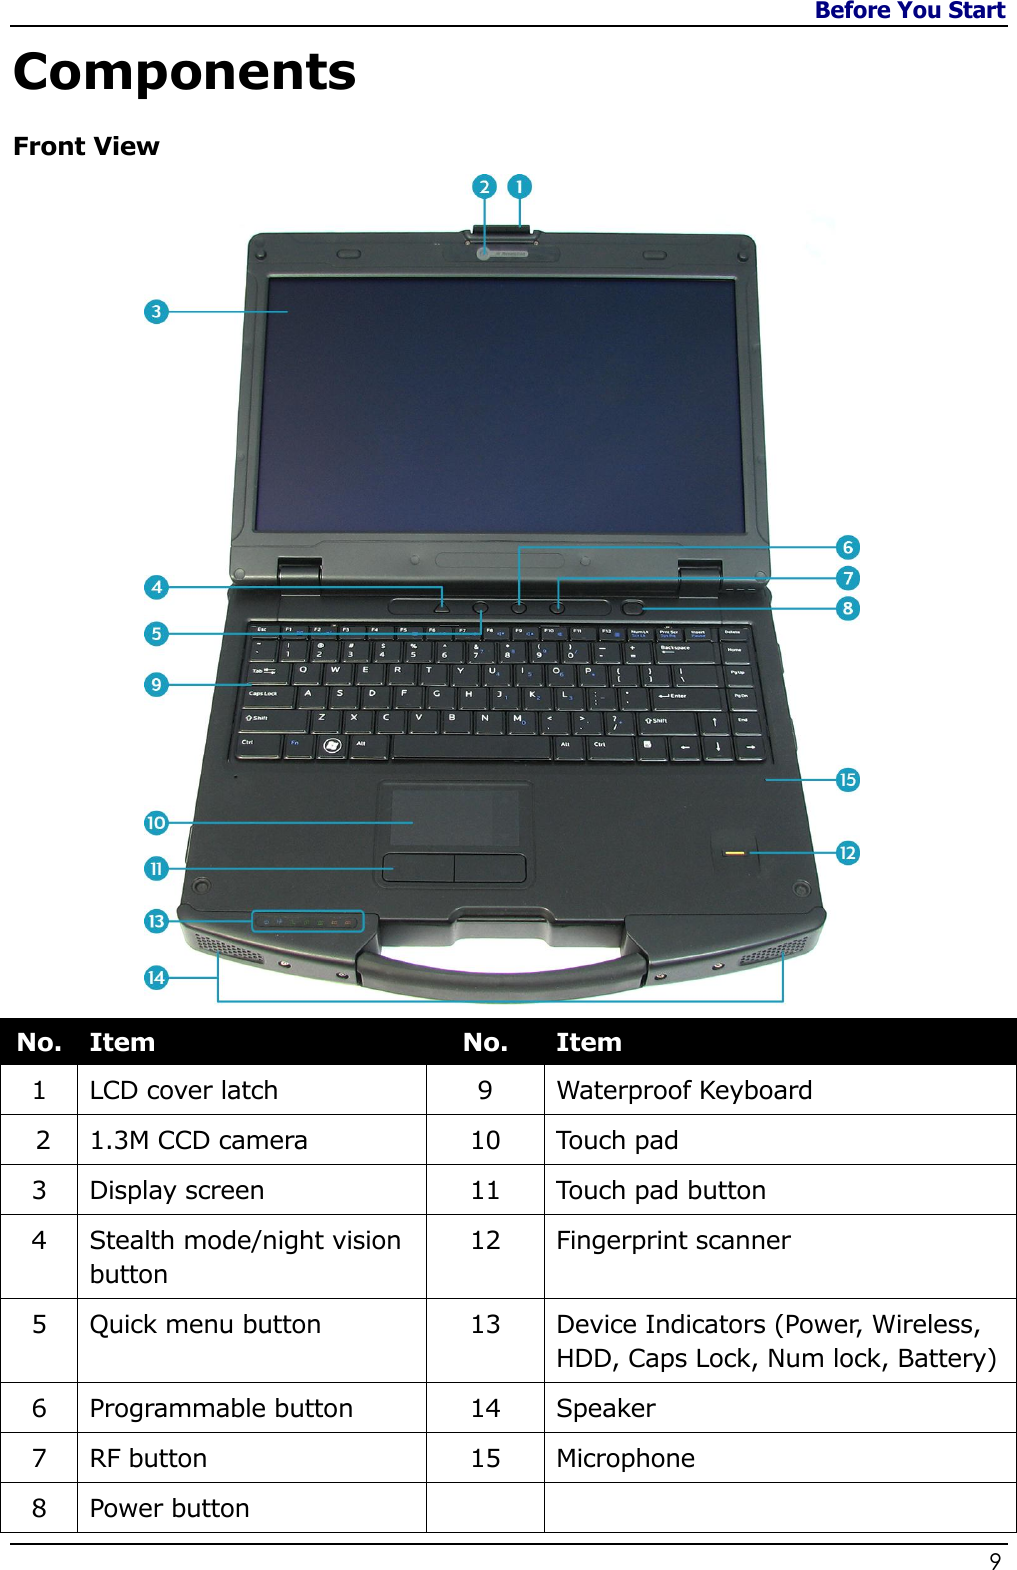

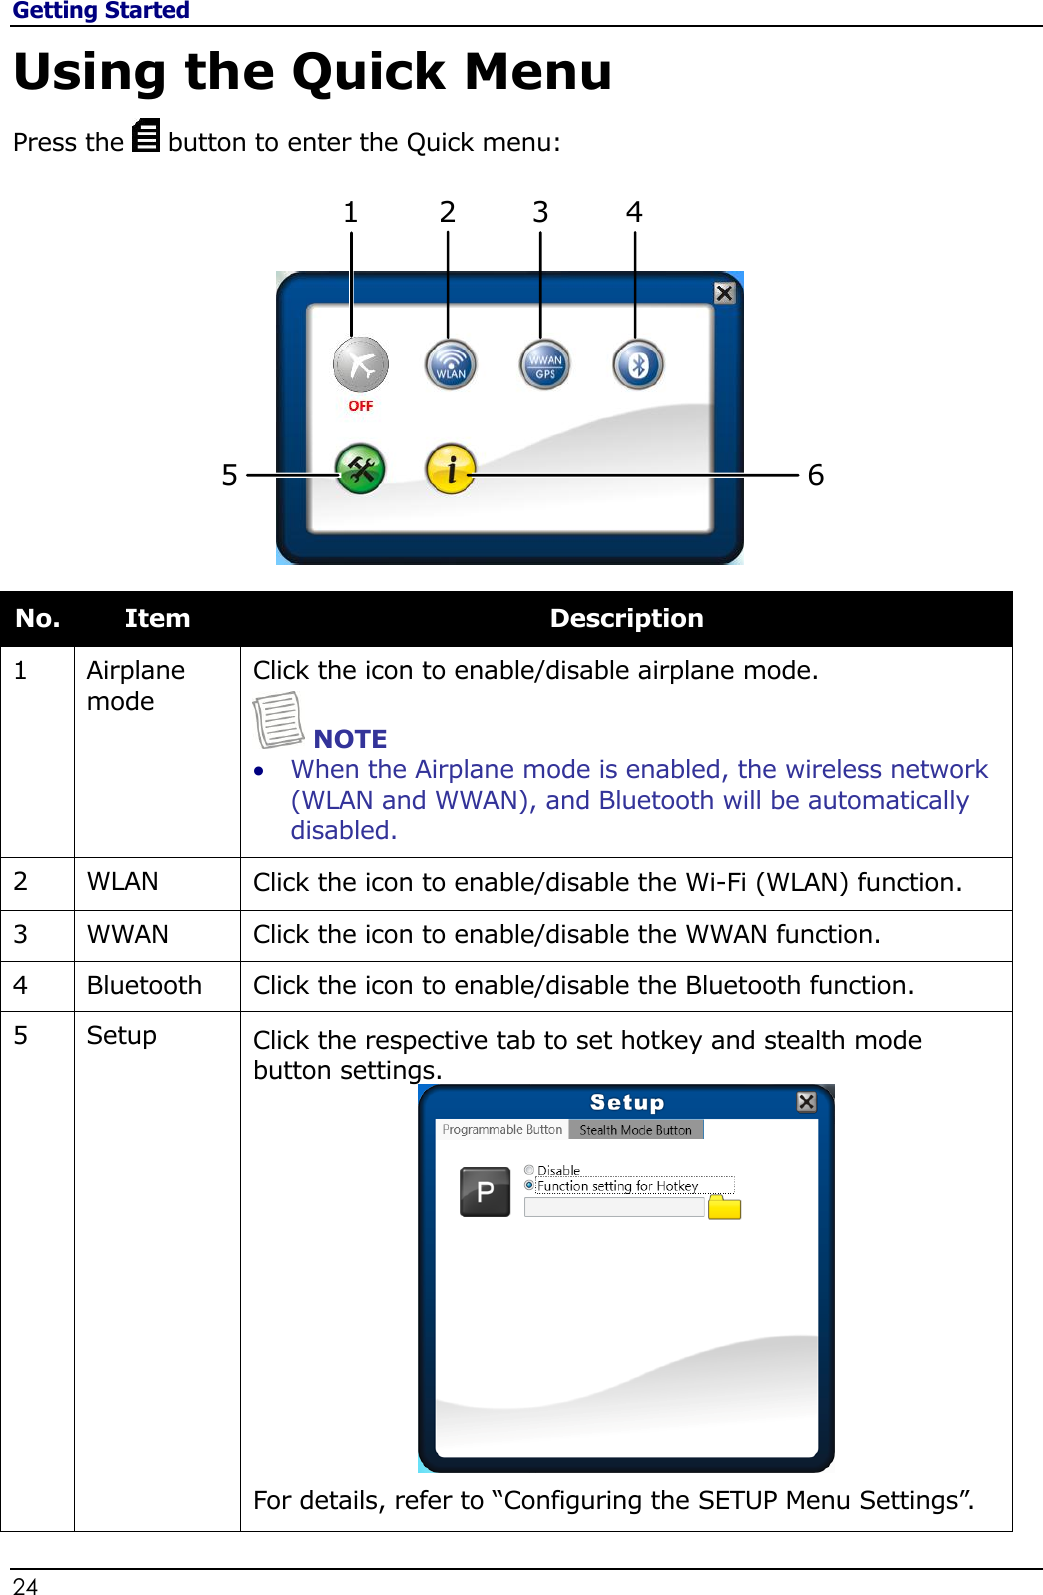
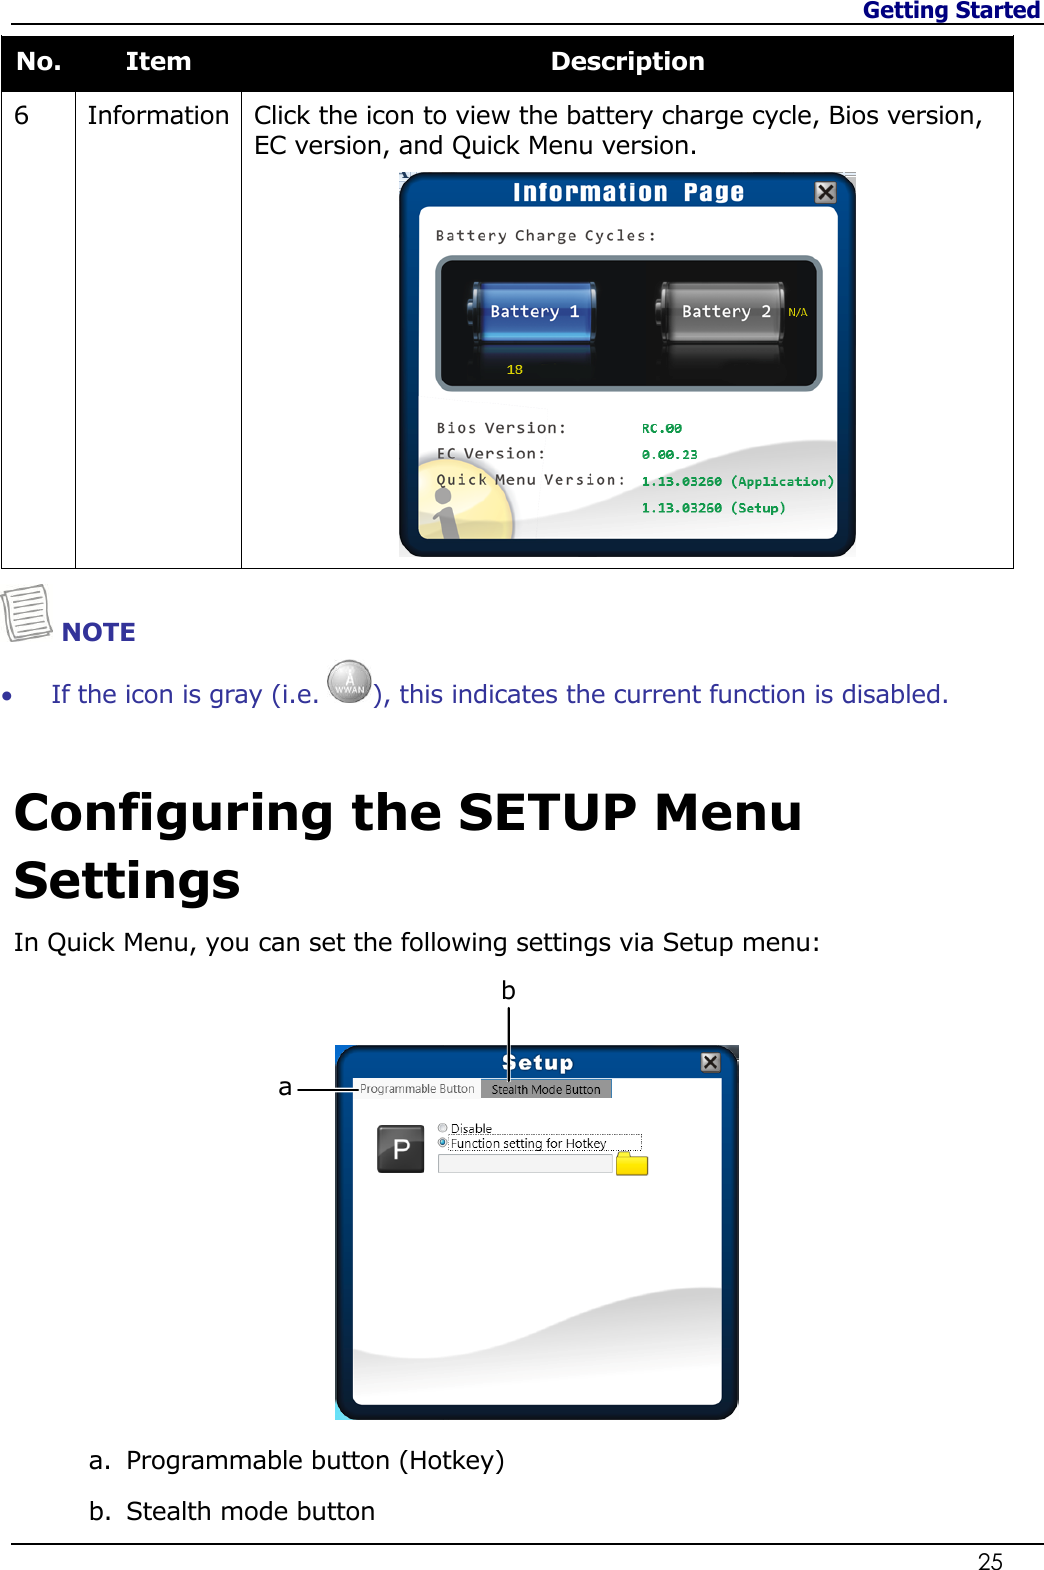
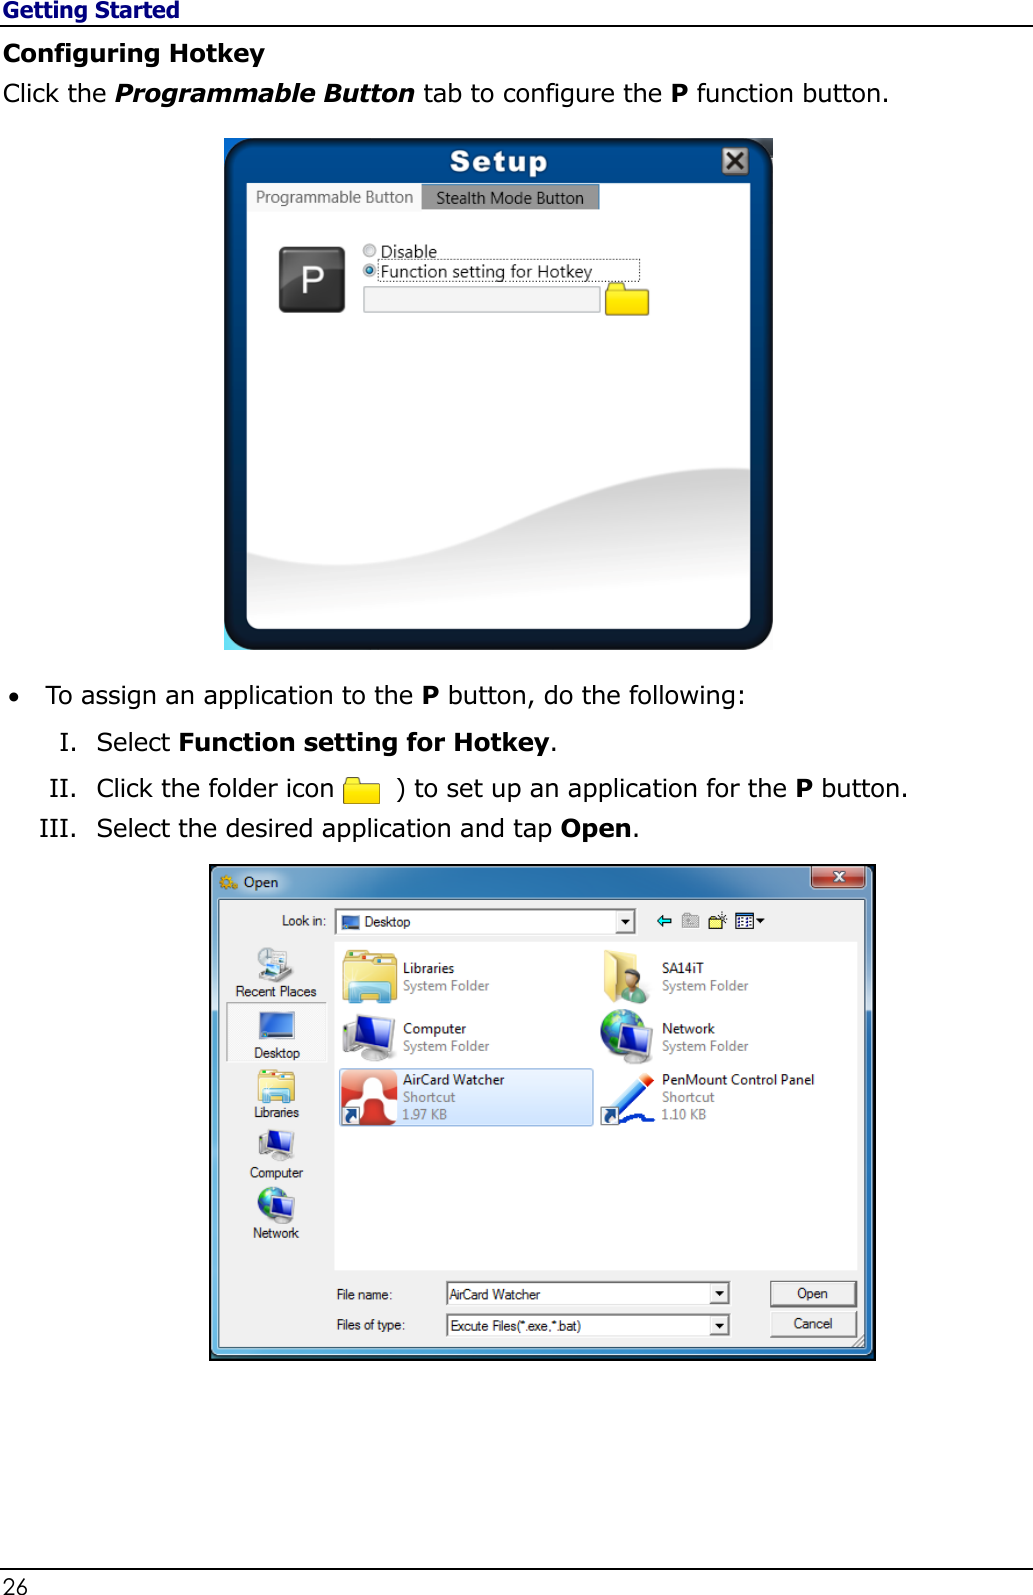
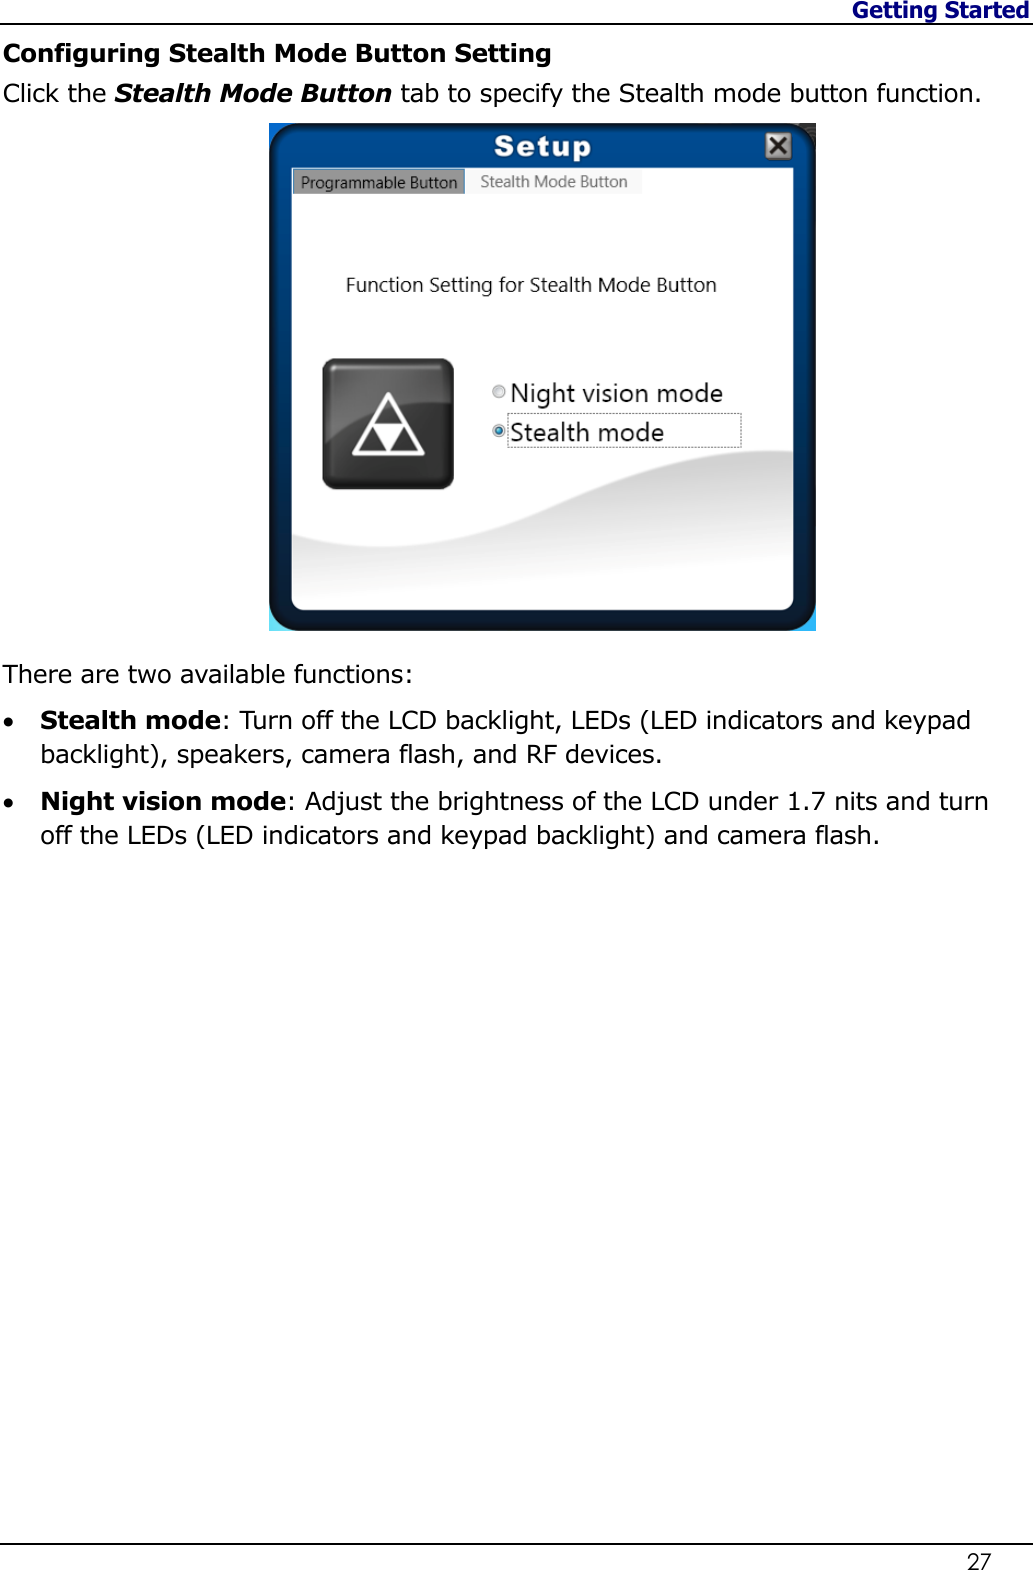
![Getting Started 22 Using the Keyboard No. Keys Description 1 Function keys These function keys are used to perform designated tasks. The tasks for each key may vary from one application to another. 2 [Fn] Press the [Fn] key in combination with other keys to execute a command. [Fn] + F1 Toggles the touch pad to on/off. [Fn] + F2 Switches to suspend mode. [Fn] + F5 Toggles between LCD, External display, or both. [Fn] + F6 Decreases the brightness level. [Fn] + F7 Increases the brightness level. [Fn] + F8 Decreases the volume by one level. [Fn] + F9 Increases the volume by one level. [Fn] + F10 Turns on or mutes the volume. [Fn] + F12 Toggles the keyboard backlight on/off. (Backlight keyboard is optional) 3 Windows key Press to display the Start menu. This action is the same as clicking the Start icon. 4 Numeric keypad Press the Num lock key to activate the numeric keypad. Press the keys on the numeric keypad to enter numbers or operands as you would on a calculator.](https://usermanual.wiki/Twinhead/MC7355/User-Guide-2270799-Page-22.png)