User Manual

Wireless LAN USB Adaptor
WL-2111
Quick Installation Guide
V.1.0

Quick Installation Guide of WL-2111
1
Copyright
Copyright © 2001, All rights reserved.
This manual and software described in it are copyrighted with all rights reserved. This manual may not
be copied, in whole or in part, without written consent. All product names are trademarks and or
registered trademarks of their respective companies.

Quick Installation Guide of WL-2111
2
Table of Contents Page
Brief Introduction……………………………………………………………………..3
Item List……………………………………………………………………………….3
Features………………………………………………………………………………..3
Notice………………………………………………………………………………….4
Software Installation………………………………………………………………...4-8
Ad-Hoc Mode…………………………………………………………………...8-9
Infrastructure Mode…………………………………………………………...10-11
Using WL-2111………………………………………………………………………12
Wireless USB vs. Wireless AP……………………………………………………12-13
Functions of Monitor Utility…………………………………………………….…...14
Monitor…………………………………………………………………………...14
Statistics…………………………………………………………………………..15
Site Survey…………………………………………………………………….....16
Encryption………………………………………………………………………..17
Advanced…………………………………………………………………………18
Version.………………………………………………………………………...…18
Infrastructure to Ad-Hoc…………………………………………………….……19-20
Uninstall Driver…………………………………………………………………...21-22
FCC Regulation………………………………………………………………………23

Quick Installation Guide of WL-2111
3
Wireless USB Adaptor provided by UAT Inc. is designed to be small, portable & compatible in many
different platforms. It provides users with reliable and high-speed connection to the Internet &
supports simple plug-and-play function.
Your package should contain all the components listed below. If anything is missing or damaged, please
contact the dealer/ service provider from whom the equipment was purchased.
l One (1) WL-2111 Wireless USB Adapter
l One (1) USB cable
l One (1) CD (incl. Driver)
l This Quick Installation Guide
-
Product Name 11Mbps Wireless LAN USB Adaptor
Model Number WL-2111
Interface USB V1.0
Modulation Technique DSSS (Direct Sequence Spread Spectrum)
Frequency Band 2.400~2.4835 GHz
Number of Channels USA & Canada 11; Europe 13; France 4; Japan 13
Data Rate 11Mbps, 5.5Mbps, 2Mbps, 1 Mbps
Modulation CCK, DQPSK, DBPSK
Physical Media Protocol CSMA/CA (Collision Avoidance)
Supported Operating Systems Microsoft Windows 95/98/2000, NT4.0, Linux Red Hat 6.2
Medium Access IEEE 802.11, IEEE02.11b Fully Compliant
Ethernet Port Standards Fully Supports All IEEE 802.3 10/100Mbit/S Networking
Operating Range Indoor: 50M-100M, Outdoor: 100M-300M
Dimension 123x100x34 mm
Environmental 32° to 122° F (0° to 50°C), 10 to 90% (non-condensing)
Brief Introduction
Item List
Features

Quick Installation Guide of WL-2111
4
Read Me First:
1. Please install the driver first before plug in the USB adaptor.
2. Before you install the driver, please do the following:
a. Right click “My Computer”à “Properties” à Disable current LAN card installed in the computer.
b. Right click the “Network Neighborhood” à”Properties” à “TCP/IP” à Choose “Obtain an IP
address automatically”
To have your Wireless USB Adaptor working properly, please follow the step-by-step instructions listed
below to successfully install the Adaptor.
1. Insert the CD driver (included in the package) to your CD-ROM drive.
2. Choose “My Computer” from the desktop.
3. Under My Computer, double click CD-ROM drive
4. Double click the “setup” icon to start installation.
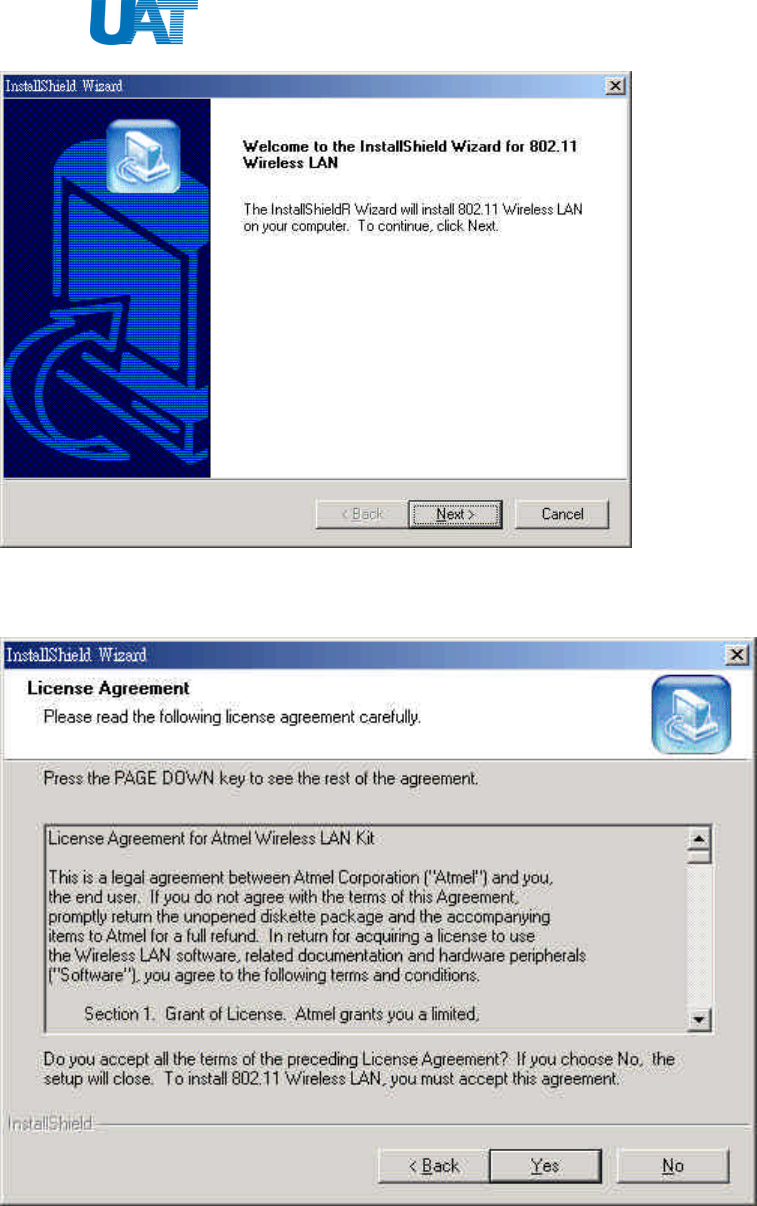
5. Installation Wizard will appear as follow: Choose “Next” to continue.
Notice
Software Installation
Quick Installation Guide of WL-2111
5
(Figure 1)
6. License Agreement: Please read the “License Agreement” carefully. Click “Yes” to continue with
the installation.
(Figure 2)
Quick Installation Guide of WL-2111
6
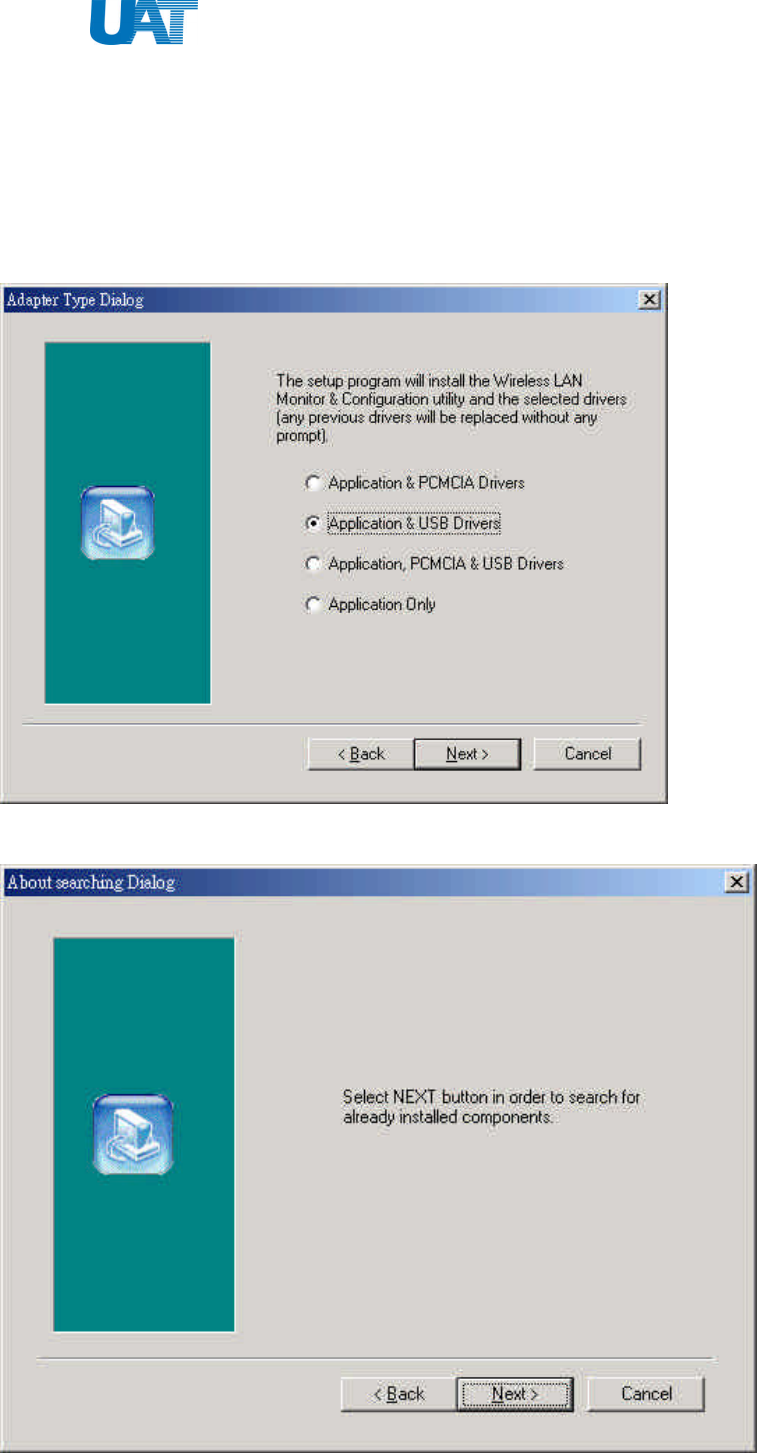
7. Adapter Type Dialog: Please Choose “Application & USB Drivers” as adaptor type & “Next”
Note: By selecting this installation option, you will install the Applications (Configuration & Monitor
Utility and Firmware Upgrade Utility) and the latest USB (A) drivers. If the USB (A) drivers have been
previously installed and they have not been uninstalled prior to the new installation the new drivers will
overwrite the old ones without prompting you. If you would like to uninstall the driver installed in the
past. Please refer to page 21 & 22
(Figure 3)
8. Select “Next” to continue.
Quick Installation Guide of WL-2111
7
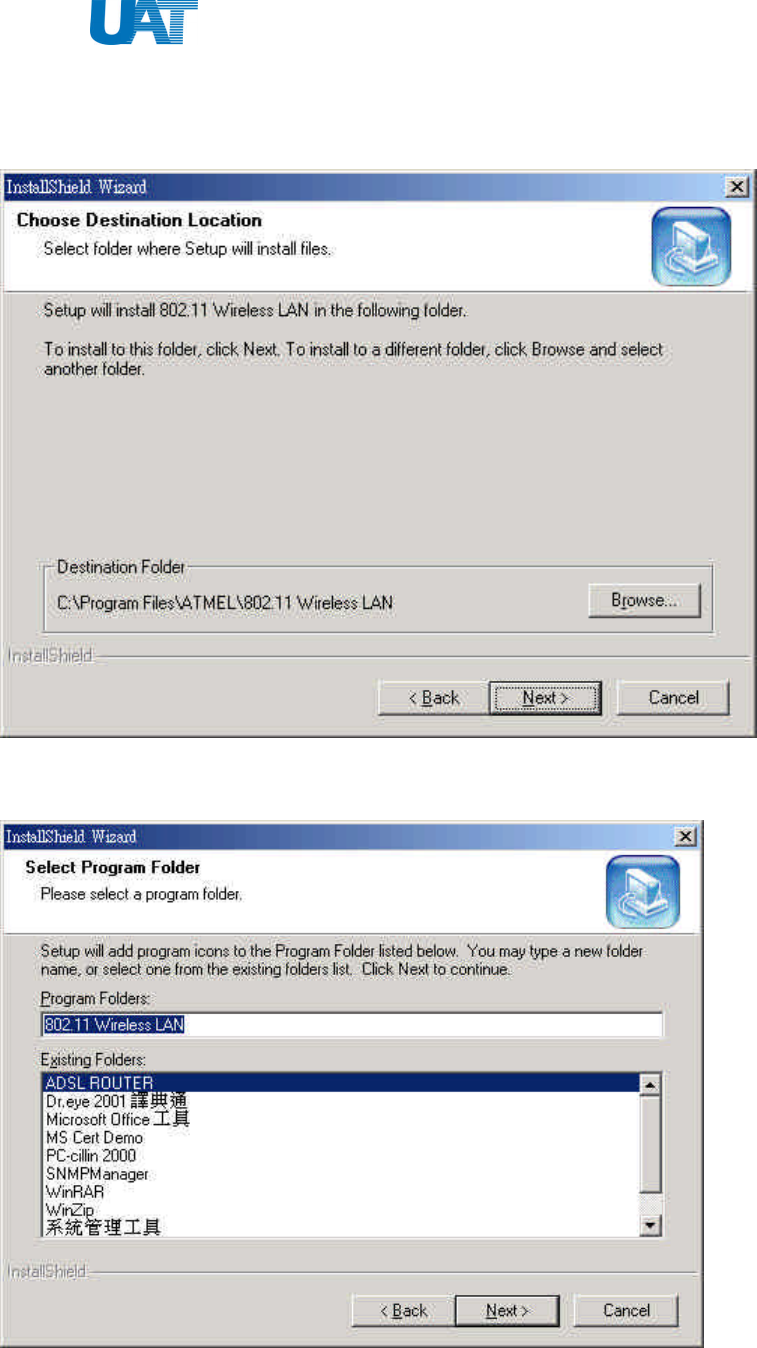
9. Choose Destination Location: This will save the driver in “C:\Program Files\ATMEL\802.11
Wireless LAN”. Click “Next” to continue.
(Figure 4)
10. Select Program Folder: Choose the folder you wish to add the program icon then click “Next”
(Figure 5)
Quick Installation Guide of WL-2111
8
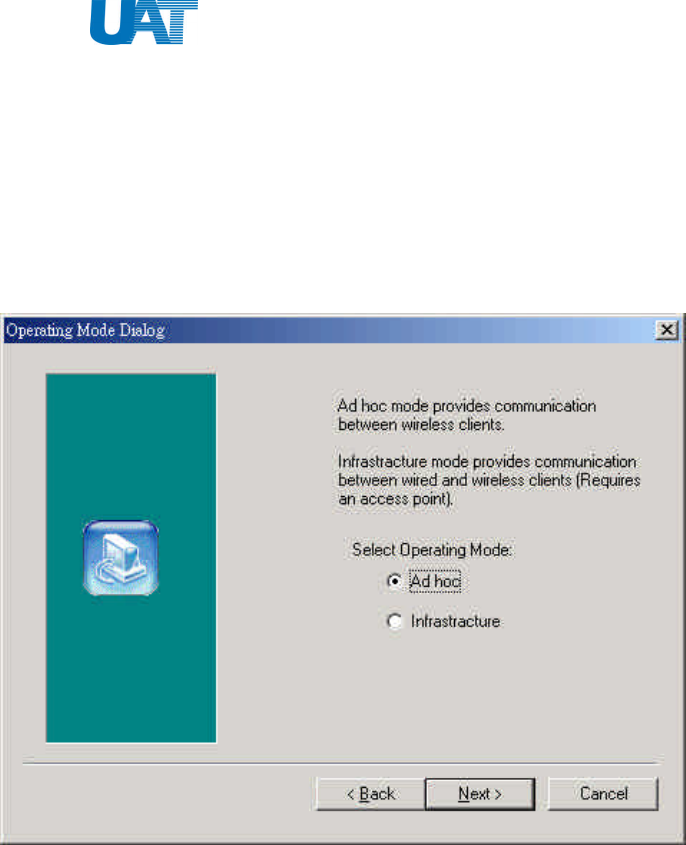
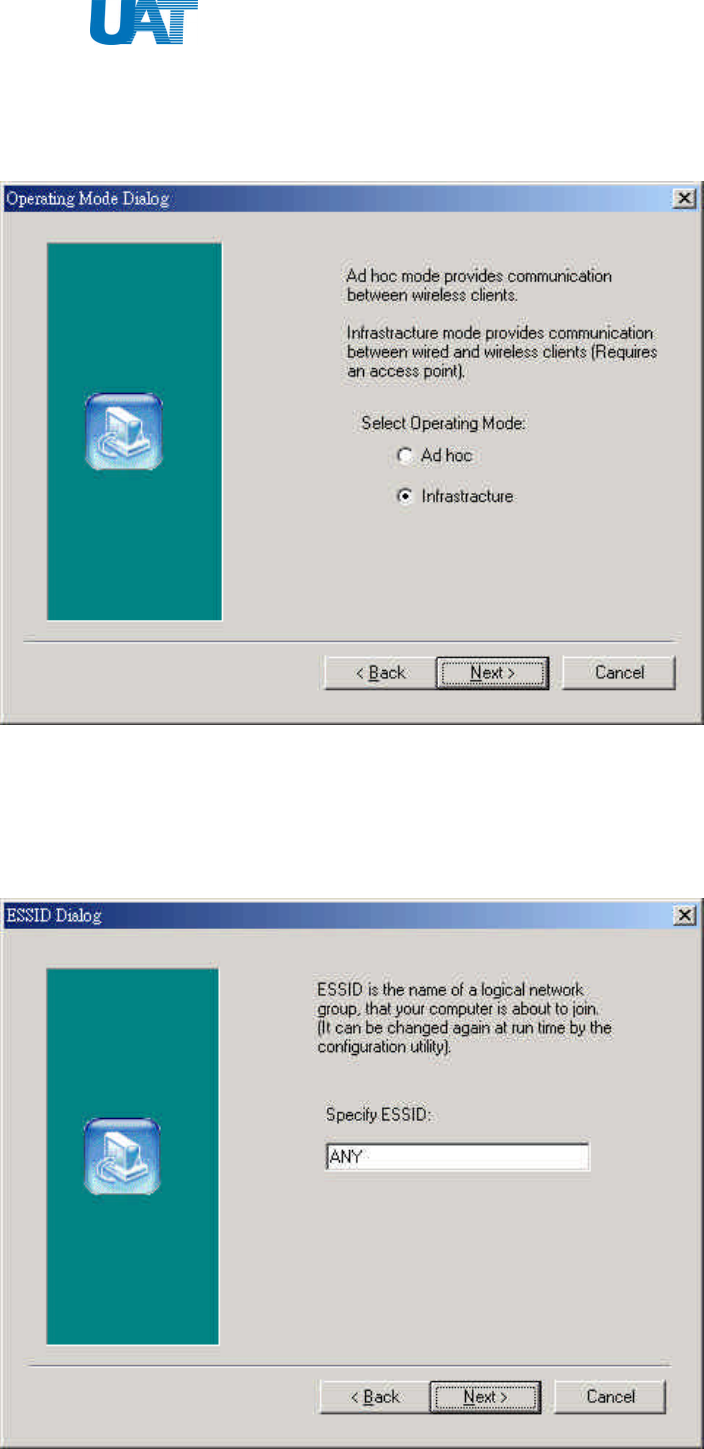
11. Choose the Mode of Operation (Ad-Hoc or Infrastructure):
Note: In Ad-Hoc Mode the wireless stations can directly communicate with each other. In
Infrastructure Mode the use of an Access Point is necessary in order for the wireless clients to
communicate with each other.
Ad-Hoc Mode
In Ad-Hoc Mode the wireless stations can directly communicate with each other.
(Figure 6)
When selecting the Ad-Hoc mode you have to specify the ESSID and the Channel parameters
• ESSID: Select the ESSID of the Ad-Hoc network. All stations participating in the Ad-Hoc
network should use the same ESSID.
• Channel: Select the channel to be used. There are 14 channels available. All stations
participating in the Ad-Hoc network should use the same channel.
Quick Installation Guide of WL-2111
9
(Figure 7)
After you have set your selections, press the “Next” button and a window appears with a review of your
installation settings. Please make sure that these values are the desired ones. In case you have made a
mistake you can always select the “Back” button to make a correction. Press the “Next” button to
continue with the installation, and finally select the “Finish” button for the installation to be completed.
Quick Installation Guide of WL-2111
10
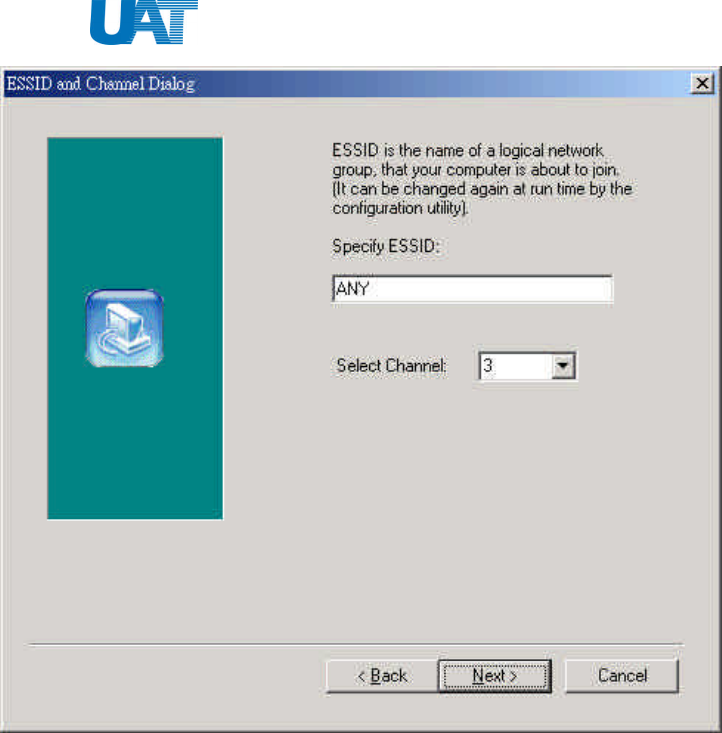
Infrastructure Mode
In Infrastructure Mode the use of an Access Point is necessary in order for the wireless clients to
Communicate with each other.
(Figure 8)
When selecting the Infrastructure mode you need to specify the ESSID
• ESSID: Select the ESSID of the access point to which the wireless station will be associated with in
infrastructure mode.
Note: We recommend user to type ANY. The computer will choose the most suitable ESSID for you.
(Figure 9)
Quick Installation Guide of WL-2111
11
After you have set your selections, press the “Next” button and a window appears with a review of your
installation settings. Please make sure that these values are the desired ones. In case you have made a
mistake, you can always select the “Back” button to make a correction. Press the “Next” button to
continue with the installation, and finally press the “Finish” button for the installation to be completed.
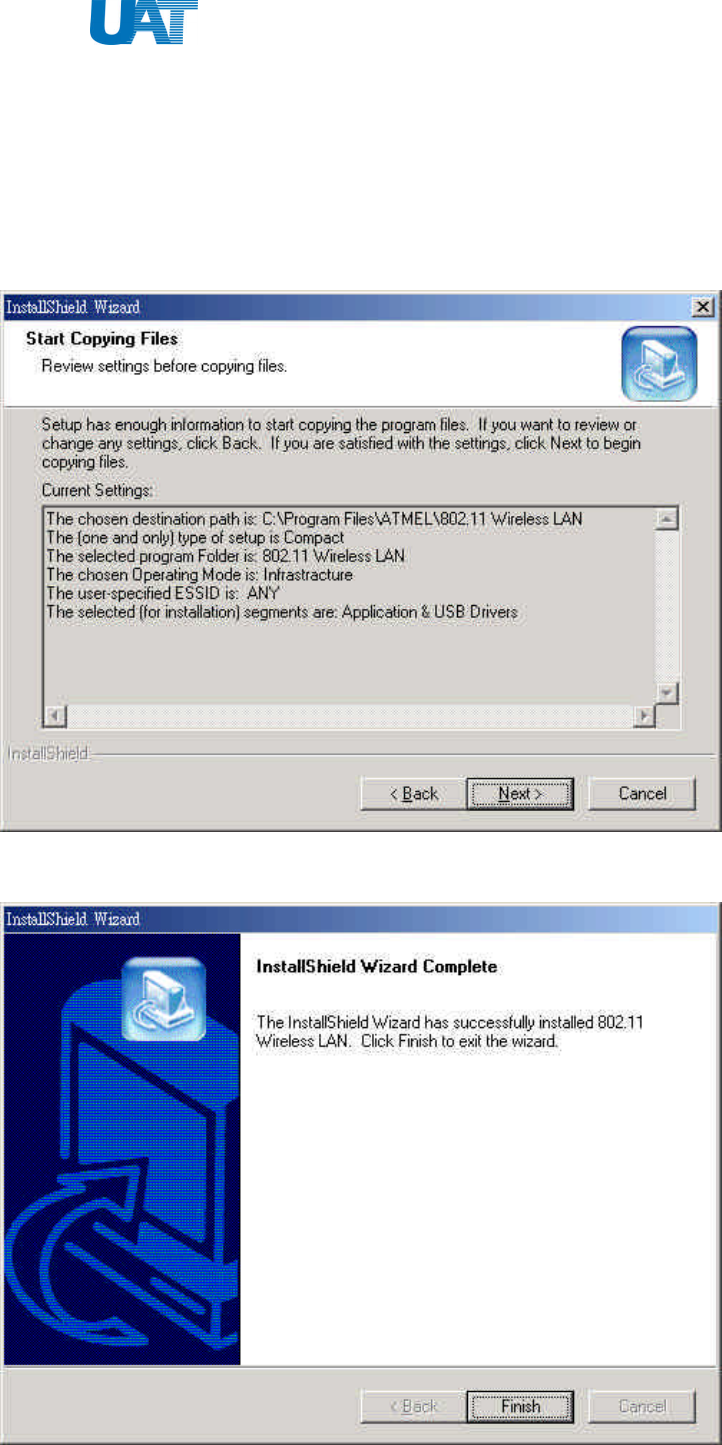
12. Start Copying files: Click “Next” to continue
(Figure 10)
13. Install Shield Wizard Complete: Select “Finish” to finish setup.
(Figure 11)
Quick Installation Guide of WL-2111
12
Wireless USB Adaptor provides plug-and-play function, therefore you only need to plug in the USB
cables & you can experience the great speed of Internet instantly.
If the Wireless USB Adaptor is installed properly, Windows will auto-detect the hardware. This will take
around 15 seconds. You can find the following icons on the bottom corner of start up bar:
Ø When the icon is in “Blue” color, it means the connection of USB Adaptor is successful.
Ø When it is in “Red” color that means the connection has been broken.
Note: 1. Please refer to Q & A in page 24 for dealing with failed connection.
2. At any time if you want to remove the Wireless USB Adaptor, just unplug the USB cable & the
modem will be successfully removed.
When the connection fails between Wireless USB Adaptor and Wireless AP. Double click on the
icon or go to “Start” à “Program” à “ATMEL 802.11 Wireless LAN” à “Configuration & Monitor
Utility”
1. Choose the “Site Survey”. (This window shows all the available AP. The % means the connection
quality, the higher the %, the better the connection.) à “Re-Scan” à double click on AP Listed under
BSSID; it will jump to “Monitor” page.
(Figure 12)
Using WL-2111
Wireless USB vs. Wireless AP
Quick Installation Guide of WL-2111
13
2. Monitor page shows the status of Wireless USB adaptor. If the “Signal Strength” & “Link
Quality” is running, it means the USB adaptor is operating properly. If error occurs, please redo step 1.
If error keeps occurring, please contact the dealer/ service provider from whom the equipment was
purchased.
(Figure 13)
Quick Installation Guide of WL-2111
14
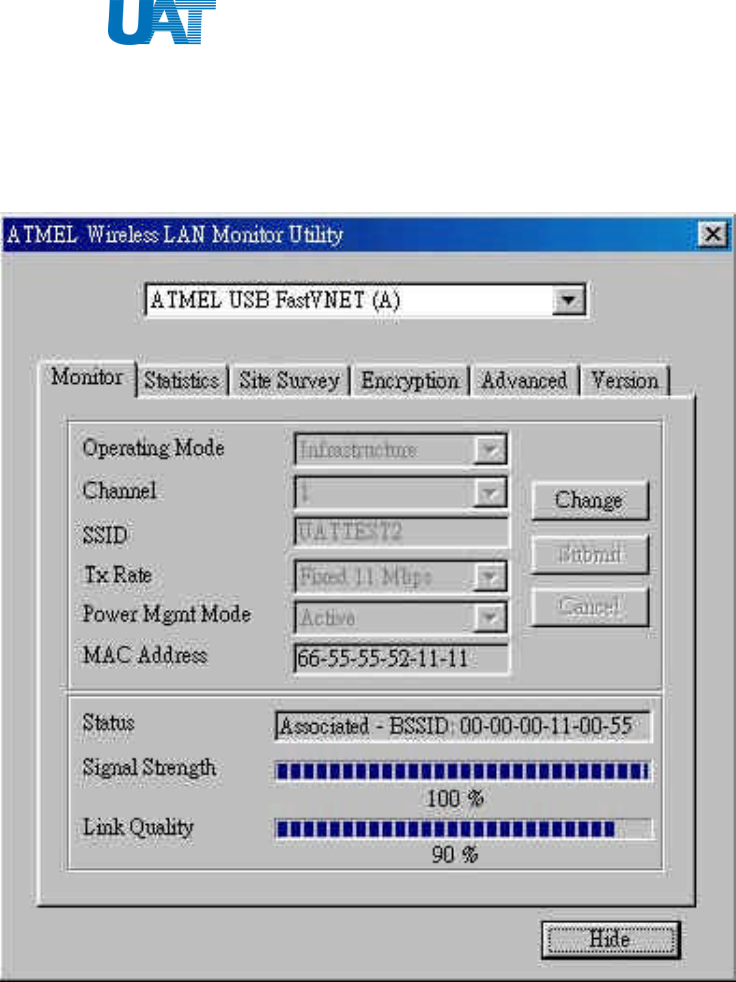
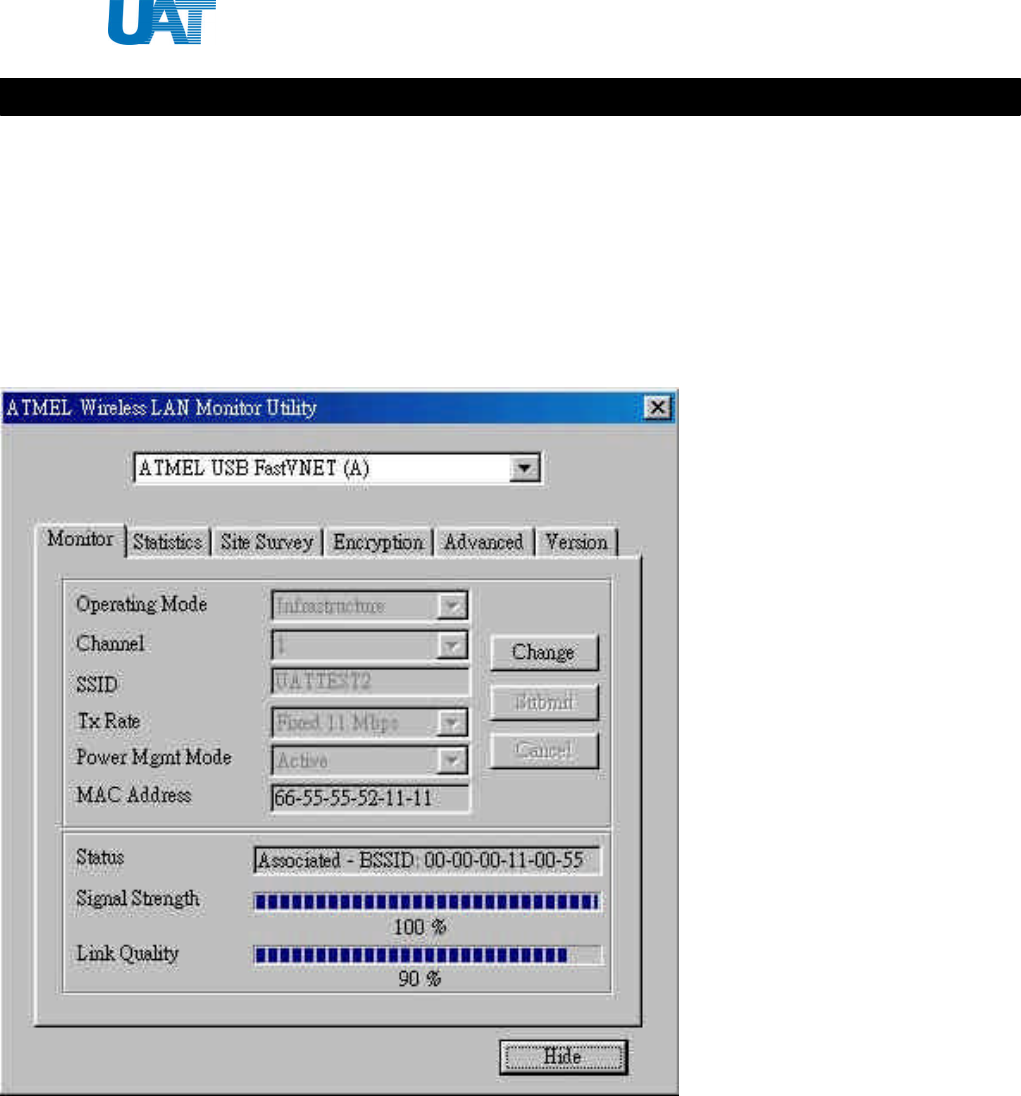
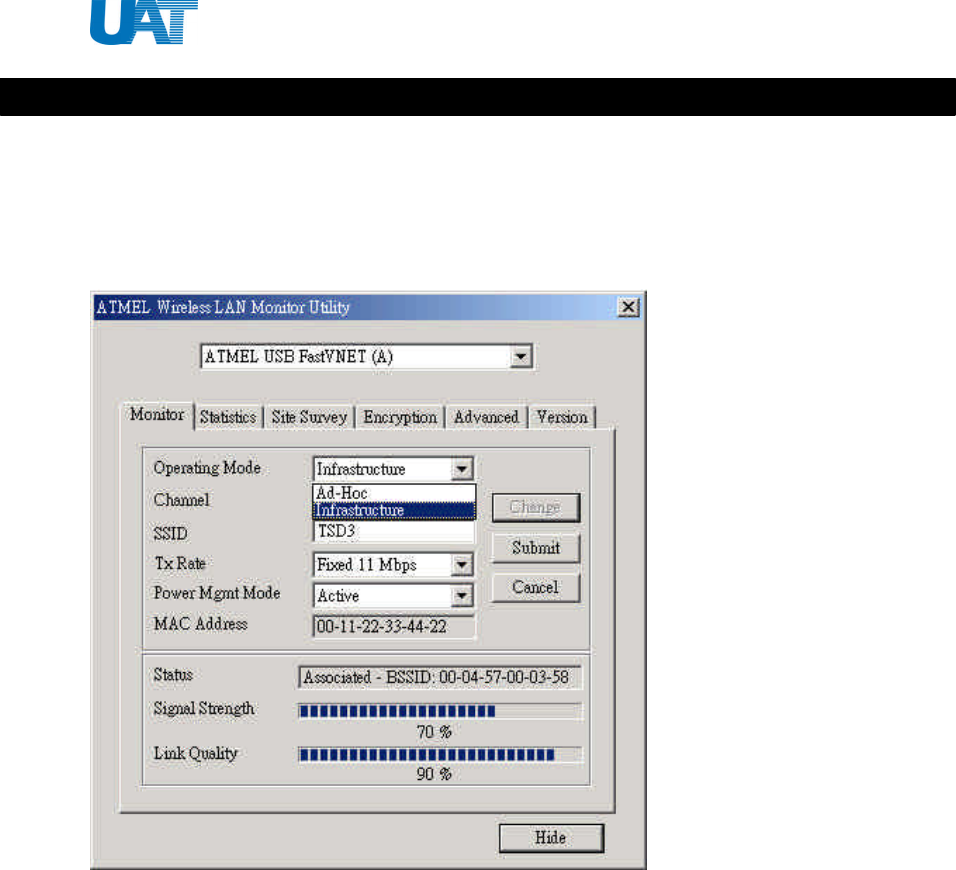
Monitor
A typical screen of the application in Infrastructure mode. The configuration parameters are shown at the
top of the screen (Operation Mode, Channel, SSID, TxRate, Power Management Mode and MAC Address
of the USB adaptor). In the middle of the screen there is information about the status of the
communication (the BSSID of the Access Point to which the adaptor is associated, Signal Strength, and
Link Quality). In order to change the configuration parameters press the “Change” button, make your
changes and then press “Submit” in order to save your changes.
(Figure 14)
Note: we suggest you to set “TX Rate” to “Auto” this will give you the best connection.
Functions of Monitor Utility
Quick Installation Guide of WL-2111
15
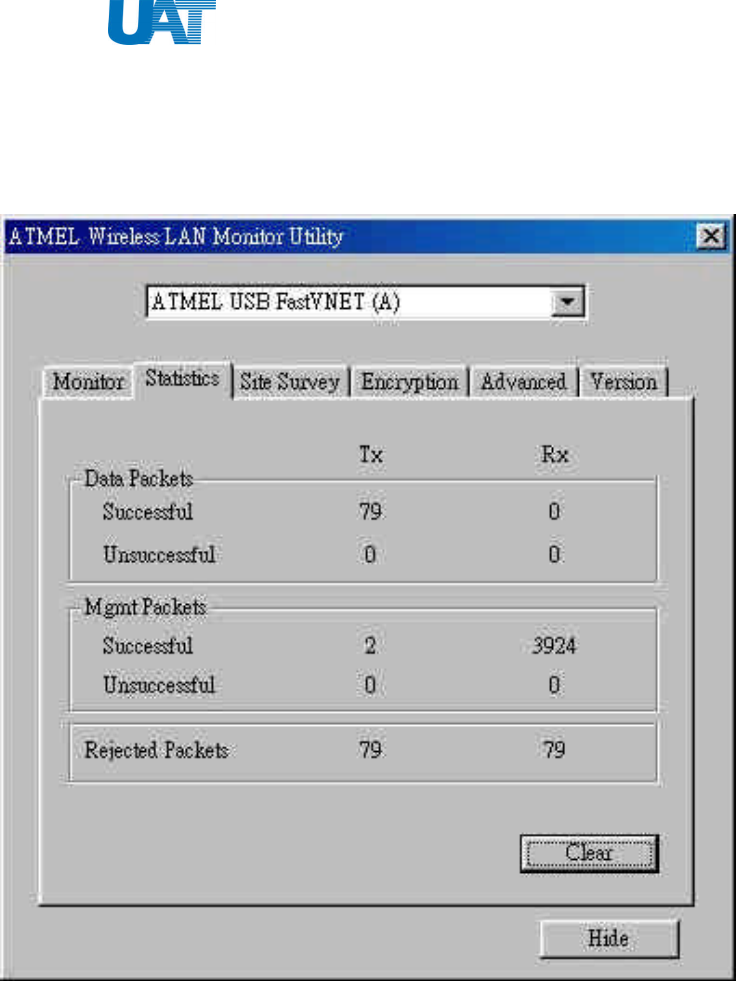
Statistics
This option enables you to view the available statistic information (Data packets, Management Packets
and Rejected packets). In order to renew or update this list of statistics, press the “Clear” button. In order
to exit press the “Exit” button at the bottom of the screen.
(Figure 15)
Quick Installation Guide of WL-2111
16
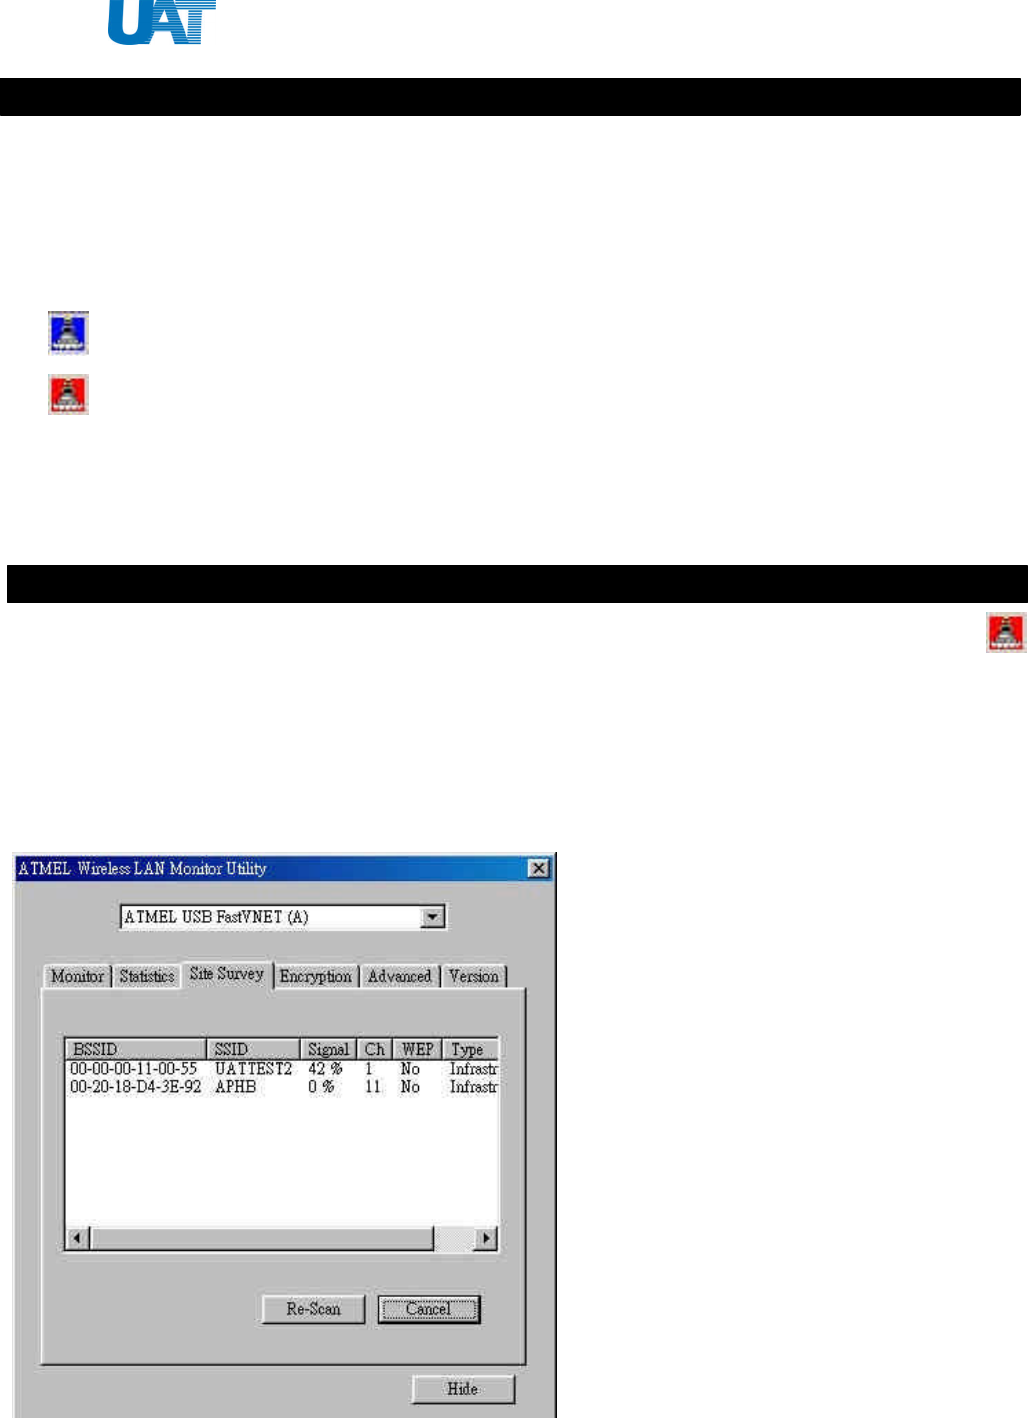
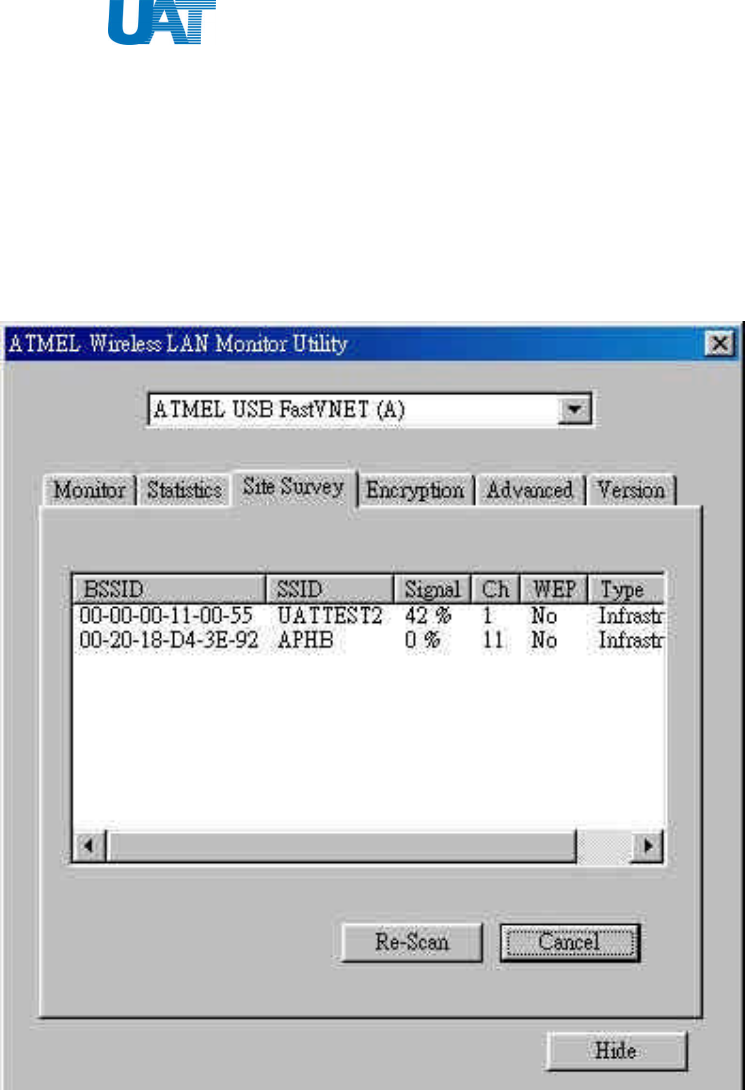
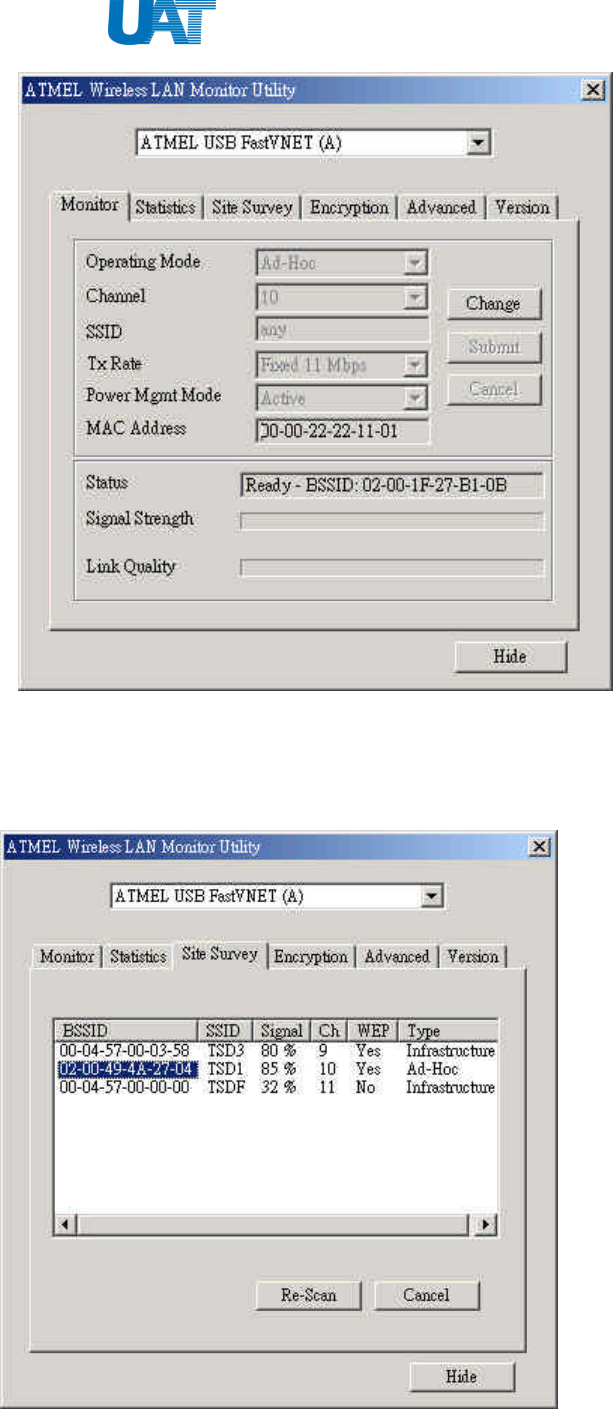
Site Survey
By choosing the Site Survey option, you can scan all the channels in order to find all the access points
within the range of your card. The list includes information about the BSSID and SSID of the access
point(s), the signal strength, the channel where the access point(s) operates, and whether or not WEP
encryption is used. In order to update this list, press the “Rescan” button. If you want to associate with any
of the access point(s) listed, double click on your choice (on the BSSID field), and the system will take
you back to the Monitor screen showing you the parameters of the connection newly established.
(Figure 16)
Quick Installation Guide of WL-2111
17
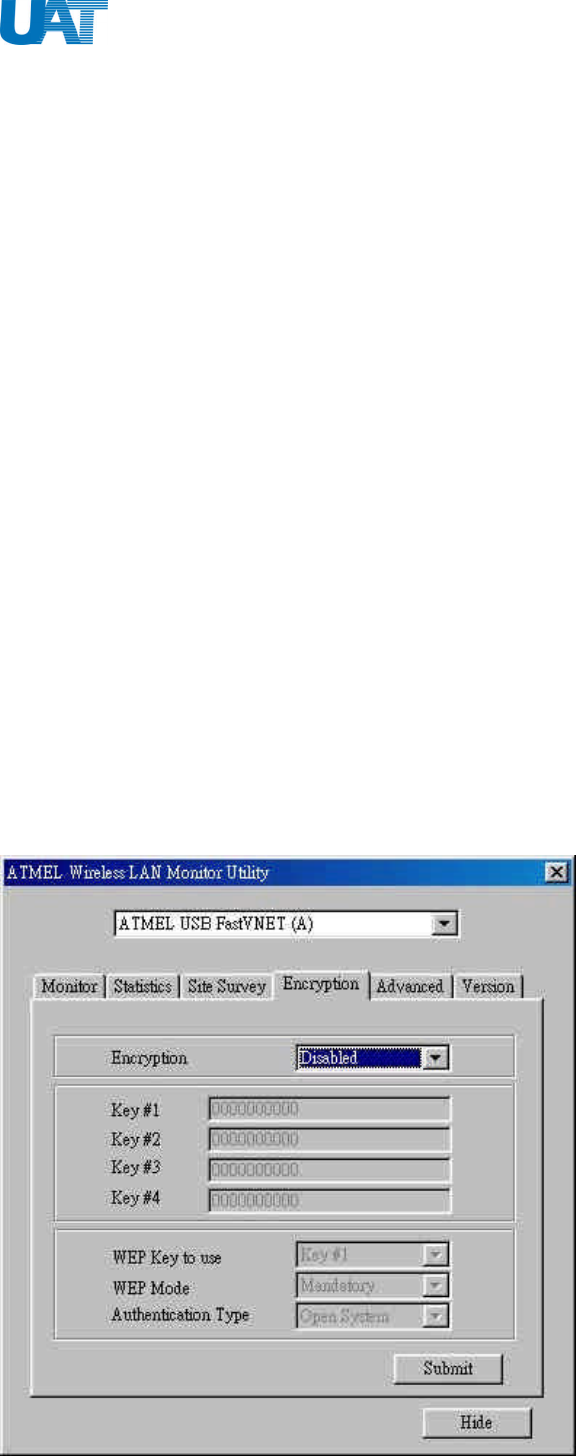
Encryption
By choosing this option, you can set four different WEP keys and specify which one of them to use. First,
either enable or disable encryption from the appropriate “Encryption” field. If you decide to use
encryption, you can choose any of the available WEP keys (1 to 4). You also have the option to select the
WEP mode (Mandatory/Optional). If you select “Mandatory”, then not only WEP will be used, but also
any other station needs to use WEP encryption in order to establish a communication with your station.
This requirement is in line with the IEEE 802.11b standard. If, on the other hand, you choose “Optional”,
then your station can communicate with every other station regardless if they use WEP or not. Please keep
in mind that the WEP keys must be in HEX format. Finally, you have the option to select whether Open
System or Shared Key authentication will be used. You have to click “Submit” to enable all the setting
you have chosen.
Note: If you want to set up encryption function, you need to change the following 6 parts in “Utility”
frame:
1. “Encryption”: Change “Disabled” to “64 bit”(64 bits & 128 bits differs in password sets. 128 have
10 set &, 64 have 5 sets.)
2. Key in password in the Key# field, which should be the same as the password in the AP. If you
didn’t set password for your AP, you do not need to use encryption function.
3. Choose one key from “WEP Key to use”
4. Change “WEP Mode” from “Optional” to “Mandatory”
5. “Authentication Type” need to change from “Open System” to “Shared Key”
6. Press “Submit”
(Figure 17)
Quick Installation Guide of WL-2111
18
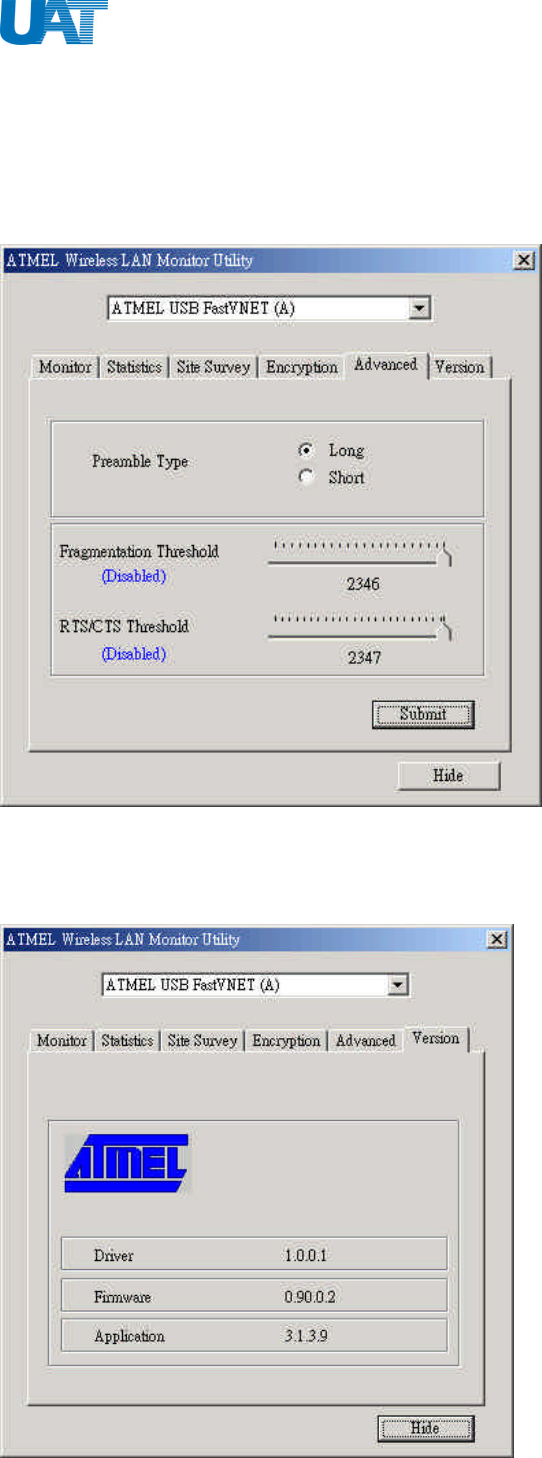
Advanced
By Choosing the Advanced option, you can change advanced Configuration settings, such as the
Preamble Type, Fragmentation Threshold, and RTS/CTS Threshold. The Encryption Window
shows the recommended configuration for the advanced settings. Before selecting Short Preamble,
make sure that the other stations and APs also support this feature.
(Figure 19)
Version
By choosing this option, you can view basic information about the Utility like the Driver, Firmware
and Application Versions. Use the “Exit” button in order to exit the application.
(Figure 20)
Quick Installation Guide of WL-2111
19
An Ad-hoc wireless LAN is a group of computers, each with a WLAN adapter, connected as an
independent wireless LAN. Ad-hoc wireless LAN is applicable at a departmental scale for a
branch or SOHO operation.
(Figure 21)
Situation I:
If you want to change the operating mode from Infrastructure to Ad-Hoc mode you
need to do the following.
1. Make sure your Wireless Adaptors are in the same channel
2. Change “SSID” to the same name. Do not use “ANY”.
3. Encryption mode from “64 bits” to “Disabled” (if encryption model is opened.)
4. If you have connection between PCs, you need to set the TCP/IP in the same
Subnet. Make sure IP should be different for every computer & the Subnet Mask
are in the same subnet. After you have enable DNS function & disable WINS
function, please restart your computer.
5. You need to set NetBEUI in the Network Neighborhood. To set NetBEUI, right
click on Network NeighborhoodàPropertiesà “NetBEUI Protocol” to check
if Netbeui is set, if not, double click on “Add” àProtocol à Microsoft à
NetBEUI à OK.)
Infrastructure to Ad-Hoc
Quick Installation Guide of WL-2111
20
(Figure 22)
Situation II:
If you could see the “Infrastructure and Ad-Hoc” mode exist concurrently in site survey, then
you can double click on “Ad-Hoc”
(Figure 23)
Quick Installation Guide of WL-2111
21
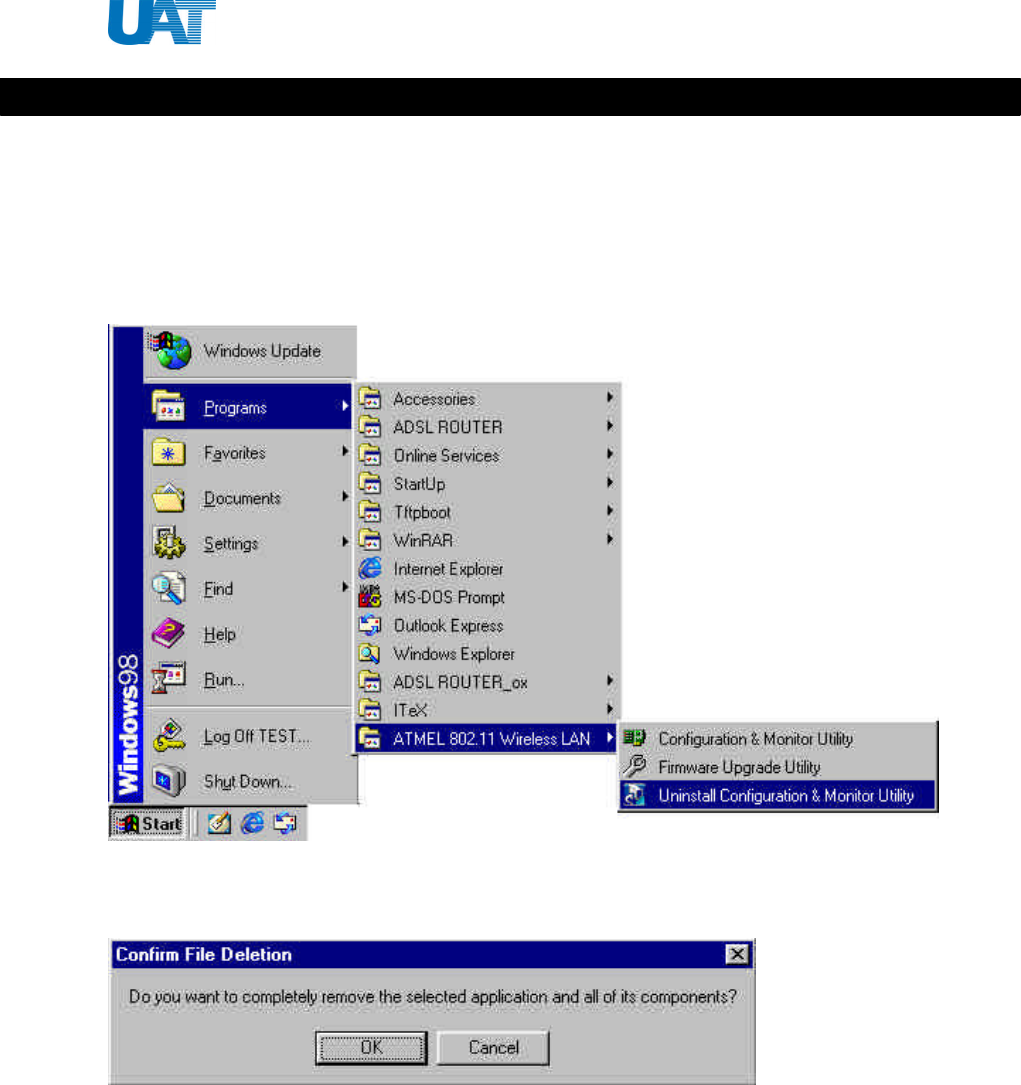
To uninstall the driver, please follow the instructions shown below.
1. Go to “Start” à “ATMEL 802.11 Wireless LAN” à “ Uninstall Configuration &
Monitor Utility”
(Figure 24)
2. Confirm File Deletion. Click “Yes” to continue.
(Figure 25)
Uninstall Driver
Quick Installation Guide of WL-2111
22
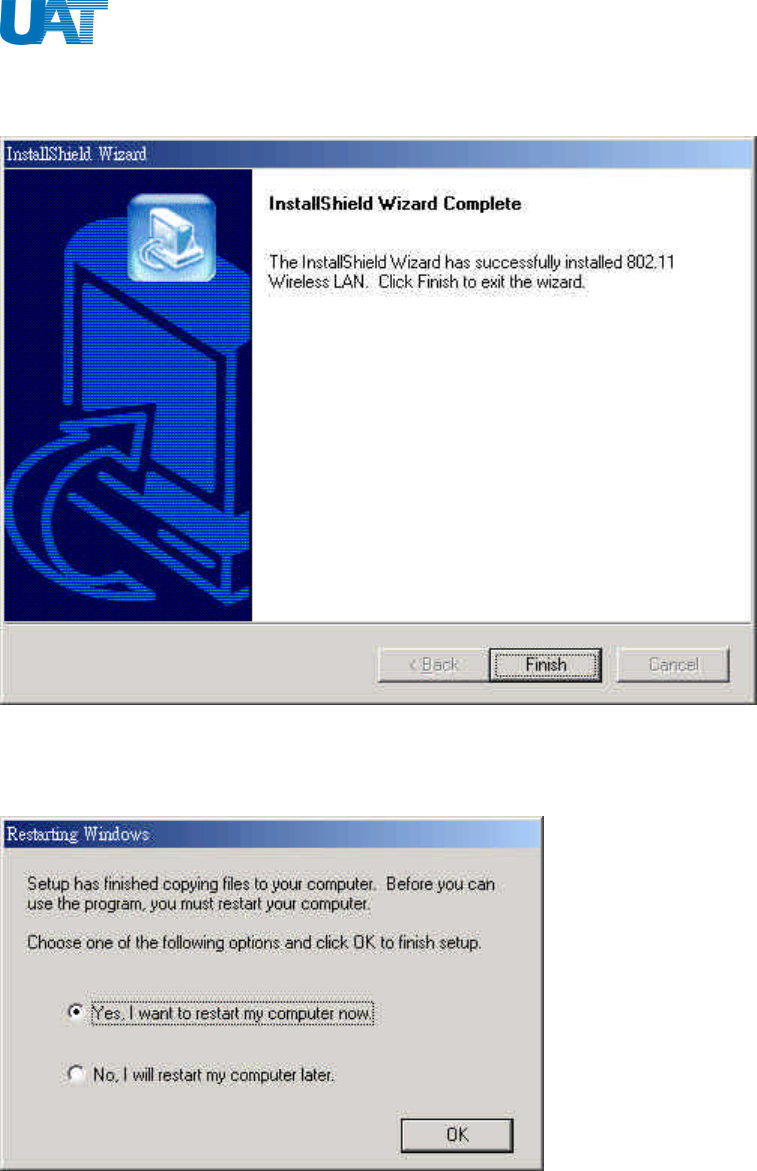
3. InstallShield Wizard will uninstall the driver for you. Click “Finish” to finish removing
driver.
(Figure 26)
3. Restarting Windows. Please choose “Yes, I want to restart my computer now.” to end
uninstallation procedure.
(Figure 27)
In order7 to fully remove the driver from your PC, please go to “Start” à “Find” à “Files
and Folders” to find the following files & delete them.
Ø external.rom
Ø internal.rom
Ø netvusba.inf
Ø netvusba.PNF
Ø Vnetusba.sys

Quick Installation Guide of WL-2111
23
FCC Regulations
INTERFERENCE INFORMATION: PART 15 OF FCC RULES
Some telephone equipment generates and uses radio frequency energy, which if not properly
installed, may cause interference to radio and television reception.
This unit has been tested and found comply with the limits for a Class B computing device in
accordance with Part 15 of the FCC rules. These specifications are designed to provide
reasonable protection against such interference in a residential installation. However, there is
no guarantee that interference will not occur in a particular installation.
If this equipment does cause interference to radio or television reception, when it’s in use, the
user is encouraged to try to correct the interference by one or more of the following measures:
A. Where it can be done safely, reorient the radio or TV receiving antenna.
B. To the extent possible, relocate the television, radio, or other receiver with respect to
telephone equipment.
C. If your telephone product runs on AC power, plug your product into an AC outlet that’s not
on the same circuit as the one used by the radio or television.
SAFETY INFORMATION
Your device contains a low power transmitter. When device is transmitted it sends out radio
frequency (RF) signal.
CAUTION: To maintain compliance with FCC’s RF exposure guidelines, this equipment should
be installed and operated with minimum distance 20cm between the radiator and your body.
Use on the supplied antenna. Unauthorized antenna, modification, or attachments could damage
the transmitter and may violate FCC regulations.