UBTECH ROBOTICS JR1601 Jimu Robot User Manual
UBTECH ROBOTICS CORP Jimu Robot
Contents
- 1. User manual
- 2. User Manual
User manual
SHARE YOUR CREATIONS:ubtrobot.com/Forum
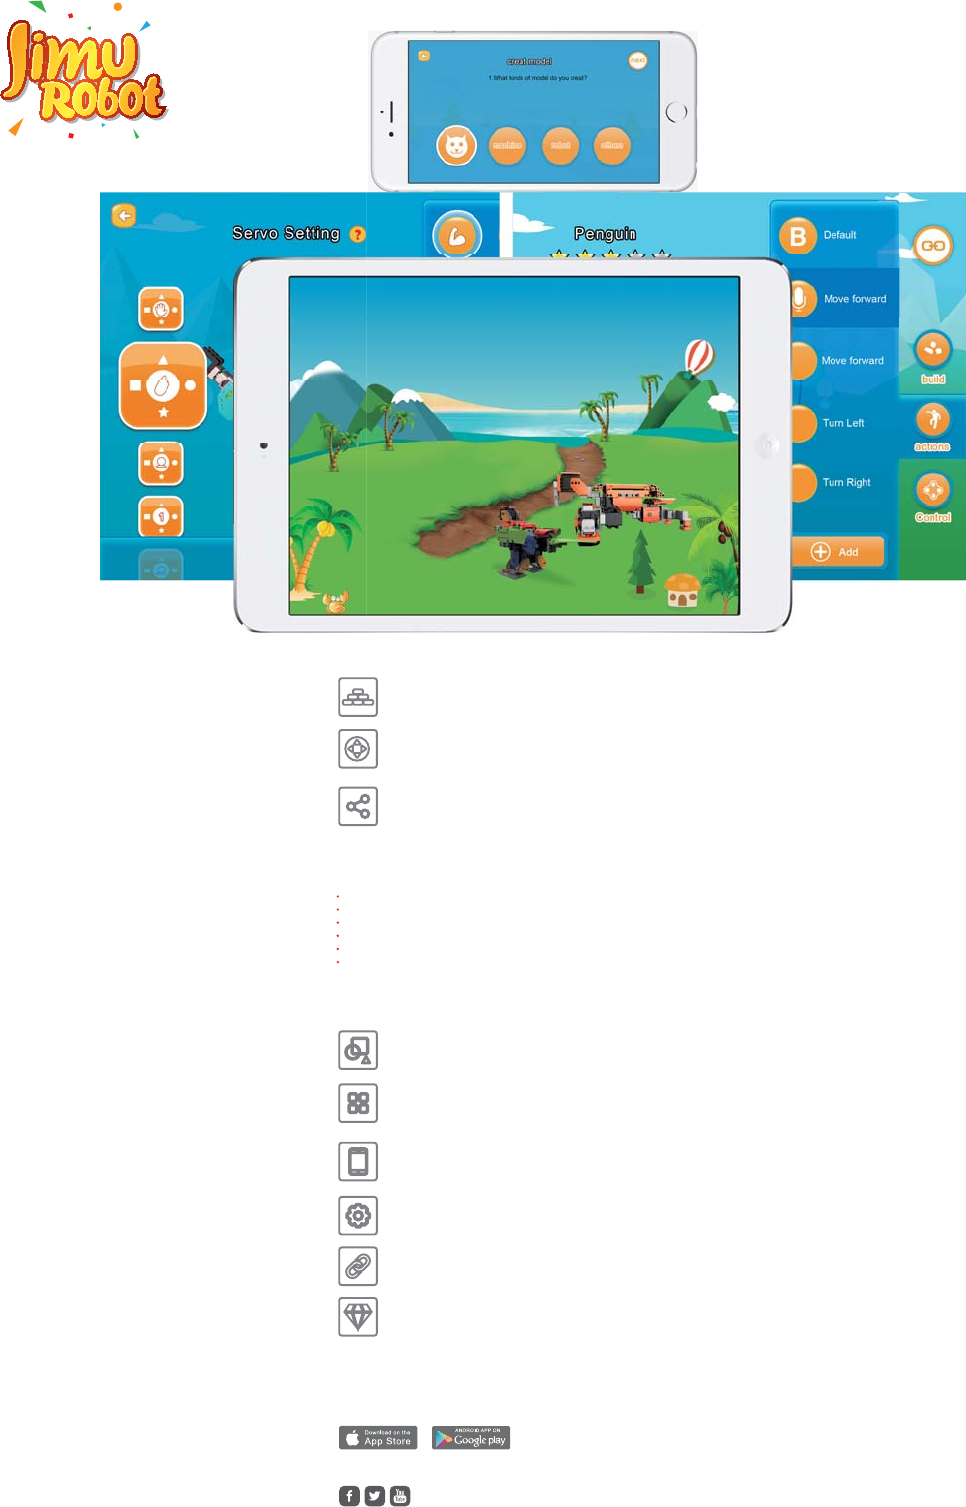
Download App:
Follow the App to Build Your JIMU Robot
Functions
With JIMU ROBOT ,YOU CAN MAKE ANYTHING YOU CAN IMAGINE
Creativity and Manual Operation;
Focus and Identication;
Logical and Spatial Thinking;
Team Building and Cooperation;
3D Imagination;
Sharing and Eective Communications.
Dynamic Drawing
Built-in APP module for “dynamic drawings”, giving step by step illustrations
of every part. Detailed building procedures so that children will nd it easier
to master the robot construction techniques, increasing players’ interest.
APP Connection and Programming
Create your unique Robot manually. Connect it to your Bluetooth or phone
to program and control its movements.
Open Source and Sharing Platform
The Jimu software and hardware open source enables fans to share
their joy in exploring Jimu with people all over the world through its
platform and community.
High-torque Servos
The high-torque servos create uid movement. Highly exible servo
ensures precise action control and expectations.
Snap-in Design
The pieces snap together by hand, no tools required. It’s easy to use for
kids as young as 7.
Durable and Safe
JIMU uses environmentally friendly materials that are durable and safe for
kids.
Build a Jimu Robot
The intimate “dynamic drawing” APP enables fans to understand the
3D building steps more easily.
Control a Jimu Robot
The APP will automatically identify and connect the robot by bluetooth,
complete movement programming and then control movement simulation.
Share Your Jimu Robot with Others
Create your own robot and then share it with fans all over the world through
our community and platform.
VISIT www.ubtrobot.com FOR MORE INFORMATION
FOLLOW US @UBTECHRobotics
JIMU ROBOT
JR1601

Main control box
Battery
Fastener A
Fastener B
C4
1
C6
5
BUTTON
4
By following the instructions below, you can assemble your rst barrier gate.
BUILD YOUR ROBOT STEP-BY-STEP
3
C3
6
A.Installing the battery B. Connecting the switch
1) Place the battery in the slot of the main
control box.
2) Push in fastener A and fastener B
respectively to lock the battery. Pull
out A and B to unlock the battery. Locate the 2-pin switch cable and switch box, and
then connect them as show on the picture.
Attation:
Each servohas 4
symbols,in order
to install part C3,
”O” symbol should
be facing down.
SERVO
2
ER
VO
Please Use:
Servo ID-01
Assemble barrier gate by following
the above steps. Locate the 3-pin
power supply cable in the parts box,
and connect the main control box
and servo as shown on the picture.
Flip the switch to the “ON” position and run the Jimu app on your mobile phone to start the beginner’s guide.
D. Connecting to your mobile phone
C. Assembling barrier gate

SHARE YOUR CREATIONS
ubtrobot.com/Forum
More Forms
Rhino Elephant Mantis
Girae
Gir
ae
Human
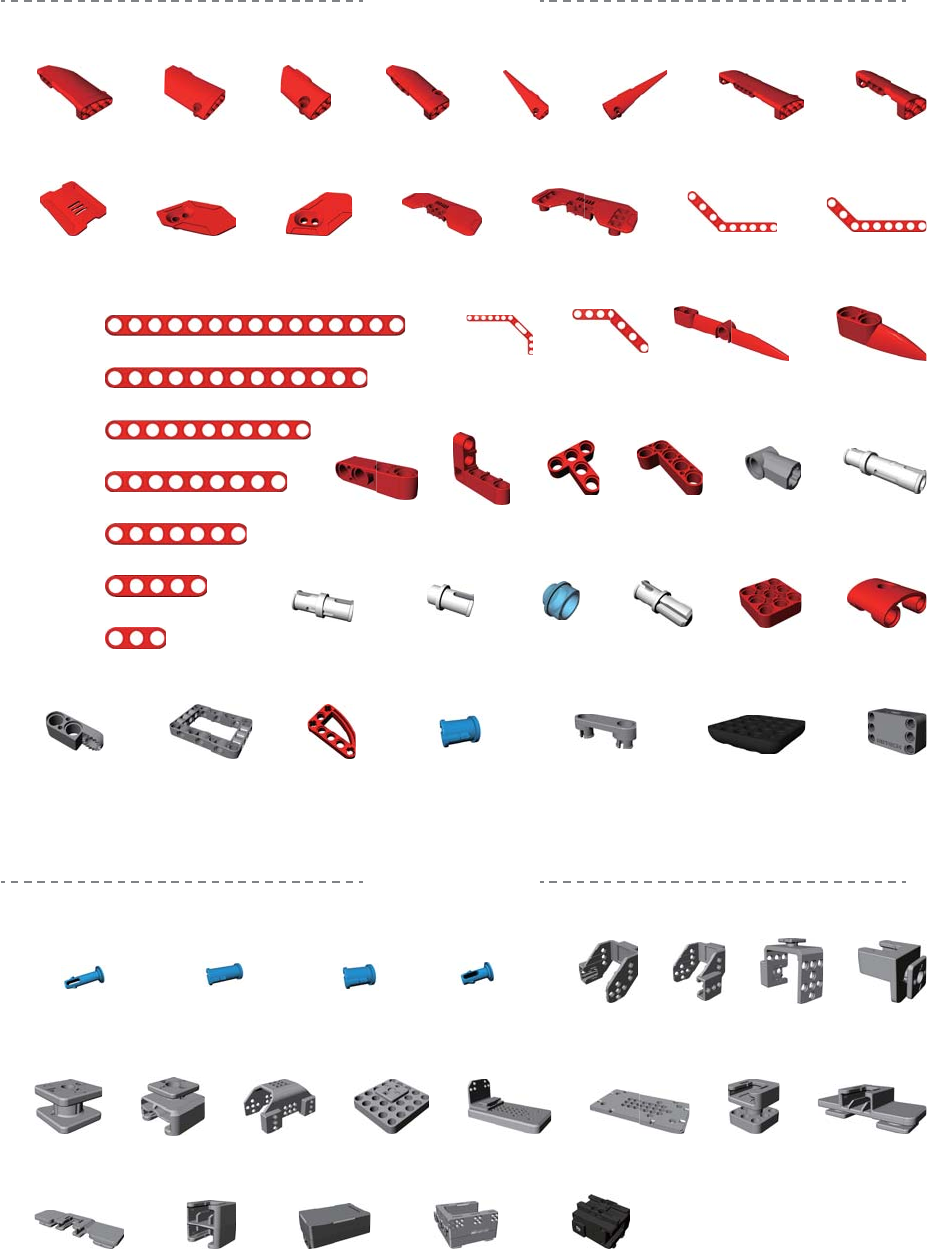
C7 x 2 C8 x 8 C9 x 2
C14 x 3 C15 x 8
C10 x 2 C13 x 6
C1 x 3 C2 x 3 C3 x 6 C4 x 24
C5 x 7 C6 x 29
LP x 1 MC x 1 SERVO x 16
C11 x 7
M01 x 1 M02 x 1 M03 x 13 M04 x 13 M05 x 1 M06 x 1 M07 x 3 M08 x 8
M12 x 6
M20 x 5
M21 x 7
M22 x 8
M23 x 9
M24 x 15
M25 x 9
M26 x 17
M13 x 6 M14 x 6
M18 x 2
M35 x 14
M48 x 250
M70 x 5 M71 x 7
M53 x 30
M78 x 16 M79 x 4 M80 x 1
M50 x 4 M51 x 6 M68 x 7M67 x 4
M69 x 10
M37 x 15 M38 x 2 M46 x 8 M47 x 100
M19 x 2 M27 x 2 M28 x 10
M34 x 24
M15 x 2M09 x 15
M72 x 2
M16 x 6 M17 x 2
Customer Service
Ubrobot.com/technology and service
services@ubtrobot.com
Parts
Connectors
BUTTON C x 50 BUTTON D x 50BUTTON A x 30 BUTTON B x 30

FCC Information and Copyright
This equipment has been tested and found to comply with the limits for a Class B digital device,
pursuant to part 15 of the FCC Rules.
These limits are designed to provide reasonable protection against harmful interference in a residential
installation. This equipment generates,
uses and can radiate radio frequency energy and, if not installed and used in accordance with the
instructions, may cause harmful interference
to radio communications. However, there is no guarantee that interference will not occur in a particular
installation. If this equipment does
cause harmful interference to radio or television reception, which can be determined by turning the
equipment off and on, the user is
encouraged to try to correct the interference by one or more of the following measures:
—Reorient or relocate the receiving antenna.
—Increase the separation between the equipment and receiver.
—Connect the equipment into an outlet on a circuit different from that to which the receiver is
connected.
—Consult the dealer or an experienced radio/TV technician for help.
15.19 Labelling requirements.
This device complies with part 15 of the FCC Rules. Operation is subject to the
following two conditions:
(1)This device may not cause harmful interference, and
(2) this device must accept any interference received, including interference that may
cause undesired operation.
changes or modifications not expressly approved by the party responsible for compliance could
void the user's authority to operate the equipment.
FCC RF warning statement: the device has been evaluated to meet general RF exposure
requirement , The device can be used in portable exposure condition without restriction.