UNION COMMUNITY T9 Fingerprint Access Controller User Manual AC7000 UserGuide 1 0
UNION COMMUNITY Fingerprint Access Controller AC7000 UserGuide 1 0
UserManual.wiki
>
UNION COMMUNITY
>
T9 User Manual
User Manual
Navigation menu
Upload a User Manual
Namespaces
Wiki Guide
HTML
PDF
Info
Views
User Manual
Discussion / Help
Navigation
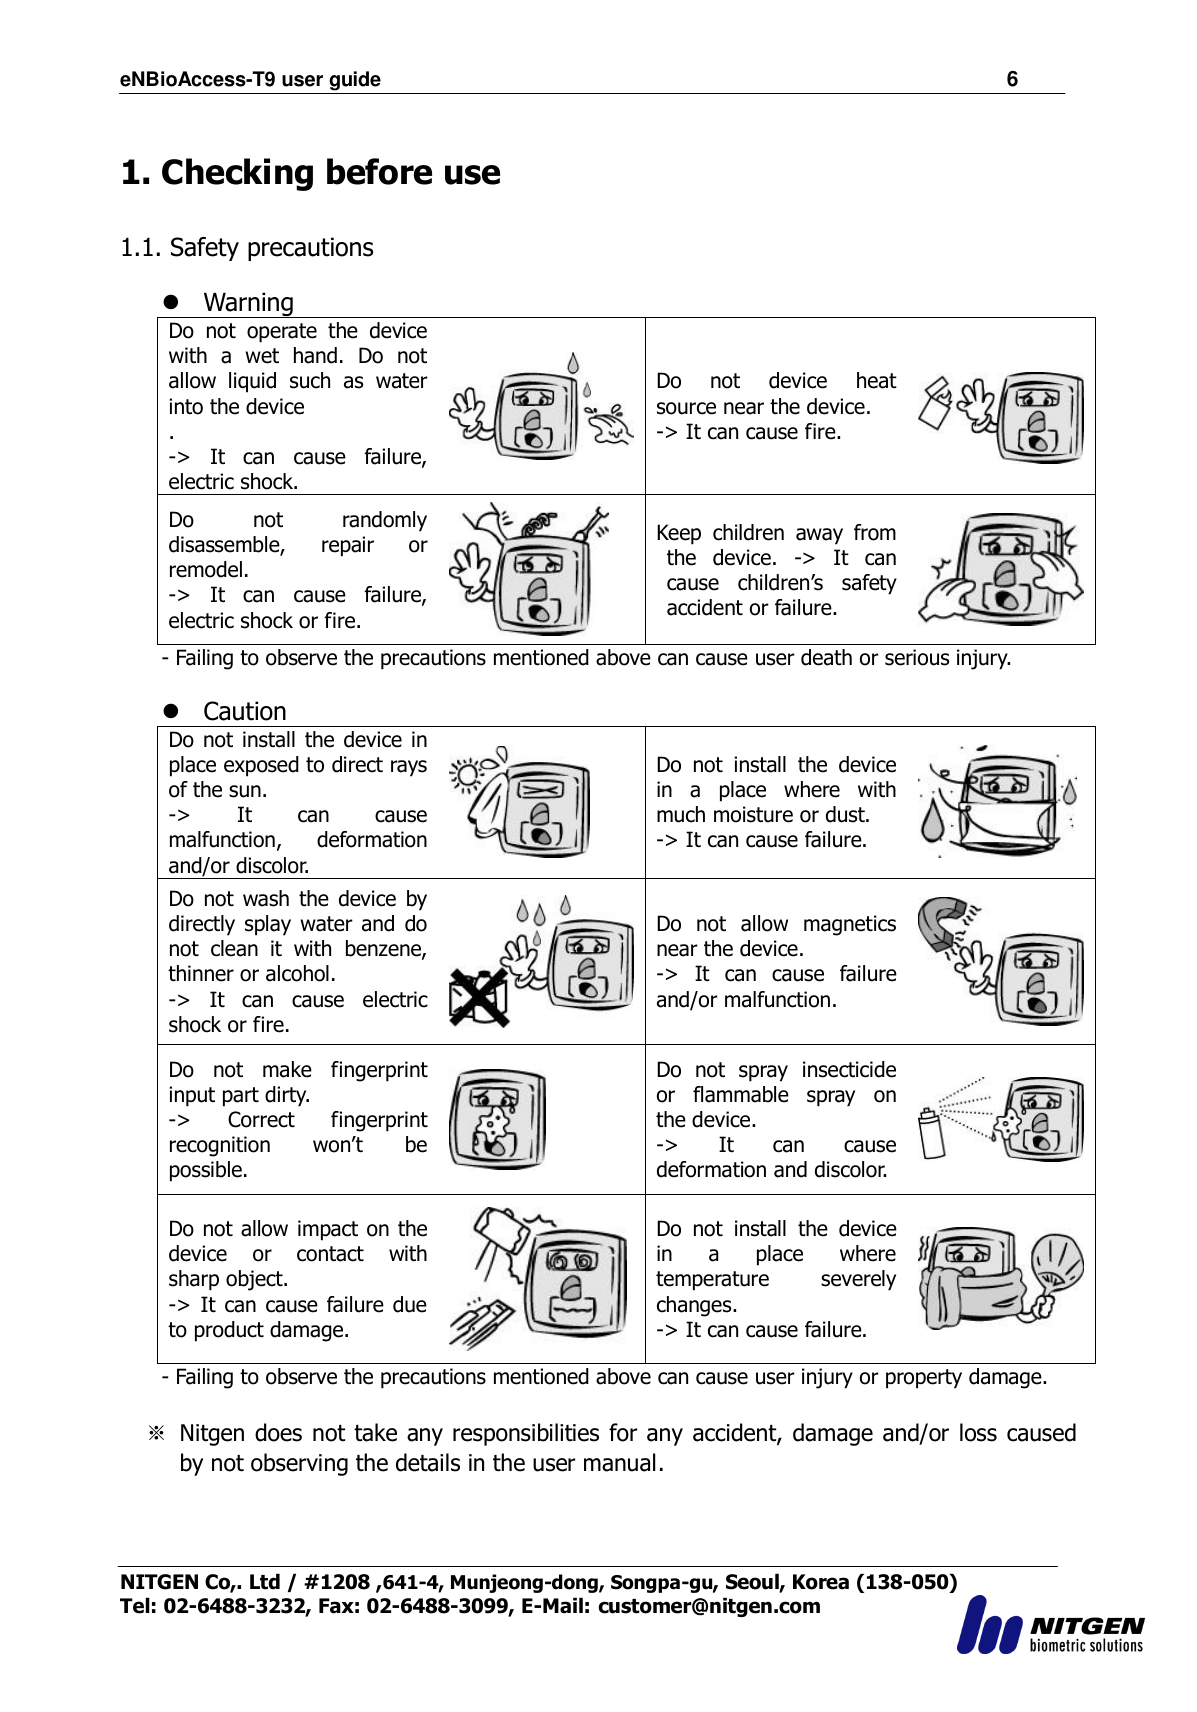
![eNBioAccess-T9 user guide 7 NITGEN Co,. Ltd / #1208 ,641-4, Munjeong-dong, Songpa-gu, Seoul, Korea (138-050) Tel: 02-6488-3232, Fax: 02-6488-3099, E-Mail: customer@nitgen.com How to use touch screen To select the function you want, touch lightly with your fingertip. When the touch is recognized, the color of button or icon will be temporarily reversed and return to the orginal color. Touch screen operates by recognizing human body‟s tiny current (capacitive), so you must use your fingertip. (do not use fingernails). [Caution] - Do not let anything with electricity flow touch the touch screen. The touch screen might not operate properly due to electric stimulation such as static. - Do not press strongly with sharp object. The touch screen might be damaged. The touch sensor might not properly operate with water on the screen or on your finger.](https://usermanual.wiki/UNION-COMMUNITY/T9/User-Guide-4185831-Page-7.png)

![eNBioAccess-T9 user guide 20 NITGEN Co,. Ltd / #1208 ,641-4, Munjeong-dong, Songpa-gu, Seoul, Korea (138-050) Tel: 02-6488-3232, Fax: 02-6488-3099, E-Mail: customer@nitgen.com 3. Configuration 3.1. Check points before configuration 3.1.1. Entering menu Press [ ] icon in the main screen to access into the main menu screen below. Press the relevant button to move to each sub menu. 3.1.2. Administrator authentication If an administrator is registered, the following administrator authorization screen will be displayed first. ▶ Administrator authentication Input administrator ID to proceed with administrator authentication using card, fingerprint, face or password according to authentication method of the relevant administrator. Administrator authentication screen will be displayed only when there is a registered administrator. Authentication will be performed only once to enter menu mode. After that, access to all menus is possible until completely move out of the main menu.](https://usermanual.wiki/UNION-COMMUNITY/T9/User-Guide-4185831-Page-20.png)
![eNBioAccess-T9 user guide 21 NITGEN Co,. Ltd / #1208 ,641-4, Munjeong-dong, Songpa-gu, Seoul, Korea (138-050) Tel: 02-6488-3232, Fax: 02-6488-3099, E-Mail: customer@nitgen.com 3.1.3. Method to enter menu without administrator authorization The method is to enter the menu when an administrator lost registered administrator card which is registered at the terminal or when fingerprint or face verification is impossible because there is no administrator. ① Remove the bracket on the rear side of the terminal to open the cover ② As shown in the figure below, in cover open status, connect each of the following 5-pin connector No 1 and 3 pin, No 2 and 4 pin on the rear side of the terminal. <Figure3-3> ② Press icon in the main screen to access into administrator authorization screen in <Figure3-2>, fill with „0‟ for administrator ID length and press [ ] button to enter menu screen. (But if the admin user ID was „000…0‟, you can insert the unregistered user ID as you please instead of the ID „000…0‟ and then press [ ] button to enter the menu screen) ▶ Make sure that connection pin of the connector is removed after modifying the setting value. 3.1.4. Saving setting value When [OK] button in each menu is pressed after setting change to save change detail, the setting detail in the screen will be saved and the following message box will be displayed. ▶ If nothing is changed, the screen will move to the previous menu screen. ▶ If nothing is input for 30 seconds while changing setting value in the menu, the screen will move to the previous menu.](https://usermanual.wiki/UNION-COMMUNITY/T9/User-Guide-4185831-Page-21.png)
![eNBioAccess-T9 user guide 22 NITGEN Co,. Ltd / #1208 ,641-4, Munjeong-dong, Songpa-gu, Seoul, Korea (138-050) Tel: 02-6488-3232, Fax: 02-6488-3099, E-Mail: customer@nitgen.com 3.2. Menu configuration 1. User management 1. Add 2. Change 3. Delete 4. Delete All 5. Search 2. Network Terminal IP address Static IP / DHCP ▶ Terminal IP address ▶ Subnet Mask ▶ Gateway DNS server ▶ DNS server1 ▶ DNS server2 Server IP address ▶ Server IP address ▶ Port Terminal ID ▶ Terminal ID 3. Operation mode 1. Function key setting □ F1 use □ F2 use □ F3 use □ F4 use □ ID button □ Access button □ F key mode: Normal,Fixed 4. System 1. System ▶ User ID length ▶ Authentication: Server/Terminal Terminal/Server Server Only Terminal Only ▶OperationMode : Network/StandAlone 2. Fingerprint recognition ▶ 1: N level [3~9] ▶ 1 to 1 level [1~9] ▶ Fake fingerprint detection : None Low Medium High □ Check similar FP 3. Face recognition ▶ Face Authentication Use ▶ Matching level [1~4] ▶ Face recognition: Fixed Normal Adaptive ▶ Camera Angle [-2~4] ▶ Enrollment Sensitivity: Auto](https://usermanual.wiki/UNION-COMMUNITY/T9/User-Guide-4185831-Page-22.png)
![eNBioAccess-T9 user guide 23 NITGEN Co,. Ltd / #1208 ,641-4, Munjeong-dong, Songpa-gu, Seoul, Korea (138-050) Tel: 02-6488-3232, Fax: 02-6488-3099, E-Mail: customer@nitgen.com [1~10] 4. Date/time ▶ Display format ▶ Set Date ▶ Set Time 5. Database 1. Delete all users 2. Delete setting 3. Delete Log 4. Delete image log 5. Factory Init 5. Terminal setting 1. Sound ▶ Voice volume ▶ Buzzer volume □ User Voice 2. Terminal option ▶ Read Card Number ▶ Card format □ Lock Terminal ▶ Card reader: Standard HID-iCLASS (option) 3. Input setting ▶ M0 ▶ M1 ▶ M2 ▶ IO ▶ Warn door open (sec) □ Tamper alarm 4. Lock setting ▶ Lock1 option ▶ Lock2 option ▶ Lock1 duration (ms) ▶ Lock2 duration (ms) 5. External setting ▶ Wiegand Sitecode ▶ Wiegand output ▶ Wiegnad Input 6. Screen setting 1. Theme ▶ Background 2. Camera ▶ Display option ▶ Save option □ Save success log □ Save failed log 3. Language ▶ Language 4. Option ▶ Screen saver ▶ Display option](https://usermanual.wiki/UNION-COMMUNITY/T9/User-Guide-4185831-Page-23.png)
![eNBioAccess-T9 user guide 24 NITGEN Co,. Ltd / #1208 ,641-4, Munjeong-dong, Songpa-gu, Seoul, Korea (138-050) Tel: 02-6488-3232, Fax: 02-6488-3099, E-Mail: customer@nitgen.com 5. Message display time ▶ Message display time (ms) 7. Terminal information 1. System ▶ System information ▶ Disk ▶ RAM 2. Terminal ▶ Terminal information Terminal ID Application Language 3. Network ▶ Network info MAC <Ethernet> IP 4. User ▶ User 5. Log ▶ Log 6. About ▶ About 8. SD card 1. Export 1. User data 2. Event log 3. System option 4. Export all 5. Picture 2. Import 1. User data 2. System option 3. Others 1. Theme 2. F/W upgrade 3.3. User management Select [User] in the main menu to display the screen below.](https://usermanual.wiki/UNION-COMMUNITY/T9/User-Guide-4185831-Page-24.png)
![eNBioAccess-T9 user guide 25 NITGEN Co,. Ltd / #1208 ,641-4, Munjeong-dong, Songpa-gu, Seoul, Korea (138-050) Tel: 02-6488-3232, Fax: 02-6488-3099, E-Mail: customer@nitgen.com Number of all registered users including administrator will be displayed on the top of the screen. To add a new user, press [Add] button. To change a user, press [Change] button. To delete user with specific ID, press [Delete] button. To delete all users, press [Delete All] button. To search registered user list, press [View] button.](https://usermanual.wiki/UNION-COMMUNITY/T9/User-Guide-4185831-Page-25.png)
![eNBioAccess-T9 user guide 26 NITGEN Co,. Ltd / #1208 ,641-4, Munjeong-dong, Songpa-gu, Seoul, Korea (138-050) Tel: 02-6488-3232, Fax: 02-6488-3099, E-Mail: customer@nitgen.com 3.3.1. Adding Select [User] [Add] in the main menu to display the screen below. Input user ID to be registered and press [OK] button. In this case, ID which can be registered is automatically displayed in the screen. Hence, registration is easy and convenient. To change ID, Press [ ] button to delete the existing value and to input a new one. Press [BACK] button to cancel and move out. If an already registered ID is input, failure message will be displayed. If it is an unregistered ID, the screen below will be displayed. Each icon has the following meaning. : number of registered face : number of registered fingerprint templet (X, 2~20) : whether password is registered (X: not registered, O: registered) : whether card is registered (X: not registered, O: registered) : user ID to be registered : user : administrator button: take user‟s picture to register it Press [name] to register name, press [Fingerprint] to register fingerprint, press [face] to register face, press [card] to register card, press [password] button to register password. Basically, everybody is registered as a user. Press [administrator] button to convert into an administrator. To save registration after completing, press [Save] button or press [Cancel] or [BACK] button to cancel input or to move out of it.](https://usermanual.wiki/UNION-COMMUNITY/T9/User-Guide-4185831-Page-26.png)
![eNBioAccess-T9 user guide 27 NITGEN Co,. Ltd / #1208 ,641-4, Munjeong-dong, Songpa-gu, Seoul, Korea (138-050) Tel: 02-6488-3232, Fax: 02-6488-3099, E-Mail: customer@nitgen.com ※ Only the user who is registered as an administrator can change operation method for the terminal, and can register/change/delete information of all users saved at the terminal. Hence, care is required to register administrator. 3.3.1.1. Registering picture Press [ ] button in [Add user] screen to register a picture. Press [Save] button to register current camera image as a picture. To cancel registration and move out, press [Cancel] or [BACK] button. 3.3.1.2. Registering name Press [Name] button in [Add user] screen to register a name. Input name using the keyboard displayed below and press OK button. Up to 29 characters can be input for name. To cancel registration and move out, press [ ] button.](https://usermanual.wiki/UNION-COMMUNITY/T9/User-Guide-4185831-Page-27.png)
![eNBioAccess-T9 user guide 28 NITGEN Co,. Ltd / #1208 ,641-4, Munjeong-dong, Songpa-gu, Seoul, Korea (138-050) Tel: 02-6488-3232, Fax: 02-6488-3099, E-Mail: customer@nitgen.com 3.3.1.3. Registering fingerprint ① Press [Fingerprint] button in [Add user] screen to register. To cancel registration and move out, press [ ] button. When the left screen is displayed, select a finger to be registered. ※ In case of registering many fingers, already registered finger will be displayed in blue circle ( ). If an already registered finger is selected, the following message will be displayed. Select Re-register to delete the existing registered fingerprint and try again. ② Input fingerprint(s) referring to „1.7. Method to correctly register and input fingerprint„. Input fingerprint 2 times according to information in the screen as below 2. When the fingerprint sensor lamp is ON along with the message of „input fingerprint„, put finger in fingerprint input window and wait for about 2~3 seconds until lamp OFF and then remove the finger. ④ Input the fingerprint which is just input one more time when the message of „Input the same fingerprint once again‟ will be displayed. ※ For the second input of the fingerprint after the first input, make sure that finger is removed from the fingerprint input window before the second input.](https://usermanual.wiki/UNION-COMMUNITY/T9/User-Guide-4185831-Page-28.png)
![eNBioAccess-T9 user guide 29 NITGEN Co,. Ltd / #1208 ,641-4, Munjeong-dong, Songpa-gu, Seoul, Korea (138-050) Tel: 02-6488-3232, Fax: 02-6488-3099, E-Mail: customer@nitgen.com ④ Message on the left will be displayed when input is completed. Press [OK] button to complete registration and move to the upper menu. To register fingerprint again, press [Retry] button to start it again from the process of ② above. To cancel it, press [ ] button to move to upper menu. If a fingerprint is similar with an already registered fingerprint, message of “similar with an already registered fingerprint” will be displayed as shown on the left. In this case, press [Retry] button to start it again from the process of ② above. To cancel it, press [ ] button to move to upper menu. ※ Max 10 fingerprints for each ID can be registered, but more than 10 fingerprints can be registered. In case of failing after 2~3 times of registration try according to correct fingerprint registration method, it is recommended that face, password or card is used.](https://usermanual.wiki/UNION-COMMUNITY/T9/User-Guide-4185831-Page-29.png)
![eNBioAccess-T9 user guide 30 NITGEN Co,. Ltd / #1208 ,641-4, Munjeong-dong, Songpa-gu, Seoul, Korea (138-050) Tel: 02-6488-3232, Fax: 02-6488-3099, E-Mail: customer@nitgen.com 3.3.1.4. Registering face Register face referring to „1.6 Correct face registration and authentication method„. Press [Face] button in [Add user] screen to select [Regular Registration] or [Quick Registration]. To cancel registration, press [BACK] button. * In case of general registration, register face through 5 steps after fixing face and pose according to the guideline. * In case of simple registration, register face through 3 steps using auto face search function when face area is detected. ② Press [Start] button to register face. As shown in the left screen, set face to face contour in the screen and then look ahead according to the information message displayed in the screen.](https://usermanual.wiki/UNION-COMMUNITY/T9/User-Guide-4185831-Page-30.png)
![eNBioAccess-T9 user guide 31 NITGEN Co,. Ltd / #1208 ,641-4, Munjeong-dong, Songpa-gu, Seoul, Korea (138-050) Tel: 02-6488-3232, Fax: 02-6488-3099, E-Mail: customer@nitgen.com ③ As shown in the left screen, if face is normally recognized, guide line will be changed into green to start registering face. At this point, do not move face and stand still for easy registration. ④ Move face to front/up/down little by little whenever information message is displayed in the screen. At this point, do not move more than 15 degree. After registering face, message of “completed” will be displayed as shown in the left screen. Press [OK] button to complete face registration and to move to the previous screen. To register face again, press [Start] button to start it again from the process of ② above.](https://usermanual.wiki/UNION-COMMUNITY/T9/User-Guide-4185831-Page-31.png)
![eNBioAccess-T9 user guide 32 NITGEN Co,. Ltd / #1208 ,641-4, Munjeong-dong, Songpa-gu, Seoul, Korea (138-050) Tel: 02-6488-3232, Fax: 02-6488-3099, E-Mail: customer@nitgen.com 3.3.1.5. Registering password Input 4~8 digit password in password input window and press [OK] button to move input focus to „password check‟ window below. Input the same password again and press [OK] button. To cancel and move out, press [ ] button. ※ If wrong password is input after checking password input, message of “Check input value” will be displayed as below. 3.3.1.6. Registering card Press [Card] button in [Add user] screen to register a card. To move out without registering, press [ ] button. ※ If an already registered card is input, the message below will be displayed ※ If registration of more than 10 cards for each user is tried, the following message will be displayed.](https://usermanual.wiki/UNION-COMMUNITY/T9/User-Guide-4185831-Page-32.png)
![eNBioAccess-T9 user guide 33 NITGEN Co,. Ltd / #1208 ,641-4, Munjeong-dong, Songpa-gu, Seoul, Korea (138-050) Tel: 02-6488-3232, Fax: 02-6488-3099, E-Mail: customer@nitgen.com 3.3.1.7. Authentication option ▶ ‟Fingerprint verification level‟ (Default setting: „0‟) This item is to decide fingerprint verification level for each user. Authentication level for each registered user can be changed by change this value. If it is set to „0‟, authentication will be done using 1 to 1 fingerprint verification level at the terminal. ▶ If „Allow 1 to N face identification (Default setting: face is registered [v])‟ option is checked, authentication with only face without user ID or card is possible. 3.3.1.8. Authentication method Press [Auth Type] button in [Add user] screen to set authentication method. (However, this can be set only when more than one authentication method are registered.) To move out without changing, press [BACK] button. “▶ registered authentication method” in the left screen shows all already registered authentication methods. If each authentication method is selected, it will be deleted from authentication method. The buttons below display combination of authentication method which can be selected. Press the button desired to be changed to change authentication method to move to the previous screen. The followings are icons for authentication method. : fingerprint : face : card : password](https://usermanual.wiki/UNION-COMMUNITY/T9/User-Guide-4185831-Page-33.png)
![eNBioAccess-T9 user guide 34 NITGEN Co,. Ltd / #1208 ,641-4, Munjeong-dong, Songpa-gu, Seoul, Korea (138-050) Tel: 02-6488-3232, Fax: 02-6488-3099, E-Mail: customer@nitgen.com 3.3.1.9. Saving After completing all registering processes, press [Save] button. At this point, if [Cancel] or [BACK] button is pressed without pressing [Save] button, the user won‟t be saved. The following shows LCD messages which can be displayed during registering processes. When [Save] button is pressed, Normally registered When [Save] button is pressed, User registration failed : None of authentication method using fingerprint, face, card or password is registered When [Authentication Method] button is pressed, No Authentication Method is registered When [Save] button is pressed, User registration/modification failed : Operation is under Network mode but the terminal is not connected to the server](https://usermanual.wiki/UNION-COMMUNITY/T9/User-Guide-4185831-Page-34.png)
![eNBioAccess-T9 user guide 35 NITGEN Co,. Ltd / #1208 ,641-4, Munjeong-dong, Songpa-gu, Seoul, Korea (138-050) Tel: 02-6488-3232, Fax: 02-6488-3099, E-Mail: customer@nitgen.com During [Register Fingerprint] Not same fingerprint but different fingerprint is input during fingerprint registration During [Register Fingerprint] Already registered fingerprint is tried to be registered again (However, same fingerprint input with same user ID is possible.) ※ To register same fingerprint with another different ID, „System fingerprint recognition prevention of registration of similar fingerprint‟ function must be released. However, in this case, same fingerprint can be authenticated as different ID each other. Hence, it is not proper for something like time and attendance management. 3.3.2. Deleting Select [User management] [Delete] in the main menu to display the screen below](https://usermanual.wiki/UNION-COMMUNITY/T9/User-Guide-4185831-Page-35.png)
![eNBioAccess-T9 user guide 36 NITGEN Co,. Ltd / #1208 ,641-4, Munjeong-dong, Songpa-gu, Seoul, Korea (138-050) Tel: 02-6488-3232, Fax: 02-6488-3099, E-Mail: customer@nitgen.com Input user ID to be deleted and press [OK] button. Press [BACK] button to cancel and move out. Failure message of “unregistered user” will be displayed in the screen when unregistered ID is input, and success message of “deleted” will be displayed when registered ID is input. However, it is not deleted from the server even when it is deleted from the terminal. Therefore, it must be deleted from the server in order to completely delete it. Deletion will be performed without distinction of user/administrator. Hence, care is required. If a user registered only at the terminal without registering at the network server is deleted, recovering is impossible. Hence, be cautious of it. The following shows LCD messages which can be displayed during deletion. Normally deleted Unregistered ID is input](https://usermanual.wiki/UNION-COMMUNITY/T9/User-Guide-4185831-Page-36.png)
![eNBioAccess-T9 user guide 37 NITGEN Co,. Ltd / #1208 ,641-4, Munjeong-dong, Songpa-gu, Seoul, Korea (138-050) Tel: 02-6488-3232, Fax: 02-6488-3099, E-Mail: customer@nitgen.com Operation is under Network mode but the terminal is not connected to the server. 3.3.3. Changing Select [User management] [change] in the main menu to display the screen below. Input user ID to be changed and press [OK] button. Press [BACK] button to cancel and move out. If an unregistered ID is input, failure message will be displayed. If a registered ID is input, information of the registered user will be displayed as below.](https://usermanual.wiki/UNION-COMMUNITY/T9/User-Guide-4185831-Page-37.png)
![eNBioAccess-T9 user guide 38 NITGEN Co,. Ltd / #1208 ,641-4, Munjeong-dong, Songpa-gu, Seoul, Korea (138-050) Tel: 02-6488-3232, Fax: 02-6488-3099, E-Mail: customer@nitgen.com Each icon displayed on the left has the following meaning. : number of registered face : number of registered fingerprint (X, 1~10) : whether password is registered (O: registered/X: not registered) : whether card is registered (O: registered/X: not registered) : user ID to be registered : user : administrator Touch picture to take user‟s picture again to register a new one. Since the method to change each item is same with that for user add, refer to „3.3.1. Add‟. 3.3.4. Deleting All Select [User] [Delete All] in the main menu to display the screen below To really delete all users, press [Yes]. To cancel it, press [No] ※ If [Yes] is selected, all users and administrators will be deleted. Recovering after deleting is impossible. Hence, it should take extra care. 3.3.5. Searching Select [User] [View] in the main menu to search the list of all registered users as below.](https://usermanual.wiki/UNION-COMMUNITY/T9/User-Guide-4185831-Page-38.png)
![eNBioAccess-T9 user guide 39 NITGEN Co,. Ltd / #1208 ,641-4, Munjeong-dong, Songpa-gu, Seoul, Korea (138-050) Tel: 02-6488-3232, Fax: 02-6488-3099, E-Mail: customer@nitgen.com User list will be displayed in the order of ID. Scroll down screen to search following user lists. List will be displayed by 100 persons unit. If there are more than 100 persons, press [BACK] or [NEXT] button below to search the previous or the next list. ▶ [ID]: Touch ID of a specific user to directly move to the screen to change it. ▶ [Delete]: Check at the check box on the right and press Delete button to delete checked users at a time. Press [BACK] button on the top in this screen to move to the previous „3.3. User management‟ menu. ▶ [ID search]: As shown in the left screen, input a user ID to search the relevant user. Press [BACK] button in this screen to move to „3.3. User management‟ menu.](https://usermanual.wiki/UNION-COMMUNITY/T9/User-Guide-4185831-Page-39.png)
![eNBioAccess-T9 user guide 40 NITGEN Co,. Ltd / #1208 ,641-4, Munjeong-dong, Songpa-gu, Seoul, Korea (138-050) Tel: 02-6488-3232, Fax: 02-6488-3099, E-Mail: customer@nitgen.com ▶ [Name]: Press the button and input user name to display registered user list with the name in which input character string is included. Press [BACK] button in this screen to move to „3.3. User management‟ menu. Ex) In case of searching with “Yeon”, all users who have “Yeon” in their names will be searched as shown in the left screen. 3.4. Network setting Select [network] in the main menu to display the screen below.](https://usermanual.wiki/UNION-COMMUNITY/T9/User-Guide-4185831-Page-40.png)
![eNBioAccess-T9 user guide 41 NITGEN Co,. Ltd / #1208 ,641-4, Munjeong-dong, Songpa-gu, Seoul, Korea (138-050) Tel: 02-6488-3232, Fax: 02-6488-3099, E-Mail: customer@nitgen.com ▶ Default setting: same with the setting in the left screen Select [Static IP] if IP is fixed in the connected network is allocated. Select [DHCP] if there is a DHCP server at the connected network and IP is allocated from it. In case of setting it to [Static IP], set terminal IP address, subnet mask and gateway. If [DHCP] is selected, no need to set it. DNS can be input in [Server IP address] instead of IP. In case of using specific DNS server, input IP address of [DNS server] too. Up to 2 DNS servers can be designated. To input DNS, check at DN□ to input English. ▶ [Port]: default port value of the authentication server (AccessServer server) is „7332‟. In case of changing the value, the value must be changed to the same value at the server program as well. Hence, care is necessary to change it. ▶ [Terminal ID]: unique ID used to distinction of terminal by authentication server, and default value is „1‟. It must match with the ID of terminal registered by the server program. Up to 2000 ID can be input. Touch a desired item to be changed to display keypad. After completing input for the relevant item using the keypad, touch [ ] button or the next input window to continue input. After completing input, touch not input window but background to close the keypad. Press [OK] button to apply the changed value after setting. To cancel it, press [BACK] button to move to upper menu. 3.5. Operation mode 3.5.1. Operation mode](https://usermanual.wiki/UNION-COMMUNITY/T9/User-Guide-4185831-Page-41.png)
![eNBioAccess-T9 user guide 42 NITGEN Co,. Ltd / #1208 ,641-4, Munjeong-dong, Songpa-gu, Seoul, Korea (138-050) Tel: 02-6488-3232, Fax: 02-6488-3099, E-Mail: customer@nitgen.com Select [Application] in the main menu to display the screen below. ▶ Default setting: same with the setting in the left screen ▶ Function key setting [F1] ~ [F4], [Access], [ID Input] buttons used to change authentication mode for attending/quitting. Press function button to convert authentication mode into the relevant mode. Only the checked button will be displayed in the main screen. Hence, it can be used for exclusive terminal for attending/quitting by unchecking other function keys. ▶ F key mode Normal : Selected F Key value is set back to 0 after user authentication. Fixed : Selected F Key value remains unchanged if no other F Key is selected. To apply the setting value, press [OK] button, or and press [BACK] button to cancel and to move to the upper menu.](https://usermanual.wiki/UNION-COMMUNITY/T9/User-Guide-4185831-Page-42.png)
![eNBioAccess-T9 user guide 43 NITGEN Co,. Ltd / #1208 ,641-4, Munjeong-dong, Songpa-gu, Seoul, Korea (138-050) Tel: 02-6488-3232, Fax: 02-6488-3099, E-Mail: customer@nitgen.com 3.6. System 3.6.1. System Select [System] [System] in the main menu to display the screen below. ▶ Default setting: same with the setting in the left screen ▶ Length of user ID This part is to set the length of user ID. It can be changed to 4~ 20-digit ID and it must be same with the length of registered ID at the server program. If ID registered at the server program uses 6-digit ID of „000075‟, set it to „6‟. ▶ Authentication This item is to decide authentication priority between the terminal and the network server. Authentication will be performed according to the setting order. ▶ Operation Mode There are Network Mode that requires server connection and StandAlone Mode where the terminal can function on its own without server connection. When switching from the Stand Alone mode to the Network mode, there may be a discrepancy between the server data and the terminal data. To solve this, download the users from AccessManager to the terminal or vice versa. To apply the setting value, press [OK] button or press [BACK] button to cancel and to move to the upper menu. If [OK] button is pressed without changing the setting value, directly move to upper menu. To continuously set another item, press the relevant menu item button on the left 3.6.2. Fingerprint recognition Select [System] [Fingerprint recognition] in the main menu to display the screen below.](https://usermanual.wiki/UNION-COMMUNITY/T9/User-Guide-4185831-Page-43.png)
![eNBioAccess-T9 user guide 44 NITGEN Co,. Ltd / #1208 ,641-4, Munjeong-dong, Songpa-gu, Seoul, Korea (138-050) Tel: 02-6488-3232, Fax: 02-6488-3099, E-Mail: customer@nitgen.com ▶ Default setting: same with the setting in the left screen ▶ 1 to N level (3~9) This authentication level is used for 1 to N fingerprint verification. Since authentication level for each user is not set for 1 to N identification, it is always based on the authentication level of the terminal. ▶ 1 to 1 level (1~9) This authentication level is used for 1 to 1 fingerprint verification. However, 1 to 1 verification level of the relevant user will be performed for the user for whom 1 to 1 verification level is not to set „0‟ (use authentication level of the terminal). ▶ Fake Finger Detection This is to set LFD level to prevent input of fake fingerprint. The higher LFD level, the higher function to prevent input of fake fingerprint made of rubber, paper, film or silicon. However, sometimes input of real fingerprint can be difficult if fingerprint is too dry. ▶ Check similar FP If this item is checked ( ), check fingerprint whether it is an already registered fingerprint to prevent reregistering it as another user ID by duplicating a same fingerprint. The function is only for the users who are saved at the terminal. It is a separate function from similar fingerprint prevention function of the server. To apply the setting value, press [OK] button or press [BACK] button to cancel and to move to the upper menu. If [OK] button is pressed without changing the setting value, directly move to upper menu.](https://usermanual.wiki/UNION-COMMUNITY/T9/User-Guide-4185831-Page-44.png)
![eNBioAccess-T9 user guide 45 NITGEN Co,. Ltd / #1208 ,641-4, Munjeong-dong, Songpa-gu, Seoul, Korea (138-050) Tel: 02-6488-3232, Fax: 02-6488-3099, E-Mail: customer@nitgen.com 3.6.3. Face recognition ▶ Default setting: same with the setting in the left screen ▶ Face Authentication Press the check box to enable the function. ▶ Matching Level Level used for face authentication. It is set to 1~4 of steps according to match degree with registered face. Match degree must be higher than the setting authentication level for successful authentication. The higher the authentication level, security can be the higher. However, since it requires relatively high match rate, probability that failure of authentication will be higher during self-authentication. ▶ Face Recognition The mode is to designate method for face authentication, and it can be set according to use environment. For more information on each setting method, refer to „1.6, correct face registration and Authentication Method‟. ▶ Camera Angle The mode is to set the default value of camera angle for face authentication, and it can be selected from –2 degrees to +4 degrees ▶ Enrollment sensitivity This is to set face registration sensitivity. Default value is automatically set. To apply the setting value, press [OK] button or press [BACK] button to cancel and to move to the upper menu. If „OK‟ button is pressed without changing the setting value, directly move to upper menu. 3.6.4. Setting current time Select [System] [Date/time] in the main menu to display the screen below.](https://usermanual.wiki/UNION-COMMUNITY/T9/User-Guide-4185831-Page-45.png)
![eNBioAccess-T9 user guide 46 NITGEN Co,. Ltd / #1208 ,641-4, Munjeong-dong, Songpa-gu, Seoul, Korea (138-050) Tel: 02-6488-3232, Fax: 02-6488-3099, E-Mail: customer@nitgen.com ▶ Default setting: same with the setting in the left screen ▶ Display format This is to set the method to display the current time of the terminal. - yyyy-mm-dd: displayed in the order of year, month, day - dd-mmm-yyyy: displayed in the order of day, month (English), year ▶ Set Date/Set time This is to change the current time of the terminal. If the server is connected and the above [Time sync] is set to [Auto], the time is synchronized with the time of the server. Hence, no need to change it. To apply the setting value, press [OK] button or press [BACK] button to cancel and to move to the upper menu. 3.6.6. Database Select [System] [Database] in the main menu to display the screen below.](https://usermanual.wiki/UNION-COMMUNITY/T9/User-Guide-4185831-Page-46.png)
![eNBioAccess-T9 user guide 47 NITGEN Co,. Ltd / #1208 ,641-4, Munjeong-dong, Songpa-gu, Seoul, Korea (138-050) Tel: 02-6488-3232, Fax: 02-6488-3099, E-Mail: customer@nitgen.com To delete all users, press [Delete all users] button. To reset the setting value, press [Delete setting] button. To reset authentication record, press [Delete Log] button. To delete only image log, press [Delete image log] button. To delete the whole data to make the device to factory setting status, press [Factory Init] button. Press [Close] or [BACK] button to move to upper menu. 3.6.6.1. Deleting all users Select [System] [Database] [Delete all users] in the main menu to display the screen below. To delete all users, press [Yes] button, or press [No] or [ ] button to cancel it. If nothing is input for 5 seconds in this status, message box will be closed without delete. The following success message box will be displayed when all users are successfully deleted by pressing [Yes]. <Figure3-5> In this case, all of users and administrators will be deleted. They can’t be recovered after deleting.](https://usermanual.wiki/UNION-COMMUNITY/T9/User-Guide-4185831-Page-47.png)
![eNBioAccess-T9 user guide 48 NITGEN Co,. Ltd / #1208 ,641-4, Munjeong-dong, Songpa-gu, Seoul, Korea (138-050) Tel: 02-6488-3232, Fax: 02-6488-3099, E-Mail: customer@nitgen.com 3.6.6.2. Setting delete Select [System] [Database] [Delete setting] in the main menu to display the screen below. To reset all setting values, press [Yes] button, or press [No] or [ ] button to cancel it. If nothing is input for 5 seconds in this status, message box will be closed without resetting. Success message in <Figure3-5> will be displayed when the setting is successfully delete by pressing [Yes] and display language and voice will be changed to default value (English). Reset all setting values of the terminal excepting MAC (physical) address and [Fingerprint templet format], but user and authentication record won‟t be deleted. 3.6.6.3. Log data delete Select [System] [Database] [Delete Log] in the main menu to display the screen below. To delete all authentication records saved at the terminal, press [Yes] button, or press [No] or [ ] button to cancel it. If nothing is input for 5 seconds in this status, message box will be closed without delete. Success message in <Figure3-5> will be displayed when successfully deleted by pressing [Yes]. All authentication logs including image log will be deleted. They can‟t be recovered after deleting. 3.6.6.4. Image log delete Select [System] [Database] [Delete Image log] in the main menu to display the screen below.](https://usermanual.wiki/UNION-COMMUNITY/T9/User-Guide-4185831-Page-48.png)
![eNBioAccess-T9 user guide 49 NITGEN Co,. Ltd / #1208 ,641-4, Munjeong-dong, Songpa-gu, Seoul, Korea (138-050) Tel: 02-6488-3232, Fax: 02-6488-3099, E-Mail: customer@nitgen.com To delete all image logs saved at the terminal, press [Yes] button, or press [No] or [ ] button to cancel it. If nothing is input for 5 seconds in this status, message box will be closed without delete. Success message in <Figure3-5> will be displayed when successfully deleted by pressing [Yes]. Only image saved as a log will be deleted, but authentication log itself won‟t be deleted. 3.6.6.5. Deleting all Select [System] [Database] [Factory Init] in the main menu to display the screen below. To reset the terminal to factory setting status, [Yes] button, or press [No] or [ ] button to cancel it. If nothing is input for 5 seconds in this status, message box will be closed without resetting. Success message in <Figure3-5> will be displayed when successfully deleted by pressing [Yes], and display language and voice will be changed to the default value (English). Delete all setting values and user, log information excepting MAC (physical) address saved at the terminal to make the terminal to factory setting status. They can‟t be recovered after resetting. Hence, great care is required. 3.7. Terminal setting 3.7.1. Sound Select [Terminal] [Sound] in the main menu to display the screen below.](https://usermanual.wiki/UNION-COMMUNITY/T9/User-Guide-4185831-Page-49.png)
![eNBioAccess-T9 user guide 50 NITGEN Co,. Ltd / #1208 ,641-4, Munjeong-dong, Songpa-gu, Seoul, Korea (138-050) Tel: 02-6488-3232, Fax: 02-6488-3099, E-Mail: customer@nitgen.com ▶ Default setting: same with the setting in the left screen ▶ Voice volume Scroll to the left/right in 0~15 steps to set voice size. Press [ ] button on the right to play voice in order to check voice volume. ▶ Beep volume Scroll to the left/right in 0~3 steps to set buzzer sound size. Press [ ] button on the right to make buzzer sound in order to check buzzer sound volume. ▶ User voice To change voice which outputs when authentication is successful or failed, copy the relevant voice to the terminal and then check at this option to output user voice. For the method to copy voice to the terminal, refer to 3.10. SD card [theme] or 3.11.2 voice message change. To apply the setting value, press [OK] button, or press [BACK] button to cancel and to move to the upper menu. To continuously set another item, press the relevant menu item button on the left 3.7.2. Terminal option Select [Terminal] [Option] in the main menu to display the screen below.](https://usermanual.wiki/UNION-COMMUNITY/T9/User-Guide-4185831-Page-50.png)
![eNBioAccess-T9 user guide 51 NITGEN Co,. Ltd / #1208 ,641-4, Munjeong-dong, Songpa-gu, Seoul, Korea (138-050) Tel: 02-6488-3232, Fax: 02-6488-3099, E-Mail: customer@nitgen.com ▶ Default setting: same with the setting in the left screen ▶ Read Card number Touch a card on this screen to display card No on the LCD. Card No according to the setting value can be searched by changing [card format]. ▶ Lock terminal The function is directly lock or unlock the terminal by an administrator not from the server program but at the terminal. If it is checked ( ), terminal will become lock status in which nobody can access until the administrator release the setting. ▶ Card reader Card reader can be set to Standard or HID iClass. The reader will recognize only the setting type of card. ▶ Card format This is to set method to display card No. Since card No becomes different according to the setting value as below, set it during initial installation. If it is inevitably changed during operation, the card must be registered again. RF card(EM Card) example) card No (5byte): 08h 01h 16h 1Dh D6h Card format Card No Display method Standard 02207638 Displayed in (3+5)-digit decimal number [022 (16h) +07638 (1DD6h) ] SC card(Mifare Card) example) card No (4byte): 52h 9Dh 06h E3h Card format Card No Display method Standard 529D06E3 Displayed in 8-digit hexadecimal To apply the setting value, press [OK] button or press [BACK] button to cancel and to move to the upper menu. 3.7.3. Input setting Select [Terminal] [Input] in the main menu to display the screen below.](https://usermanual.wiki/UNION-COMMUNITY/T9/User-Guide-4185831-Page-51.png)
![eNBioAccess-T9 user guide 52 NITGEN Co,. Ltd / #1208 ,641-4, Munjeong-dong, Songpa-gu, Seoul, Korea (138-050) Tel: 02-6488-3232, Fax: 02-6488-3099, E-Mail: customer@nitgen.com ▶ Default setting: same with the setting in the left screen ▶ M0: Set this to connect an external contact to DM0. (If motor lock is used, set it to [door open status NO] or [door open status NC].) - Not use: Select this when nothing is connected. - Door open status NO or door open status NC: when door open status monitoring pin is connected. Set NO/NC according to status of pin which is input during detection. ▶ M1/M2: Set this to connect an external contact to DM1/DM2. (If motor lock is used, set it to [locked status NO] or [lock status NC].) - Not use: Select this when nothing is connected. - Locked status NO or locked status NC: when locked status monitoring pin is connected Set NO/NC according to status of pin which is input during detection ▶ IO: Set this to connect an external contact to Exit pin. - Not use: select this when nothing is connected - Inside Open NO or Inside Open NC: Exit button is connected Set NO/NC according to status of pin which is input during detection ▶ Warn Door open (sec) This function makes the terminal to check door Open time to make a warning sound if the door is open more than the setting time (min 5 seconds ~ max 60 seconds). If it is set to [0], no warning sound will be made. Warning sound will be started after min 5 seconds even when it is set to [01~04]. The door must be closed within the setting time. If not due to unexpected situation, the terminal will make warning sound to inform the situation administrator to take measures for normal door closing. To use this function, monitoring of the Lock for door open lock status must be possible, and monitoring pin of the Lock must be also connected to M0. In addition, M0 must be set to [door open status NO] or [door open status NC] as well.](https://usermanual.wiki/UNION-COMMUNITY/T9/User-Guide-4185831-Page-52.png)
![eNBioAccess-T9 user guide 53 NITGEN Co,. Ltd / #1208 ,641-4, Munjeong-dong, Songpa-gu, Seoul, Korea (138-050) Tel: 02-6488-3232, Fax: 02-6488-3099, E-Mail: customer@nitgen.com ▶ Tamper Alarm If this is checked ( ), warning sound will be made when the terminal is disassembled. To apply the setting value, press [OK] button, or press [BACK] button to cancel and to move to the upper menu. 3.7.4. Lock setting Select [Terminal] [Lock] in the main menu to display the screen below. ▶ Default setting: same with the setting in the left screen ▶ Lock 1 option - Not use: when it is not used - Strike/Auto/successful authentication notice: warning lamp to indicate Strike type, auto door or authentication success/failure is connected to Lock1 - Motor lock 1: when a motor lock is connected ▶ Lock 2 option - Not use: when it is not used - Authentication failure notice: warning lamp to indicate authentication failure is connected to Lock2 - Motor lock 2: when a motor lock is connected ▶ Lock 1 Duration (ms) This is to designate time to give signal when Lock 1 is set to „Strike/Auto/successful authentication notice‟. Since it is set to ms unit, set it to 3000 to designate it to 3 seconds. Strike type means time until the door is closed again when the door is open after authentication. ▶ Lock 2 Duration (ms) This is to designate time to give signal when Lock 2 is set to „authentication failure notice‟. Since it is set to ms unit, set it to 3000 to designate it to 3 seconds.](https://usermanual.wiki/UNION-COMMUNITY/T9/User-Guide-4185831-Page-53.png)
![eNBioAccess-T9 user guide 54 NITGEN Co,. Ltd / #1208 ,641-4, Munjeong-dong, Songpa-gu, Seoul, Korea (138-050) Tel: 02-6488-3232, Fax: 02-6488-3099, E-Mail: customer@nitgen.com To apply the setting value, press [OK] button or press [BACK] button to cancel and to move to the upper menu. 3.7.5. External terminal setup If you select the [Terminal]->[External device] in the main menu, the following window appears. ▶ Basic setting : Same with the window at the left side. ▶Site code It sets the sitecode value sent in Wiegand output below. ▶Wiegand Output It is used only when the special controller is equipped running by the Wiegand input. When the authorization is finished, the data of the following format is sent to the Wiegand port of the terminal. None General case. It does not use Wiegand out port. 26bit Because it sends “Sitecode[1byte] + User ID[2 byte]”, set the user ID less or equal than 4 digits. Send example) In case of SiteCode:045(2Dh), UID:6543(198Fh) 1 00101101 0001 1001 10001111 0 34bit Because it sends “Sitecode[1 byte] + User ID[3 byte]”, set the user ID less or equal than 7 digits. But, if the user ID is 8 digits, ignore sitecode and send only the “User ID[4byte]”.](https://usermanual.wiki/UNION-COMMUNITY/T9/User-Guide-4185831-Page-54.png)
![eNBioAccess-T9 user guide 55 NITGEN Co,. Ltd / #1208 ,641-4, Munjeong-dong, Songpa-gu, Seoul, Korea (138-050) Tel: 02-6488-3232, Fax: 02-6488-3099, E-Mail: customer@nitgen.com Send example) SiteCode:001(1h), UID:123456(1E240h) 0 00000001 00000001 11100010 01000000 0 User definition It is set by the user definition, which only can be set in the server, and the setting type only can be inquired in the terminal. Click [OK] button to apply the set value, and click [BACK] button to cancel and return. 3.8. Screen setting 3.8.1. Theme Select [Display] [Theme] in the main menu to display the screen below. ▶ Default setting: same with the setting in the left screen ▶ Main background This is to set background of the main screen. Press [] button to search the next image. To apply the setting value, press [OK] button or press [BACK] button to cancel and to move to the upper menu. To continuously set another item, press the relevant menu item button on the left. 3.8.2. Camera Select [Display] [Camera] in the main menu to display the screen below.](https://usermanual.wiki/UNION-COMMUNITY/T9/User-Guide-4185831-Page-55.png)
![eNBioAccess-T9 user guide 56 NITGEN Co,. Ltd / #1208 ,641-4, Munjeong-dong, Songpa-gu, Seoul, Korea (138-050) Tel: 02-6488-3232, Fax: 02-6488-3099, E-Mail: customer@nitgen.com ▶ Default setting: same with the setting in the left screen ▶ Display option This is to select image displayed in authentication success message window. - None - Registered photo ▶ Save success log If this is checked ( ), capture camera image and save it as an image log when authentication is successful. ▶ Save failed log If this is checked ( ), capture camera image and save it as an image log when authentication failed. To apply the setting value, press [OK] button or press [BACK] button to cancel and to move to the upper menu. 3.8.3. Language Select [Display] [Language] in the main menu to display the screen below. ▶ Default setting: „English‟ ▶ Language Press „OK‟ button after changing language to change voice message and message displayed in the screen to the setting language. Press [BACK] button to cancel and to move to the upper menu. ※ Support language English, Korean, Japanese, Portuguese, Chinese, French 3.8.4. LCD option](https://usermanual.wiki/UNION-COMMUNITY/T9/User-Guide-4185831-Page-56.png)
![eNBioAccess-T9 user guide 57 NITGEN Co,. Ltd / #1208 ,641-4, Munjeong-dong, Songpa-gu, Seoul, Korea (138-050) Tel: 02-6488-3232, Fax: 02-6488-3099, E-Mail: customer@nitgen.com Select [Display] [Option] in the main menu to display the screen below. ▶ Default setting: same with the setting in the left screen ▶ Screen saver (5 seconds ~ 10 minutes) If nothing is input for the setting time, the screen will be automatically OFF. However, LCD will be always ON if it is set to „None‟. ▶ Display option This is to set detail to be displayed when authentication is successful. - None: display only authentication result of [Successful/Failed] - User ID - User name: If user name is not registered, user ID will be displayed (In this case, add “ID:” to distinct it from name) - Social No. To apply the setting value, press [OK] button or press [BACK] button to cancel and to move to the upper menu. 3.8.5. Message time setting Select [Display] [Message display time] in the main menu to display the screen below. ▶ Default setting: same with the setting in the left screen ▶ Message display (ms) This is to set time to be displayed in authentication result window. Up to 0~5000 can be set. Authentication result window will be displayed for the setting time and then it will be closed. Since it is by ms unit, input 2000 to set it to 2 seconds. To apply the setting value, press [OK] button or press [BACK] button to cancel and to move to the upper menu.](https://usermanual.wiki/UNION-COMMUNITY/T9/User-Guide-4185831-Page-57.png)
![eNBioAccess-T9 user guide 58 NITGEN Co,. Ltd / #1208 ,641-4, Munjeong-dong, Songpa-gu, Seoul, Korea (138-050) Tel: 02-6488-3232, Fax: 02-6488-3099, E-Mail: customer@nitgen.com 3.9. Terminal information 3.9.1. System information Select [Terminal info] [System] in the main menu to display the screen below. ▶ System info This is to display hardware and firmware version of the terminal. ▶ Disk (amount used/total) This is to display amount of used storage space. If amount of used storage space is getting too much, it will be displayed in red. ▶ RAM (amount used / total) This is to display amount of RAM being used out of total RAM. If amount of used memory is getting too much, it will be displayed in red. To move to upper menu after searching, press [BACK] button. To continuously search another item, press the relevant menu item button on the left 3.9.2. Terminal information Select [Terminal info] [Terminal] in the main menu to display the screen below.](https://usermanual.wiki/UNION-COMMUNITY/T9/User-Guide-4185831-Page-58.png)
![eNBioAccess-T9 user guide 59 NITGEN Co,. Ltd / #1208 ,641-4, Munjeong-dong, Songpa-gu, Seoul, Korea (138-050) Tel: 02-6488-3232, Fax: 02-6488-3099, E-Mail: customer@nitgen.com ▶ Terminal info This is to display option setting value of the terminal. To move to upper menu after searching, press [Close] or [BACK] button. 3.9.3. Network information Select [Terminal information] [network] in the main menu to display the screen below. ▶ Network info This is to display network setting value of the terminal. To move to upper menu after searching, press [Close] or [BACK] button.](https://usermanual.wiki/UNION-COMMUNITY/T9/User-Guide-4185831-Page-59.png)
![eNBioAccess-T9 user guide 60 NITGEN Co,. Ltd / #1208 ,641-4, Munjeong-dong, Songpa-gu, Seoul, Korea (138-050) Tel: 02-6488-3232, Fax: 02-6488-3099, E-Mail: customer@nitgen.com 3.9.4. User information Select [Terminal info] [User] in the main menu to display the screen below. ▶ User information - User: number of registered user (including administrator) - Admin: number of registered administrator - FP: number of all registered fingerprint - Face: number of user who registered face - Face1toN: number of user for whom 1 to N face identification is possible - Photo: number of user who registered picture (Max means maximum number can be registered for each item.) To move to upper menu after searching, press [Close] or [BACK] button. 3.9.5. Log information Select [Terminal information] [log] in the main menu to display the screen below. ▶ Log information Log: number of log saved at the terminal Image Log: number of image log saved at the terminal (Max means maximum number can be saved for each item.) ▶ View Log This is to display log time and authentication status.](https://usermanual.wiki/UNION-COMMUNITY/T9/User-Guide-4185831-Page-60.png)
![eNBioAccess-T9 user guide 61 NITGEN Co,. Ltd / #1208 ,641-4, Munjeong-dong, Songpa-gu, Seoul, Korea (138-050) Tel: 02-6488-3232, Fax: 02-6488-3099, E-Mail: customer@nitgen.com ▶ Log search Press [Terminal info] [Log] -> [View Log] -> [Log Search] button to set start date, end date, event condition and press [OK] button to search log. ▶ Search result Log search result is to check information of date, time, ID, authentication result (successful or failed). Press [BACK] or [NEXT] button to check search information. To move to upper menu after searching, press [Close] or [BACK] button. 3.9.6. About Select [Terminal info] [About] in the main menu to display the screen below.](https://usermanual.wiki/UNION-COMMUNITY/T9/User-Guide-4185831-Page-61.png)
![eNBioAccess-T9 user guide 62 NITGEN Co,. Ltd / #1208 ,641-4, Munjeong-dong, Songpa-gu, Seoul, Korea (138-050) Tel: 02-6488-3232, Fax: 02-6488-3099, E-Mail: customer@nitgen.com ▶ About License information of Korean font applied to the terminal will be displayed. To move to upper menu after searching, press [Close] or [BACK] button. 3.10. SD card Select [SD card] in the main menu to display the screen below. <When SD card is inserted,> < When SD card is not inserted,> ※ This can be done only when SD card is inserted. As shown in the figure below, the card must be over side down. (Only SD card with capacity below 32G can be used.)](https://usermanual.wiki/UNION-COMMUNITY/T9/User-Guide-4185831-Page-62.png)
![eNBioAccess-T9 user guide 63 NITGEN Co,. Ltd / #1208 ,641-4, Munjeong-dong, Songpa-gu, Seoul, Korea (138-050) Tel: 02-6488-3232, Fax: 02-6488-3099, E-Mail: customer@nitgen.com This function is to backup data of the terminal using [EXPORT]. Data backed up by [IMPORT] can be copied back to the terminal. ▶ Export This is to copy the relevant data from the terminal to an external SD card. - User data: copy user DB into „eNBioAccessT9/terminal ID/user/today‟s date‟ folder in the SD card. - System option: Copy option setting values of the terminal into „eNBioAccesT9/config‟ folder. - Event log: Copy authentication log into „eNBioAccessT9/terminal ID/log/ today‟s date‟ folder in the SD card. (Do not copy image log.) Click event log button and select period of authentication log to be exported as shown in the image below. - Picture data: Save image log into „eNBioAccessT9/terminal ID/log/today‟s date / pictures‟ folder in the SD card as a .jpg file. - Export all: Export the above user data and system option, event log, image log. In case of export all, all of the saved event logs will be saved.](https://usermanual.wiki/UNION-COMMUNITY/T9/User-Guide-4185831-Page-63.png)
![eNBioAccess-T9 user guide 64 NITGEN Co,. Ltd / #1208 ,641-4, Munjeong-dong, Songpa-gu, Seoul, Korea (138-050) Tel: 02-6488-3232, Fax: 02-6488-3099, E-Mail: customer@nitgen.com ▶ import This is to copy the relevant data from a SD card to the terminal - User data: Copy user data of *.ndb file name from „eNBioAccessT9/user‟ folder in the SD card to the terminal. - System option: Copy option setting values of the terminal saved in the SD card („eNBioAccessT9/config‟ folder) by exporting to the terminal. To apply a new DB or setting value when import is performed, the terminal must be rebooted. ▶ Others - Theme: This is to copy voice file in „eNBioAccessT9/audio‟ folder of SD card to the terminal. In case of replacing authentication success (user_ok.mp3), authentication failure (user_fail.mp3) message with user voice, copy each of voice defined by a user by designating it as a stipulated file name to play user voice. - F/W Upgrade: This is to upgrade firmware from a SD card (Firmware must be located in „eNBioAccessT9‟ folder in the SD card.) To move to upper menu after upgrade, press [OK] or [BACK] button.](https://usermanual.wiki/UNION-COMMUNITY/T9/User-Guide-4185831-Page-64.png)
![eNBioAccess-T9 user guide 65 NITGEN Co,. Ltd / #1208 ,641-4, Munjeong-dong, Songpa-gu, Seoul, Korea (138-050) Tel: 02-6488-3232, Fax: 02-6488-3099, E-Mail: customer@nitgen.com 4. How to use terminal Background image and configuration in the main screen can be changed according to the setting by an administrator. In addition, if screen saver time is set by the administrator, LCD screen will be automatically OFF if nothing is operated at the terminal for the designated time. when a user approach the terminal, when authentication is tried with something like fingerprint/card or when the main screen is touched, the LCD screen will be automatically activated. 4.1. Converting authentication mode <Figure 4-1> Press attending [F1]/quitting [F2] button in the screen to convert into a desired authentication mode. Press button on the right of the screen to display the screen below in order to select mode (Going out [F3], Return [F4], Access [Access], etc) beside the modes in the screen. Card Input part](https://usermanual.wiki/UNION-COMMUNITY/T9/User-Guide-4185831-Page-65.png)
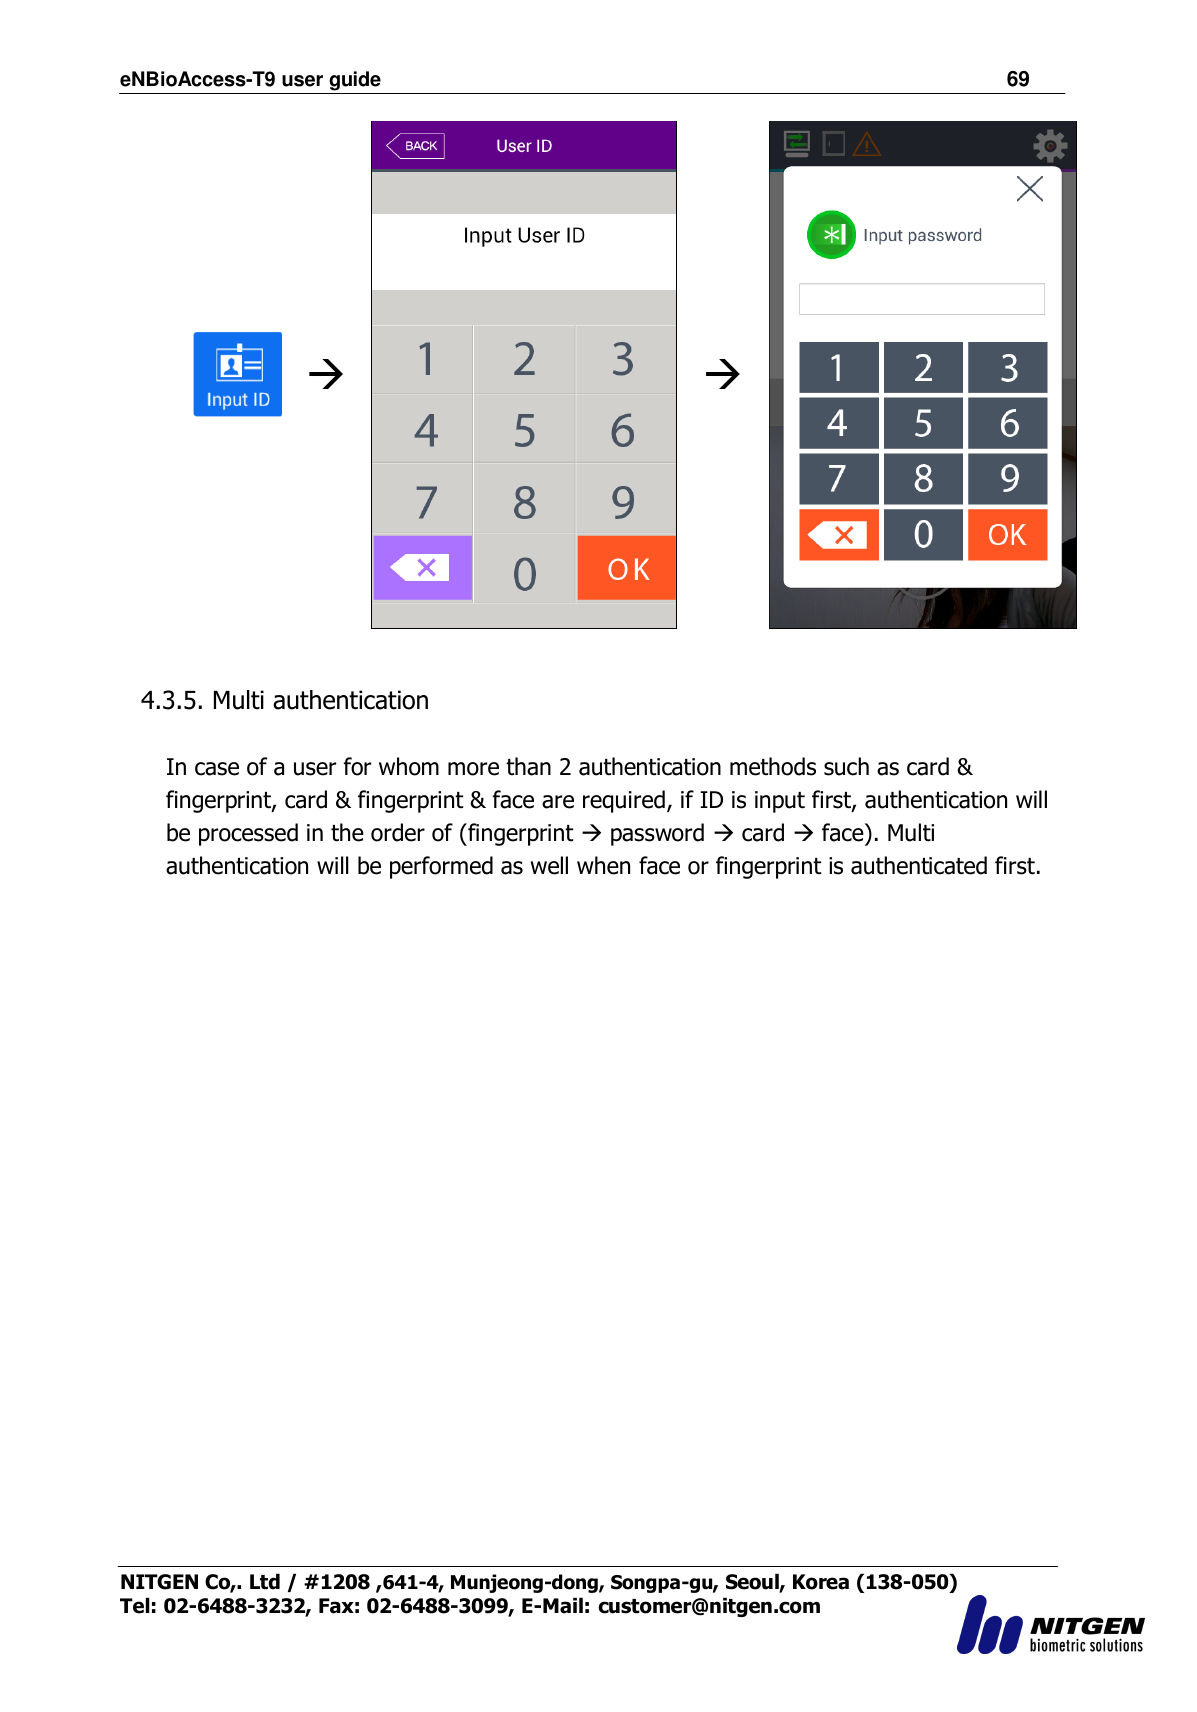
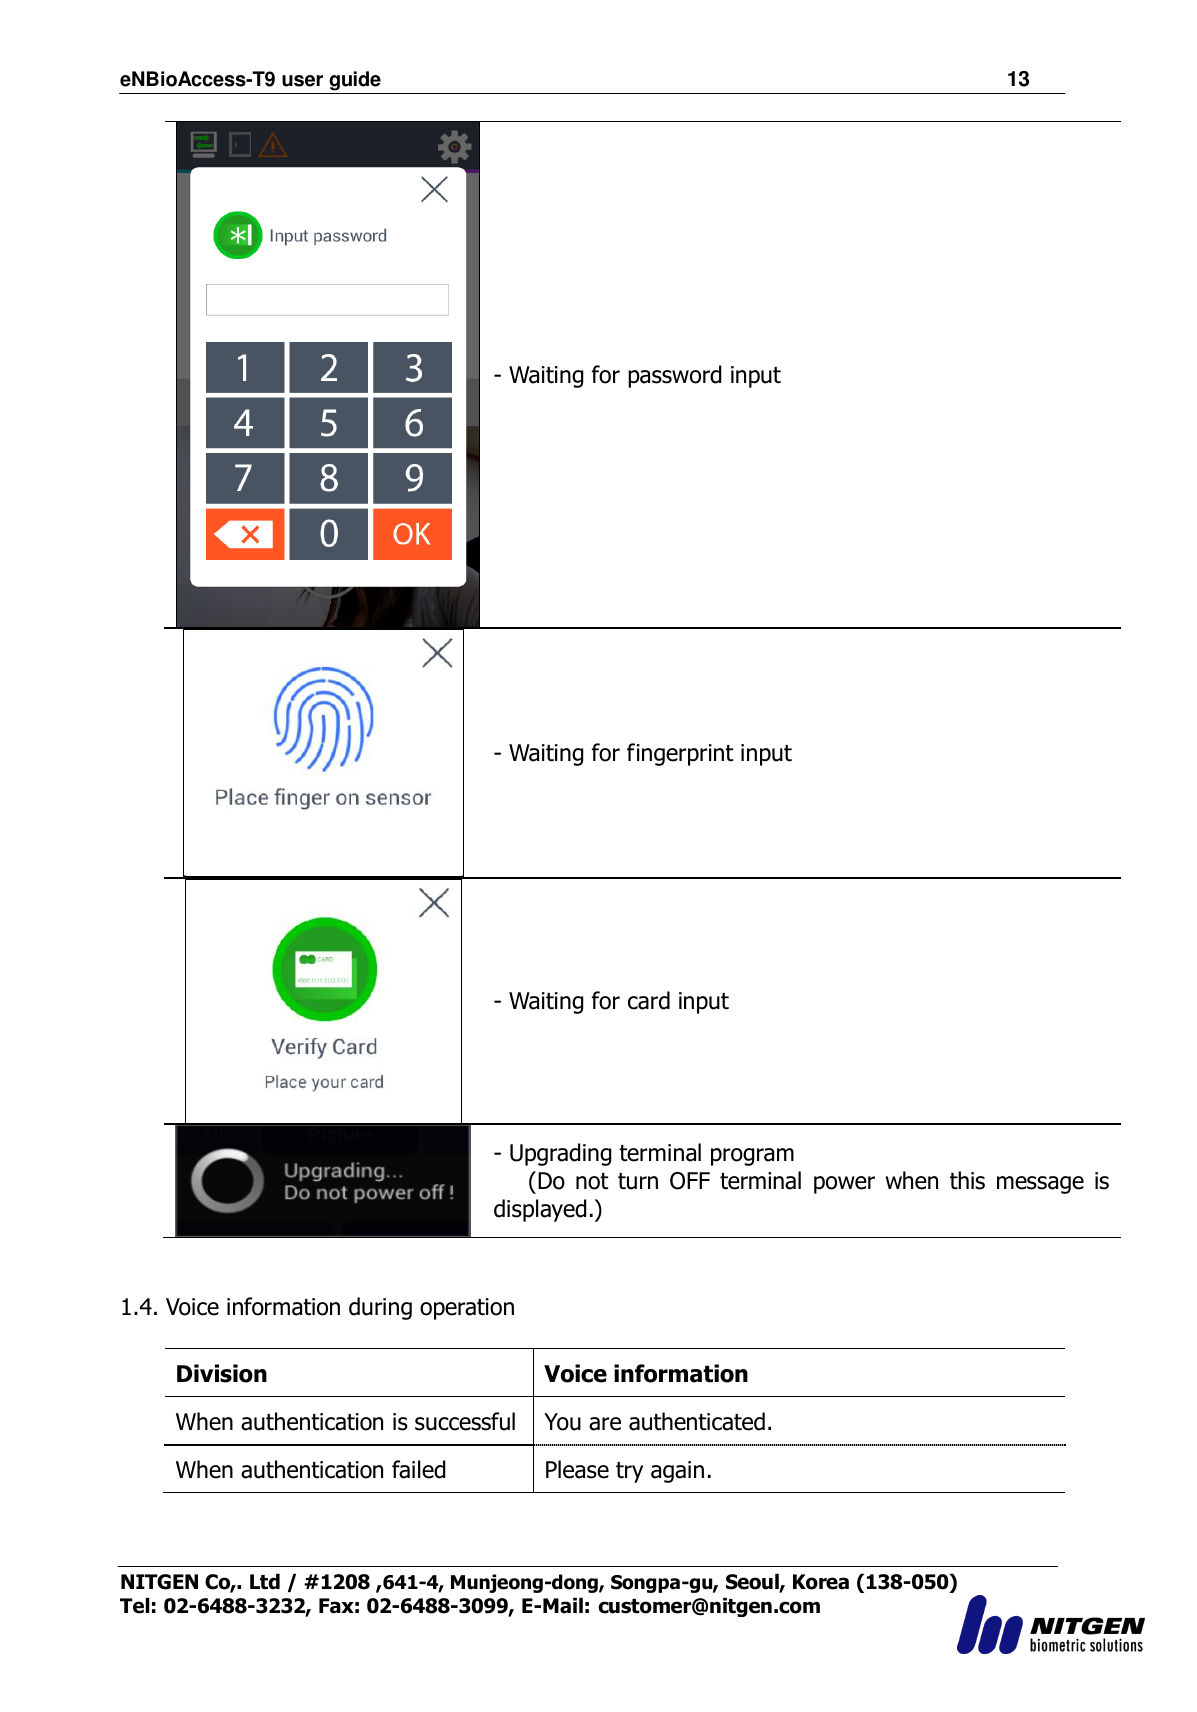
![eNBioAccess-T9 user guide 66 NITGEN Co,. Ltd / #1208 ,641-4, Munjeong-dong, Songpa-gu, Seoul, Korea (138-050) Tel: 02-6488-3232, Fax: 02-6488-3099, E-Mail: customer@nitgen.com Press desired access mode button in access mode selection screen in the left to close selection screen and to convert mode in the main screen into the relevant mode. 4.2. ID input Press [Input ID] button in the main screen to display the following ID input window. Input user ID and press [OK] button to display fingerprint input, face input, card input or password input screen according to Authentication Method of a user.](https://usermanual.wiki/UNION-COMMUNITY/T9/User-Guide-4185831-Page-66.png)
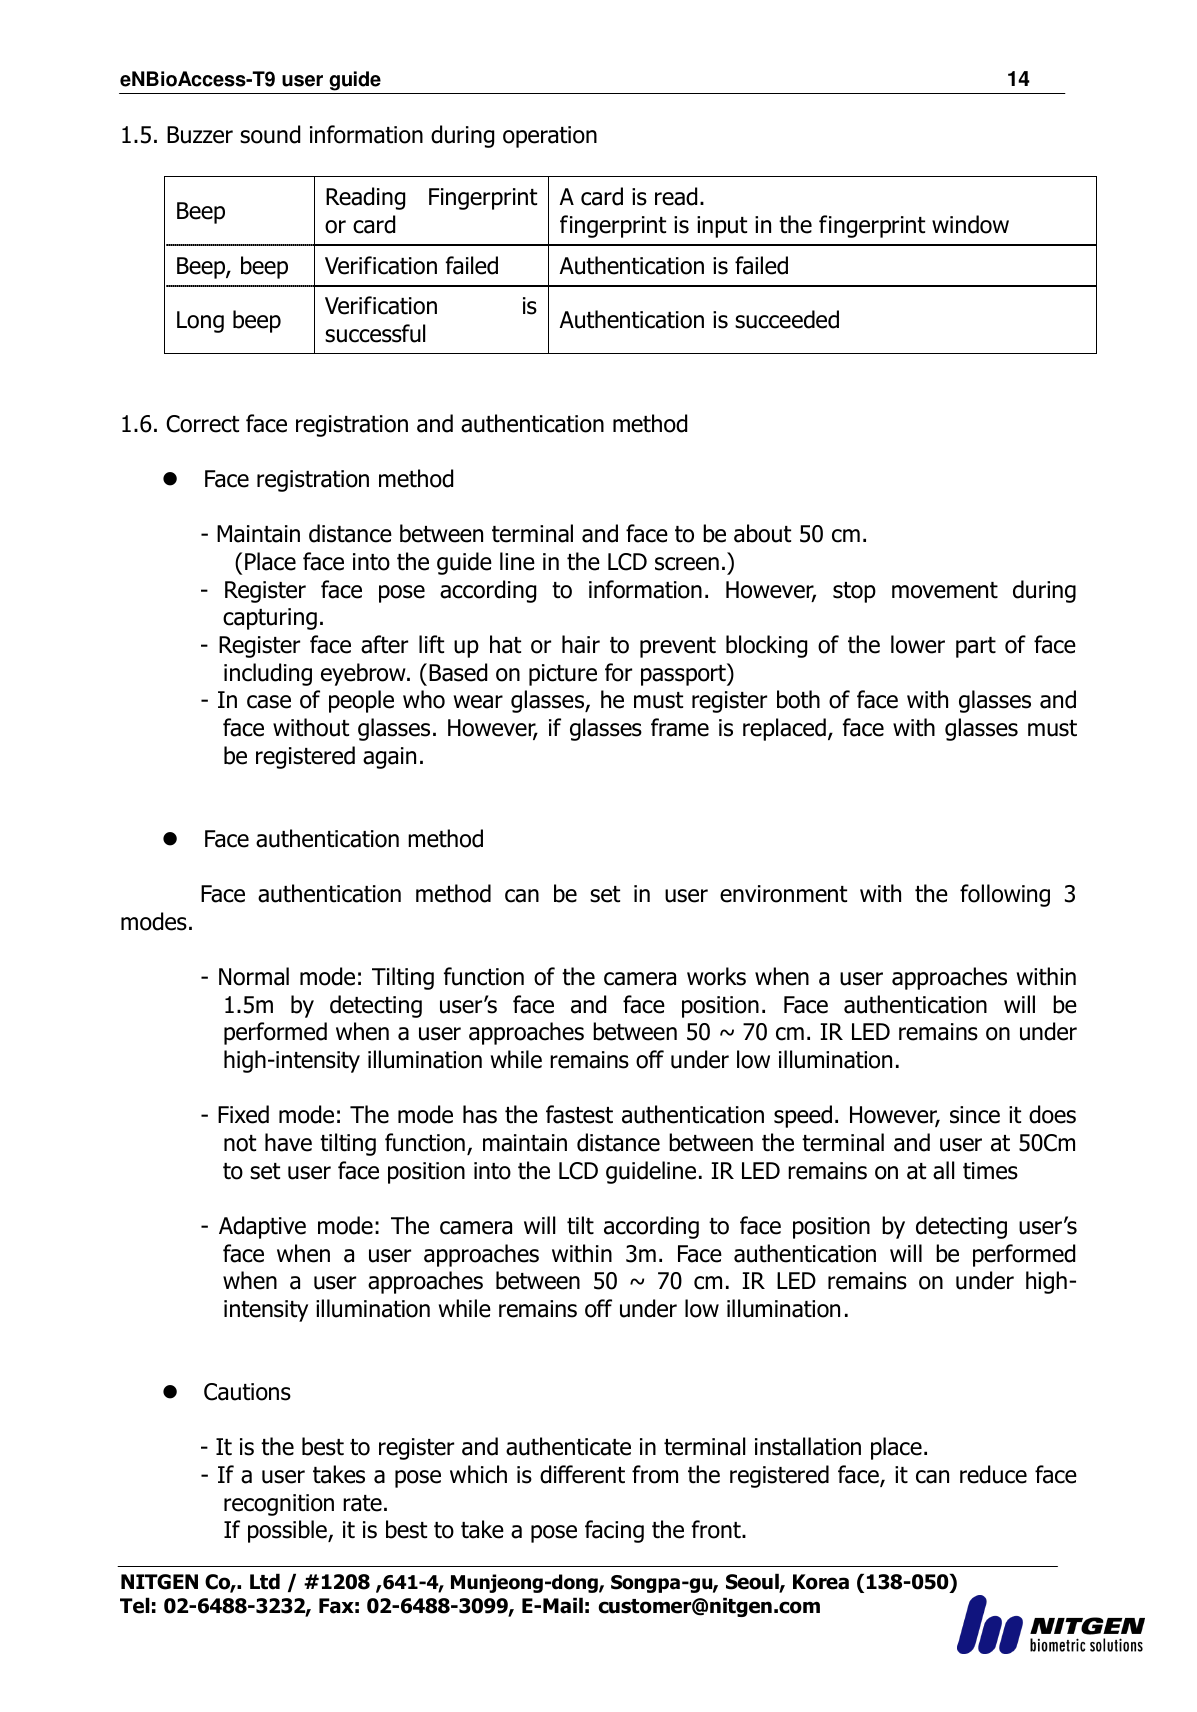
![eNBioAccess-T9 user guide 67 NITGEN Co,. Ltd / #1208 ,641-4, Munjeong-dong, Songpa-gu, Seoul, Korea (138-050) Tel: 02-6488-3232, Fax: 02-6488-3099, E-Mail: customer@nitgen.com 4.3. Authentication 4.3.1. Face authentication ▶ 1 to N identification Set face position until guide line is changed to green, look at the camera when the guide line becomes green and then stop movement for a moment to proceed with authentication. ▶ 1 to 1 verification As shown in the figure below, press [ID input] button to input ID first. After that, set face position until guide line becomes green when face input message is displayed and then look at the camera stopping movement for a while. 4.3.2. Fingerprint verification ▶ 1 to N identification When fingerprint is placed on the fingerprint sensor in the main screen, buzzer sounds and the sensor lamp turns ON to receive fingerprint. Do not remove finger until lamp of the fingerprint sensor is completely OFF. ▶ 1 to 1 verification As shown in the figure below, press [ID input] button to input ID first, input fingerprint when fingerprint input window is displayed and fingerprint sensor lamp is ON. Do not remove finger until lamp of the fingerprint sensor is completely OFF and the following fingerprint input window is closed.](https://usermanual.wiki/UNION-COMMUNITY/T9/User-Guide-4185831-Page-67.png)
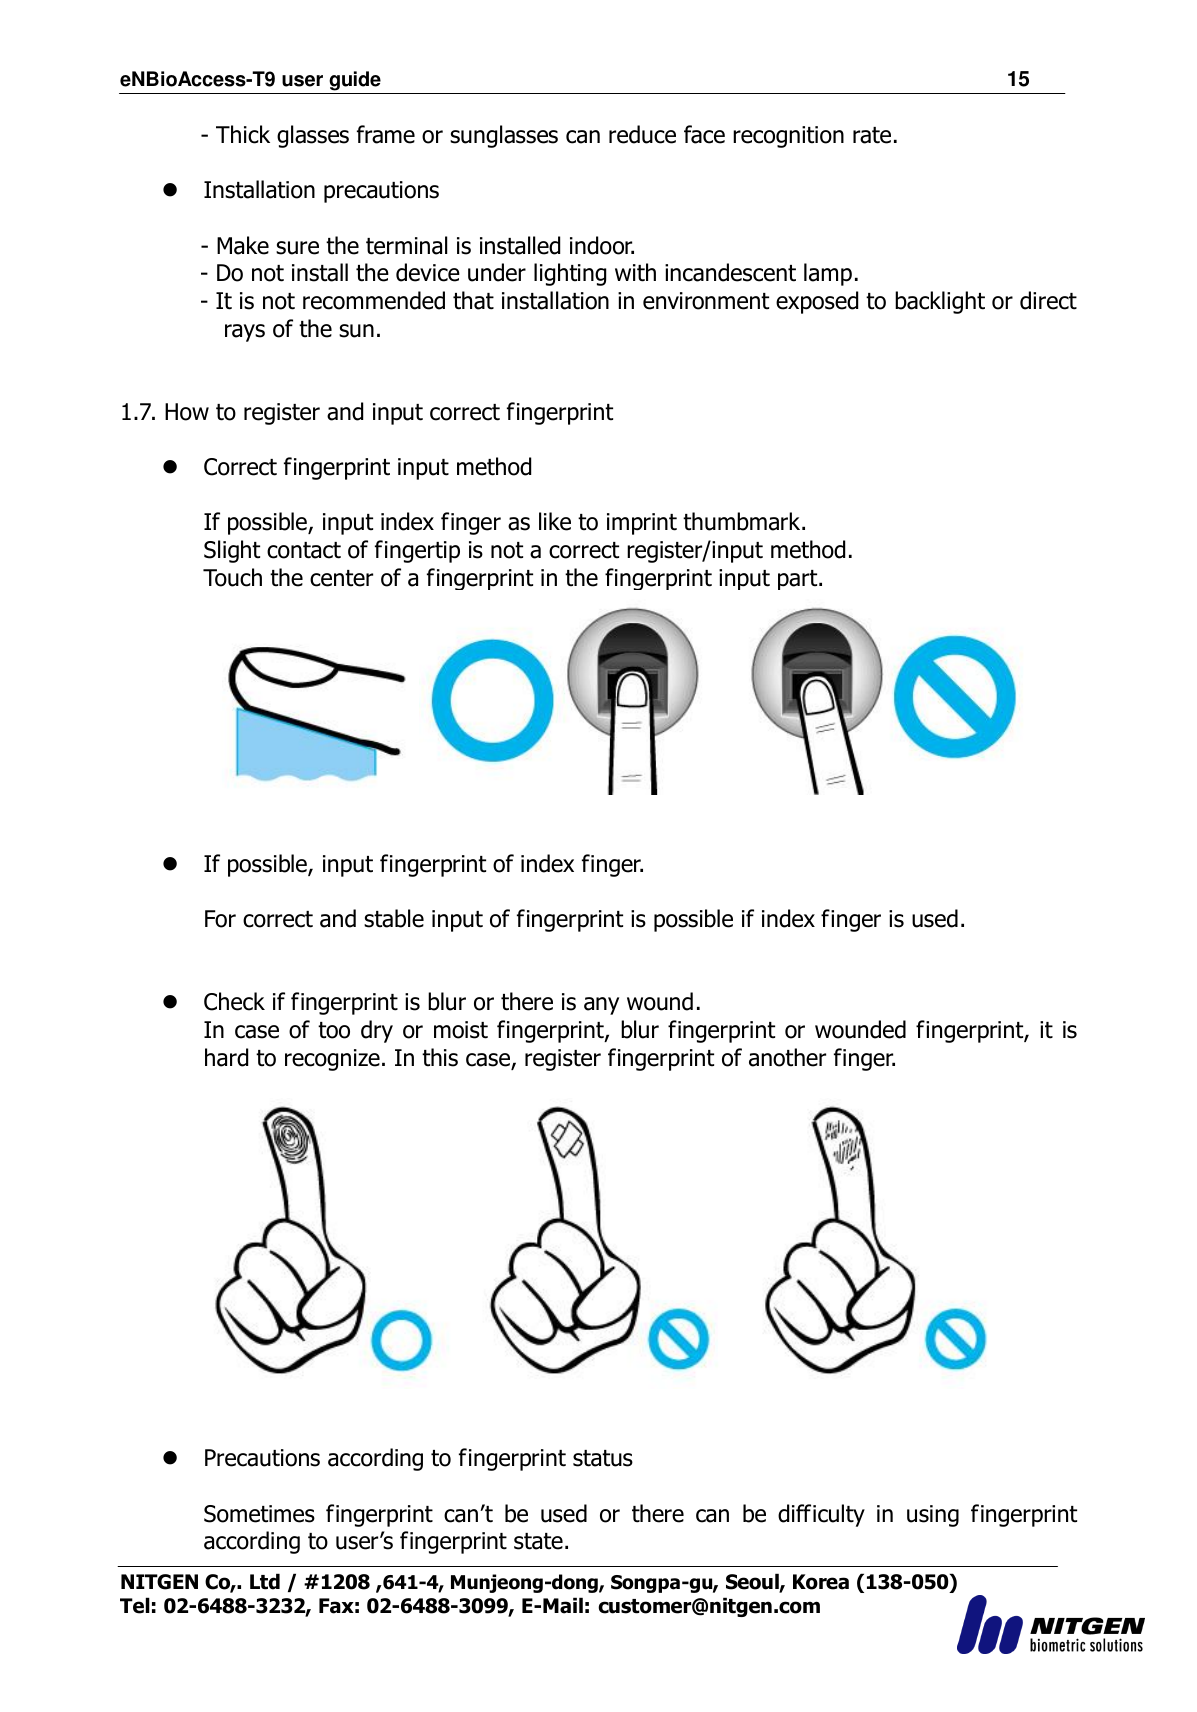
![eNBioAccess-T9 user guide 68 NITGEN Co,. Ltd / #1208 ,641-4, Munjeong-dong, Songpa-gu, Seoul, Korea (138-050) Tel: 02-6488-3232, Fax: 02-6488-3099, E-Mail: customer@nitgen.com ▶ Authentication while loading fingerprint data The saved fingerprint data of all users will be loaded to the memory for 1 to N identification during terminal booting. Progress will be displayed during loading in the top left of the screen as below. Server 1 to N identification will be tried if server authentication is included among the authentication methods at the terminal when 1 to N fingerprint verification is requested by a user during loading. In case of authentication method by the terminal itself, ID input window will pop up to proceed with 1 to 1 verification. 4.3.3. Card authentication Put the card on the card Figure in <Figure 4-1>. 4.3.4. Password authentication As shown in the figure below, press [Input ID] button to input ID first and then input password when password input window is displayed.](https://usermanual.wiki/UNION-COMMUNITY/T9/User-Guide-4185831-Page-68.png)