User Manual
MID
Quick Start
Guide
WIN-I8211(V6.2)

Introduction
Thank you for your choosing the new Tablet PC.
This guide serves to enable users to get to know and familiar with our product as soon as possible.
Here we have made a brief introduction to the key layout and definitions in figures and words.
Contents
Ⅰ. Precautions before Use 03
Ⅱ.Key Layout and Definitions 04
Ⅲ. Key Descriptions and Applications 05
Ⅳ. Introduction to Desktop 06
1. Windows8.1 Start Screen 06
2. Image Slide Application 06
3. apps Introduction 08
4. Charm Menu Column 09
5. Double Screen Application 11
Ⅴ. Basic Operations 12
1. Dormancy, Restart, and Power off 12
2. Security Management 12
Ⅰ. Precautions before Use
This production is suitable for use in non-tropic areas below 2,000 meters, and the mark in

the nameplate indicates the product is suitable for use in non-tropic areas.
2. Prevent the Tablet PC from falling to the ground or being strongly impacted otherwise.
3. Do not use it in the long term in any environment where the air is too cold, too hot (<35℃), too
humid or with too much dust. Do not expose the Tablet PC to sunlight.
4.
Avoid using it in the strong magnetic and strong static environment as much as possible.
5. Once any water or other liquid splashes onto the Tablet PC, close it immediately and do not use
it until it dries out.
6. Do not clean the Tablet PC with any detergent containing chemical element or other liquid to
avoid causing damage due to corrosion and becoming damp. If cleaning is really necessary, clean
it with dry soft cloth tissue paper.
7.
Our company shall not bear any and all responsibilities for loss or deletion of material inside the
machine caused due to abnormal software and hardware operation, maintenance or any other
accident.
8. Please back up your important material at any time to avoid loss.
9. Please do not disassemble the Tablet PC by yourself; otherwise you will lose the right to
warranty.
10. This product supports the overwhelming majority of mainstream brands of 3G DONGLE
network cards. The cases for 3G Dongle may be different. It is suggested that you test it to make
sure it is OK before buying it. 3G dongle and 3G network card are not include in Tablet PC
package
11. Quick Use Guide and the relevant software shall be updated at any time. For updated software
version, visit www.xxx.com for downloading by yourself, and no notice shall be given otherwise.
If any anything is found to be inconsistent with the Quick Use Guide, the material object shall
prevail.
12. Replacement with incorrect type batteries may cause explosion. Make sure to use original
batteries.

○
1 Sound-/sound+: Lower/raise volume
○
2 Loudspeaker: The built-in loudspeaker enables you to hear the sound without having to linking
additional devic
○
3 Front CCD camera: take photos, and record pictures
○
4 CCD camera indicator: The CCD camera indicator will be on when the built-in CCD camera is
used.
○
5 Windows key: Press this button to return to the Start screen.
○
6 Movable base keyboard interface: This interface is magnetic, which is convenient for
alignment and firmly linking the Table PC and the keyboard.
○
7 Back CCD camera: take photos, and record pictures
○
8 SIM card slot:Built-in 3G internet
○
9 DC Indicator: Becomes brighter when charging.
○
10 Power button: Press it down to start or close the touch screen panel. You can also let the
computer to enter dormancy through this button or wake from the dormancy mode.
○
11 Socket for earphone and microphone: This socket can transmit the audio signals of Tablet PC
to loudspeaker or earphone.
○
12 Mini HDMI Interface: High-Definition Multimedia Interface
○
13. Micro SD card slot: The built-in storage card reader slot supports MicroSD and MicroSDHC
format.
○
14 Micro USB Interface: You can read the data through USB.
○
15 USB 3.0 Interface: You can directly inserted USB flash disk, mouse, keyboard.
○
16 Power DC Interface: Recharge your Tablet PC through DC interface.
○
17 MIC:Microphone Interface
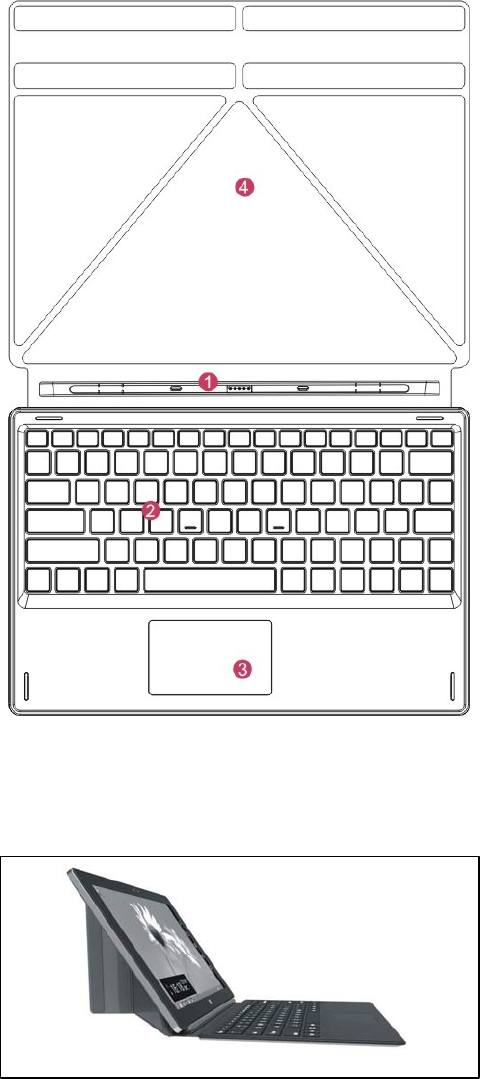
Ⅲ. Descriptions of Keys
Attention: Keyboard is optional, and configure the product according to the specific type of
the tablet PC you have bought.
○
1 Movable base keyboard interface:
This interface is magnetic, which is
convenient for alignment and firmly
linking the Table PC and the keyboard.
○
2 Keyboard group: The keyboard
group provides full size QWERTY key
and best typewriting comfortability.
○
3 Touch Tablet: Used to control the
cursor on the Tablet PC, with the same
function as a mouse.
○
4 Base: Folding base of Tablet PC.
Use of tablet and keyboard
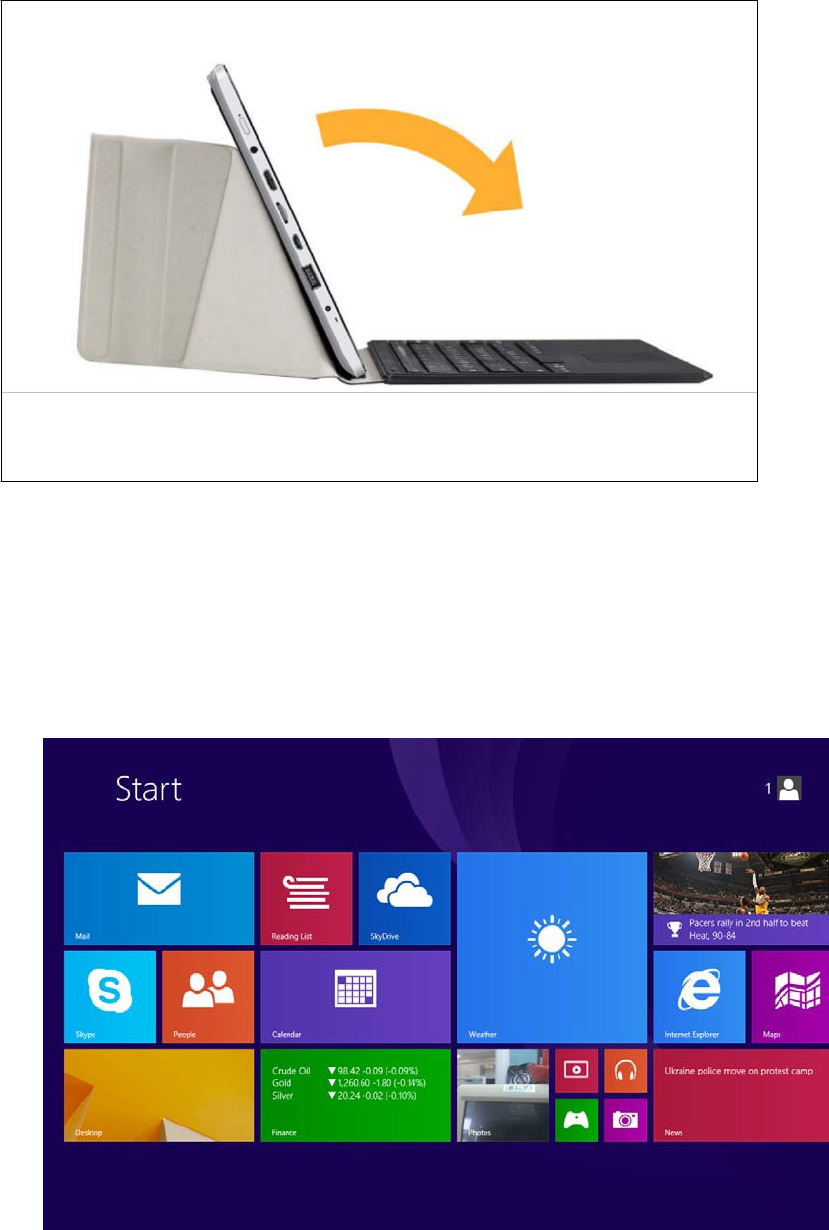
Hall-effect switch
Tablet PC with keyboard to Cover,Windows OS Automatically entered into the Sleep.
Ⅵ. Introduction to Desktop
1. Windows 8.1 start image: On the start screen, you can see many programs fixed in the
image. These application programs are displayed in the form of “magnet”. As long as you click
them, you can easily visit them.
You need to log on your Microsoft account before the application program completely runs.
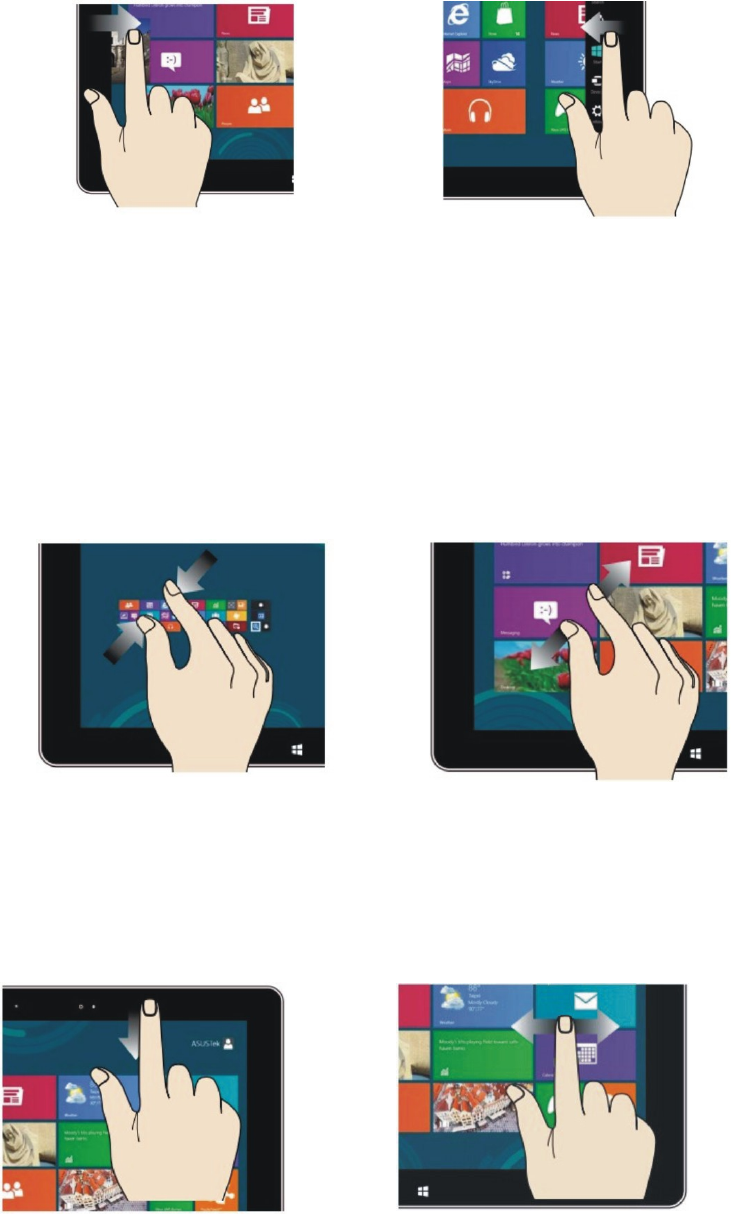
2. Image slide applications
Slide to right Slide to left
Slide to the right from the left side Slide to the left from the right side of the
of the screen to start the application screen to start Charm menu column.
program in running.
Reduce Enlarge
On the touch screen, narrow two fingers On the touch screen, widen two fingers
to reduce the image.
to enlarge the image.
Slide downward Slide with finger
In start screen, slide from the top of the screen In start screen, slide finger right and left
to view all application programs to move the image.
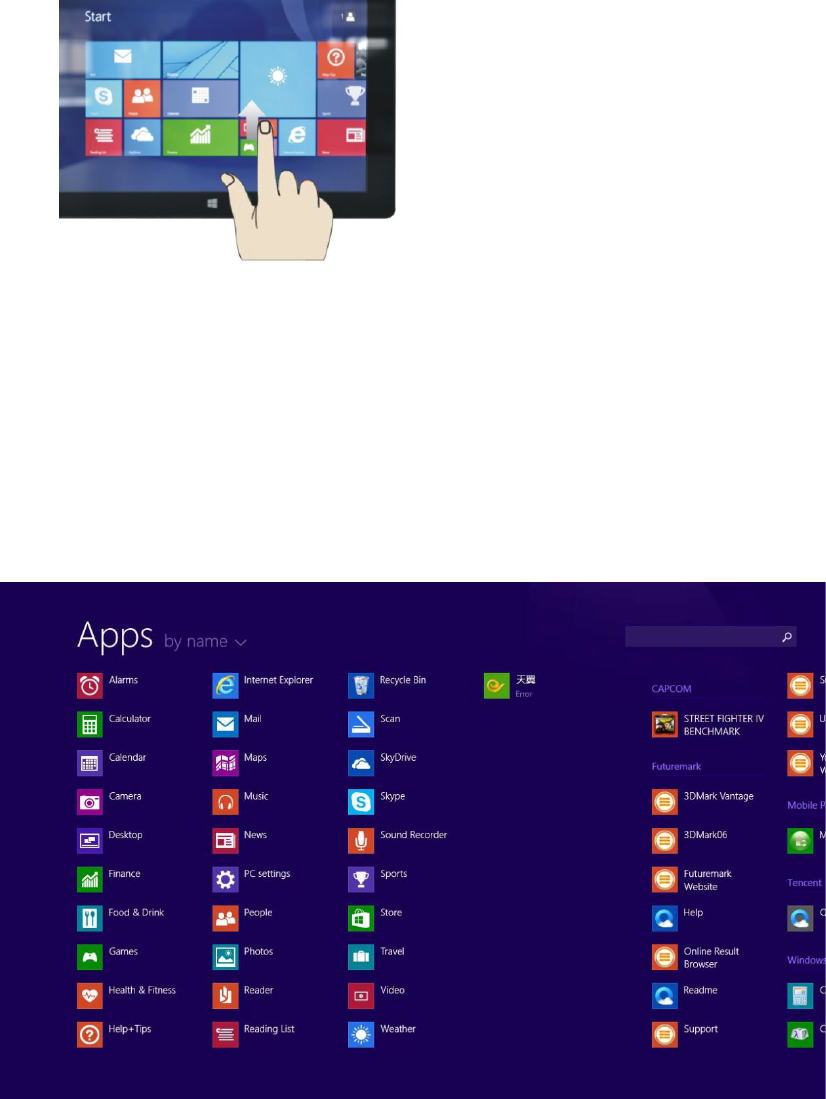
Slide upward
In the start screen, slide upward from the bottom of the screen to visit all application
program (APPS) interfaces.
3. Introduction to app Interface
Besides the application programs already fixed on the start screen, you can also start other
application programs in all application programs, such as other software application programs
attached to the Tablet PC.
If you want to fix more application programs on the start interface, see the operation in the figure
below, (1) lightly touch, press and hold the application program magnet for about one second and
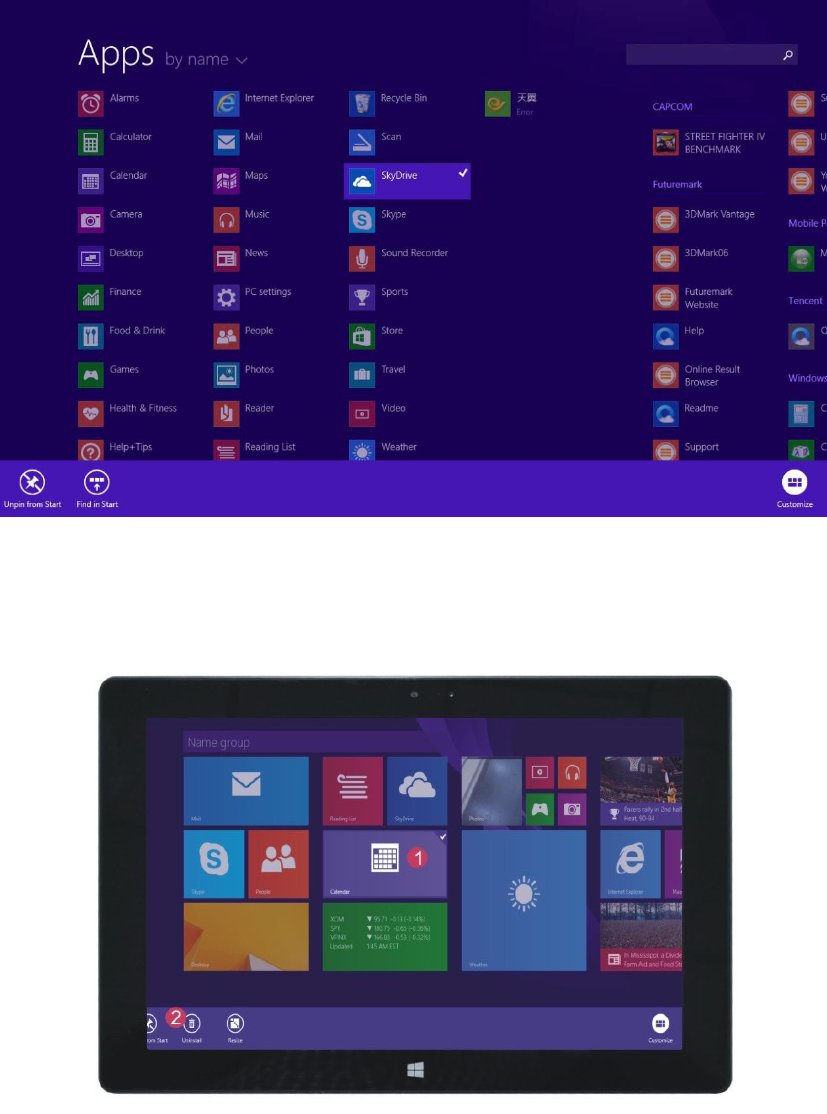
then let go, and select (2) to fix to the start screen.
Conversely, if you want to cancel or delete a certain application in the start screen, (1) lightly
touch, press and hold the application program magnet for about one second and then let it go and
run, and select (2) attribute column to cancel the programs such as fixation and deletion and then it
can be completed.
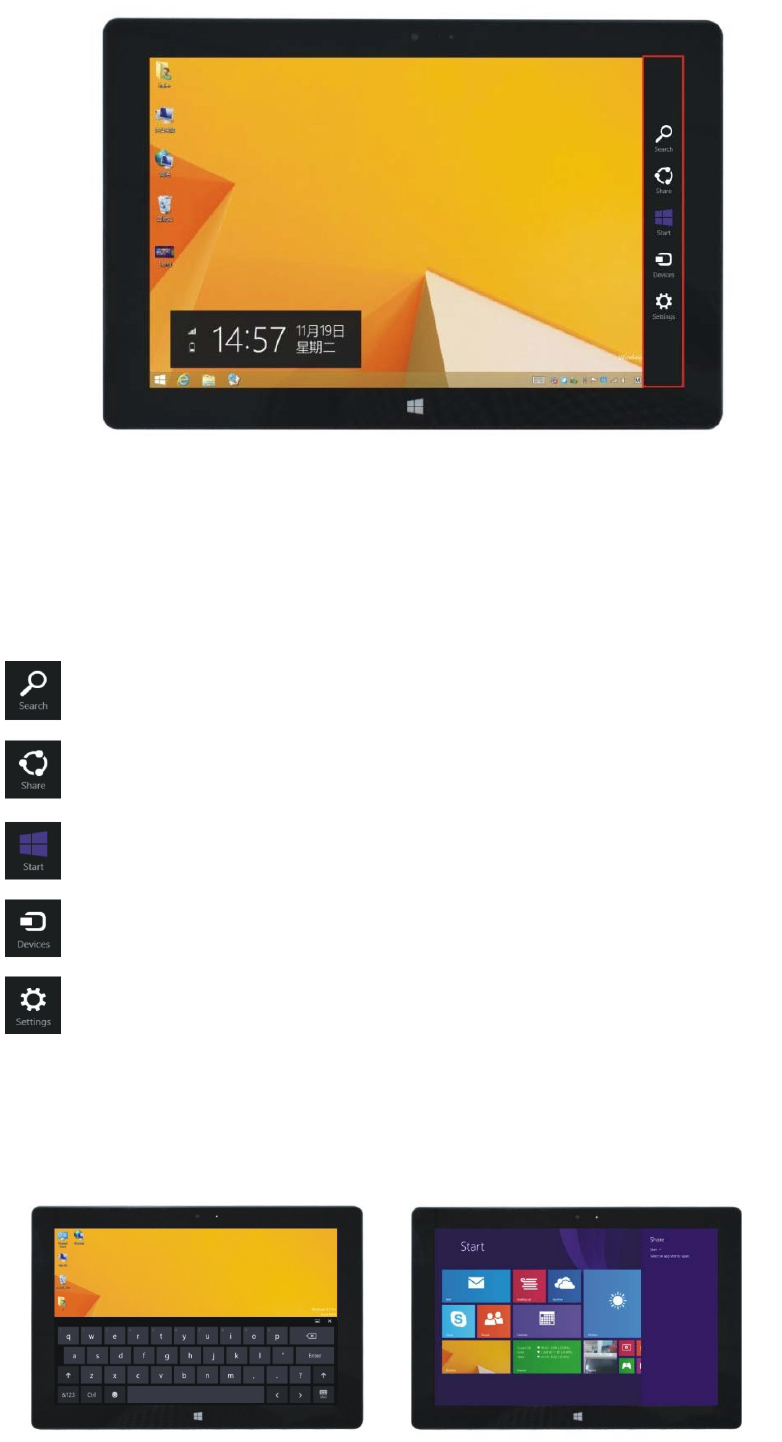
4. Charm menu column
Slide it to the left from the right side of the screen to start Charm menu column, including:
Start, Device, Setup, Share, and Search Program.
Slide it to the left from the right side of the screen to start Charm menu column, including: Start,
Device, Setup, Share, and Search Program.
Can let you search the files and application programs in the Tablet PC.
Can let you share the program through social exchange website or e-mail.
Can return to the start screen. From the start screen, you can also use this function to
return the application program that is opened in the latest.
Can let you read, write and share files, connect external screen or printer with the device
connected to the Tablet PC.
Can let you set up the Table PC.
Search menu Share menu
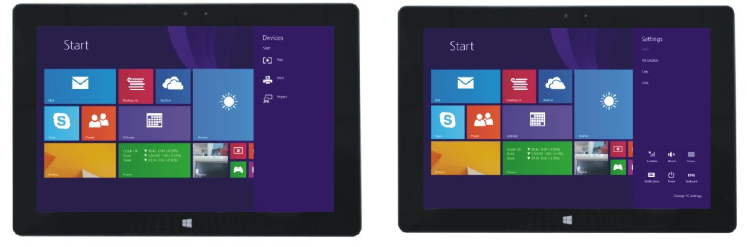
Device Menu Set up Menu
5. Dual-Screen Application
On my computer in (Figure 1), slide it inward from the left side of the screen, drag it and hold. Let
go when seeing double interfaces appear.
In (Figure 2), press the partition button on the middle partition line and drag right and left to
partition the display proportion of the double screens.
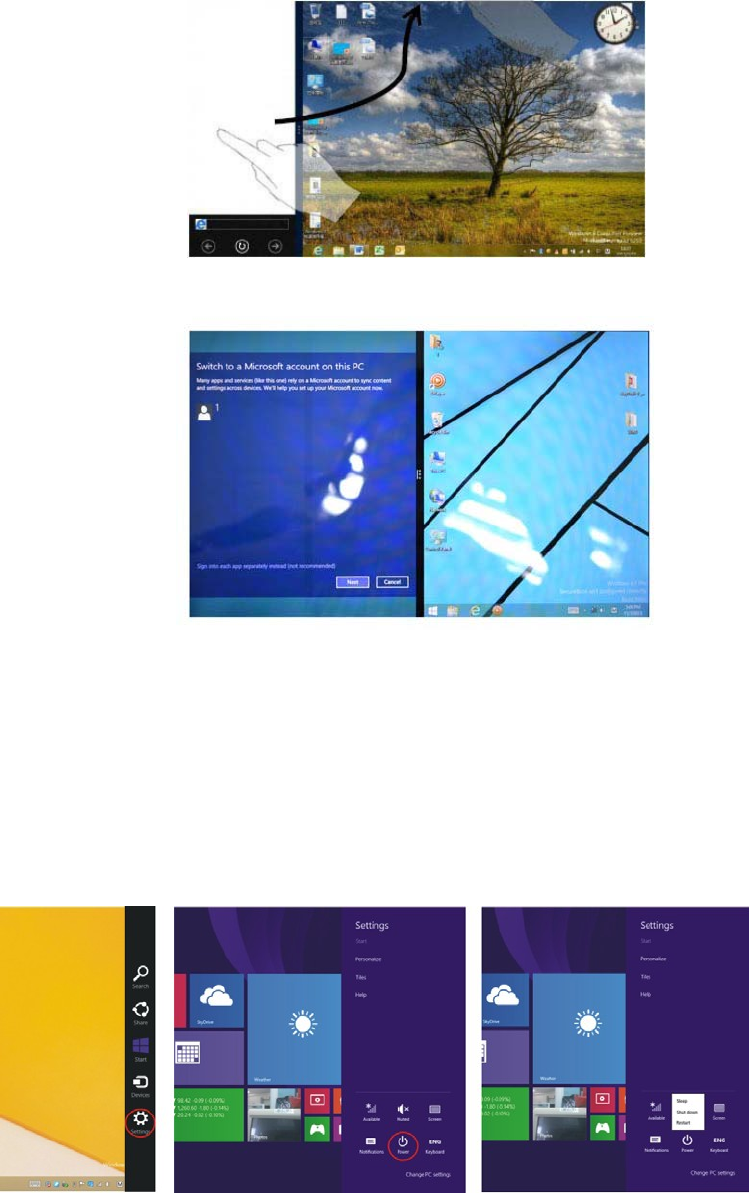
(Figure 1)
(Figure 2)
Ⅴ. Basic Operations
1. Dormancy, restart and power off
2. Security Management
User and password setup
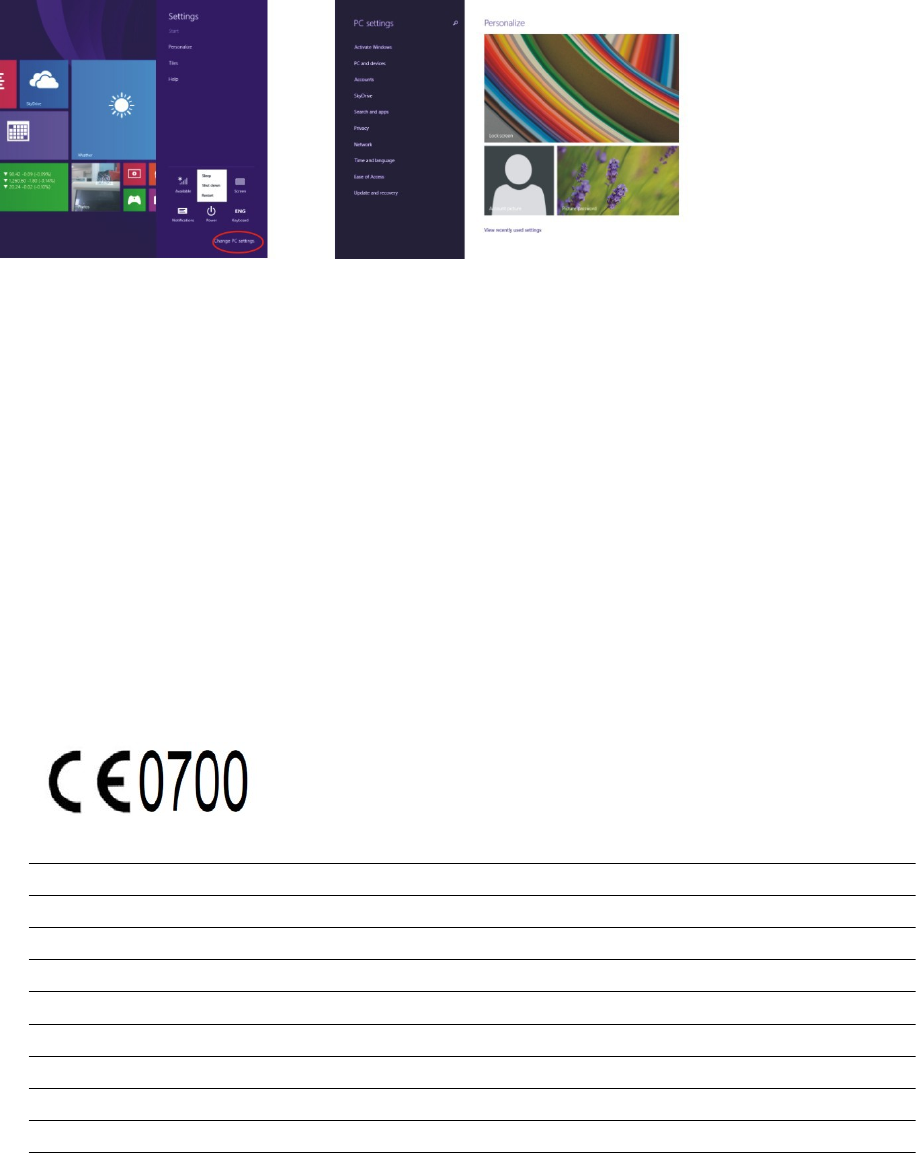
Method for quick setup:
Click the “Setup” button in “Charm” setup, and select “Change computer setup”. Select “User” on
the left and click “Create local account” in “Your account” on the right side. After inputting the
password of Complete Windows Live Id Account, input username, password, confirm password
and password prompt.
DECLARATION OF CONFORMITY
Herby,
Emdoor Digital Technology Co.,Ltd. declares that this MID product in compliance with
the essential requirements and other relevant provisions of Directive 1999/5/EC. A
copy of the Declaration of Conformity can be found an Website: http://www. emdoor.com/
CE Logo:
EN 60950-1:2006+A11:2009+A1:2010+A12 :2011+A2:2013
EN 62479: 2010
EN 62209-2 :2010
EN50360:2001+A1:2012
EN 50566 : 2013
EN 301 489-01 V1.9.2: 2011-09
EN 301 489-03 V1.6.1 (2013-08)
EN 301 489-17 V2.2.1: 2012-09
EN 300 328 V1.8.1: 2012-06
(Title(s) of regulations, standards, etc.)
All essential radio test suites have been carried out.
1. Use careful with the earphone maybe possible excessive sound pressure from earphones and
headphones can cause hearing loss.
2. CAUTION : RISK OF EXPLOSION IF BATTERY IS REPLACED BY AN INCORRECT TYPE.
DISPOSE OF USED BATTERIES ACCORDING TO THE INSTRUCTIONS.

3. The product shall only be
connected
to a USB interface ofversion USB 2.0
4. Adapter shall be installed near the equipment and shall be eωily accessible.
5 The plug considered as disconnect device of adapter
6. The device complies with RF specifications when the device used at 0 mm form your body
7.The EUT maximum working temperature
-20
o
C
and
40
0
C
FCC Statement
1. This device complies with Part 15 of the FCC Rules. Operation is subject to the following two
conditions:
(1) This device may not cause harmful interference.
(2) This device must accept any interference received, including interference that may cause undesired
operation.
2. Changes or modifications not expressly approved by the party responsible for compliance could void
the user's authority to operate the equipment.
NOTE:
This equipment has been tested and found to comply with the limits for a Class B digital device, pursuant
to Part 15 of the FCC Rules. These limits are designed to provide reasonable protection against harmful
interference in a residential installation.
This equipment generates uses and can radiate radio frequency energy and, if not installed and used in
accordance with the instructions, may cause harmful interference to radio communications. However,
there is no guarantee that interference will not occur in a particular installation. If this equipment does
cause harmful interference to radio or television reception, which can be determined by turning the
equipment off and on, the user is encouraged to try to correct the interference by one or more of the
following measures:
Reorient or relocate the receiving antenna.
Increase the separation between the equipment and receiver.
Connect the equipment into an outlet on a circuit different from that to which the receiver is connected.
Consult the dealer or an experienced radio/TV technician for help.