UTStarcom Korea Technologies UT251 UT GF251 Handset User Manual UT GF251 UG EN 20040809
UTStarcom Korea Technologies Ltd. UT GF251 Handset UT GF251 UG EN 20040809
Revised Manual
1
UT GF251 User Guide
version 0.1, 2004/08/09
2
Contents
1. Security Rules …………………………………………… 3
2. Getting Started …………………………………………… 5
3. Quick start ………………………………………….… 7
4. Introduction …………………………………………… 11
5. Introduction of menu …………………………………………… 15
6. Menu tree ………….……………………………… 24
7. FCC RF Exposure Information ………….……………………………… 28
3
1. Security Rules
Please read the handbook carefully. The manipulation that does not agree with the handbook may
bring dangers or violate the law.
1.1. Safety Information
The safety of driving
Please do not use the handset when you are driving. This behavior will violate the law in some
countries.
Power off the phone first when you are supplying the energy
Be sure not to use handset near the gas station, fuel, or chemical.
Power off the phone when you are in the airplane
The wireless phone will lead to communication confliction. Use the handset in the airplane is
dangerous and illegal.
Power off the phone when you are in the hospital.
Please obey the rules of the hospital and power off the phone near the medical machines.
Obey the rule
Obey the forbidden rules anywhere to avoid conflictions and dangers (such as in the hospital).
Conflictions
Any wireless phone may encounter the wireless confliction and affect the performance.
Choose the qualified service
Only the qualified staffers can fix the phone.
Use naturally
Please use the phone naturally and avoid touching the antenna when powering on.
Emergency call
Be sure that the phone is powered on and in service. After calling the emergency number, you
should show your position and not power off your phone.
Ionization radiation
Keep away from the antenna when using the phone.
Note
Be sure to use the normal accessories and batteries. Otherwise, it would be dangerous.
1.2. Battery Information
In lower temperature condition
In lower temperature condition, LCD’s showing speed become slower. This phenomenon is
4
normal. The phone may stop working when the battery is too hot or too cold.
Charging the new battery
* The new battery for user may be uncharged.
* In order to make full use of battery, the first charging time length is preferred beyond 15 hours,
but lower 24 hours.
* The battery may be charged and discharged for hundreds of time, but it would be invalidate in
the end. When its using time is too short, we should use new battery.
* When the charger is unused, we should switch off electrical source.
Attention
* Just use the suitable charger.
* Keep away from the fire. Do not disassemble the charge by authenticated person.
* Do not throw phone. This will affect battery’s life.
* The performance of battery mostly depends on networks.
* If it is unused, the charged battery will auto discharge in a mouth.
* If battery is not used continuously, you’d better discharge it completely and place it in the cool,
no-sunshine, and thirty place.
* Do not place the phone or the battery in hot situation(beyond 60 ), such as the sun℃-shine
window.
* Clear the phone with the prevent-electrostatic cloth. Do not use the dry or electrostatic cloth.
* Old battery should be discarded at the pointed place and not throw away freely.

5
2. Getting Started
2.1. SIM card
You need to register as a subscriber of a network operator and receive a SIM (Subscriber Identity
Module) card. A SIM card contains a micro computer chip which can track of phone number,
services included in your subscription, phone book and etc. A default PIN (Personal Identity
Number) code is provided by the SIM card from your operator and must be entered when switch on
this mobile phone.
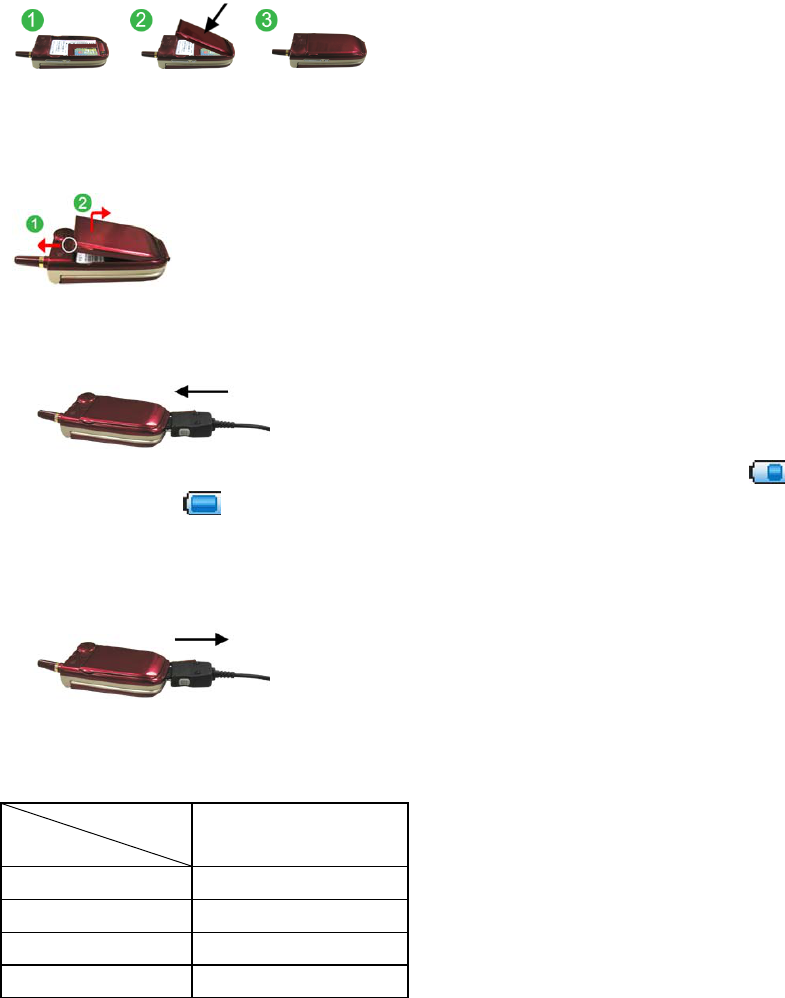
2.2. Install SIM card and battery
2.2.1. Install SIM card
1. Press key to turn off the phone. Push the catch up and then remove the battery.
2. Insert your SIM card into SIM card slot as figure below.
3. Make sure that the golden connectors are facing downward and that the beveled corner is
on the left.
4. Replace the battery into its place.
2.2.2. Remove the SIM card
1. Press key to turn off the phone. Push the battery lock up and then pick up the
battery.
2. Slide the SIM card out of the slot carefully.
2.2.3. Replace the battery
1. The battery is at the back of the phone.
2. Push the battery down to match the slot on it to the tabs at the bottom of the phone.
3. Press the battery down until it click into place.
6
2.2.4. Remove the battery
1. Push the catch above the battery towards the top of the phone and hold it in the position.
2. Lift the battery away as shown.
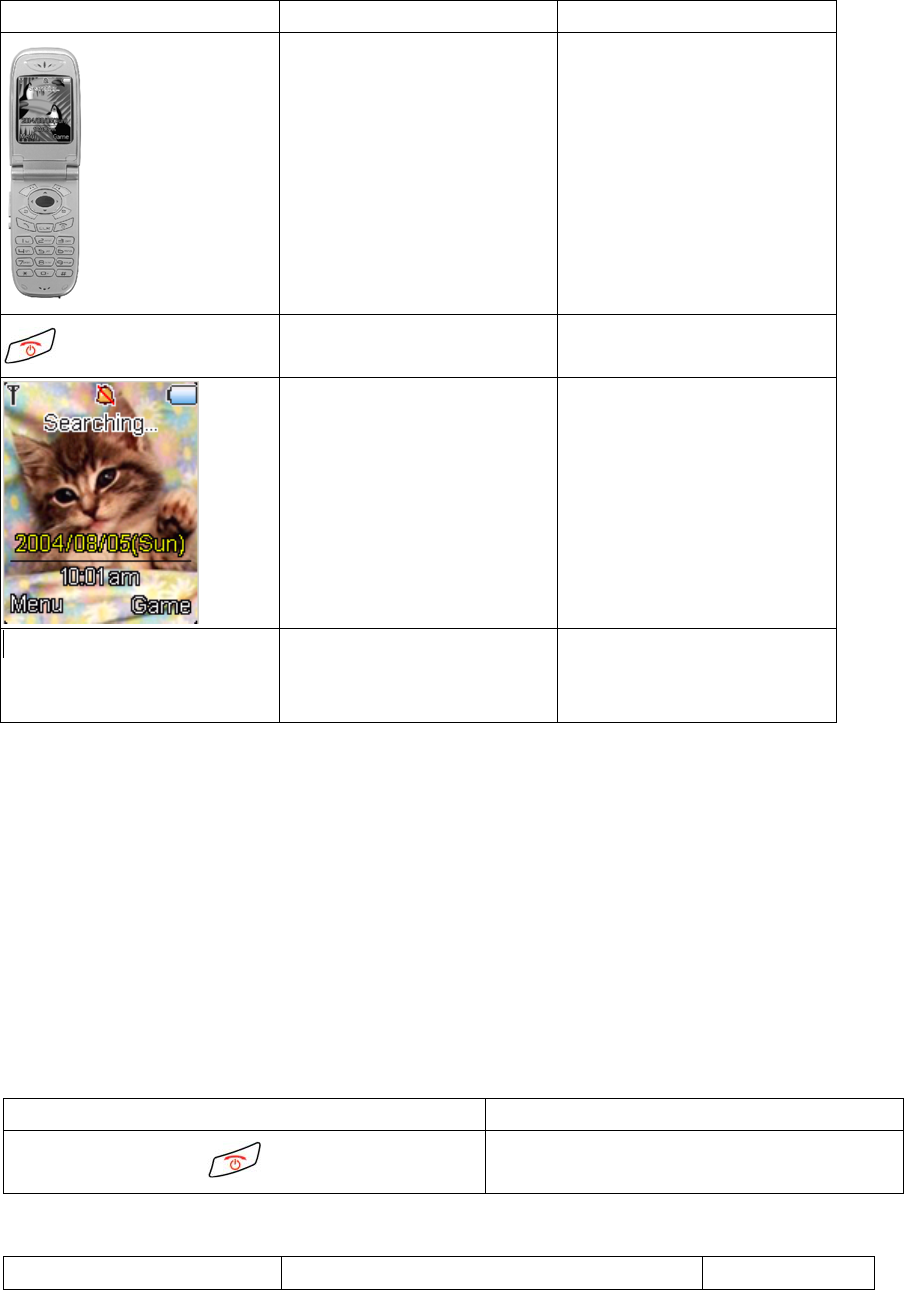
2.3. Charging the battery
1. Connect the battery to the base of the phone.
2. Connect the adapter to the mains. The battery charging icon appears on the screen.
3. The battery icon stops blinking after battery full.
4. When charging is finished, unplug the adapter from both the power outlet and the
charger.
5. When charging the phone, the battery might be hotter. This is normal situation.
2.4. Power management
Battery
Status Standard Battery
Charging times 2 hours
Talk time 2~3 hours
Standby time 90~150 hours
Battery Capacity 600 mAh
Notice:
Variation in operating times will occur depending on SIM card, network and usage
settings, usage style and environments.
The actual charging times depend on the adapter.
7
3. Quick start
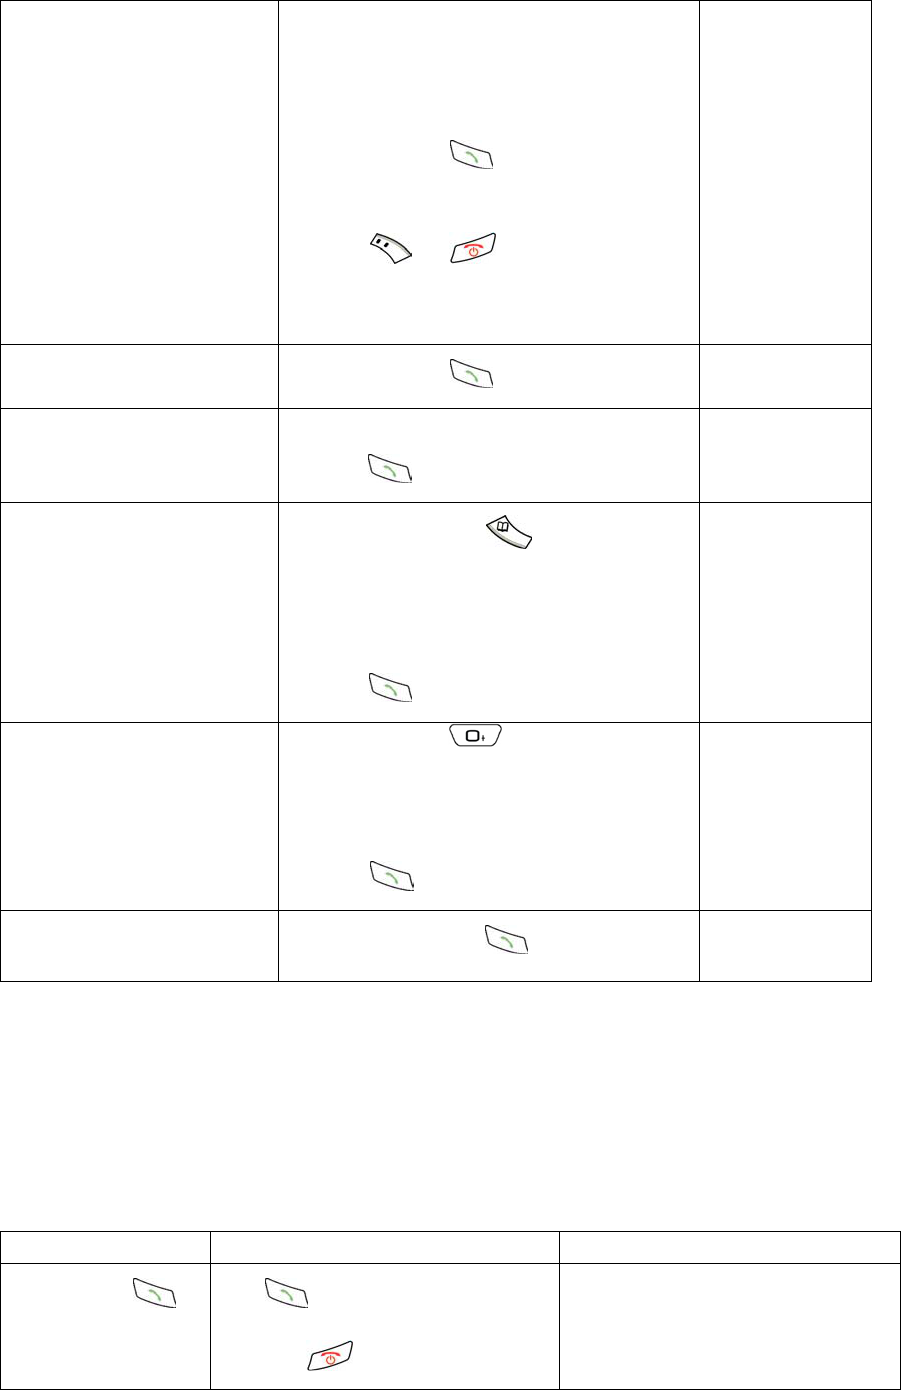
3.1. Switching the phone on and off
3.1.1. Power on
Figure Steps Description
1. Open the flip
2. Press and hold end key Switch on the phone
3. Display idle mode
screen after power on.
4. Enter the PIN code if
PIN code request is
enabled.
The ‘*’ mark is displayed
instead of number input while
entering PIN code.
Notice:
If you key in an incorrect PIN code three times in succession, SIM card will be locked.
Key in the PUK code to unlock it.
PIN code is usually supplied with SIM card.
The PUK code may be supplied with the SIM card. If not, contact your service provider
for the code.
If the SIM card is not inserted or invalid, the following figure will be shown on the screen.
You can only dial an emergency call number 911.
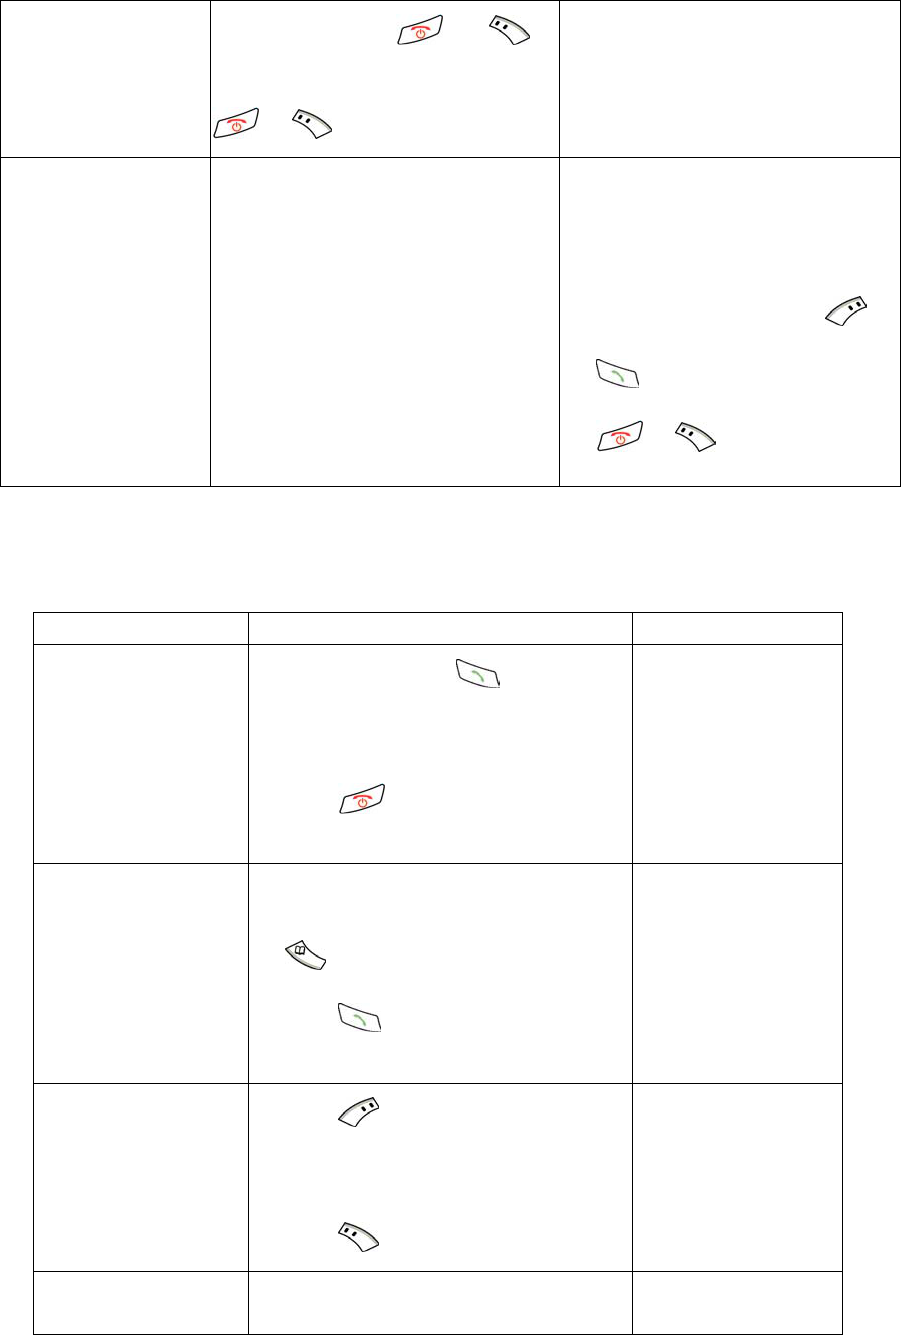
3.1.2. Power off
Steps Description
Press and hold end key
The power off animation shows and the phone is
power off.
3.2. Making calls
Function Steps Description
8
Making a call 1. Enter the phone number in idle mode.
Press clear key or [Delete] to delete the
last character. Press and hold to delete
all characters.
2. Press send key to call the
number.
3. Press or key to end the
call. You can also end the call by
closing the flip.
When the ear piece
is connected,
closing the flip will
not end a call. You
can press and hold
the button on the
ear piece to answer
or end a call.
Last number redial In idle mode, press twice continuously
Dial a number from call
record
Search the desired number from “Call Records”
and press key to call.
Dial a number from
Phonebook 1. In idle mode, press key to
access phonebook.
2. Select [Search] to find the desired
record by name or position and then
press key to call.
International calls 1. Press and hold key for
international prefix (+ character).
2. Enter the country code, area code, and
the phone number.
3. Press key to call the number.
GSM emergency call Key in ‘112’ then press key.
Notice:
This phone, like any wireless phone, operates using radio signals, wireless and landline networks as
well as user-programmed functions, which cannot guarantee connection in all conditions. Therefore,
you should never rely solely on any wireless phone for essential communications (medical
emergencies, for example).
3.3. Answering a call
There are three methods of answering a call according to the settings.
Function Steps Description
Press send key to
answer
Press key to answer the incoming
call. Press key to reject the call.
When somebody is calling you, the
phone shows the caller’s information.
9
Press any key to
answer Press any key except and
key to answer the incoming call. Press
or key to reject the call.
When somebody is calling you, the
phone shows the caller’s information.
Open the flip to
answer
Open the flip to answer the incoming
call.
Notice:
1. If you have set call divert in
[Network Service], the call will be
forward to the number you set.
In any situation, you can press or
key to answer the call. Press
or key to reject it.
3.4. Handling two or more calls
You can answer an incoming call or make another call during a call. You can also build a conference
call.
Function Steps Description
Answering an
incoming call during a
call
1. During a call, press key to answer
an incoming call. The first call is put on
hold and the new call becomes active.
2. Press key to reject the incoming
call.
Making another call
during a call
1. During a call, press number keys to key
in the outgoing call numbers or press
key to select from phonebook.
2. Press key to make the new call and
the first call is put on hold.
Swap calls
1. Press key for in call option list.
Select [Swap] to switch between the
active and held call.
2. Press key to end the selected call.
Build a conference call 1. To build a conference call, you must have
an active call and a held call.

10
2. Press key and select [Start
Conference].
3. To add a new participant to the call, put
the conference call on hold. Connect a
new call and then select [Add To
Conference] from option list.
To speak privately to a
specific party
1. Select a party in the list by pressing up
and down key.
2. Select [Private Call] in option list. Other
calling parties in the conference call are
put on hold.
3. You can press [End] to end this call or
select [Add To Conference] to rejoin to
the conference call.
To end the call for
specific party
1. Select a party in the list by pressing up
and down key.
2. Select [End Selected Call] in option list.
End conference call 1. Select any party of the conference call.
2. Press or key to end the
conference call for all parties.
Notice:
Conference call is a network service that allows you to make a conference call with a maximum of
six participants, including yourself. Please contact your service provider for this service.
11
4. Introduction
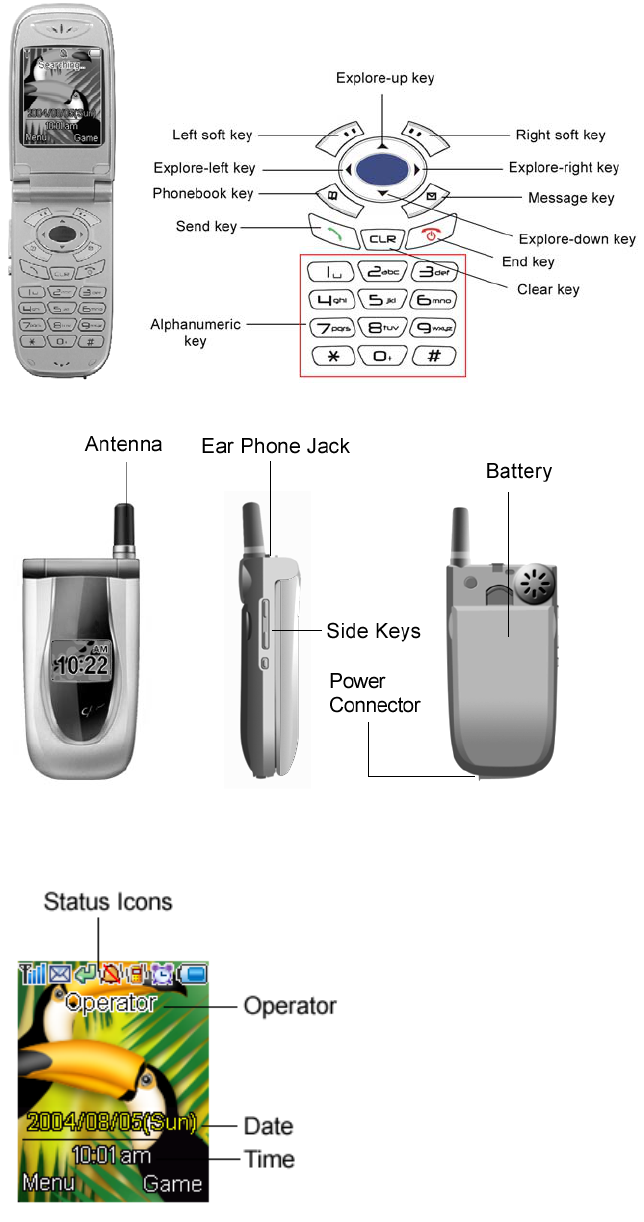
4.1. Phone overview
4.2. Standby mode
4.2.1. Idle mode overview
12
4.2.2. Status icons
Signal intensity: used to identify the signal intensity, the more bar the more intensity it
has.
Messages: used to identify whether you have got a new message, if the SIM has
overflow then the icon will wink.
Call divert: used to identify if call divert is activate.
Silent: used to identify if the phone is set as silent.
Vibrator: used to identify whether you have activate the function of vibrating
Notice: the ting tone volume is not effected by vibrating
Alarm: used to identify whether the function of alarm has been activated.
Battery: used to identify power, the more bar the more power it has.
4.3. Keypad introduction
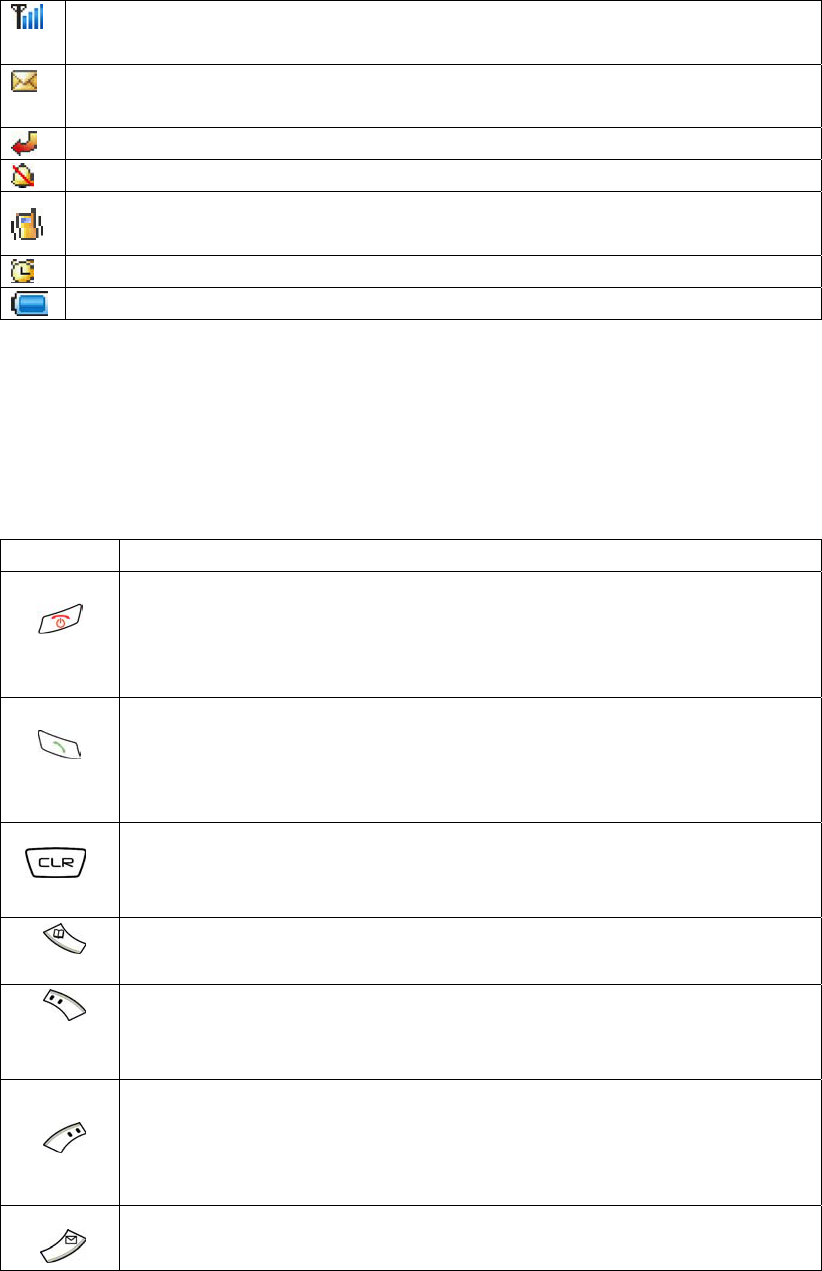
4.3.1. Function key
In the manual book “long press” means “press the key about 2 seconds without halt”, while “press
for one time” and “press the key” means “press the key then release”.
Not all key functions are included in this table. More details please refer to other part of the manual.
Key Orders and function
End key
Long press this key for 2-3 seconds to turn on /off phone.
Press this key to over or quit a call.
In the sub menu state, press this key to back to idle state
Send key
Press this key can answer call or call out.
In the idle state, press this key , then the outgoing calls will be shown,
press explore key to select, press again to dial.
Clear key
Press to clear the input characters in editing mode. Long press to delete
all input characters.
Phonebook key
In the idle state, press this key to enter phone book
Right soft key (Game key)
Perform the function shown in the bottom of screen
In the idle state , press this key to enter Game.
Left soft key (Menu key)
In the idle state, press this key to enter the main menu.
In the call, press this key to enter the phone book menu.
Perform the function shown in the left bottom of screen
Message key
In the idle state ,press this key to enter Message
13
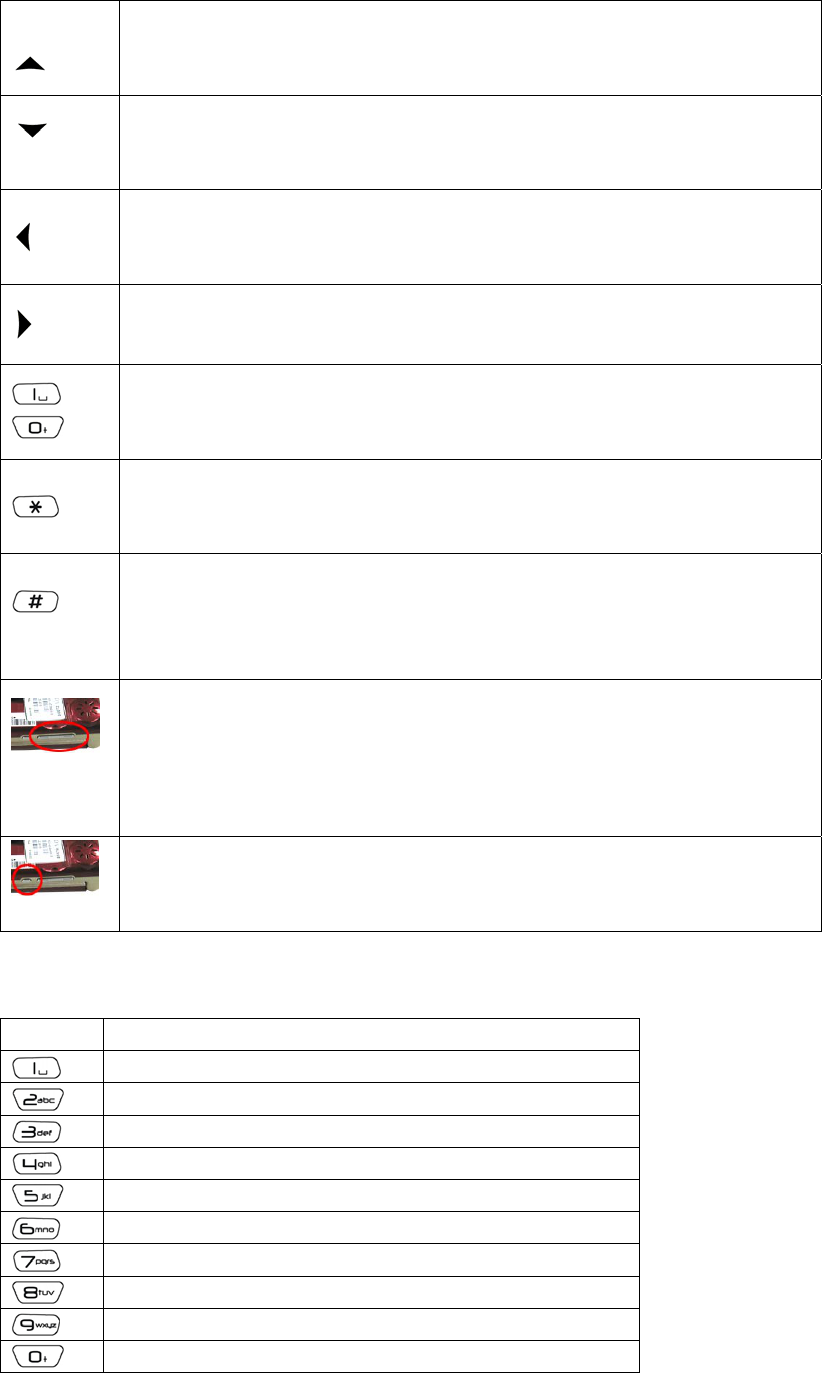
Explore-up
Browse menu and list
In the idle state ,press this key to enter Accessory
Explore-down
Browse menu and list
In the idle state ,press this key to enter Alarm
Explore-left
Browse items
In the idle state ,press this key to enter Received Calls
Explore-right
Browse items
In the idle state ,press this key to select Ring Tone
〜
Number key
In the idle state, press number key to enter call number.
In edit mode ,press to input the corresponding characters
* key
In the idle state, long press to enable/disable vibration.
In edit mode, press to enter symbol list
# key
In edit mode, press this key to switch from different case and input
method.
In call number edit mode, long press to insert a pause ‘p’.
Side up & down key
In the idle state, press up and down key to adjust ring tone volume.
In flip closed state, press up and down key to switch LED color.
In call state, press up and down key to adjust receiver volume.
In hands free status, press up and down to adjust ear piece volume.
Side function key
In the idle state, press this key to display/hide operator name.
In flip closed state, press this key to turn on/off LED light.
4.3.2. Alphanumeric keys
key character
space ? ! 1 :
A B C 2 )
D E F 3 (
G H I 4 $
J K L 5 space
M N O 6 ,
P Q R S 7
T U V 8 ;
W X Y Z 9
. + - = 0

14
. , ? ! : ; - + # * ( ) ’”_ @ & $ ₤ % / < > =
switch input method
15
5. Introduction of menu
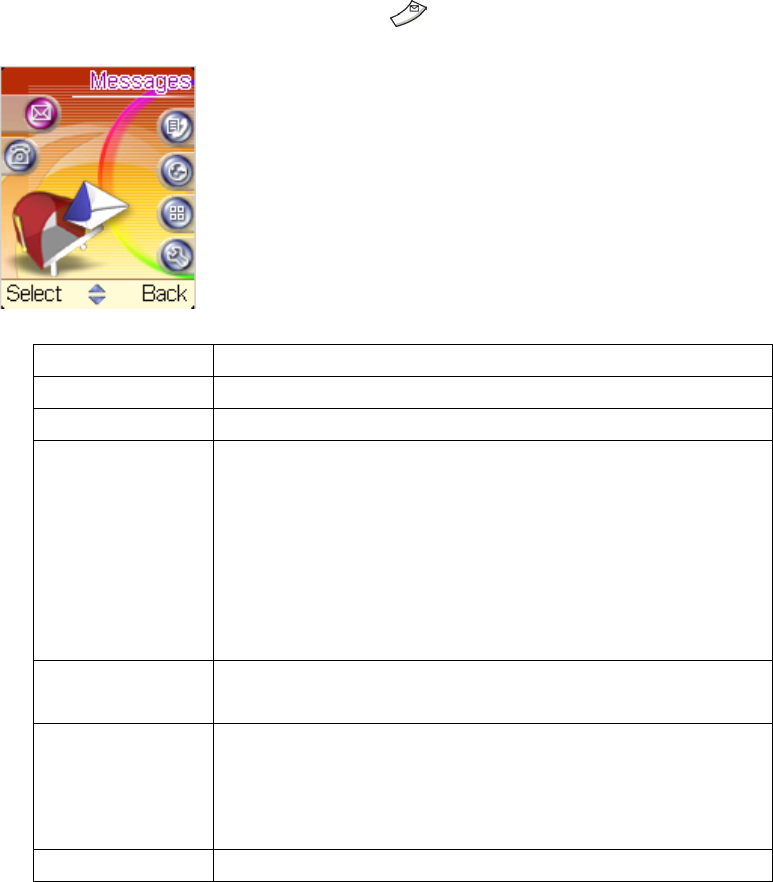
5.1. Messages
In idle mode, select Menu->Message or press key to enter Message. You can save maximum
30 messages in on the handset for Draft and Outbox.
5.1.1. Inbox
function description
(1)Reply reply message to the sender
(2)Delete Delete the focused message.
(3)Forward Forward a receiving message. After editing the message, press
[Option] to send, save or give it up.
【Send】:send the message
【Group Send】:send the message to the existing group
【Save】:save the message to the Draft
【Insert template】:insert template in editor
【Cancel】:abandon the editing message
(4)Save as
template
Save the message content as template
(5)Extract
Number
Extract the number of sender and the number in the messages.
Press [Option] to save or call the number
【Save】:save this number into Phonebook
【Call Number】:call this number
(6)Call Number call the sender
5.1.2. Write Message
You can edit maximum 160 characters in a message. Press this function to send and store messages.
Press [Select] to enter the edit interface.
The input method including,
Abc
The first letter is written in upper case and other letters are written in lower case
ABC
Upper case input mode
abc
Lower case input mode
123
Number input mode
16
Press key to switch the input mode. Press key to show the symbols. Select the symbols by
using explore key and press [Select] to confirm.
Press to delete one character, long press to clear all the characters on the screen.
Functions in [Option] are,
function description
(1)Send Send the message
(2)Group Send send the message to the existing group
(3)Save save the message to the Draft
(4)Insert template Insert template in editor
(5)Cancel abandon the editing message
5.1.3. Draft
Enter to show the saved message list. Press key to select the focused message. Functions
including,
(1)Send: send the message
(2)Delete: delete the selected message.
5.1.4. Outbox
Enter to show the sent message list. Press key to select the focused message. Functions
including,
(1)Forward: Forward the focused message.
(2)Delete: delete the focused message.
(3)Save as template: Save the message content as template
5.1.5. Templates
Display the template list. Press [New] to add a new template.
5.1.6. Memory Status
Display SIM card and handset storage space. The display format is,
saved records / total records available
5.1.7. Delete All
Delete all records on SIM card and handset. After selecting this function, a dialog “Delete All?”
shows. Press [OK] to delete all the messages, press [Back] to give up this operation.
5.1.8. Settings
(1)Service Center: Edit or save the service center number. This number can be offered by
network supplier.
(2)Validity Period: If the recipient cannot be reached within the validity period, the message
will be removed from the message center. Options includes [1 hour], [12 hours], [24 hours], and [1
week].
(3)Status Report: After sending messages, it will report whether it has been successful, Press
[On] to open this function, [Off] to close this function.
(4)Concatenate: Support long messages. Press [On] to open this function, [Off] to close this
function.
(5)Select SMS Storage: Save the SMS in SIM card or phone in default.
5.1.9. Broadcast
17
This service is used to receive information of weather report, traffic information, hospital, taxi
information, etc. You can contact with network service to get more information. Please contact your
service provider for more information.
(1)Receiving Setting
On:open the cell broadcast function
Off:close the cell broadcast function
(2)Read Broadcast:Check all the received cell broadcast message
(3)Add Channel:Add a new cell broadcast channel
(4)Channel List:List all the cell broadcast channel, press [Delete] to delete the focused
channel
Note: This service is not support for all networks. More information please contacts your service
provider.
5.1.10. Voice Mail
(1)Dial Voice Mail:Dial the voicemail number to get the message.
(2)Set Voice Mail:set the voicemail number.
(3)Clear Number:clear voice mail number
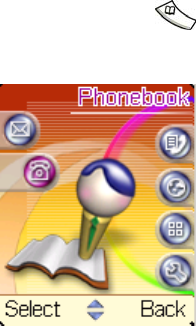
5.2. Phonebook
In idle mode, press “menu” to enter main menu. Using explore key and hint to select “Phonebook”.
You can also press key to enter Phonebook. The handset phonebook can store 200 names and
phone numbers.
5.2.1. Search
(1)By Name:search records by your entering name
(2)By Position:search records by position. The position of handset records starts from 1 to 200.
SIM card position starts from 201.
5.2.2. New Entry
Using explore key and then press [Select] to enter New Entry.
(1)Save To SIM:add a new entry on SIM card.
(2)Save To Phone:add a new entry on handset.
Step1 Press [Select] to enter edit mode. Key in the phone number and press [OK] to save record. Or
press [Delete] to modify the entry.
Step2 Key in the name and press [OK]. A confirm dialog shows if the record is successfully saved.
5.2.3. Group Setting
You can set a specific ring tone and short message alert for a group. Select group member from
18
phonebook records.
5.2.4. Copy All
SIM To Phone:Copy all SIM card records to your phone.
Phone To SIM:Copy all phone records to SIM card.
5.2.5. Delete All
SIM Card:Delete all SIM card records.
Phone:Delete all phone records.
5.2.6. Memory Status
The using state will be shown in number: the used capacity/ total capacity.
5.2.7. My Number
Select to set your own phone number. Select [Check] to view your phone number. Select [Add] to
edit it.
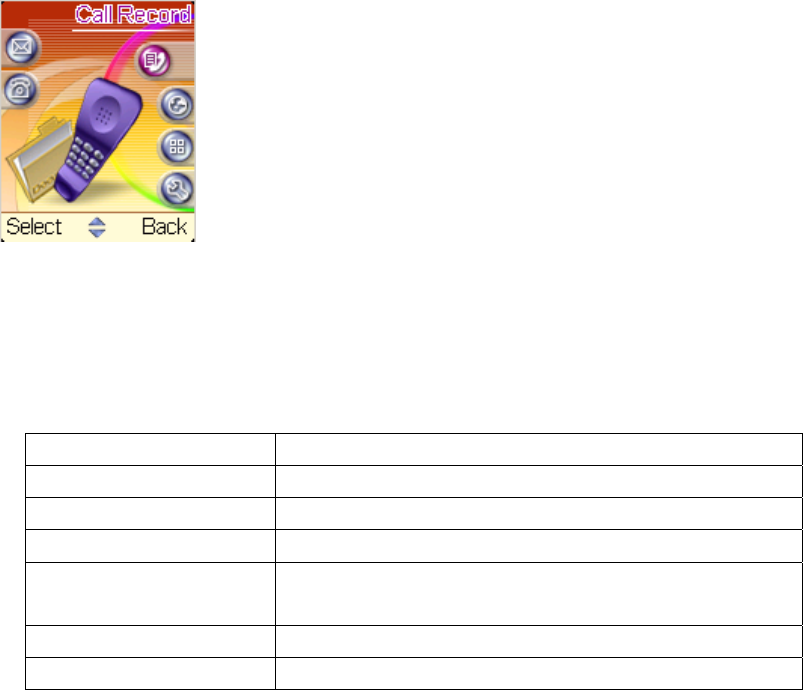
5.3. Call Record
This item can show the records of all the outgoing calls, missed calls and received calls.
5.3.1. Missed Calls
This item shows the last recently 10 answered number.
1. You can press [up] or [down] key to browse.
2. Press [option] key ,then press [Select] key to activate this functions.
function description
Call Number Dial the missed call number.
Store Number store the number in the SIM card or phone.
Send Message send message to this number.
Details show the number and the name (if stored before) also the time
and the date of the call
Delete delete the number from Missed Calls.
Delete all delete all the number from Missed Calls.
5.3.2. Received Calls
This item shows the last recently 10 received number. Functions are as [Missed Calls].
5.3.3. Dialed Calls
This item shows the last recently 10 dialed number. Functions are as [Missed Calls].
5.3.4. Call Timers
This function shows the duration of your incoming and outgoing calls.

19
(1)Last Call:check the last call duration
(2)All Incoming:check total duration of all incoming calls
(3)All Outgoing:check total duration of all outgoing calls
5.3.5. Call Cost
Show the total fee of all the calls. The network server will provide fee inquiry, and you can inquiry
the fee of last call and all calls.
(1)Last charge: enquire the fee of last call.
(2)Total charge: total fee of all the calls.
(3)Rate: look for or set a unit of time and currency. PIN2 is required.
(4)Limit:inquiry or set the maximum fee. You should enter PIN2 number if you want use this
function.
View:check the cost limit.
Change:change the cost limit and activate this function. PIN2 is required.
Cancel:cancel this function. PIN2 is required.
(5)Reset Charge: delete cost records, it require PIN2.
Notice! Not all the SIM card has this function.
5.3.6. Clear Records
(1)Missed Calls:Clear all missed call records.
(2)Received Calls:Clear all received call records.
(3)Dialed Calls:Clear all dialed call records.
(4)Clear All:Clear all call records.
5.4. Network Service
This option contains some Network Services.
5.4.1. Call Divert
This option can divert the incoming calls to the target phone. It needs to set the number of the target
phone in advance.
(1)When No Service
This option can set the diverting of no reaching. It can divert the incoming calls to the designated
phone when the phone is powered off or not connecting to network. Press [Select] and select
operations: Voice, Fax and Data. Each operation provides three functions: Check Status, Set Divert
and Cancel Divert Please press [select] to activate it.
Check Status:View the current settings status of the diverting.
Set Divert:Set the diverting.
Cancel Divert:Cancel the diverting.
(2)When Busy
20
This option can set the busy diverting. When the phone is in busy it can divert the incoming calls to
the target phone. Its submenu is the same as When No Service.
(3)When No Answer
If this item is selected, the call will be diverted to the target phone when it is ignored. Its submenu is
the same as When No Service.
(4)All Calls
Divert all incoming calls to the target phone. Its submenu is the same as When No Service.
(5)Cancel All
The diverting of all incoming calls is cancelled.
5.4.2. Call Barring
Forbid the outgoing or incoming calls. Please input password before operating this function. (The
password is provided by network supplier.)
(1)Outgoing Calls:Restrict the outgoing callings. There are three function options. Press
[Select] to activate.
Check Status: View the current status of the restriction of the calls.
Set Bar:Set the restriction of the calls.
Cancel:Cancel the restriction of the calls.
(2)Internat. Calls:Restrict the international callings. Its second rank menu is the same as
Outgoing Calls.
(3)Internat. But Home:Restrict the international callings except it those directed to the home
PLMN country. Its submenu is the same as Outgoing Calls.
(4)Incoming Calls:Restrict the incoming callings. Its submenu is the same as Outgoing Calls.
(5)When Roaming:Restrict the roaming service. Its submenu is the same as Outgoing Calls.
(6)Cancel All Barring:Cancel all of the restriction of incoming and outgoing calls.
(7)Change Password:Change the restriction password.
5.4.3. Call Waiting
Open or close the function of the incoming calls waiting. If it is active, you will be notified when the
phone is busy but another new incoming call. If it is deactivated, you will not be notified.
(1)Check Status:View the current status of this option.
(2)Active:Activate this function.
(3)Cancel: Disable this function.
5.4.4. Network Selection
This option can select the method of searching network. There are two modes, Automatic and
Manual. And the default is automatic.
(1)Automatic: Select this item to search network automatically.
(2)Manual: Select this item to choose the network manually.
5.4.5. Band Mode
This option can select the band. There are five options: Automatic, 900&1800, 900, 1800, 1900.
5.4.6. Hide Number
Set this function to hide your phone number when calling. (Network support is required)
(1)On:Activate this function and hide the your phone number.
(2)Off:Turn off this function. Your phone number will be sent.
5.5. Accessories
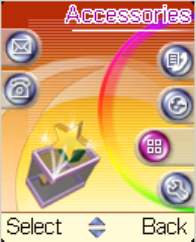
21
Some applications are provided in this menu.
5.5.1. WAP
You can access internet by WAP browser.
1()Home: access the default homepage
(2)Bookmarks: to add and display bookmarks
(3)History: display visited website
(4)Profiles: set and select a profile to connect to the internet service
(5)Settings: set user preference here. Sub menus including Save History and Image Scaling.
(6)Go To Address: enter the website address and select to link.
(7)Clear Cache: clear the temporary files in cache.
5.5.2. Game
This phone offers you three games to play: Saving Egg, Push Box, Submarine, Shrewmouse, and
Sea Baby. Choose the desired game and then select [Help] to see how to play the game.
New Game: Start a new game.
Score Chart: display the score records. Press [Clear High Score] to clear records.
Game Tone: turn on/off the game tone
Background Music: turn on/off the background music
Help: Instruction of the game.
5.5.3. Calculator
Select this item to calculate. It includes plus, minus, multiply and divide.
5.5.4. Calendar
This function helps you to edit and read the reminder. Use explore key to select date and then press
[Select] to show the user saved reminder and options.
(1)New:Add a new reminder on the selected date.
(2)Saved Reminders:Read the selected reminder and do the edit or delete single record.
5.5.5. Alarm
You can set three sets of alarms. Use explore up and down key to select the record and press [Select]
to set the alarm.
(1)Repeat:Press explore right to select the repeat period. Options includes Daily, Week Day,
and Once.
2()Time:Press explore right to set alarm time. The time format is 24 hours.
3()Date:Set this item if you select Once. Press explore right to set the date and press [OK] after
finished.
4()On/Off:Press explore right to turn on/off this alarm.
Press [Save] after finishing the settings. Select [Cancel All Alarms] to clear all alarm settings.

22
5.5.6. SIM Toolkit (STK)
Your SIM card may provide additional services that called SIM Toolkit (STK). This menu is only
displayed if this is support by your SIM card. The name and the contents of this menu depend
entirely on the service available. For more information please contact your service provider.
5.6. Phone Settings
This option is used to set your phone.
5.6.1. Language
This option can select language. Press [Select] to activate.
5.6.2. Internet Setup
1()GPRS Attach: you can select GPRS to be attached any time or only attached when GPRS is
needed.
(2)Data Count: display the data counter of GPRS transmission. Records include incoming
data and outgoing data.
(3)Attach: select to build the GPRS connection
(4)Detach: select to disconnect the GPRS connection
5.6.3. Tones
This phone provides 40 poly ring tone. It includes four options: Ring Tone, SMS Tone, Alarm Tone,
and Keypad Tone.
(1)Ring Tone:Set the ring tone and the volume of the incoming calls. Move the cursor by
Up/Down-key and press [Select] to choose.
(2)SMS Tone:Set the ring tone and the volume of the incoming SMS.
(3)Alarm Tone:Set the ring tone and the volume of the alarm clock.
(4)Keypad Tone:Set the tone of key press. The phone offers 2 sets normal keypad tone and 4
sets special ones. Use up and down key to select the preferred keypad tone.
(5)Power On/Off Music: turn on/off the power on/off music
5.6.4. Display
function description
(1) Wallpaper There are three display method, No Wallpaper, Slide Wallpaper, and Fixed
Wallpaper.
1. No Wallpaper:wallpaper displayed as blank
2. Slide Wallpaper:change wallpaper for every three seconds.
Fixed Wallpaper:Select a wallpaper from the list.
(2) Style There are two styles to choose, Blue Style and Green Style.
(3) Backlight Timer You can set backlight always off, or switch off after a period of inactivity

23
(10, 20, 30, 60 seconds).
(4) Backlight Level Use up and down key to adjust the backlight brightness. Press [Select] to
confirm.
(5) Sub LCD Settings of sub LCD.
1. Wallpaper: select sub LCD wallpaper
2. Clock: select the clock display mode of sub LCD.
3. Contrast: adjust the contrast of sub LCD display.
(6) Battery Level Check the current battery capability.
5.6.5. Clock
(1)Date Setting:Set the current date (dd/mm/yy, for example, 23/07/2003).
(2)Time Setting:Set the current time (hh/min, for example, 08/58).
(3)Time Format:Set the format of time. There are two choices: 24 hour and 12 hour.
12-Hours: for example, 1:00 PM (PM 1:00)
24-Hours: for example, 13:00 (PM 1:00).
5.6.6. Call Setting
(1)Answering Mode: This function can set the answering method.
Normal Answer: Press answer key to answer the incoming call.
Anykey Answer: Press any key except end key to answer the incoming call.
Flip Answer: Open the flip to answer the incoming call.
(2)Auto Redial: If this function is activated, the phone will redial automatically after a delay
when it can’t reach the target phone.
3()Incall Timer: Set whether you need to be noticed calling time during calling.
(4)Connect Hint: turn on/off the alert when the call is connected.
(5)Call Fire Wall: set a list of phone number that you don’t want to receive calls. You can turn
on/off this function and set a reject list.
5.6.7. Security
(1)Enable PIN
Activate: Need to input the PIN while power on.
Cancel: Select this item not to activate.
(2)Change PIN: change PIN code.
3()Change PIN2: This function needs SIM card support. For more information please contact
your service provider.
(4)Handset Code: Phone data will be protected by handset code. The default handset code is
“0000”. You can use this function to change it.
(5)FDN: When this function is activate, only the set numbers can be called out. Users can enter
phonebook to edit the fixed dialing list. Select [Cancel] to close this function. This function needs
SIM card support. PIN2 is required to change the setting.
5.6.8. Download Manager
You can browse and manage the download files here. The music files are saved in My Music and
the image files are saved in My Picture.
5.6.9. Restore Factory
Select this option to revert the initial status which manufacturer destined. Handset code is required.
24
Menu tree
1. Messages
1.1 Inbox
1.2 Write Message
1.3 Draft
1.4 Outbox
1.5 Templates
1.6 Memory Status
1.7 Delete All
1.8 Settings
1.8.1 Service Center
1.8.2 Validity Period
1.8.3 Status Report
1.8.4 Concatenate
1.8.5 Select SMS Storage
1.9 Broadcast
1.9.1 Receiving Setting
1.9.2 Read Broadcast
1.9.3 Add Channel
1.9.4 Channel List
1.10 Voice Mail
1.10.1 Dial Voice Mail
1.10.2 Set Voice Mail
1.10.3 Clear Number
2. Phonebook
2.1 Search
2.1.1 By Name
2.1.2 By Position
2.2 New Entry
2.2.1 Save To SIM
2.2.2 Save To Phone
2.3 Group Setting
2.4 Copy All
2.4.1 SIM To Phone
2.4.2 Phone To SIM
2.5 Delete All
2.5.1 SIM Card
2.5.2 Phone
2.6 Memory Status
2.7 My Number
2.6.1 Consult
2.6.2 Edit
25
3 Call Record
3.1 Missed Calls
3.2 Received Calls
3.3 Dialed Calls
3.4 Call Timers
3.4.1 Last Call
3.4.2 All Incoming
3.4.3 All Outgoing
3.5 Call Cost
3.5.1 Last Charge
3.5.2 Total Charge
3.5.3 Rate
3.5.4 Limit
3.5.5 Reset Charge
3.6 Clear Records
3.6.1 Missed Calls
3.6.2 Received Calls
3.6.3 Dialed Calls
3.6.4 Clear All
4. Network Service
4.1 Call Divert
4.1.1 When No Service
4.1.2 When Busy
4.1.3 When No Answer
4.1.4 All Calls
4.1.5 Cancel All
4.2 Call Barring
4.2.1 Outgoing Calls
4.2.2 Internat. Calls
4.2.3 Internat. But Home
4.2.4 Incoming Calls
4.2.5 When Roaming
4.2.6 Cancel All Barring
4.2.7 Change Password
4.3 Call Waiting
4.3.1 Check Status
4.3.2 Activate
4.3.3 Cancel
4.4 Network Selection
4.4.1 Automatic
4.4.2 Manual
4.5 Band Mode
4.5.1 Automatic
26
4.5.2 900&1800
4.5.3 900
4.5.4 1800
4.5.5 1900
4.6 Hide Number
4.6.1 On
4.6.2 Off
5. Accessories
5.1 WAP
5.1.1 Home
5.1.2 Bookmarks
5.1.3 History
5.1.4 Profiles
5.1.5 Settings
5.1.6 Go To Address
5.1.7 Clear Cache
5.2 Game
5.2.1 Saving Egg
5.2.2 Push Box
5.2.3 Submarine
5.2.4 Shrewmouse
5.2.5 Sea Baby
5.3 Calculator
5.4 Calendar
5.5 Alarm
5.6 STK(Need SIM card support)
6. Phone Settings
6.1 Language
6.1.1 English
6.1.2 Spanish
6.1.3 French
6.1.4 Portuguese
6.2 Internet Setup
6.2.1 GPRS Attach
6.2.2 Data Count
6.2.3 Attach
6.2.4 Detach
6.3 Tones
6.3.1 Ring Tone
6.3.2 SMS Tone
6.3.3 Alarm Tone
27
6.3.4 Keypad Tone
6.3.5 Power On/Off Music
6.4 Display
6.4.1 Wallpaper
6.4.2 Style
6.4.3 Backlight Timer
6.4.4 Backlight Level
6.4.5 Sub LCD
6.4.6 Battery Level
6.5 Clock
6.5.1 Date Setting
6.5.2 Time Setting
6.5.3 Time Format
6.6 Call Setting
6.6.1 Answering Mode
6.6.2 Auto Redial
6.6.3 Incall Timer
6.6.4 Connect Hint
6.6.5 Call Fire Wall
6.7 Security
6.7.1 Enable PIN
6.7.2 Change PIN
6.7.3 Change PIN2
6.7.4 Handset Code
6.7.5 FDN
6.8 Download Manager
6.9 Restore Factory

28
6. FCC RF Exposure Information
This model phone meets the government’s requirements for exposure to radio waves.
This phone is designed and manufactured not to exceed the emission limits for
exposure to radio frequency (RF) energy set by the Federal Communications
Commission of the U.S. Government.
The exposure standard for wireless mobile phones employs a unit of measurement
known as the Specific Absorption Rate, or SAR. The SAR limit set by the FCC is
1.6W/kg. *Tests for SAR are conducted using standard operating positions accepted
by the FCC with the phone transmitting at its highest certified power level in all tested
frequency bands. Although the SAR is determined at the highest certified power level,
the actual SAR level of the phone while operating can be well below the maximum
value. This is because the phone is designed to operate at multiple power levels so as
to use only the poser required to reach the network. In general, the closer you are to a
wireless base station antenna, the lower the power output.
The highest SAR value for the model phone as reported to the FCC when tested for use
at the ear is 0.564 W/kg and when worn on the body, as described in this user guide, is
0.112 W/kg. (Body-worn measurements differ among phone models, depending upon
available enhancements and FCC requirements.)
While there may be differences between the SAR levels of various phones and at
various positions, they all meet the government requirement.
The FCC has granted an Equipment Authorization for this model phone with all
reported SAR levels evaluated as in compliance with the FCC RF exposure guidelines.
SAR information on this model phone is on file with the FCC and can be found under
the Display Grant section of http://www.fcc.gov/oet/fccid after searching on FCC ID:
O6Y-UT251.
For body worn operation, this phone has been tested and meets the FCC RF exposure
guidelines for use with an accessory that contains no metal and the positions the
handset a minimum of 1.5 cm from the body. Use of other enhancements may not
ensure compliance with FCC RF exposure guidelines. If you do no t use a body-worn
accessory and are not holding the phone at the ear, position the handset a minimum of
1.5 cm from your body when the phone is switched on.

29
FEDERAL COMMUNICATIONS COMMISSION
This device complies with Part 15 of the FCC Rules. Operation is subject to the following
two conditions:(1) this device may not cause harmful interference, and (2) this device must
accept any interference received, including interference that may cause undesired
operation.
Note:
This equipment has been tested and found to comply with the limits for a Class B digital
device, pursuant to Part 15 of the FCC Rules. These limits are designed to provide
reasonable protection against harmful interference in a residential installation. This
equipment generates, uses and can radiated radio frequency energy and, if not installed
and used in accordance with the instructions, may cause harmful interference to radio
communications. However, there is no guarantee that interference will not occur in a
particular installation If this equipment does cause harmful interference to radio or
television reception, which can be determined by turning the equipment off and on, the
user is encouraged to try to correct the interference by one or more of the following
measures:
-Reorient or relocate the receiving antenna.
-Increase the separation between the equipment and receiver.
-Connect the equipment into an outlet on a circuit different from that to which the receiver is
connected.
-Consult the dealer or an experienced radio/TV technician for help.
Changes or modifications not expressly approved by the party responsible for
compliance could void the user‘s authority to operate the equipment.
This EUT is incompliance with SAR for general population /uncontrolled exposure limits in
ANSI/IEEE C95.1-1999 and had been tested in accordance with the measurement
methods and procedures specified in OET Bulletin 65 Supplement C.