Ubiquiti NBM5D 802.11n 2x2 MIMO User Manual manual grid p1
Ubiquiti Networks, Inc. 802.11n 2x2 MIMO manual grid p1
Ubiquiti >
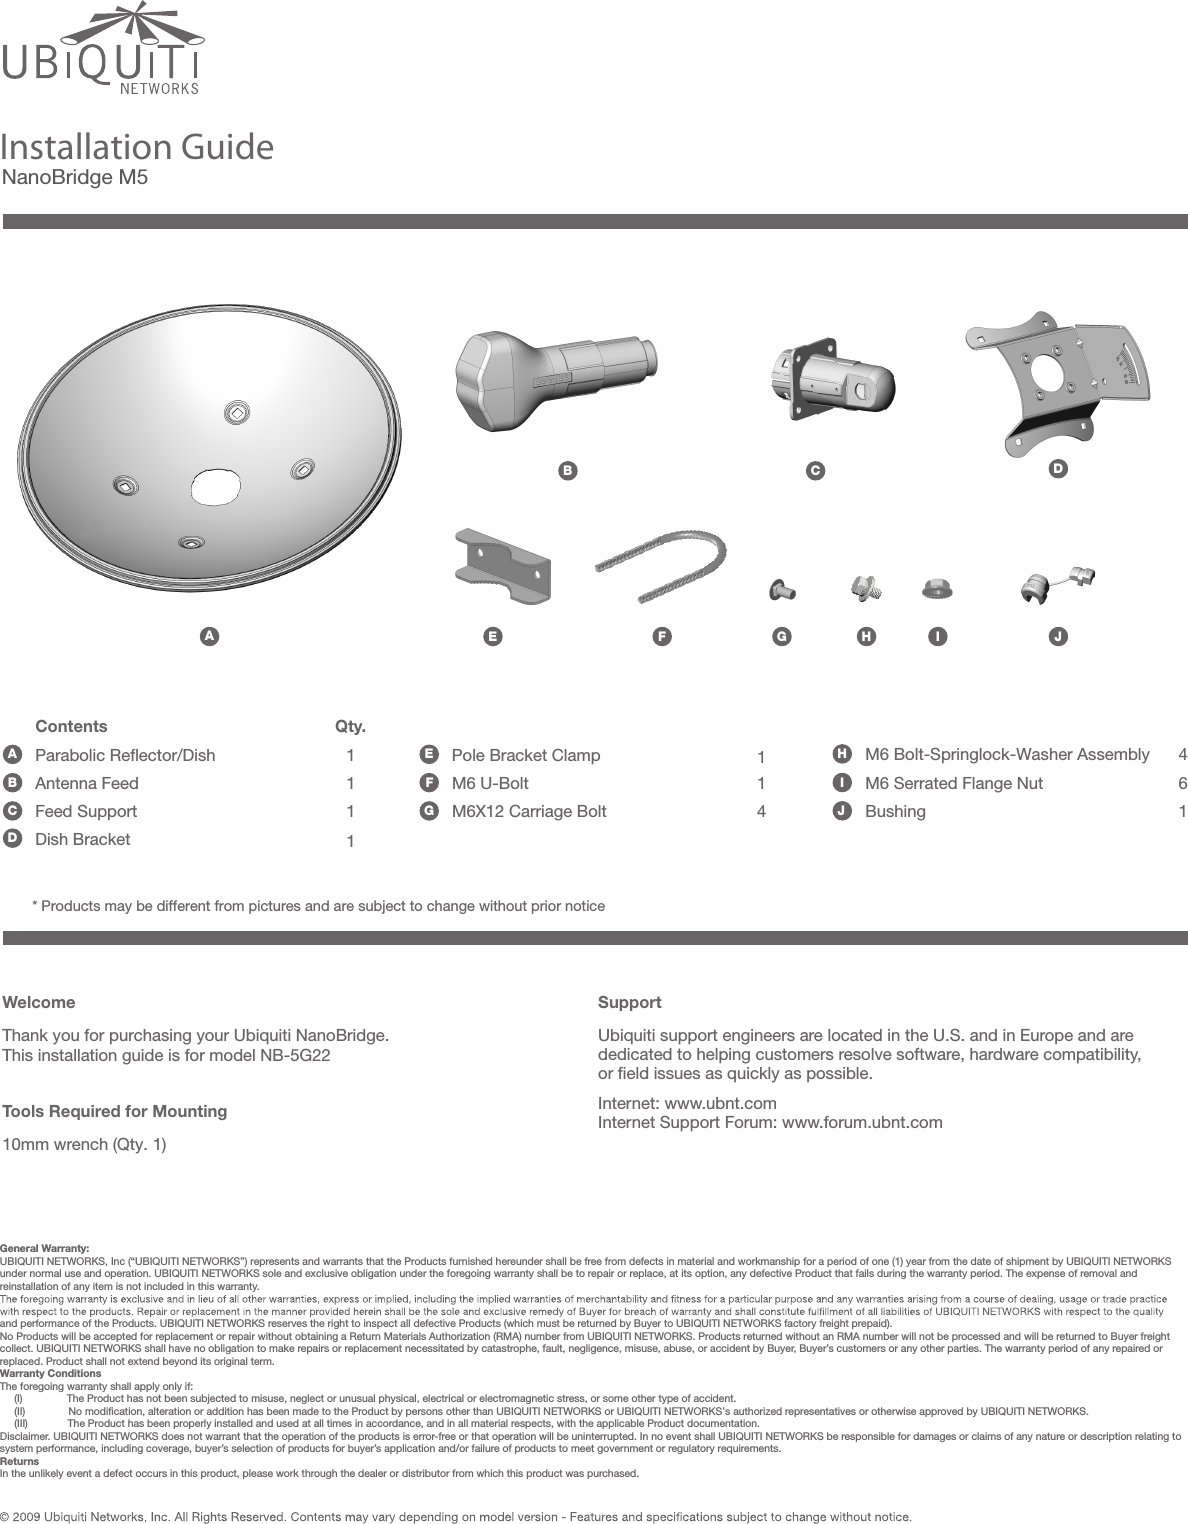
Contents
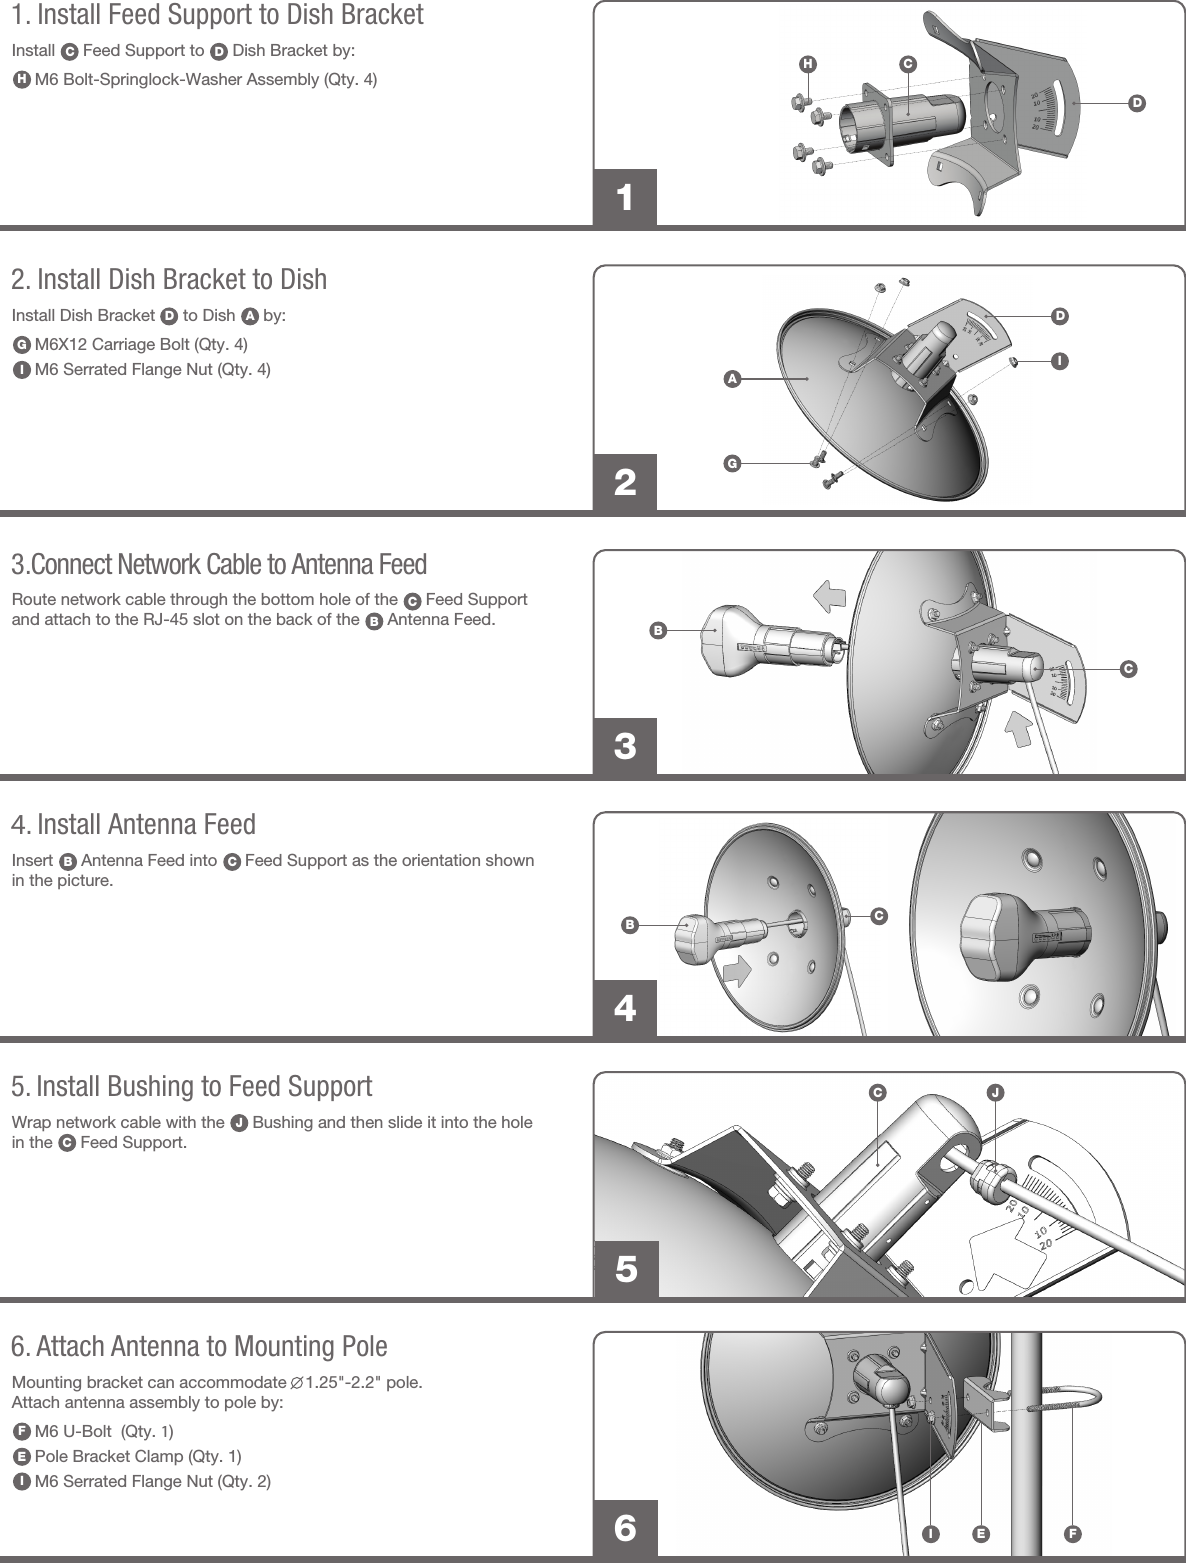
- 1. Professional Install Guide
- 2. Quick Start Guide
- 3. Revised Manual_Rev3
Professional Install Guide