Uni Art Precise SP3491-001T Wireless Audio Transmitter User Manual
Uni-Art Precise Products Ltd Wireless Audio Transmitter
User Manual
INTRODUCTION
SP3490
This 900 MHz stereo wireless speaker system uses latest wireless
technology that enables you to enjoy music and TV sound anywhere inside
or outside your home. You can simply connect the system to any audio
source such as Radio, TV, VCR, Hi-Fi and CD/MP3/VCD/DVD player.
Without complicated wiring and installation with your Audio/Video
equipments and rear channel amplifier, the system enables you to enjoy
thrilling, lifelike sound stereo in minutes.
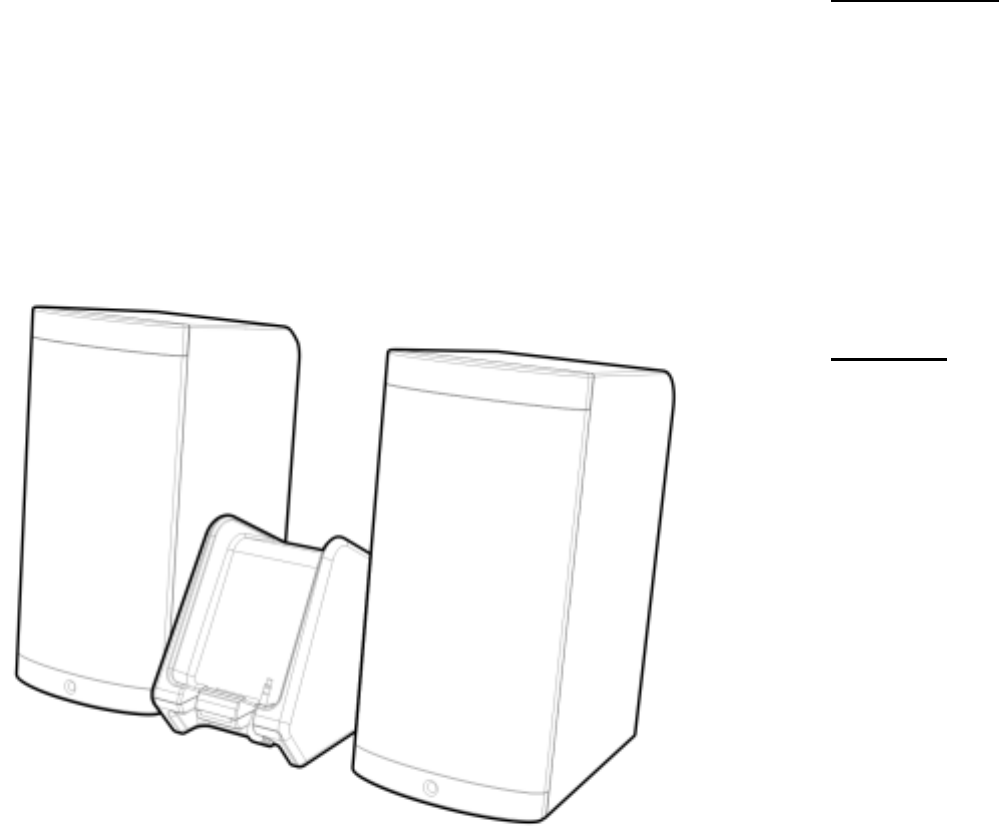
Cordless Stereo 900MHZ
Speaker System
FEATURES
1. Automatic Phase Lock Loop (PLL) scanning system on speaker
receivers
2. Phase Lock Loop (PLL) transmission system on transmitter
3. 900 MHz RF technology speaker system.
4. RF technology lets you roam freely throughout your house.
5. Operating distance up to 50 Meters in open area.
6. No line of sight limitation.
7. Virtually interference free stereo quality.
8. ALC and auto ON/OFF control.
9. Auto tuning function.
10. Bass boost function
User’s Manual
Please read before using the equipment P. 2
COMPONENT IDENTIFICATION
P. 4
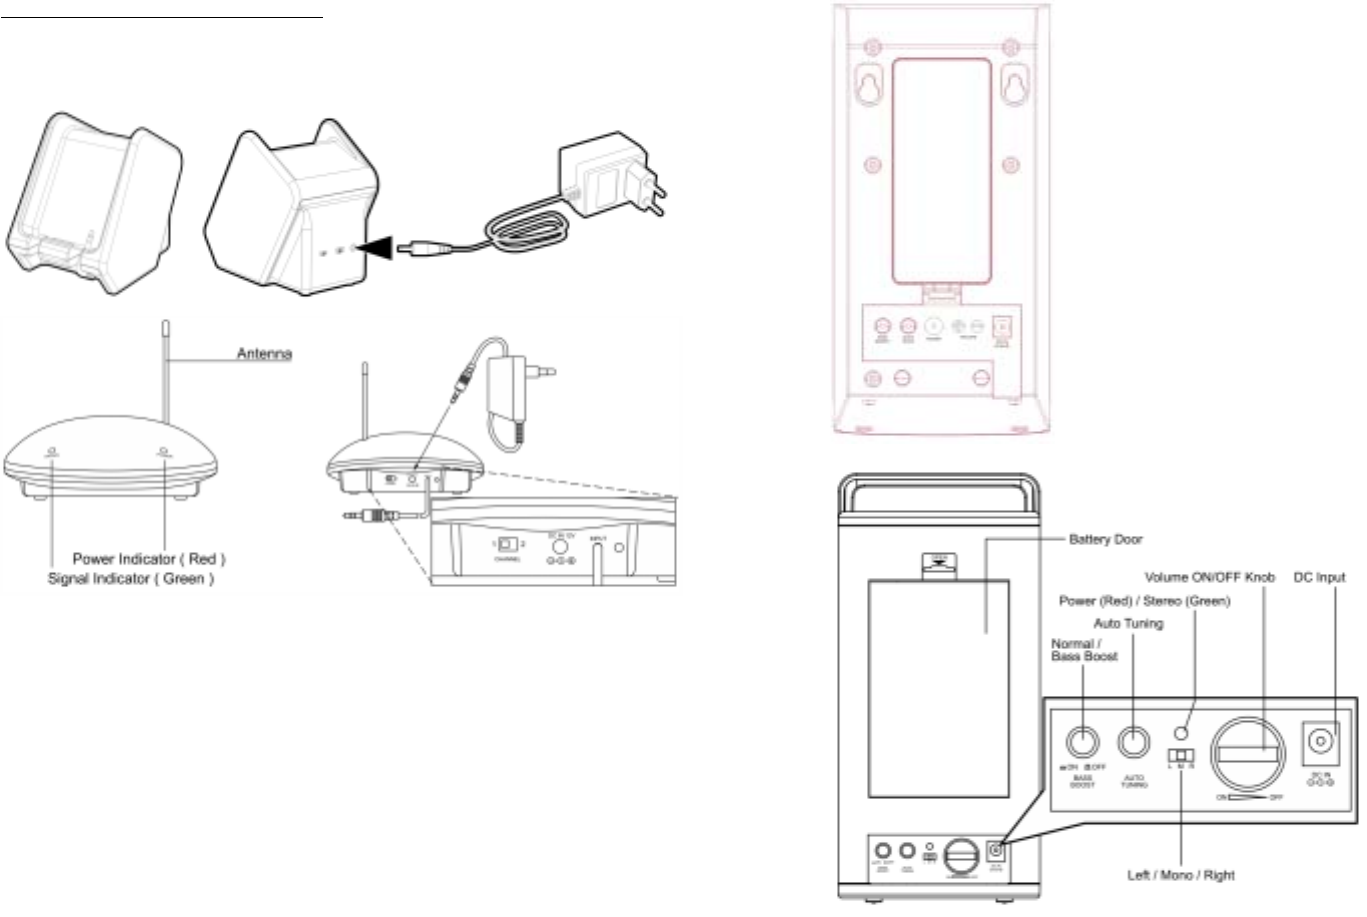
TRANSMITTER
SPEAKER RECEIVERS
P. 3
INSTALLATION SPEAKER RECEIVERS
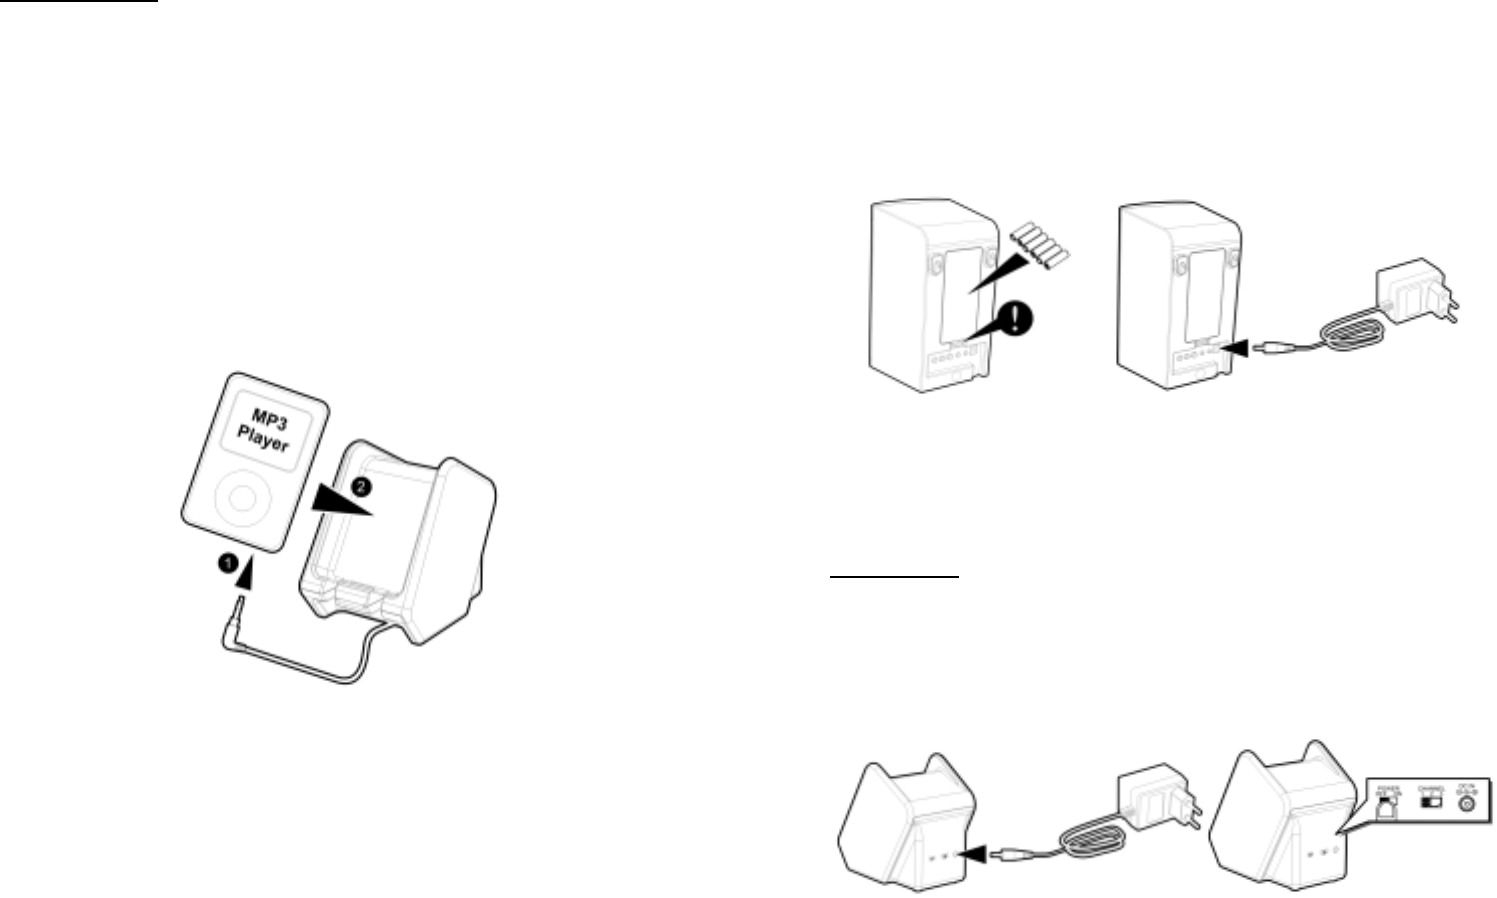
TRANSMITTER 1. Insert 6 pieces ‘AA’ size ALKALINE battery into the battery compartment
with correct polarity at the rear of the speakers or connect the 12V
power adaptor to the DC input jack on the rear of each speaker, then
plug it to the wall AC outlet.
1. Connect the supplied AC power adaptor to an electrical wall outlet.
2. Plug the AC power adaptor in the DC jack located on the rear of the
transmitter.
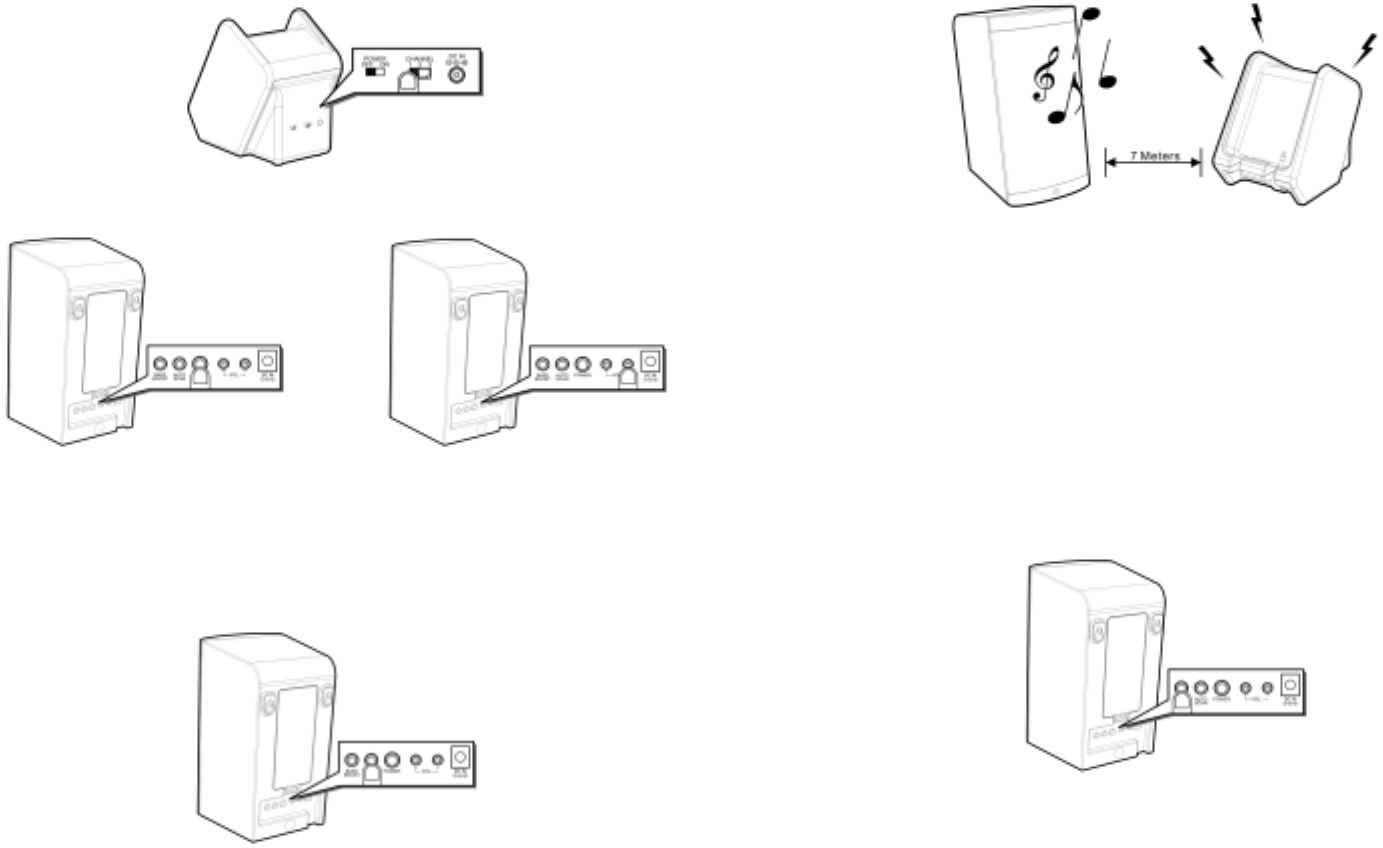
3. Turn on the transmitter by set the POWER switch to ON position, and
the POWER LED on transmitter will light up.
4. The retractable audio cord that located at the front of transmitter can be
connected to audio output jack MP3 / CD / VCD / DVD players.
2. Switch on the speakers by press the POWER button. The POWER
LED will light up. Switch off the speakers by press the POWER button
again.
OPERATION
1. Turn on the audio source (TV or audio component) to which the
transmitter is connected with.
2. Turn on the transmitter by set the POWER switch to ON position, and
the POWER LED on transmitter will light up.
Plug the adaptor in the AC source and connect the audio plug to the audio
source. As soon as the transmitter is receiving the audio signal, it will
automatically switch on and the Signal LED (Green) will illuminate.
3. Select the channel 1, 2 or 3 of the transmitter for best performance in
your location.
P. 6
P. 5
P. 8
4. Turn on the speaker and adjust the volume to the desired listening level.
B) Whenever you find frequency jam, move your channel switch from
one channel to the other channel (there are two channels for
selection) on the transmitter, and then press the “SCAN” auto-tuning
button on the speaker again.
6. The BASS BOOST button can be used to enhance the bass sound
depending on your own music preferences. Turn bass/boost effect ON
simply by pressing the button down, and pressing it once again to OFF.
5. Push the “SCAN” auto-tuning button to get the best tuning reception in
the speakers. When the button is pressed, frequency tuning starts
automatically and it stops when a signal is detected. The POWER /
STEREO LED will change from red to green.
NOTE :
You should now be able to place the speakers freely from room to room
without disruption. If disruption should occur (signal breaks up), press the
speaker’s “SCAN” auto-tuning button to maximize best reception.
A). Keep a distance of the speaker up to 7 meters apart from transmitter, and
then press “SCAN” auto-tuning button for best tuning reception.
If you hear interference from other components, switch the channel control
P. 7

of transmitter, and then move the speakers to other free location. You can
re-adjust the tuning control by moving it either channel 1, 2 or 3 of the
transmitter, then pressing “SCAN” auto-tuning button for best reception.
TROUBLE SHOOTING
NO SOUND
Ensure the AC adaptor is fully inserted into the AC outlet and the
power connection input on the transmitter.
-
-
-
-
-
-
-
-
-
-
-
-
When transmitting / receiving over long distances, the signal from the
system will become weaker. Ensure the speaker is switch ON.
SWITCHNG OFF Speaker’s battery capacity is too low, replace with new batteries or
connect the AC adaptors to the speakers.
1. Turn the VOLUME ON/OFF knob until the click sound is heard to turn
off the speaker and the LED light goes off Ensure the TV or audio component is ON.
The connected audio / video equipment is not playing. Start
playing the equipment.
The volume of speaker is too low, adjust the volume to an
appropriate level.
DISTORTED
Press the “SCAN” button on the speakers until matching the
frequency of the transmitter.
2. For protection of the transmitter and power saving, the transmitter will
cut off automatically if there is no/weak operation input signal from
audio source for 4 minutes.
Change the position of the channel selector on the transmitter.
You must then press the SCAN button on the speakers.
Battery capacity is too low. Replace with the new battery.
Ensure the volume level of speakers is adjusted properly.
In other words, if the signal comes back, the transmitter will work
again automatically. The speaker is too far from transmitter, move closer.
The input level of the audio signal is too low. Turn up the
volume of the audio source equipment.
P. 1 0
P. 9

TECHNICAL SPECIFICATIONS
Transmission Mode : UHF stereo
Carrier Frequency : 900 MHz
Operation Voltage : Transmitter, DC 12V 200mA
Speaker, 6 X ‘AA’ size Alkaline batteries or DC
12V 500mA adaptor
Frequency Response : 40Hz – 12KHz
Distortion : 1.5%
S/N Ratio : 50dB (typical)
Channel Separation : 30dB (Typical)
Operation Distance : Up to 50 meters
Output Power : 2 x 5W (RMS)
WARNING : Changes or modifications to this unit not expressly
approved by the party responsible for compliance could void
the user’s authority to operate the equipment. Operation is
subject to the following two conditions: (1) this device may not
cause interference, and (2) this device must accept any
interference, including interference that may cause undesired
operation of the device.
P. 11