Unical 36248-X 2.4 GHz Cordless Phone with Digital Answering Machine User Manual manual
Unical Enterprises Inc 2.4 GHz Cordless Phone with Digital Answering Machine manual
Unical >
FCC ID application Confirmation number EA98077 EUT user manual file
EXCURSION 36248 MANUAL MAY 25 , 2000
FCC INFORMATION …………………………………PAGE 1
HANDSET CONTROL-CORDLESS PHONE………….PAGE 3
HANDSET CONTROL-ANSWERING SYSTEM……..PAGE4
BASE UNIT CONTROL ……………………………..PAGE 5
INITIAL SETUP …………………………………….PAGE6
TELEPHONE OPERATION
SPEED DIALING ………………………………..PAGE7
USING CALLER ID AND CALL WAITING ID ……………PAGE 9
PROGRAMING MODE ……………………………… PAGE 13
ANSWERING MACHINE OPERATION …………….PAGE 16
REMOTE OPERATION ……………………………….PAGE 19
REMARK & DISPLAY ON BASE ……………………PAGE 21
READING DISPLAY MESSAGE ……………………. PAGE 22

FCC INFORMATION
FCC Regulations
This equipment has been tested and complies with the limits for a Class B digital device, pursuant to part 15
of the FCC rules. These limits are intended to provide reasonable protection against such interference in a
residential installation. This equipment generates, uses, and can radiate radio frequency energy and if not
installed and used in accordance with the instructions, may cause harmful interference to radio
communications. However, there is no guarantee that interference will not occur in a particular installation. If
this equipment does cause harmful interference to radio or television reception, which can be determined by
turning the equipment off and on, the user is encouraged to try to correct the interference by one or more of
the following measures :
. Reorient or relocate the receiving antenna.
. Increase the separation between the equipment and receiver.
. Connect the equipment into an outlet on an electrical circuit different from that to which
the receiver is connected.
. Consult the dealer or an experienced radio/TV technician.
Upon request from your telephone company, you must provide the FCC registration number and the Ringer
Equivalence Number(REN) found on the bottom of your 36248.
An FCC compliant telephone cord and modular plug are provided with this equipment. This equipment is
designed to be connected to the telephone network or premises wiring using a compatible modular jack which
is Part 68 compliant.
Telephone Company Procedures
The goal of the telephone company is to provide you with the best service it can. In order to do this, it may
occasionally have to make changes in its equipment, operations, or procedures. If these changes might affect
your service or the operation of your equipment, the telephone company will give you notice in writing to
allow you to make any changes necessary to maintain uninterrupted service. If you have any questions about
your telephone line, such as how many pieces of equipment you can connect to it, the telephone company will
provide this information upon request.
In certain circumstances, it may be necessary for the telephone company to request information from you
about the equipment which you have connected to your telephone line. Upon request of the telephone
company, you must provide the FCC registration number and the Ringer Equivalence Number(REN) of the
equipment which is connected to your line.
Both of these numbers are listed on the equipment label on the bottom of your 36248.
In most(but not all) areas, the sum of the RENs of all devices connected to one line should not exceed 5. To
be certain of the number of devices you may connect to your line as determined by the REN, you should
contact your local telephone company.
Note: This equipment is hearing aid-compatible(HAC).
1

Type of Service
Your cordless telephone is designed for use on standard device telephone lines. The phone connects to the
telephone line with a standard jack called the USOC-RJ11C.
Connection to telephone company-provided coin service (central office implemented systems) is prohibited.
Connection to party line service is subject to State tariffs.
If Problems Arise
If any of your telephone equipment is not operating properly, you should immediately remove it from your
telephone line, as it may cause harm to the telephone network. If the telephone company notes a problem,
they may temporarily stop service. When practical, they will notify you before this disconnection. If advance
notice is not feasible, you will be notified as soon as possible. When you are notified, you will be given the
opportunity to correct the problem and will be informed of your right to file a complaint with the FCC.
In the event repairs are ever needed on your cordless telephone, they should be done by an authorized
representative of
For information, contact
Industry Canada(IC)regulations
This Class B digital apparatus meets all requirements of the Canadian Interference-Causing Equipment
Regulations.
Cet appareil numerique de la classe B respecte toutes les exigences du Reglement sur le material brouilleur du
Canada.
Notice: The Canadian Department of Communications label identifies certified equipment. This certification
means the equipment meets certain telecommunications network
Protective, operational and safety requirements. The Department does not guarantee the equipment will
operate to the customer’s satisfaction.
Before installing this equipment users should ensure that it is permissible to be connected to the facilities of
the local telecommunications company. The equipment must also be installed using an acceptable method of
connection. Sometimes, the company’s inside wiring associated with a single line individual service may be
extended with a certified connector assembly (telephone extension cord). The customer should be aware that
compliance with
these conditions may not prevent degradation of service in some situations.
Repairs to certified equipment should be made by an authorized Canadian maintenance
Facility by the supplier. Any equipment malfunctions or repairs or alterations made by
The user to the equipment may give the telecommunications company cause to request the user to disconnect
the equipment.
Users should ensure, for their own protection, that the electrical ground connections of the power utility,
telephone lines and internal metallic water pipe system, if present, are connected. The precaution may be
particularly important in rural areas.
Caution: Users should not attempt to make such connections themselves, but should contact the appropriate
electric inspection authority or electrician.
The Load Number assigned to each terminal device denotes the percentage of the total load to be connected a
telephone loop, which is used by the device to prevent overloading.
The termination on a loop may consist of any combination of devices subject to the requirement that the total
of the load numbers of all the devices does not exceed 100.
2
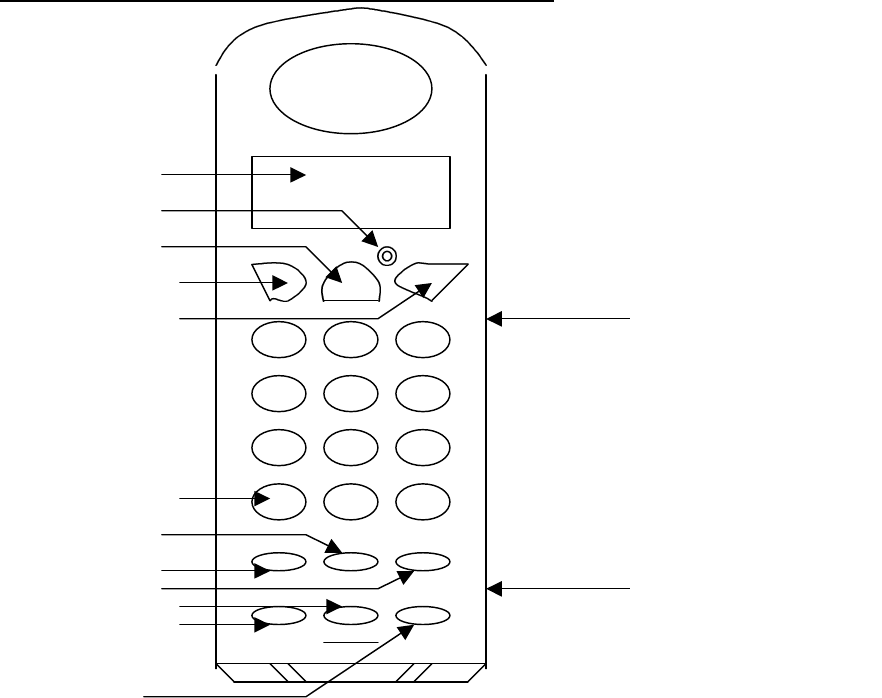
HANDSET CONTROLS – Cordless Telephone & caller ID
2
3
4
5
6
1
7
8
9
10
11
12
1. TONE(*) button: Used to temporarily change the dialing mode from pulse to tone for rotary service.
2. LCD display
3.NEW CALL LED
4.TALK BUTTON: Press to answer an incoming call or to place a call. Press to end a call.
5.MEMO BUTTON: Used to store up to 10 telephone numbers into memory and you can
Then dial any of the stored phone numbers.
6.SCAN/PRG button : Allows you to change channels if the current channel is noisy or having interference
from other sources. And allows you to enter and store the program function.
7.FLASH/DEL BUTTON: Momentary hangs up the phone to regain dial tone or access custom calling
features such as Call Waiting or Three-way Calling provided by your local phone company.
Also you can remove records from callers log or from memory dialing.
8. CALLER ID SCROLL (+) : You can enter to your callers log with this key.
Also scrolls up with this key in callers log mode and memory and program mode.
9. C.BACK/REMOTE : allows you to callback in callers log mode and memory and predial mode.
And you can enter remote mode in standby mode.
10.RE/PA(Redial/Pause): Automatically dials the last number called up to 31 digits.
Also used to insert a four –second delay in dialing sequence.
11. CALLER ID SCROLL (-): You can enter to your callers log with this key.
Also scrolls down with this key in callers log mode and memory and program mode.
14 ( BACK SIDE )
13
12.VOL(ç) button: Allows you to select the volume higher or lower. Also you can use this key for mode
changing and shift left in proram/memory/predial mode.
13.Headset Jack : For headset connection at hands free conversation.(Headset not included)
14.BATTERY : Rechargeable Battery [ 3.6V / 850mAH ]
3
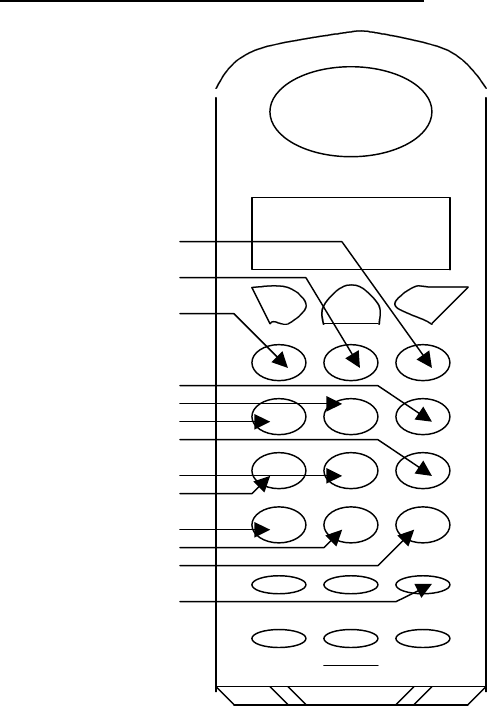
HANDSET CONTROLS –Answering system
14
15
1
11
3
2
13,16
9,10
4,5
6
8
12
7
1. PASSWORD button: Press to change password for remote operation.
2. MEMO REC button: Press to record MEMO.
3. REC OGM button: Press to record outgoing message.
4. PLAY button: Press to playback message.
5. PREV button: Press to skip to the previous message during playback.
6. STOP button: Press to stop current activity.
7. C.back/REMOTE button: Allows you to access most of the 36248’s functions away from the base unit
using the handset. Or Press to listen to the caller leave their ICM .
8. ERASE button: Press to erase messages.
9. OGM button: Press to playback outgoing message.
10:RPT button: Press to repeat the message being played.
11.ANSWER ON button: Press to activate answer function.
12.ANSWER OFF button: Press to deactivate answer function.
13.SKIP button: Press to skip to the next messages during playback.
14.MEMO PLAY button: Press to playback memo messages.
15.TIME/DAY button: Press to set the day and time stamp.
16. HELP button : Press to listen to the voice help menu 4
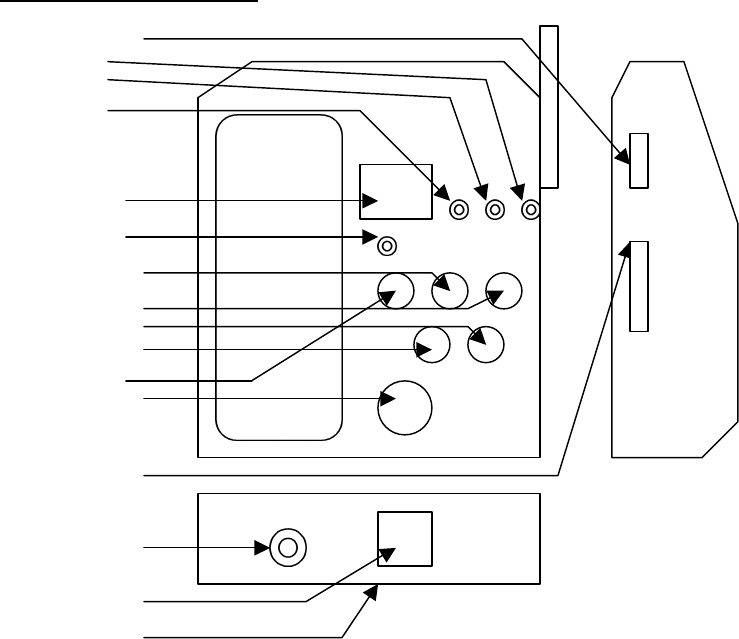
BASE UNIT CONTROLS
3
14
13
16
18
15
5
7
4
1
2
17
1.9VAC / 500mA Adapter Jack
2.TEL line jack.
3.RINGS switch: Selects the number of rings before the 36248 automatically answers the call and used to
activate the Toll saver(TS) feature.
4.Volume control: Adjusts the base unit speaker volume level.
5.PAGE (PH REC)button: Allows to page the handset, or to record the two way record during talking.
6.MEMO PLAY button: Press to playback the memo message.
7.PLAY/STOP button: Press to playback the messages or to stop current activity.
8.ERASE button: Press to erase all messages or to erase a message being played.
9.PREV(33) button
10.OGM button: Press to playback outgoing message.
11.SKIP (44)button
12.ANSWER on/off button
13.MSG indicator: Lights up to indicate the presence of message. And blinks if new messages comes in.
14.MEMO indicator : Lights up to indicate the presence of memo message. And blinks if new memo
messages comes in.
15.NEW CALL indicator
16. INUSE/CHARGE indicator
17. TONE/PULSE switch (bottom side)
18. 7-SEGMENT DISPLAY
5
6
8
11,12
9,10

INITIAL SETUP
Before you can use your cordless telephone, the handset must be charged for at least 20 hours.
SETTING THE DAY AND TIME For TAD
1. After 14 hours, remove the handset from the base unit.
2. Press the REMOTE button on the handset.
The 36248 will prompt, “ You have (xx) new message”. And “For help press 9”.
3. Press 2. The unit will prompt “Time is off. enter new day.”
4. After hearing a long beep enter the new day(Sunday =1,Monday =2,Tuesday=3,ect..).
The unit will the prompt “ enter new time”.
5. After hearing a long beep enter the new hour(01-12).
6. After two beeps, enter the new minute(00-59).
7. After two beeps press 1 for AM, or press 2 for PM. The unit will announce the new day and time
followed by a long beep and will prompt :please enter next command”.
8. Press the REMOTE button to exit the REMOTE mode. Otherwise automatically turn off if not in use for
10 seconds.
TONE/PULSE mode setting
Select the appropriate dialing service by moving the TONE/PULSE switch on the side of the base unit.
1. TONE for Tone service, or
2. PULSE for Rotary service
SET YOUR AREA CODE INCLUDING NEIGHBOR AREA CODE
In order to use call back function, You must program your area code and NEIGHBOR area code.
(The NEIGHBOR area code is optional)
Ref to page 13
If you want the CALLER ID CALL WAITING (CIDCW), you can program the function.
Ref to page 13
(Factory default is CIDCW OFF)
TELEPHONE OPERATION
TO PLACE A CALL USING THE HANDSET
1. Press the TALK button on handset. The handset LCD will display TALK. The BASE INUSE LED
indicator will also light steadily when the handset is in use.
2. Listen for a dial tone.
3. Dial the telephone number.
4. When finished with your call, Press the talk button or place the handset on the base unit,
TO RECEIVE A CALL USING THE HANDSET
A. IF THE HANDSET IS ON THE BASE
1. SINCE THE 36248 FEATURES “AUTO ANSWER”, simply pick up the handset from the base cradle
when phone rings.
2. Start your conversation
3. When finished with your call, Press the talk button or place the handset on the base unit,
B. IF THE HANDSET IS OUT OF THE BASE
1.Press the TALK button on the handset when phone rings.
2.Start your conversation
3.When finished with your call, Press the talk button or place the handset on the base unit,
6

LAST NUMBER REDIAL
A. AFTER HEARING A BUSY TONE WHEN PLACING A CALL
1. If you get a busy tone, press handset TALK button to hang up.
2. Press the handset TALK button again and listen for a dial tone.
3. Press the handset RE/PA button. This will automatically redial the last telephone number you
called(Up to 31digits)
.
B. WHEN THE HANDSET IS OFF THE BASE UNIT AND IN STANDBY MODE
1. Press the handset TALK button again and listen for a dial tone.
2. Press the handset RE/PA button. This will automatically redial the last telephone number you called(Up
to 31digits)
FLASH FUNCTION
Used to access custom calling features such as Call Waiting or Three-Way Calling provided by your local
phone company. Flash can also be used to restore a dial tone to make a new call.
PREDIALING IN STANDBY MODE
1. In standby mode.2.
2. Press dial key to dial or RE/PA key
3. If you make a mistake, press VOL/←← key to delete one
number.
4. Press C.BACK key.
Adjust Receiving Volume
During talk you can change the receiving volume in three steps
with vol/←← key.
Creating a Speed dialing list
In addition to your Call Records, You can store up to 20 speed dial names and
numbers in memory. You can either enter the name and the number, or you can
transfer a Call Record into your speed dialing list.
PROGRAM WITH MANUAL METHODE
BASIC PROCESURE :
MEMO -> LOCATIONS (01 ~ 20) -> NAME -> MEMO ->TEL No. -> MEMO
( OR (+) , (-) KEY )
MEMO -> LOCATIONS (01 ~ 20) -> MEMO ->TEL No. -> MEMO (PROGRAM ONLY TEL No.)
( OR (+) , (-) KEY )
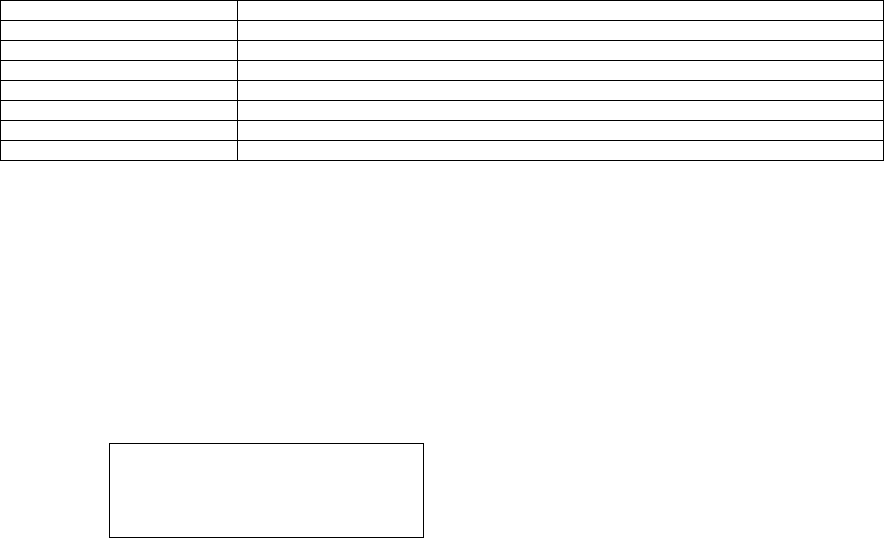
1. Press MEMO at the STANDBY message.
2. Use the (+),(-) Key to locate an available location
or enter a memory location. There are 20 available
slots. Numbers under 10 need a leading zero, such as
01,02 or 09 . If the record is available, the screen shows the
record number
and an EMPTY message. The flashing line or cursor indicates that the phone
is ready for you to enter data.
3. Enter the name ,character by character. You can have up to 15 characters.
. To choose a character;
a. Locate the character on the dialing keys 2 through 9.
b. Press once to enter the first character, twice for the second character, etc.
c. Use the VOL/←← , #> keys to move back and forth through the name.
7
3 EMPTY
1234_
DIAL
d. Creates a space between names or words, by pressing the #> key twice after
the last character.
e. Press MEMO to store the name field. The Cursor, or marker, moves to the
number field.
4. Enter the telephone number, area code first, using the dialing key pad.
If you make a mistake entering the telephone number, you can use the ←← key.
5. Press MEMO to save and exit. But If you want to register more memory, you can
use the (+),(-) key instead of MEMO key.
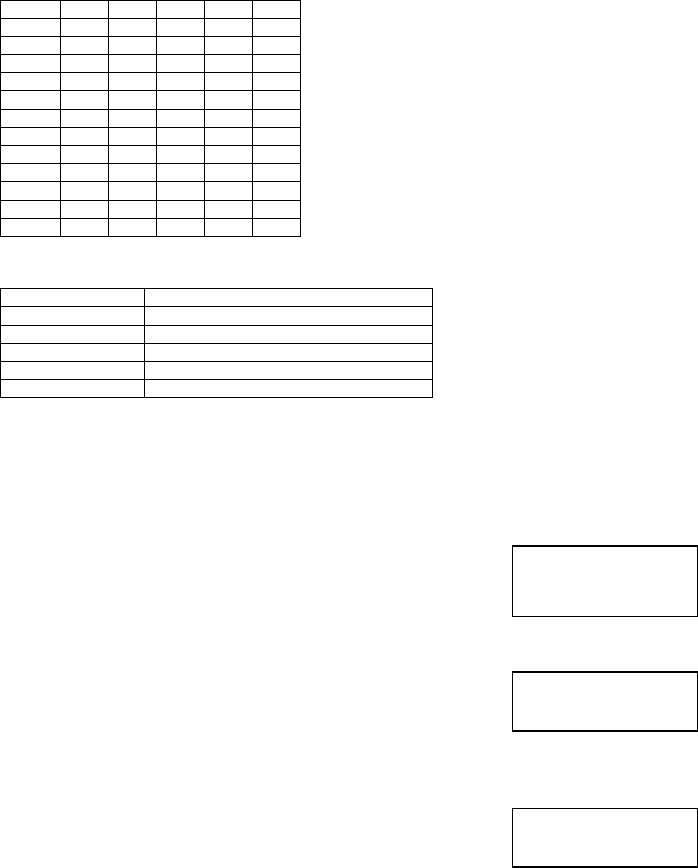
NAME ENTRY TABLE
key 1st 2nd 3rd 4th 5th
1 &
( ) 1 SP
2 A B C 2
3 D E F 3
4 G H I 4
5 J K L 5
6 M N O 6
7 P Q R S 7
8 T U V 8
9 W X Y Z 9
0 0
* * #
#> SP
SP : SPACE
EXAMPLE : JOHN 1
J PRESS 5
O PRESS 6 THREE TIMES
H PRESS 4 TWO TIMES
N PRESS 6 TWO TIMES
(SPACE) PRESS #> TWICE
1 PRESS 1 FIVE TIMES
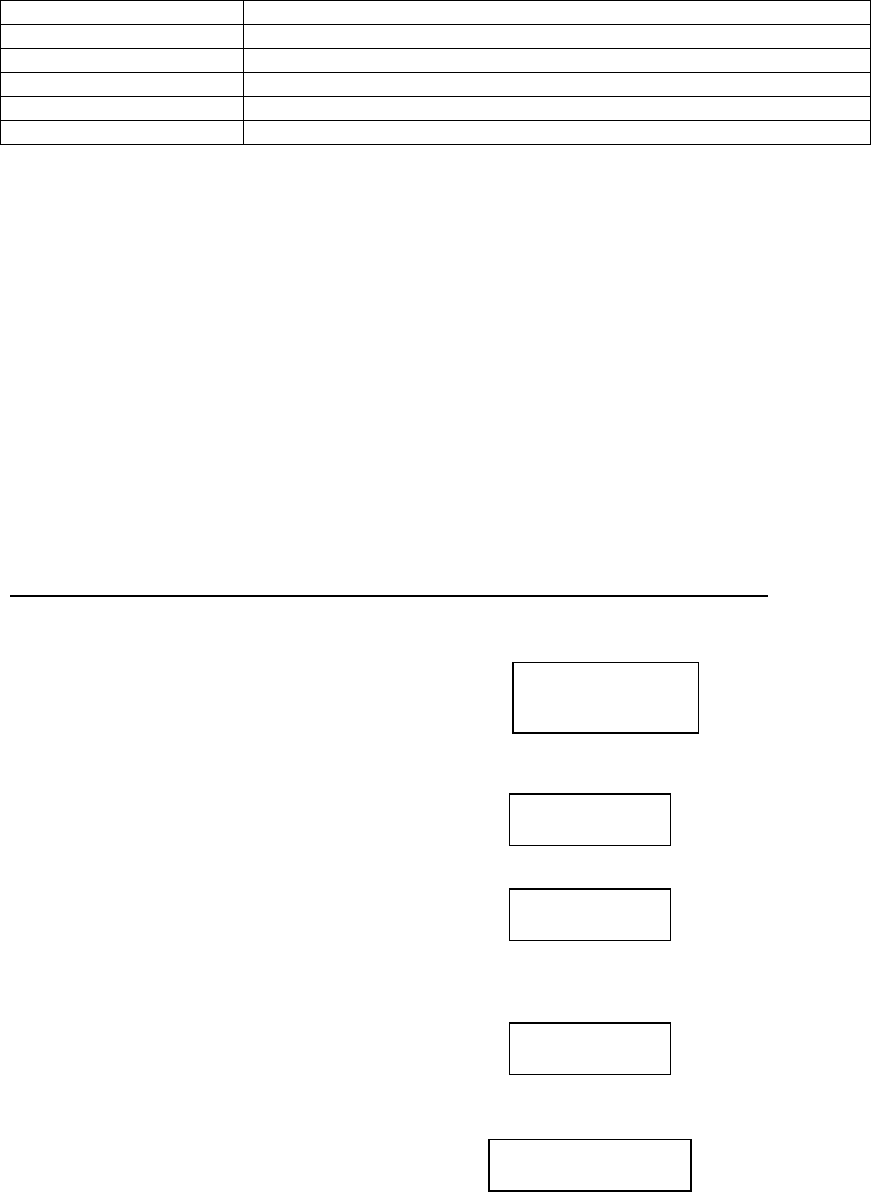
PROGRAM FROM CALLER ID RECORDS
A quick way to add to your speed dial list is to copy a Caller ID Call record.
At the STANDBY.
1. Locate the Call Record that YOU want to copy using
(+) ,(-) keys.
2. Press MEMO .
a. If there is empty slot, the Record is saved automatically.
And you can see the saved memory location on the
screen.
(EXAMPLE: SAVED AT MEMORY LOCATION
10 )
b. If there is no empty slot, the Record will fail.
You must erase one of the speed dialing numbers.
3. The Screen returns to the Call Record after 1 second.
8
817-456-7890
NAME
SAVE TO #10
MEMORY FULL

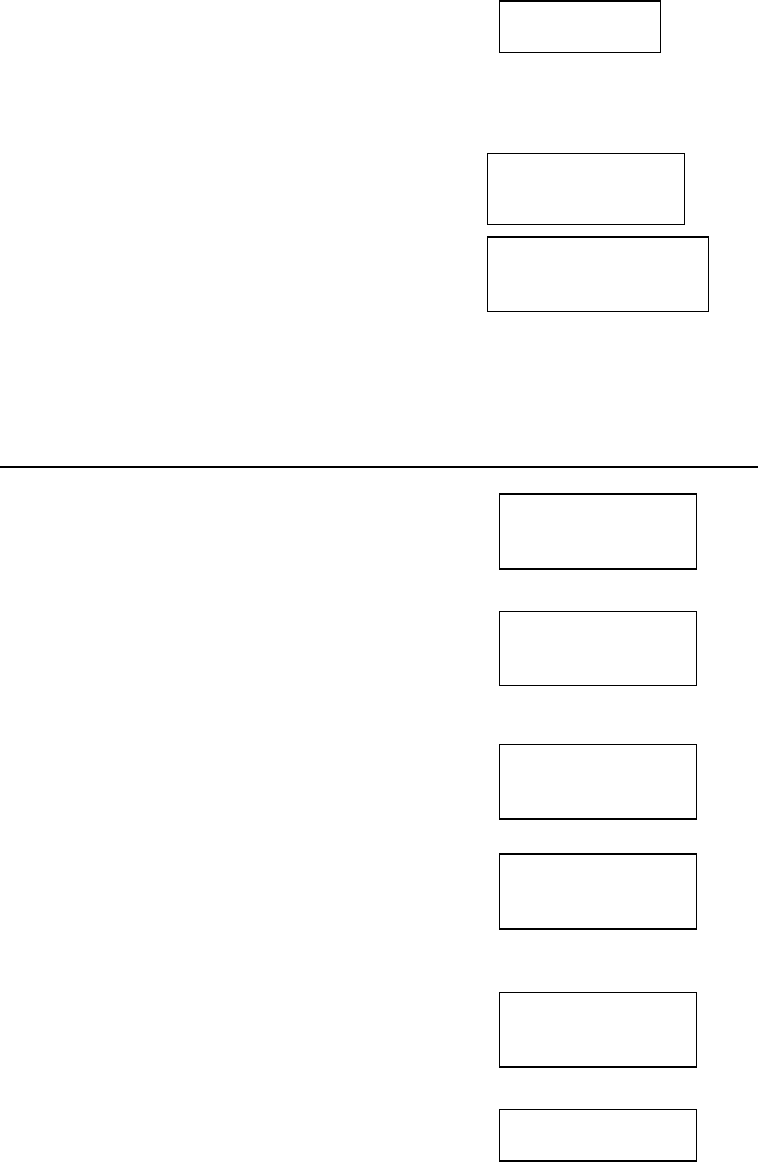
DELETING SPEED DIALING NUMBER
To clear single memory location:
1. Press MEMO to see your speed dial list.
2. Use VOL ←← , #> to find the memory location you want.
3. Press FLASH/DEL once, and this system asks if you want
to delete this memory entry.
4. Press FLASH/DEL again to delete the speed dial number.
NOTE: If you do not wish to delete the number, Press
MEMO to cancel.
To clear ALL memory location:
1. Press MEMO to see your speed dial list.
2. Press FLASH/DEL once, and this system asks if you want
to delete all memories .
3. Press FLASH/DEL again to delete all numbers in the speed list.
NOTE: If you do not wish to delete all numbers, Press
MEMO to cancel.
DIALING FROM THE SPEED DIALING LIST
1. Press MEMO to see your speed dial list in standby
Mode or talk mode.
2. Use VOL←← , #> to find the memory location you want.
3. Press C.BACK key.
The system will make a call, and dial out.
USING CALLER ID AND CALL WAITING ID
One of the best features of your phone is Caller ID, which allows you to see the information about an
incoming call before you pick up the phone. With Caller
ID service from your local telephone company, this system telephone displays
an records information about the call in a log.
Possibly even better than Caller ID is Call Waiting ID.(In case of CIDCW ON MODE)
In addition to providing normal Caller ID information, Call Waiting ID allows you to see caller
information
while you are on a call. Now you can have the information you need to choose
whether or not to answer a waiting call.
Before you use this feature on your system telephone, you must first subscribe
to the service through your local telephone company.
9
8174567890
DELETE?
DELETED!
DELETE ALL?
DELETED!
8171234567
TALK
MEMORY

RECEIVING NEW CALLS
When you receive a new call, the call information is stored under CALLER.
And at STANDBY mode, you can find how many calls and new calls you have.
<--- NEW SEGMENT FLASHES IF THERE
ARE ANY NEW CALL.
And When press (+) or (-);
When you receive a call, the system displays
the caller information sent by the telephone
company, called a Call Record. The Call Record
consist of the following information.
. The Caller's name (if available)
. The caller's telephone number
. The time and date of a call
. A call record number
If there is no Call records.
VIEWING CALL RECORDS/NEW CALL RECORDS
To review a Call record :
At the STANDBY screen.
1. Checks how many new calls you have.
2. Press (+),(-) keys to move through the Call Record list.
If some new calls remained, the new calls will be displayed at first.
When you reach either end of the Call Record list, it will back to standby
mode
If you continue to press (+), or (-)
you scroll through the list again.
3. IF you view a new call record once, the record is not a new call record anymore.
But if you view downward using (-) key, the new calls will be remained unchanged
until you view all of the new calls.
SAVING CALL RECORDS
Your phone stores up to 40 Call Records before the memory becomes full.
When the next call comes in, the oldest record drops off and makes room
for the new Call Record. To save specific calls, delete old and unnecessary
call records to keep from filling your phone's memory.
10
NEW
ALL:10 NEW:05
11:59pm 10/14 call 03
817-456-7890
NAME
NO CALLS
ALL:10 NEW:00

DELETING CALL RECORDS
You can either delete a single record or all Call Records at one time.
To delete single record:
1. Press (+) or (-) to see your Call Record.
2. Use (+) or (-) to find the desired Call record.
3. Press FLASH/DEL once ,and the system asks if you want
to delete this Call Record.
4. Press FLASH/DEL again to delete the Call Record.
If you do not wish to delete the number, Press
(+), or (-) to cancel.
5. The system will show the next Call record automatically.
To delete ALL Call Records:
1.In standby mode.
2. Press FLASH/DEL once, and the system asks if you want
to delete all Call Records.
3. Press FLASH/DEL again to delete all Call Records.
If you do not wish to delete all numbers, Press
(+) or (-) to cancel.
11
817-456-7890
DELETE?
DELETED!
ALL:10 NEW 05
DELETE ALL?
DELETED!

CALLBACK FROM CALL RECORDS
A. CALLBACK OPTION 1
In this option, Callback dial is like as LCD display.
1. Press (+), (-) to see your Call Records in standby
Mode or TALK mode.
2. Finds the desired Call Record.
3. Press C.BACK key shortly to dial.
The system will dial out as below note.
NOTE: CALLBACK DIAL OPERATION TABLE
CASE DISPLAY CALLBACK
1. The type of incoming
telephone number is DDN All of incoming telephone
Numbers All of incoming telephone
Numbers
2. The area code of incoming
telephone number is same as
user’s area code.
7 digits when CALLBACK NUM
is 07.
10 digits when CALLBACK
NUM is 10.
7 digits when CALLBACK NUM
is 07.
10 digits when CALLBACK
NUM is 10.
3. The area code of incoming
telephone number is same as
Neighbor area code.
10 digits
10 digits
4. The area code of incoming
telephone number is
different from user area
code or neighbor area code.
1 + 10 digits
1 + 10 digits
5. Call Qualifier L
Same as the case 1,2,3,4
‘$’ blink on the last text
display position.
Same as the CASE 1,2,3 & 4
B. CALLBACK OPTION 2
In this option, CALLBACK dials is 1+10 digits.
And Your Call record will be changed to 1+10 digits automatically
But in DDN data formats, it is same as option 1.
1. Press (+), (-) to see your Call Records.
2. Finds the desired Call Record.
3. Press C.BACK about 2 seconds.
The system will dial as below table. USER AREA CODE =
817
LCD display
Callback
7 digits 1+user area code + 7 digits
If user area code is not set,
7digit will be called back.
10 digits 1+ 10 digits
11 digits 11 digits
12
817-456-7890
NAME
456-7890
NAME
18174567890
PROGRAMMING MODE
HOW TO CHANGE LANGUAGE
1). Press SCAN/PRG in standby mode.
2). Press 1,or press (+) once.
The Current language displays.
3). If you want to change the language,
press VOL→→. Then the language scrolls.
( ENGLISH -> FRENCH -> SPANISH )
4) Press SCAN/PRG to save and exit.
HOW TO SET CIDCW ON/OFF
(FACTORY OPTION SETTING = CIDCW OFF mode)
Confirms BASE unit is power on.
1). Press SCAN/PRG in standby mode.
2). Press 2 or press (+) two times.
The Current MODE will displays.
3). If you want to change the mode ,
press VOL→→ . Then the mode will toggle ,
4) Press SCAN/PRG to save and exit.
*In CIDCW OFF MODE ,CALL WAITING FUNCTION will not be operated.
CW : THIS INDICATES THAT CIDCW IS ON MODE.
HOW TO SET USER AND NEIGHBOR AREA CODE
1. Press SCAN/PRG in standby mode.
2. Press 3 or press (+) key three times.
(No AREA CODE is registered)
_ _ _ _ _ _ _ _ _
AREA CODE
3. Enter Your AREA CODE 3digits.
817
AREA CODE
4. If your AREA is not SPLIT AREA, press SCAN/PRG and exit.
5. If your AREA is one of SPLIT AREA, enter neighbor AREA CODE.
817 913 412
AREA CODE
817 = your AREA CODE, 913/412 = Neighbor AREA CODE
6. Press SCAN/PRG and exit.
7. If the number is incorrect, Press FLASH/DEL, and restart from 3
13
CIDCW OFF
CIDCW ON
ENGLISH
FRENCH

HOW TO SET CALLBACK NUMBER
You can program the CALLBACK NUMBER if you need.
This number is the digit numbers to be called back when you call using the Call record, and the area
code of incoming telephone is same as your area code.
(Ref to CALLBACK DIAL OPERATION TABLE of PAGE 12.)
1.FACTORY SETTING : 7 DIGITS
2.Program the CALLBACK NUMBER: 07
1). Press SCAN/PRG. CALLBACK NUMBER
2). Press 4 or press (+) four times.
The CALLBACK NUMBER is displays.
3). If you want to change the CALLBACK NUMBER,
press VOL→→. Then the CALLBACK NUMBER
scrolls. ( 07 -> 10 -> 07 ...) 10
4) Press SCAN/PRG to save and return. CALLBACK NUMBER
HOW TO SET RINGER ON/OFF
1). Press SCAN/PRG in standby mode.
2). Press 5,or press (-) three times.
The Current type displays.
3). If you want to change the MODE
press VOL→→. Then the MODE toggles.
4) Press SCAN/PRG to save and exit.
HOW TO SET TIME
1). Press SCAN/PRG in standby mode.
2). Press 6,or press (-) TWO times.
The Current TIME displays.
3). ENTER TIME and days.
Procedure :
HOUR 2DIGITS -> MINUTE 2DIGITS -> AM/PM -> MONTH 2DIGITS-> DAY 2DIGITS
(AM =1 , PM=2)
The position to edit will be blinked.
If you mistake, use VOL←← key.
4) Press SCAN/PRG to save and exit.
NOTE : IF CALLER ID COMES IN, THE TIME WILL BE ADJUST AUTOMATICALLY.
HOW TO ADJUST THE CONTRAST OF LCD
1). Press SCAN/PRG in standby mode.
2). Press 7,or press (-) once.
The Current CONTRAST displays.
And you can see the level through LCD.
3) Press VOL←← or #> to change the contrast to higher or lower. (01 – 03 THREE STEPS)
4) Press SCAN/PRG to exit.
14
RINGER ON
RINGER OFF
12:20 AM 10/20
TIME SET
02
CONTRAST
SUMMARY OF FUNCTION MODE
FUNCTION CODE MODE
1 LANGUAGE SET (ENGLISH,FRENCH,SPANISH)
2 CIDCW ON/OFF
3 AREA CODE SET INCLUDING NEIGHBOR CODE
4 CALLBACK NUMBER SET
5 RINGER ON/OFF
6 TIME SET
7 CONTRAST (3 STEPS)
NEW CALL/MESSAGE INDICATOR
ON THE BASE UNIT
NEW CALL /MESSAGE INDICATOR WILL flash EVERY 1SEC
WHEN NEW CALL COMES IN.
NEW CALL /MESSAGE INDICATOR WILL flash EVERY 2SEC
WHEN VOICE MAIL MESSAGE COMES IN.
ON THE HANDSET
NEW CALL /MESSAGE INDICATOR WILL flash will flash every 2 sec.
TALKING TIME AND CHANNEL DISPLAY
In talk mode, You can see the talking time.
1:12 10 32
TALK
It means 1hour and 12 minutes 10 seconds.
The using CHANNEL is 32.
CHANNEL SELECTION(40 CHANNEL)
A.AUTO CHANNEL SCAN
When you place or receive a call and handset TALK button is pressed, the 36248 auto-scans for a clear
channel.
B. MANUAL CHANNEL SCAN
Scan button allows you to change channels during conversation, if the current channel is noisy or having
interference from other sources.
OUT OF RANGE WARNING
If you are far away from the base unit, the handset emits 2-beeps every 2 seconds to warn you that the
background noise level is too high for proper communication between the handset and the base unit.
When you hear this sound, you should move closer to the base unit to reduce the noise level. Otherwise the
call will automatically cut off.
LOW BATTERY WARNING
When the handset battery voltage level is low, the handset will two-beep every 1 minutes and the handset
BATT LOW LED indicator will flash.
Return the handset on the base cradle to charge.
PAGING FUNCTION
Press the PAGE button on the base unit which simultaneously sends a signal to the handset. The handset
will beep about 30 seconds.
15

ANSWERING MACHINE OPERATION
The 36248 features a sophisticated DIGITAL ANSWERING SYSTEM. Incoming Messages (ICMs),
Outgoing Message(OGM) and Memo message are stored electrically into digital memory. Messages are
accessed instantly and arranged compactly in this memory. The 36248 can store 15 minutes of messages
(ICMs, OGM and Memos combined).
VOICE MENU SYSTEM
A sophisticated Voice Menu System has been designed and pre-programmed into 36248. This system will
verbally guide you through key operational procedures.
TIME/DAY STAMP
ICMs and MEMO messages are automatically voice-stamped with the current time and day.
NOTE: After power failure, the time/day will be lost.. So in this case the time stamp is incorrect. Please
refer to the INITIAL SETUP SECTION on how to set the system time and day.
SETTING ANSWER ON/OFF
You can use the SKIP/ANSWER button on the base unit to change ANSWER mode in standby mode.
Also You can use the ANSWER ON or ANSWER OFF button on the handset in REMOTE mode.
In answer on mode, the message counts will be displayed on base unit and you hear “Answering machine is
on”.
In answer off mode, ‘ - -‘ will be displayed and you hear “Answering machine is off”.
SETTING THE RINGS SWITCH(2/6/TS)
The number of rings before the answering system answers a call can be selected by setting the RINGS
switch on the base unit to:
2 – two rings
6– six rings
TS – toll saver
Toll saver lets you avoid unnecessary toll changes when calling long distance to remotely retrieve your
messages.
The 36248 can be set to answer the first call on the 6th ring , and all subsequent calls on the 2nd ring by
setting the RINGS switch on the Toll saver position.
If your 36248 fails to answer on the 2nd ring, then you know that you don’t have any new messages.
You can hang up before the unit answers and save the cost of the call.
OUTGOING MESSAGE (OGM)
This is the announcement callers will hear when the 36248 answers a call. A maximum can be recorded up
to 30 seconds. 36248 Also has a default OGM which is active when there are no OGM present.
Default OGM: ”Please record your message after beep”
RECORDING THE OGM
You can record the OGM remotely on the handset.
1.Press the REMOTE button on the handset.
The 36248 will prompt, “ You have no new message”. And “ For. Help press 9”.
2.Press 5. The unit will prompt “please record your announcement after beep. To stop press star”.
3. After hearing a long beep, begin your announcement.
1. Press star(*) to stop recording then automatically the unit will play back once for your review.
2. Press the REMOTE button to exit the REMOTE mode. Otherwise automatically turn off if not in use for 10
seconds. 16
CHECKING THE OGM
Press the PREV/OGM button on the base unit to hear your previously recorded OGM. If you have not
recorded your OGM, the unit will state “You have no announcement”.
RECORDING MEMO
You can record YOUR MEMO remotely on the handset.
1.Press the REMOTE button on the handset.
The 36248 will prompt, “ You have (no) new message”. And “For help press 9”.
2.Press 4. The unit will prompt “please record your MESSAGGE after beep. To stop press star ”.
3. After hearing a long beep, begin your recording.
4.Press star(*) to stop recording. The maximum recording time is 2 minutes.
3. Press the REMOTE button to exit the REMOTE mode. Otherwise automatically turn off if not in use for 10
seconds.
PLAYBACK THE MEMO
If MEMO LED indicator is on, it indicates that you have memo message. If it is blinking, it mean new memo
message come in.
A. PLAYING MEMO MESSAGES
Press MEMO button. The 36248 will announce “ You have (number) memo message”. And begins playing
the first message to the end. It will announce the message number before each message.
B. PREVIOUS MESSAGES
Press the PREV(33) button once during message playback to skip backward one message.
C. SKIPPING MESSAGE
Press the SKIP(44) button once during message playback to skip to the next message.
D. REPEATING MESSAGE (ONLY REMOTE MODE)
Press the RPT button once during message playback.
E. STOP MESSAGE PLAYBACK
Press the STOP button to stop message playback.
PLAYBACK THE MESSAGE
If MSG LED indicator is on, it indicates that you have memo message. If it is blinking , it mean new
messages come in. You can see the message counts on base unit display when answering mode is on.
A. PLAYING MESSAGES
Press MSG button. The 36248 will announce “ You have (number) message”. And begins playing the
first message to the end. It will announce the message number before each message.
B. PREVIOUS MESSAGES
Press the PREV(33) button once during message playback to skip backward one message.
C. SKIPPING MESSAGE
Press the SKIP(44) button once during message playback to skip to the next message.
D. REPEATING MESSAGE (ONLY REMOTE MODE)
Press the RPT button once during message playback.
E. STOP MESSAGE PLAYBACK
Press the STOP button to stop message playback.
ERASING MESSAGES
A. SELECTIVE ERASING
1. Press the ERASE button during message playback.
2. The 36248 will announce “Message (number) erase.” And then start the next message.
B. ERASING ALL MESSAGE
Press and hold ERASE button about 2 seconds. Then the unit will announce “ message erase. You have no
message”.
17
C. ERASING ALL MEMO MESSAGE
Press ERASE button briefly, and press and hold MEMO button about 2 seconds within 8 seconds. Then the
unit will announce “ message erase. You have no memo message”.
D.ERASING OGM
During OGM playing, press ERASE . Then the unit will announce “ Erase your announcement. you have
no announcement”
MEMORY FULL DETECTION
The memory full condition occurs:
If 15 minutes of recording time is reached, or
If 59 message (i.e. memo, OGM, ICM) have been recorded .
In this case ‘Fu’ will be displayed on base unit when ANSWER MODE is on.
HOW TO RELEASE FROM MEMORY FULL CONDITION
è Erase some messages.
Sometimes you may fail to escape from memory full condition when you erase a short message.
In this case you must erase more message. (1 frame at least, it’s about 1 minutes contents).
NOTE: if there is an incoming call, the unit will answer at 10 rings and announce ”Memory full”. You can
erase any or all the messages remotely after listening to them. Refer to the REMOTE OPERATION section
for more details.
CALL SCREENING
You can listen to the caller leave their ICM and decide if you want to answer the call.
1. When the 36248 rings, press the REMOTE button on the handset. The 36248 will immediately answer the
call. You will hear your OGM followed by the caller’s message through the handset receiver.
2. Also same if you press the REMOTE button on handset during answer.
3. If you decide to take the call, simply press the TALK button and begin speaking.
TWO-WAY RECORDING
Two-way recording allows you to record your conversation with another caller.
Two-way recording can be enabled during TALK mode while you are using the handset.
Two-way recording message will be stored in MESSAGE area.
While in talk mode, press and hold the PAGE (PH REC) button of base unit. If memory is full, the unit will
announce “Memory full”. Release the PAGE(PH REC) button to end your conversation recording.
NOTE: Recording two-way conversations may be subjected to Local State and Federal laws and regulations.
VOX (VOICE ACTIVATED) DETECTION
During OGM, ICM, or MEMO recording in tel-line remote mode, the 36248 uses VOX to conserve message
storage space. The conditions for the 36248 terminating a recording are:
Continuous silence for seven seconds.
Seven seconds after the caller hangs up.
NOTE : The 36248 will not operate VOX detection during handset OGM/MEMO recording.

MAXIMUM ICM RECORDING TIME
. The maximum recording time of ICM is 2 minutes
18
REMOTE OPERATION
Allow you access most of the 36248 functions away from the base unit using only the handset or any touch
phone when you call the 36248. You can play, review, repeat, skip, erase, and stop messages in message boxes,
record a memo or OGM, set the answer mode on or off, change your password, set the time and day.
USING THE REMOTE OPERATION FUCTION
There are two ways of using Remote Operation:
1. Handset, or
2. Calling the 36248 from a tone dialing phone
A. USING THE HANDSET
1. Press the REMOTE button to activate the remote function.
2. The handset and base INUSE indicator will blink.
B. CALLING THE 36248 FROM A TONE PHONE
NOTE: The factory preset password for remote operation is #58.
1. Call the 36248 from a tone dialing phone.
2. While the OGM is playing or during ICM recording, enter # plus 2 digit password.
3. After a successful password entry, the Remote function is activated.
Once you have activated the Remote operation function either by handset or through a tone dialing phone
to call the 36248:
1. The 36248 will announce the total number of new messages in message box.
2. The unit will prompt “ For help press 9.”.
REMOTE COMMANDS
A. MENU
KEY FUNCTION
1 CHANGE PASSWORD
2 CHANGE TIME AND DAY
3 PLAYBACK MEMO MESSAGE
4 RECORD MEMO MESSAGE
5 RECORD OGM MESSAGE
6 SET THE ANSWER MODE ON
7 PLAYBACK MESSAGE
8 PLAYBACK OGM
9 HELP
* STOP FUNCTION
# SET THE ANSWER MODE OFF
DURING PLAYBACK, YOU CAN PRESS FOLLOWING KEYS:

7 PLAYBACK PREVIOUS MESSAGE
8 REPEAT A MESSAGE
9 SKIP FORWARD TO THE NEXT MESSAGE
0 ERASE A MESSAGE
* STOP FUNCTION
B. STOP FUNCTION
Press * to abort the current function.
C. CHANGING THE PASSWORD
1. Press 1 key. The unit will prompt “your password is (current code). enter new password”.
2.After a long beep, enter your new 2-digit password, and the unit announce “Your password is (new code)”.
19
D. SETTING THE DAY AND TIME.
1. Press 2. The unit will announce current day and time. The unit will prompt “ enter new day.”
2. After hearing a long beep enter the new day(Sunday=1,Monday =2,Tuesday=3. etc..).
The unit will the prompt “ enter new time”.
3. After hearing a long beep enter the new hour(01-12).
4. After two beeps, enter the new minute(00-59).
5. After two beeps press 1 for AM, or press 2 for PM. The unit will announce the new day and time
followed by a long beep and will prompt : please enter next command”.
E. SETTING ANSWER MODE ON
Press 6. The unit will announce, “Answering machine is ON”.
F. SETTING ANSWER MODE ON
Press #. The unit will announce, “Answering machine is OFF”.
G. OGM RECORDING
1. Press 5. The unit will prompt “please record your announcement after beep. To stop press star”.
2. After hearing a long beep, begin your announcement.
3. Press star (*) to stop recording then automatically the unit will play back once for your review.
H. OGM PLAYBACK
Press 8 and the unit playback the OGM if it was stored. If there is not OGM, the unit announce, “You
have no announcement”.
I. RECORDING A MEMO
1.Press 4. The unit will prompt “please record your MESSAGGE after beep. To stop press star.”.
2. After hearing a long beep, begin your recording.
3.Press star(*) to stop recording. The maximum recording time is 2 minutes.
J. PLAYBACK MESSAGE/MEMOS
1. Press 7 for message playback or Press 3 for memo message playback.
2. The 36248 will prompt “ You have (number) (new) (memo) message.”.
K. PLAYBACK OPTIONS
Review previous message: Press 7, to go to the previous message.
Repeat messages: Press 8, to restart the same message from the beginning.
Skip message: Press 9, to skip forward to the next message.
Erase message: Press 0 to erase a particular message.
Stop message playback: Press *, to terminate message playback.
NOTE: 36248 will announce “End of message” when all messages have been played”.

L. HELP
Press 9. The unit will prompt “ To change your password press 1, to change time press 2, to playback memo
press 3, to record memo press 4, to record announcement press 5, to turn answering machine on press 6, to
playback message press 7, to playback announcement press 8, for help press 9, to turn answering machine off
press pound(#), while message playback to playback previous message press 7, to repeat message press 8, to
skip message press 9, to stop press star ,to erase message press 0”
20
REMARK
1. If you press any key of base unit during tel-line remote operation, the operation will stop.
2. You maybe hear continuous beeps (beep –beep –beep ..) several seconds after erasing operation .
It is for memory sorting in memory full condition or near memory full.
But if you exit the operation condition abnormally without sorting (TALK, RINGING,REMOTE
KEY,CHARGING ), The memory full condition maybe not released until you get to standby mode, and
You must wait several seconds.
Sometimes you may fail to escape from memory full condition when you erase a short message.
In this case you must erase more message. (1 frame at least, it’s about 1 minutes contents).
3. In condition of memory full, you cannot record OGM. You must erase some messages.
4. 36248 has auto-disconnection function if you picked up a extension phone during answering mode.
But if the function do not operate due to bad line condition, press star(*) and star(*) again within 2
seconds with your extension Phone. Then the 36248 will release the LINE and you can talk using your
extension Phone.
5. The Rings in setting the rings switch (page 9) mean coming rings from Telephone company.
Sometimes it is different from the handset bell counts because handset has some ringer delay time to
reduce battery consumption.
DISPLAY ON BASE UNIT
DISPLAY MEAN
- - ANSWERING OFF
00 ~59 ANSWRING ON AND MESSAGE COUNT
An ANSWERING MODE
rc REMOTE CONTROL MODE
1 ~ 40 RF CHANNEL NUMBER ON TALK MODE
1r MEMO RECORDING
2r TWO WAY RECORDING
Or OGM RECORDING
OP OGM PLAYBACK
EA ERASE MESSAGE
Fu MEMORY FULL
30 èè 0 OGM RECORDING TIME (30 SEC)
0 èè 60 MEMO RECORDING TIME (TWICE) TOTAL 120 SEC
21
READING DISPLAY MESSAGE
MEANING SCREEN SHOWN
ALL CALLS & NEW CALLS: This message lets you
know how many call records and new call records
you have.
DELETE ALL? : You pressed the DELETE key after
the CALLER or MEMO keys.
EMPTY : When creating speed dialing
entries, this message indicates an available
memory location.
DATA ERROR : The message sent is incomplete.
This message usually indicates temporary
interference. There is no problem with the
phone.
LONG DISTANCE : The message sent is a long
distance call.
ALL:10 NEW :05
DELETE ALL?
EMPTY
DATA ERROR
LONG DISTANCE
NO CALLS : There are no call records
stored in memory.
NUMBER ONLY : Either name service is not
available in your area, or you are subscribed
to a number-only service.
Toll Mark : This ($) blink indicates a Toll mark.
(QUALIFIER L)
22
MEANING SCREEN SHOWN
BLOCKED CALL : The Caller has purposely
chosen to block his/her name and phone numbers.
OUT OF AREA : The Caller NUMBER
might not be available from
the caller's area.
NO NAME : The Caller NAME
might not be available from
the caller's area.
REPEAT CALL : This (*) blink indicates
the Call record information comes multiple.
TALK : The handset is on and ready for
you to dial.
[M] means that the volume level is midium.
OUT OF RANGE : The handset has tried to call,
but failed.
Or Handset moves out of range
from BASE in talk.
NO CALLS
11:10am 10/10 call 03
817-456-7890
11:10am 10/10 call#03
1-817-456-7890
JONH SMITH $
11:10am 10/10 call 03
- - - - - - - - - - - -
BLOCKED CALL
11:10am 10/10 call 03
- - - - - - - - - - - -
OUT OF AREA
11:10am 10/10 call 03
234-567-8901
NO NAME
11:10am 10/10 call 03
817-456-7890
SMITH JOHNS *
TALK [M]
OUT OF RANGE

MSG WAIT ON : This means your voice mail box
has a new Message right now.
MESSAGE WAITING MARK
MSG Mark means that your voice mail box has a new message.
23
DISPLAY EACH LANGUAGE
ENGLISH FRENCH SPANISH
CONTRAST CONTRASTE CONTRASTE
AREA CODE CODE REGION CODIGO AREA
CALLBACK NUMUMBER NOMB RAPPEL CIFRA VOLVER
EMPTY VIDE VACIO
SAVE TO #10 MEMORIS A 10 GUARDE AL 10
MEMORY FULL MEM.PLEINE MEMORI LLENA
DELETE? EFFACER? BORRE?
DELETED! EFFACE! BORRADO!
DELETE ALL? EFFAC. TOUT? BORRE TODO?
OUT OF RANGE HORS PORTEE FUERA ALCANC
ALL:25 NEW:05
TOUT: 25 NOUV:05
TODO:25 NUEV:05
TIME SET REGLER HEURE PONER HORA
MSG WAIT ON MSG ATT.OUI MSJ ESP PRND
MSG WAIT OFF MSG ATT.NON MSJ ESP APGD
DIAL TOUCHE MARCAR
DATA ERROR ERR.DONNEES ERROR DATOS
LONG DISTANCE INTERURBAIN CONFERENCIA
NO CALLS PAS D'APPELS NO LLAMADAS
BLOCKED CALL APPEL BLOQUE BLOQUEADA
OUT OF AREA HORS REGION FUERA AREA
TALK PARLER HABLAR
PROGRAM PROGRAM PROGRAMAR
BASE CALL APPEL BASE LLAMADA BASE
RINGING SONNERIE TIMBRE
CIDCW ON CIDCW OUI CIDCW PRND
CIDCW OFF CIDCW NON CIDCW APGD
NO NAME NON NOM NO NOMBRE
RINGER ON SONNERIE OUI TIMBRE PRND
RINGER OFF SONNERIE NON TIMBRE APGD
ANSWERING REPONDRE CONTESTAR
REMOTE TELECOMMANDE MANDO
MEMORY MEMOIRE MEMORIA
MSG WAIT ON
MSG
ALL:10 NEW:05
SECURITY CODE
June 08, 2000
1. TOTAL DATA BITS LENGTH : 64BITS
2. DATA FORMAT.
START
iiii iiii iilp kkkk cccc cccc xxup kkkk iiii iiii iilp kkkk dddd dddd zzup kkkk
iiii : system (security) ID (20bits)
P : parity
kkkk: check sum
U : unit (base =1 , handset =0)
cccc : channel number
dddd : command data
xx : sequence of data
zz : sub data
3. System (Security) ID = 20 bits ( 0~1048576)
4. Security Code - Max : 1048576
- Type : Random
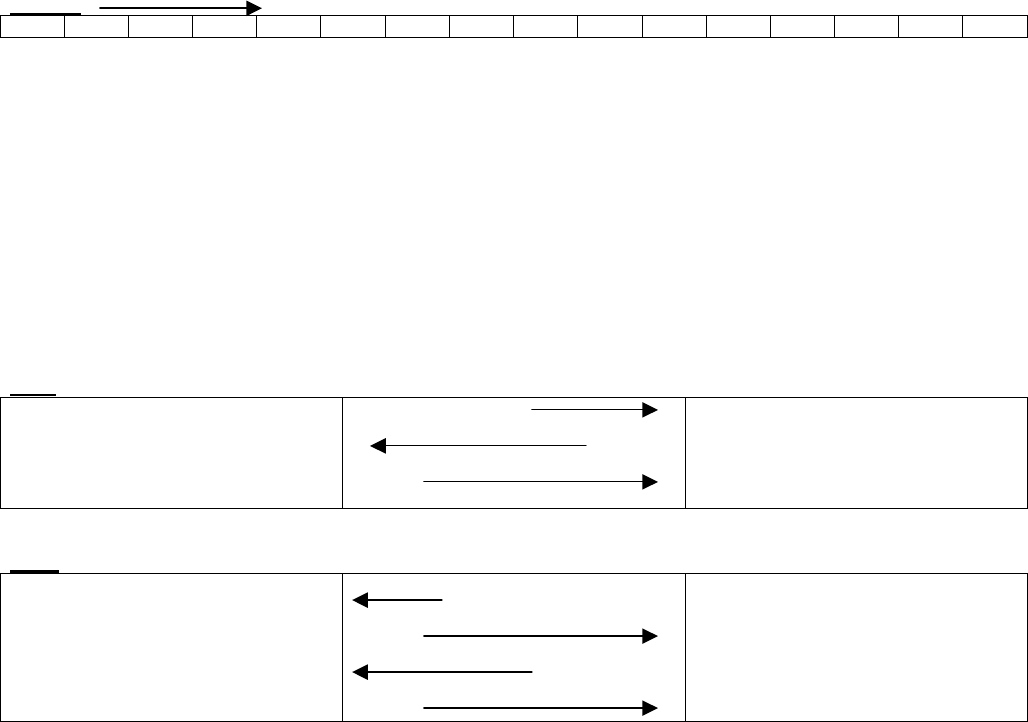
5. Link sequence.
Talk
handset Talk request
Ack
Ack
Base
Ring
handset Ring commnad
Ack
Ring off
Ack
Base