Uniden America 70001 FLOATING VHF MARINE RADIO User Manual Pt 1
Uniden America Corporation FLOATING VHF MARINE RADIO Pt 1
UserManual.wiki
>
Uniden America
>
70001 User Manual
>
User Manual Pt 1
Contents
1.
User Manual Pt 1
2.
User Manual Pt 2
3.
User Manual pt 1
4.
User Manual pt 2
User Manual Pt 1
Navigation menu
Upload a User Manual
Namespaces
Wiki Guide
HTML
PDF
Info
Views
User Manual
Discussion / Help
Navigation

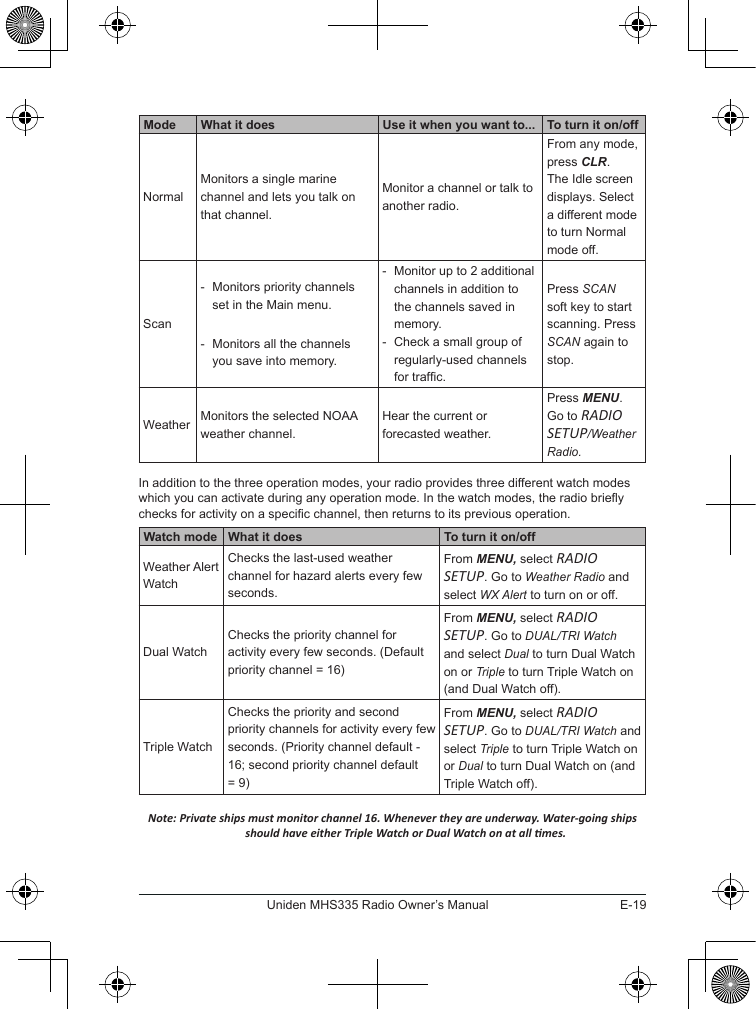
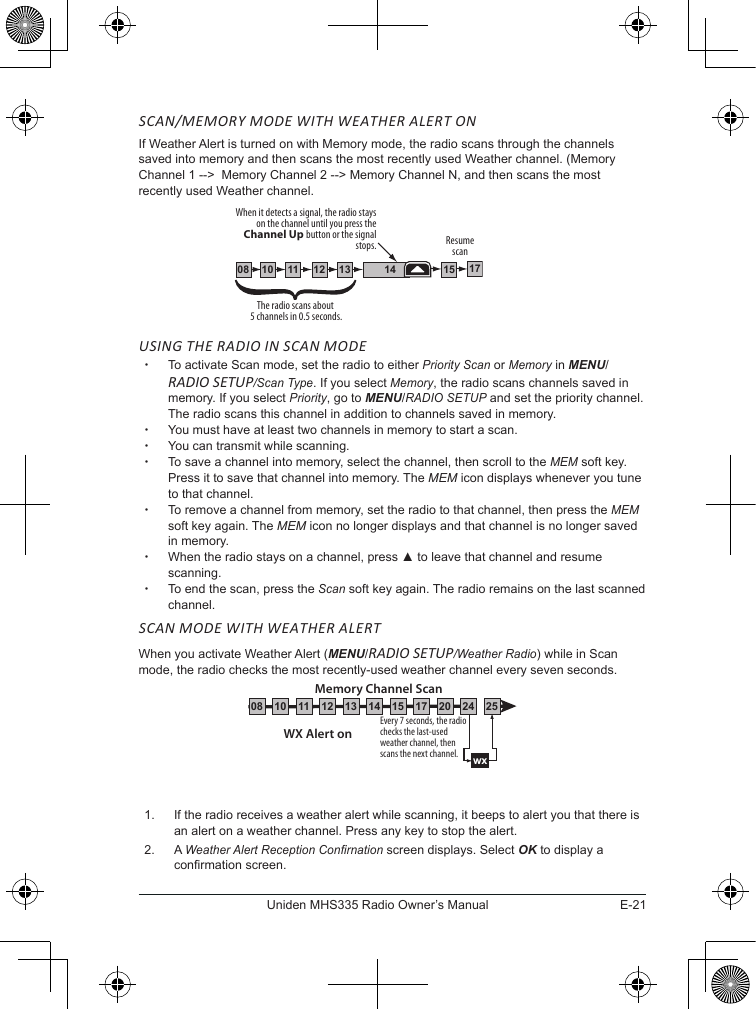
![E-20Uniden MHS335 Radio Owner’s ManualNormal xTo transmit, remove the radio from the charger, then press and hold Push-to-Talk. Release the key when you are nished talking. xFor the best sound quality, hold the microphone about two inches from your mouth while you’re talking. xPress ▲ to move up one channel at a time. Press and hold the key to scroll quickly up the channels. xPress ▼ to move down one channel at a time. Press and hold the key to scroll quickly down the channels. xTo change the transmit power, press the HILO soft key. The transmit power cycles through 1W, 2.5W, and 6W, then back to 1W again. NORMAL MODE WITH WEATHER ALERTIf you activate Weather Alert (MENU/ RADIO SETUP/WX Alert) while operating in Normal mode, the radio checks the most recently used weather channel every seven seconds. If it detects a weather or other hazard alert, it will switch to that weather channel. (If you are actively transmitting, the radio waits until you nish your transmission before checking the weather channel.)NORMAL MODE WITH TRIPLE WATCH OR DUAL WATCHIf you activate Triple Watch while operating in Normal mode (MENU/RADIO SETUP/Dual/Tri Watch/Triple), the radio checks the priority and second priority channels every few seconds along with the current marine channel. With Dual Watch turned on, the radio only checks the priority channel and the current marine channel. The radio will not check either of the priority channels while you are actively transmitting; it waits until your transmission is nished and then checks the channels.ScanThere are two Scan modes - Priority and Memory. SCAN/PRIORITY MODEPriority mode scans through the channels saved into memory and then the priority channel [set in the Main menu (see page E-10)]. For example: Memory Channel 1 --> Priority Channel --> Memory Channel 2 --> Priority Channel --> etc. SCAN/PRIORITY MODE WITH WEATHER ALERT ONIf Weather Alert is turned on with Priority mode, the radio alternately scans through the channels saved into memory and the priority channel (Memory Channel 1 --> Priority Channel --> Memory Channel 2 --> Priority Channel --> Memory Channel X ) and then scans the most recently used Weather channel.SCAN/MEMORY MODEYou can save any channel into memory and then use Scan mode/Memory Scan to monitor those channels from lowest to highest. If the radio detects a signal on a channel, it stays on that channel as long as the signal is received; when the signal stops, the radio continues scanning. wxEvery 7 seconds, the radio checks the last-used weather channel.WX Alert onMonitoring Channel 25](https://usermanual.wiki/Uniden-America/70001.User-Manual-Pt-1/User-Guide-3662146-Page-24.png)