Uniden America UB352 HANDHELD SCANNER User Manual AMWUB352 OML
Uniden America Corporation HANDHELD SCANNER AMWUB352 OML
UserManual.wiki
>
Uniden America
>
UB352 User Manual
OWNERS MANUAL
Navigation menu
Upload a User Manual
Namespaces
Wiki Guide
HTML
PDF
Info
Views
User Manual
Discussion / Help
Navigation
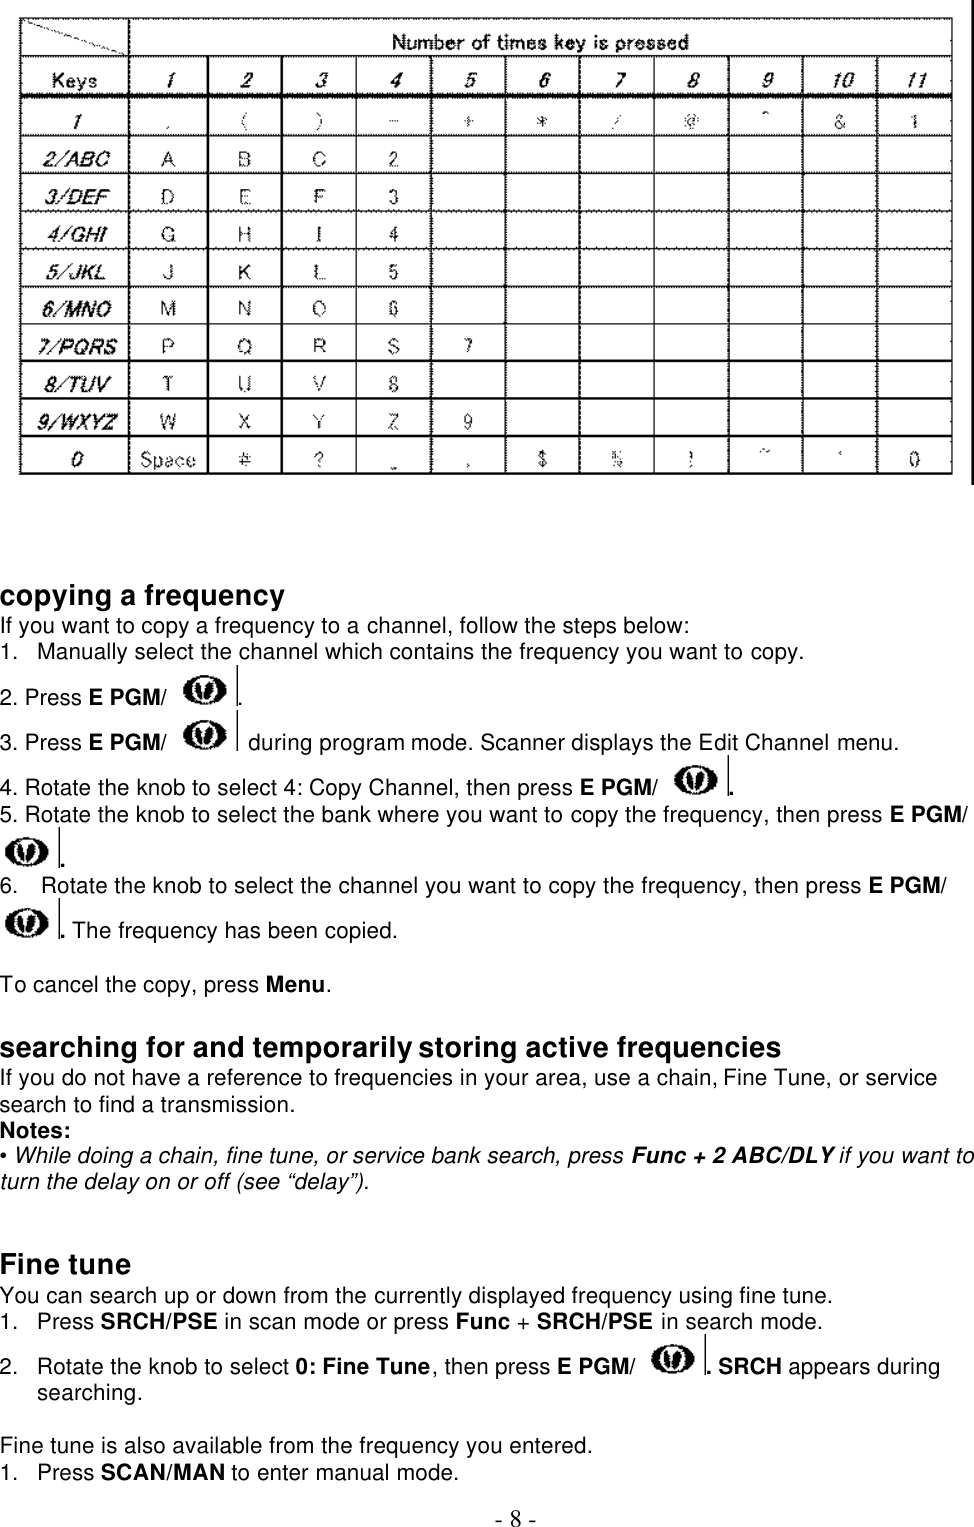
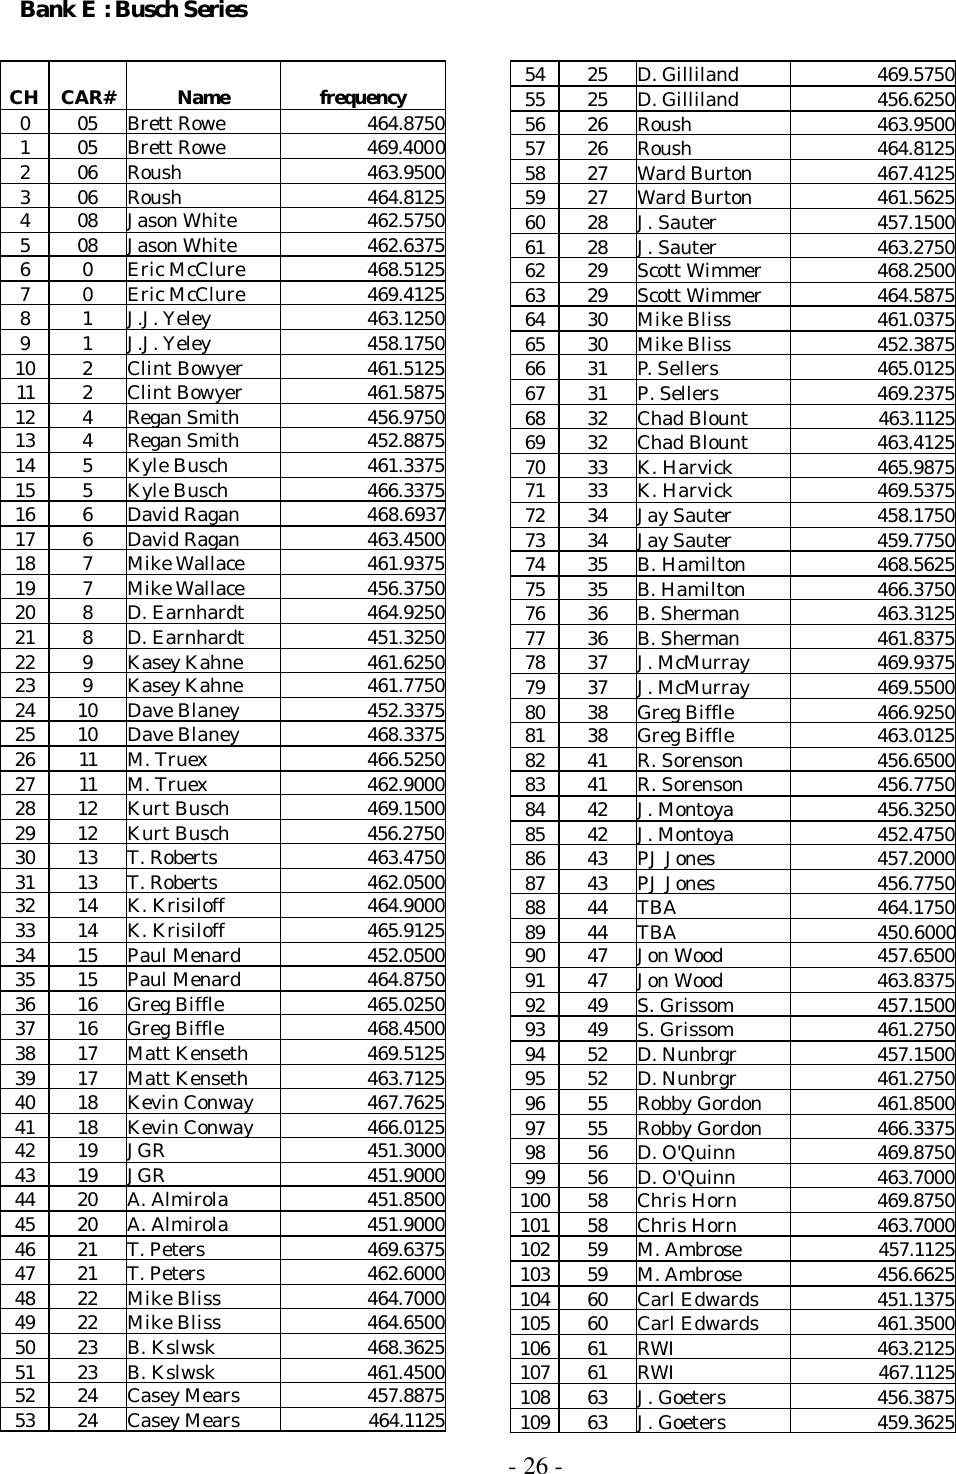
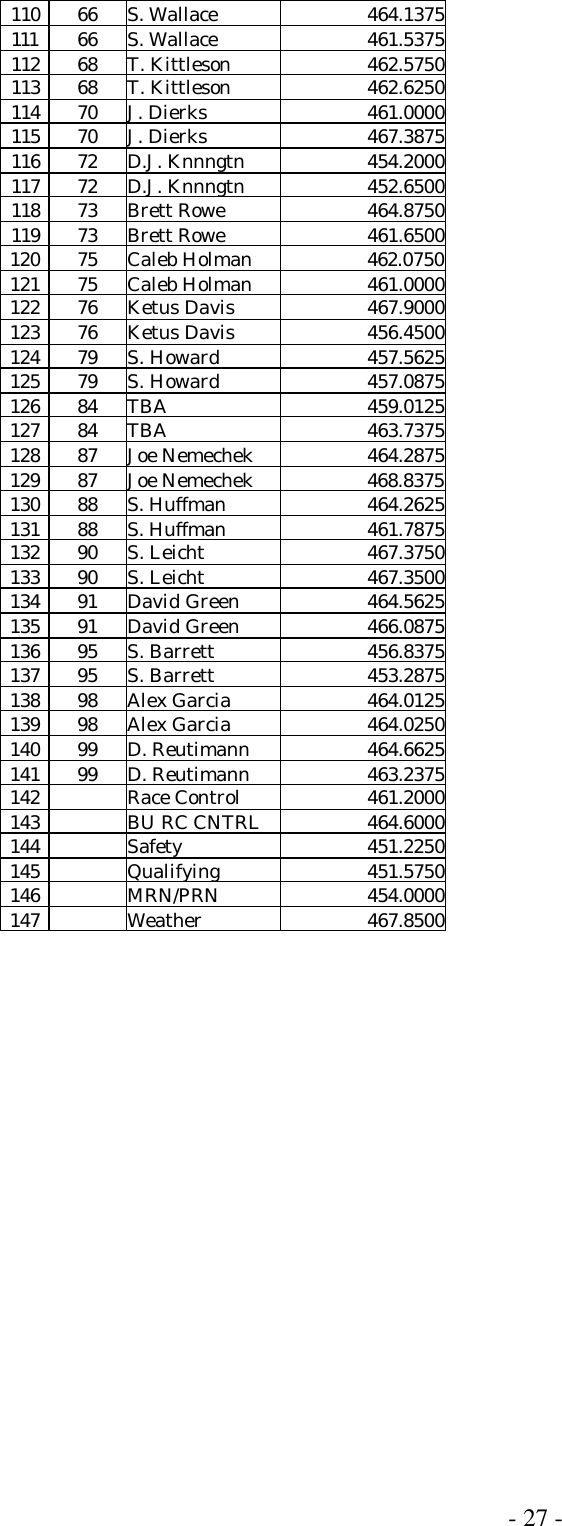
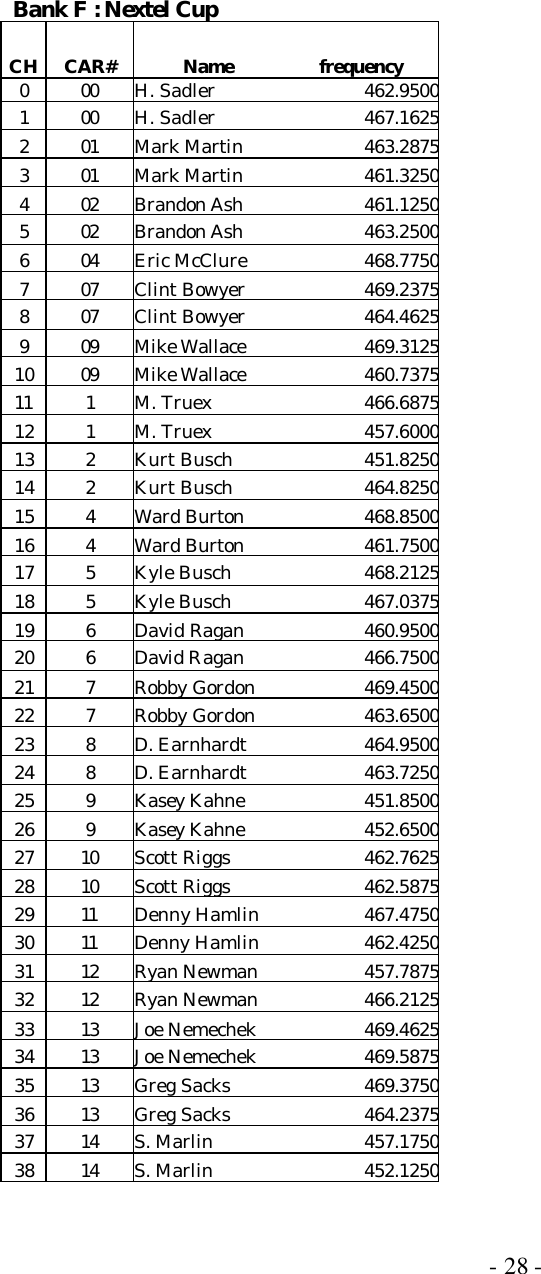
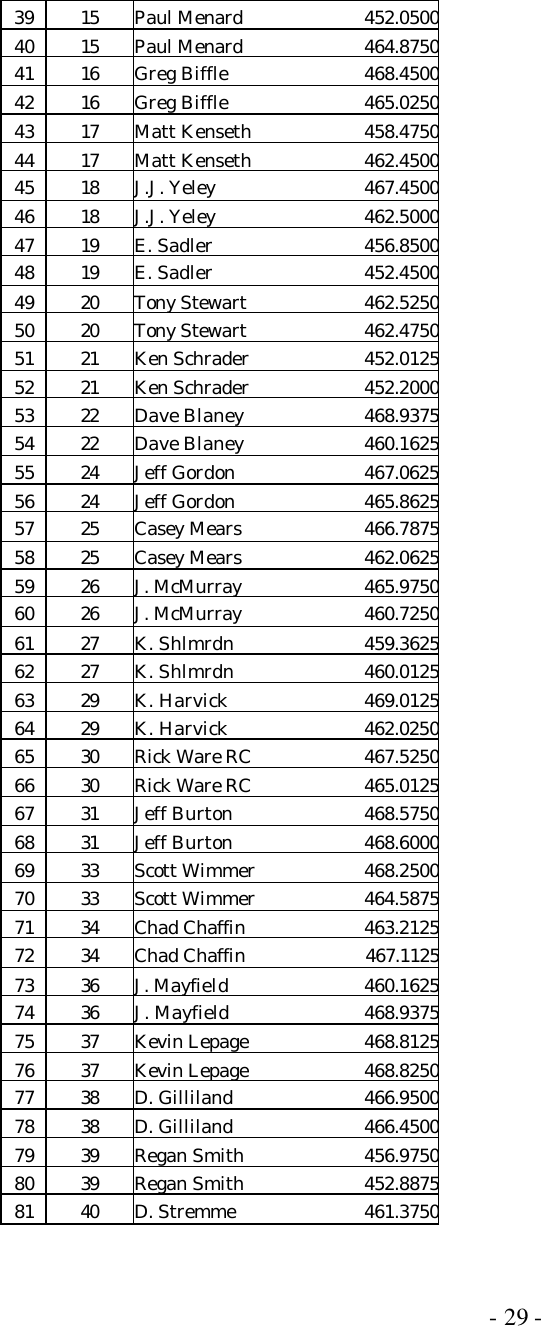
![- 7 - • If you entered an invalid frequency in Step 5, Error appears and the scanner beeps error tones. Enter a valid frequency. • If you entered a frequency in Step 5, which already exists on another channel, the scanner beeps an error tone and displays that channel. Press •CLR / L/OUT to clear the display, or press E PGM/ to store the frequency in both channels. • The scanner automatically rounds the entered number to the nearest valid frequency. For example, if you enter 151.473 (MHz), your scanner accepts it as 151.475. 7. Press E PGM/ again. Edit Channel menu appears. 8. Rotate the knob to select 1: Edit Car# , then press E PGM/ . 9. Use the number keys to enter the car number in 3-digits, then press E PGM/ . 10. Rotate the knob to select 2: Edit Tag, then press E PGM/ . 11. Use the number keys to enter the tag referring to the next section, editing a tag , then press E PGM/ 12. To program the next channel in sequence, press Menu then repeat the Steps from 3. editing a tag Input a tag using the following functions: Rotate clockwise to moves the cursor to the left, counterclockwise to the right. Pressing Func toggle the input mode as follows: ABC à abc à 123àABC. Press •CLR / L/OUT once to erase the character on which the cursor is put. Press and hold to erase all the characters. Press E PGM/ to save the tag and exit editing tag. For example, to enter "Scanner": 1.Press [7 / PQRS] key 4 times to enter "S". 2.Press [FUNC] key to switch the capital letter to small letter. 3.Then press [2 / ABC / DLY] key 3 times to enter "c". 4.Turn [ROTARY KNOB] to move cursor. 5.Press [2 / ABC / DLY] key 1 times to enter "a". 6.Press [6 / MNO] key 2 times to enter "n". 7.Turn [ROTARY KNOB] to move cursor. 8.Press [6 / MNO] key 2 times to enter "n". 9.Press [3 / DEF / WX] key 2 times to enter "e". 10.Press [7 / PQRS] key 3 times to enter "r". 11.Press [E / PGM / SKYWARN] key to end the user’s text entry.](https://usermanual.wiki/Uniden-America/UB352/User-Guide-837929-Page-7.png)