Uniden America UB362 ANALOG MOBILE SCANNER User Manual BC355C indd
Uniden America Corporation ANALOG MOBILE SCANNER BC355C indd
UserManual.wiki
>
Uniden America
>
UB362 User Manual
Users Manual
Navigation menu
Upload a User Manual
Namespaces
Wiki Guide
HTML
PDF
Info
Views
User Manual
Discussion / Help
Navigation
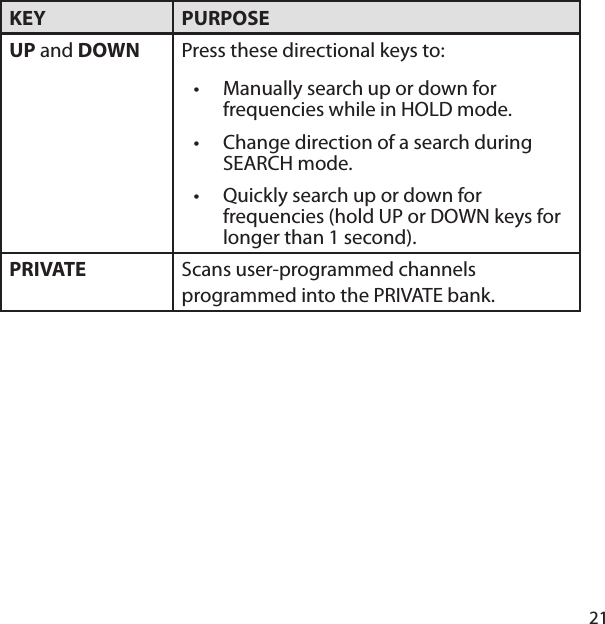

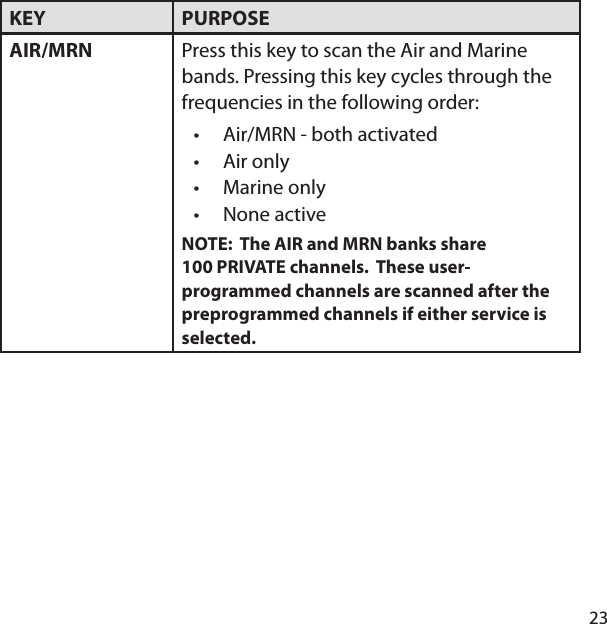
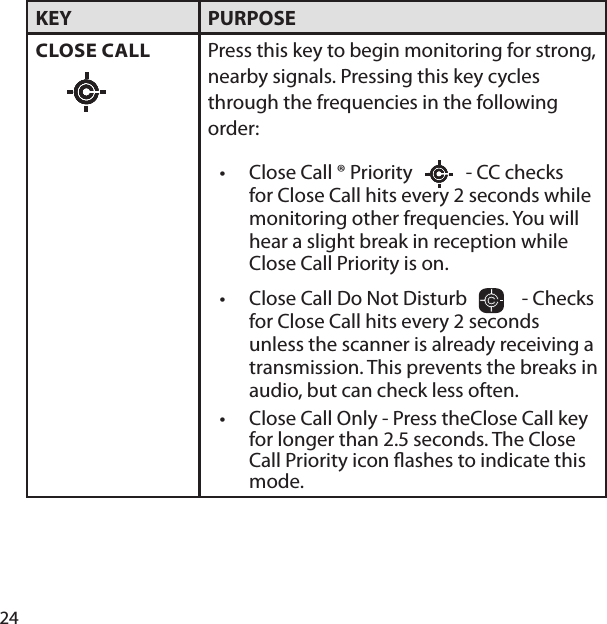
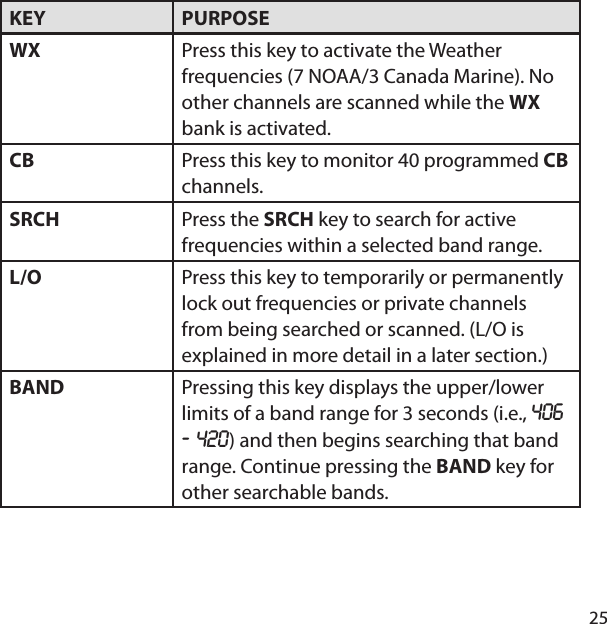


![60CLEANING Disconnect the power to the unit before cleaning. Clean the outside of the scanner with a mild detergent. To prevent scratches, do not use abrasive cleaners or solvents. Be careful not to rub the LCD window. Do not use excessive amounts of water. REPAIRS Do not attempt any repair. The scanner contains no serviceable parts. Contact the Uniden Customer Hotline at 1-800-297-1023 or take it to a quali ed repair technician. BIRDIES All radios are subject to receiving undesired signals or birdies. If your scanner stops during Search Mode and no sound is heard, it may be receiving a birdie. Birdies are internally-gen erated signals inherent in the electronics of the receiver. If the interference is not severe, you might be able to turn [SQ] counterclockwise to cut out the birdie. You can also press [SEARCH] to resume searching.](https://usermanual.wiki/Uniden-America/UB362/User-Guide-1173434-Page-60.png)